Far East Campaign 1941-42 – Making a River

Following on from the last blog post (ages ago, about the Japanese Platoon, here) please find an update on the project. The last few weeks has been spent making some Jungle terrain including recently – a river.

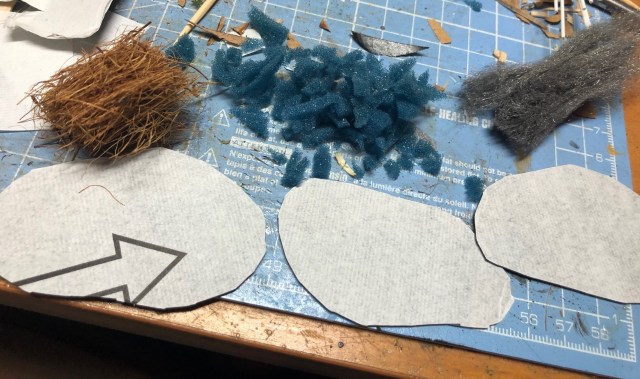
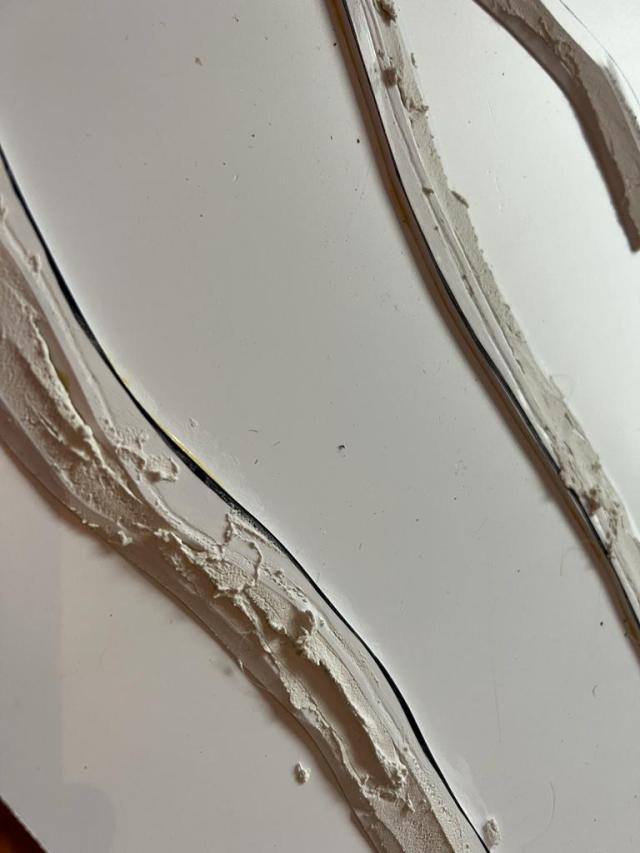
The first thing I did was to cut some pieces of river, I made these 6 inches wide in total, I used White Foamex Board 3mm thick, that is a fantastic material to work with, it is not that cheap but have wonderful non-warping properties compated to say MDF, at least in my experience. Note the additional border added (this is just abut 10mm cut out of the offcut on each side). Be careful here and make sure that each piece fits with the others. You can get 10 A2 boards for about £35 on ebay, I used two boards for the project so about £7.

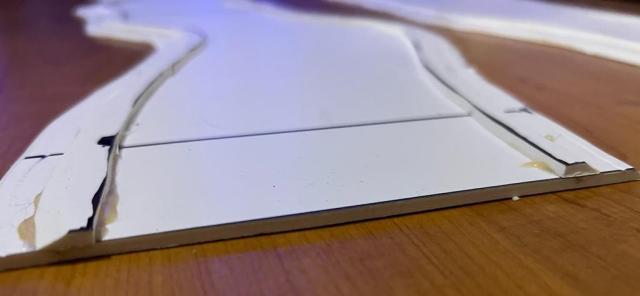
I made enough for 8 feet (as we occassional might need a longer river). The 2 feet versions will become more fragile as they are a little bit wobbly and might not be strong enough unless you are careful – so worth considering. I went for the longer version. Cut down the sides.

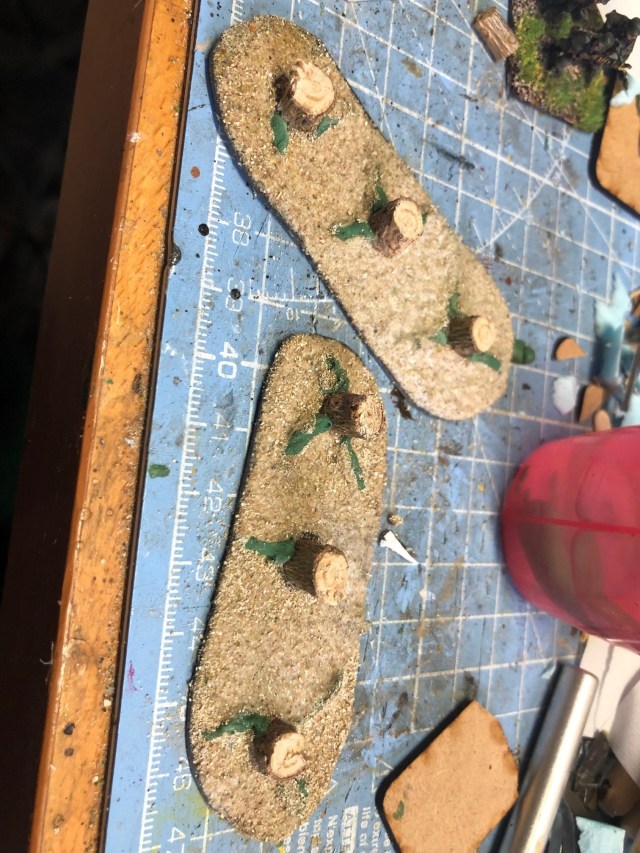
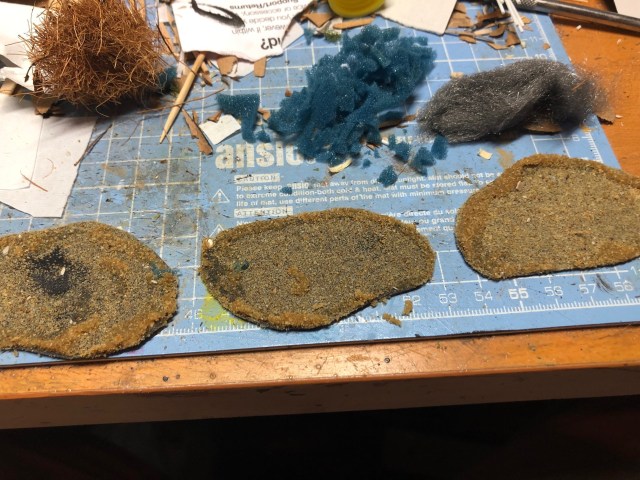
I then added some filler on the outside of the borders.

I then added some sand on the inside of the border

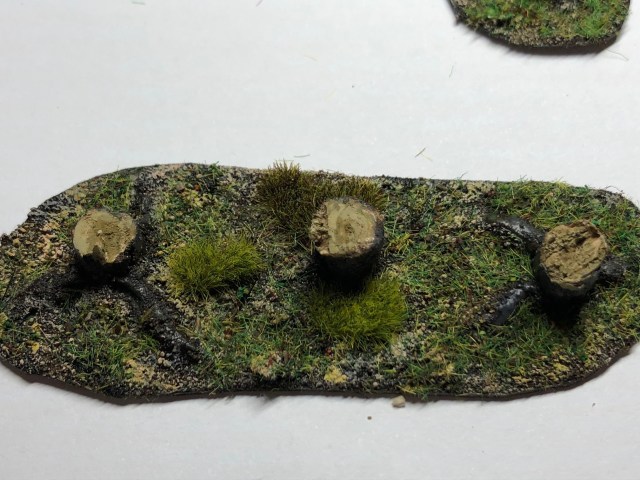
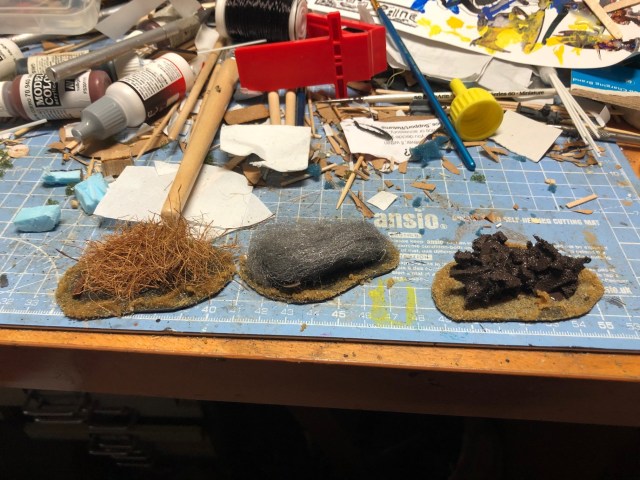
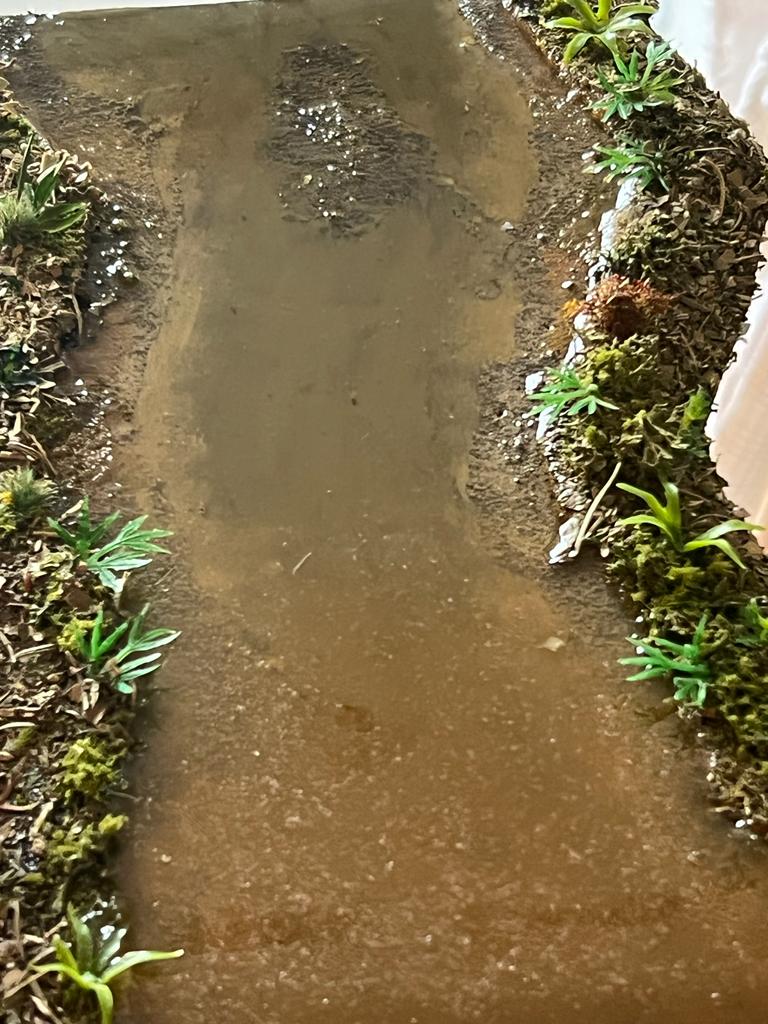
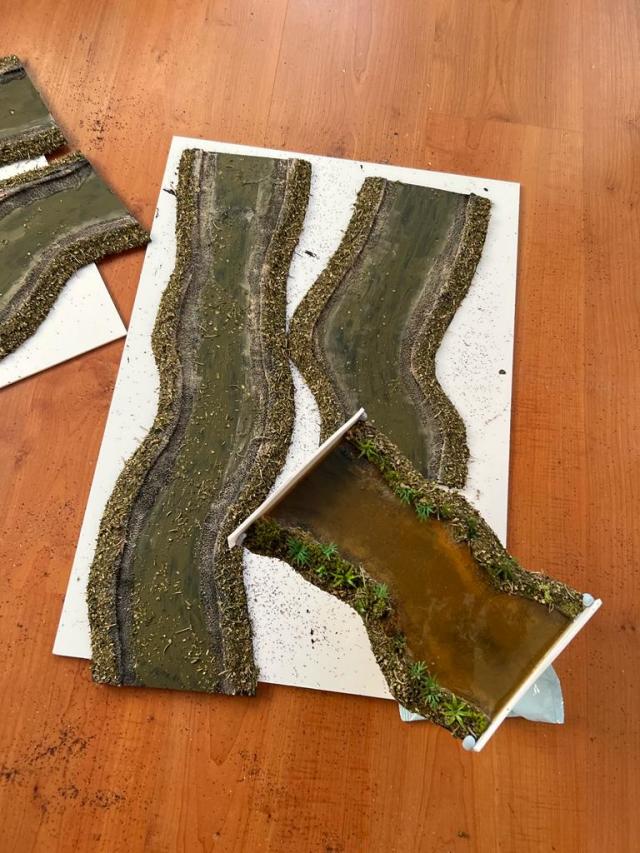
Missed a few steps here, but in summary (i) Paint all of it in dark brown, (ii) paint the middle part with no sand in a greenish colour (this was done by mixing dark brown with yellow), add some highlights, (iii) drybrush the sand with a light brown (spill over a little bit on the green parts, (iv) add Herbs the Provance on the sides (cover with PVA and add the herbs), (v)add some foliage, I used some flock and some plastic jungle plants (let dry at appropriate points).

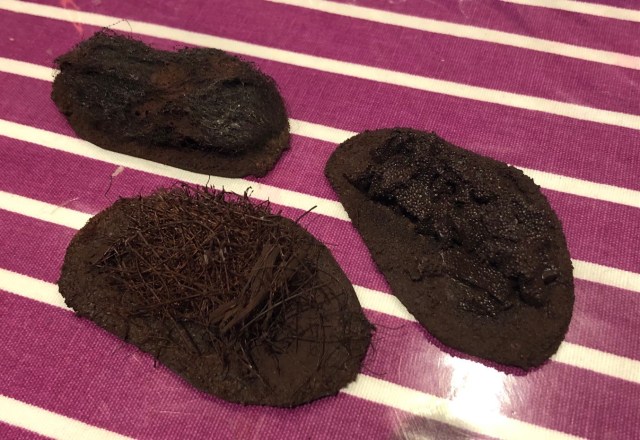
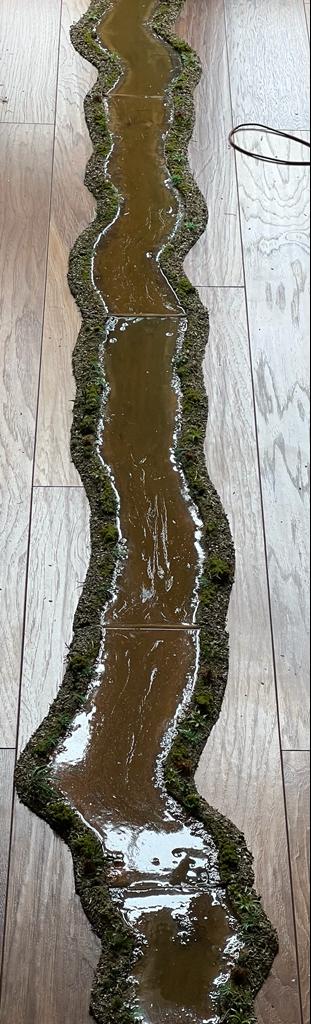
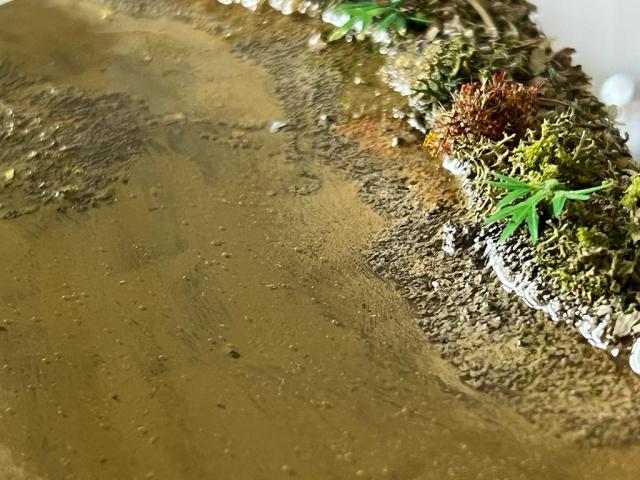
The final thing is to mix some clear resin and pour it over the boards (I used a clear low odour version from CFS, for this project but some brands can be really smelly), I cut a piece of foamex and applied it on each side with some hot glue, if you add a consistent bead of it on the side the leakage should be minimal but ensure it drops on something you are not precious about. I did a test piece before the big pour to make sure it all worked – and it did. I added some light brown paint in the resin to make it a little bit more interesting. I probably spent the equivalent of say £13 on resin for this project, meaning that the total cost of the river with the boards at £7 (with the cost of the other materials being negligible), so about £20 in total.

Alternatively you could just use a gloss varnish a few times over the boards, but will have a less striking effect.

Ended up with 8 feet of river.

Some of details look really good.

Next time we will look at some of the other jungle stuff built/made to date.

Until then keep on toysoldiering!

Far East Campaign 1941-42 – 15mm Japanese Platoon

Good friend Des has taken an interest in the 1941-42 Dutch Far East Campaign and consequently so have I and whilst he is doing the less common Dutch (in the sense that we do not often see Dutch Forces on the table in European battles and perhaps even less common in the Far East ones) I will be doing some Japanese. This is a short blog just to introduce the platoon and I am more than sure there will be more detailed posts following this one. There are a few options but I narrowed it down to either Peter Pig or Skytrex as they both do really nice ranges that covers most if not all needs, I went with Skytrex on this occasion.

As for the Platoon I have used the Platoon as presented in the Too Fat Lardies Christmas Special 2015, available on their webpage. There is a Malaya 1942 campaign that looks excellent and gives you the basics of a Japanese platoon and a few special rules – these will do until the Chain of Command Far East supplement is released at some point in the future.

I primed them in chocolate brown and used Desert Yellow (vallejo) for the uniforms highlighted in various Desert Yellow/Iraqi Sand mixes (25% to 75%). The Helmet is Brown Violet (again Vallejo).

Platoon HQ – Senior and Junior Leader (yes I added a flagbearer that needs to get a flag)

Mortar Squad – 3 mortar teams (4 in each) with a Junior Leader

Next the first Rifle Squad – LMG team (4) and Rifle team (9)

Second Rifle Squad – LMG team (4) and Rifle team (9)

Third Rifle Squad – LMG team (4) and Rifle team (9)

I also did another Rifle Squad as a support options, as well as some MMG teams and Infantry Guns.

Next issue will be to find some vehicles… but that is for next time. Hope that was of some interest.

/Keep Toysoldiering!

Featured

Hobby Round-up of 2021 – An eclectic mix

A few days before Christmas I was invited to speak on Sean Clark’s podcast Gods Own Scale, where I covered some thoughts and reflections from the year that just passed (link below the picture, if you want to check it out).

https://godsownscale6mm.podbean.com/e/episode-40-the-one-with-per-broden-again/

It is always great to catch-up with Sean and it is well worth checking up his back catalogue if you are not already familiar with it.

Anyway as a kind of complement I will do a quick overview of some of the things I did on the hobby front this year (mainly an organised listing of links to blogposts). As always in doing the review I realise that I have been doing far more than expected.

The sections are

  • More 3D printing
  • Commissioning some 6mm miniatures
  • Sweden 1943 Project 15mm
  • 6mm Projects
  • The Battle of Lund 1676 6mm and the 6mm Charity Project
  • Terrain Projects
  • Fantasy Ice Hockey 28mm
  • Other Projects
  • An Awarding Year – Caesar Award (Wargaming Blog 2021) and Best in Show at Salute (6mm Poltava 1709

More 3D printing

I continued some exploration of 3D printing and came to the conclusion after a lot of printing that I should stop just printing and just keep things back until I intended to paint stuff, avoiding creating yet another mountain – this time in resin instead of lead. On the whole I really enjoy using the printer and the result it produced – it has not really reduced the amount of stuff I buy but has given me some options for doing alternative stuff. Here are few of the stuff I did do.

I printed a few ships and Max and I had a blast playing a few naval engagement with them.
Image
I also got a battle mat from Geek Villain for naval engagement (or wide rivers).
Image
Some really nice details in these 1/2400 scale ships
I also printed up a company of “Sturmis”, the Stug used by the Finns in WW2

More details on this here

Commissioning some 6mm miniatures

I also commissioned some 6mm miniatures to be used as commanders for my GNW 6mm stuff. I did 5 minutures in total, the one below shows Stenbeck at Helsingborg in 1710.

Image
Image

More about that here and the other miniatures that I commissioned.

Sweden 1943 Project 15mm

Further Progress was made on my Swedish 1943 Project and I added some more tanks and armoured cars (well trucks). I also did a high level army list for O Group, the new game from Too Fat Lardies.

Image
Image

More about this project here

6mm Projects

The only big 6mm project I did start in the year was the Forces in Holstein 1700 as part of the start of the Great Northern War. This offers two very colourful opposing armies and the potential for a very interesting wargaming experience – in reality there were no big field battles, but this project offers some exploration of this.

I also bought some already painted 6mm ancients that I rebased and quickly got my 6mm Ancient Punic War collection substantially increased. I also did a summary blog on a lot of the #6mmtips I have shared on twitter over the last few years. More on these projects below.

Image

The Battle of Lund 1676 6mm and the 6mm Charity Project

This year I took the Battle of Lund 1676 to the Virtual Joy of Six event, I ended up doing a video to present the game and also talked about the Charity Project that was completed last year. There are some links to two video that was produced to support these projects.

Terrain Projects

I did a lot of terrain projects this year most notably I did a lot of clutter, or immersion markers as I prefer to call them, for the 1943 table, but there are some generic ideas you could use for other theatres and scales. I also did a fair few buildings and fields.

These projects has allowed me to create some really immersive battlefields, like this one. Here a little video that Des Darkin did showing off the table laid out using many of the terrain elements produced this year (thanks Des).

Image
Image

Fantasy Ice Hockey 28mm

I did some further work on my Fantasy Ice hockey project and we are developing some alternative rules to use. More on some conversions and some 3d printed models below.

Image

Other projects

Those were my main activities for the year, here some of the smaller projects that was done

An Awarding Year

I received two awards this year, the Caesar Award for the Blog of 2021 organised by Little Wars TV and also the Best Game in Show (Presidents Award) at Salute for the 6mm Poltava 1709 table.

Image

Here a video made by Alex at Storm of Steel covering the show with an interview with Nick and I discussing the battle.

And of course the sad news about Mike Hobbs passing earlier in the year, miss you mate!

Featured

Re-Clutter your Life (#Terraintober Immersion marker Project) Part 31 – Summary of it all.

This Part 31 of a series I have been running during October in support of the #Terraintober initiative. Part 1 (link here) gives an overview and the philosophy applied to the series – cheap, simple and fun clutter in 15mm. So no master classes here, just quantity to fill that table with things to enhance immersion, that is what immersion markers are for.

As stated before nothing I will be doing is particularly original or difficult to do and I hope it will have some use and give some kind of inspiration to do some immersion markers yourself. I will try to discuss how I did each piece but it is really mostly about splicing some coffee stirrers, eyeballing it and Rock and Roll a One modelling. Some items will be more specific to the theatre I am aiming for, a rural Sweden in 1943, but I think you will find most items useful as generic clutter anywhere with a few modifications.

Here is a link to the individual blogposts, the objective was a total spend of less than £30, we hit £25 (with perhaps a little bit of cheating), it could have been significantly less. I Hope some of them might inspire you to either have a go or seek out commercial alternatives. Clutter leads to immersion, immersion enhances the game!

  1. Pigsty
  2. Root cellar
  3. Log piles
  4. Pile of Planks
  5. Dog Kennel
  6. Cellar Entrance
  7. Composter
  8. Small Pond
  9. Planter
  10. Wheelbarrow
  11. Well
  12. Hunting Tower
  13. Road Signs
  14. Washing Line
  15. Some Boxes
  16. Outhouse
  17. Swedish Hayrack
  18. Haywagon
  19. Play house and a See-saw
  20. Scarecrow
  21. Charcoal Burner
  22. Bee Hives
  23. Chicken Coop
  24. Mile Stone
  25. May Pole
  26. Bushes
  27. Charcoal Burner’s Hut
  28. Big Stones
  29. Tree Stumps
  30. The Belfry

My top 5 have been the following ones

  • The Charcoal Burner (and the hut too)
  • The Chicken Coop
  • The Pig Sty
  • The Swedish Hayrack
  • Dog Kennel

The next step of the project is to start getting some of the stuff on the table for the What-if 1943 invasion, plenty of Germans eager to jump the border. I have more than enough to do a varied amount of scenarios – for both sides.

These pieces of clutter will really add a lot of character to the stuff I already have.

Some Swedish Infantry advancing
Some Swedish APC (well these early versions lacking any useful armour) with Infantry demounting into the village buildings

So putting the new Clutter into some practice with a few quick shots, planned to do a game today but got an opportunity to do something better with the family so a few “staged” photos instead, but I hope you get the idea. Battle Mat from Geek Villain ( https://geekvillain.co.uk/ ).

First out a small farm with a lot of clutter, do you recognise it? The pile of planks, the cellar entrance, the wheelbarrow, the Hayrack, the planter, the Dog Kennel, the pile of logs, the boxes, the outhouse, the play house & see-saw, the haywagon, the well, the washing hanged to dry, the Chicken Coop and the Pig Sty.
A Swedish Anti-tank gun next to the hayracks,
The Beehives and the Earth Cellar and Swedish Tank and some Motorcycles cruising,
The instant cellar entrance!
That is the direction to the Folkpark!
Really enjoying the overall effect!
The Composter!
Scarecrow
A (Moose) Hunting Tower in the forest
A Charcoal burner, the Charcoal Burner’s Hut, some bushes, stone and tree stumps.
Some foods is being served at the Belfry with the small Duck pond in the background
From a different angle

Many thanks

/ Hope that was of some interest, I really enjoyed making this series. Now I do not want to see Coffee Stirrer for at least a week. If you do end up doing some of the clutter yourself please share your experience and pictures – I would really appreciate it. Or let me know which one is your favourite.

Re-Clutter your Life (#Terraintober Immersion marker Project) Part 30 – Belfry

This Part 30 of a series of a fair few posts, Part 1 (link here) gives an overview and the philosophy applied to the series – cheap, simple and fun. I have also added a section with links to all the other posts in the first one. Today will be the last entry as I plan to do an overview presentation of what has been done to date tomorrow.

I grew up in the Village of Sågmyra in Sweden and the picture below show the main building and the Belfry. I was baptized in that Church and I always liked the look of it, not as intimidating as other churches. The Belfry was built after WW2 but serves as an example of many similar ones that would have existed during the WW2 era.

See the source image

They are very common in the region and if you Google “Klockstapel Dalarna”, you will find may varieties (the one burning is Swedish, but not from Dalarna, it burnt down 4 years ago).

Here another picture of the Belfry (showing the front, during some repairs.).
See the source image

Anyway, here is my version (not a copy but like more “heavily inspired by”).

I think you get the gist from the pictures, I am using techniques already shown in previous episodes – base material is nylon floor tiles, then clad with coffee stirrers, cut lengthwise. Some cardboard for the shutters. I made it to fit the base size I used for the other items made as part of the project.

Just make a rough shape for the building, as you will see mine is not very straight as I did mine in a sitting.
Wonky but serviceable, I addes some plastic pieces around teh shutter to act like hinges.
I really recommend the Laser cut Brown spray paint from TT Combat
Painted in Falu Red
Magnetic Church Steeple
Really happy!

So final spend rounded up at £25.

See you for tomorrow’s finale..

/ Hope that was of some interest

Re-Clutter your Life (#Terraintober Immersion marker Project) Part 29 – Tree Stumps

This Part 29 of a series of a fair few posts, Part 1 (link here) gives an overview and the philosophy applied to the series – cheap, simple and fun. Today and tomorrow (when we make some tree stumps) we are doing yet again some really easy scatter.

This clutter simply adds a little bit of interest to a flat area and will hardly cause any visibility issue, some tree stumps. I based these in threes and in retrospect very orderly and dense – you might consider during yours as individuals or less ordered on a, perhaps, bigger base.

Material for this from your Garden, if you do not have a garden go to the park and help yourself there should be plenty of twigs all around the place. I have seen hobby shops selling twigs, I find that amazing!
Cut out some tree stumps (I used a hobby saw)
Glue the on a base and add some green stuff as shown (or clay, or pva soaked toilet paper) they will give the hints of roots later on, this is not sculpting just roll a length and apply it as shown, I just went for a few roots.
Then add glue and sand, note I left some parts exposed – “branch areas”
Then just paint it up, grass it etc, note the notion of the roots, creates a little bit a feeling that these are looking better than they are.
Fair enough, will do!

Spend is still £24.42 in total.

Tomorrow, we will do some tree stumps…

/ Hope that was of some interest

Re-Clutter your Life (#Terraintober Immersion marker Project) Part 28 – Big Stones

This Part 28 of a series of a fair few posts, Part 1 (link here) gives an overview and the philosophy applied to the series – cheap, simple and fun. Today and tomorrow (when we make some tree stumps) we are doing yet again some really easy scatter.

Today some freestanding stones, basically made these from blue foam, based them and painted them up.

Do not use superglue (PVA and patience works)

Spend is still £24.42 in total.

Tomorrow, we will do some tree stumps…

/ Hope that was of some interest

Re-Clutter your Life (#Terraintober Immersion marker Project) Part 27 – Charcoal Burners Hut

This Part 27 of a series of a fair few posts, Part 1 (link here) gives an overview and the philosophy applied to the series – cheap, simple and fun. In a previous blog post in thsi series (Re-Clutter your Life (#Terraintober Immersion marker Project) Part 21 – Charcoal Burner) we did a Charcoal Burner, The Charcoal burners would work in shifts and monitor the charcoal burner from a hut, often with a window toward the burner so they could observe it during the night. They came in many different shapes but I found this one inspiration and decided to use this one as a basis for my hut (form somewhere in Sweden, but not sure where exactly). Search on Google using the word “Kolarkoja” and you will find a lot of different huts.

I used this as my base inspiration, key items being the door, a roof above it, the window, the chimney and it all being covered with earth and growth.
I thought I could use one of the Nespresso type of capsules for this project
Cut off the top and clean the inside.
I found it a little bit too tall so cut if off a little bit
Then glued it back and glued it down on a base
Then I used some modelling clay to build up the earth around the hut
Making a few details by gluing coffee stirrers on pieces of nylon tiles or cardboard.
Slowly build up a shape I wanted with a door, a window, a pile of fire wood and a chimney for the burner inside. I also made a slightly different roof than the original picture.
Starting to look good with a little bit of sand
Simple painting the wood as old in grey then added some tufts and static grass, happy!

Spend is still £24.42 in total.

Tomorrow, we will do something else…

/ Hope that was of some interest

Re-Clutter your Life (#Terraintober Immersion marker Project) Part 26 – Bushes

This Part 26 of a series of a fair few posts, Part 1 (link here) gives an overview and the philosophy applied to the series – cheap, simple and fun. Today we are making some bushes, not the linear terrain kind of bushes but some bog standard ones to clutter your battle field and making it look at little less flat and interesting.

Ok here we go.

You can use many different material to build up the structure of your bush, I will be using three of the many ones you could use – (i) Coconut Fibre, (ii) Cut to small pieces foam and (iii) steel wool. I also made a few bases,
First we put some sand on the bases
Glue down the materials (I used superglue, note the foam is now brown (I mixed it with PVA and Brown paint)
Let dry then spray paint brown (the coconut probably needs a little trim with some scissors at this stage)
First thing is to drybrush the edges in some browns and perhaps yellows (I use light brown, pale terracota and wheat yellow). After this apply pva glue all over the structures and dip in some flock, mine is a mix of turf scatter and some small foam particles. Finally shake off and then put some pva and add grass to the edges. Finalise when dry by applying diluted PVA on top, hairspray or a spray adhesive (this will create layer on top making the terrain stronger).
Point here was that you can use a lot of different base mater

Spend is still £24.42 in total.

Tomorrow, we will do something else…

/ Hope that was of some interest

Re-Clutter your Life (#Terraintober Immersion marker Project) Part 25 – May Pole

This Part 25 of a series of a fair few posts, Part 1 (link here) gives an overview and the philosophy applied to the series – cheap, simple and fun. Today we are talking May Poles, or Midsummer Poles, as we call them in Sweden. The video below shows how they were installed.

Sorry for anyone who got an early version of Part 25 yesterday, a new version will be out on Friday (I finished a few items this weekend and this week is busy so most of it is already scheduled for issue, but I messed up Part 29, instead of scheduling I published – just life!).

Anyway some good memories of going to the local celebrations at Midsummer.

Some soldiers putting up a pole during the WW2 era.

Lets make one (this one being a large one in 15mm and a small one on 28mm, sizes of poles just like in real life varies)

Take a kebab stick and cut out a little part and install a crossbeam (I made mine from a coffee stirrer cut lengthwise in half).
Then I needed something for the rings, the solution was derived from an old note book.
Cut out and ready to install
I attached them with some Green Stuff (alternatively you could tie them with string and glue it and cut way any excess string)
I added green stuff all around the pole (again you could use string).
I then based the pole and then soaked the pole with superglue and applied Oregano (yes the spice) and the pole is done.
|Add some decorations (I used painted rice paper – the paint being 50/50 paint and pva), then shape it to give it some movement from the wind.
Nice height in this one
Ok very specific for Sweden but an example of taking something from your theatre and giving it that unique look.

Spend is still £24.42 in total.

Tomorrow, we will do something else…

/ Hope that was of some interest