To play Bag the Hun (as well as a number of other air wargames) a hexagon mat is required, I do not have one so I decided to buy one. Yes, I hear you saying “…there are ways around it, and why don’t you make one yourself!”. However occasionally, and contrary to popular belief, I do go with that famous flow and just get something off the shelf. I looked around but could not really find anything suitable. I could not really see the cliffs of Dover representing the Karelian Isthmus, neither would Kentish countryside do nor the desert or anything else that I found for that matter. I suppose that some of the Eastern Front battles would have been fought over some forested areas that could pass for what I needed, but none of these seem to be readily available.
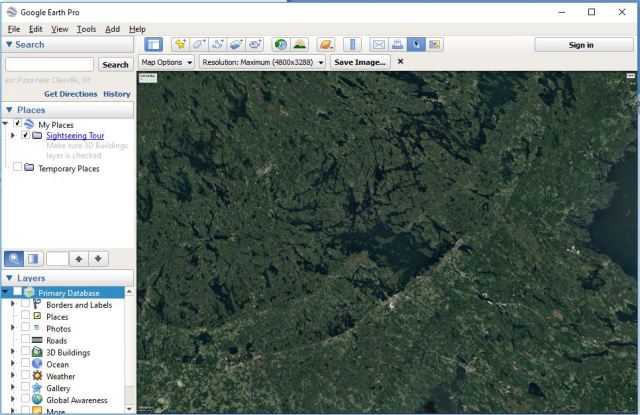
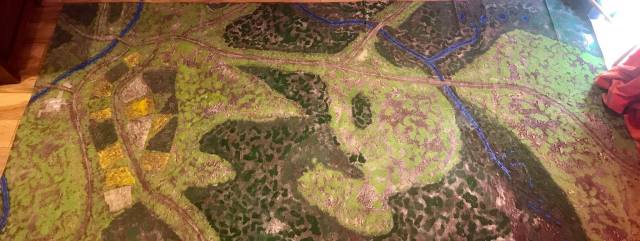
What I really was after was an image showing two things – forested areas and lakes. I went on Google Earth Professional (that you can download for free) and realised, probably as the last person on the (Google) Earth, that you can get rid of all the overlays and plainly look at the picture and capture images at relatively high resolution.
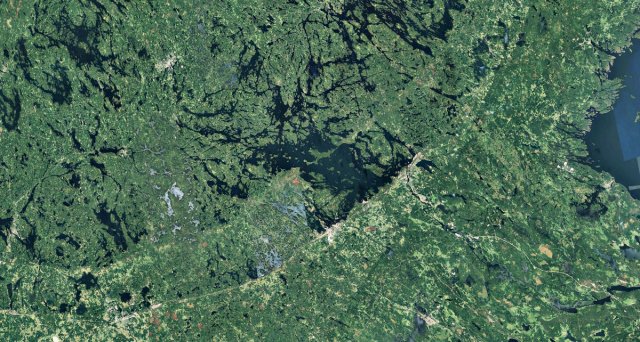
Maximum resolution is 4800 by 3288 which proved more than adequate for my purposes. I found a piece of southern Finland I liked and saved the picture. I then resized it to a 3 by 5 ratio (as I wanted to get a mat I could throw on the dinner table) and sent it to Tiny Wargames (link here) and asked (i) if the image was good enough to print on one of their 3 by 5 mats, (ii) if he could add a 30mm hexagon pattern on top and (iii)how much it would take me back – the answer was (i) no problem, (ii) of course and (iii) £50 (that inclusive of delivery within the UK). Further he said it would take them 4 days to do it. Incidentally the cost is the same as it would cost to buy a mat with the same dimension of any of their existing mat designs – I suppose if you can provide a picture with sufficient resolution they will print a mat for you.
I also note that they can do more bespoke mats as well, like taking an old air photo from say D-day and make it into a stylised and coloured mat. However I do not know the cost of doing this as I suppose it would take some time to do – but if you are interested drop them a line.
A small note you need to specify how you want your hexagons printed on the mat – I sent a screen shoot from a Bag the Hun scenario map and told him my hexes should be aligned in the same way as those on the map. Very often the hexagon size is about 1½ inch, but since I went with a small mat (3 by 5) I also condense the hex from 38.1mm (1½ inch) to 30mm. The reason for the smaller mat is that I can quickly put the mat on the dining table and fly, with minimal fuss.
This is the map I sent them.
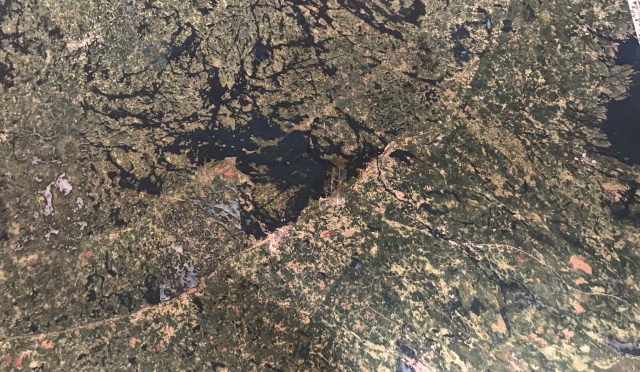
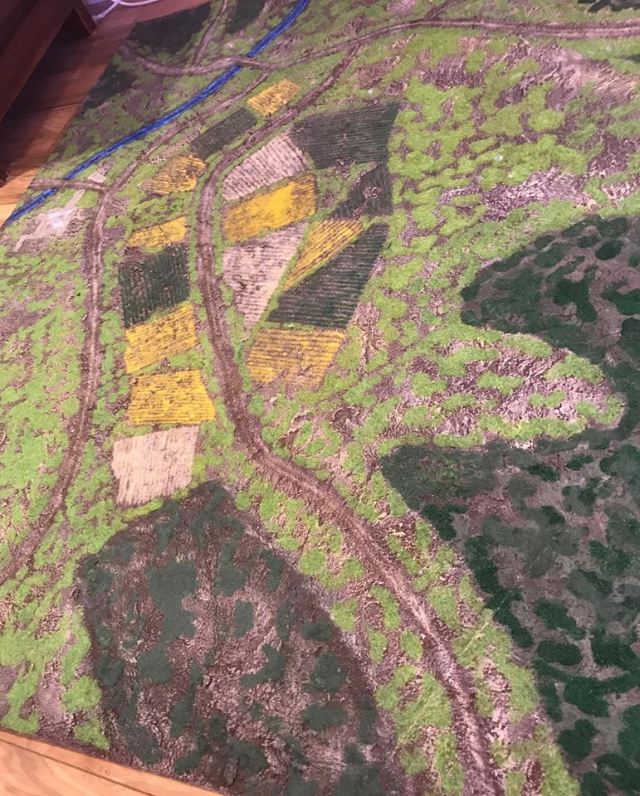
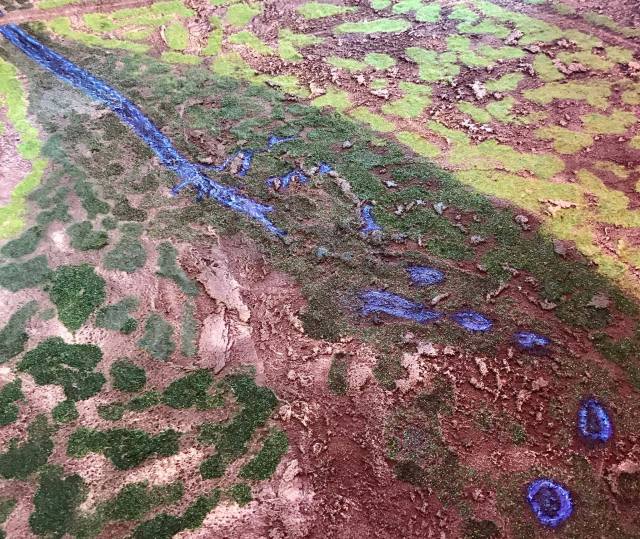
And this is what turned up.
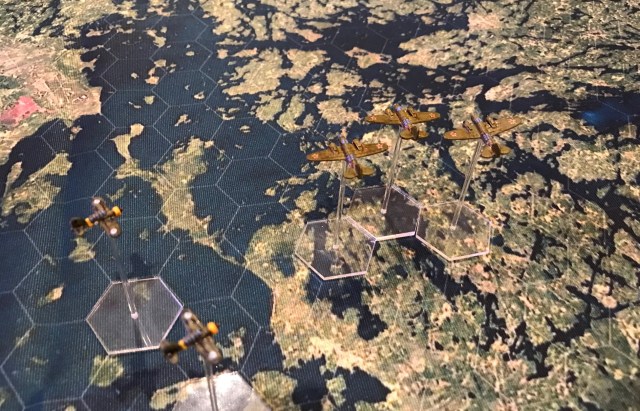
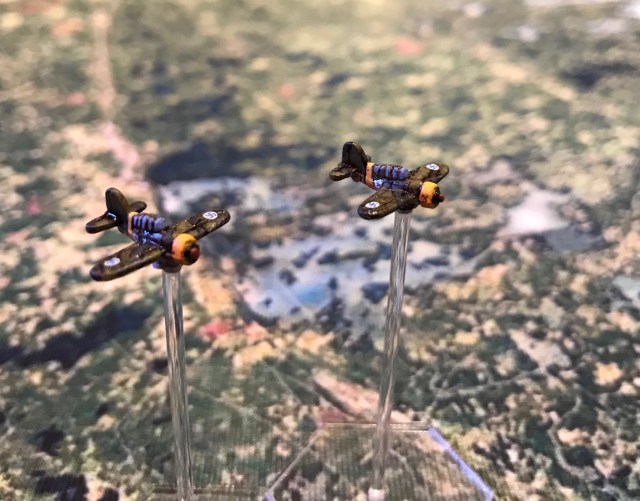
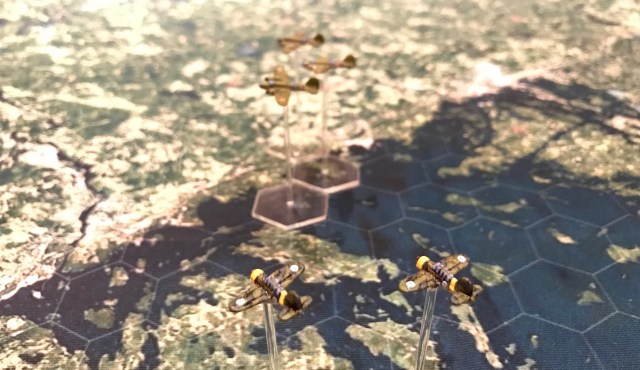
Really happy in the way it came out (note the colour difference is due to the lighting when I took the picture of the mat on the table), I ordered it on a Monday afternoon and it arrived safe and sound on the following Monday. More than pleased and this is how it looks with some Russian and Finnish aircraft flying on it.
On reflection I should perhaps had taken a lower altitude picture, but I do like it and gives the feel of forests and lakes I was after.
Also in the settings you can include clouds, this could create some interesting pictures as well depending on what you are after.
Note on flight stands
With regards to flight stands the best way to manage it is if you do not attach each plane on a stand permanently but instead magnetise the plane and the base. There are several reasons for doing this, I think these are the key ones:
Base set of stands – you are very unlikely to use all you planes at the same time on the table, so consider what the maximum size your aerial engagements are likely to be. This will determine the number of flight stands you make. For example if you are playing the Check your Six rules more than a handful (that is about five) per player is about right, for Bag the Hun (in my case) where you fly sections a few more would be required – I went for a total of 40 stands (overkill, but what the hell).
Changing your mind – If you change the size or type of the base you are using for whatever reason this is easily accommodated as you just need to make some new bases – if you want to revert back you just use the old ones.
Storing your flyers – Storing small 1/600 on individual flight stands will take unnecessary space and when my current project is complete I will probably have in excess of 200 aircraft. Without the bases they take hardly any space. If I want to fly some planes for another project, I just use these flight stands again.
I made my flight stands using some transparent acrylic bases (30mm, 2mm thick) that I drilled a hole in and some and acrylic rod (2mm), I also used Neodymium magnets (2mm by 0.5mm). Remember the polarity when you glue the magnets to allow you to use the same flightstands for all your planes.
Big shoutout and thanks to Tiny Wargames (link here again)
First a big thank you to all of you who either come by here by chance, occasionally, have registered as followers of the blog, likes the Roll a One page on facebook and/or follow the Per at RollaOne account on twitter (@Roll_a_one). Please feel free to get in touch here, on Facebook or Twitter if you have any questions or comments on this or anything else. Just doing this for fun, thanks for making it more so. Now without further ado…
It has become a tradition in doing a battle board for Joy of Six as a start of the Summer in our house. For the last few years I have made 8 by 4 feet tables for my GNW stuff, but this year I came to the conclusion that I needed a 12 by 5 feet beast (more on the battlefield and how it was derived can be found in a previous blog post, click here).
Some of the stages in deriving the map for Horka 1708
For the first generation of boards (Fraustadt 1706, Klissow 1702, Gadebush1712 and Kalisz 1706) I used 8 No. 2 by 2 feet mdf boards with underfloor heating boards (blue styromfoam) on top that could be shaped to rivers and hills, etc. This created more sturdy individual blocks but it takes a lot of space, especially when you start getting a fair few of them. There is also a question of warping and its impact on the gap between the boards, unless you make very sturdy ones.
In the process of needing to make two smaller tables (4 by 3 feet) for running Saga in 6mm at Joy of Six in 2016 I tried out a method I had seen on the net. This used a canvas sheet covered in a mix of paint, acrylic sealant and sand (see my notes from then here). This worked really well and creates a mat with some nice texture on top that can be dry brushed and decorated very much in the same way as I would do with the boards (and you can also incorporate roads and rivers directly into the mat).
This is the mat I did last year and apart from the houses, trees, bridges, some small elevation markers and miniatures, all the features are in the 8 by 4 mat and it makes set-up very quick (here are some notes on that process here , here, here and here) – no gaps!
The Mat at Joy of Six 2017 – The Battle of Lesnaya 1708. It is very difficult to roll up the mat with all the trees so I did not glue them in place. The bridges are also loose, but flat and placed on top of the river crossings.
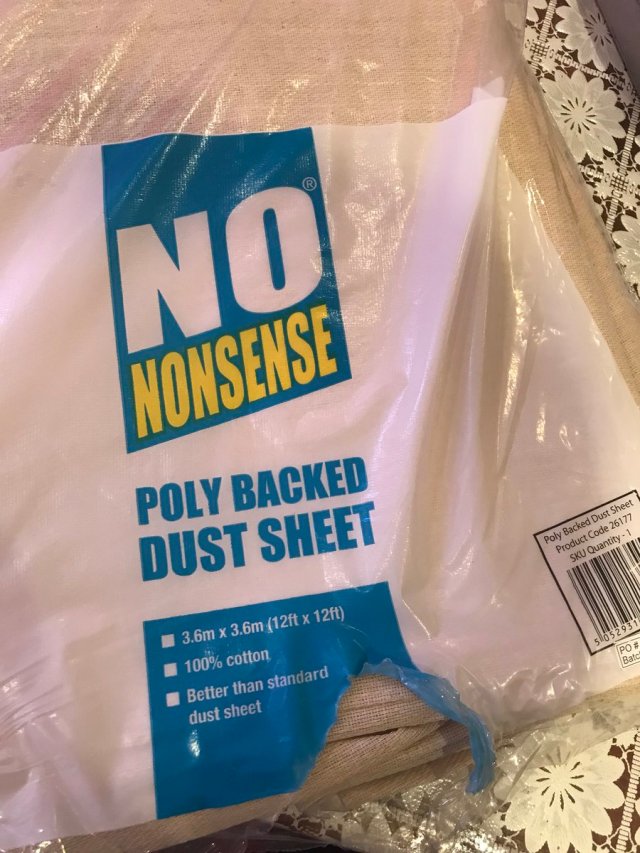
I decided to have another go with the mat approach this year and got myself some backed dust sheet from Screwfix here in the UK (I did get some before but it was not backed, so I kept this for some other day). The reason I use the backed version is that the backing (a layer of plastic/poly) stops the paste going through the sheet when it is applied and I also think it strengthens the actual mat, compared to using a non-backed dust sheet.
No nonsense sheet, I cut out the desired dimension 12 by 5 feet and will use the other part some other time.
The “innvoation” for this year was that I had some paper backed grass sheets lying around that I cut out some fields from and glued straight onto the mat (I used gripfill for this purpose, still not sure they will stay on!) – the colours are very sharp so far but I think it may work better once the shit (sorry, I meant chocolate brown) colour is dampened by my normal 3 colour dry brushing and the static grass is being added. Here are a selection of photos from the work so far.
The issues I have found (so far) in making and using this kind of mat are:
It is physically harder work to make one than you think – it gives a good workout! My Doctor told me that I need to gain more height so I think this is a good exercise for that purpose – there is a lot of stretching involved!
It is very difficult to manage a 12 by 5 sheet when you make it. I do not have a big enough space to put the whole sheet down on a flat surface. So I tend to work on it in sections and then roll it up again, meaning that you have to wait for it to dry which means that works have to be done in short burst and then wait for 12 to 24 hours. If you have a flat surface for the full size of the mat then this is not a problem at all (however if the surface is not totally flat this can effect the shape of the acrylic you apply and also the effect of the dry brushing as any edges will show through very well by the technique – something you may not want. I did mine in the lounge but this is honestly not the ideal place if you are not on your own. It is not just the space you occupy but other impacts to consider. I try to use low odour stuff but this does not mean no odour so ensure you have your windows open and create a draught. Health and safety for you and yours are more important than a bloody wargames mat – just be sensible. Luckily, I have a more than understanding family when it comes to these kind of things. They are more than happy to spend the weekend with breathing apparatus in their own rooms (that was a joke, sorry!).
The sheets seem to be 4 feet standard width. The 12 by 12 sheet I bought from Screwfix was made of 3 no. 12 by 4 feet sheets, it means that there is a border to be dealt with for any greater widths than 4 feet. I covered it with some gripfill before I got the mix on top. This mediocre mitigation is more than likely going to fail in the future but I am ignoring it for now. In general it does crack in places but normally looks decent when it lies flat – be prepared to do some repairs the first few times you roll it out.
Although I did iron the sheet before I applied the paste (properly I thought, but being mindful not to melt the backing), very often some of the folds seem to reappear and this is less than ideal. I will try to hide this as part of the drybrushing stage by avoiding to make the fold stand out to much by being careful with the brush – you do not want to highlight the fold, it does not look very natural.
It does not allow you the same artistic freedom compared to a fixed board. Hedges are more difficult to incorporate into the design and rivers obviously can not be filled with resin (but if you apply some varnish it at least gives some reflection to the surface that fools the eye, at least from a distance.
It goes without saying that the mat is not very versatile with the features built-in (rivers, roads, etc.). This is not an issue for me, and it was the same when I did the boards, but worth considering with regards to how much specific stuff like roads and rivers you incorporate into the mat, especially as it is an investment in money and time to make one.
Looking back some of the features of those boards some are very difficult to beat using the mat. Maybe some boards next year!?
Obviously none of the points above were showstoppers for me this time, but I hope this discourages you unless you are prepared to get into to something heads on and improvise along the journey. The rest of the family laugh at my swearing and screaming when I mess things up, so if nothing else it is some cheap entertainment – maybe that is why they tolerate me doing this in the first place?
[To be continued when appropriate level of progress achieved]
/ Hope that was of some interest, keep toy soldiering on!
In other news I had the opportunity to see the fabulous Tiger Lillies (the forefathers of Brechtian Punk Cabaret!) last week and it was absolutely brilliant! More on them here. I stumbled upon them a few years ago as they had done an album called Mountains of Madness as a homage to H.P. Lovecraft.
Some time ago I was writing a few blog entries about doing Gaslands in 6mm and then it went quiet – we actually have played a fair few games and really enjoy it.
Anyway a little bit of summary of where we are at with this:
Overview
Games we have played on our Toxic Track
Using Dropzone commander terrain
Further ideas – Snowmobiles and Zombies
As I have said before I am not in a position to have a permanent set-up so prefer to do some of the games I play on smaller surfaces (say a maximum of 3 by 4 feet), so games like X-wing or Saga are great straight from the box. Another way to achieve this is to convert a bigger scale game (e.g.28mm) from inches to centimeters (1″ becomes 1 cm) or by using half inches (1″ becomes 1/2″ or 1.27cm – not that difficult if you make special measuring sticks – a one time investment in time) – and using smaller scales for the miniatures. I did this for the Dan Mersey series of rules (e.g. here and here) and for Too Fat Lardies Sharp Practice (e.g. here) and it does work. Yes it is a little bit more fiddly.
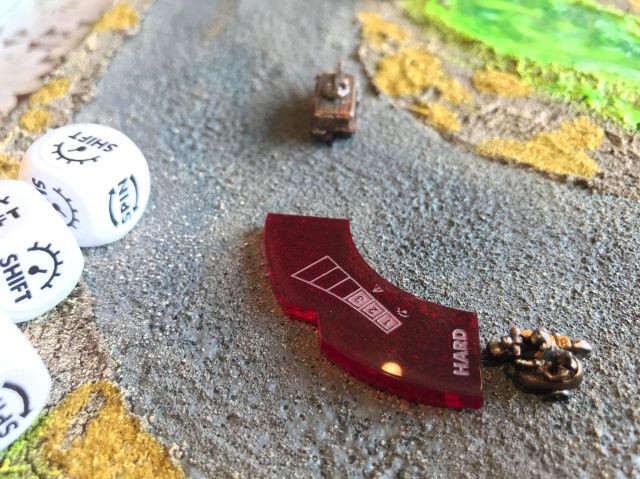
My original thoughts on doing Gaslands in 6mm – well actually more than thoughts – can be found summarised in a blog post I wrote earlier (Here). After this I got myself some 50% movement templates that I bought from Bendyboards (link here, contact Lee and ask him for 50% if this is of interest) that produces the official Gaslands templates. This in effect means that a 2 by 2 foot board equates to a 4 by 4 in full scale.
If you want a good overview of the game, I think this review (link here) is a good summary and worth reading instead of me repeating something similar in content but less enjoyable and thorough. I agree with the sentiment of this review.
TERRAIN FOR PLAYING THE GAME
Getting toxic
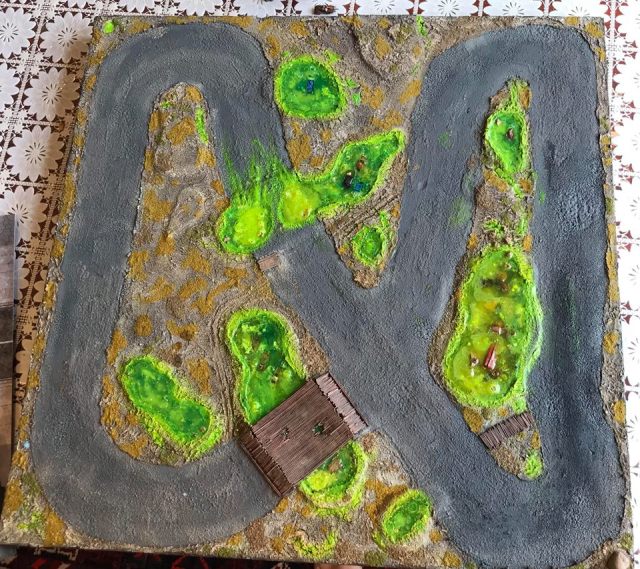
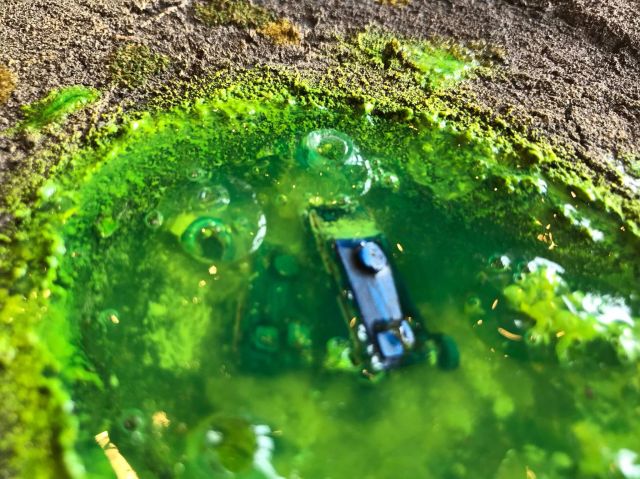
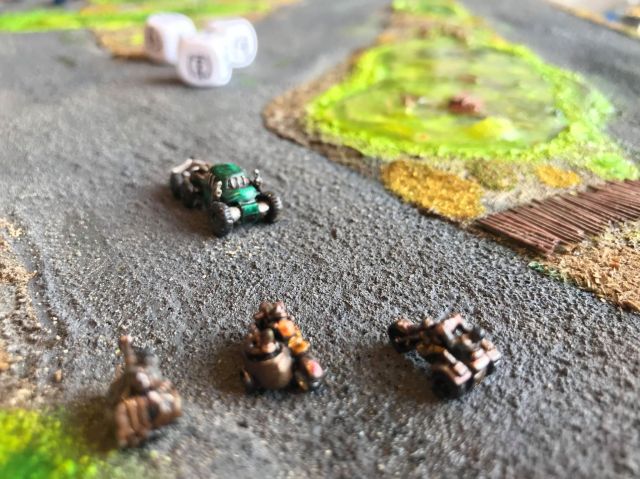
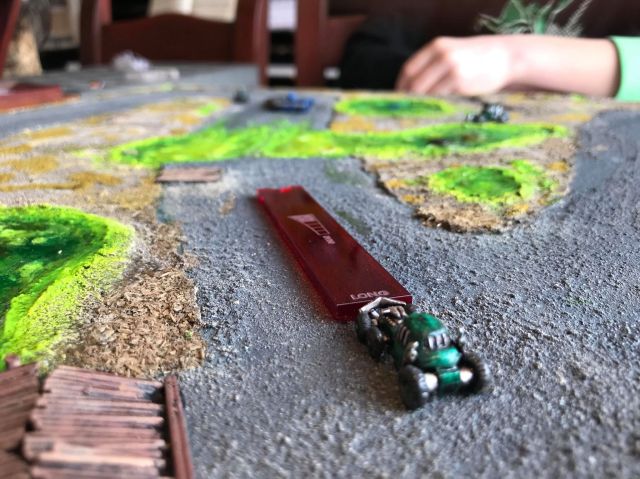
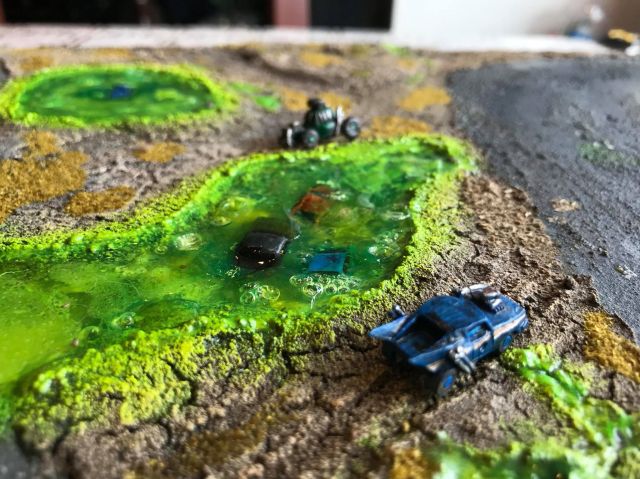
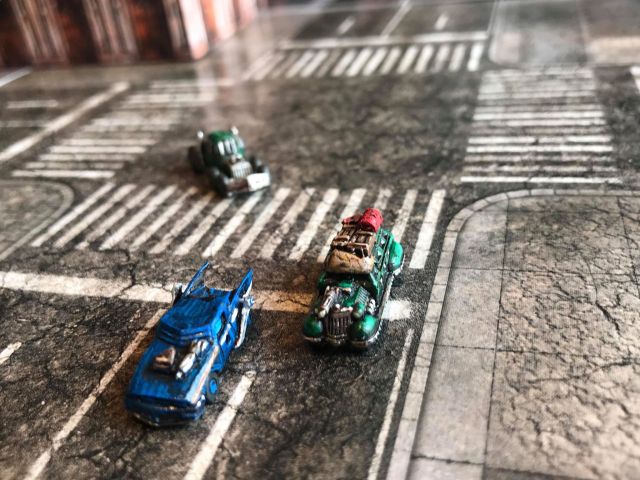
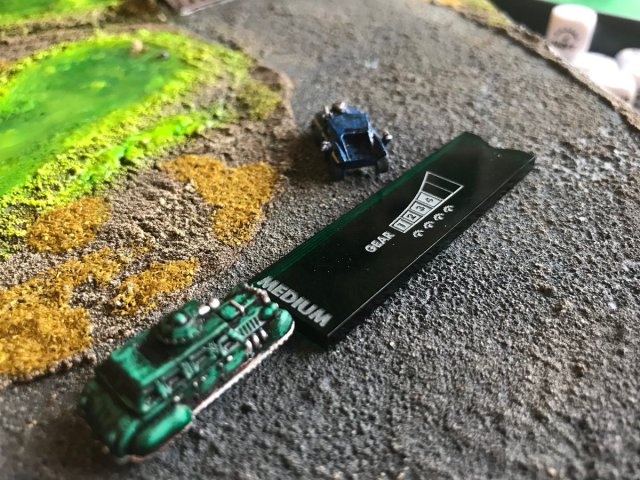
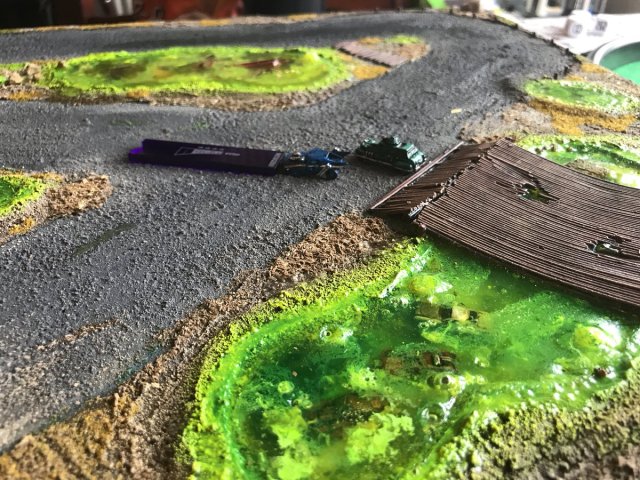
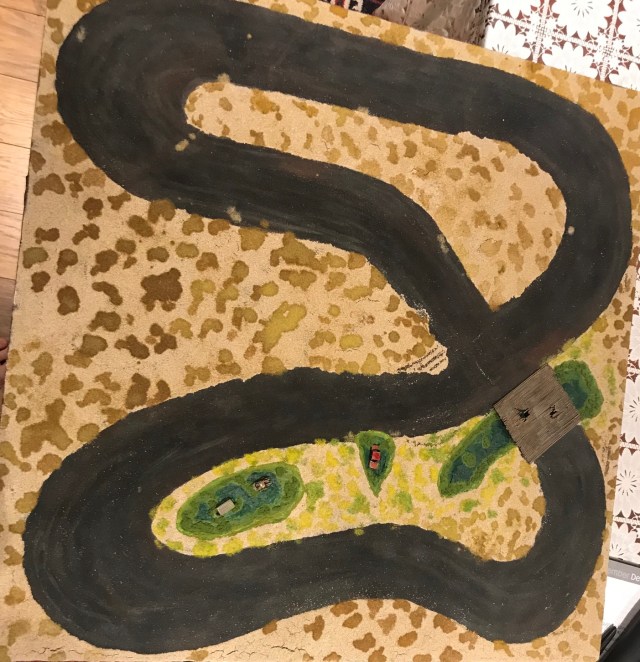
So far we have used the Toxic track I made some time ago to do our games, we played a fair few games just using a car each with front mounted machine gun, but we have now also done some games with 3 to 5 vehicles on each side. I find that it produces different games – the single car race is about outmaneuvering and skill whilst the selection of vehicles tends to lead to a more skirmish fight situation – at least the way the Little One and I are playing. Both version highly enjoyable.
Here is the terrain board again (2 by 2 feet) – we are ready to press the pedals very quickly with 2 minutes of so set-up time.
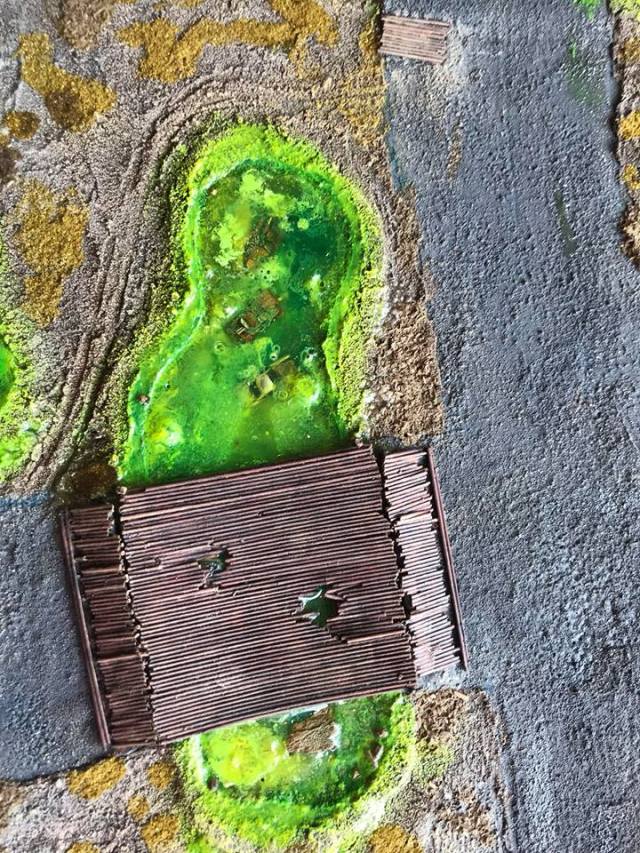
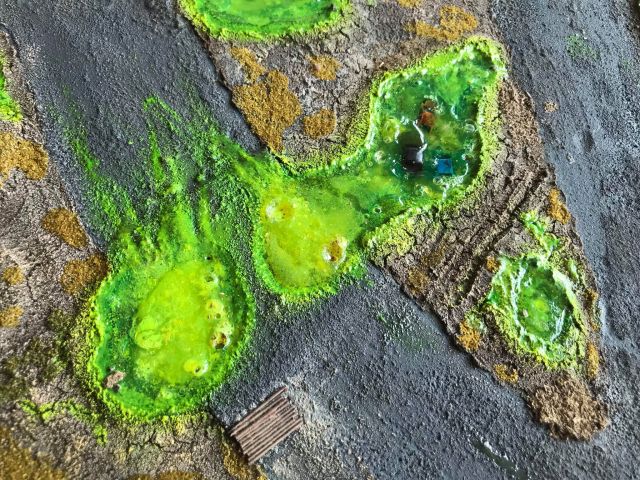
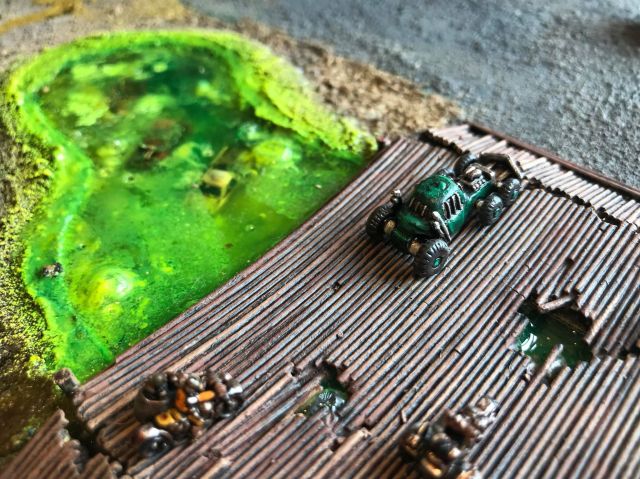
It has some slimy pits that are best left alone.
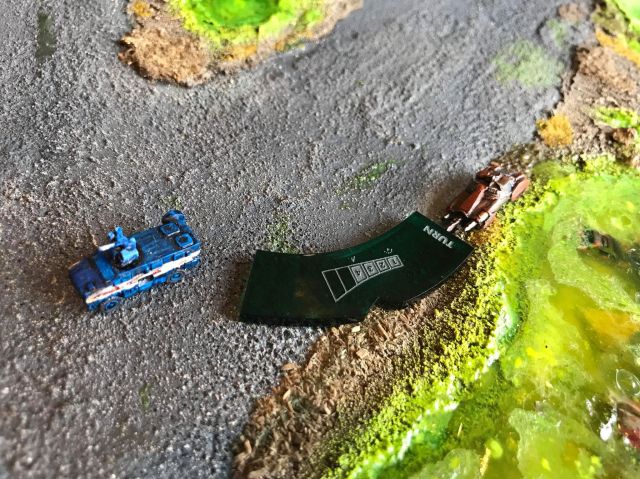
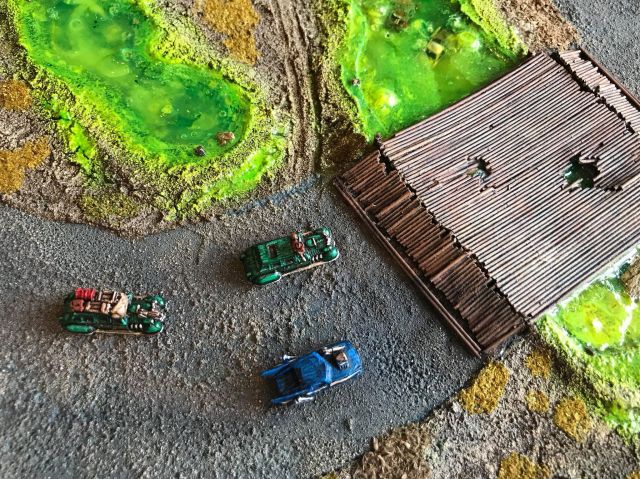
Here are a few shots from some of the games we have played.
dropzone commander ruined city tiles
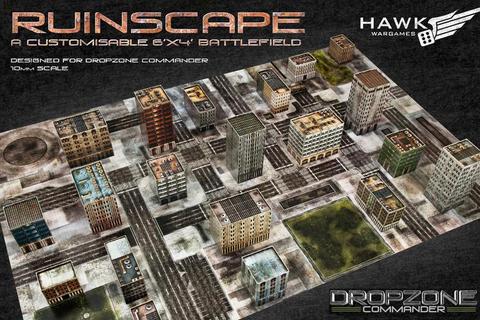
I actually came to the conclusion that the cars I ended up getting were probably closer to 10mm than 6mm scale – instead of 1/285 scale I found them being more like 1/200. 10mm normally is referred to as 1/160. I then remembered the Dropzone commander rules and some cityscape terrain I had seen that looked decent – at least from what I was seeing. I ordered a set of ruined city tiles and buildings for the Dropzone commander game. It is a card board set in 10mm scale and I think this will work brilliantly as it may portray a section of a city where the level of radiation is too high for permanent inhabitation, or otherwise abandoned, and is now being used for Gaslands competitions.
You can find more information about it here. It comes with 20 buildings and mats to cover 6 by 4 feet, so more than plenty for our needs. At £20 (reduced at the time I bought it 3rd April 2018, from £30) for the whole set (including delivery in the UK), hardly any significant outlay even if it is cardboard and we will probably end up knocking down the buildings whilst maneuvering our cars – but I will keep you posted on how this cardboard adventure will progress.
Here is the full set as presented on the Webpage. Looks ok I would use some model trees for the park but otherwise good to go. It is recommended that you mount the tiles on some sturdier board.
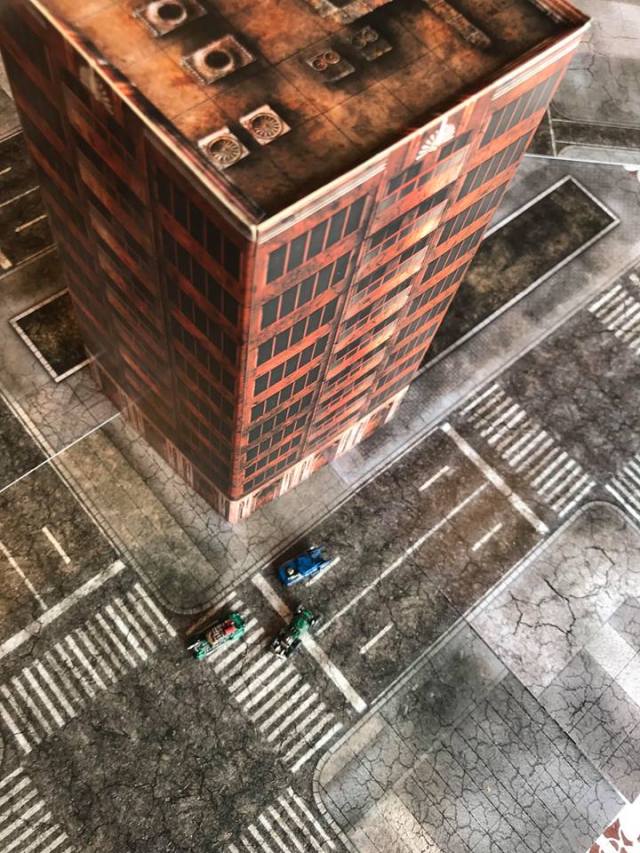
Here are some shots showing how the cars I am using compare in relation to the terrain. I think it is a more than adequate fit and I think this terrain have some potential for a lot of different things.
Really like thisSpot on
In addition you can download more buildings for free on the webpage (here), but I think I will stick to these pre-printed ones as I am happy with the amount of terrain I already have in the basic set. I suppose if you use these you could re-sixe them to fit to the scale you are using.
Example of a printable free building for Dropzone Commander as the link above.
further gasland ideas
mutant 1984
I recently completed some Snowmobiles for my Mutant 1984 project, based on a matchbox model (“Snow Hopper”). I found these at a Poundshop for £1 each.
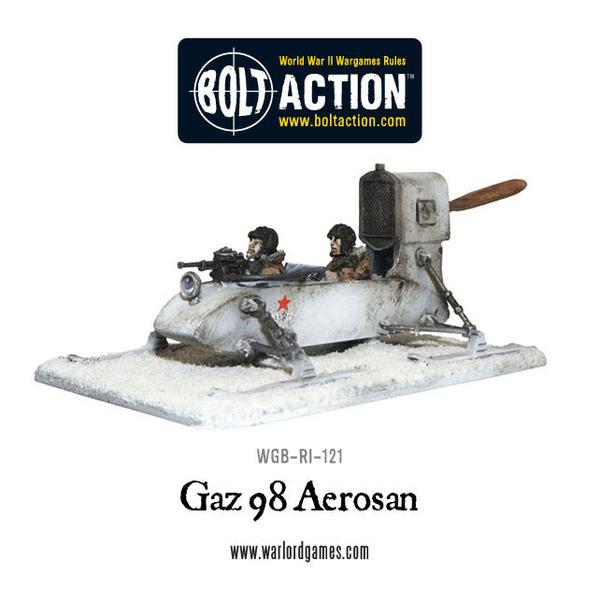
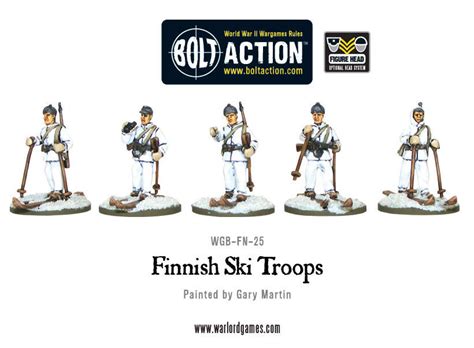
These are in “28mm” and I am planning on using Gaslands for a chase scene with some skiers, snowmobiles and some other snow vehicles, like the one in the picture below from Warlord Games – the Gaz 98 Aerosan (link here, picture from their webpage) and the skiers (link here, picture from their webpage). Still work in progress, so some time away from completion. It is basically a “downhillish” race where a detachment of Pyri Commonwealth Scouts on skis are being spotted by some Borderguards of the Ulvriket Army on Patrol in the occupied Göinge during the cold Winter Year 109.
6MM ZombieS
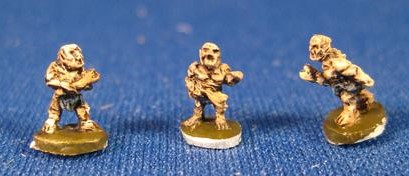
I also have some 6mm zombies that I need to paint to do the zombie scenario for my “6mm” cars, these are from Microworld Miniatures and I will be using Zombies and Ghouls (link to Microworlds Undead Range, here. Pictures from their Webpage).
In summary we are having fun with these rules!, I hope you are too.
Next time is the 100th Roll a One blog entry.
/All the best, and by the way we had a guest font in this blog post it is called 28 days later and used in Gaslands – you can download it here.
Second blog update today, as I was a week behind due to various reasons…
I made a New Year resolution of getting my Winter War progressed and I think I have done so during January and February (if you go back and check some of the previous blogs). However it is time to box it up for now and progress with the hobby day job of getting ready for Joy of Six this year – I have no idea about my current progress on this project as I do some stuff on it every now and then. I will spend the next few weeks getting this back on track – I suspect that I will need to paint a fair few Swedish infantry units. So the Winter war gets packed away …. (links to the relevant blog entries forming part of the winter war stuff at the end of this blog posting).
….and the 6mm Great Northern War is back in focus.
However before the snow melts let us have a look at some of the Winter War stuff I have been working on since the last Winter War blog update 2 weeks ago. First some road tiles and then a log fire.
Doing Winter Roads
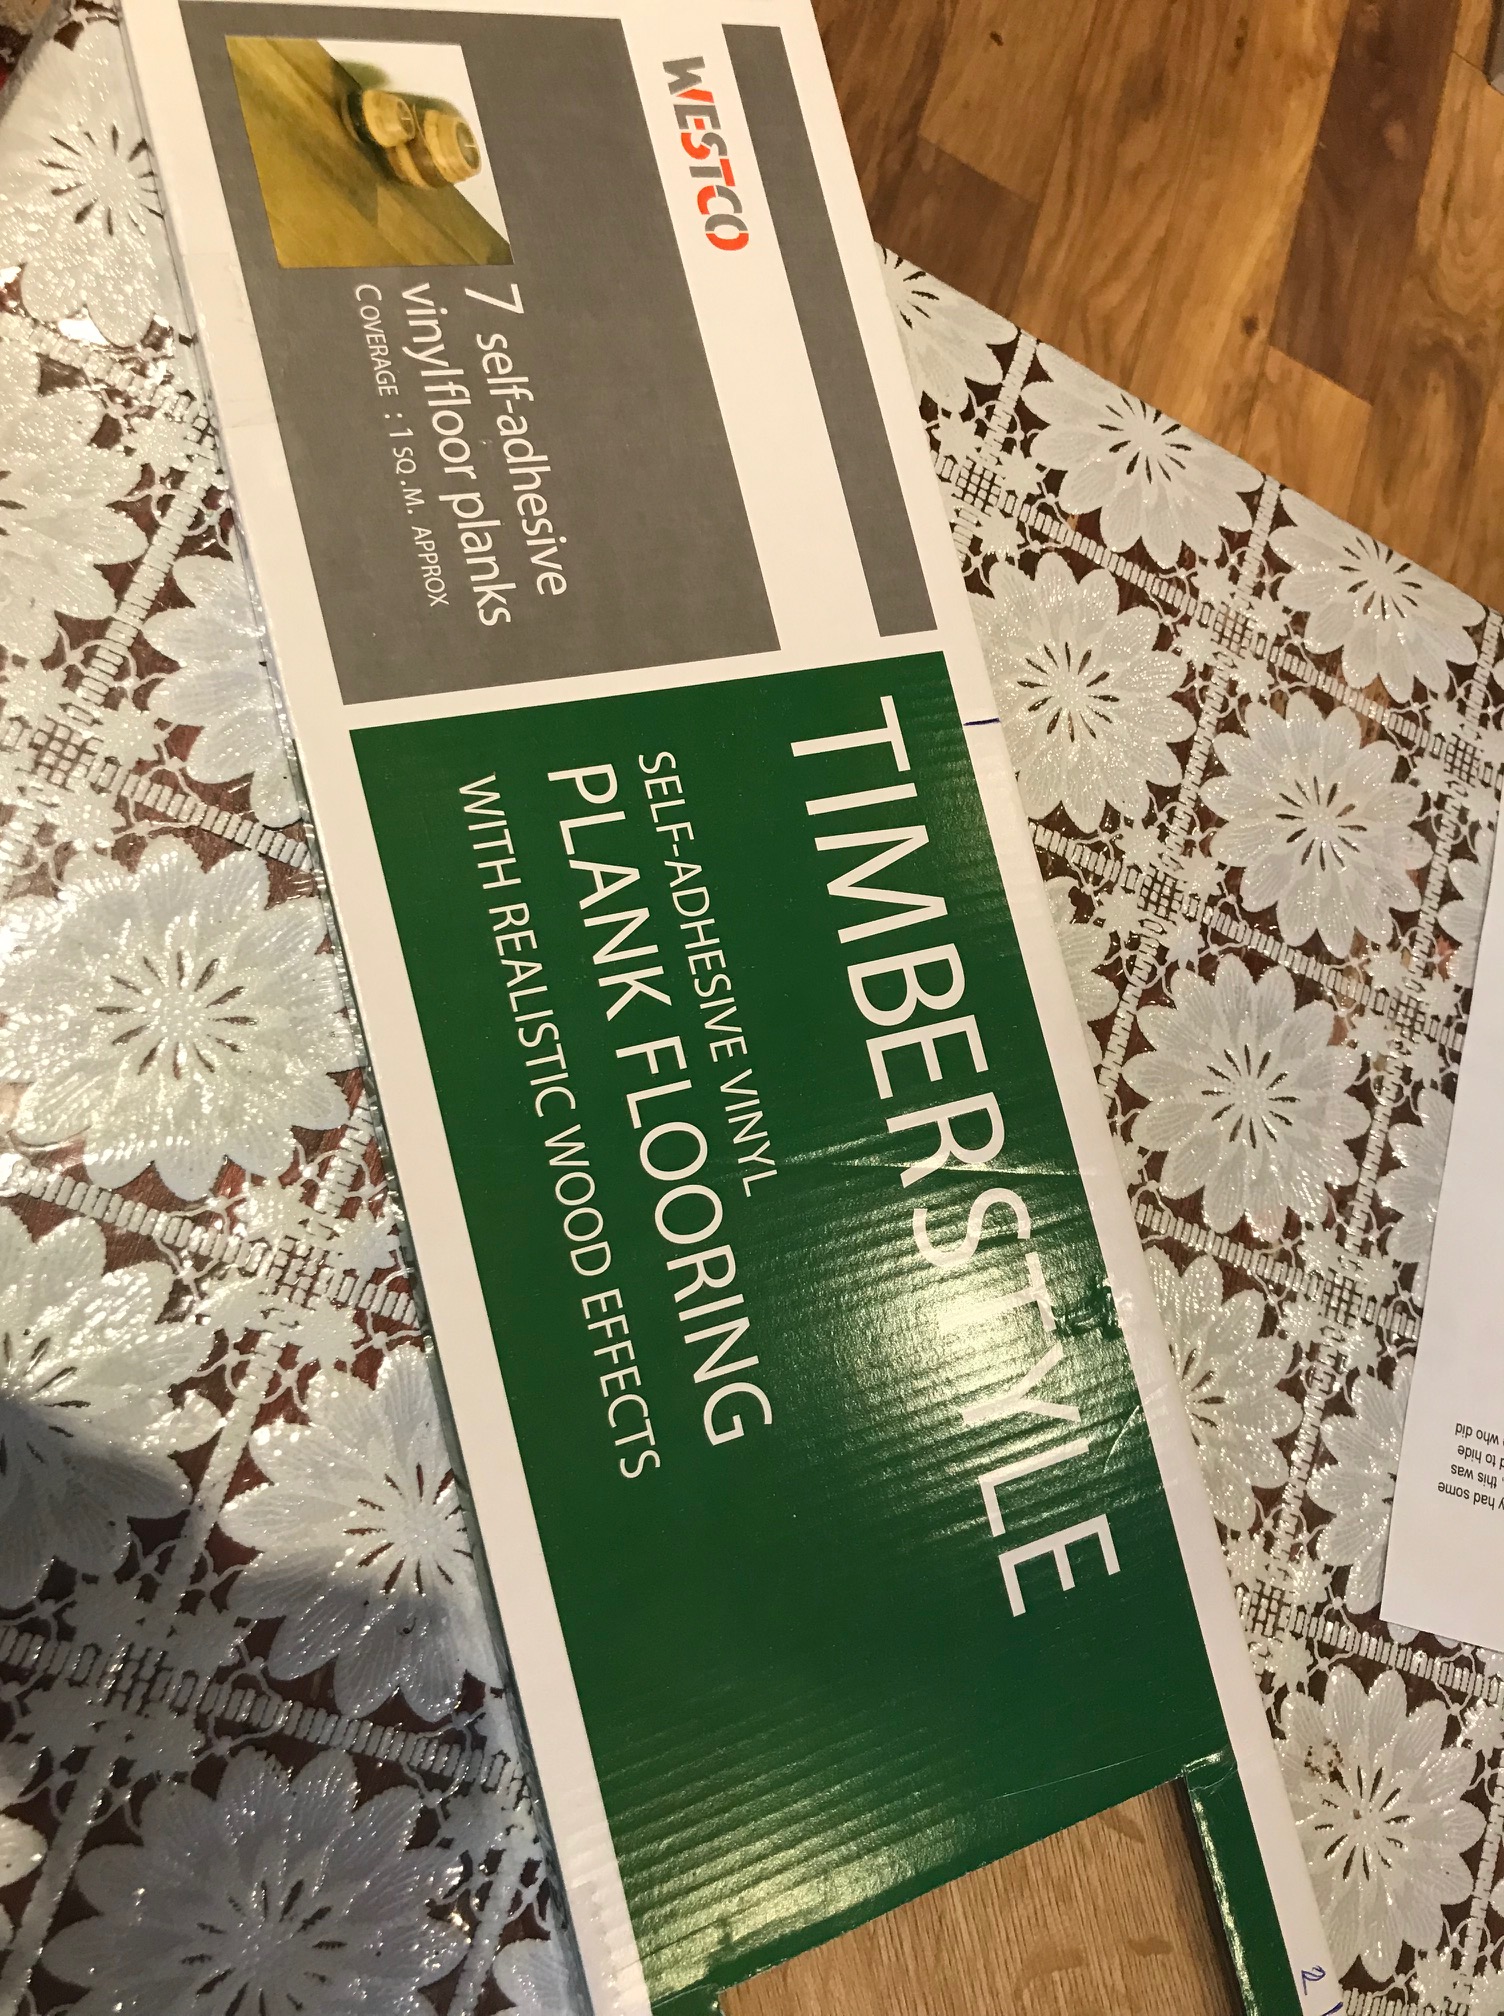
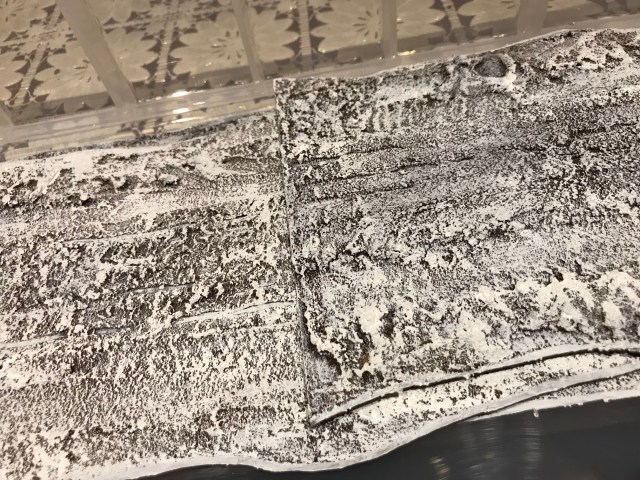
I wanted to make some wintery roads and got myself some self-adhesive vinyl planks. I have used these before and they come in 3 foot lengths. At these lengths they are fragile and can easily snap but it allows the creation of longer pieces – which I like. If I am not careful enough I have to make a new one! – no problem. You could make shorter lengths if you are worried about handling and storing them.
About a tenner from Wickes – 7 planks.
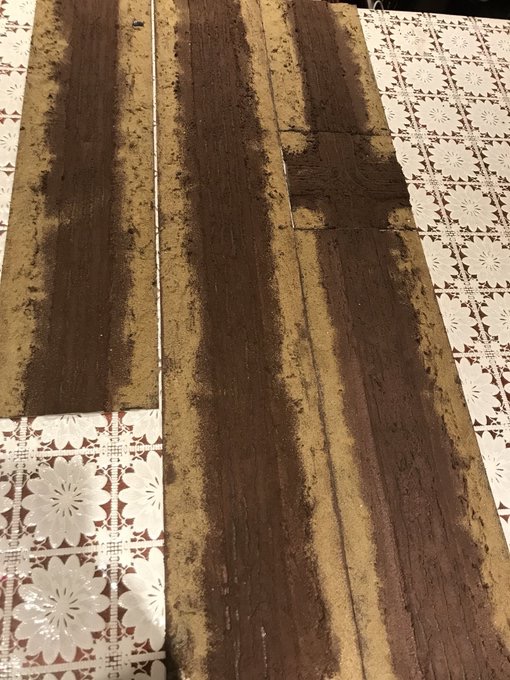
The width of the Raate road was 5m (so in 15mm the same as 50mm). The planks are 150mm so I used the whole plank width to be able to model the cleared sides of the road as well as the elevated road surface in the middle. I did this by cutting 50mm wide lengths from a plank and sticking them on the top of the base plank I was doing.
Like this!
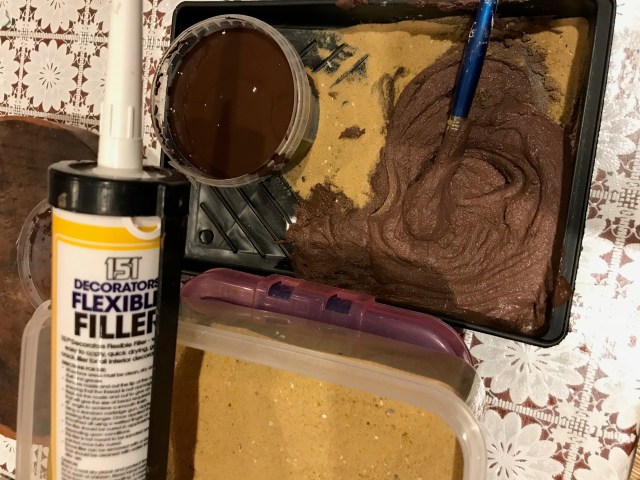
Then I mixed some brown emulsion, caulk (decorators filler, or alternatively an acrylic sealant), bird sand until I get a Nutella like consistency!
Then I covered the roads with the brown mix, I added some extra sand on the sides and added some tyre tracks with a kebab stick.
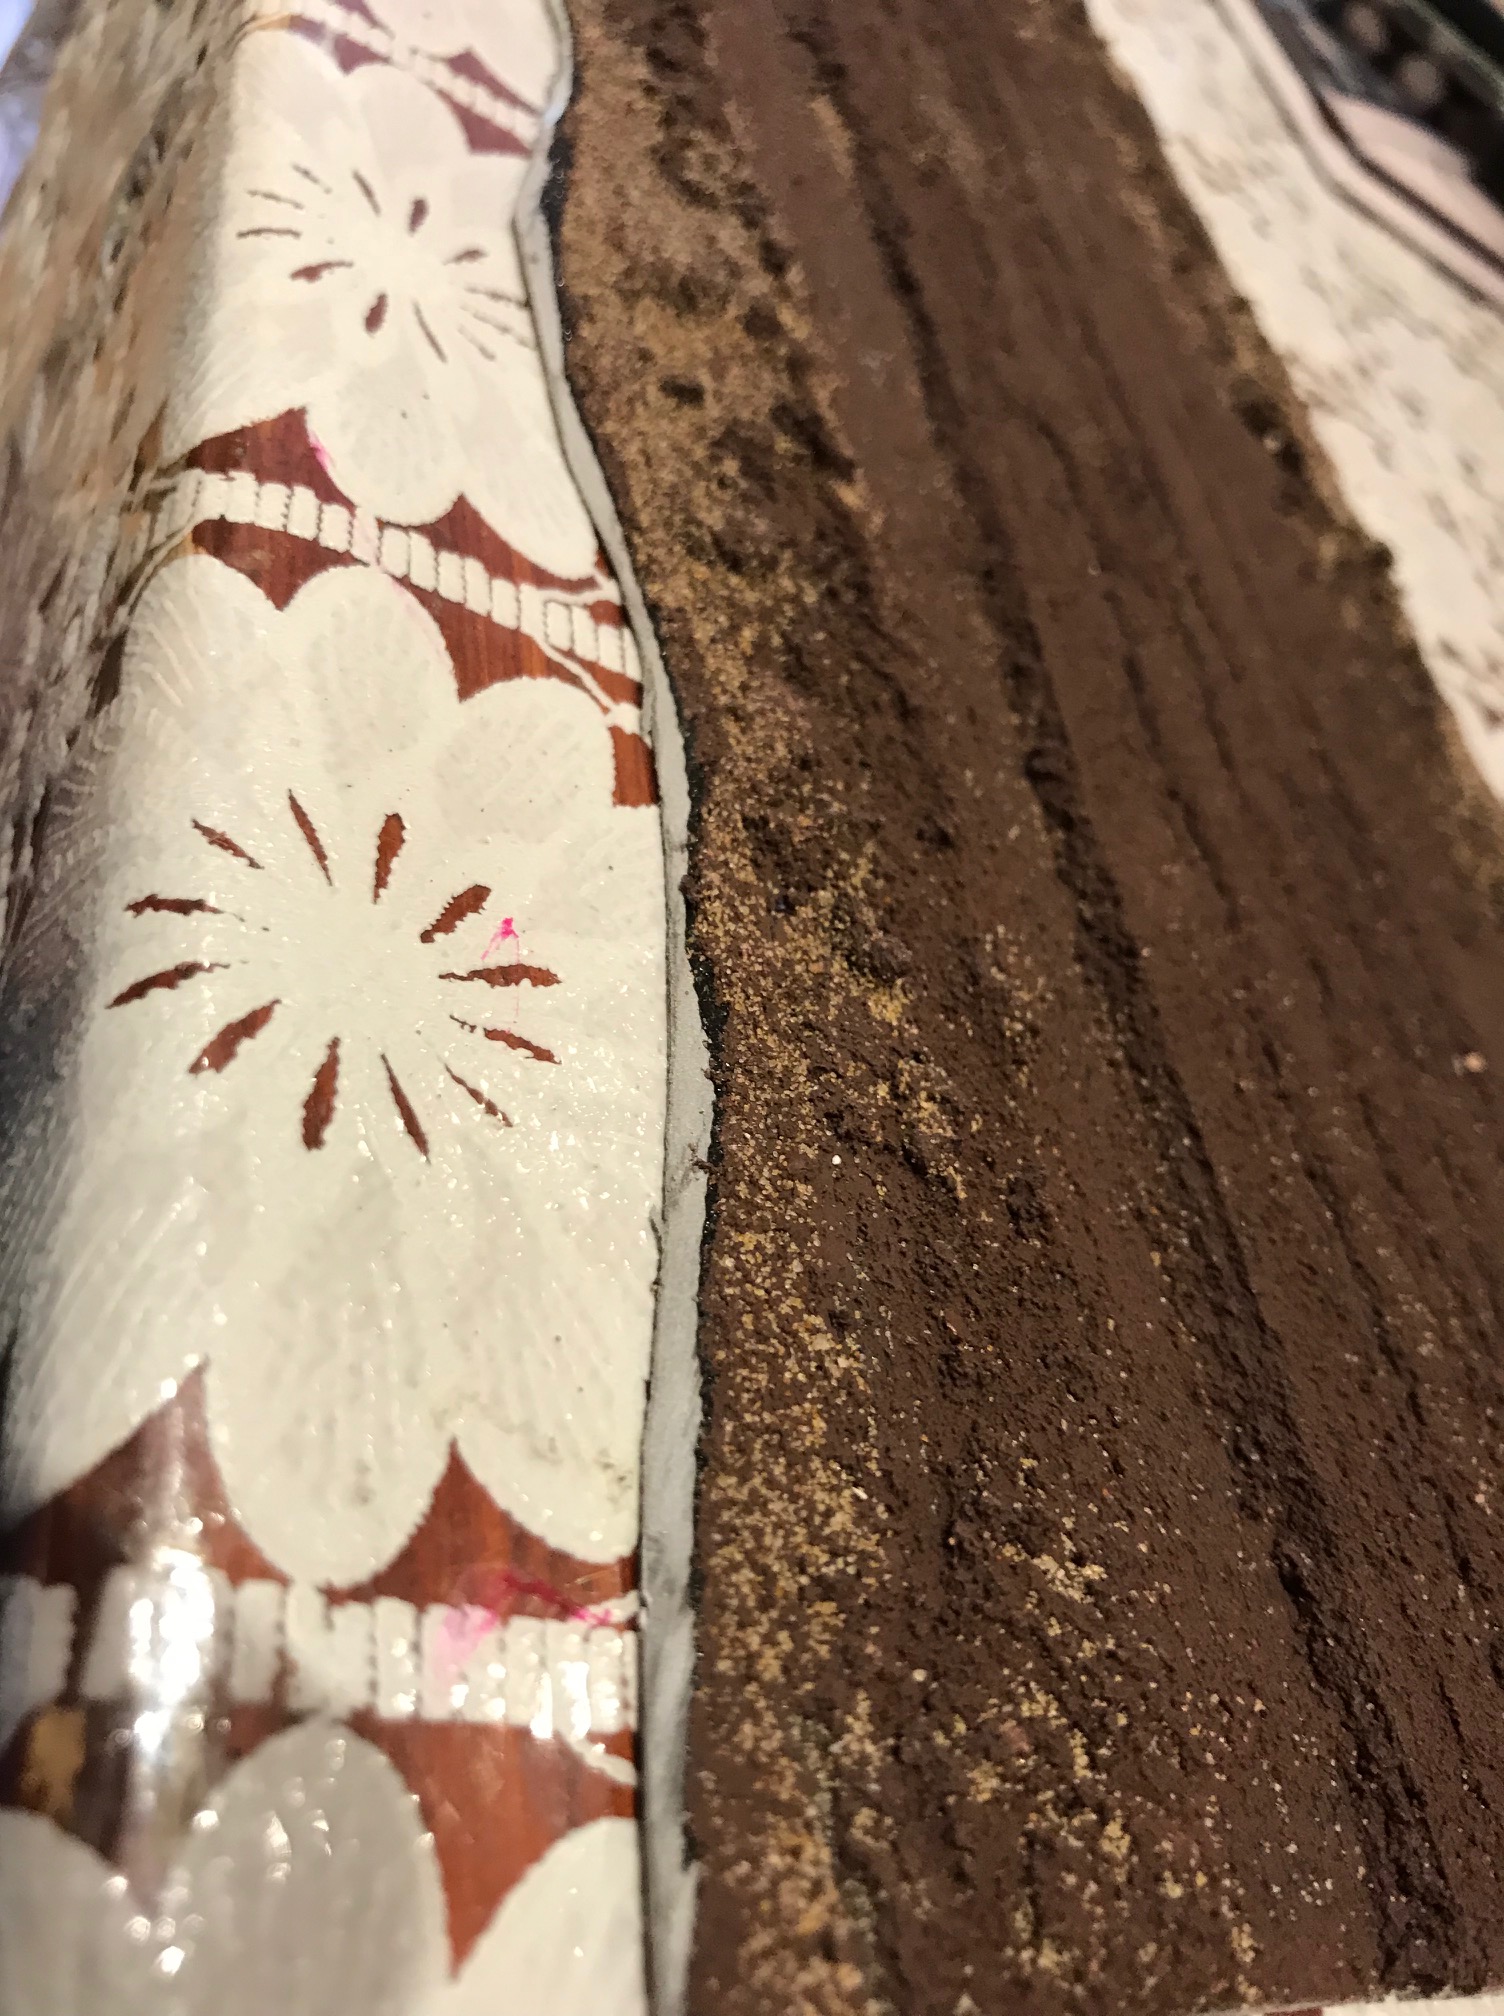
Then I let it dry for a an evening and then shook of any excess sand and trimmed the sides to make them less straight.
Then I drybrushed the road sections with white acrylic hobby paint.
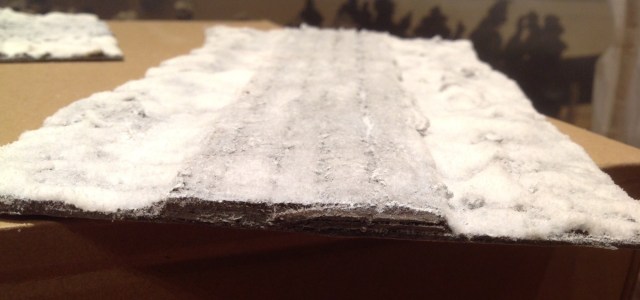
Then I added (on the sides of the road only) the snow flock mixed with mod podge (matt) or PVA glue and a dash of white paint (acrylic) – I think I prefer the mod podge but pva glue is more affordable. On the top of the road surface I use mod podge mixed 1 to 2.5 with Water (you could use PVA instead of Mod Podge) and sprinkle some snow flock over it (I did not include any acrylic paint in the mix that went of the road). Let it dry and apply some Varnish on top (matte variety).
Looks pretty good to me!
Log fire prototype
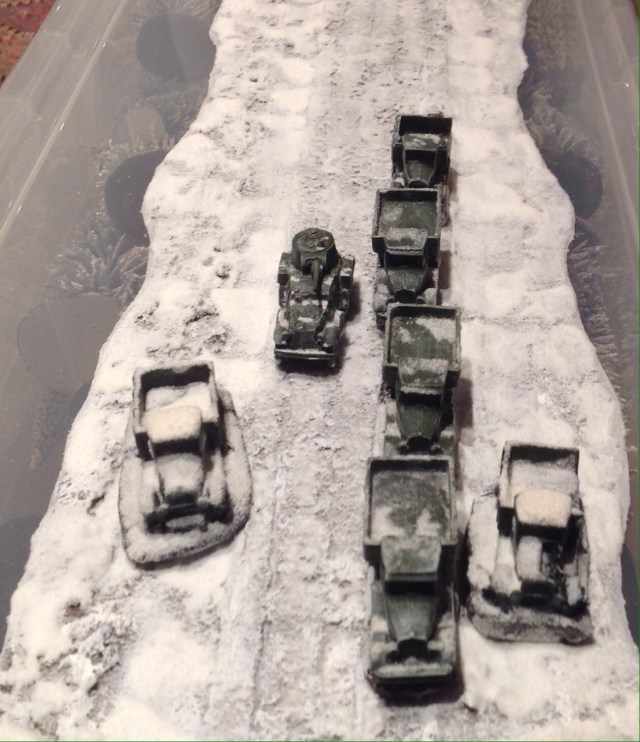
I wanted some fires on the table for a scenario where the column of Sovietic vehicles have stopped and the Sovietic soldiers have dug in and Finns attack at dawn while it is still dark. I had seen some LEDs being used for fire/smoke markers in the past (using the round LED flickering candles).
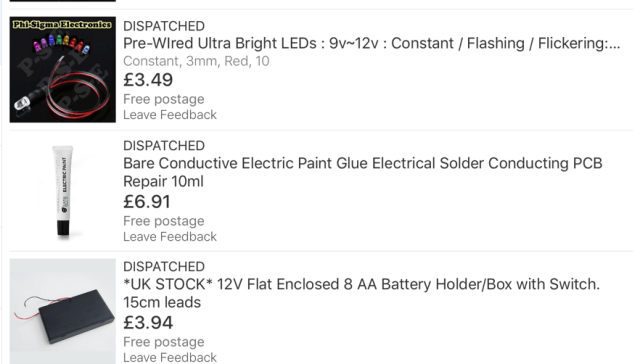
I went on eBay and ordered a set of red constant light LED 3mm 9v-12v (I got ten for £3.99 including postage) and the same but orange flickering (random flashing). I also got a tube of bare conductive electric paint glue (to avoid needing to solder the wire) for £6.91 and a battery holder with a switch for £3.94.
Then I connected up 2 of the orange and one of the red LEDs with the battery box (adding 8 1.5V batteries of course). If you do this, be careful and do not leave it unattended until you are sure it is working as sparks can fly and cause devastation even at these low voltages. Anyway here is how it looks like.
Then I put the construct and some of the cabling on a base and glued it down with hot glue, covered it up with non-drying clay, put some stones around the fire, a dollop of clear silicone on top and pulled it up a little bit to look like flames.
Halfway through the process!
Here is the finished article.
I really enjoyed doing this, a few notes:
Unless you have a permanent setting where the cabling and LED are in you board there will be an elevation around the fire – I suspect no one would put a fire on top of a little hill surrounded by enemies, if they would make a fire at all! If I develop this further I may look at incorporating this into the roads with fires on the sides (in the ditches) or having small hills on the sides with the fires at the start of the slopes.
There are some lower voltage LED that would required smaller flat batteries, I may look into this instead.
Work is taking more than its fair share of my time at the moment, but it happens to most of us. However, I have had some time to get some things done over the last week or so, this is just a summary of that. As always, I do hope it is of some interest.
Chain of Command – dice, casualty markers and suppression markers
Gaslands – finally a game
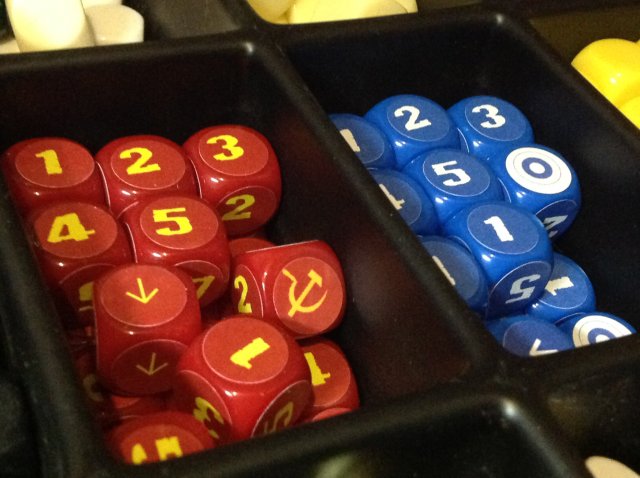
Finnish and Sovietic dice
I am currently working on some terrain and markers for winter war Chain of Command. I wanted to have some dedicated Finnish and Sovietic dice so looked around and found a fair few Sovietic options but only one Finnish (very nice ones, sold by Dice of War in Australia, see here). These are not specific ones needed for the game, just the type where the 6 is replaced by a unit or a country symbol and could therefore be used for any game that uses D6s. I wanted to have blue ones for the Finns and Red ones for the Soviets, and thought I could perhaps do some myself. I found some 16mm blank dice on ebay and got myself a few different colours (these are from China so will take a week or two to arrive!, at least if you live in the UK).
I then ordered some labels/stickers from Amazon (13mm).
From Label Planets website (link here) you can get a word template for this label set and buy bigger quantities as well. From this you can design your own labels.
I wanted to have 1 to 5 in the same font as used for the Chain of Command rules. This font is called Vulgar Display of Power (download it here). In addition I wanted the hammer and sickle for the Soviets and the hat emblem that the normal enlisted men had for the Finns, replacing number 6.
Here is are the files with the sheet I made for the Soviets (Russian Dice) and sheet for the Finns (Finnish Dice), these are word files. You can change these to add your own colours and symbols.
I have to admit that I had some problem with the laser printer I was using in aligning the sheet so that it printed out correctly (I wasted three sheets but luckily managed to get two done, which was all I needed)- the final result is not perfect and if you have trouble I can only say I am sorry.
This is how they turned out.
I will make some yellow Sovietic ones and some white for Finns for Command Dice rolls.
Dead Soviets
One of the striking things with the Winter War are all the pictures of dead Sovietic soldiers especially in the fighting North of Lake Ladoga. Behind my romanticised view of the war and Finnish bias, I am not immune to the hell those Sovietic soldiers had to go through trapped on those wintery stretches of roads, with inadequate supplies of just about everything. Go to the Wikipedia page and read about the Battle of Suomussalmi (link here) and check the losses on both sides – 50% losses for the Soviets and less than 10% for the Finns.
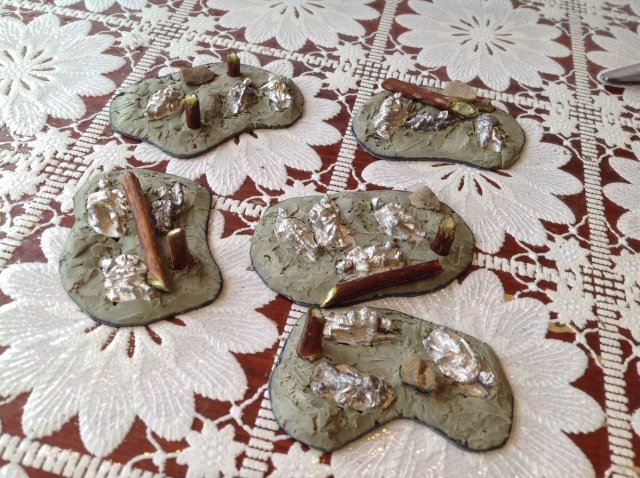
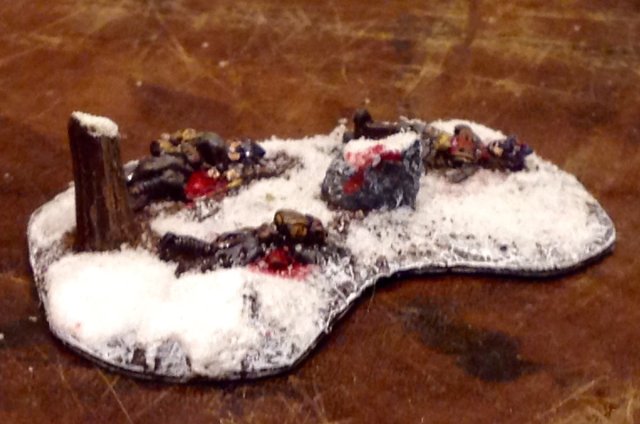
To create a reminder of this I did a few terrain features with dead Sovietic soldiers (I keep on using this term as the soldiers in the Red army were not only of Russian nationality). They were based on Peter Pig casualty markers (based on anything with a great coat and headswaps to pointy Russian hats and early war helmets).
Some Casualties, clay, stones and twigs from the garden
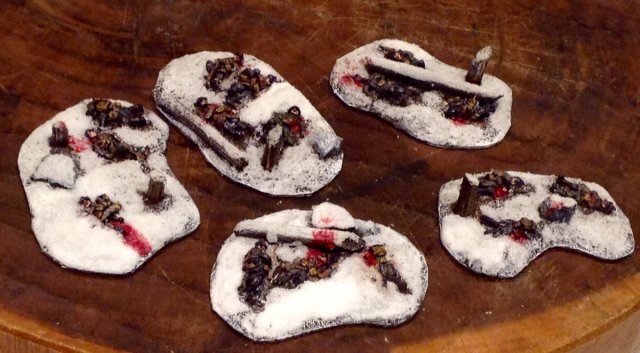
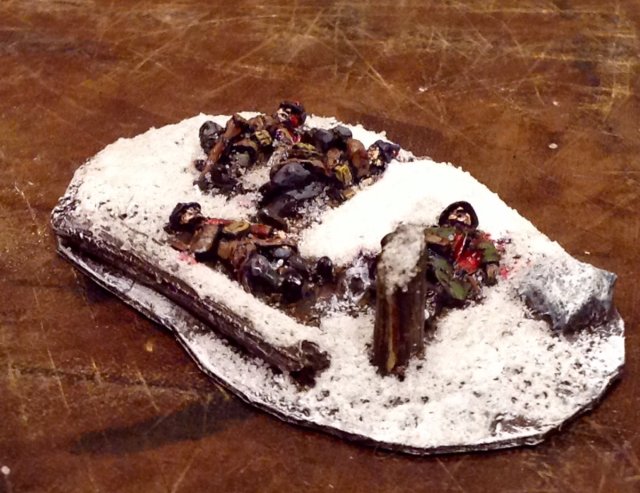
…and here with some painting, winterization and blood (sorry!).
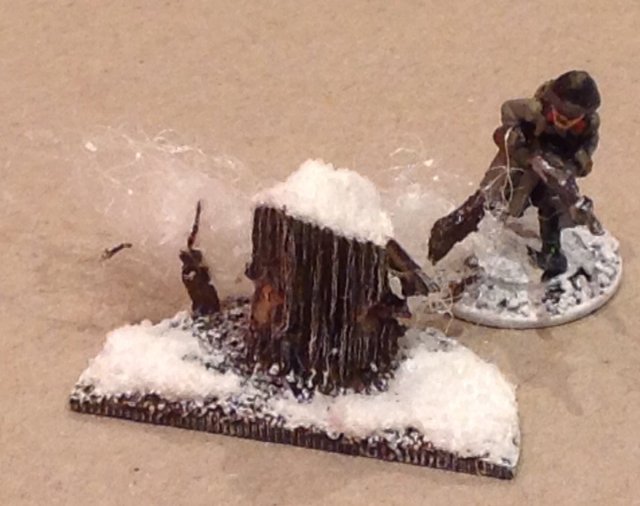
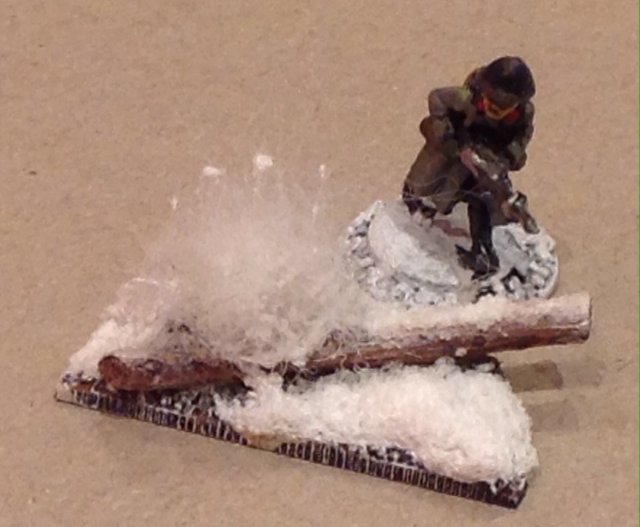
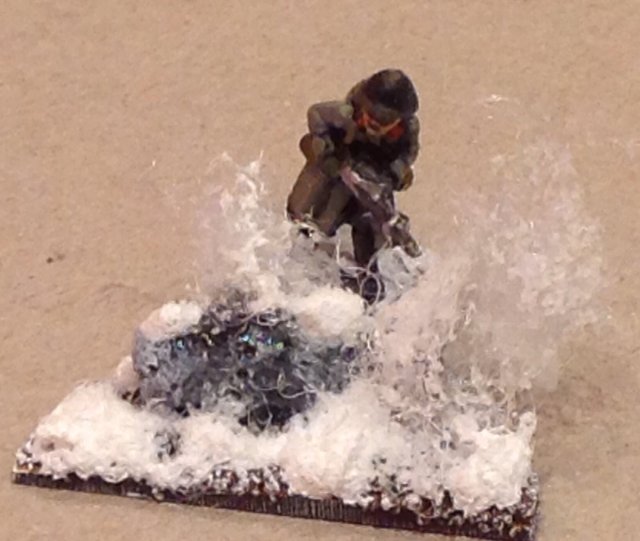
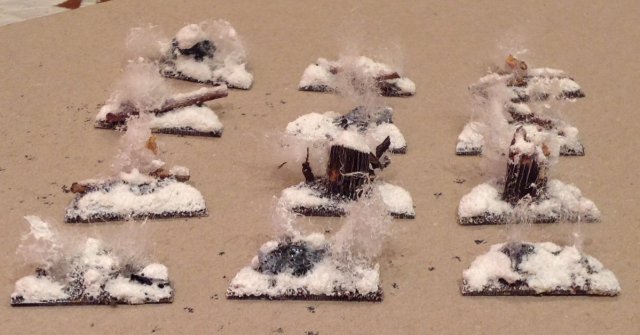
Suppression Markers
These are based on the concept of snow flying around as bullets hit the area. I used something called Universal Cooker Hood Filter to do the effect. It is like cotton but much stronger, I attached a part of it with superglue and when dry I dragged it out and trimmed it. I also added a little bit of snow flock carefully on the cloud. I think they do the job well enough.
Ivan with his LMG is under fire and splinters are flying from the tree stumpA simpler constructionSnow splashing around a stoneThe full collection
Explosion Markers
I have seen explosions markers made out of clump foliage and wanted to make some for the winter war table as it will contrasts nicely with the snowy background, and also have some practical game purpose. So I searched around the net for some ideas and found a few different options.
Ivan successfully rolled 12 saving throws
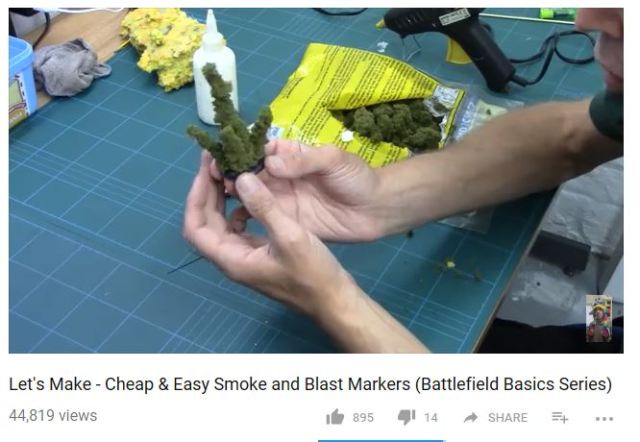
I made my set of explosion markers by following the recipe by the Terrain Tutor (link here). Always excellent, this time he blew me away again!
Terrain Tutor – check him out! Excellent.
I also had a game of Gaslands with my micro cars! (using 50% templates), and it was great, but more on that another time.
/ All the best (yes I know I should be doing GNW!)
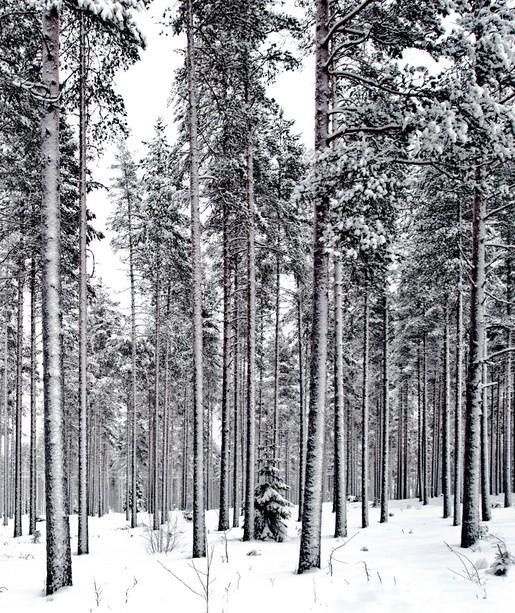
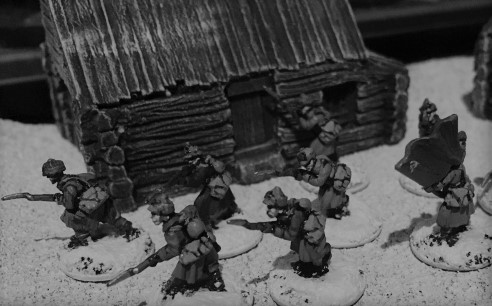
If you recall episode 6 of the Band of Brothers TV series about the Battle of the Bulge, you may remember the wintery forest fighting scenes (well that was most of it anyway). I really like the cinema photography of that episode (as well as many of the others) and the relatively clear line of sight with regards to obstacles – the dominant thing at forest floor level being the tree trunks. Of course the Ardennes is not only tall pine trees but it is the tall pine trees that, in my view, helps to set the scene. What breaks the line of site is not necessary the trees but the white fog that sweeps the forest and the uncertainty is what is lurking out there.
Mature Scandinavian pine forests look very much the same.
Scandinavian Forest
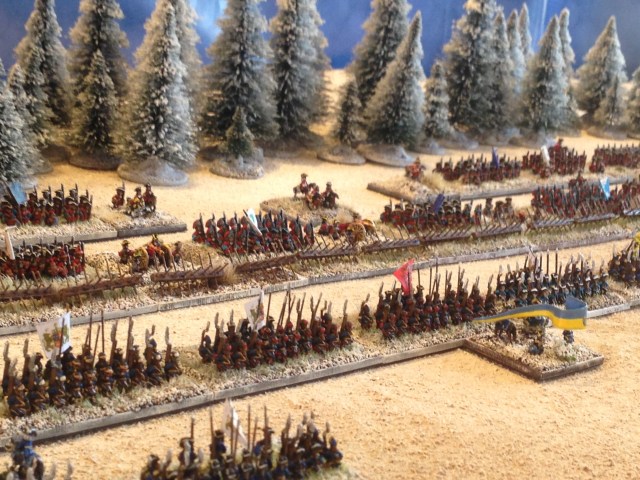
Most winter wargames tables have traditional looking Christmas Trees with some snow – it is the ticket to add some winter feel to your terrain. The pine tree is an evergreen and the Christmas tree shape is easy to deal with and to pimp up to look wintery. They are also relatively cheap, and easy to manage on the wargames table. I have use these to, in my opinion, great effect for my Fraustadt 1706 and Gadebush 1712 tables that was laid out at Joy of Six in the past.
I know I used this picture recently, but it is just to make a point!
However, in adhering to my new year resolution of doing some Chain of Command Winter war (that is the war fought between Finland and Soviet Union 1939 to 1940) I wanted to try to get some tall pine trees on the table. I looked around the net for some commercial ones but did not find anything that I particularly liked.
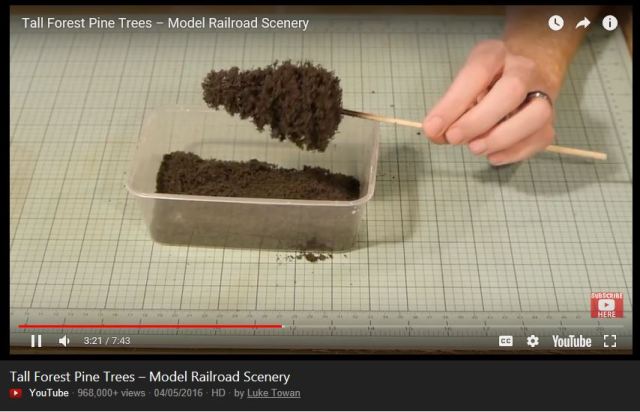
I then stumbled upon an excellent video (link here) from the world of railway modelling and followed it to the letter, with the following exceptions:
Basing – I based mine on 40mm washers
Skipped the step on the highlighting with the turf (as, in my case, I will highlight with snow)
I did not add the additional branches on the tree trunk (but perhaps will do that later).
I added some snow (step 1 a mix of snowflock, white paint and glue added on the edges of the branches, dry, step 2 apply hairspray to the tree and let snowflock drop over the tree standing from above).
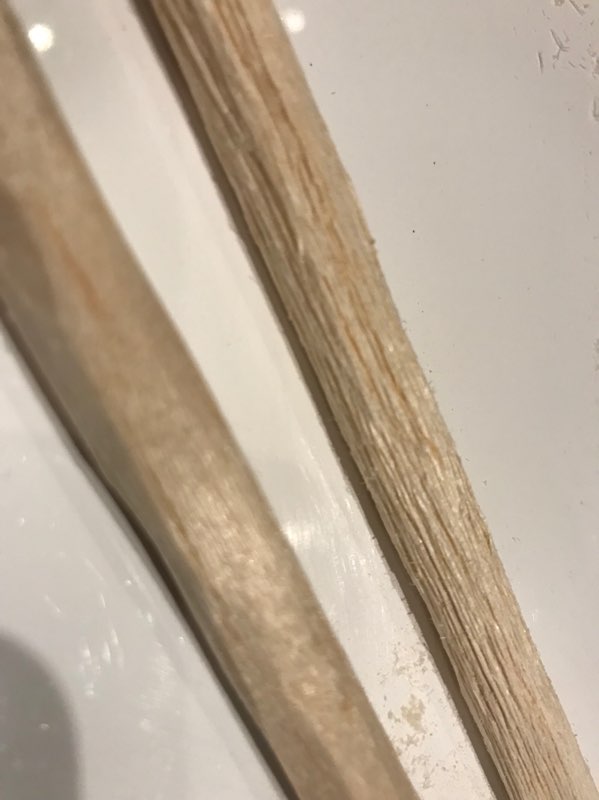
Have a look at the video (link here) by Luke Towan.
That thing of using the steel brush on the balsa to create something that looks like a tree trunk is just amazingly efficient.
Before and after the Steelbrushing
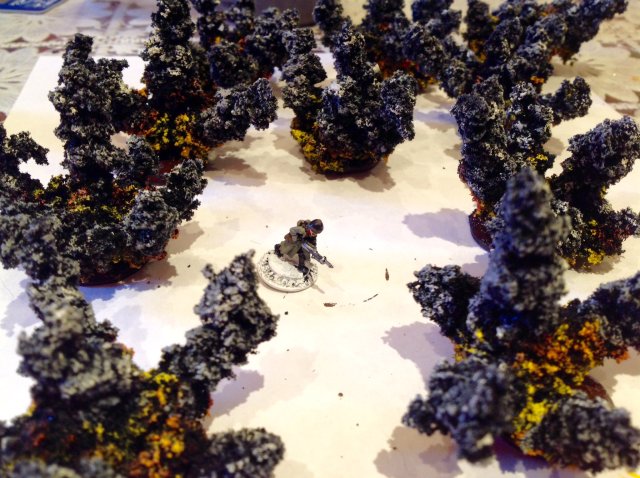
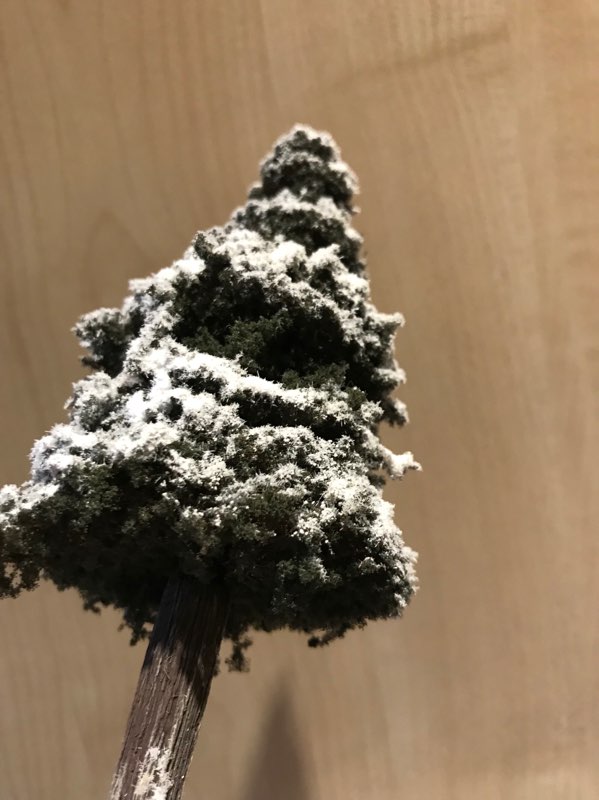
This is how mine turned out – a compromise if we compare to the picture of the forest above – but spot on for what I was looking for!
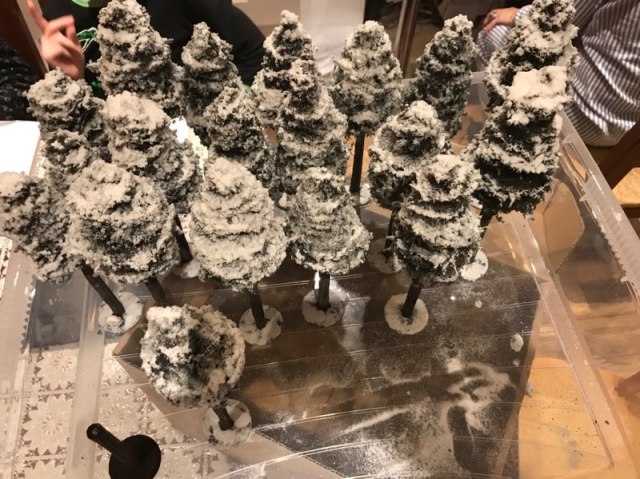
I did a total of 19 in the first batch (as I can not count to 20 yet! – it seems). I have made enough to do another 70 or so, but not sure how many I need.
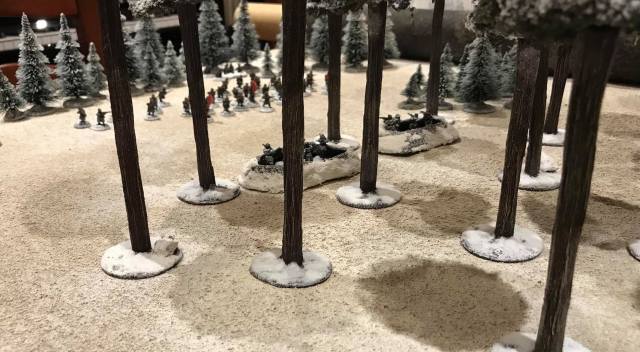
Took them for a test drive and I like the way they add to the overall look.
Now I need to figure out a practical way of basing them so they do not fall that easily – I suppose a bigger base with magnets or something like that.
The video show what material you will need to make the trees, it should be all straightforward, but if not let me know. I speculate that the total outlay for doing the 95 trees would be in range of £70 to £100, which is less than £1 per tree. I will let you know when I have finished my batch as I do not know how much spray paint and glue I will be using yet. It is not a difficult project to do, but I trust that you are careful when you use any sharp tools and read the recommendations on any packaging on the materials that you use. I am not saying this as a general statement to absolve myself of any responsibility when you are sent on a violent trip to God-only-knows-where from spray glue fumes or sent to hospital to put your cut off finger back – I am saying this because I still tend to rush into things without considering the safety of myself or more importantly others around me before the production of a piece of shitty wargames terrain.
They are relatively sturdy (the spray glue and in my case the additional hairspray to apply the snow creates some rigidity) and will probably last for a while. I suppose a few more coatings of hairspray would make it even stronger (use poundshop hairspray).
I am using mine to do Winter War using Chain of Command, but I suppose the trees could serve equally well in many other conflicts using other rules. 😉
I intend to do some for Summer actions during the Continuation war at some point, but without the snow of course.
The Little One and I have had some great games with the Road Wolf rules and I really like the fact, doing it with 6mm cars, that we have a little 40 by 20 cm piece of road that we can take with us wherever we go (more about it here). If you have followed this blog you know that I have a passion for post apocalyptic settings with regards to gaming and I have another ongoing project Mutant 1984 (see more here) that I was going to use the Scrappers rules (another Osprey set) for. However, this project is not progressing very quickly but we will get there one day (I blame the management).
I got Osprey’s latest game Gaslands and it certainly scratches the same kind of itch and since I already had some appropriate vehicles there is very little work involved to get a game going. You can listen to an excellent interview with the author of the rules, Mike Hutchinson, in the latest Meeples and Miniatures podcast (link here) and check out the Gaslands webpage (link here). What immediately appealed to me are the manoeuvre templates that reminds me of the X-wing miniatures game that is an old favourite here at the Roll a lot of Ones game table – although we have not played it for some time.
The backdrop for the game is an alternative Earth where a successful manned mission landed on Mars in 1976 followed by colonisation, secession and eventually a Martian Nuclear Attack in 1999, leading to the collapse of Earth as we knew it. The year is 2018 and in the aftermath of the devastating war the population of Earth is enslaved and is being pacified by ultra-violent blood sports on television. The most popular show is Gaslands that show death races where the ultimate objective is to end up in the prime-time international final and a the chance to win a one-way ticket to Mars to make a new life. What is there not to like?
You can buy the rules and also some nice manoeuvre template, markers and dice from the Gaslands website. You can also make these yourself.
I had a first pass of the rules and I really enjoyed reading them and together with what I have seen in the various videos on YouTube I am hooked – but have not yet played it.
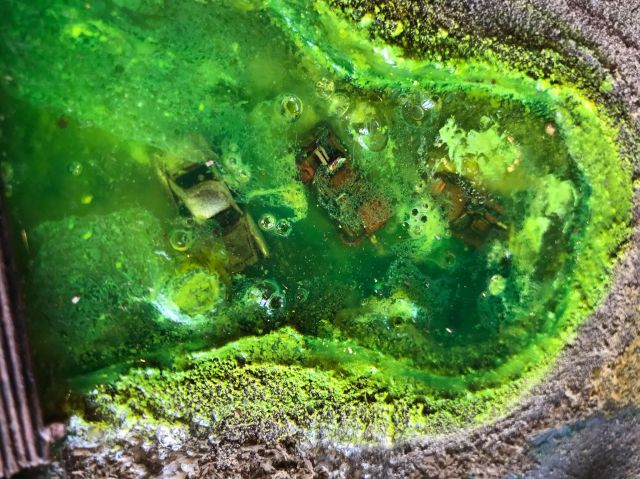
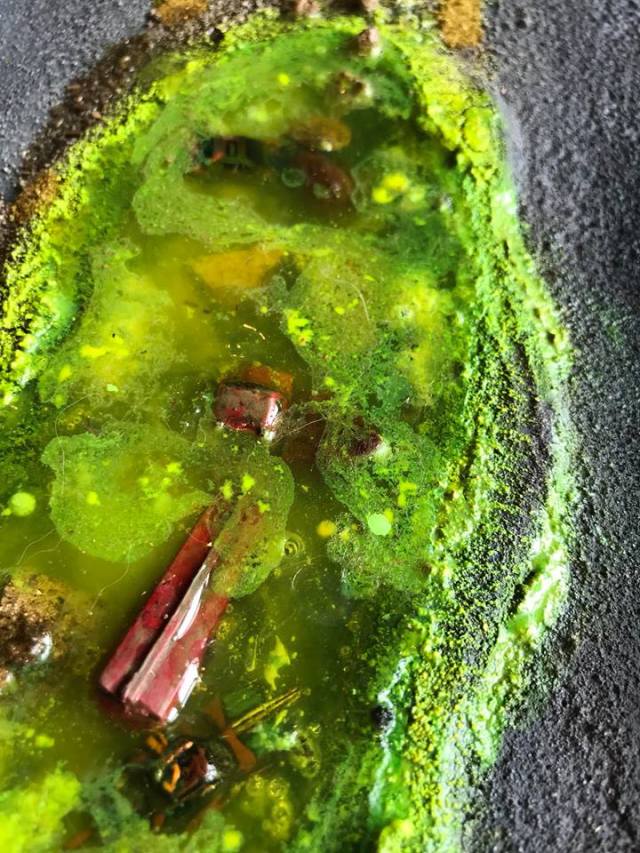
As the Little One and I already have a lot of 6mm cars we decided to do it in this scale using 50% of the measurements (this mean that that you would have to make the measuring sticks yourself and print them out at 50% size) – a 2′ by 2′ (60 by 60cm) playing area in relative terms is the same as playing the rules as written on the recommended 4 by 4 table (using roughly 20mm scales cars). I have started doing a track but have some detailing left and I need to pour some coloured resin in those toxic pits. I suppose the track was laid quickly in some area that could not be utilised by the Martian industrial machine, without excessive remediation. So instead it became a regional lower league Death Race track.
Work in Progress
Some resin to be poured into the ponds and the bridge needs to be tied into the board instead of looking like it has been tossed on top of the pond.
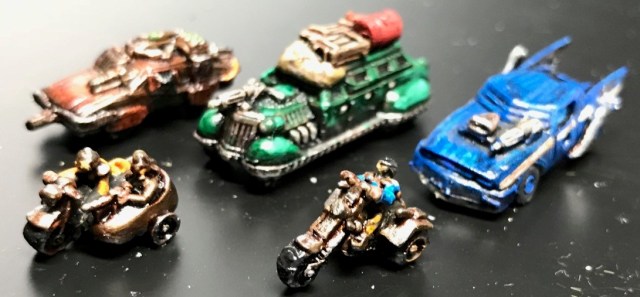
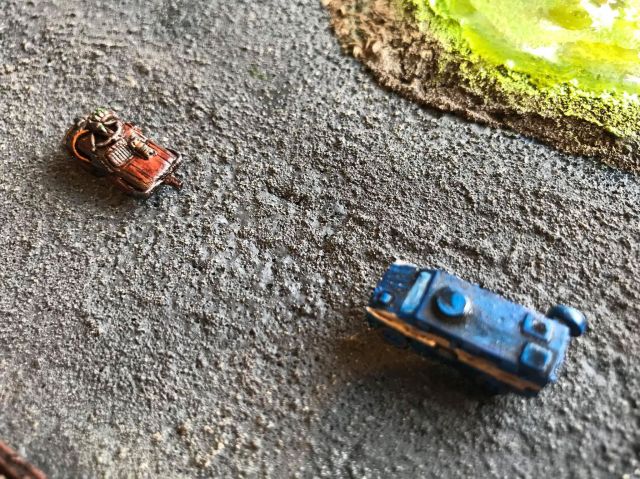
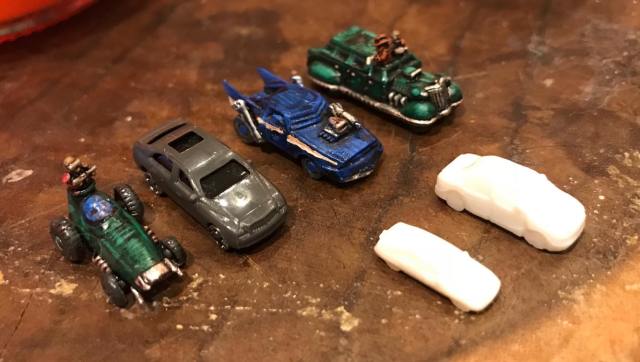
However, one drawback in doing this in 6mm is that it does take away an interesting element of the Gaslands experience, This is about finding a Matchbox or Hot Wheels car and giving it the post-apocalyptic treatment using your old kit box (I actually kind of did a post apocalyptic vehicle last year, but I am not sure it was enforced enough to last for any length of time in a death race, see more about the muddy vehicle here). But then I did some mods to some of the vehicles.
28mm scale Post Apocalyptic Car
I introduced some of the factions I have done to date in previous posts and this blog entry serves as and overview of what I will be using. I also comment on the suitability of some of the vehicles I have bought, to ensure you get something that works together on the tabletop. Having done a lot of “Micro, 6mm. 1/300. 1/285” stuff I know far too well that each manufacturer have their own interpretation of the scale – with human sized individuals ranging from 5mm to almost 8mm, this is the equivalent of using 25mm miniature alongside 40mm ones. In some cases, as we shall see, there are differences between ranges within the same manufacture too. To quote Peter Berry of Baccus (from his FAQ section) “Figure design is an Art, not a Science. Every artist sees things differently, as does every designer.” Of course this is part of the charm, but it can be frustrating if you do want to widen your options.
I hope that what follows will be of some use if you want to get into 6mm Post Apocalyptic vehicular battles and at least show you some of the options available. Please do get in touch should you have any other sources for vehicles or questions and I will update this section. As to ordering more vehicles I think I am more than happy with what I got – for now. Remember that you will only need a handful of vehicles to play the game – this is overkill but that is how we (wish we) roll!
Irregular Miniatures – UK based
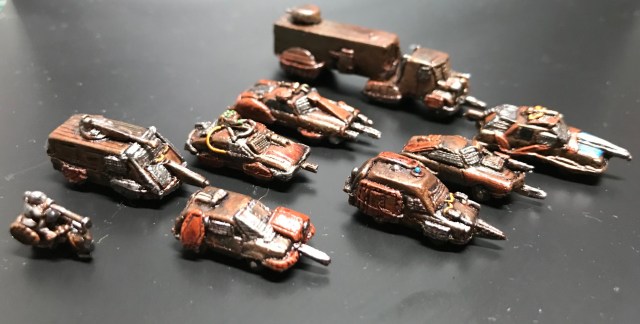
I really like the Mad Ron vehicles and the full pack is £8 and will give you 10 ready pimped vehicles – just need to paint them and turn the ignition key. There is also a set of civilian cars (also priced at £8) that are actually the same type of vehicles before they got the combat car treatment – I have used some of these for terrain, etc. Ian is a pleasure to deal with and will normally send out your stuff straight away. Link here.
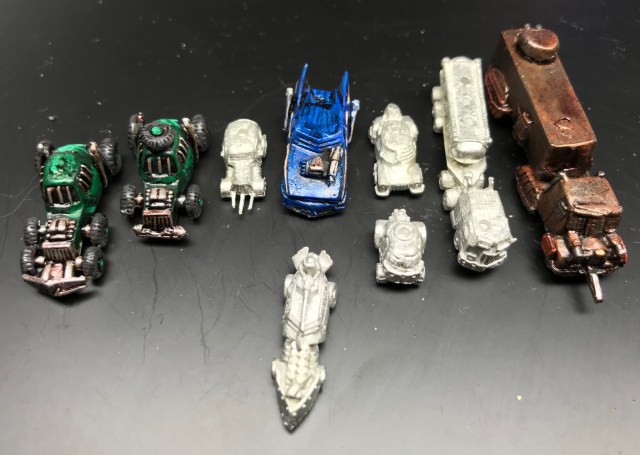
Here are the Irregular Vehicles, one is missing as it drove into a toxic pit. I painted mine as a faction/gang and therefore used the same colour scheme. To be honest the cheapest option to get going is to buy one of these packs.From the Irregular Civilian Vehicle set. The dead guy next to the Truck is a dead guy from Baccus War of the Spanish succession range. Maybe he was an re-enactor or something? Here are a few others from Irregular (unpainted) that I think work well with the other vehicles, they are MAF5 Open Backed Lorry with Separate Cover, MAF85 Toyota Pick-up Truck, MAF57 Swedish S tank and SIR8 Modern Fire Engine.
Some irregular vehicles that I felt did not really work that well in terms of size, including IKIV1 Beaverette, IKIV2 Armadillo Mobile Pill Box, IKIV3 Cockatrice Flamethrower, IKVI4 Bison Mobile Pill-Box, MAF83 Saxon APC, MAF36 Stalward Lorry and SIR7 Old Fashioned Fire Engine. But maybe some of them will get another chance with some modification.
Microworld Miniatures – US based
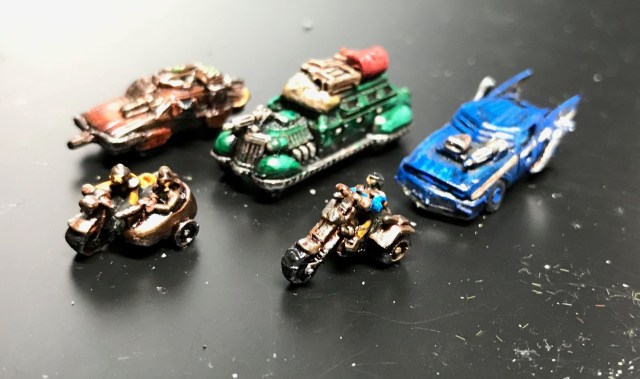
I really like these and recently a wave 2 was released — I have one issue and that is that the 1st and the 2nd wave are noticeably different (with the exception of the motorcycles and the Mini-bus). This whole range is very good but I have put most of the wave 1 stuff on the side for now. Steve, who runs Microworld, has done a good job in growing a very extensive range of 6mm stuff, especially Fantasy and Sci-Fi, but also a growing historical renaissance range that is very interesting indeed. The wave 2 stuff works with the Irregular cars that, due to the fact I got them first, is my baseline. Remember that you may have to pay an additional charge on top of your order to get it through customs (I paid a £17 top-up on my order) if you order from the UK – this is not Microworlds doing but part of international trade. Link to the Range here.
Wave 1 – Light Rig, Wasteland Bikers (works well with Wave 2) , Wasteland Buggies, Wasteland Mobile, Wasteland Mini-bus (works well with Wave 2), Wasteland Hot Rods.
Wave 2 – Denizens of the Wasteland 1 and 2.
You can order some of the 1st wave stuff from Vanguard in the UK, but I am not sure if they will carry the 2nd wave stuff (in writing this they only had some wave 1 stuff). Link to them here.
A few of the Wave 2 VehiclesA few more of the Wave 2 vehicles with two mini-buses from Wave 1. Here is a comparison between wave 2 vehicles (painted) and the irregular War Rig compared to the Wave 1 stuff (not including the Mini-bus or the bikes).
Heroics and Ros – UK based
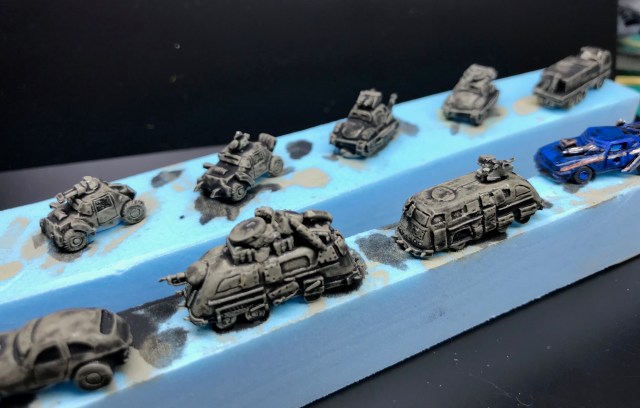
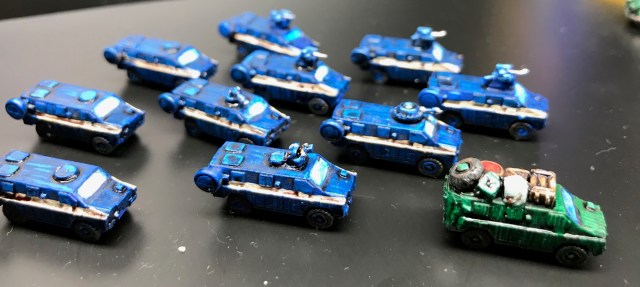
I got a few things from Heroics and Ros as I wanted to create a Police/Military type of faction. The Bushmasters I got luckily work alongside the Irregular and Microworld Wave 2 vehicles (The Bushmaster is a Protected Mobility Vehicle (PMV) and is currently used by armed forces in Australia, Netherlands, Britain and Jamaica). I did buy some more vehicles from Heroics, however most of them are a little bit on the smaller side. Here is a link to H&R.
A few of the BushmastersSome Heroics Honda Motorcycles (IFR3) next to Microworld bikes- did not really work!Some Heroics stuff that did not make it, including G135 – VW Beetle, JM01 – Toyota pick-up, CM04 – GMC Pick up truck, G133 – Opel Blitz Bus, BM34 – 1 ton Land Rover and G175 – Mercedes Staff Car. I really like the Bus and the VW beetle.Heroics BM51 – Foden 6X6 Cargo with the tank from the Microworld War Rig.
Onslaught Miniatures – UK based
My favourite cars in the garage are the armoured Limousines from Onslaught miniatures. They are not the cheapest but they look like they mean business and are beautiful models. Link here.
The Limousines, I added some stowage on one and some figures on another.
In addition I did a bonus blog showing some filler vehicles, i.e. cheap architectual and railway model cars, that can be used for Gaslands and are very cheap, see more here.
Link to blog posting above discussing these models.
I also finished the deathrace track, it is can be found here.
Further pictures of the track can be found in the link above.
/ Hope that was of some use, all the very best. Next time we will discuss a small but important aspect of the Poltava 1709 Battle.
A few ideas on some wargaming projects – Samurai, Black and White, Seasons, and I conclude that I am a sucker for 1980s nostalgia and fell for yet another diversion.
An interesting Kickstarter if you need some forest for your wargames table
Some progress on the Towards Moscow Project – Russian Infantry and Dragoons
Great Eastern War?
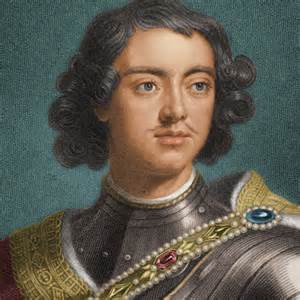
“For twenty years, Peter had been playing with soldiers; first toys, then boys, then grown men. His games had grown from drills involving a few hundred idle stable boys and falconers to 30,000 men involved in the assault and defense of the river fort of Pressburg. Now, seeking the excitement of real combat, he looked for a fortress to besiege, and Azov, isolated at the bottom of the Ukrainian steppe, suited admirably.”
From the book Peter the Great: His Life and World by Robert K. Massie
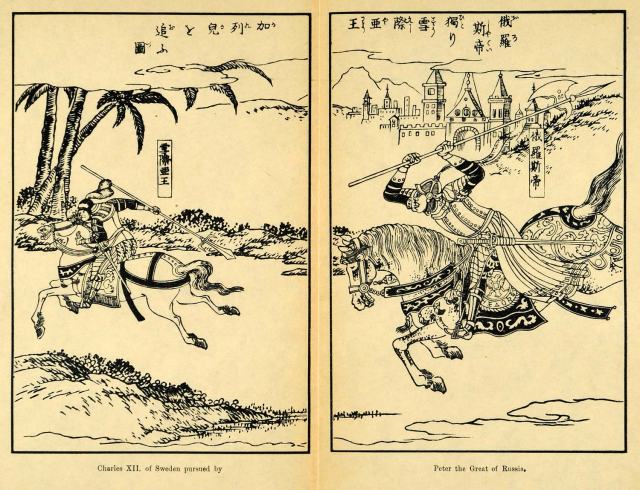
Like most of us, I suppose, I end up on small virtual journeys when I am on the net with no special destination in mind. This weekend somehow I ended up on this blog posting I really enjoyed (see here) – it is about the death of Charles XII. In the post was a picture from a Japanese 1905 print of Peter the Great and King Charles XII dressed more like Samurai warlords than 18th century Monarchs – I really liked it and it made me think about a imagination Samurai like campaign with a series of great battles between the Green/Red against the Blue army, with nicely lacquered armour and flying banners. I wonder if you go to Henry Hyde’s Dahlia and travel east you come across Chang Lee the keeper of the 12th Key of Swedsuma fighting his doomed campaign against the gigantic Gurēto Piri and his horde of undead Samurai raised after the devastating battle at Nariwa? Baccus will sell you everything you need to make this spectacle in 6mm (here is their Samurai ranges) or perhaps making a Swedish or Russian inspired warband for Warlords Test of Honour (see here), if you are more into 28mm and skirmish. But to date my excitement has not (yet!) lead to any lead being bought.
Peter and Charles at Poltava!
World War 2 in Black and White
“When you photograph people in color, you photograph their clothes. But when you photograph people in Black and white, you photograph their souls!”
― Ted Grant
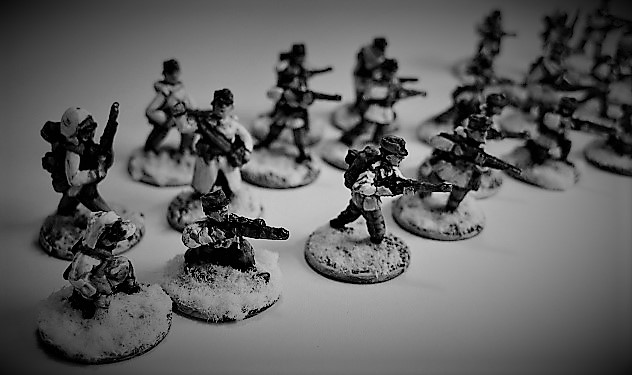
I have previously reflected on doing a WW2 table using black and white painted miniatures and terrain. The talbe would look like all those clips we have seen on History Channel and the documentaries. Not sure if it already has been done, but I think it would look really interesting if it was done correctly and with the right level of passion. But on the other hand not sure how fun it would be to do, using a palette of fifty shades of grey, and also to experience when the final novelty has worn off.
Some 15mm WW2 Norwegian ski troopers I made (..and regrettably got rid off) many years ago. Made from Peter Pig WW1 Austrians models (here) and headswapped Austrian heads (here) with Resistant Rooster (see here) and perhaps some other old stuff (I think the Sniper was a Peter Pig German WW2 Model). Sovietic infantry advancing through a Village (Miraculously no snow on the Roof!). These are Battlefront Winter War 15mm Russians.
Quattro Stagioni – All year round battles and Forests
I know I am but summer to your heart, and not the full four seasons of the year.
Another idea that I thought about was a participation game with 4 No. small battles going on at the same time. Each of the battles taking place at a different seasons.
Perhaps participants would be offered some Pizza and Vivaldis amazing Violin Concerti would play in the background. I could do this with the Great Northern War Stuff I already have as I have a large number of wintery bases and could pimp some Summer ones to look like Autumn and Spring.
My cringe moment, Summery bases on Wintery terrain! – Ouch! – but in fact these are actually mobile Astroturf mats that were developed in the early 18th century to avoid that the men froze their toes off and alos to instill a morale boost! The mats were developed by a company called Pipe Box Battle Mats. The picture was taken by the 4th Doctor at Fraustadt 1706.
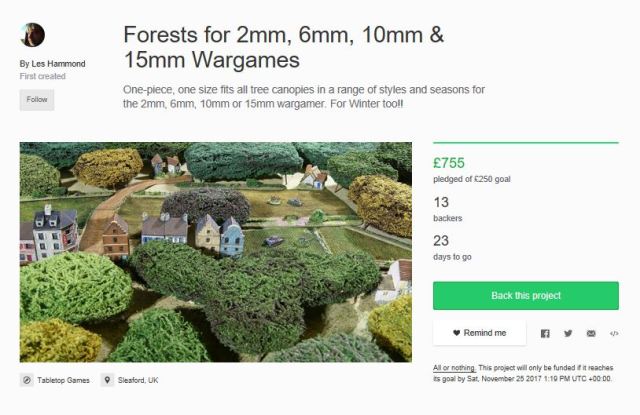
On a related subject I would like to direct you to a kick-starter that is up and running (and has already achieved its the funding goal) that is being being run by a friend of mine, Les Hammond. Les will be producing terrain pieces to represent forests that can be used for a number of scales including from 2 to 15mm. They work on the canopy principle as opposed to individual trees. I think it is well worth a look and when you do it make sure you check the update from 1st November showing the new, and I believe improved, design for the foliage effect. There are several different sets covering different type of trees and all the seasons. Check it out here!
Screenshot from the Kickstarter on the 2nd November 2017. More here.
We don’t need another Project – 1980s nostalgia hits again
Out of the ruins Out from the wreckage Can’t make the same mistake this time We are the children The last generation We are the ones they left behind And I wonder when we are ever gonna change it Living under the fear till nothing else remains
We don’t need another hero We don’t need to know the way home All we want is life beyond the Thunderdome ….
“We don’t need another hero”, from the Movie Thunderdome, sung by the phenomenal Tina Turner. Link to the Music video here.
It was more difficult to resist the next impulse that came in the form of some new vehicles and miniatures being released by Microworld for the their Micro wasteland range (link here) – these are 6mm vehicles and figures. I really enjoyed the Mad Max movies and it got me thinking what could be done with these. If you have followed this blog you know that I am a sucker for 1980s nostalgia, like the Terminator and Mutant 1984 stuff I did earlier (see here and here) and the out-of-control mode quickly kicked in,
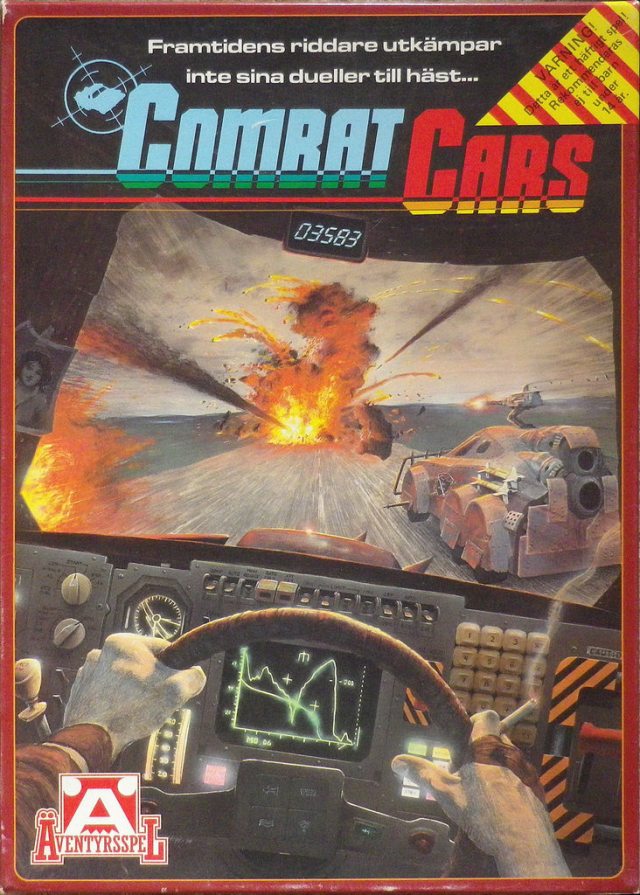
I recalled some good times with Combat Cars and Car Wars many years ago. There was a Swedish version/translation of the Combat Car rules that a good friend had and we used to play it many times.
Swedish version of the Combat Car rules.
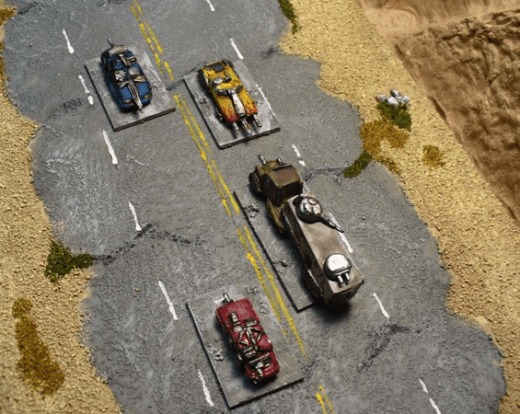
I found a set of on-line rules called Road Wolf (see link here). What is interesting, and I have seen a similar game at Salute a few years ago doing the same, is that in these rules the terrain is moving and not the cars (more than relative to each other). After having tried it out with some of the Little Ones Hot Wheels collection we decided to give this a go. It simulates a frantic forward moving battle that I think is essential for these kind of games instead of some kind of Scalectrix-like track setup. This means that the game board, especially in 6mm, is relatively small as it basically is representing a stretch of random highway. Apart from motorbike, cars and trucks the game includes rules for obstacles appearing on the road like slippery part, wrecks, tunnels, etc.
So I ordered a bunch of vehicles and I suppose with that started another little diversion. Should not be too time consuming to get into pole position on this one.
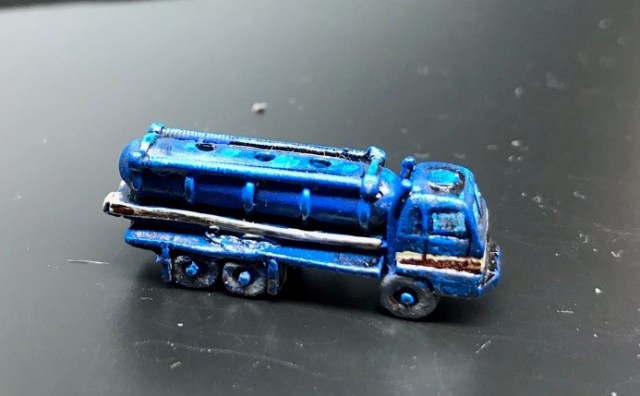
I also got myself the “Mad Ron” set of cars from Irregular Miniatures (see here) and also got the set of normal cars. One of the scenarios for the Road Wolf rules needs a train in the middle so I got an American Diesel train set from Irregular as well. In addition I also needed some railway tracks that I got from Leven miniatures (see here).
Some of the Mad Ron cars – Picture from Irregular’s Webpage (link above)
I have not mentioned the 6mm wargames page (see here) before but it has been a fantastic inspiration for me over the years. Kieran who runs it has an amazing collection of 6mm goodies worth more than a look. I checked out his guide on civilian vehicles (see more here), which led me to do a small order from Heroics & Ros. I got some WW2 BMWs motorcycles with sidecars, a few (12 No.!) Bushmasters APCs variants, a pair of Toyota Pick-ups, a pair of GMC Pick-up trucks, a pair of Foden Cargo Trucks, Honda Motorcycles, a WW2 Opel Blitz Bus, a Land Rover and WW2 Mercedes staff car. I intend to use the Bushmasters (see link here) as near future Police/Law enforcement vehicles and the others as car wrecks and civilian cars (but some of them may be pimped up to road warrior status). That should be (more than) enough vehicles to make this into a proper project over the Christmas Period. The Little one is ready to press the pedal to the lead!
So that is the vehicles sorted and on their way! (I hope they will mix reasonably well! – otherwise I will know next time around).
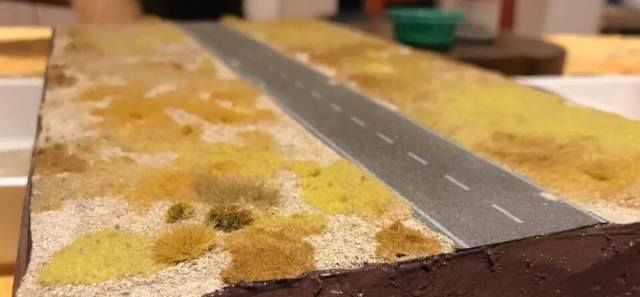
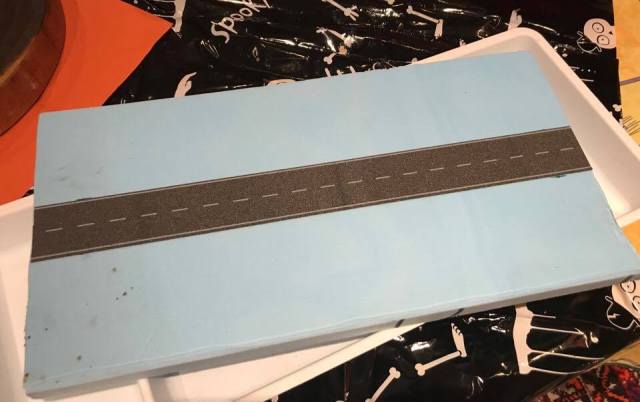
In anticipation I did a piece of road required using a 20cm by 40cm block of blue foam, a strip of N Gauge Asphalt road 4omm wide that I bought from eBay for a few pounds in a 1 metre length (you could also go to a pound shop, or a hardware store, a buy some wet and dry paper, that is similar to sand paper but comes in black. You would then have to paint the markings and, unless you got a roll, you would not be able to do a sufficient continuous length without some patching up).
Blue foam with the self adhesive road applied
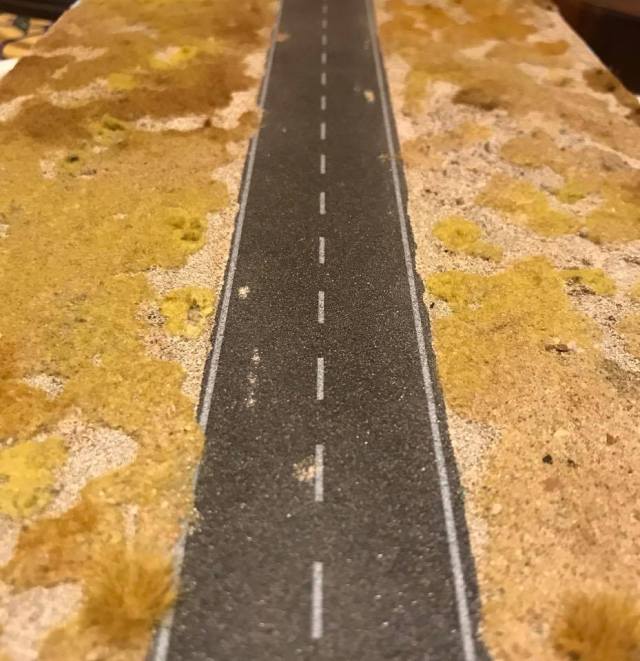
After having put the road in the middle I painted the sides on the top with a mixture of brown paint and pva glue, and applied some different coloured sands, then added some different coloured static grasses and a few tufts. I then painted the sides brown. Looks like a road with some uncontrolled but relatively flat vegetation around it – Good enough to start with.
Still waiting for some vehicles…
I will do another board, slightly wider with a railroad track in the middle and two road sections on the sides, but that is not a priority right now.
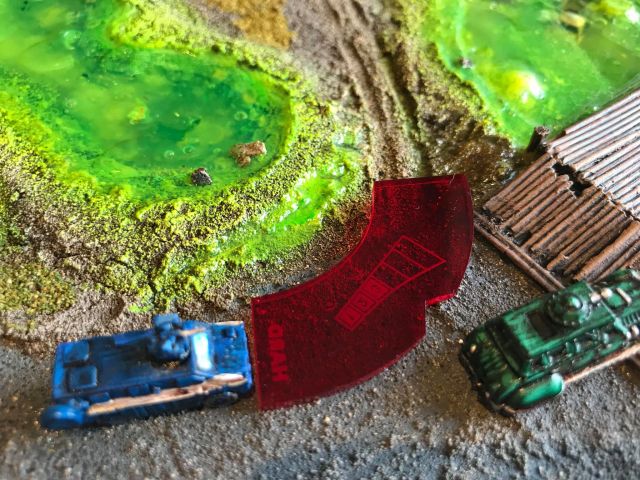
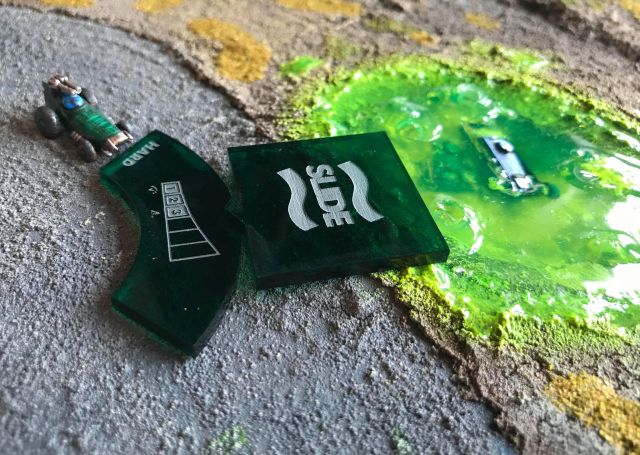
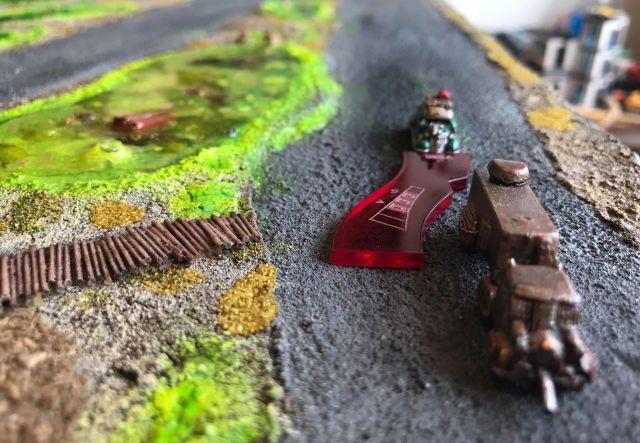
I also need the following terrain, these are items that are being generated by a card deck as part of the road’s turn to have a go (I go, you go, and then the road goes – however I may introduce some random activation element between the players):
Slide – this is a part of the road being broken/damage, overgrown, etc. It basically creates off-road conditions.
Slick – road is slippery, most likely an oil spill.
Debris – smaller obstacles in the road, e.g. scattered rubbish,
Wreck – bigger obstacles in the road, e.g. burned out cars.
Bridge and Tunnel – these are safe places to go on the road, but instead problematic to go on the side (i.e. off-road), I plan to make these as wide as the road (20cm).
Supplies – this is like a level up item in a computer game, not sure how I treat this or if I exclude it.
If we get into this proper I may get the Warlands (here) or the Outrider rules (here), both can be downloaded from Wargames Vault. You could also pick up some of the classic ones like Car Wars (here), Dark Future (link to living rule book here) or try to find Combat Cars (here) on eBay – to name a few. I will stick to the Road Wolf rules as I really like the concept of the game. I will do an update once we have done some road vehicles and perhaps a scratch built gyrocopter (unless someone knows where to find one).
“I am the Nightrider. I’m a fuel injected suicide machine. I am the rocker, I am the roller, I am the out-of-controller! “
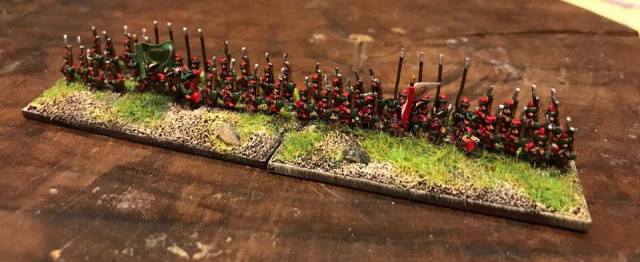
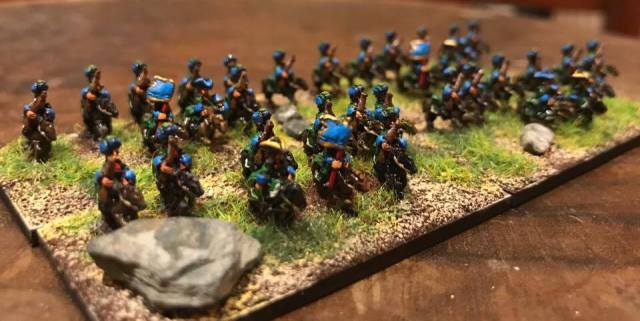
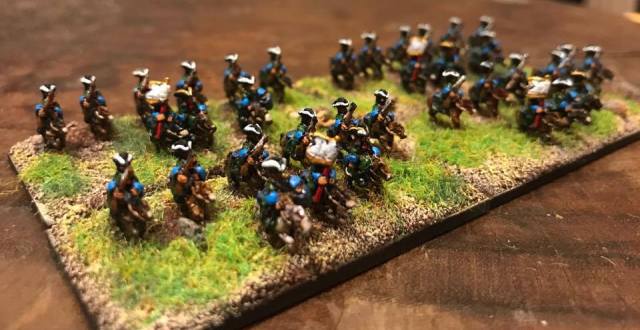
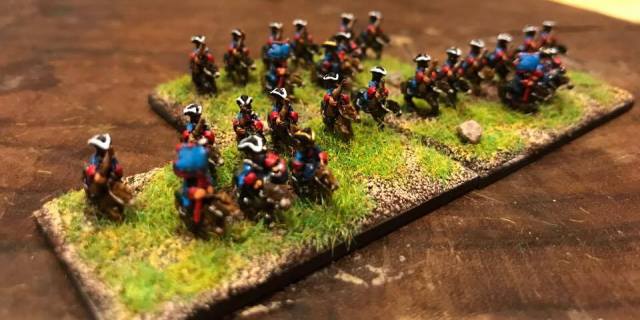
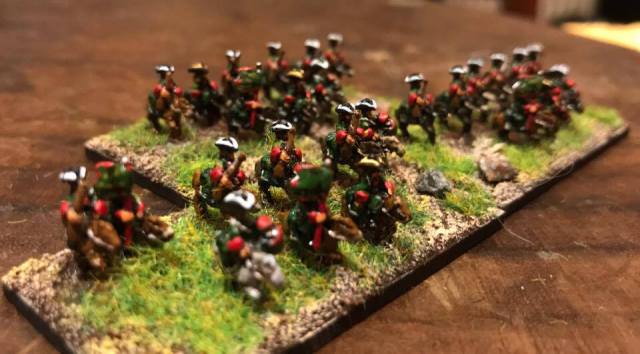
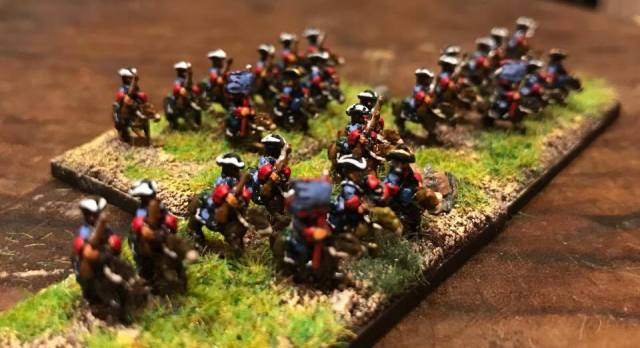
Ok, I know I have other stuff to do than inventing new ones. This week I made some progress on one of the ongoing projects and here are some completed Russians that I need for the Horka project (more on this project here and here). All are from the Baccus Great Northern War range (here).
I just finished one of the longest holidays I have had for a long time, however on the first day back it still feels like all the others – too short.
I have to admit that the idea of doing one of the Great Sieges with the Knight Hospitaliers and Ottomans in attendances (like Rhodes 1522 or Malta 1565) seemed to have planted itself in my mind. We will see for how long! Got myself a little prop just in case.
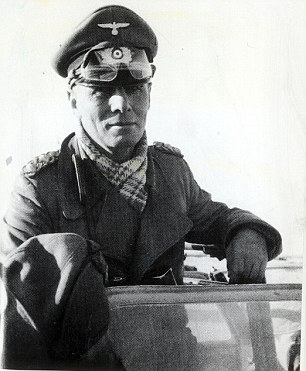
In addition I listened to the latest Meeples and Miniatures podcast about Sam Mustafa’s new ruleset Rommel (see link here) and I am currently in some wonderful la-la land with 3mm or 6mm miniatures on a desert board fighting out the North African campaign. I also listened to the latest podcast from the guys at Wargames Soliders and Strategy (WSS) and amongst other things learned about the Origin of Rommel’s legendary goggles (see a link to an newpaper article here and a link to the podcast itself here).
I also caught up on some other podcasts including Wargames Recon (here) and the Veteran Wargamer (here). I really like the stuff Jay Arnold of the Veteran Wargamer is doing and he has now done more than 20 shows now – all good.
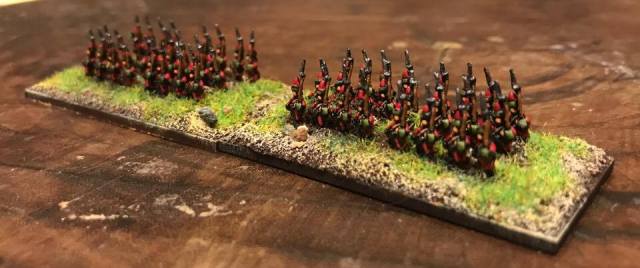
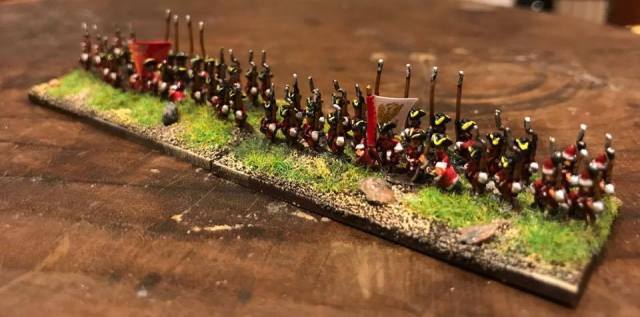
I did improve on my travel battleground following a visit to a shop that seemed to sell everything – even wargames mats!. They had been labelled door mats in error and they only had one in green left. I parted with 3 coins of that euro currency and it was mine!
Worked a treat and we played a few more battles of Pikeman’s Lament with our 6mm French and British forces travel set-up. Having used these as presented in the last post (see here) we have really enjoyed our games. Veteran Commanded Shot (we used this category for the Indians) can be very annoying (for the opponent) if you have rough terrain/forest present, as they can move faster than other units and use their skirmish ability. Here are a few action shots from one of these games – including a typical damage roll from my perspective with two dice missing probably showing “ones”.
Regretfully the doorma… oops the battlemat had to stay behind. I do hope the next guests will put it to some good use – it would be a shame if it was not shown proper respect and was actually treated as a door mat.
With two more weekends before the Joy of Six show, I felt under positive pressure this week to get the final bits completed, the key item being the mat.
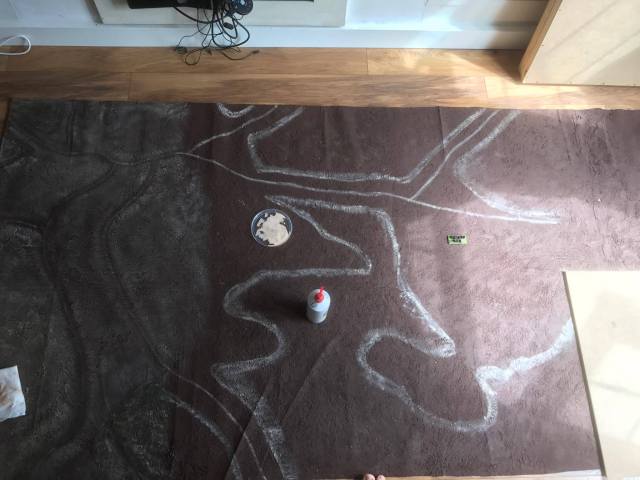
The idea this year was not to use terrain boards, as I have done previously, but instead try to do a terrain mat that contains most of the terrain features (see some background here and here). I had this rolled up piece of plastic backed drop-sheet with the acrylic paste on top – all dry but a very heavy 8′ by 4′ mat. Having been rolled up for about 2 week I did notice some cracking and a few strange folds, but nothing scary. It was time to decorate.
Remember the objective (upside down compared to the previous postings).
Marking it all out and getting stuck in there.
Drybrushed and ready for some static grass and flock!
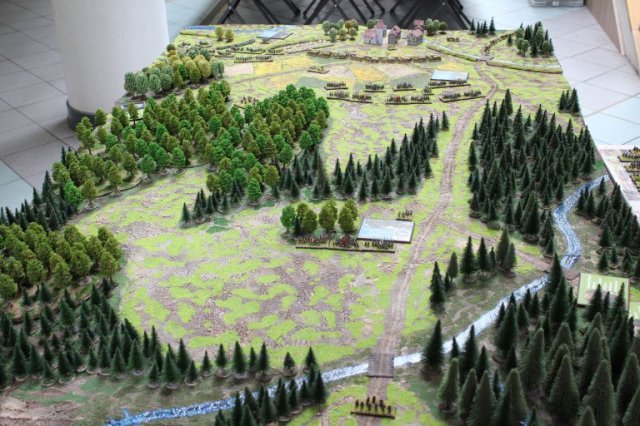
After static grass, flock and river detailing (and a good vacuum clean!) – I am actually very pleased. Dark green areas will be covered with trees and I will make some small bridges to put over the river crossings, and some buildings for Lesnaya and finally some features to show the elevation on the left.
Some details (note road space exaggerated – to allow a basewidth through!)
I think it will be good enough for the day! It took some time but I think it was worth it. It took two relatively long sessions to get it done.
Plan B
As you are aware we have two tables at Joy of Six this year (16th July in Sheffield, see more details here) – the Lesnaya Battle as show above but we were also going to do some French-Indian War using the Sharp Practice 2 (SP2) rules with the help of Neil Shuck, of Meeples and Miniatures (see, or actually listen, here!) fame; “Hello Neil!”. Neil and I ran the Saga games last year and we had a blast. However Neil is not able to make it this year so I decided to change the plans slightly and run something with the Little One. We have too little time to get up to speed with SP2, to give it a fair go, so we decided to go with plan B. As you are well aware we have grown very fond of the Dan Mersey rules and as there are no other fantasy games on offer at Joy of Six this year – we went and figured.
I will do a little presentation of that game next week but you can see some background in previous posts (here). In addition I decided to do a few more units and here are some work in progress shots (Ogres and Treemen from Irregular Miniatures, Elves from Baccus and Centaurs from Rapier Miniatures).
/ Take care and hope to see you at the Joy of Six(tenth July)