
To play Bag the Hun (as well as a number of other air wargames) a hexagon mat is required, I do not have one so I decided to buy one. Yes, I hear you saying “…there are ways around it, and why don’t you make one yourself!”. However occasionally, and contrary to popular belief, I do go with that famous flow and just get something off the shelf. I looked around but could not really find anything suitable. I could not really see the cliffs of Dover representing the Karelian Isthmus, neither would Kentish countryside do nor the desert or anything else that I found for that matter. I suppose that some of the Eastern Front battles would have been fought over some forested areas that could pass for what I needed, but none of these seem to be readily available.
What I really was after was an image showing two things – forested areas and lakes. I went on Google Earth Professional (that you can download for free) and realised, probably as the last person on the (Google) Earth, that you can get rid of all the overlays and plainly look at the picture and capture images at relatively high resolution.
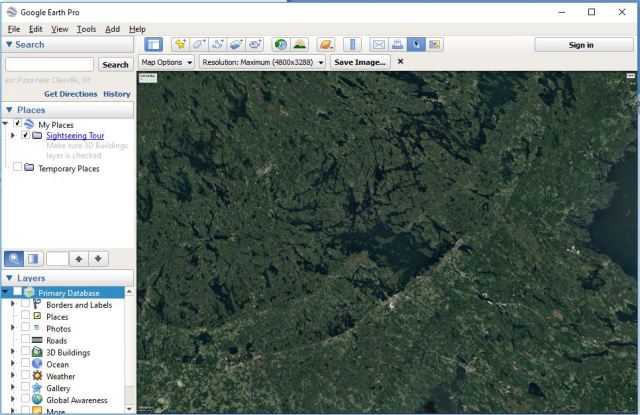
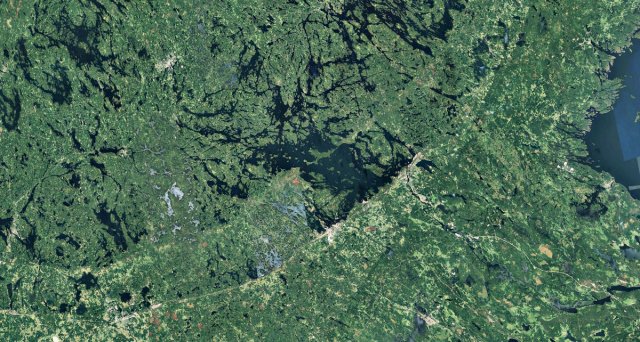
Maximum resolution is 4800 by 3288 which proved more than adequate for my purposes. I found a piece of southern Finland I liked and saved the picture. I then resized it to a 3 by 5 ratio (as I wanted to get a mat I could throw on the dinner table) and sent it to Tiny Wargames (link here) and asked (i) if the image was good enough to print on one of their 3 by 5 mats, (ii) if he could add a 30mm hexagon pattern on top and (iii)how much it would take me back – the answer was (i) no problem, (ii) of course and (iii) £50 (that inclusive of delivery within the UK). Further he said it would take them 4 days to do it. Incidentally the cost is the same as it would cost to buy a mat with the same dimension of any of their existing mat designs – I suppose if you can provide a picture with sufficient resolution they will print a mat for you.
I also note that they can do more bespoke mats as well, like taking an old air photo from say D-day and make it into a stylised and coloured mat. However I do not know the cost of doing this as I suppose it would take some time to do – but if you are interested drop them a line.
A small note you need to specify how you want your hexagons printed on the mat – I sent a screen shoot from a Bag the Hun scenario map and told him my hexes should be aligned in the same way as those on the map. Very often the hexagon size is about 1½ inch, but since I went with a small mat (3 by 5) I also condense the hex from 38.1mm (1½ inch) to 30mm. The reason for the smaller mat is that I can quickly put the mat on the dining table and fly, with minimal fuss.
This is the map I sent them.
And this is what turned up.
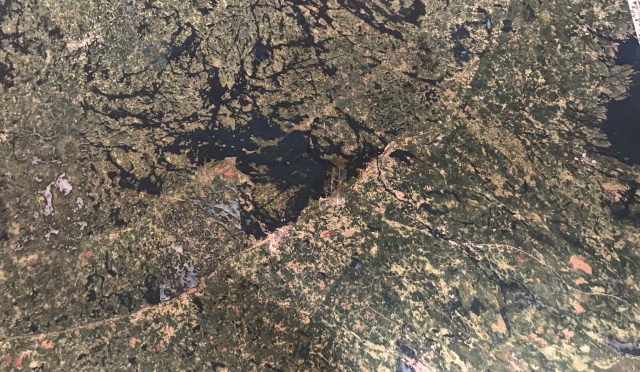
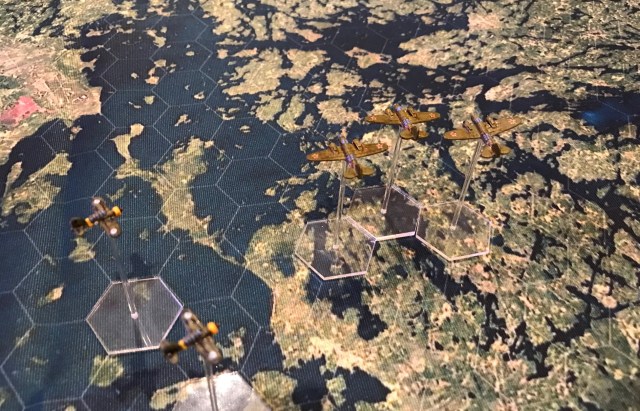
Really happy in the way it came out (note the colour difference is due to the lighting when I took the picture of the mat on the table), I ordered it on a Monday afternoon and it arrived safe and sound on the following Monday. More than pleased and this is how it looks with some Russian and Finnish aircraft flying on it.
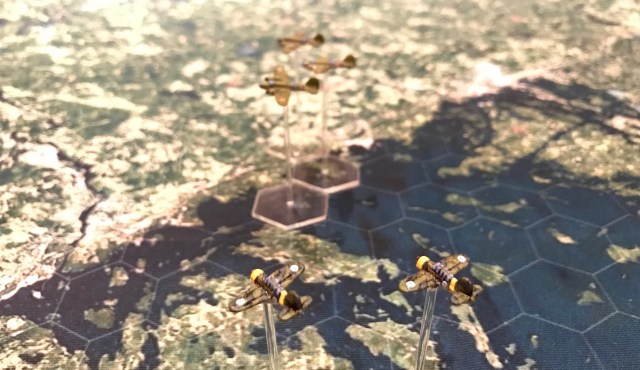
On reflection I should perhaps had taken a lower altitude picture, but I do like it and gives the feel of forests and lakes I was after.
Also in the settings you can include clouds, this could create some interesting pictures as well depending on what you are after.
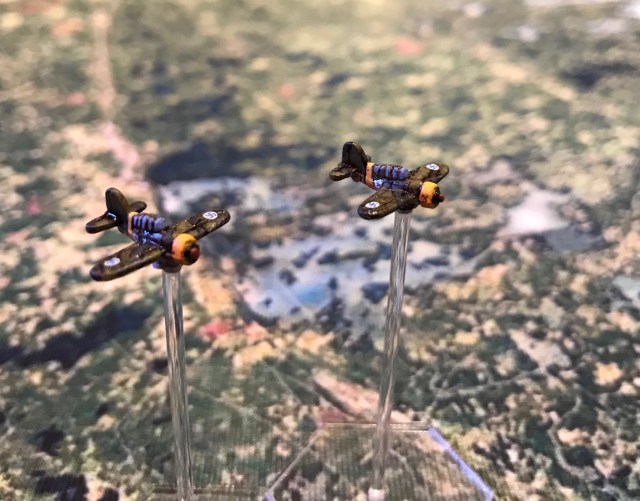
Note on flight stands
With regards to flight stands the best way to manage it is if you do not attach each plane on a stand permanently but instead magnetise the plane and the base. There are several reasons for doing this, I think these are the key ones:
- Base set of stands – you are very unlikely to use all you planes at the same time on the table, so consider what the maximum size your aerial engagements are likely to be. This will determine the number of flight stands you make. For example if you are playing the Check your Six rules more than a handful (that is about five) per player is about right, for Bag the Hun (in my case) where you fly sections a few more would be required – I went for a total of 40 stands (overkill, but what the hell).
- Changing your mind – If you change the size or type of the base you are using for whatever reason this is easily accommodated as you just need to make some new bases – if you want to revert back you just use the old ones.
- Storing your flyers – Storing small 1/600 on individual flight stands will take unnecessary space and when my current project is complete I will probably have in excess of 200 aircraft. Without the bases they take hardly any space. If I want to fly some planes for another project, I just use these flight stands again.
I made my flight stands using some transparent acrylic bases (30mm, 2mm thick) that I drilled a hole in and some and acrylic rod (2mm), I also used Neodymium magnets (2mm by 0.5mm). Remember the polarity when you glue the magnets to allow you to use the same flightstands for all your planes.
Big shoutout and thanks to Tiny Wargames (link here again)
/Hope that was of some interest!

Might be a silly question but how do I resize a image to fit a 6×4 or a 4×4? And how do I save a image of it with the good resolution? Don’t do much with computers these days.
LikeLike
Gunnar, sorry for taking some time I missed this. You need to use Google Earth Pro (downloadable for free), then pick your picture and save it at the highest resolution. This is a link on how you do it in the software paste this in your browser https://support.google.com/earth/answer/148146?hl=en You can set the resolution as part of the saving allowing you to save a large enough file for printing. I would send your picture to the company doing the printing and tell them what size you need – they are probably happy to do the resizing for you.
LikeLike