This Part 2 of a series of a fair few posts, Part 1 (link here) gives an overview and the philosophy applied to the series – cheap, simple and fun.
The Root Cellar
Today we are looking at a common feature in the Swedish, and other, landscapes of old and still being used in many places- the root cellar. This, like the pigsty yesterday, will be brilliant in my rural games.
A root cellar (American English) or earth cellar (British English) is a structure, usually underground or partially underground, used for storage of vegetables, fruits, nuts or other foods. Its name reflects the traditional focus on root crops stored in an underground cellar, which is still often true. A wide variety of foods can be stored for weeks to months, depending on the crop and conditions. The structure may not always be underground. (from Wikipedia, more here)
I remember at my cousins family place there was a root cellar just a little bit away from the main house, behind some bushes. It served as a command post during the fighting against the evil empire when we were rebels on the jungle planet Zargosa, or something similar, and also provided cover whilst we were fighting each others with our peashooters (have not seen anyone playing with one of those for a very long time).
So there are many versions of these and I browsed on the net and wanted to make something similar to this one.
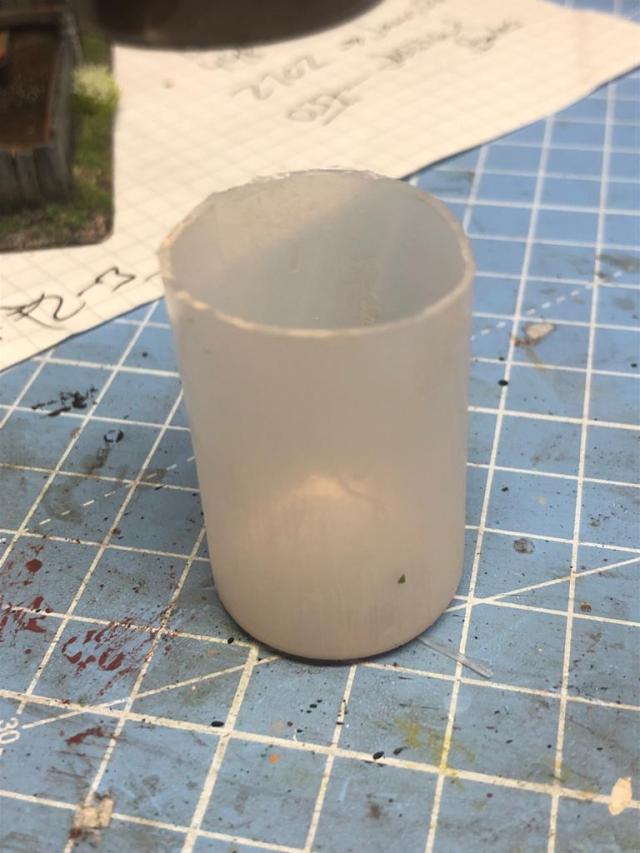
To do this project you need a cylinder of some kind, I used an old paint bottle (Vallejo type) that works brilliant at the scale I am working at 15mm (for 28mm you might want to consider using one of those new 33cl longer soda cans), some modelling clay apart from the standards stuff we discussed in Part 1.
Anyway a high level discussion on how I went about this project.
I had this old bottle that was just full of very tired paint (it has a 25mm diameter or an inch if you prefer). More or less similar to a Vallejo Paint bottle.
I cleaned it and cut of the top bit
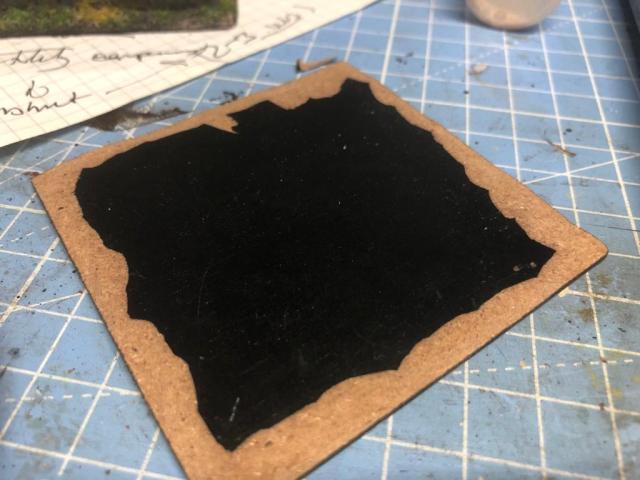
Then I got a 75m by 75mm base that I had cut down the sides on to avoid too much of the border to be seen.
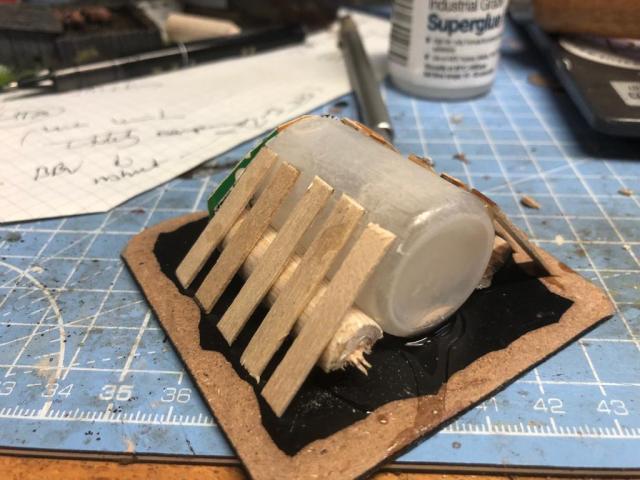
Then I glue the bottle on top
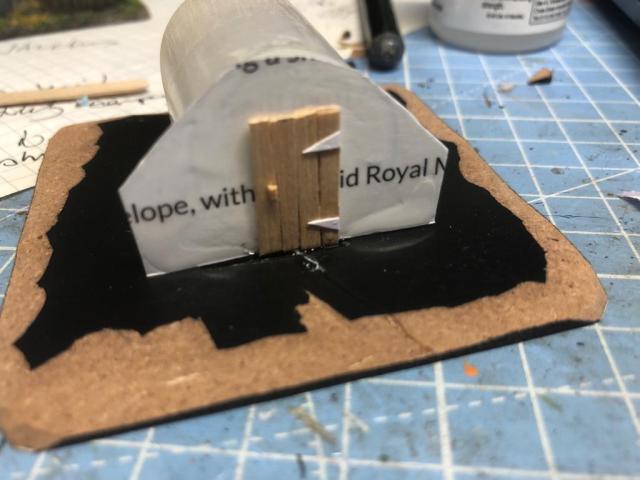
Mark out a piece like this on a piece of cardboard – the circle having the same dimensions as the bottle. I then cut out the shape and glued it on the front of the bottle.
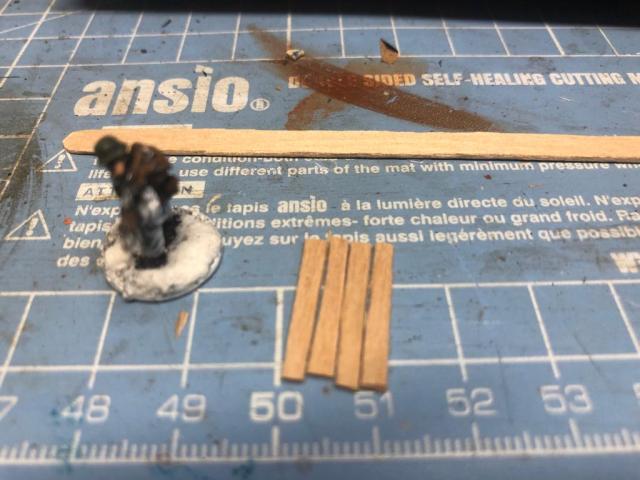
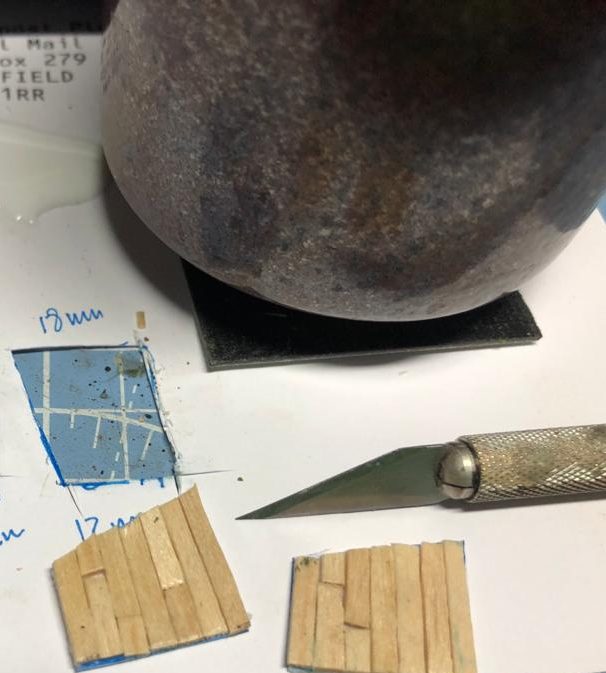
Then using a miniature measure the height you want for the door, then cut out some pieces from a coffee stirer. Note that I cut them in half lenghtwise (in 28mm you probably get away with the width as they are).
Forgot to take photos but basically glue the cutout on front of the bottle (note I trimmed the side), then glue the planks that will form the door, I also added two pieces of cardboard to represent hinges and a little door knob (You will note it falls off later but then as by magic reappears later).
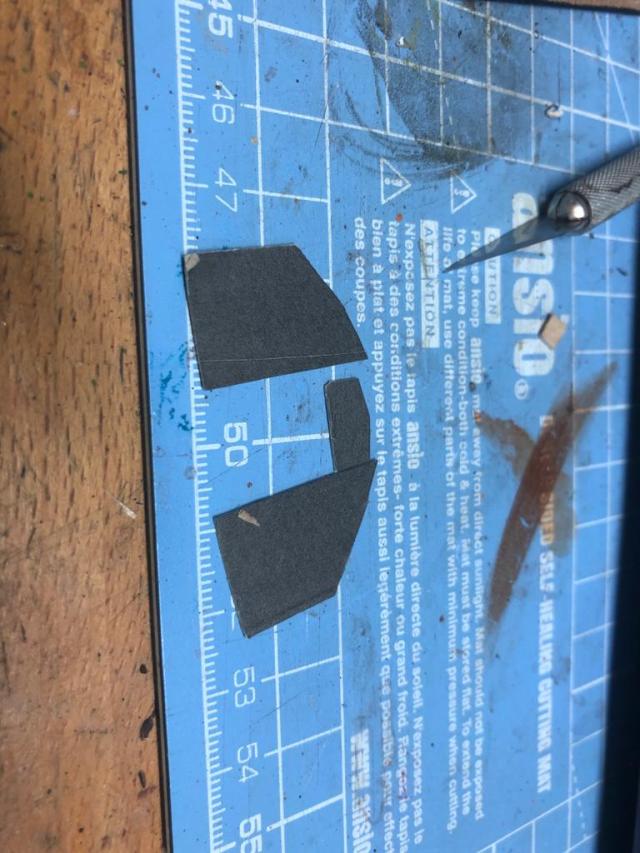
Now cut out the following pieces from the cardboard (these will go around the door)
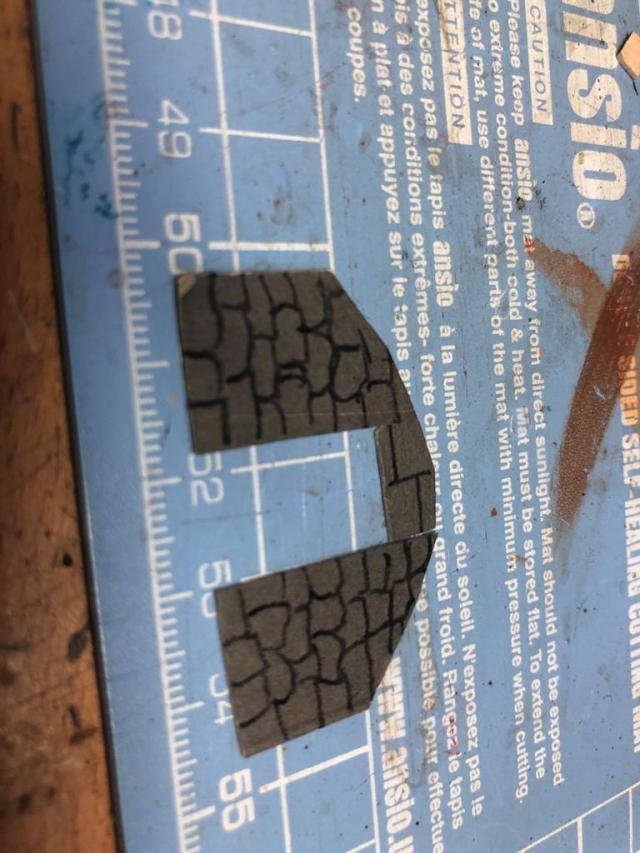
Draw a stone pattern, make it irregular
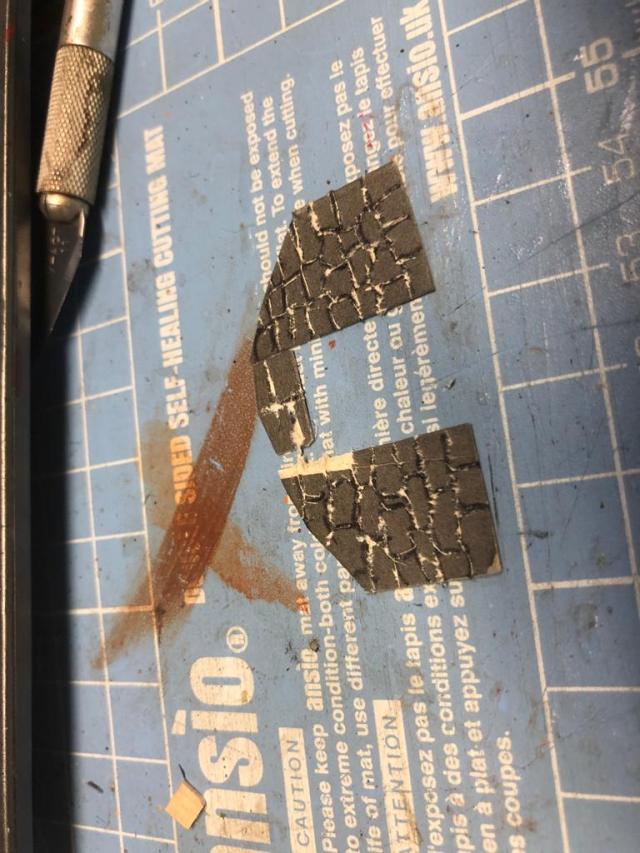
Use a knife to carefully drag along the lines to create some structure – it won’t look great now but later it will
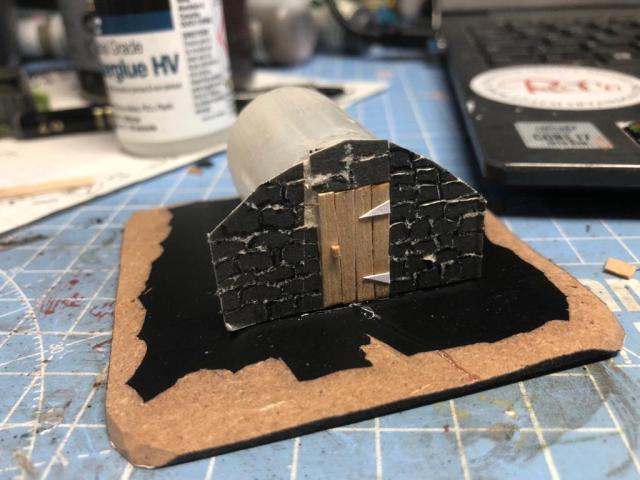
Glue the pieces on
I added a beam on top (but watch that space too)
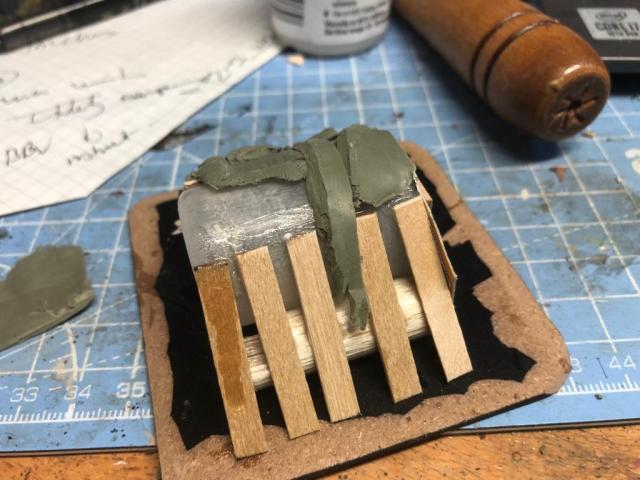
Then I add pieces of wood and coffeee stirrers all around
Then I covered it with clay (I have some old clay I use all the time), you could perhaps use some modelling clay like DAS or something like that (it is relatively cheap). The idea is to cover the whole thing, apart from the front.
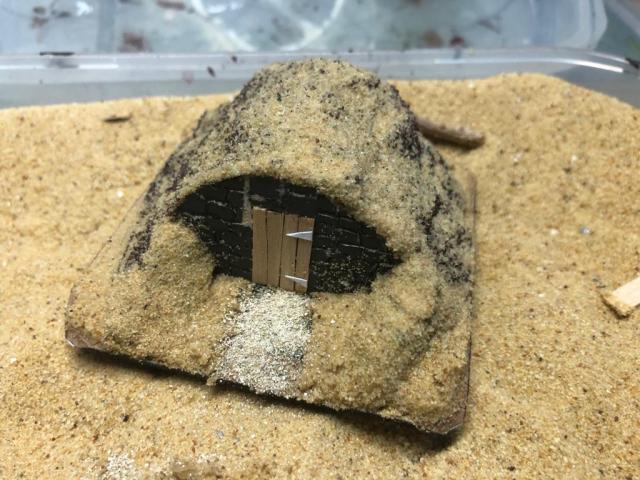
Something like this, note the knob and the beam has fallen off (also build some natural fall on the back too),
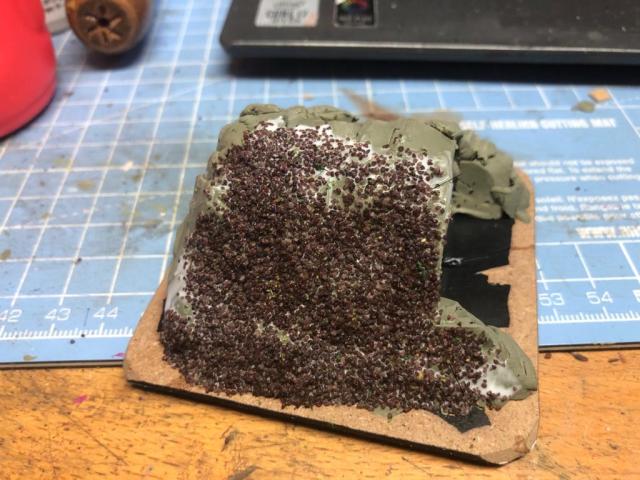
The glue and sand everywhere apart from the stone part on the front with the door.
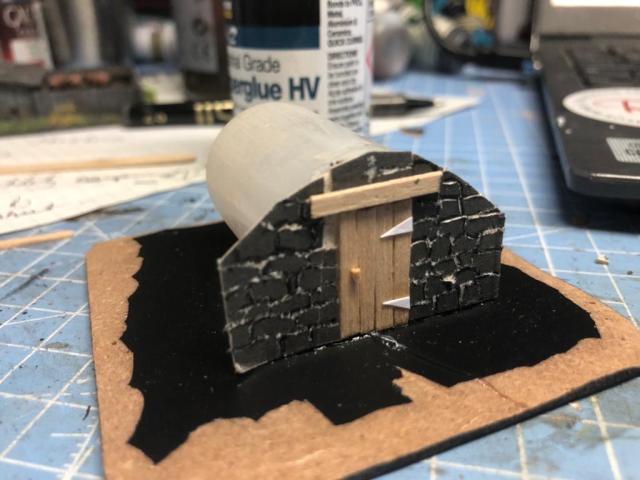
Ending up looking like this and the build is more or less done (just wait for it to dry).
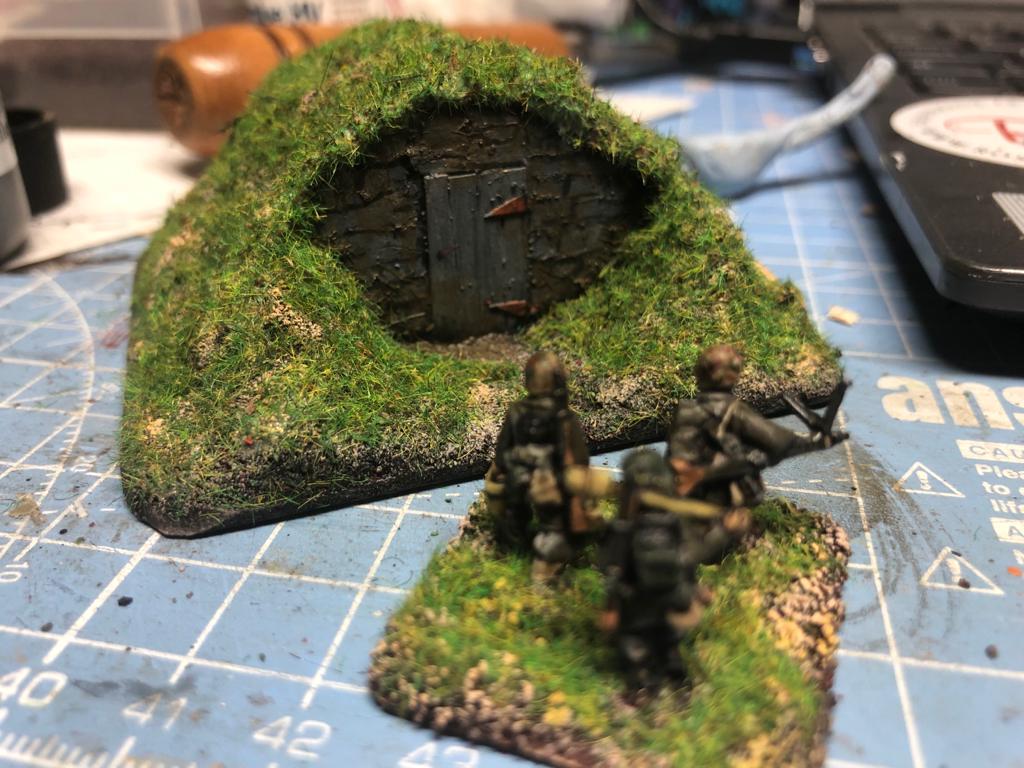
When dry just paint it brown, drybrush the front in grays, add some rust colour to the hinges and a bit of weathering, then flock it with your normal grass basing mix. Good to go. I think it will be a good thing to put on the table, and perhaps it could be used for a halfling house in 28mm?
Maybe I should have made a little more contrast between the door and the wall – well life is not over yet so maybe later.
And that budget, well we were at £14.93 yesterday and did not really spend any additional resources on this than those allowed or already bought. So we are still at £14.93.
For me terrain is really important for a full on wargames experience and I rather play with average miniatures on a decent wargames table with immersive terrain than with top notch Golden Demon winning miniatures on a piece of felt with flat terrain features – but your Glorantha may vary.
Good friend Alex who runs the fantastic Youtube channel Storm of Steel wargaming with reviews of wargame rules, playthroughs, historical overviews, paint and chats has started an initiative on twitter #Terraintober which consist on doing terrain and post it October (for those who did not see what the did there).
You can find out more about his channel here. It is well worth a look, here is one of his many videos.
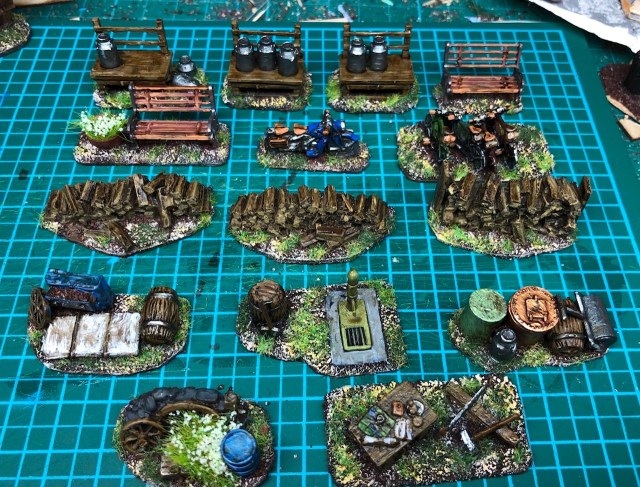
I recently decided to do some more clutter for my WW2 15mm wargaming project set in Sweden (yes long story and of course a what-if) and I wanted to take the opportunity to add some more clutter to the table. This is like the stuff you can see in the picture above. Look at the lonely barrel and the bicycle, immediately adding some immersion to the game. There are of course many other examples of this and I daily see fantastic stuff being presented by wargamers all over the world including the Too Fat Lardies, Adam Bengtsson (we game 15mm like it is 28mm mate!), Joe Bilton, Ken the Eccentric Man, Mark Morin, Adam Preston, Des Darkin, John Emmet, Gareth Lane, Alan Sheward, Dan Hodgson and all my mates from the Saturday Painting club just to randomly but with some bias mention a fair few.
These pieces of clutter more than often do not really add anything to the actual game (but sometimes could turn an area into rough going and/or break line of sight), but enhancing the experience of playing it. I call these immersion markers and I will be showing a piece of clutter every day during October and do a little blog post about it. The idea is simple projects ideally from scratch using accessible and cheap material (where I have used some commercial products like models as part of the clutter, you could easily in most cases leave these out, you do not need pigs in the pigsty, perhaps they have been taken away or are hidden by the farmer as war is raging in the land, or maybe they are inside the den having a nap). The actual pieces will vary in terms of complexity from dead easy to easy.
Below some of the clutter I have done before for the project, including more commercially available products as opposed to scratch builds.
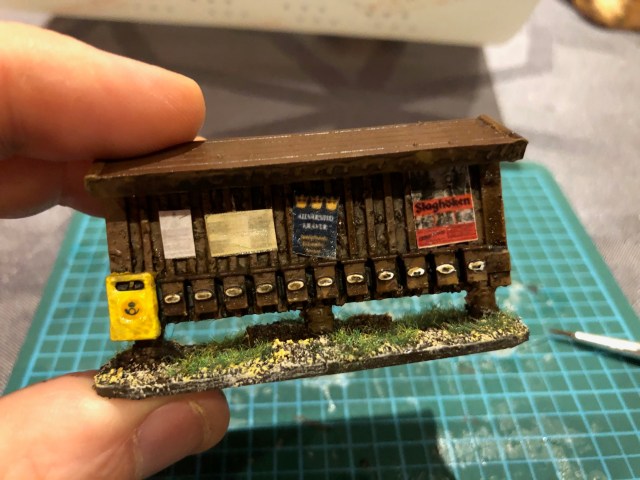
This is my favourite piece of clutter, a 3D model of a typical Swedish row of Post boxes also servicing as notice board. Paul Edward did for me, you can ask him to do one for you (more here) or something else. He is really good at getting you what you want and realising that little 3d dream of yours.
A mixture of clutter from the collection so far
This is the current plan, every number a date in October (as I did the various entries I have put in links here to the posts).
As stated before nothing I will be doing is particularly original or difficult to do and I hope it will have some use and give some kind of inspiration to do some immersion markers yourself. I will try to discuss how I did each piece but it is really mostly about splicing some coffee stirrers, eyeballing it and Rock and Roll a One modelling. Some items will be more specific to the theatre I am aiming for, a rural Sweden in 1943, but I think you will find most items useful as generic clutter anywhere with a few modifications. If there is something available to buy that I have found that is doing the same job I will include it in the posting, not everyone loves the idea of splitting matchstick logs and coffee stirrer planking.
If you are into 28mm, I guess you just need to double everything, well if I do give any measurements, the best way of modelling is to grab one or your miniatures and measure from there, for how high a door or a a fence needs to be to look right. For other scales you should be well versed with compromises and not needing much handholding, good luck from someone who used to do 6mm (well I still do, just waiting for the release of the new 6mm Great Northern War range from Baccus).
There is another catch and that is the total cost of the 30 items will be constrained at a maximum of £30 , but with a few exceptions not counting towards the cost (the item below I assume being a basic set of items you would have anyway).
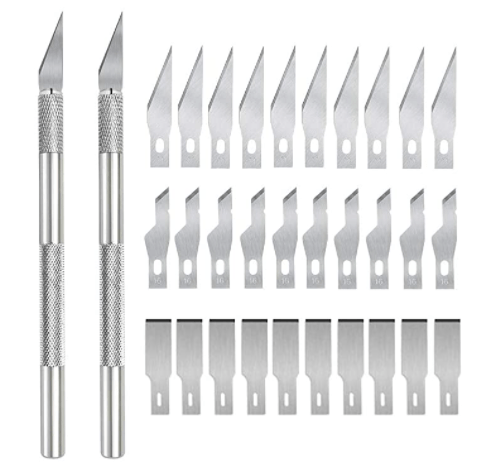
Tools – I use a side cutter and an exacto/precision knife for all my projects, these are the types I am using. It could be worth to have a good supply of spare blades, I tend to have two running at the same time – Sharp’s Peril and Blunt trauma. Please use the tools carefully.
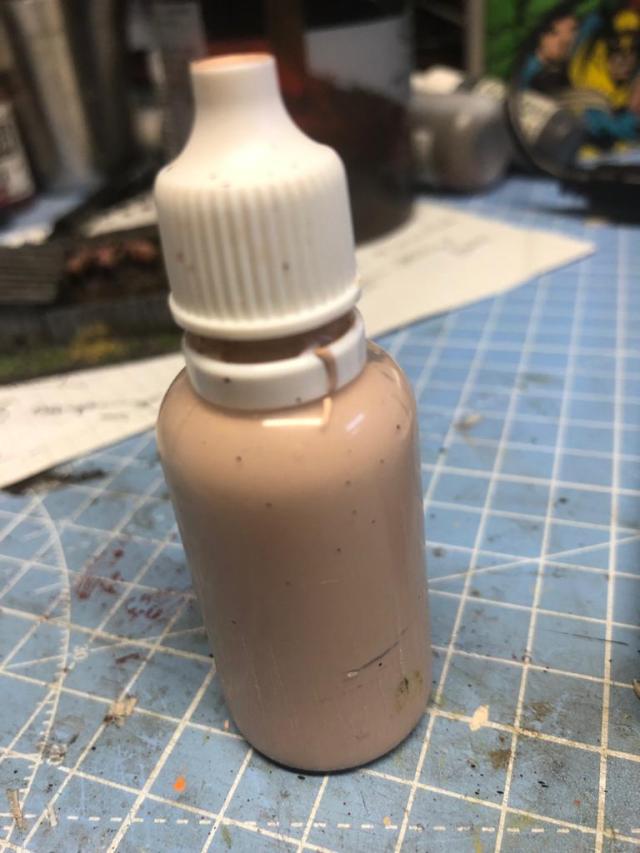
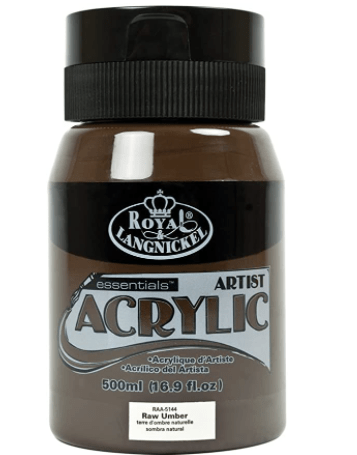
Paints and brushes, this includes varnishes and some gloss we use for some of the projects. I tend to use a shit brown (as this come in 50 shades, it can sometimes be referred to differently with names like Chocolate Brown or Burnt Umber) as a base colour for my terrain pieces. This is the one I have been using the last few years.
Scatter material (grass, flocks, sand or a whatever you use to base your figures with). I tend to use a base set of two static grass for all my miniatures stuff (a light and a dark one). This means it all kind of fits together.
Superglue, I am a big fan of superglue (be careful though, with handling it and also having adequ) – I find that the gel version works (high viscosity) best rather than the runny one (general type of low viscosity superglue). I have found Everbuild’s Industrial Strenght Glue particulary useful but of course there are others. Did I say be careful?
PVA glue, for the more civilized modeller and with more time up their a**e. Joke aside I have spent half of my life applying PVA glue to things and sprinkled sand on it. I buy it in large containers from DIY shops.
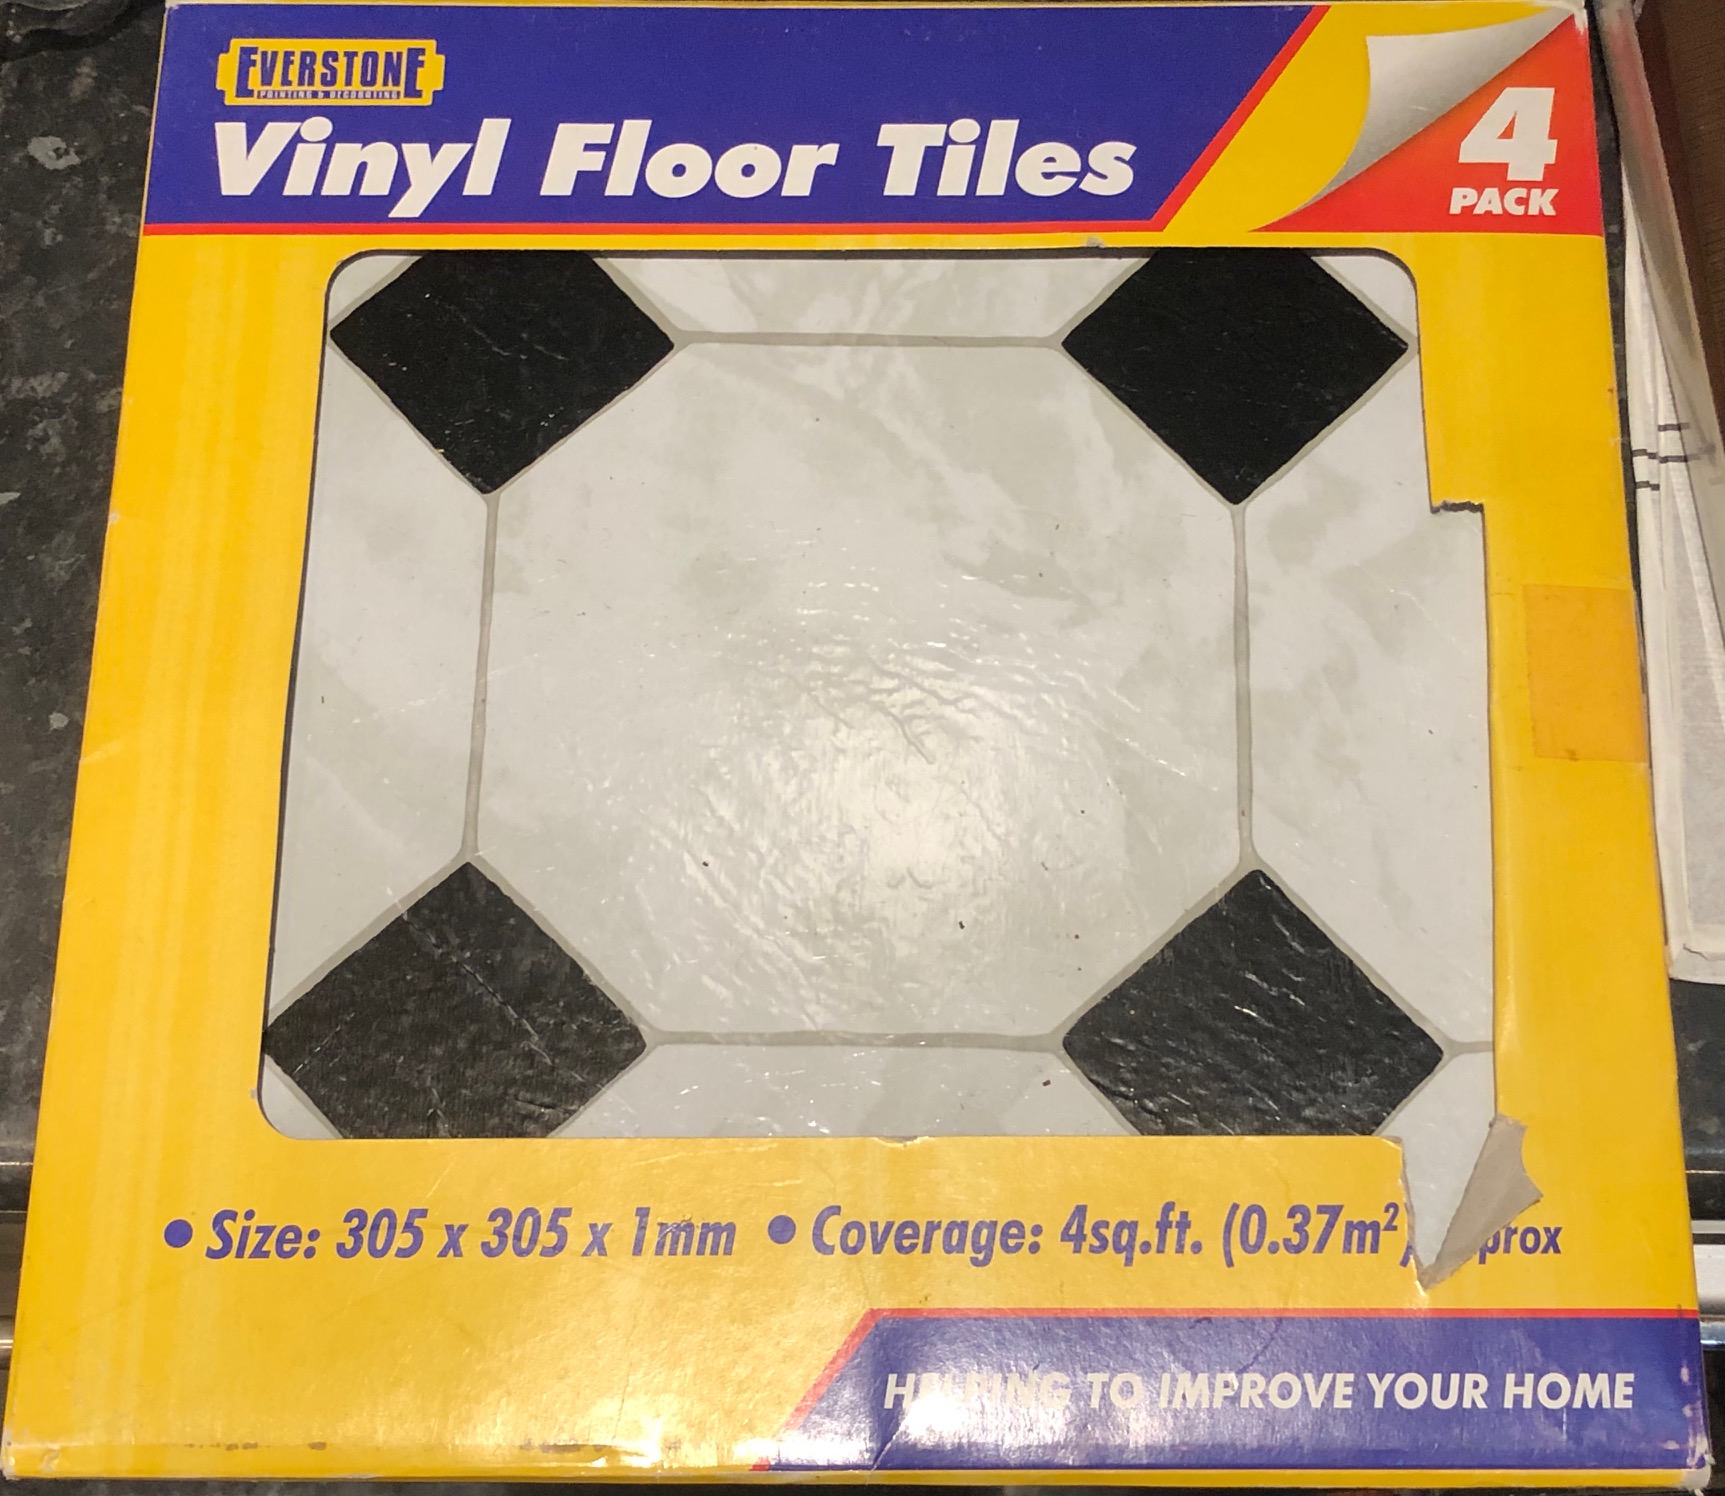
Bases, you can use MDF bases, or self adhesive vinyl tiles or whatever else you are using, I have cut away the cover side of DVD cases sometimes or used old CDs/DVDs. I will use self adhesive tiles for a number of projects therefore I have included a pack in the cost below.
Cardboard, Cereal packs are good and have a fine side and a rough side that you can take advantage off.
Some items mentioned specifically for each project.
I bought the following at the start of the project
Coffee stirrers (300 No. in wood) – £4.29
A pack of bamboo skewers (a handful) – £1.99
Self adhesive vinyl tiles – £4.95
So that is total of £11.23 at the starting block.
Pig Sty
On the farm where my father grew up they had many pigs but he told me about a special one he called Alfred. He had named it after the famous Swedish inventor and business man Alfred Nobel who invented Dynamite and of course of the Nobel Price fame. I asked Dad if it was a smart pig, “No way son, but he could fart as loud as a fire cracker.
Anyway today we want to do Pig Sty to add that little bit of flair to your farm setting, you could buy these in 15mm (and other scale pig stys from various places), like these.
From Blotz miniatures at £3, link here. The pigs will not go through that fence!
From Pendraken at £18 for the set (yes they do other stuff than 10mm), link here. A nice all-round set.
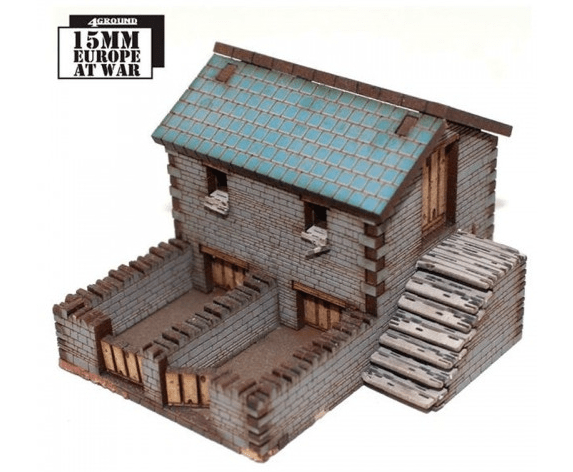
This is rather cool from 4Ground at £19 on the 4Ground homepage, strangely the 20mm version is cheaper at least when I checked (more here)
All are perfect for the job, the first two fits the “standard” pig den and sty model for the wargames table, a small fenced square base, with a fence and a building with a forward sloping roof. The 4Ground model was not really what I was looking for with regards to the Swedish 1943 table.
However, I am on a budget here, with a pile of coffee stirrers rotting in the back yard, so I better get my tools out and crack on with it.
Here is how I did it
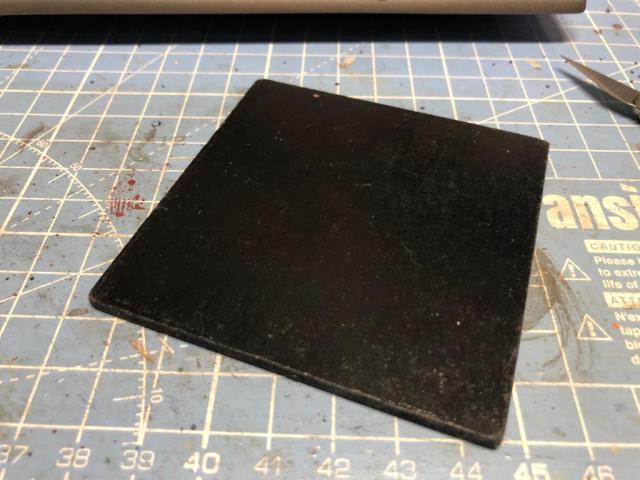
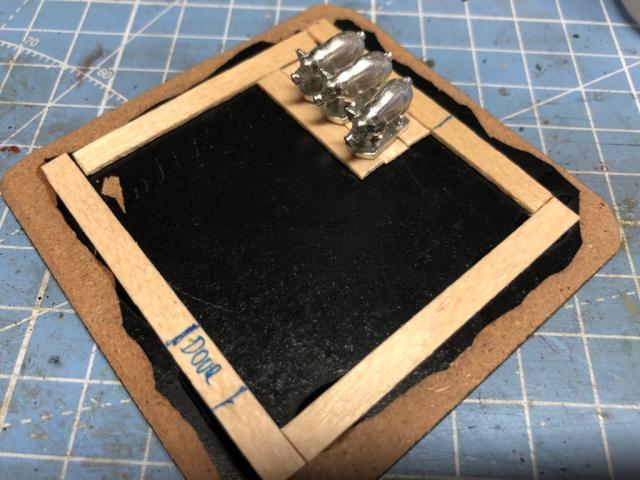
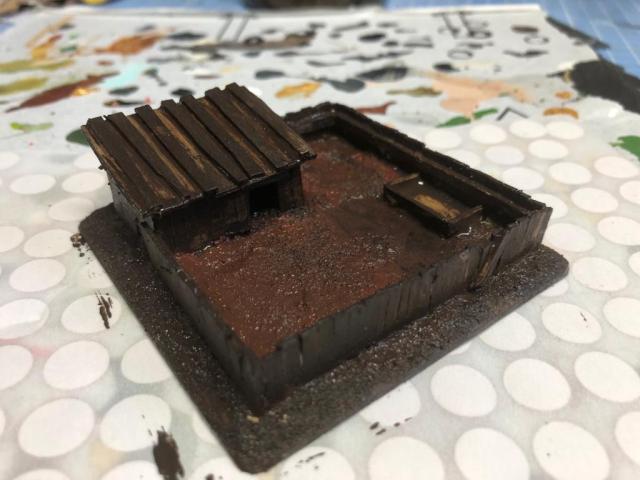
First I took a base, this one was a square 75mm
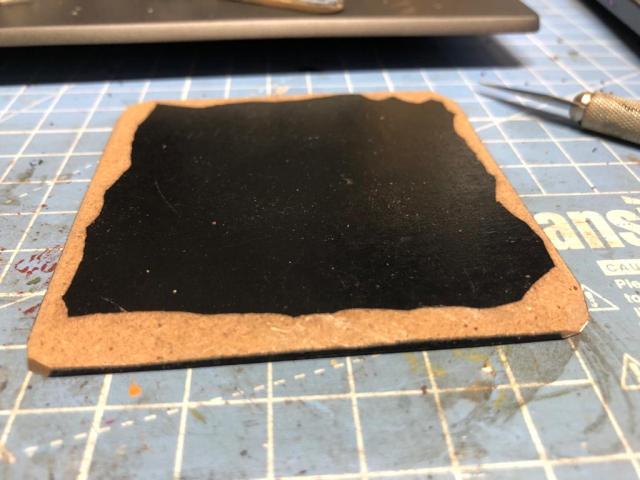
I used a sharp craft knive (as seen) and carefully cut down the sides of the base, this to make the border less obvious.
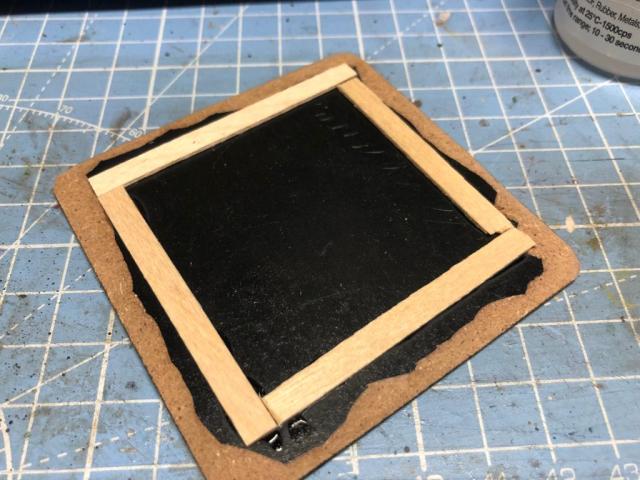
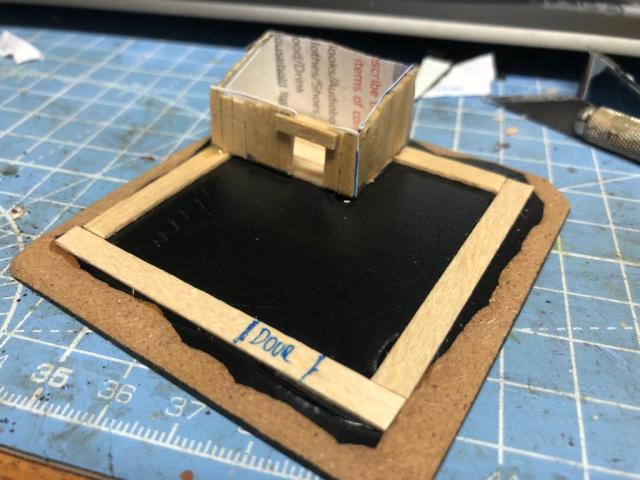
I then make a frame using the wooden coffee stirers, I attach these using superglue. Give it a little tap and and you will be good to go quickly. Please ensure adequate ventilation or use PVA glue and wait a little bit longer. Your health is more important than this crappy piece of terrain being completed.
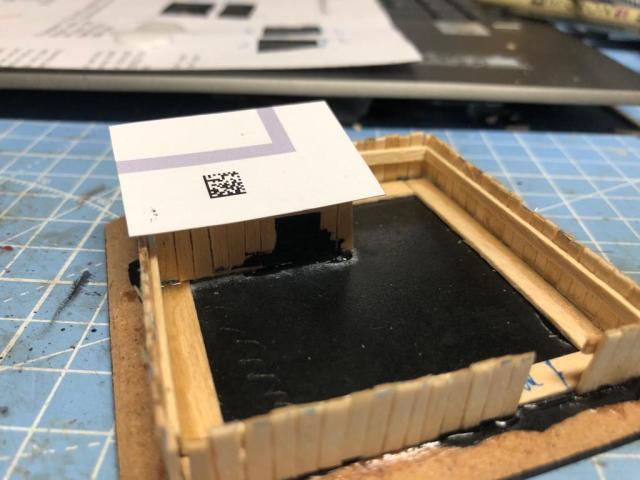
Add a few stirps to mark where the little building will go, I also marked the fence door (or gate).
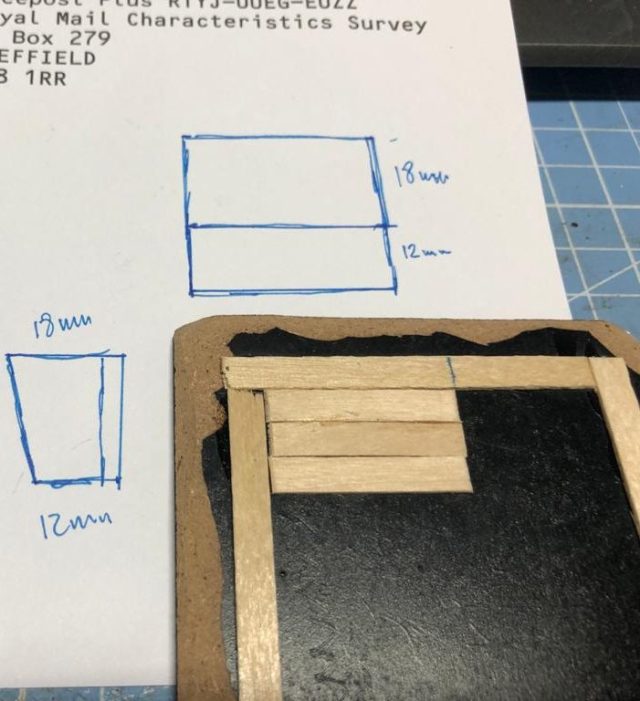
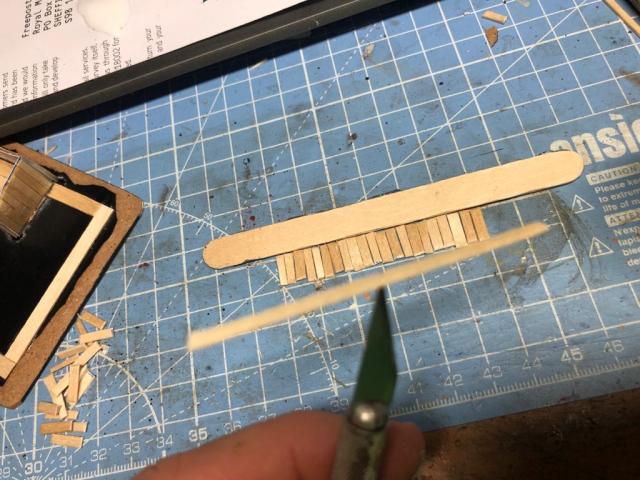
Now take your pience of cardboard and mark mark out your sides (you need to make two, only one is shown here, mirror image of the other), I made mine 18mm going down to 12mm the same lenght as the I had marked off for the building same, for the back 18mm tall and the front 12mm.
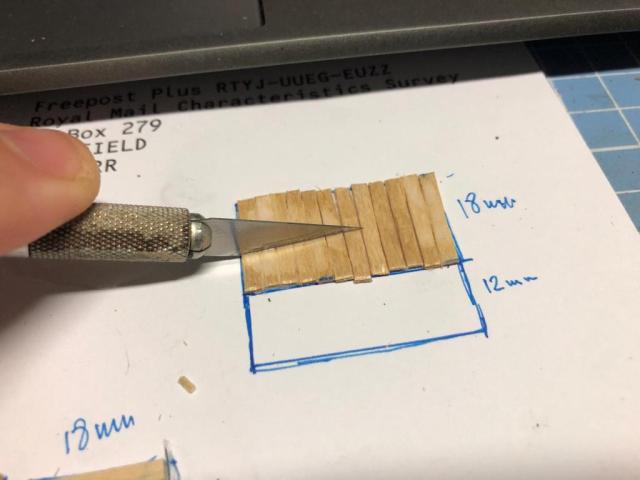
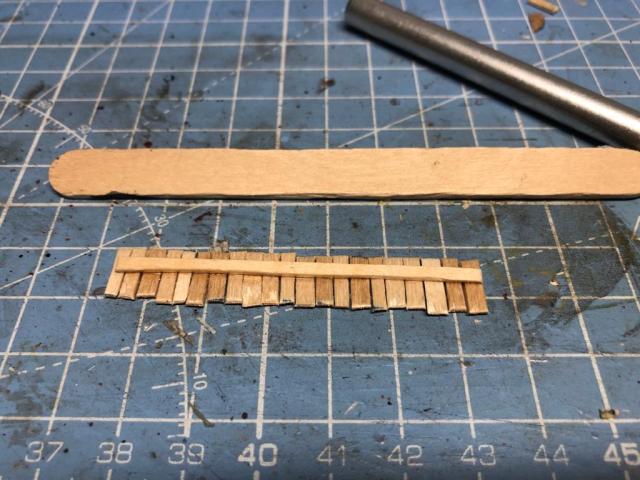
Now you need to cut your coffee stirers length wise and then cut them to fit the shape you need and glue them directly onto the cardboard (USE PVA GLUE FOR THIS). Note I left an opening to get into the building.
Sometimes they go a little bit wonky press down with your knife and eventually it will go straight
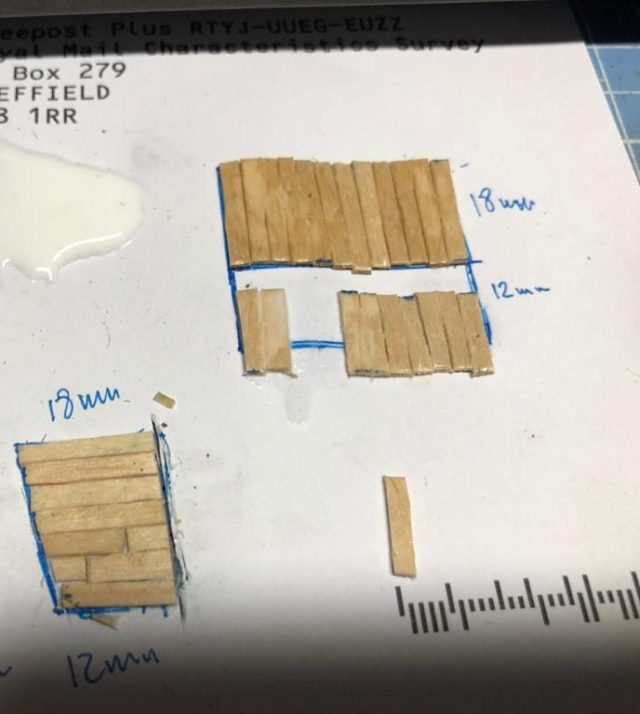
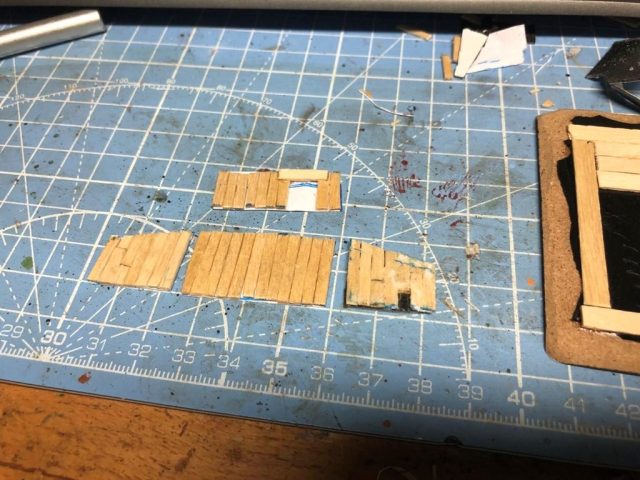
Cut out the pieces, keeping the paper on (note this shows the two pieces this idiot did first, the other one should be a mirror image of the other, like shown below).
You end up with the following four pieces, note I have added a piece of wood on top of the opening (after this is dry cut out the paper that can be see so the opening is clear..
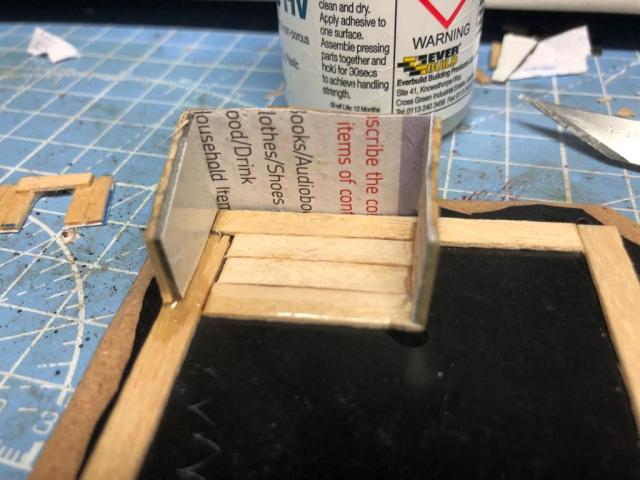
Then just glue the pieces together using superglue
Nice and easy. If the joint are looking to bad, you can also cut a small slice of wood and glue over them.
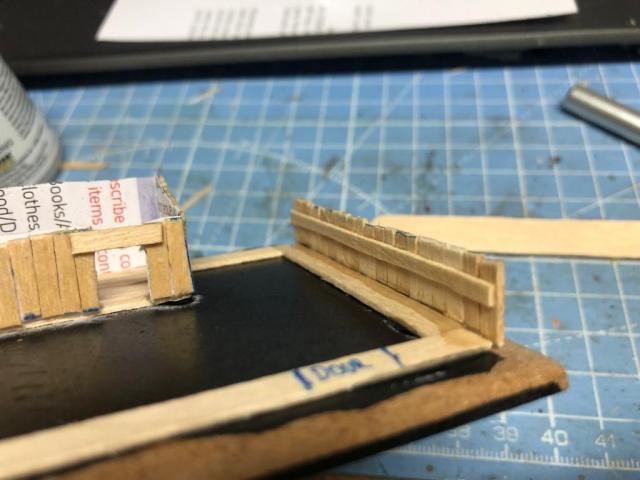
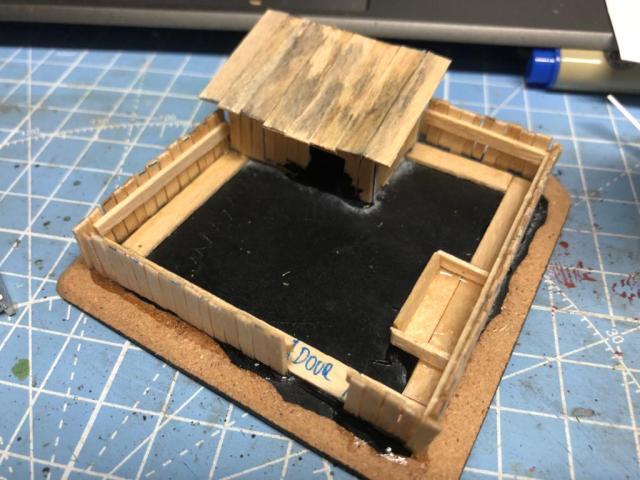
Measure up the sides and use 10mm tall pieces (again having cut the coffee stirer in half lengthwise). Cut a peice as long as the fence side and add some superglue to it (I do this whilst it being held by the knife).
Press down
Glue on the fence using the outer part of the frame as a guide
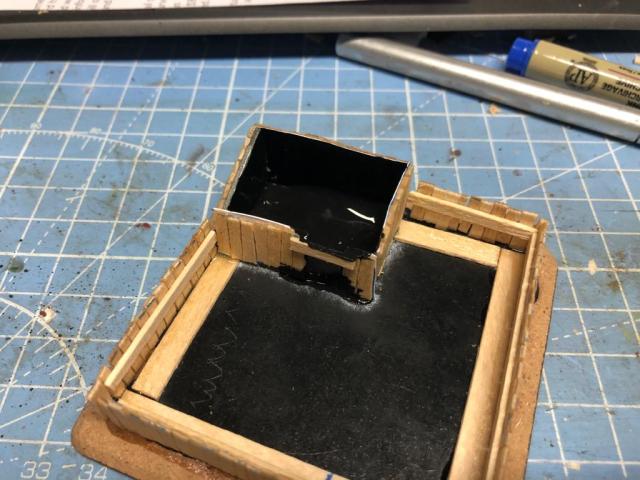
Same principle all around, as before if the joint becomes dodgy just glue some extra wood to cover it up (maybe they are just repairs?). I also have painted the inside of the house black as we will add the roof and attach it, this means it that it will look dark in the building.
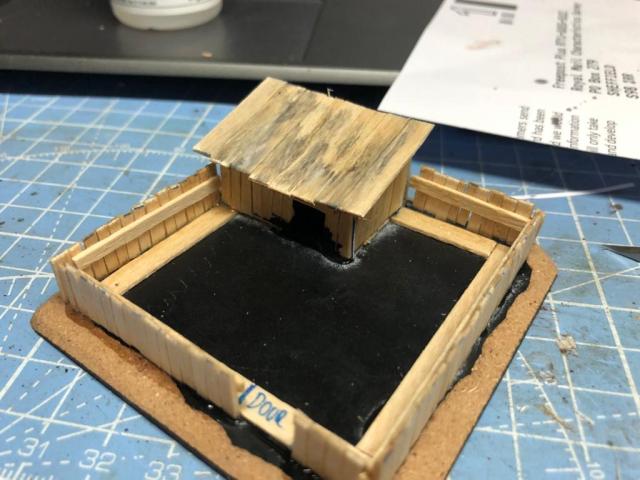
Cut of a piece of cardboard and fit until your are happy.
Clad the piece of cardboard with some overhang of the wood and glue it on top of the house.
I added a few planks to represent where the food would be thrown for the pigs
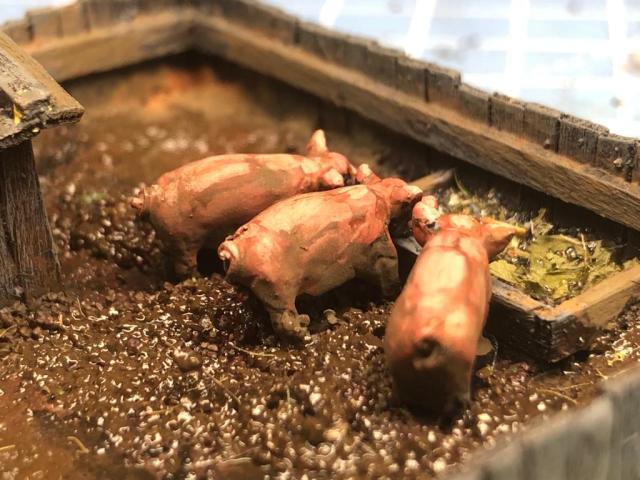
Then a few plans symbolising the gate, not great but I was in a rush. I also included my Pigs to set the scene. This is job done, only painting and basing left to do.
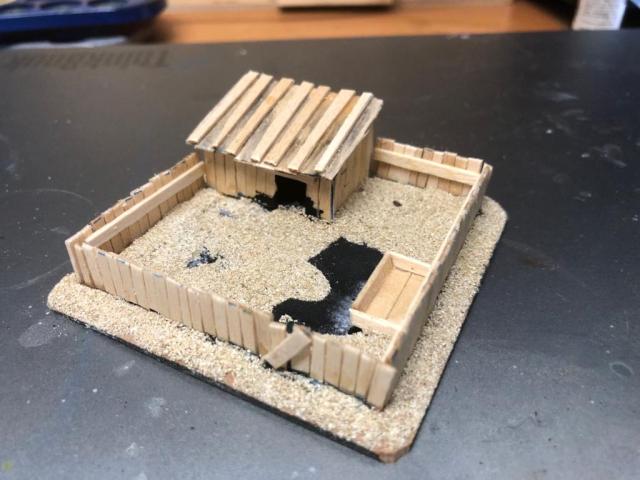
I added pva glue and then put some sand on top, shook of the excess and let it dry. I also added some additional planks on top of the roof to give it some more character.
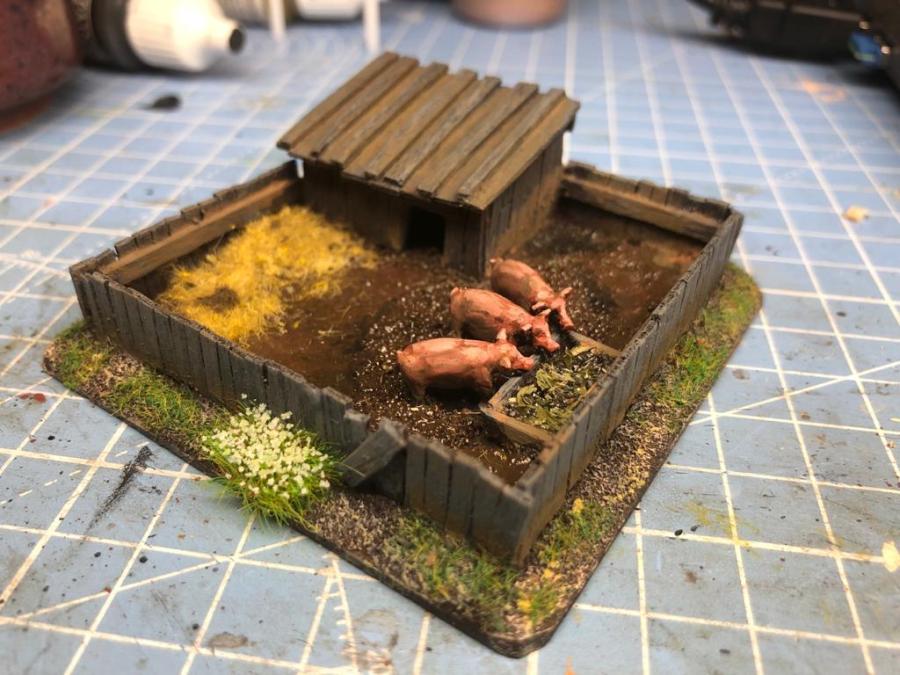
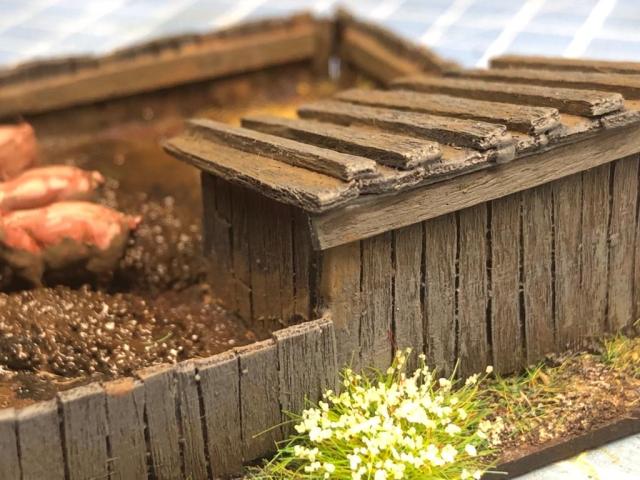
I then painted the whole thing shit brown and it was ready for detailing. After this I also glued the pigs in place and added some glue and sand around them to blend them into the piece. I drybrushed the wood in various greys and added some weathering washes. I decorated the base outside the fence with my normal basing method, drybrush and grass as well as a few tufts. Inside I used a flat earth colour and then some gloss varnish (wet mud) as well as some static grass I had to simulate some hay. In the food bowl I added some herbs. I painted the pigs using blends of red, white and mahogny brown.
Happy with that!
Love that picture of the pigs having some food and being suitably muddy (I used a Flory Models Grime weathering wash), I also think that fence looks really good and I do not regret not going for the MDF options. I find MDF stuff are great but best used as a canvas for additional layers of decoration (e.g. planking or filler, etc), this can be difficult with small items and in 15mm. Anyway, I think of the guy in the middle as Alfred the farting pig, the others I leave for you to name.
So we were at £11.23, the only additional item not part of the standard pack or the items bought are the pigs. You could of course, as said before, do it without them but to me they really need to for part of this to leave no doubt what it is. So Pigs can be bought from many places in 15mm, e.g. like Peter Pig (no pun intended), Pendraken and Museum miniatures. I used some pigs from Peter Pig and I think a full pack of 8 pigs cost about £3.70. So I suppose we need to add that to the overall cost giving us a total of £14.93 (this gives us a few more pigs to make a few of these at a later date, or painting them and basing them up to be scattered around).
In other news I have really enjoyed the Gods Own Scale podcast covering the upcoming rule set by Mark Backhouse, “Strength and Honour”,
It will be interesting to see how this gets picked up as the time to do the 2mm models will be quick in terms of painting them and getting armies ready. I have seen some of the offerings from various manufacturers and it really looks smashing with the big block of troops. But more on that some other time.
/ I hope that was of some interest, you can follow this adventure by joining on twitter, facebook or sign up here. Thanks for stopping by.
Inspiration for tomorrow’s project – the Root Cellar
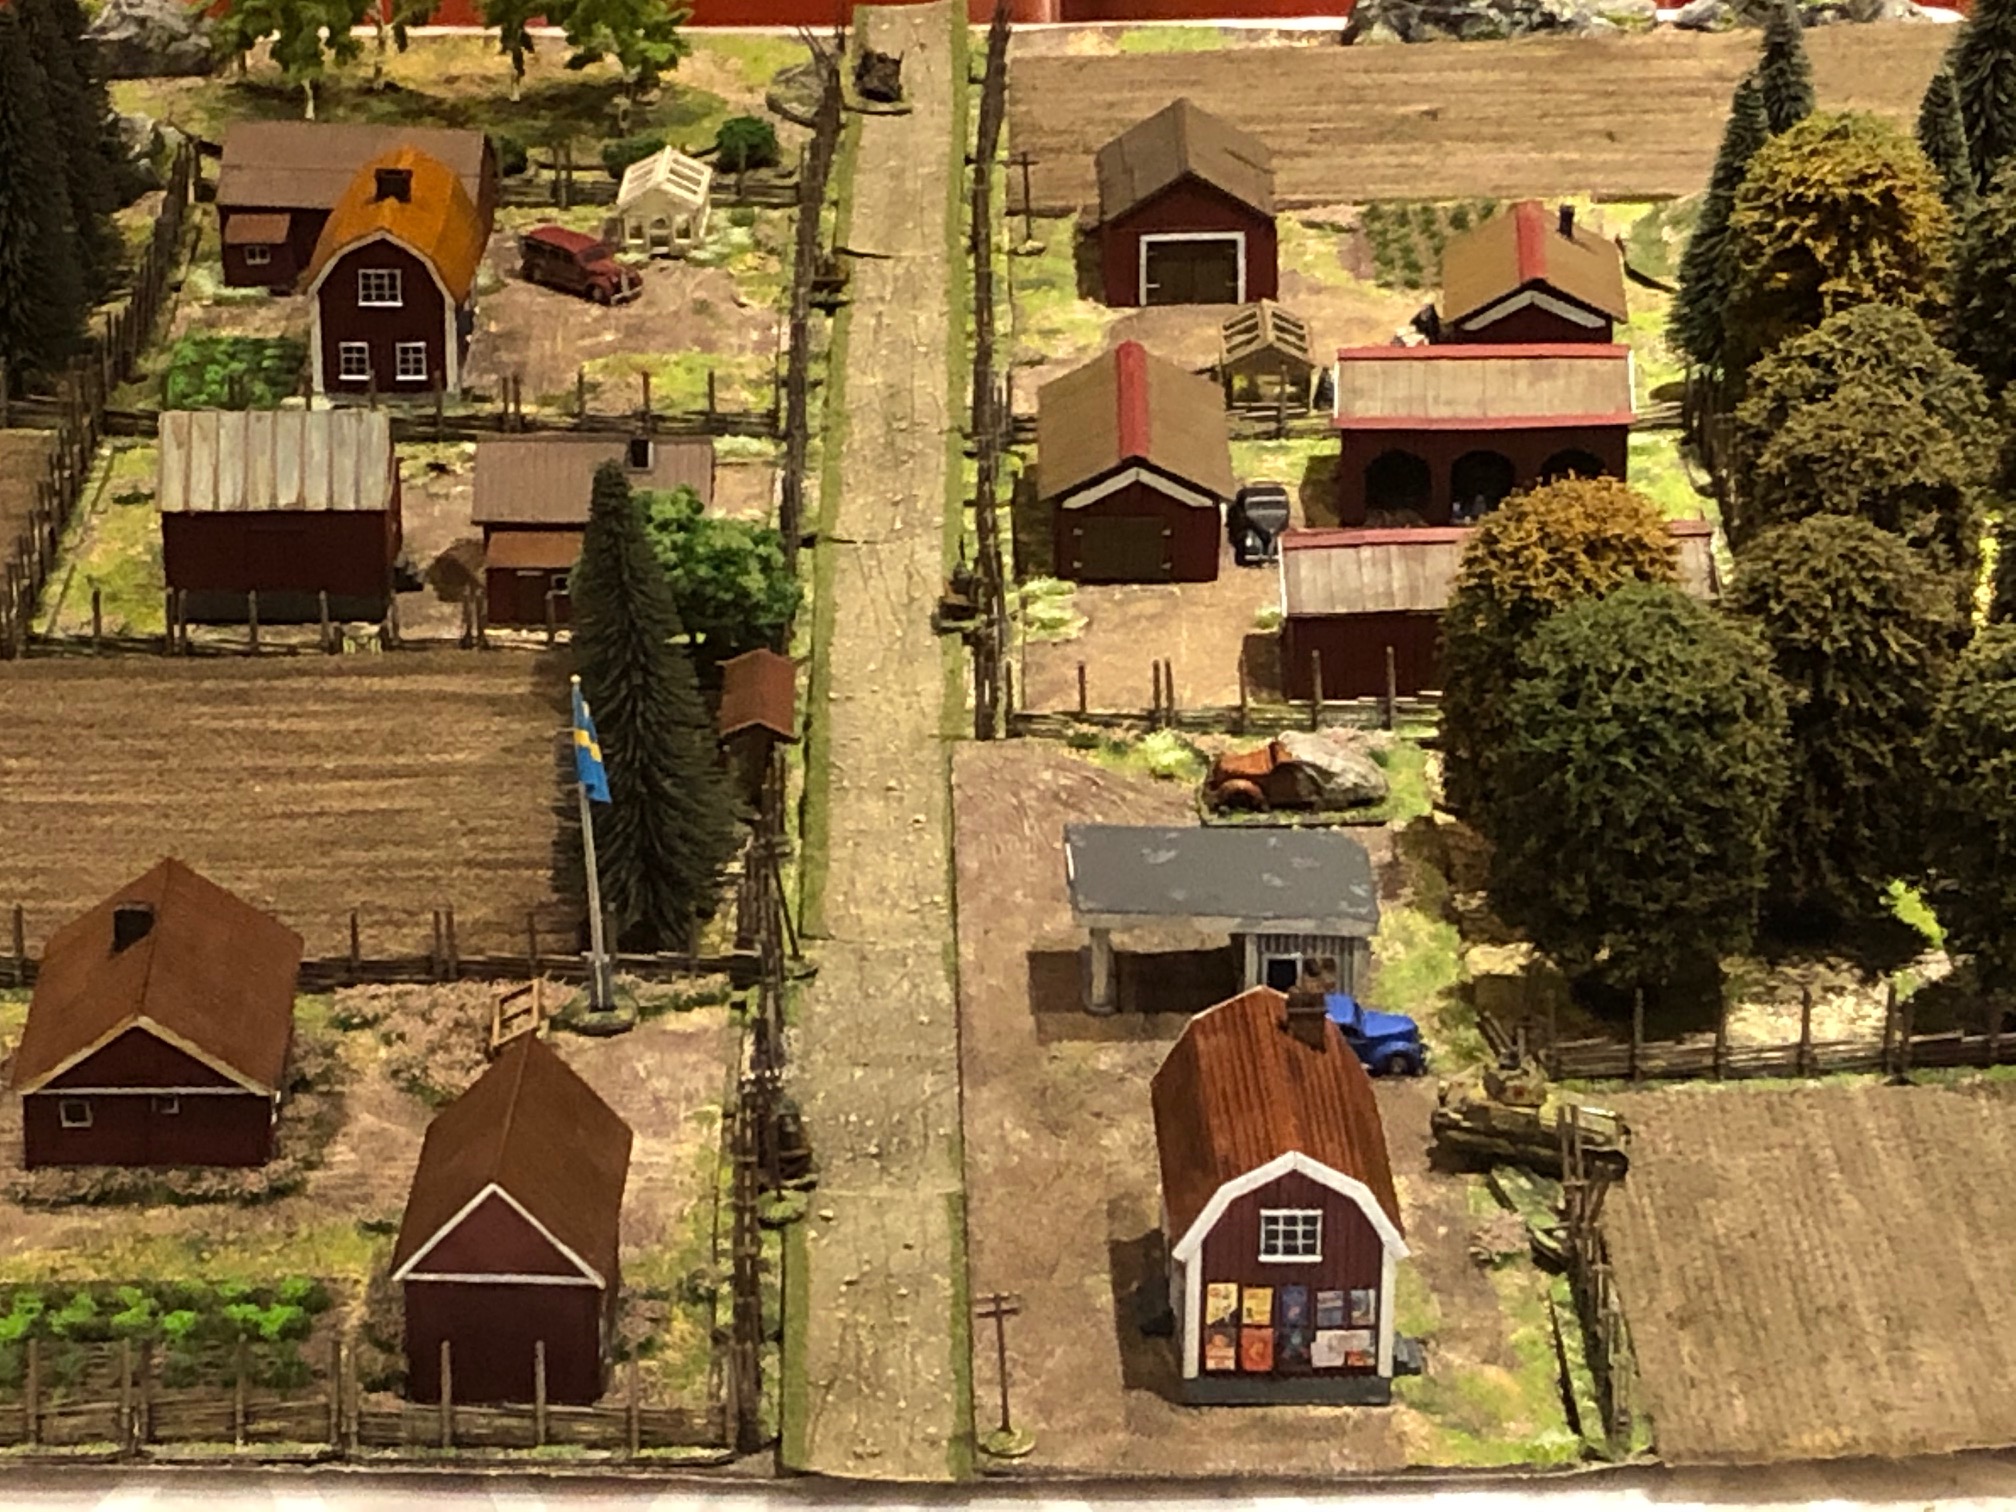
Spent this weekend pimping up some MDF buildings from Sarissa precision (more here) to fit into my Swedish 1943 project, that I have been working on slowly over the last few years – exploring a what-if invasion by Germany in 1943 through Norway. It is a passion project and I have enough buildings to create a few farms but wanted to add some more.
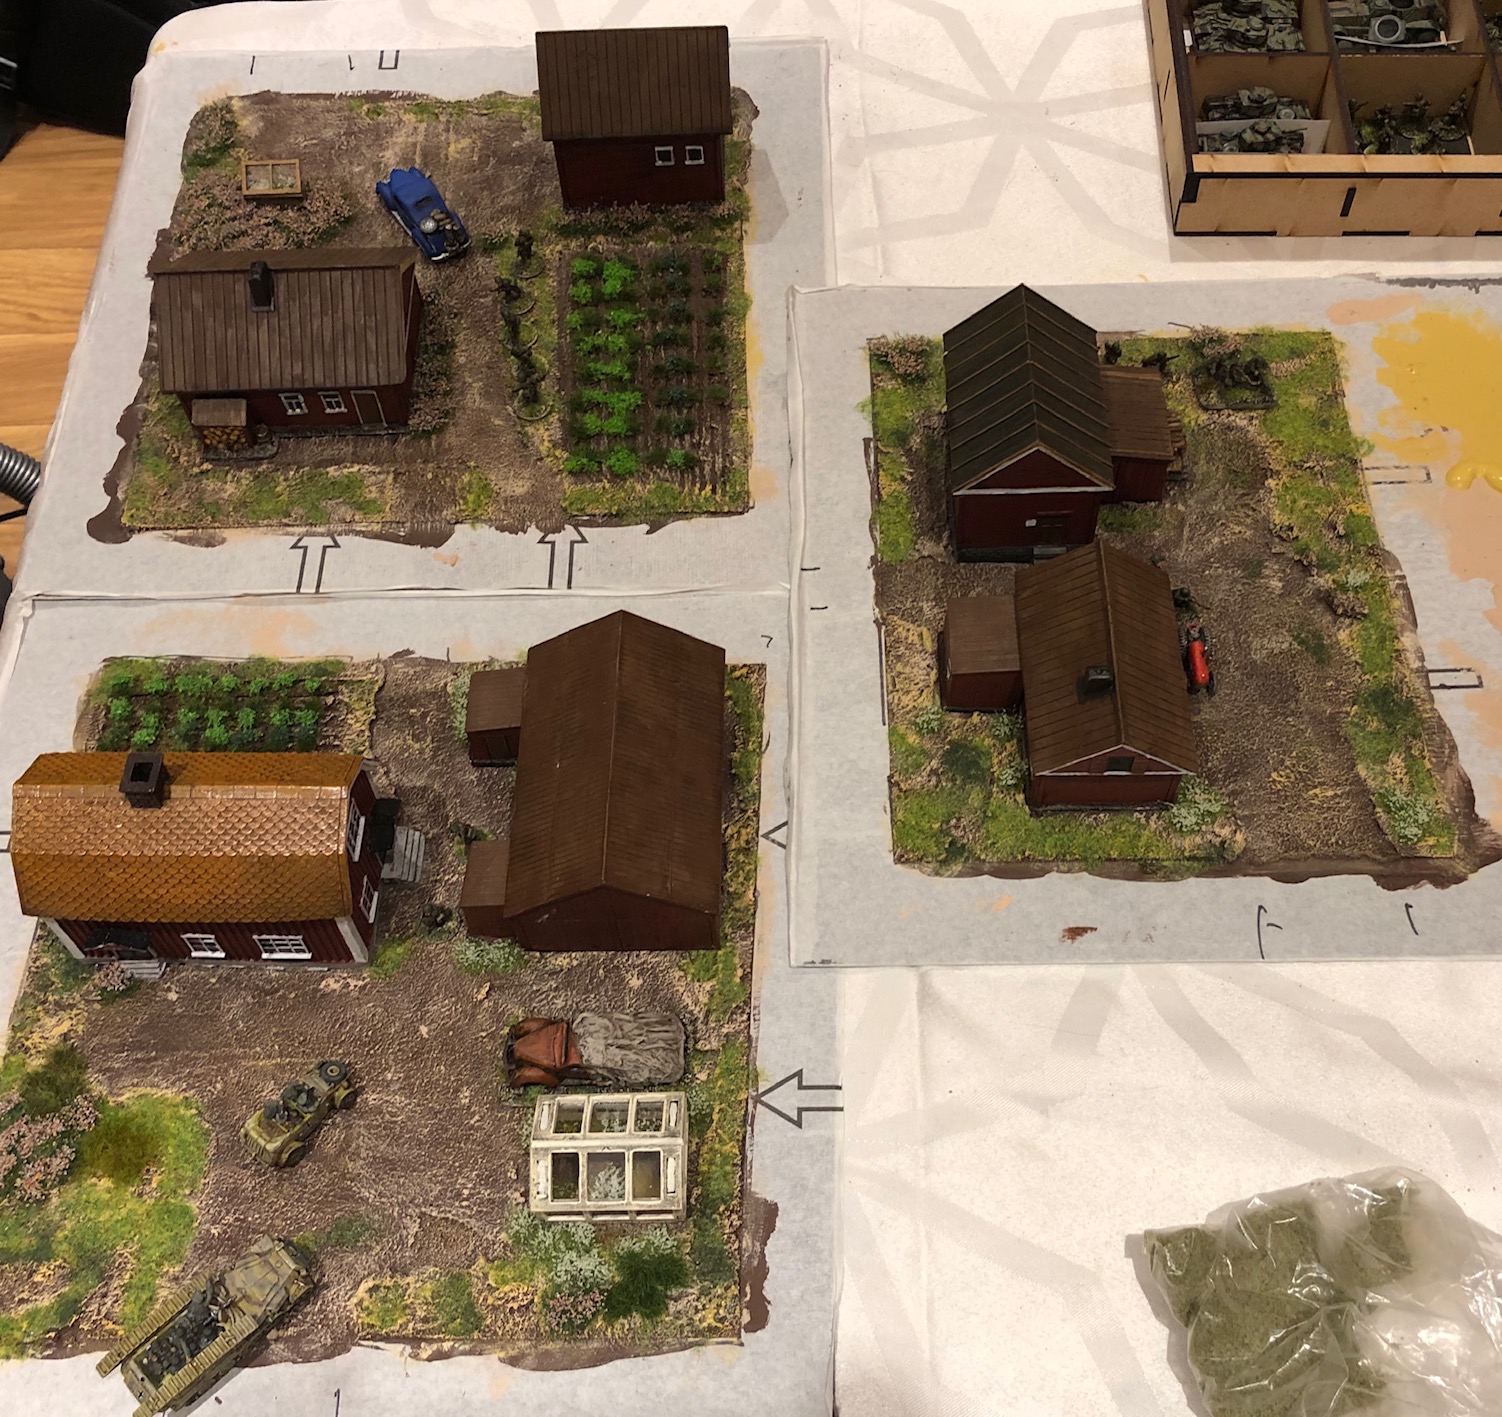
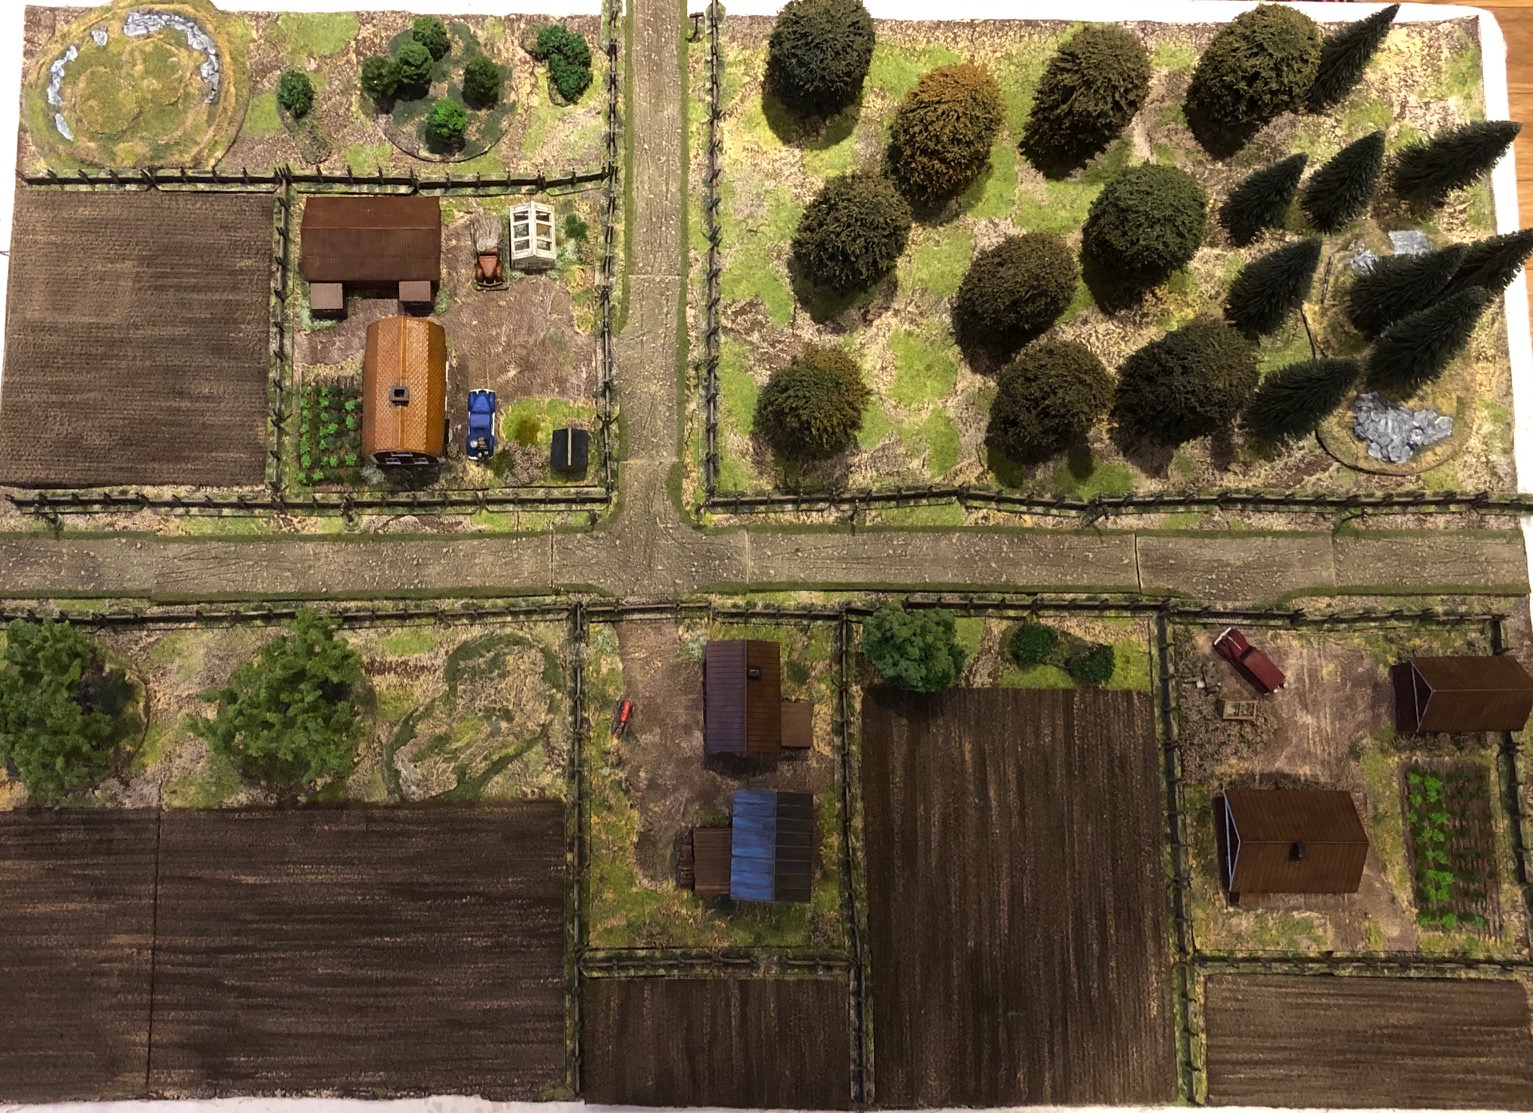
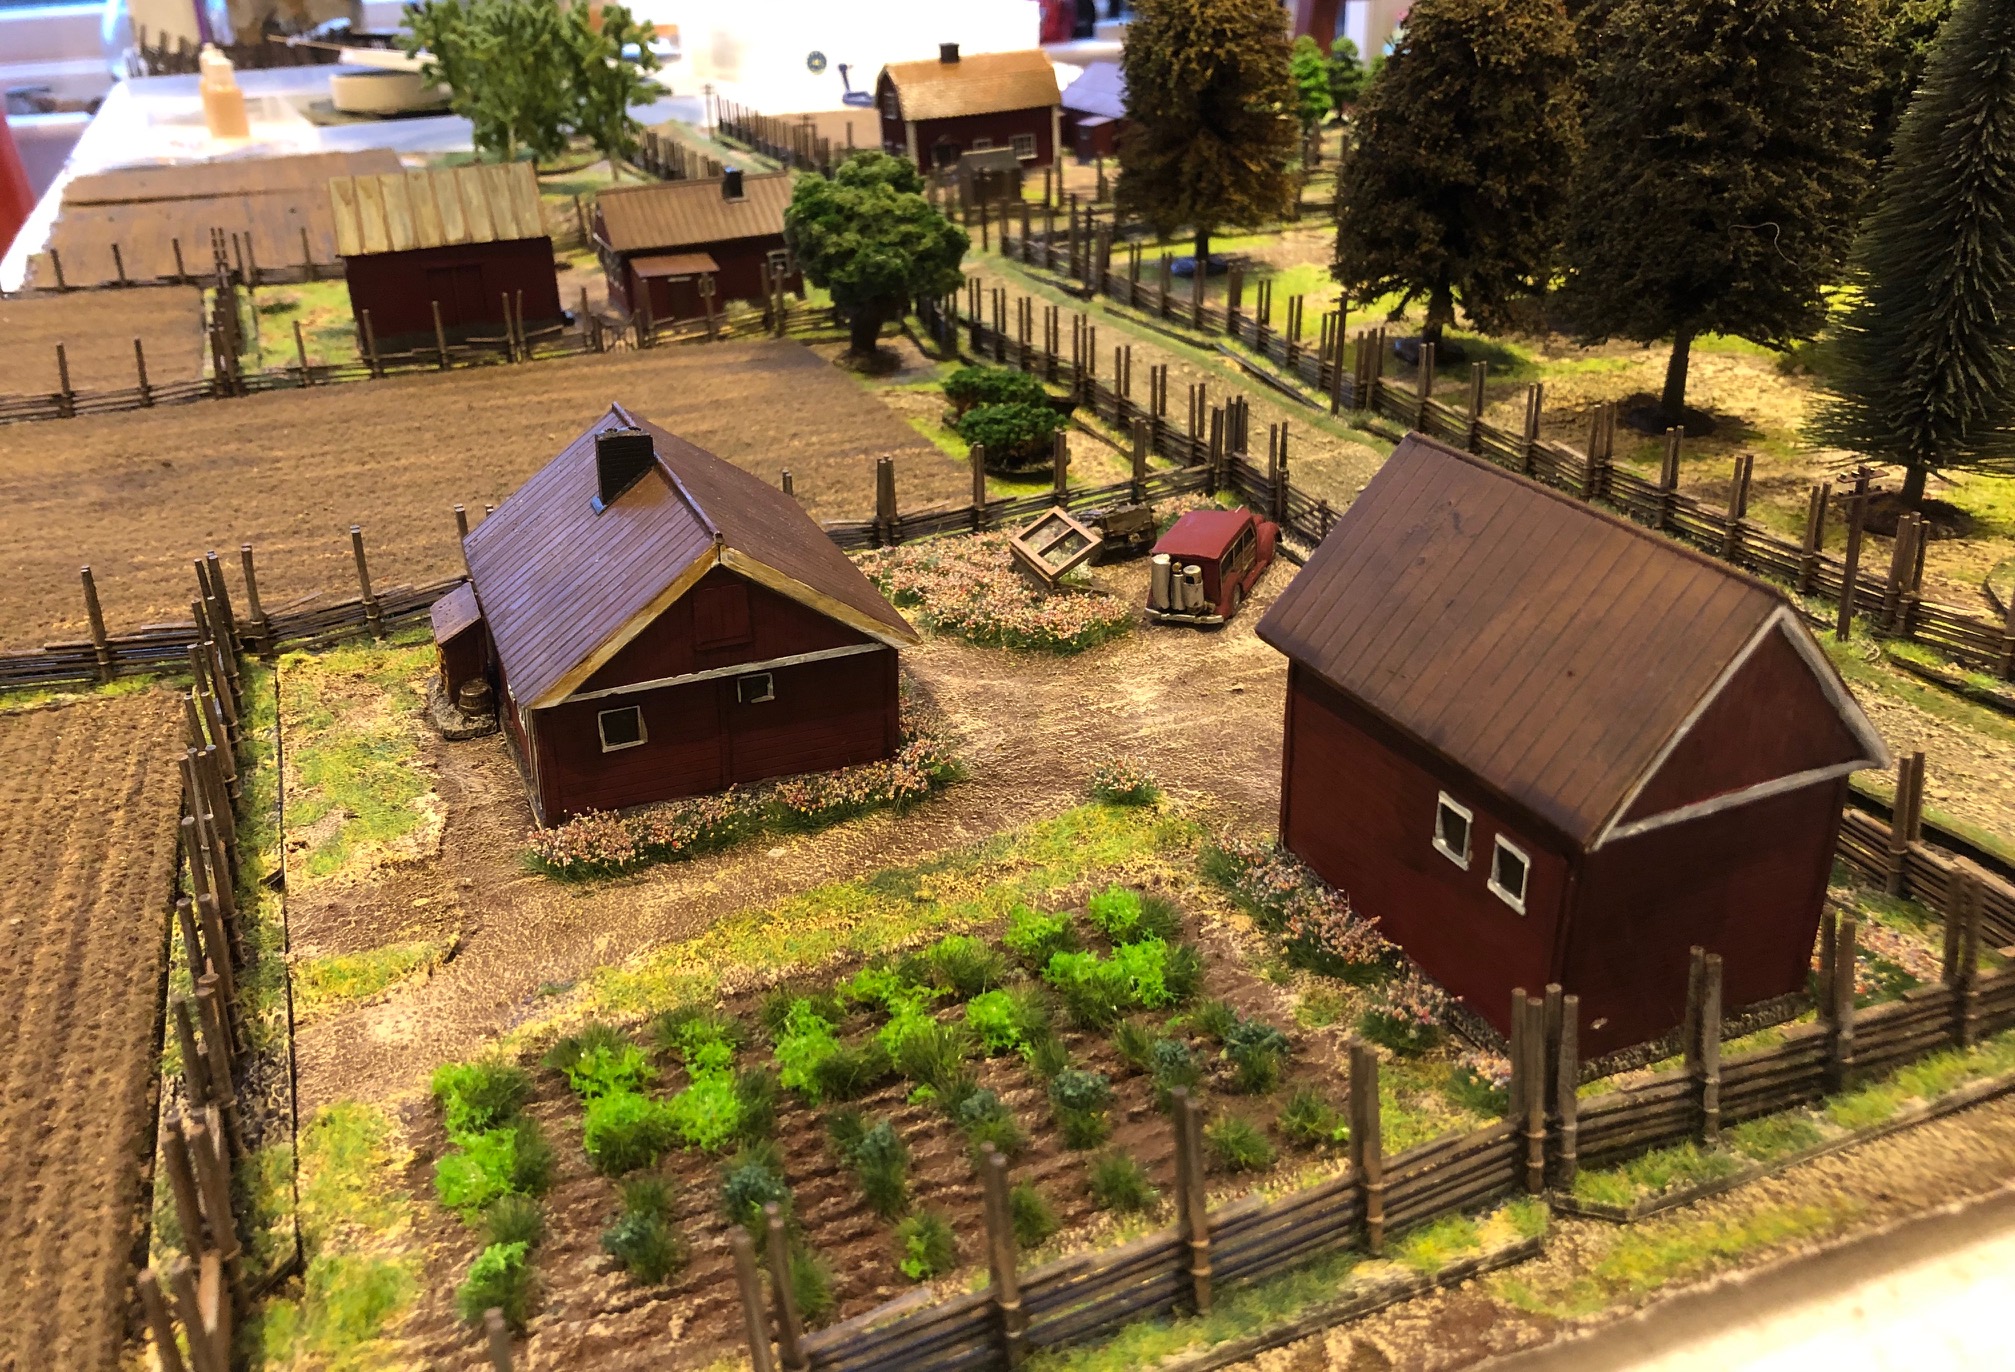
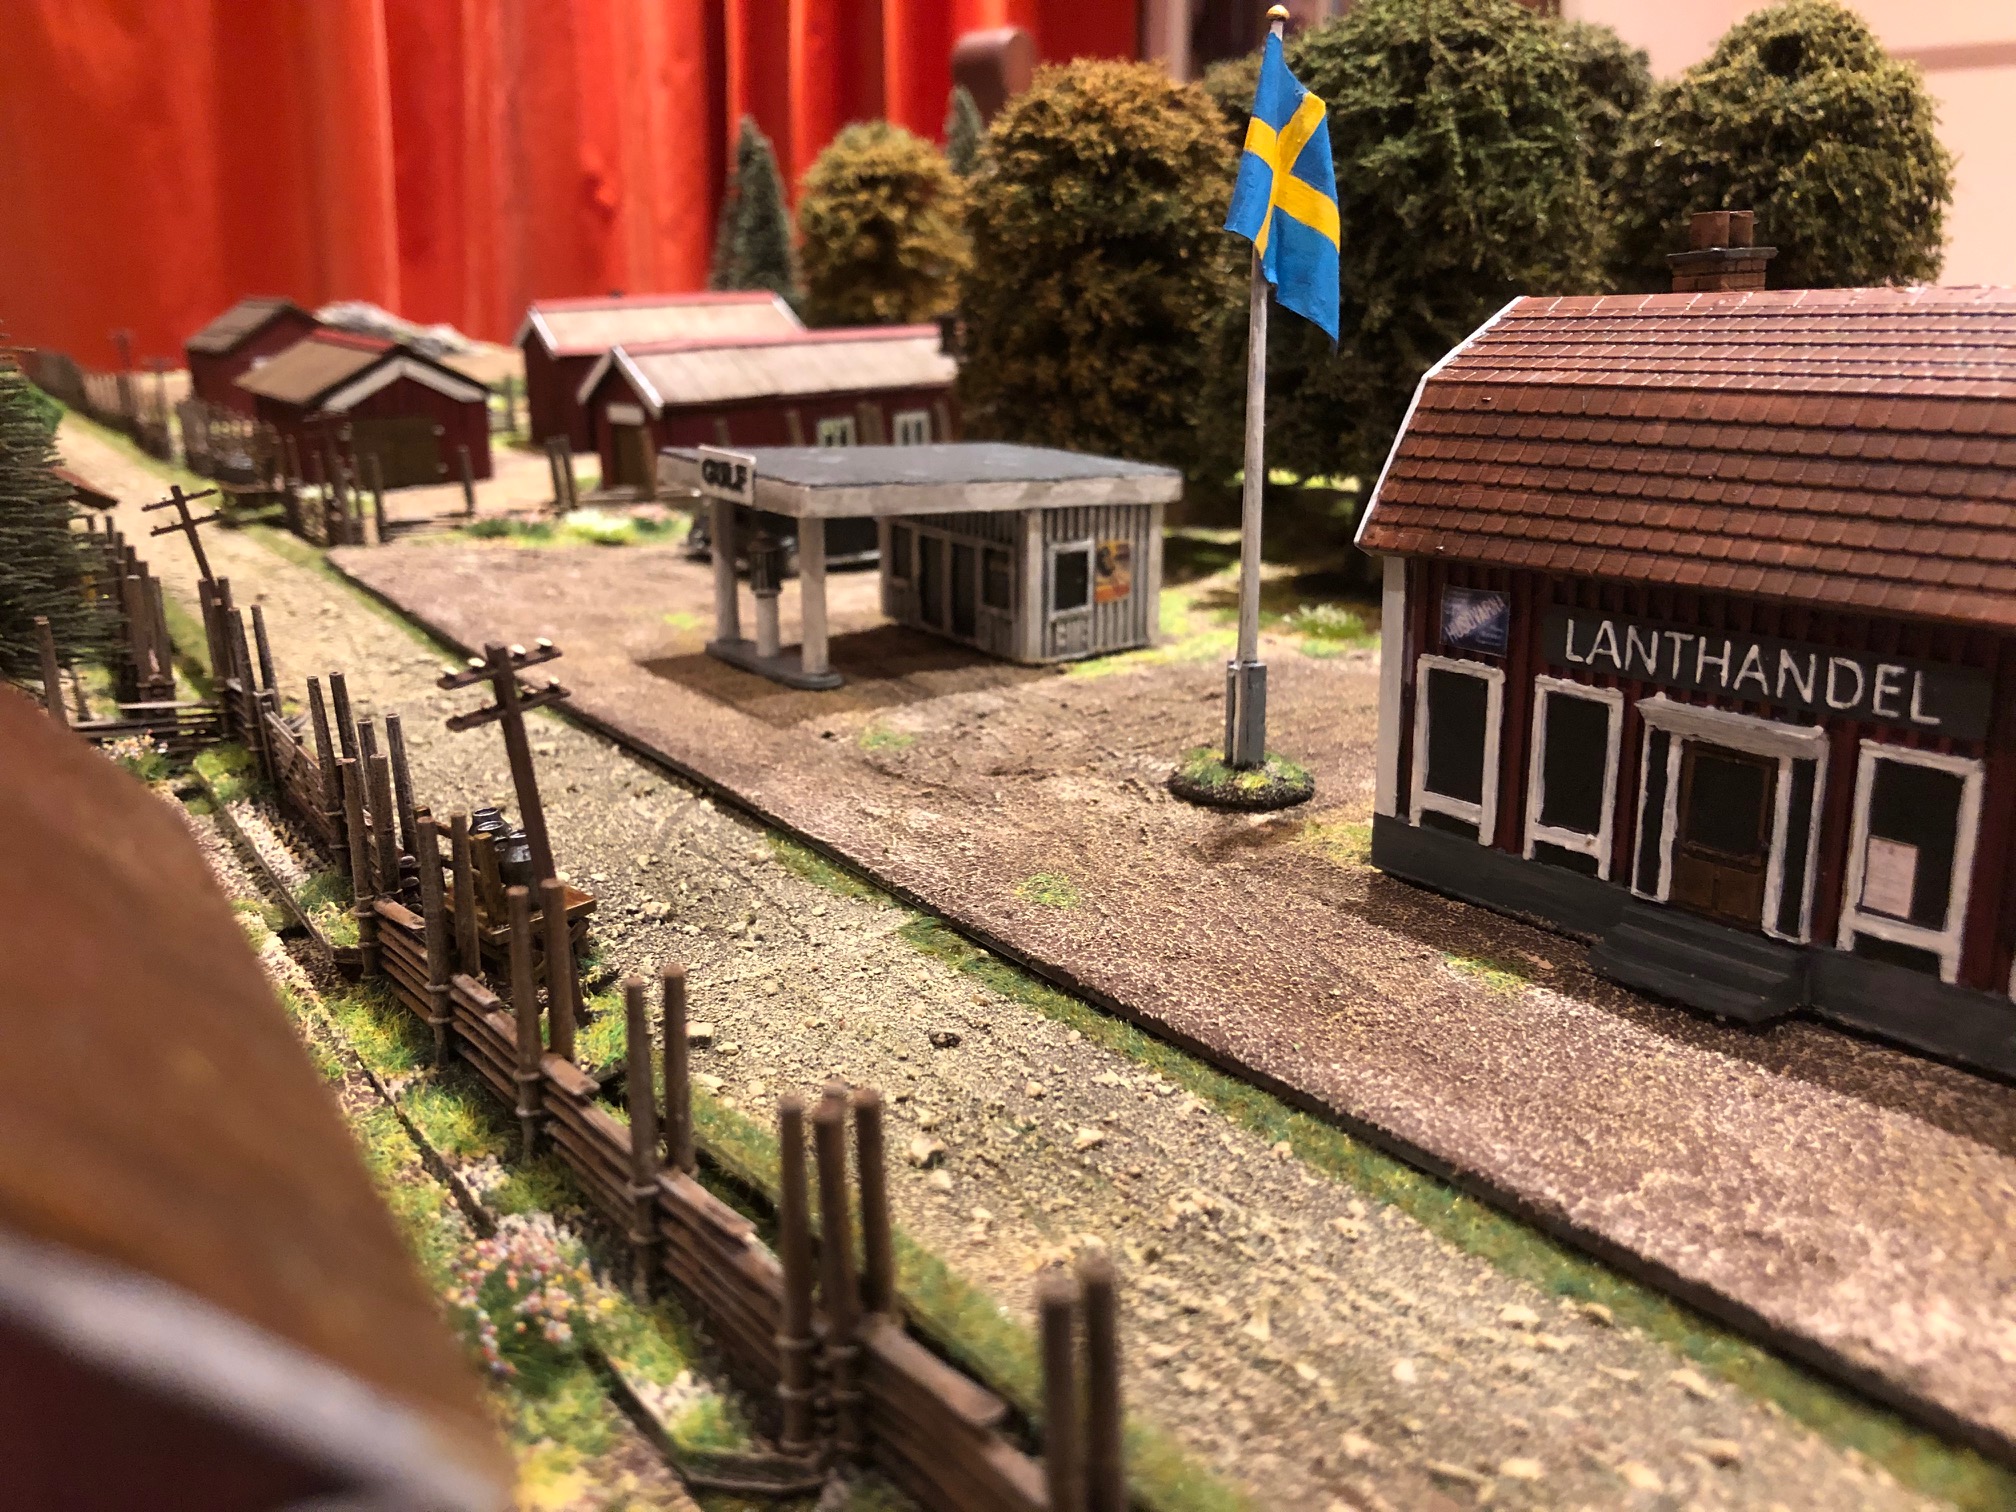
This is the village so far
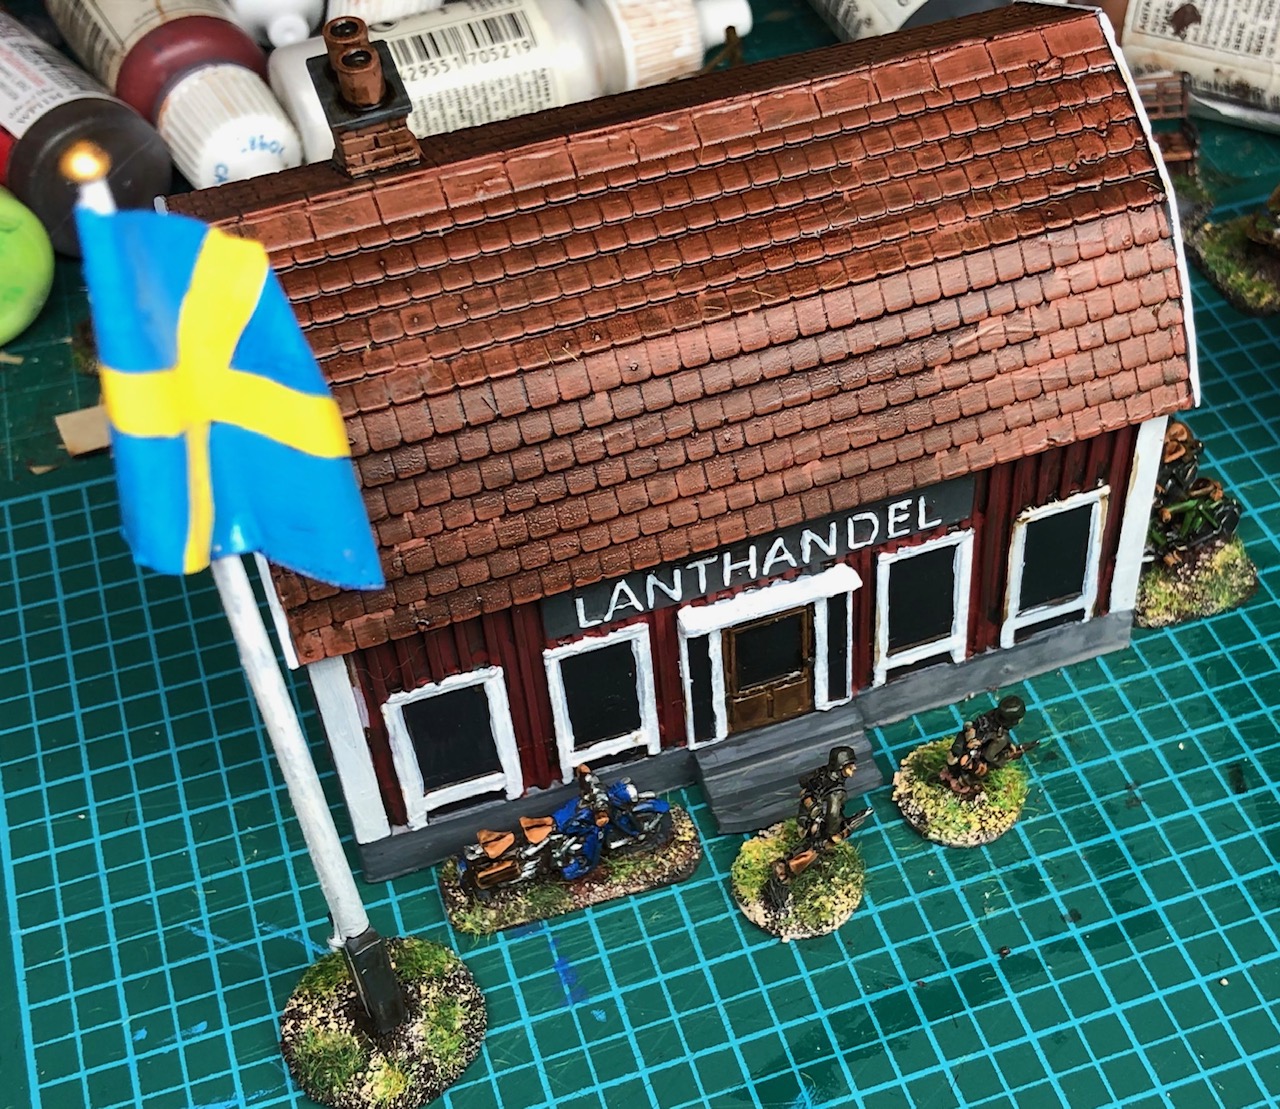
A very immersive look for anyone with a hint of how Dalarna might have looked in 1943 (yes the number of cars is more than excessive). With the Country Shop (Lanthandel – in the bottom and the Petrol Station and some farm houses.
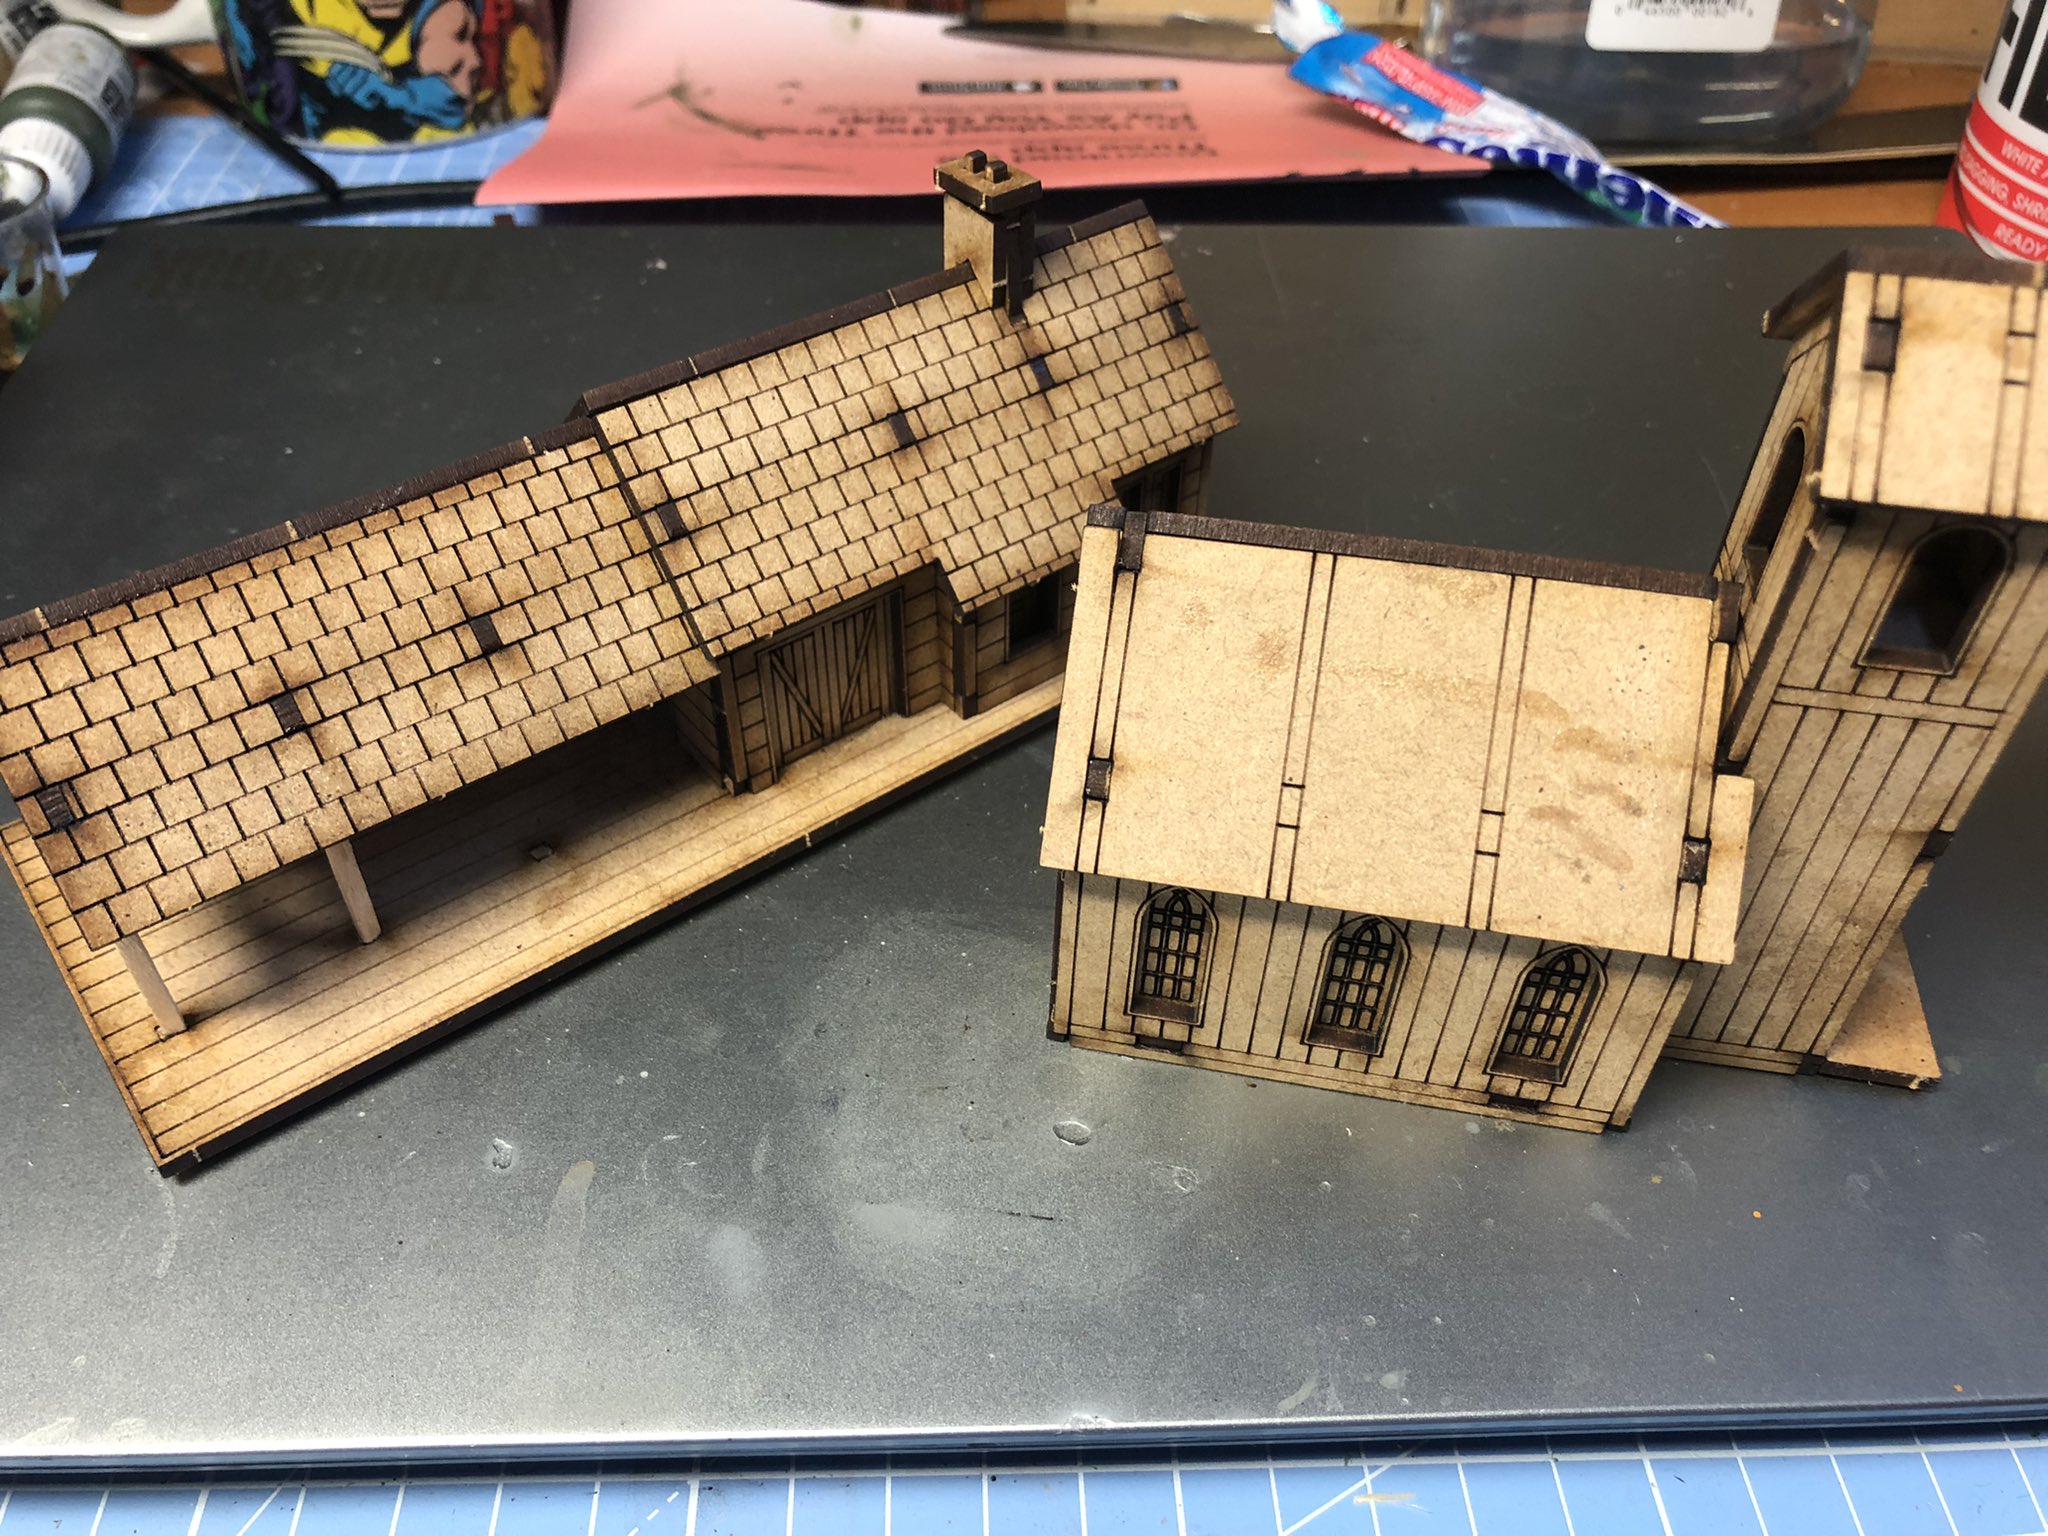
These were the houses I bought this time around.
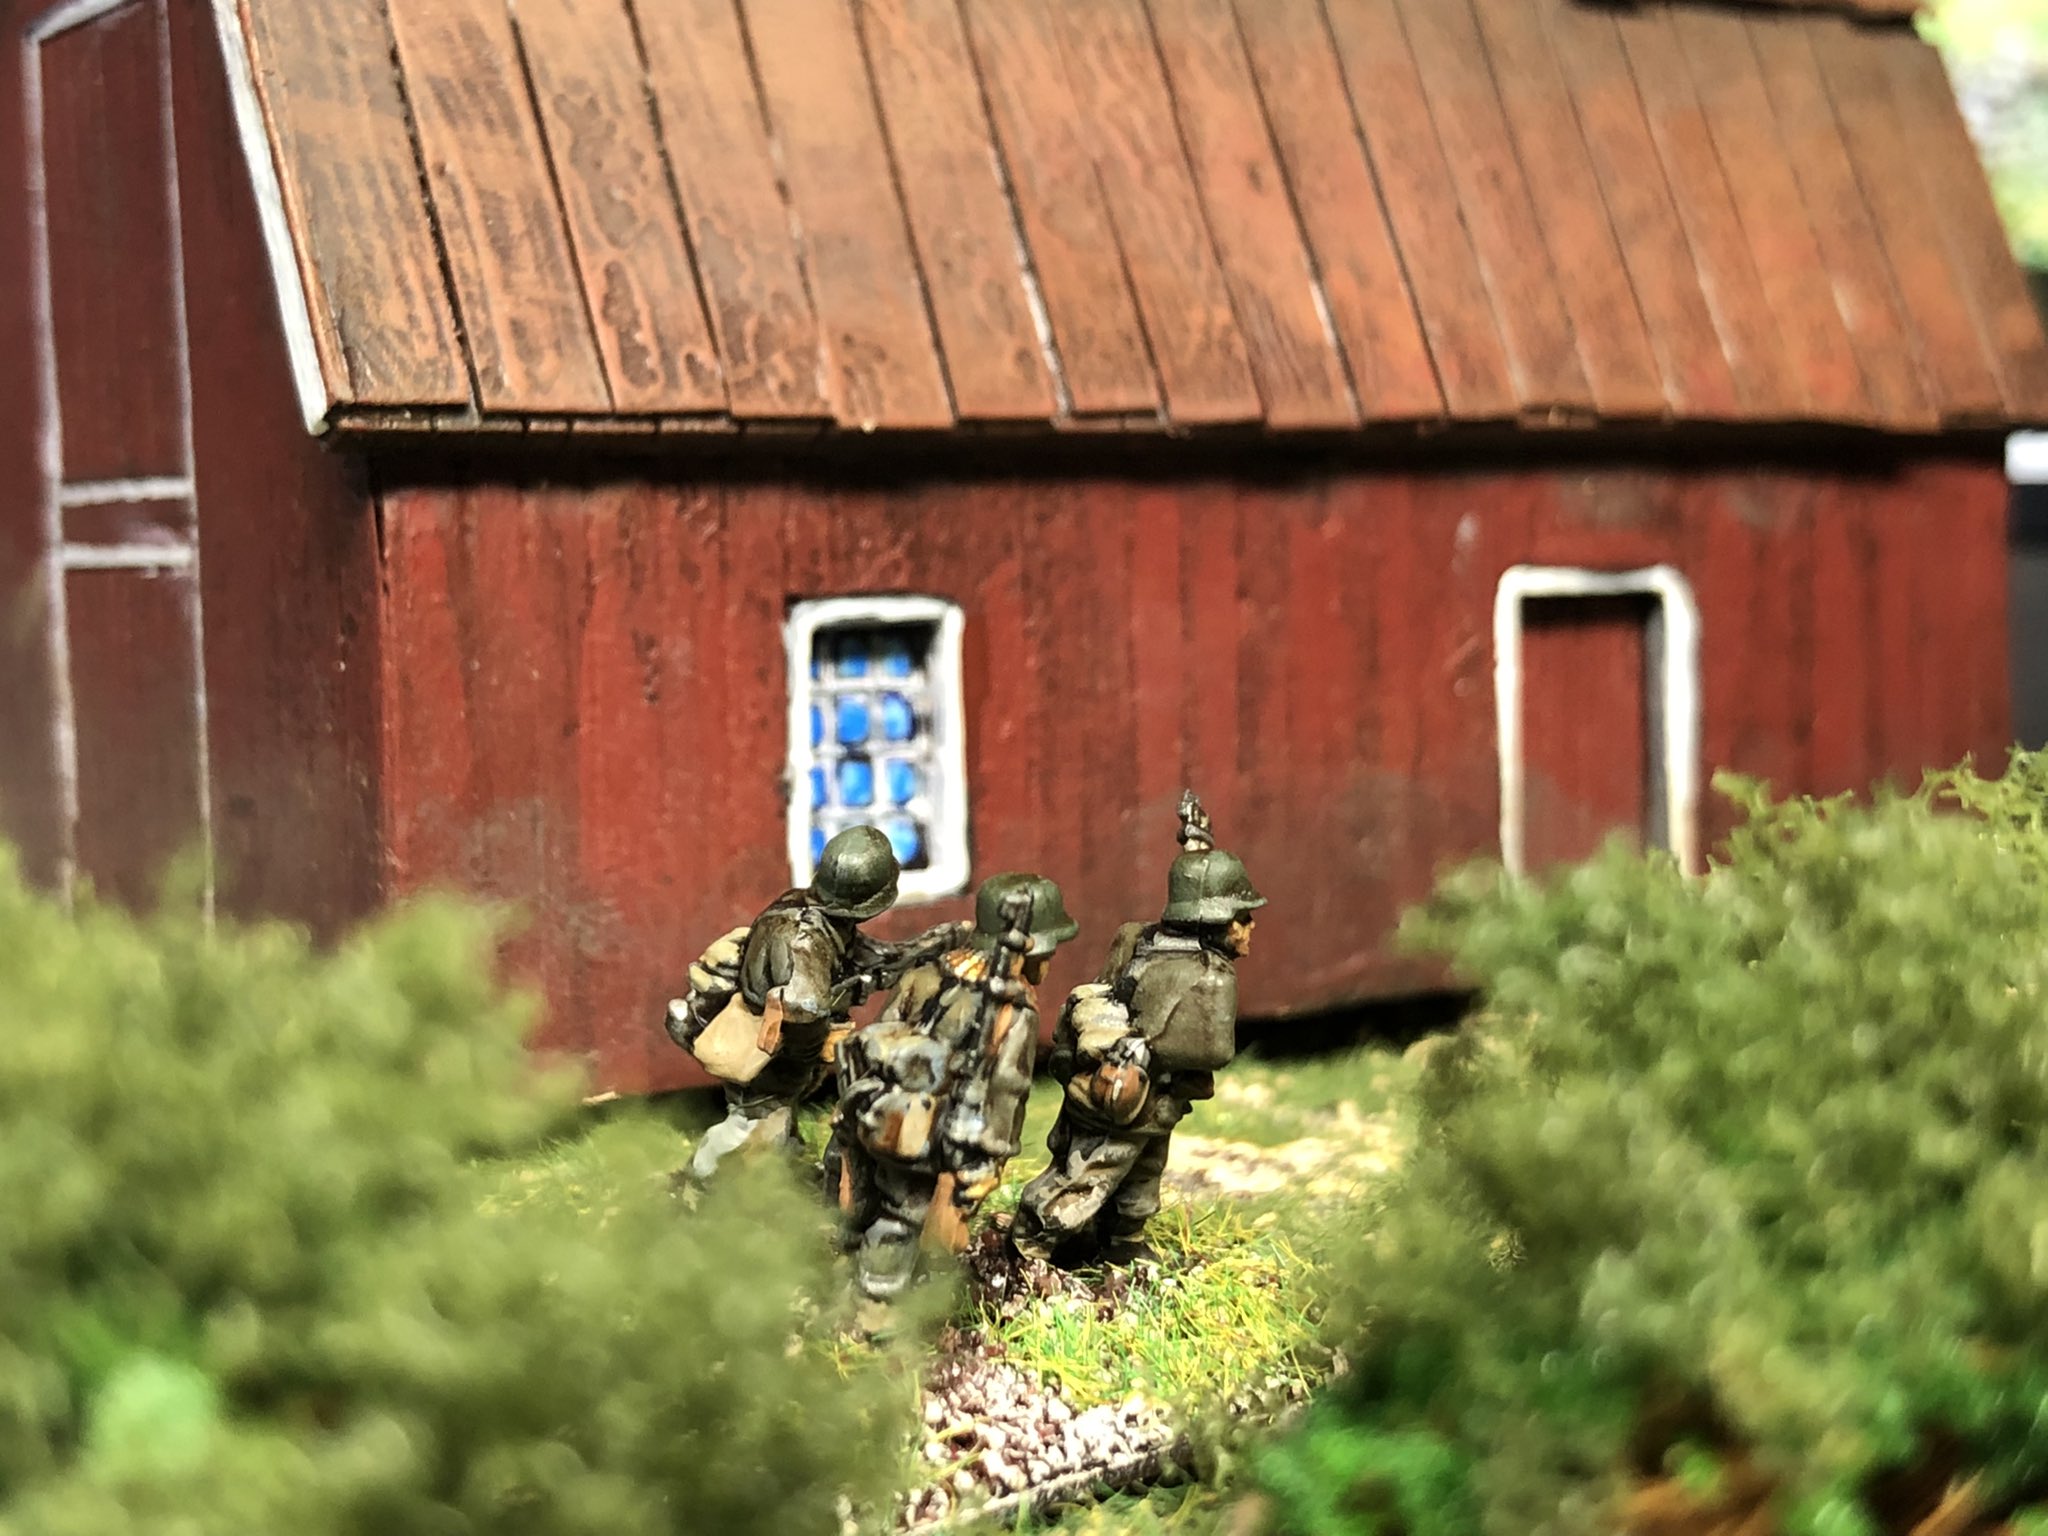
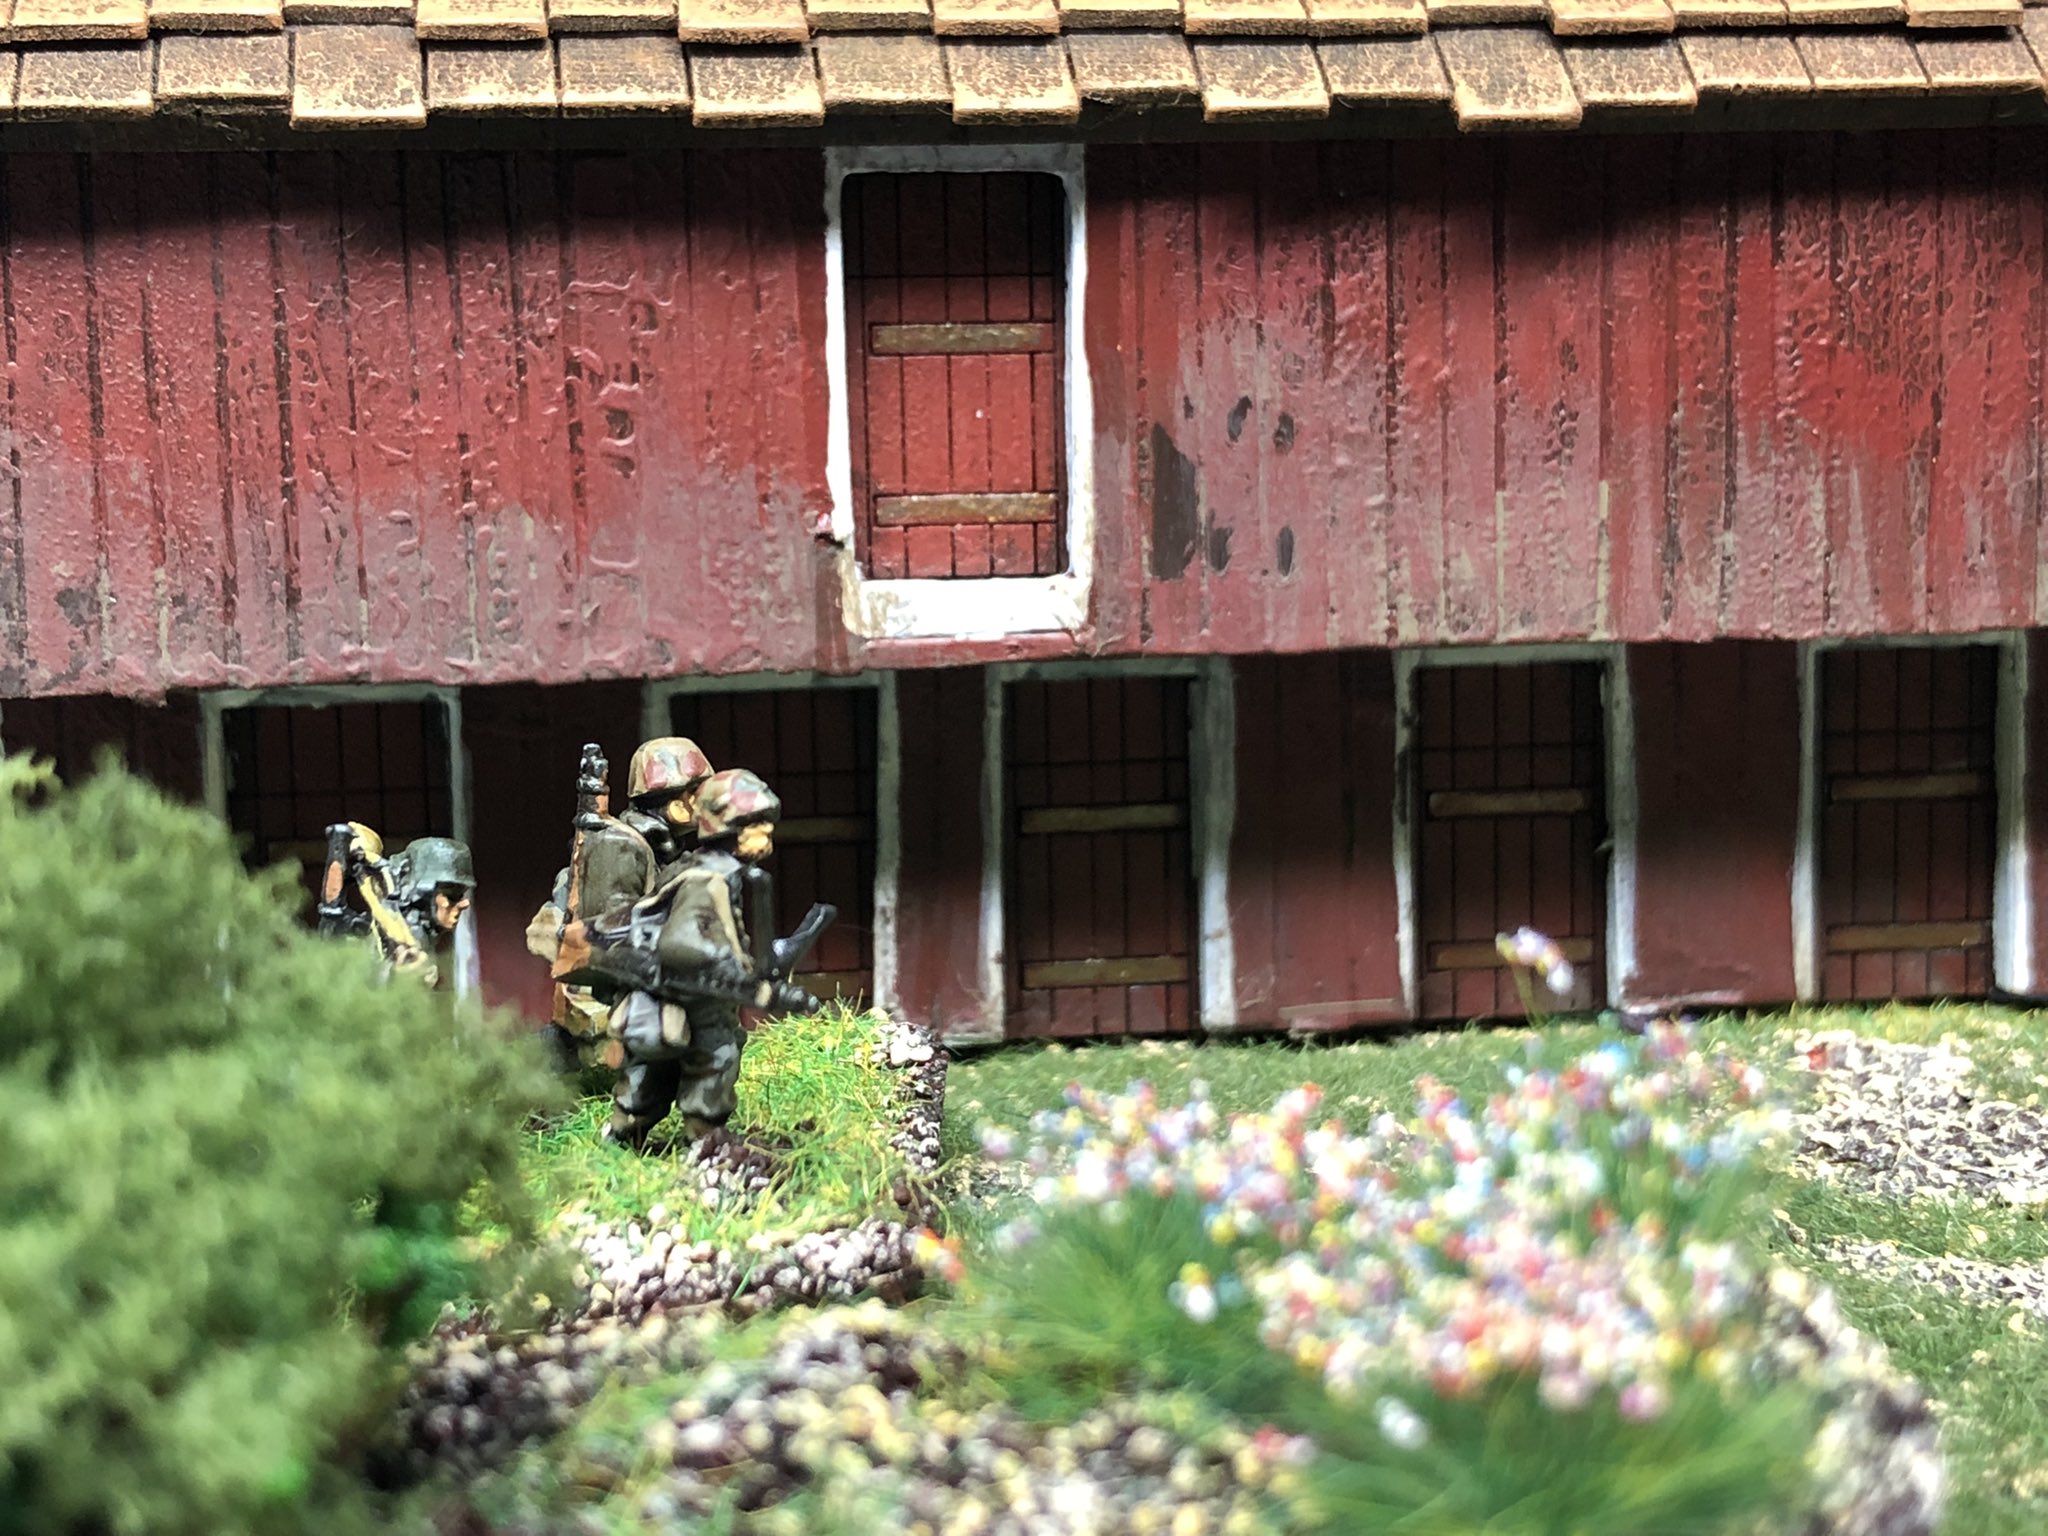
A Railway Station (Wild West Range) and a Church, I think from the ACW rangeTwo houses from the ACW Gettysburg Range – first Slyder Stable Barn and Dunkers ChurchAnd a Dutch House and a Dutch Barn
As I have explained before I want to create a certain look to make the building fit into the environment so a Normandy type building will not really do. In Sweden most house at this time, and still are in Dalarna, are made of wood and painted either Red or Brown (most commonly red). I have opted to go hard on the red with white details as a unifying and most common look.
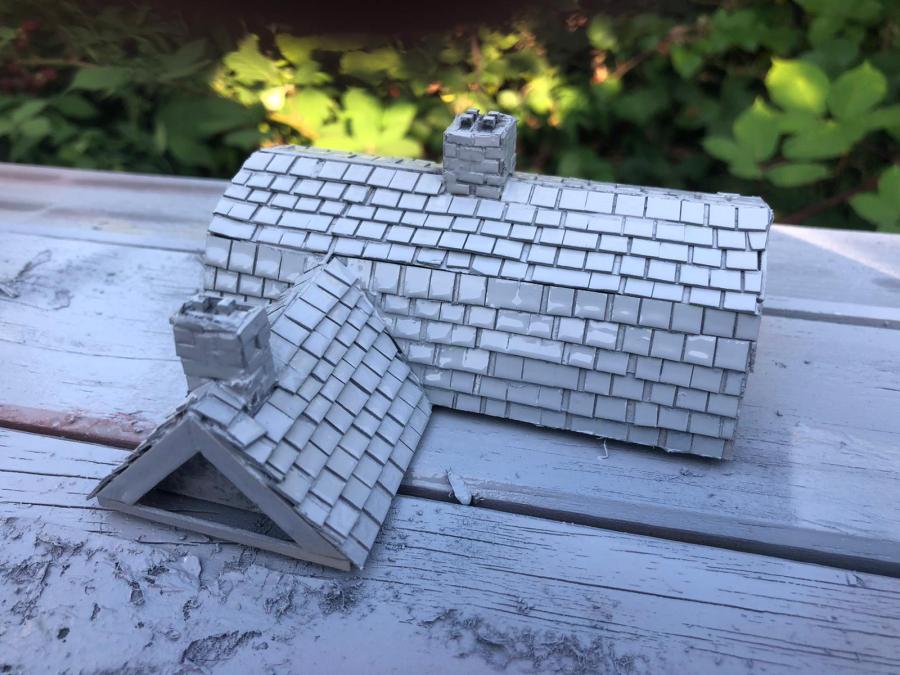
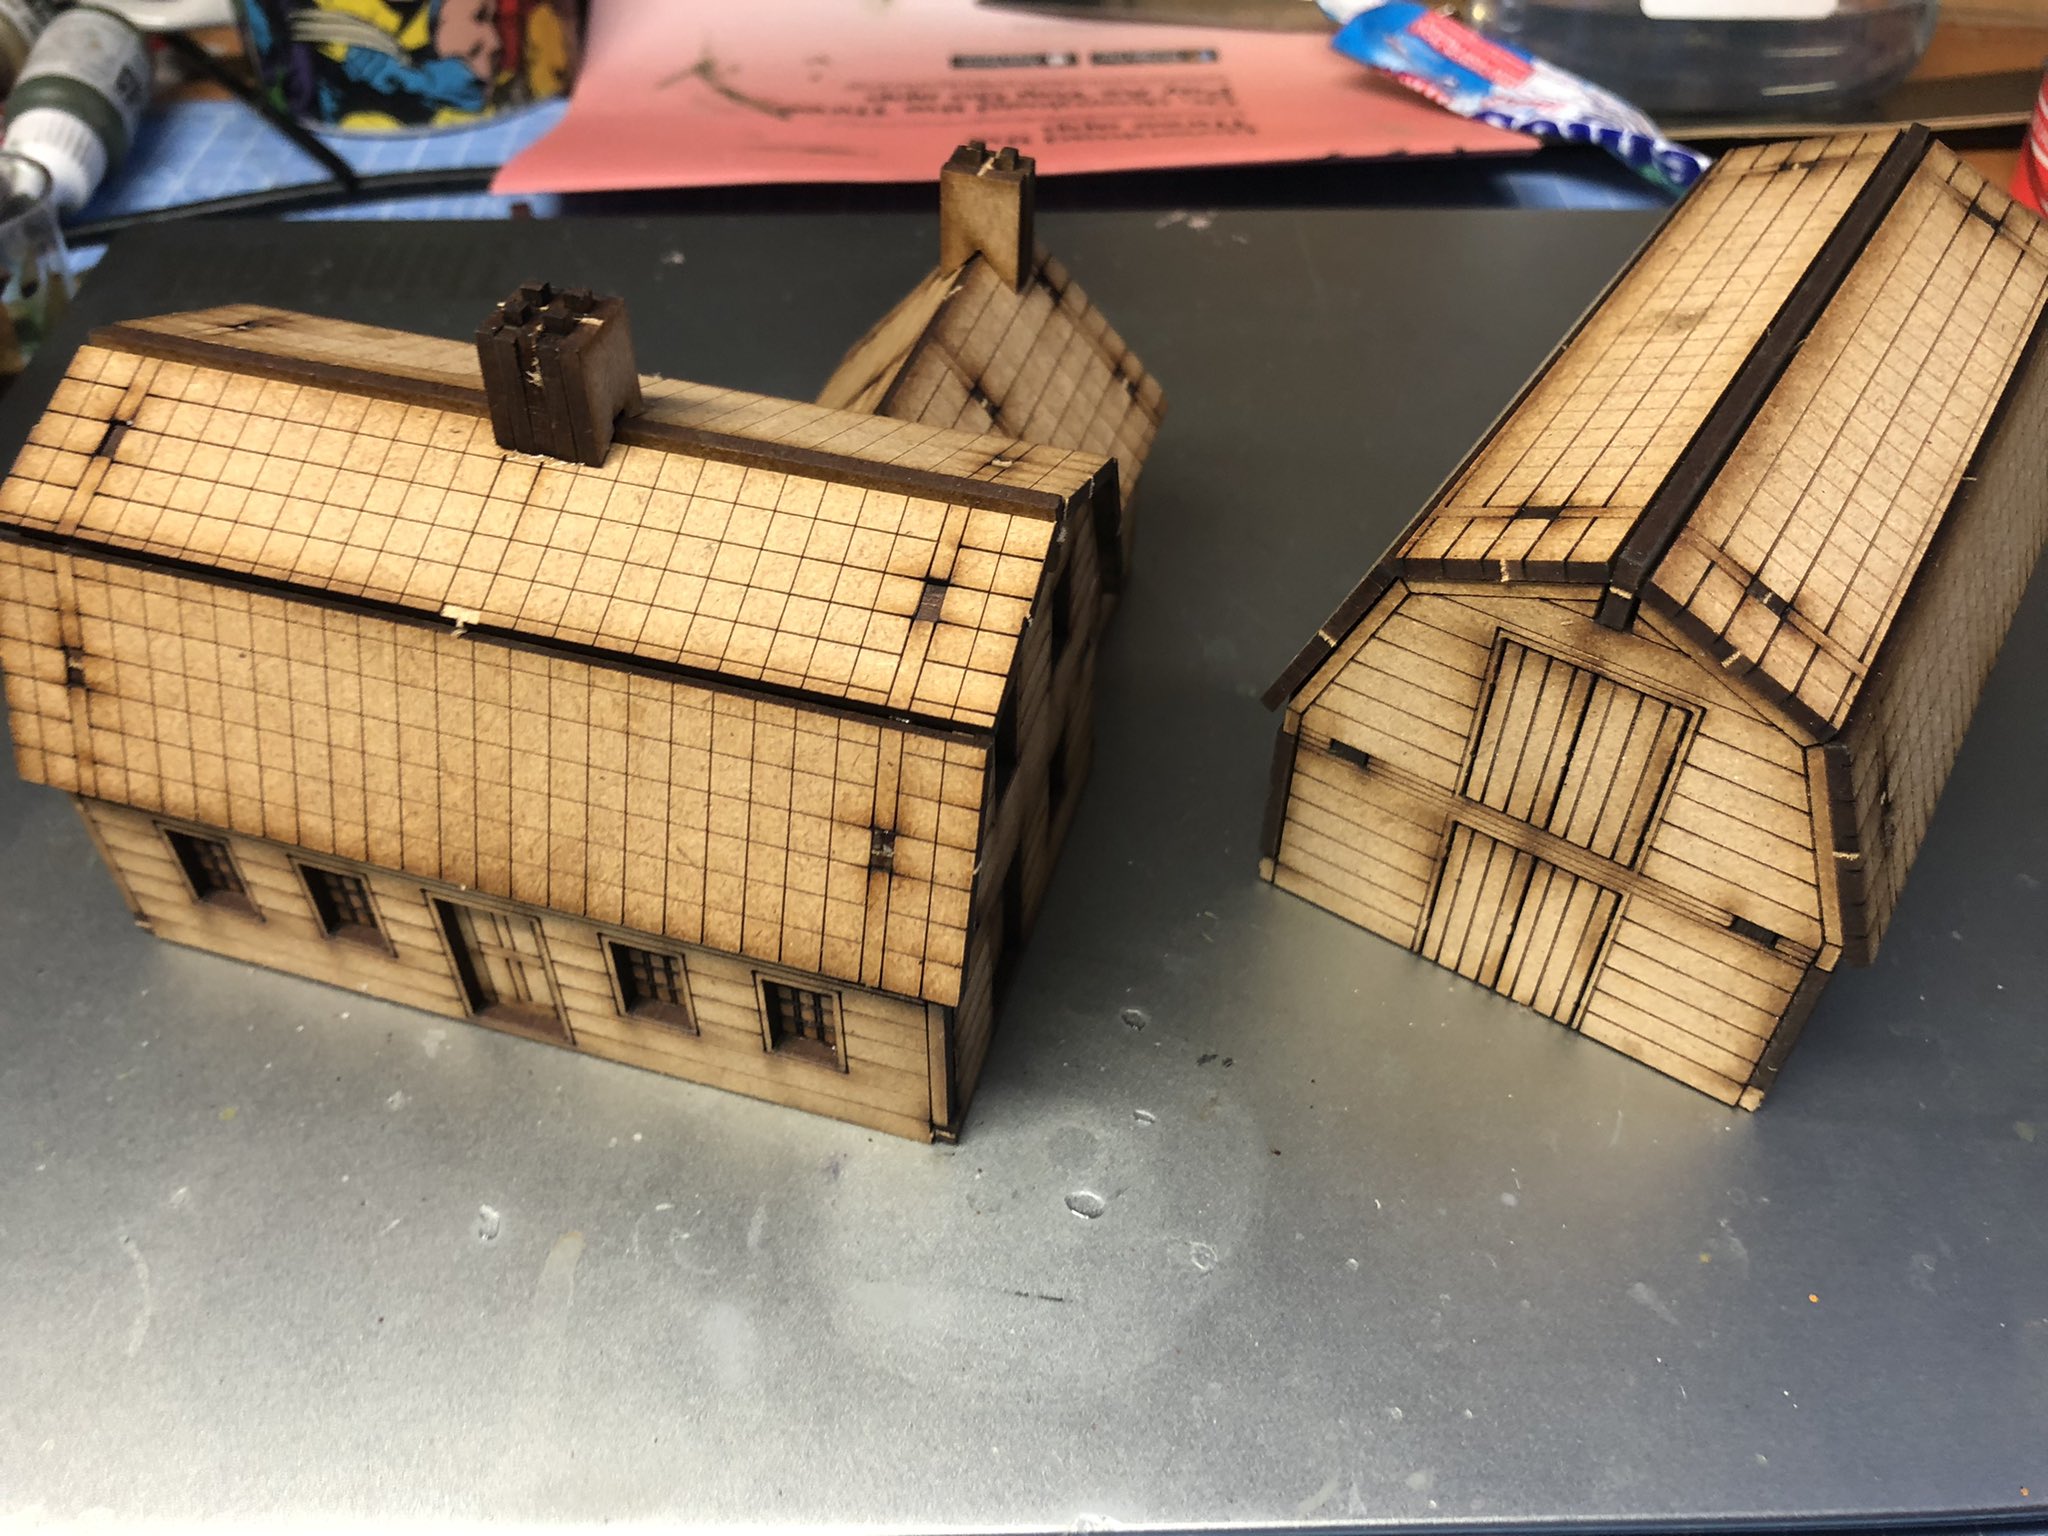
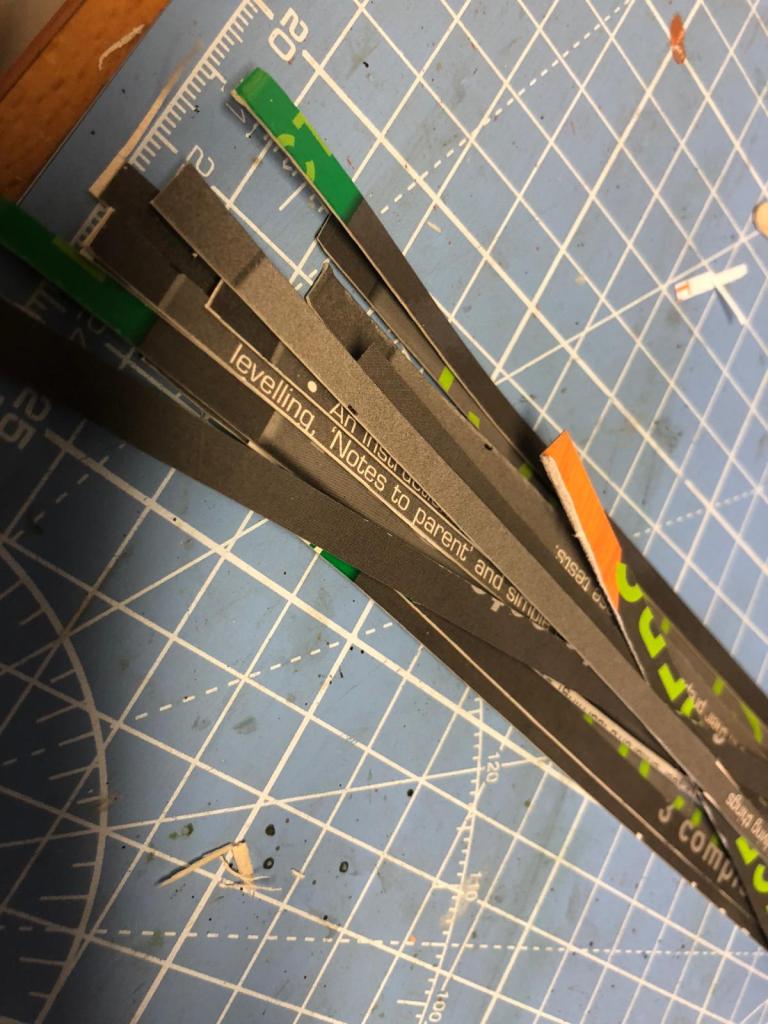
The first two buildings were the stable and the barn and the first step on these was to plank them and add tiles/roof, I did this using thick paper/card. This is just to create a little bit of structure to allow a plank pattern to show throgh as opposed to a flatish MDF surface. Note that I plank vertical.
This leaves them looking like this.
I use some harder cardboard from a cereal packet for the roof planks and for the tiles I bought a tile set from Sarissa (but there is an alternative presented lated on how to do something similar). You basically cut them with a craft knife into strips pva the building and work your way through it – it takes a while but it is really worth the time invested.
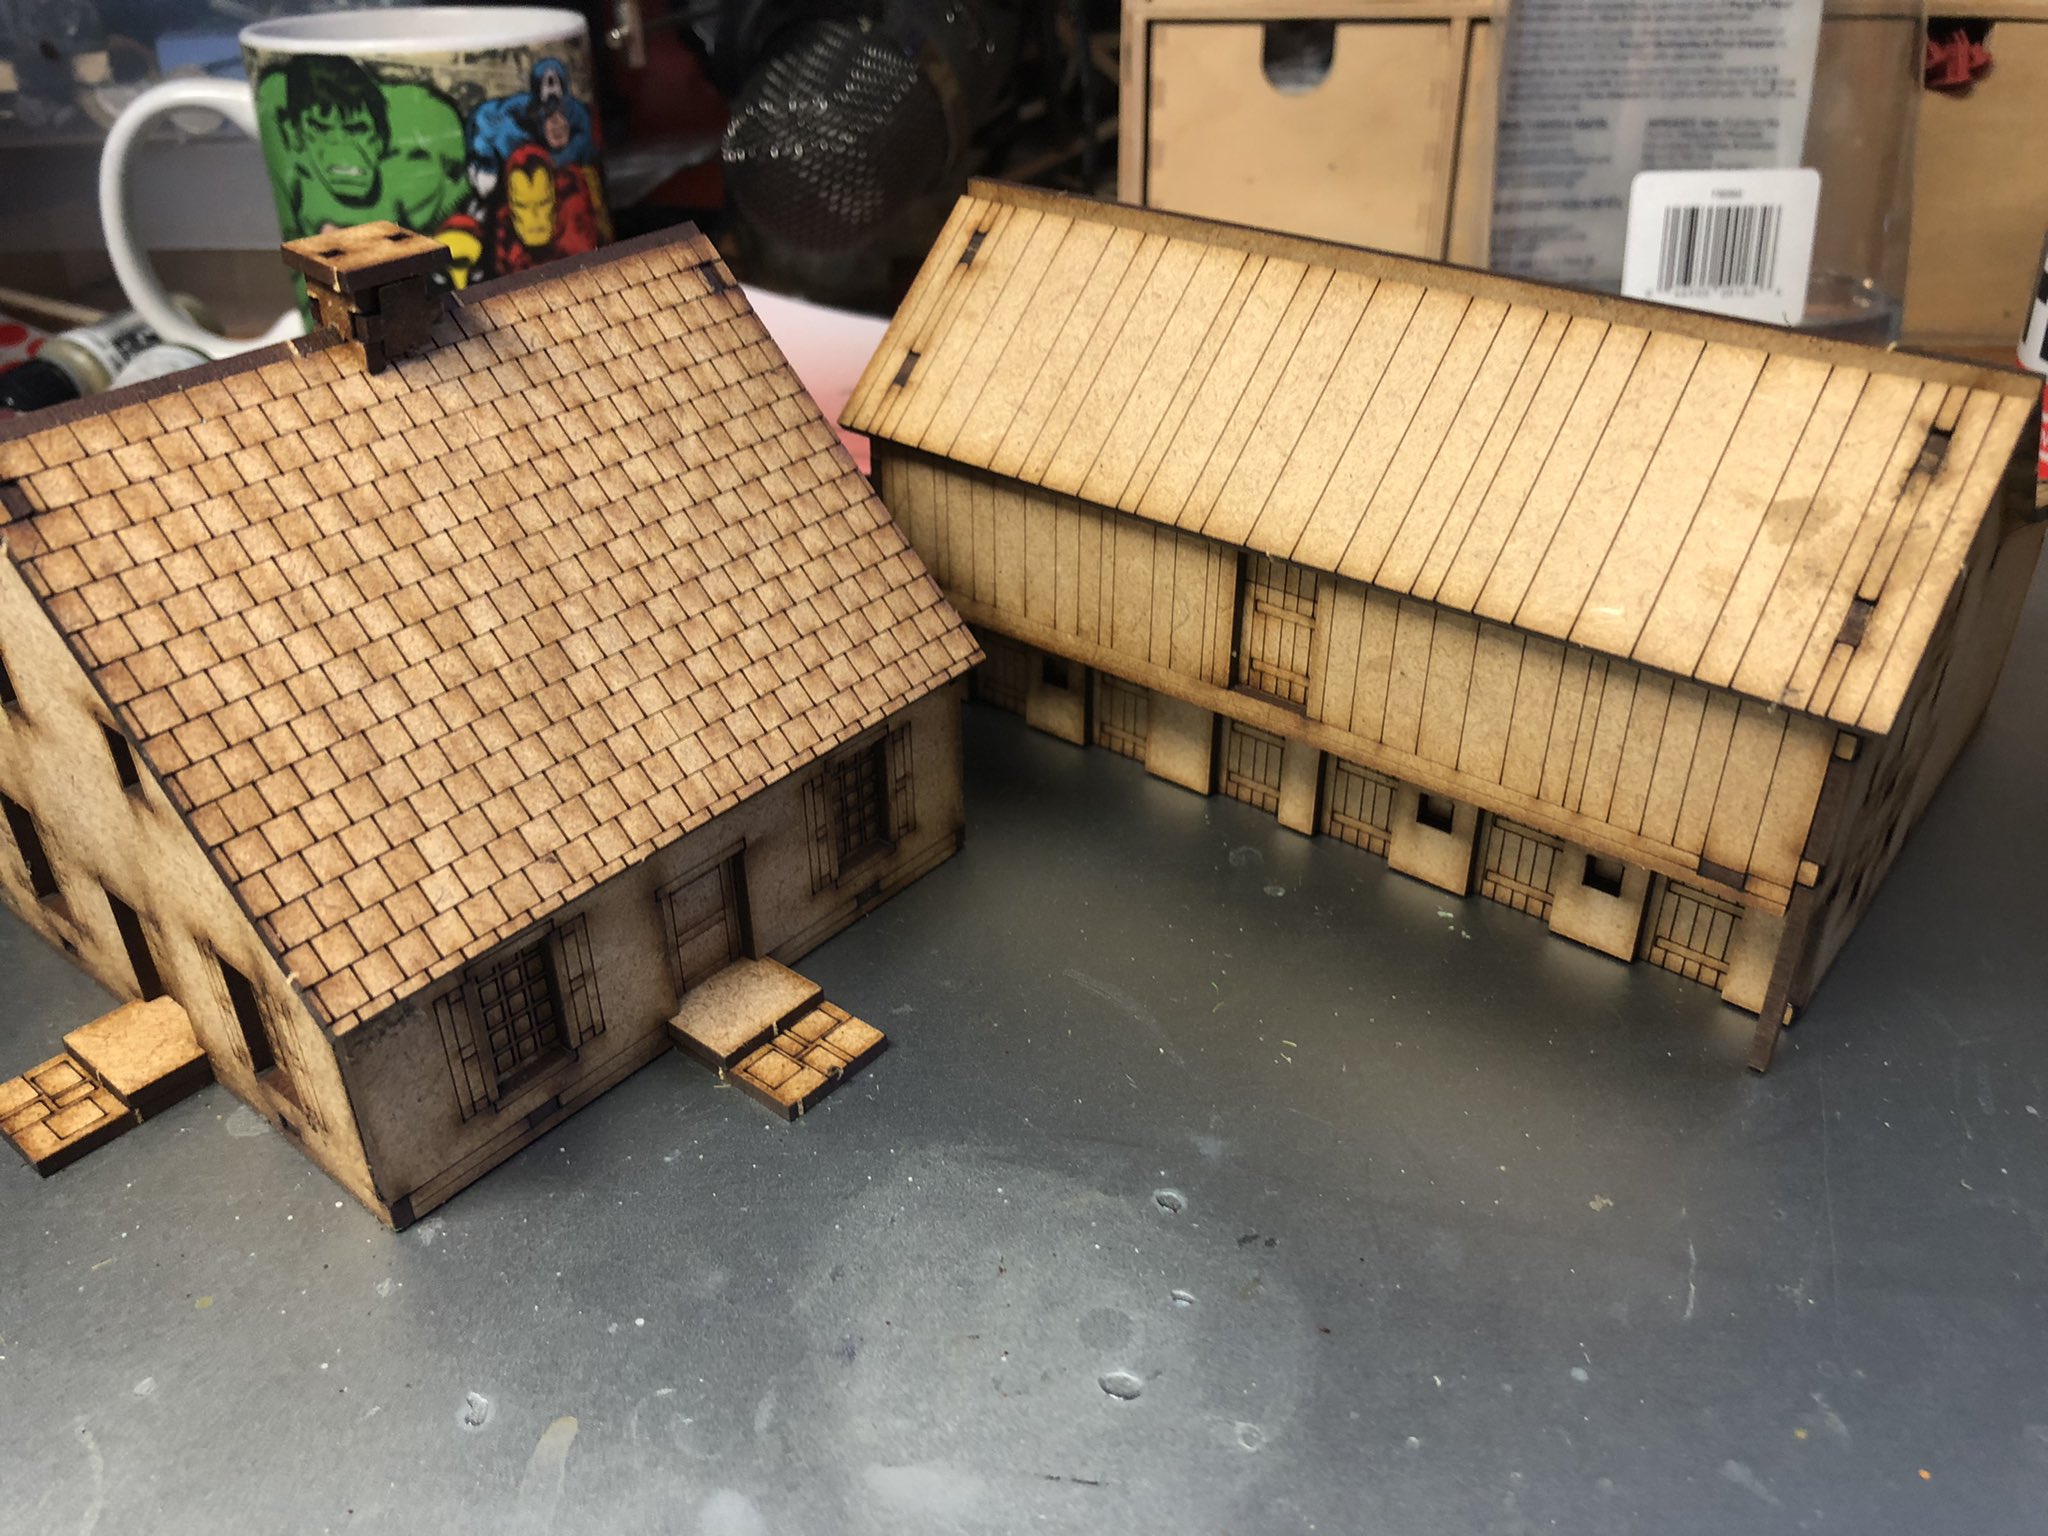
I painted them in Hull red and then another layer of red mixed with hull red (vallejo paint) added some white detail and quick weathering. They really look the deal, if I can say so myself.
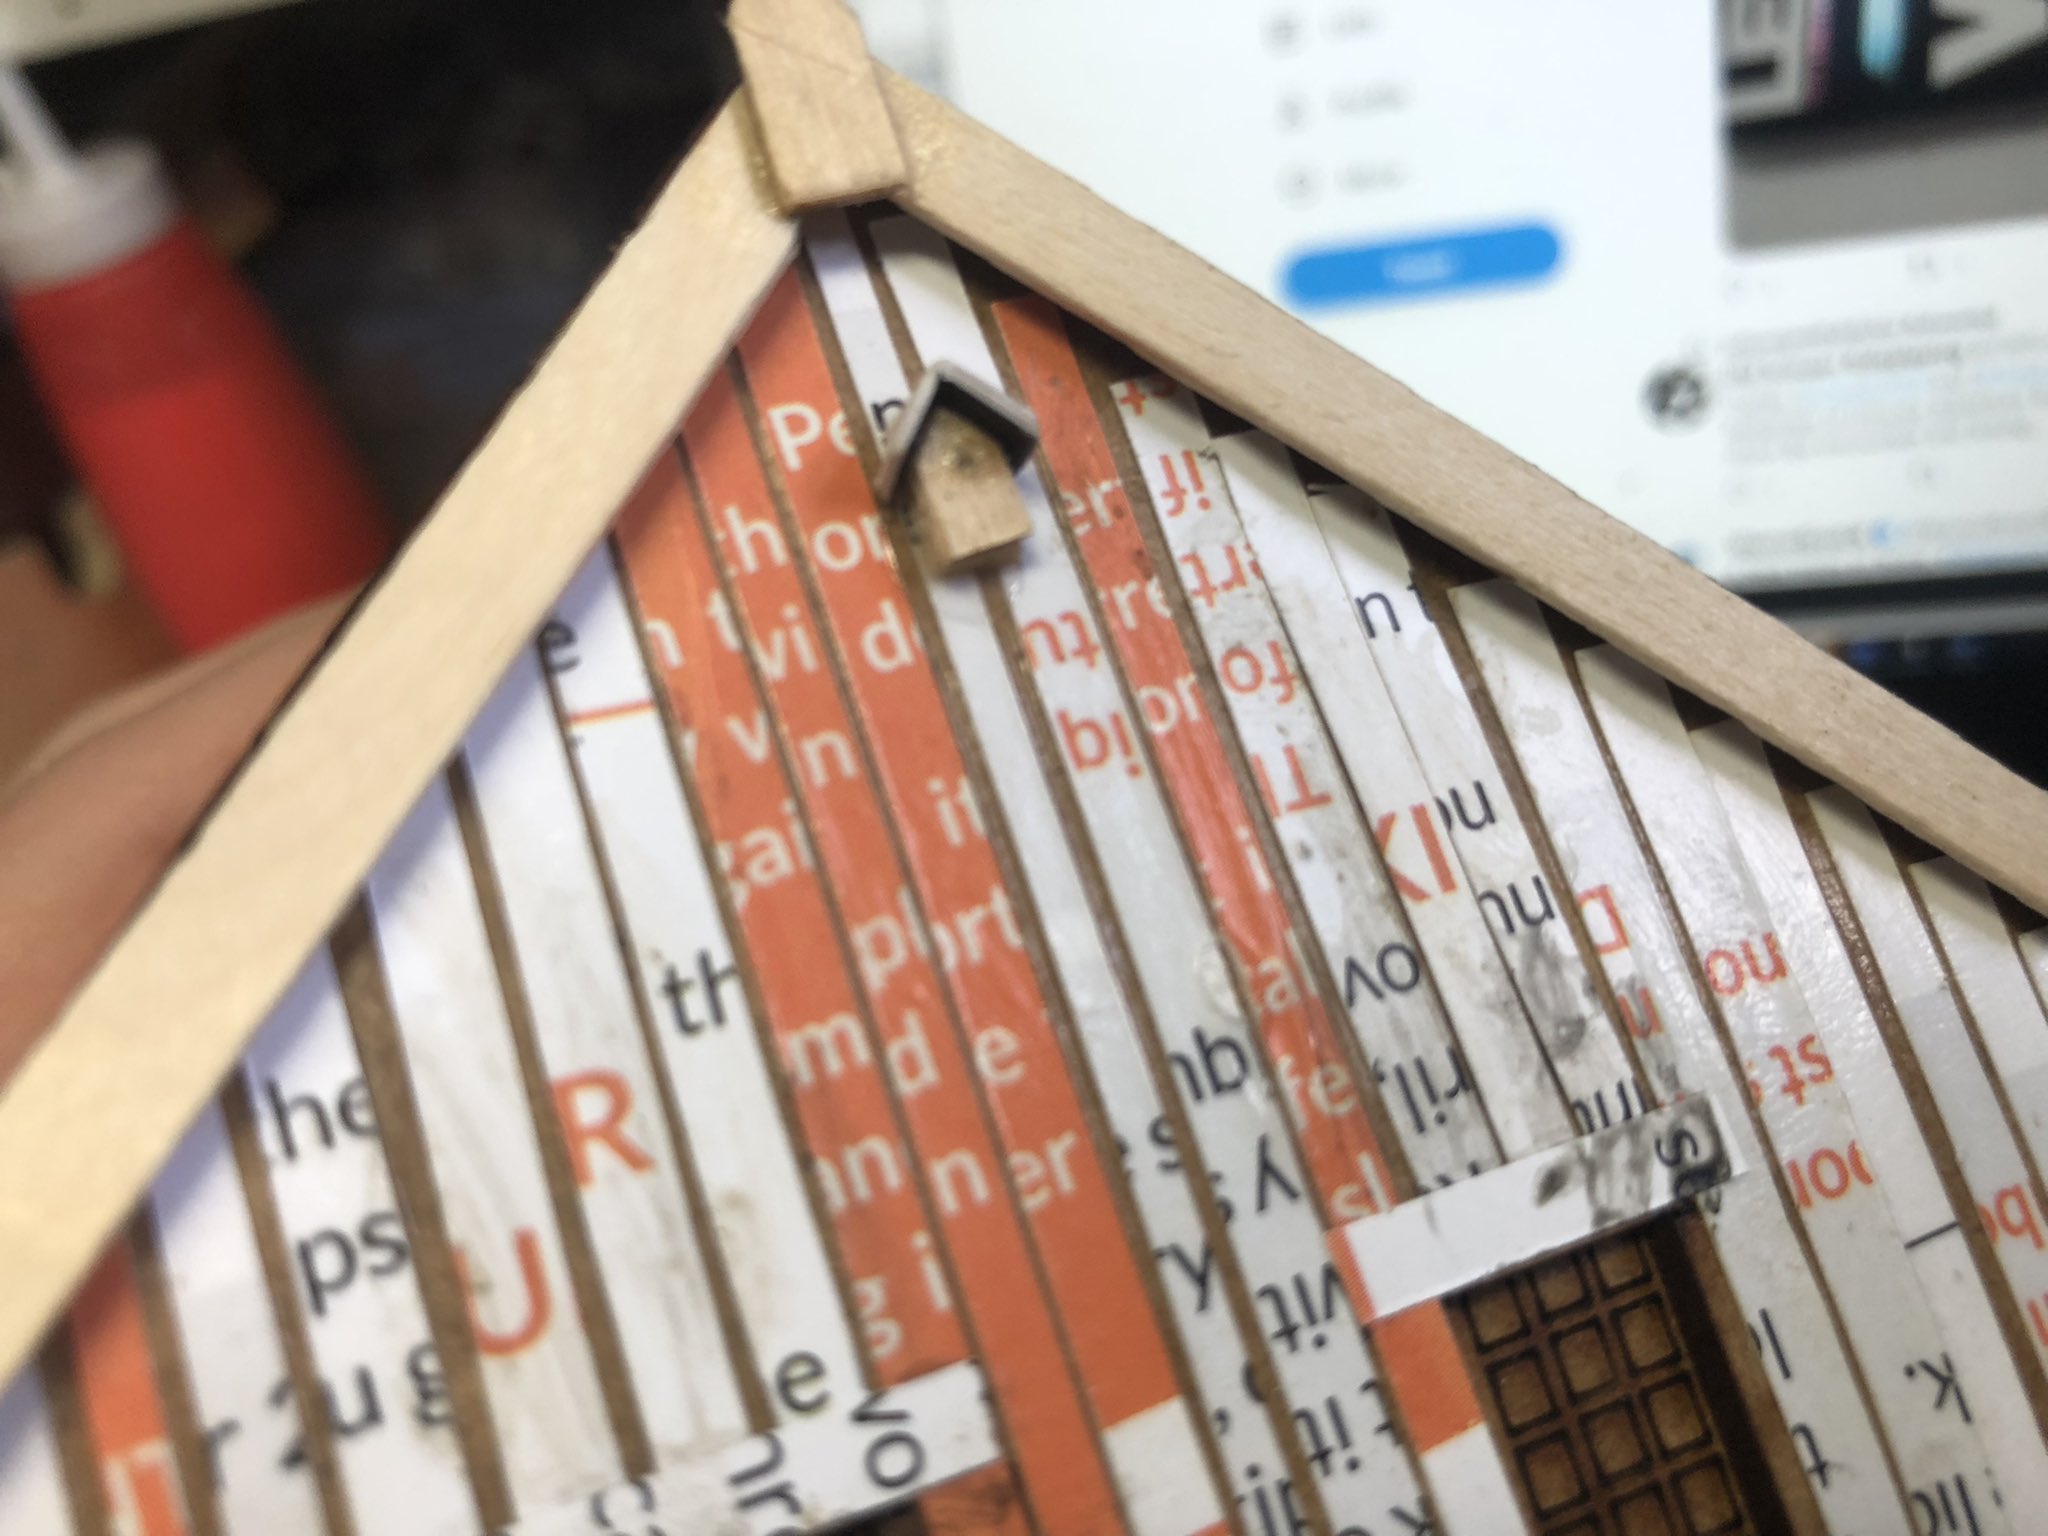
Next up the two houses
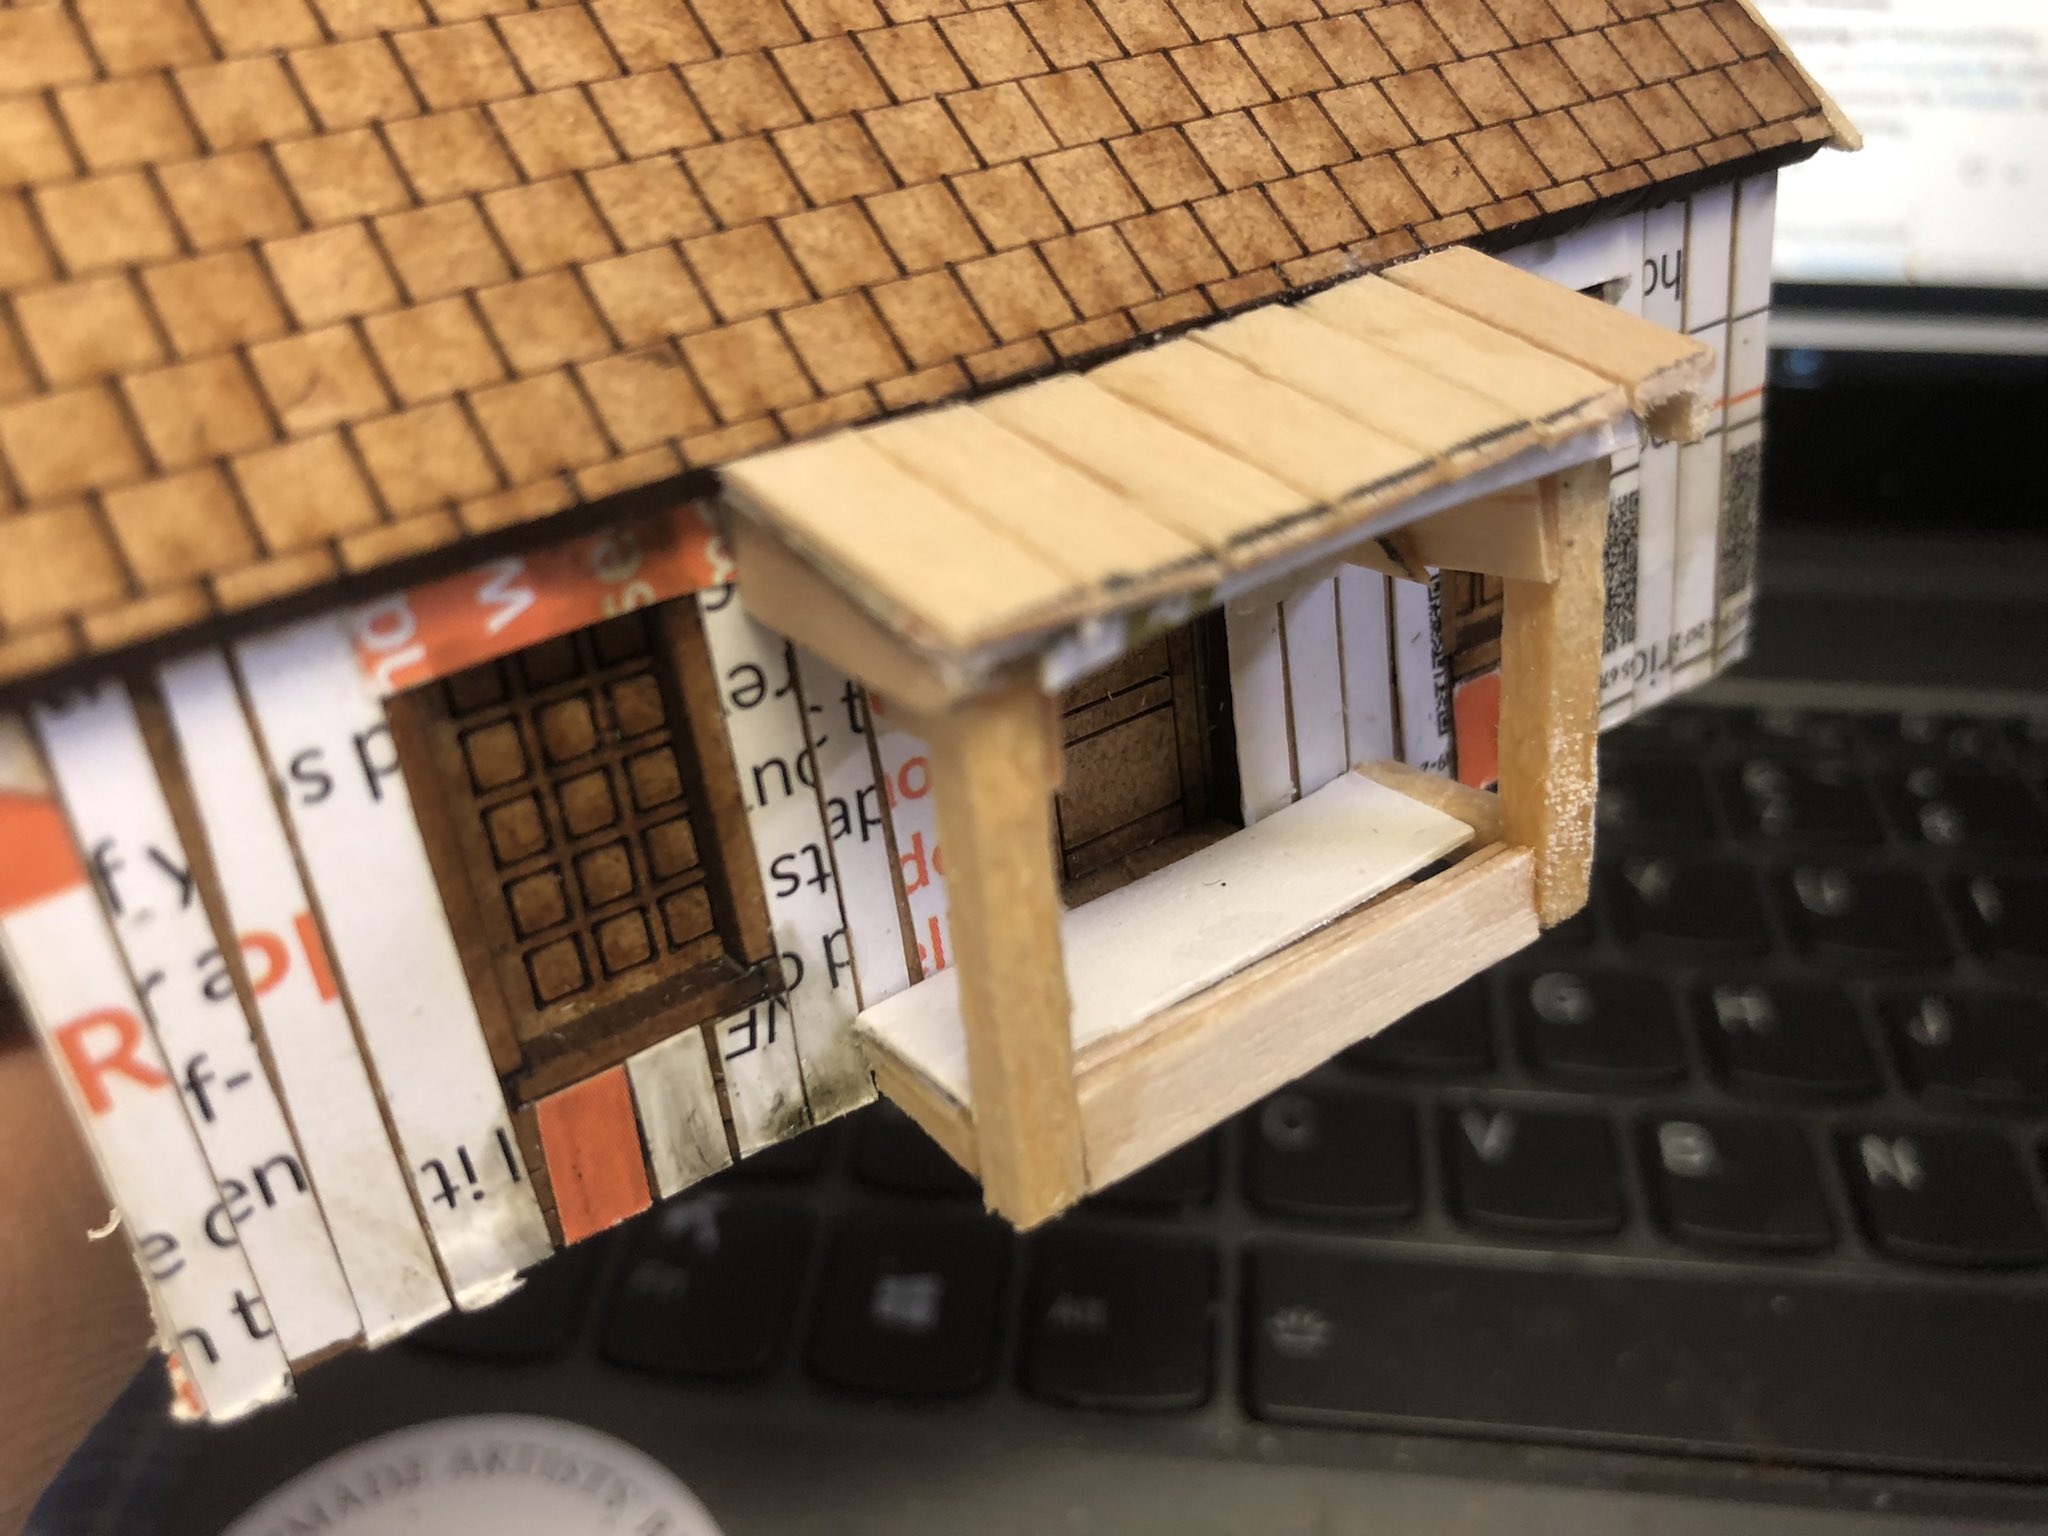
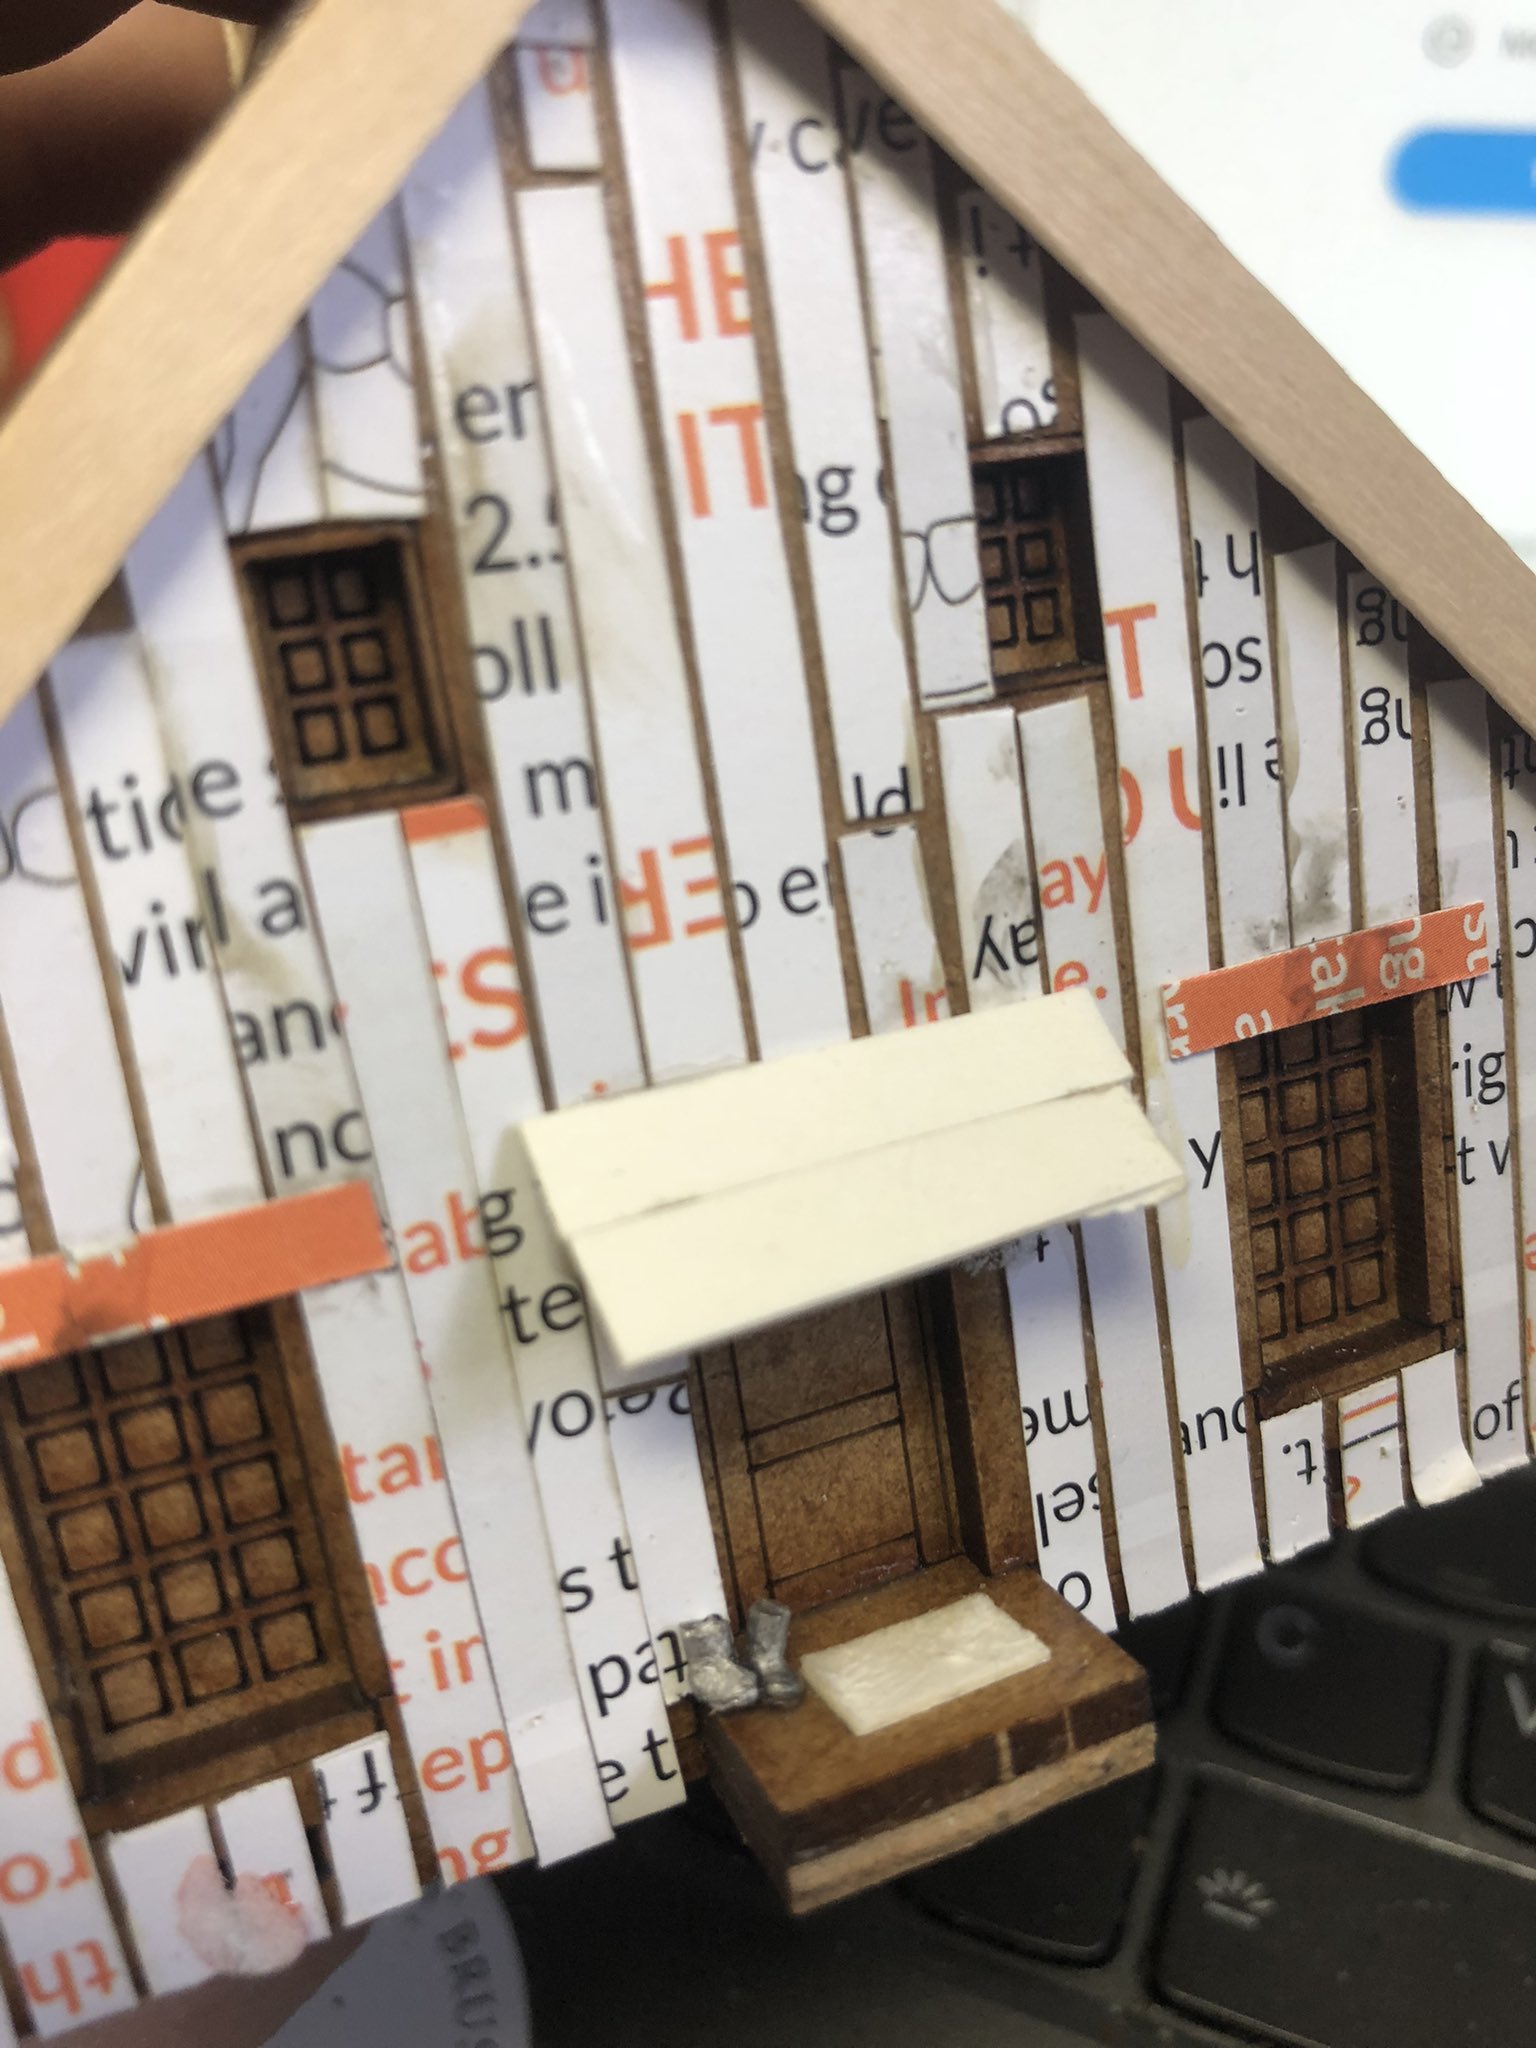
First the “Dunkers Church”, with some detail being added after planking and coffee stirer detailing, including a bird house (My great Grandad apparently had a bird house on the back of this house that he was very fond of)….
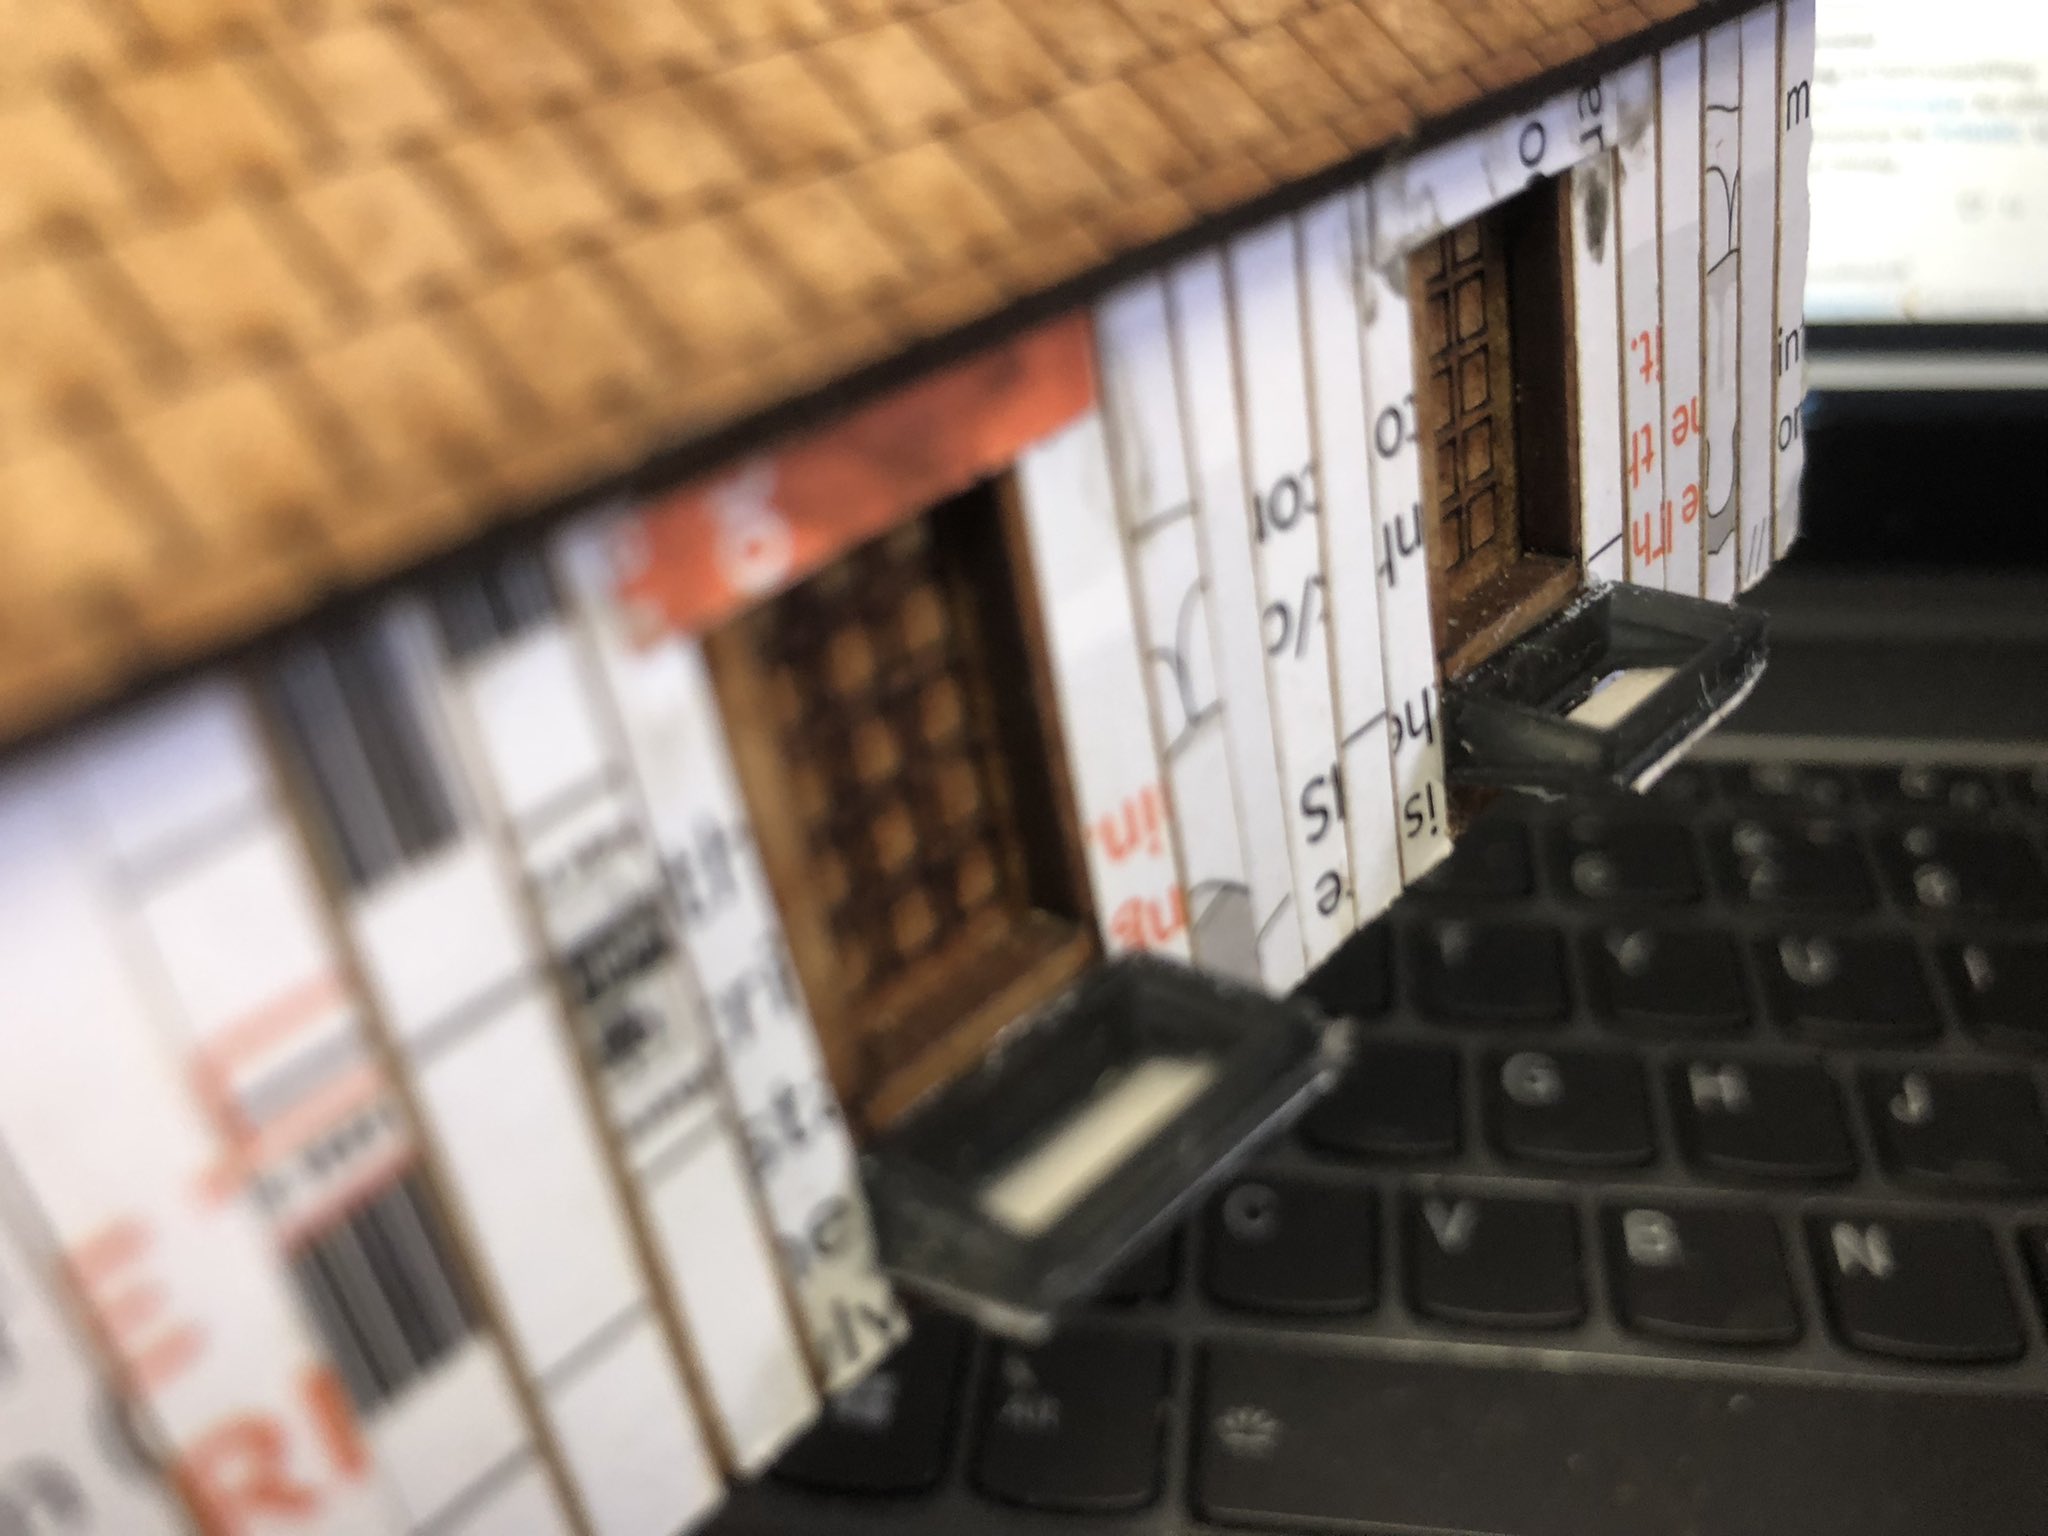
Some planters outside the windows (these will be filled with plants later).
A front porchA roof on the back (well side) door and some boots and carpet to wipe them clean before entering.
The house will need some roof tiling – I am waiting for some from Sarissa, so it will be painted next time.
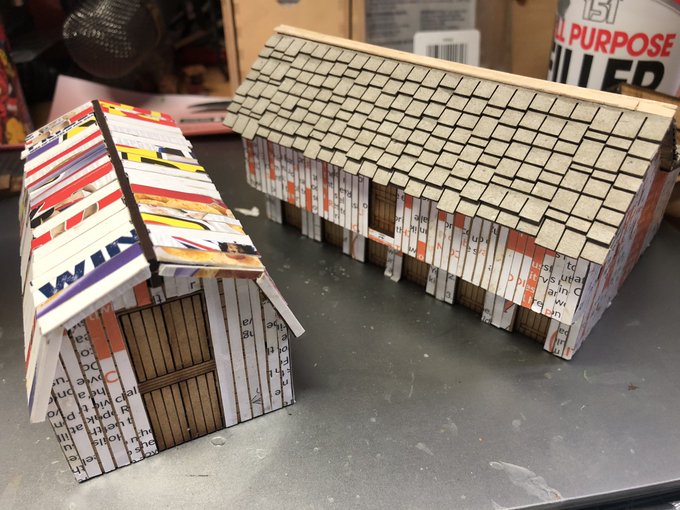
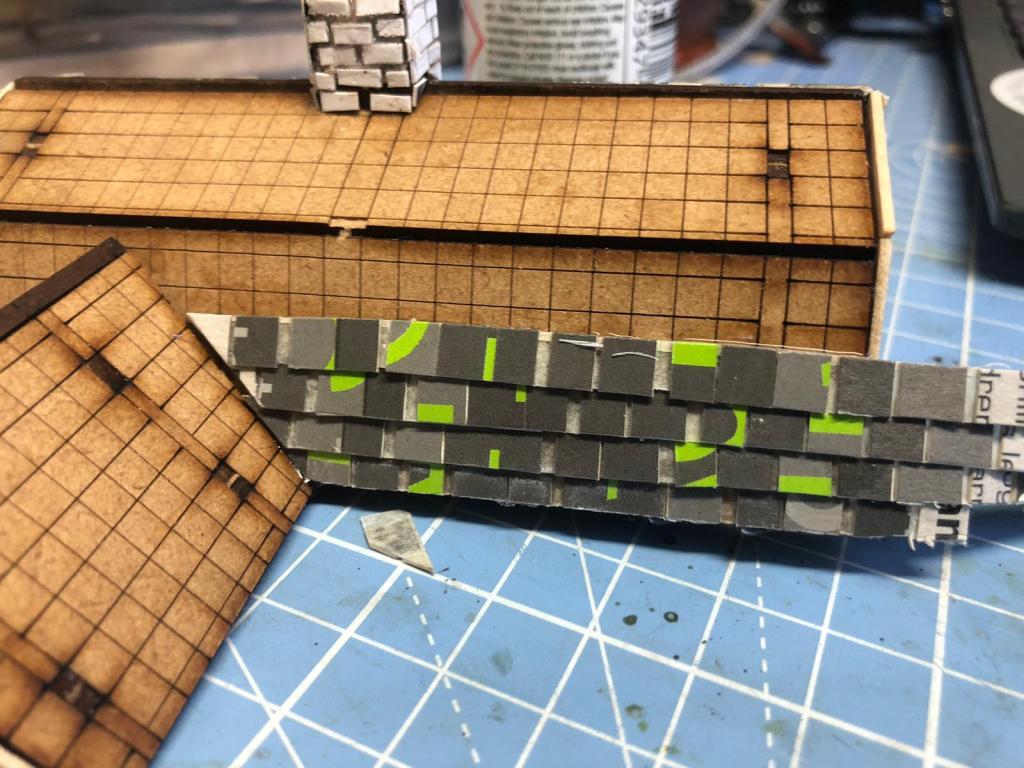
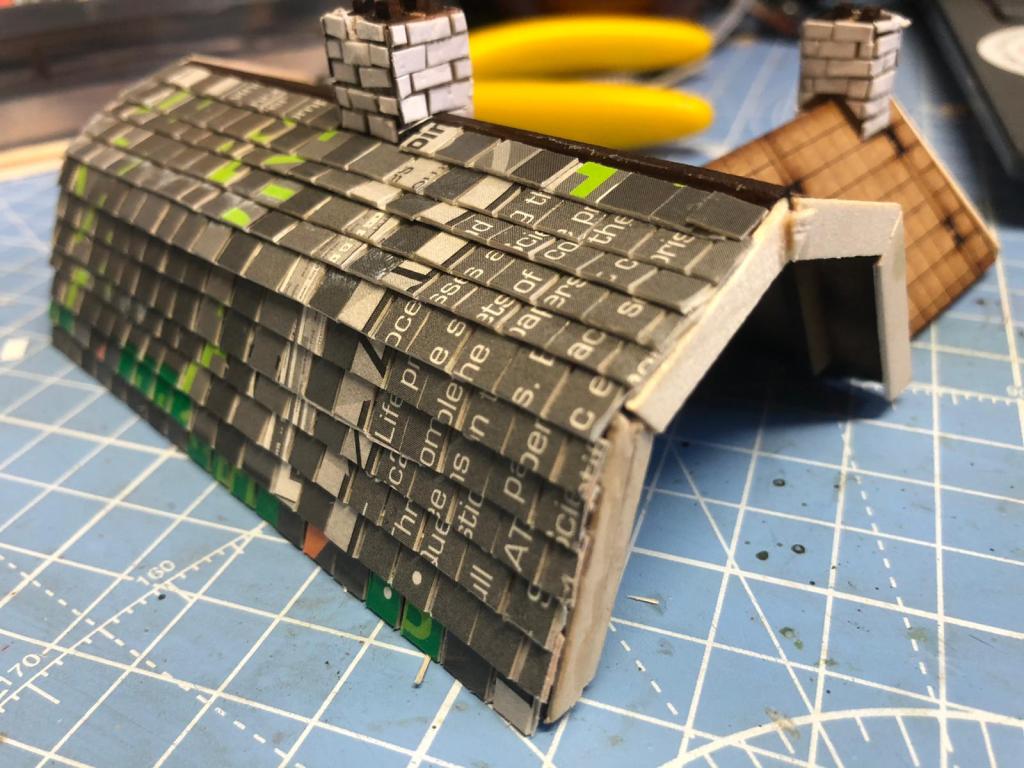
As for the Dutch House (done in the same way as the others), I wanted to use this one to illustrated how you can make tiling a roof a little bit quicker than adding tile by tile, as I used to do. You can of course get tiling cardboard from Sarissa for about £4.5 per roof as was used for one of the barns as shown before. Anyway here is how I do it, you need cardboard (like a cereal pack), a sharp knife/scissors, ruler (metal works best), masking tape and a little bit of time.
First take a piece of cardboard and mark up the width of the tile you require, I used 5mm for 15mm (this is actually a 0.5 meter tile in scale but it kind of works you might want to go finer)
Cut out strips with hobby knife or scissors
Put the strips together between two strips of masking tape, leaving a very small gap between the tiles.
Thne turn it around and add tape all overTurn it around again – you now have a “sheet” of cardboard strips (I used a similar technique when I did a chess board in woodworking many years ago).
Use scissors or a sharp hobby knife with a ruler firmly pressed against the sheet and cut strips the other way to create strips like this (a row of tiles being held together by the masking tape, as shown below).
Now use this to clad your house (use Superglue due to the masking tape not being that PVA compatiable), start from the bottom and pretest each level before you glue it. DID I SAY USE SUPER GLUE. Have good ventilation with the glue.
This with trimmed borders.
It will look funny depending of what cardboard you are using but it gets all painted over in the end so it is totally irrelevant. This is how the roof looks like when finished – you could make your tiles tighter and also cut more precise than I did but the point is that the masking tape allows you to do this really quick as you add strip by strip instead of brick (I mean tile) by brick.
Next time we will paint the two houses, after I added some of Sarissa tiles on the other one.
Not really 1943, more like 1973, Dad on the left with his mates playing badminton on a nice sunny day. Note the houses in the background, that is Dalarna folks.
Lots of things going on at the moment but getting in the occasional session and have been doing a fair few things recently.
A dropship for the 28mm stuff the Little One and I are doing, and also a really exciting Space Bus on its way.
Some clutter for Urban Sci-Fi gaming
A few more things for the Mutant 1984 project
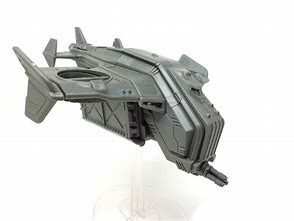
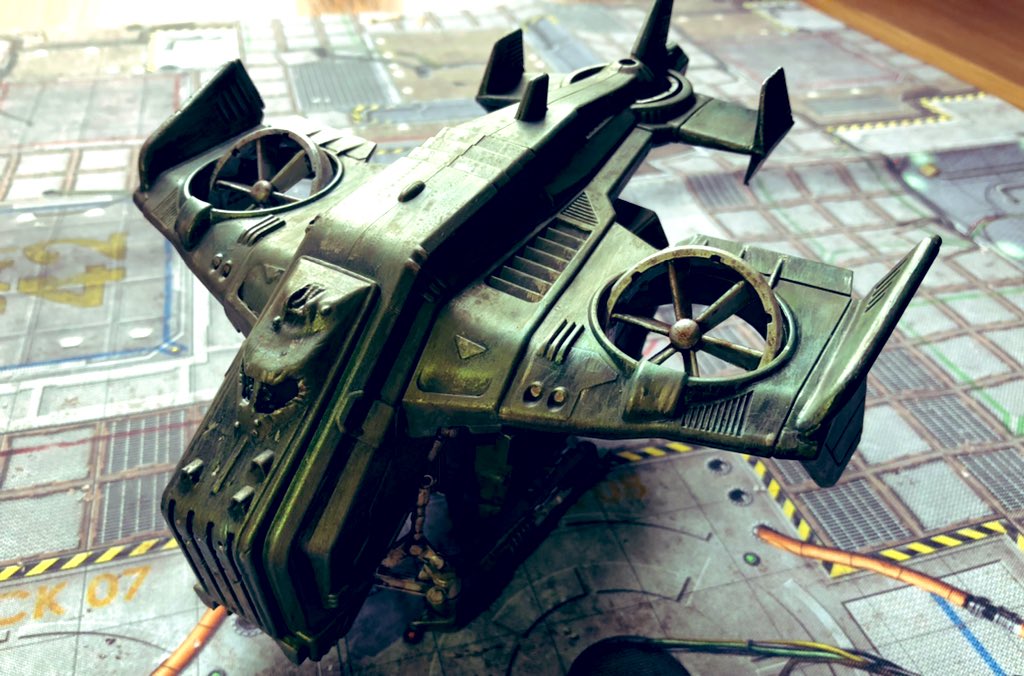
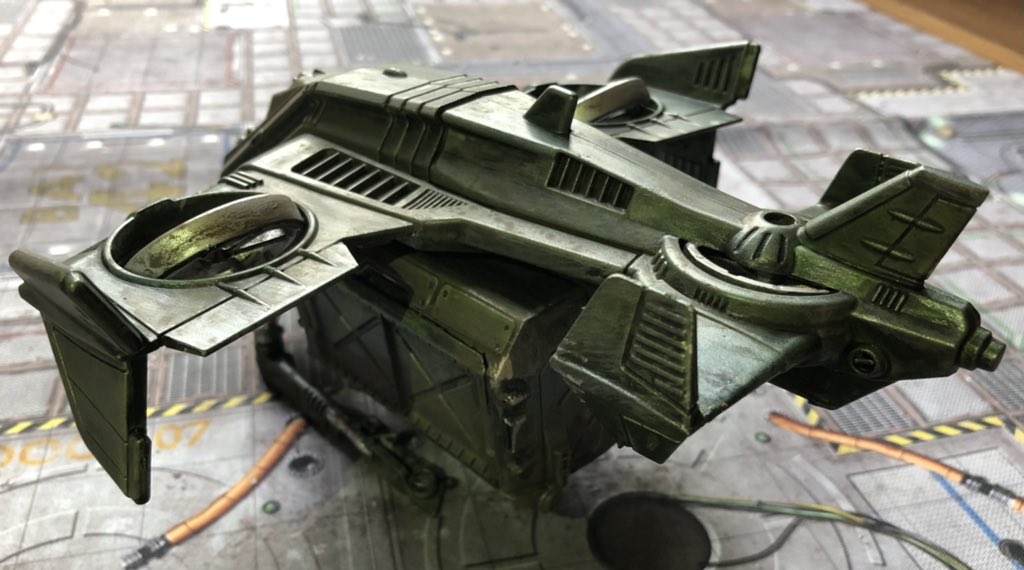
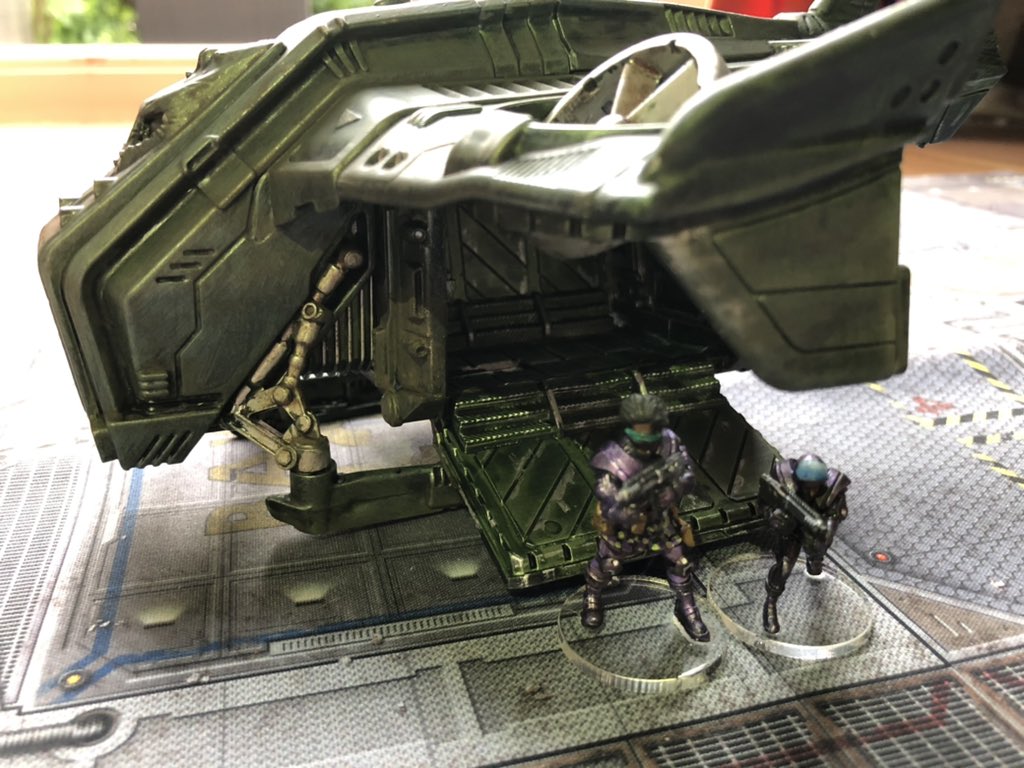
Dropship
Following from our two games so far with the Stargrave rules (we showed some pictures from one of the games here), the Little One and I felt the need to get some shuttles of dropship without breaking the bank and we found a nice model from Mantic Games (model here) that seemed to fit the bill – it sells for about £25 but we managed to get one for £20 including postage from Ebay, as usually there are some re-sellers that may sell it to you cheaper than buying directly from Mantic.
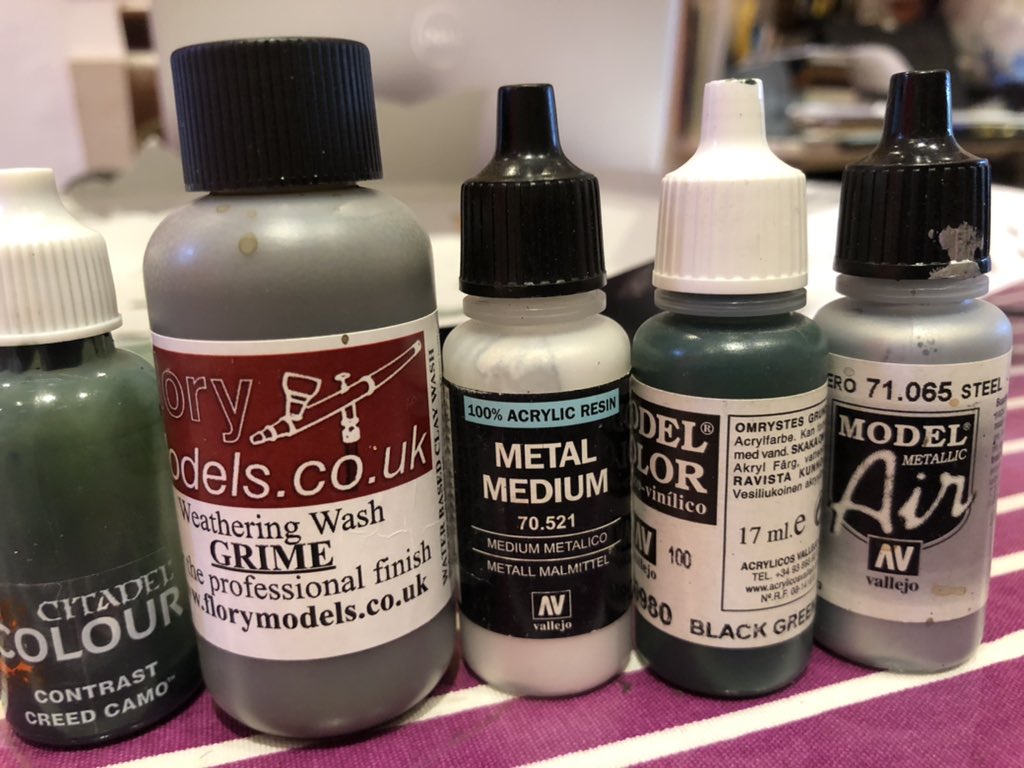
I spray painted the model with Silver paint and used a series of washes to get a dark green metal with grime look. The funnies part of it was the last step which was done applying some Flory Models Grime Wash (I bought a few of these washes some time ago and I am really happy with the effect after in essence just dabbing it on with a brush (you can get them from here).
Really happy how it came out – quick but effective.
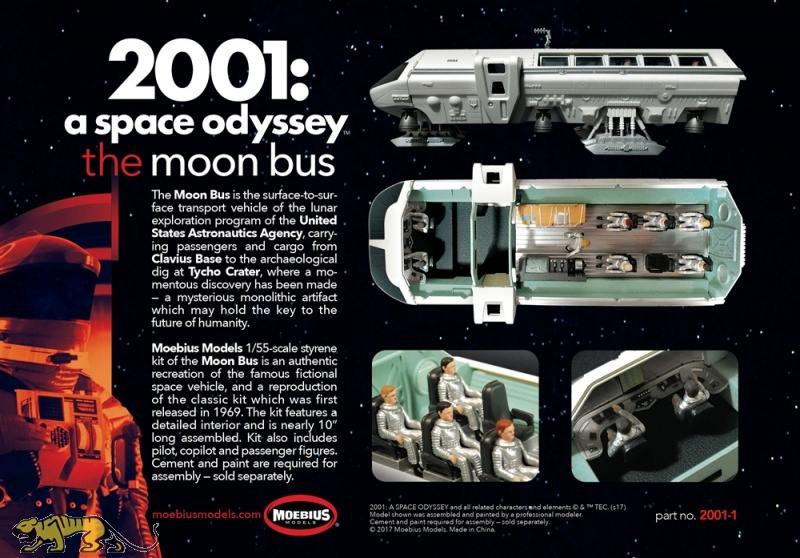
In addition we have order another flyer, a Space Bus from the 2001 movie, in 1/55 scale which hopefully will work (I will report back and let you know). It really works for me.
Clutter for Urban Sci-Fi Gaming
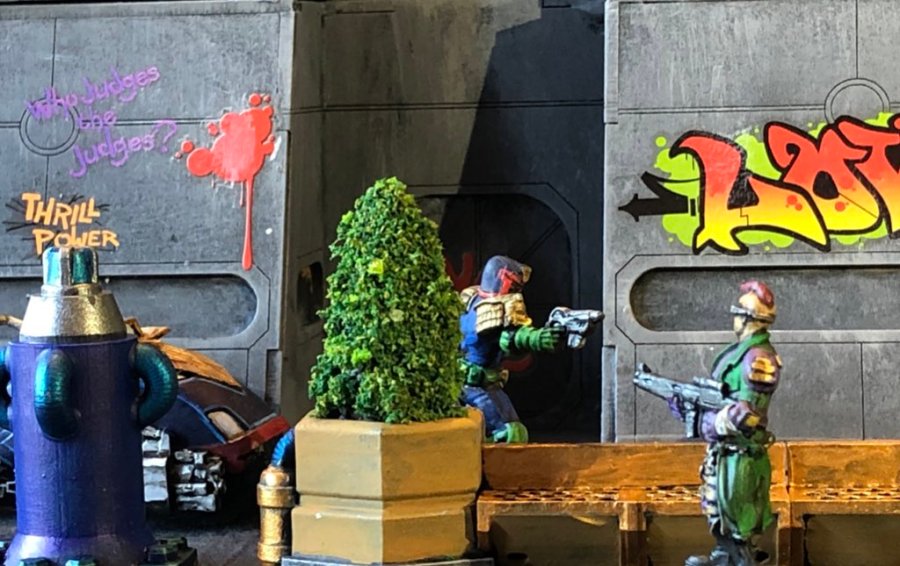
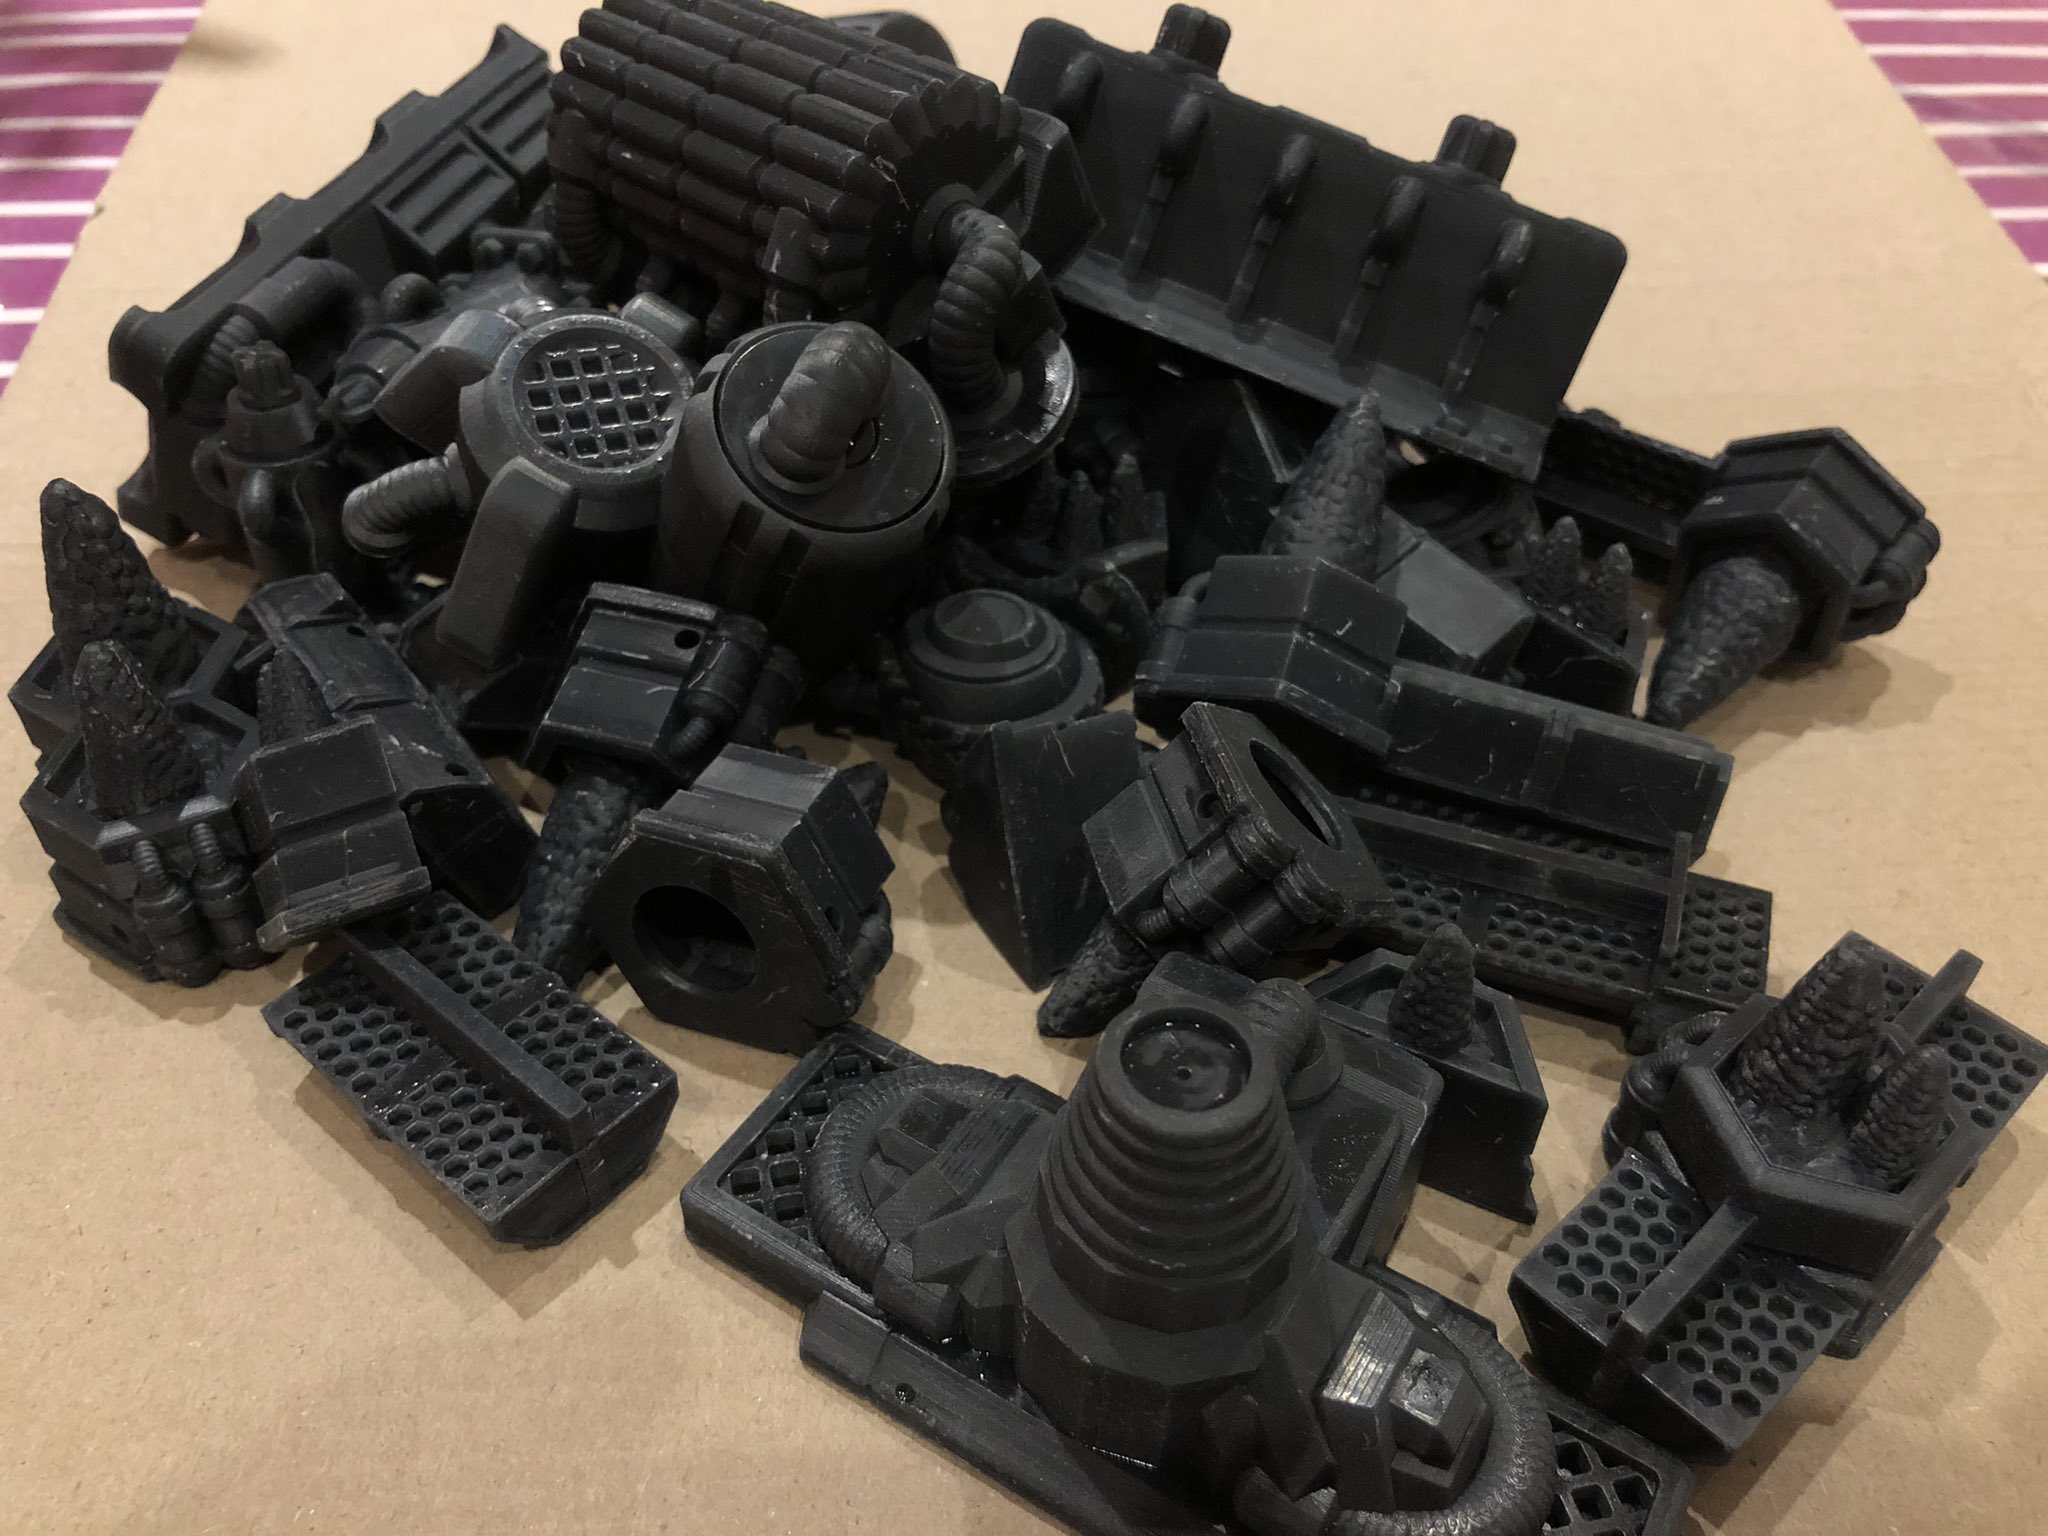
I had some 3D printed terrain I bought from Sabotag3d a year ago for my Judge Dredd project.
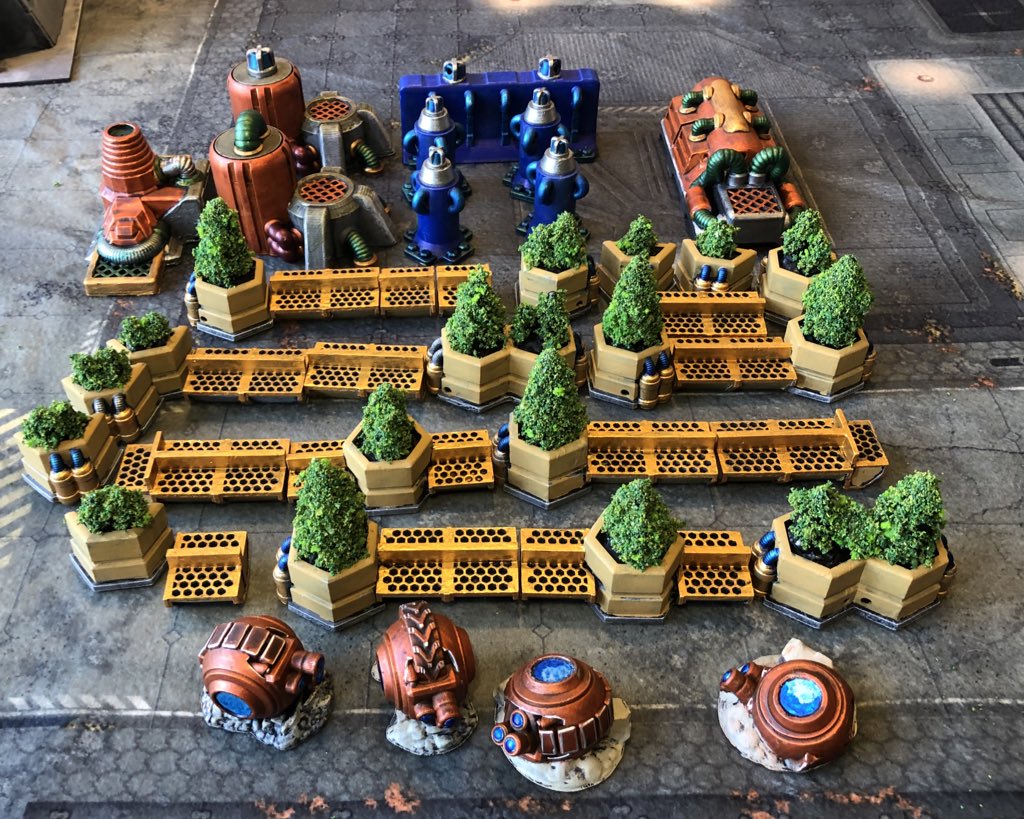
Put some paint on it this weekend trying to get a little bit of an overall cartoon feel to it all. All metallics are gold or silver base paint with contrast paint on top – I like the effect it gives.
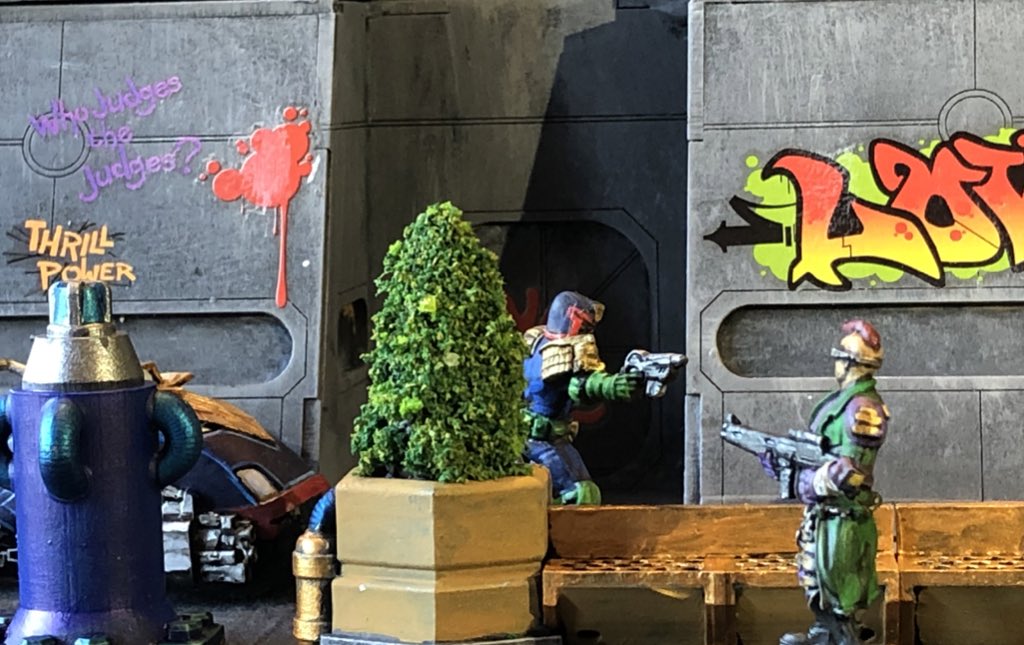
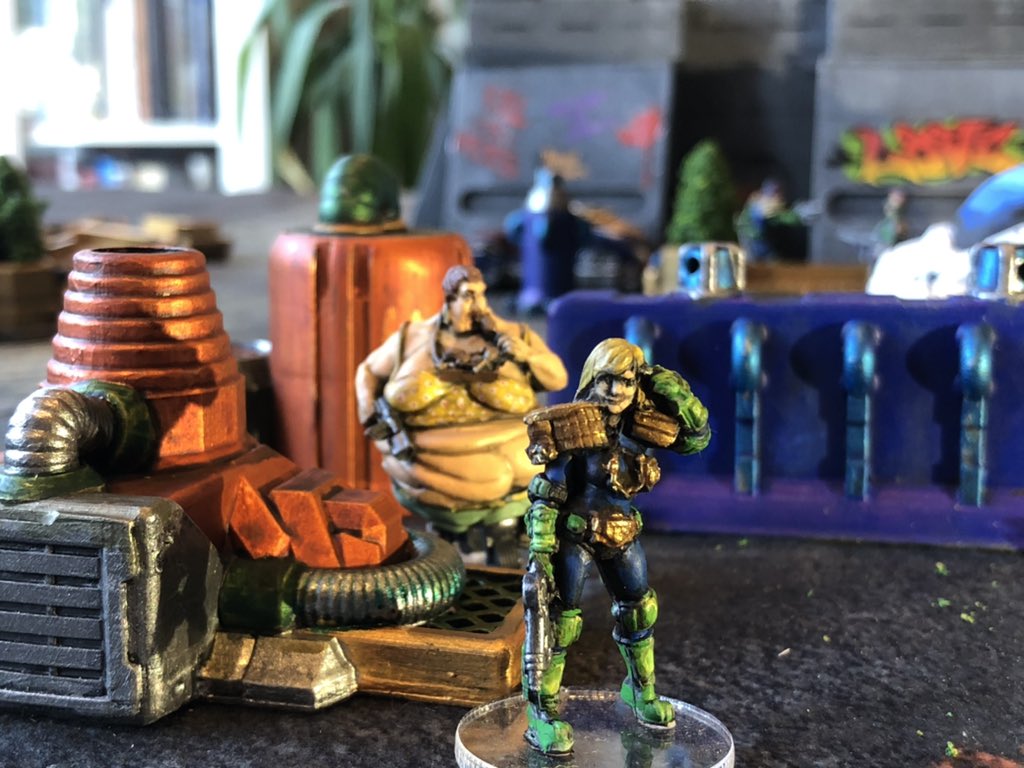
And of course with a little bit of miniatures and other terrain.
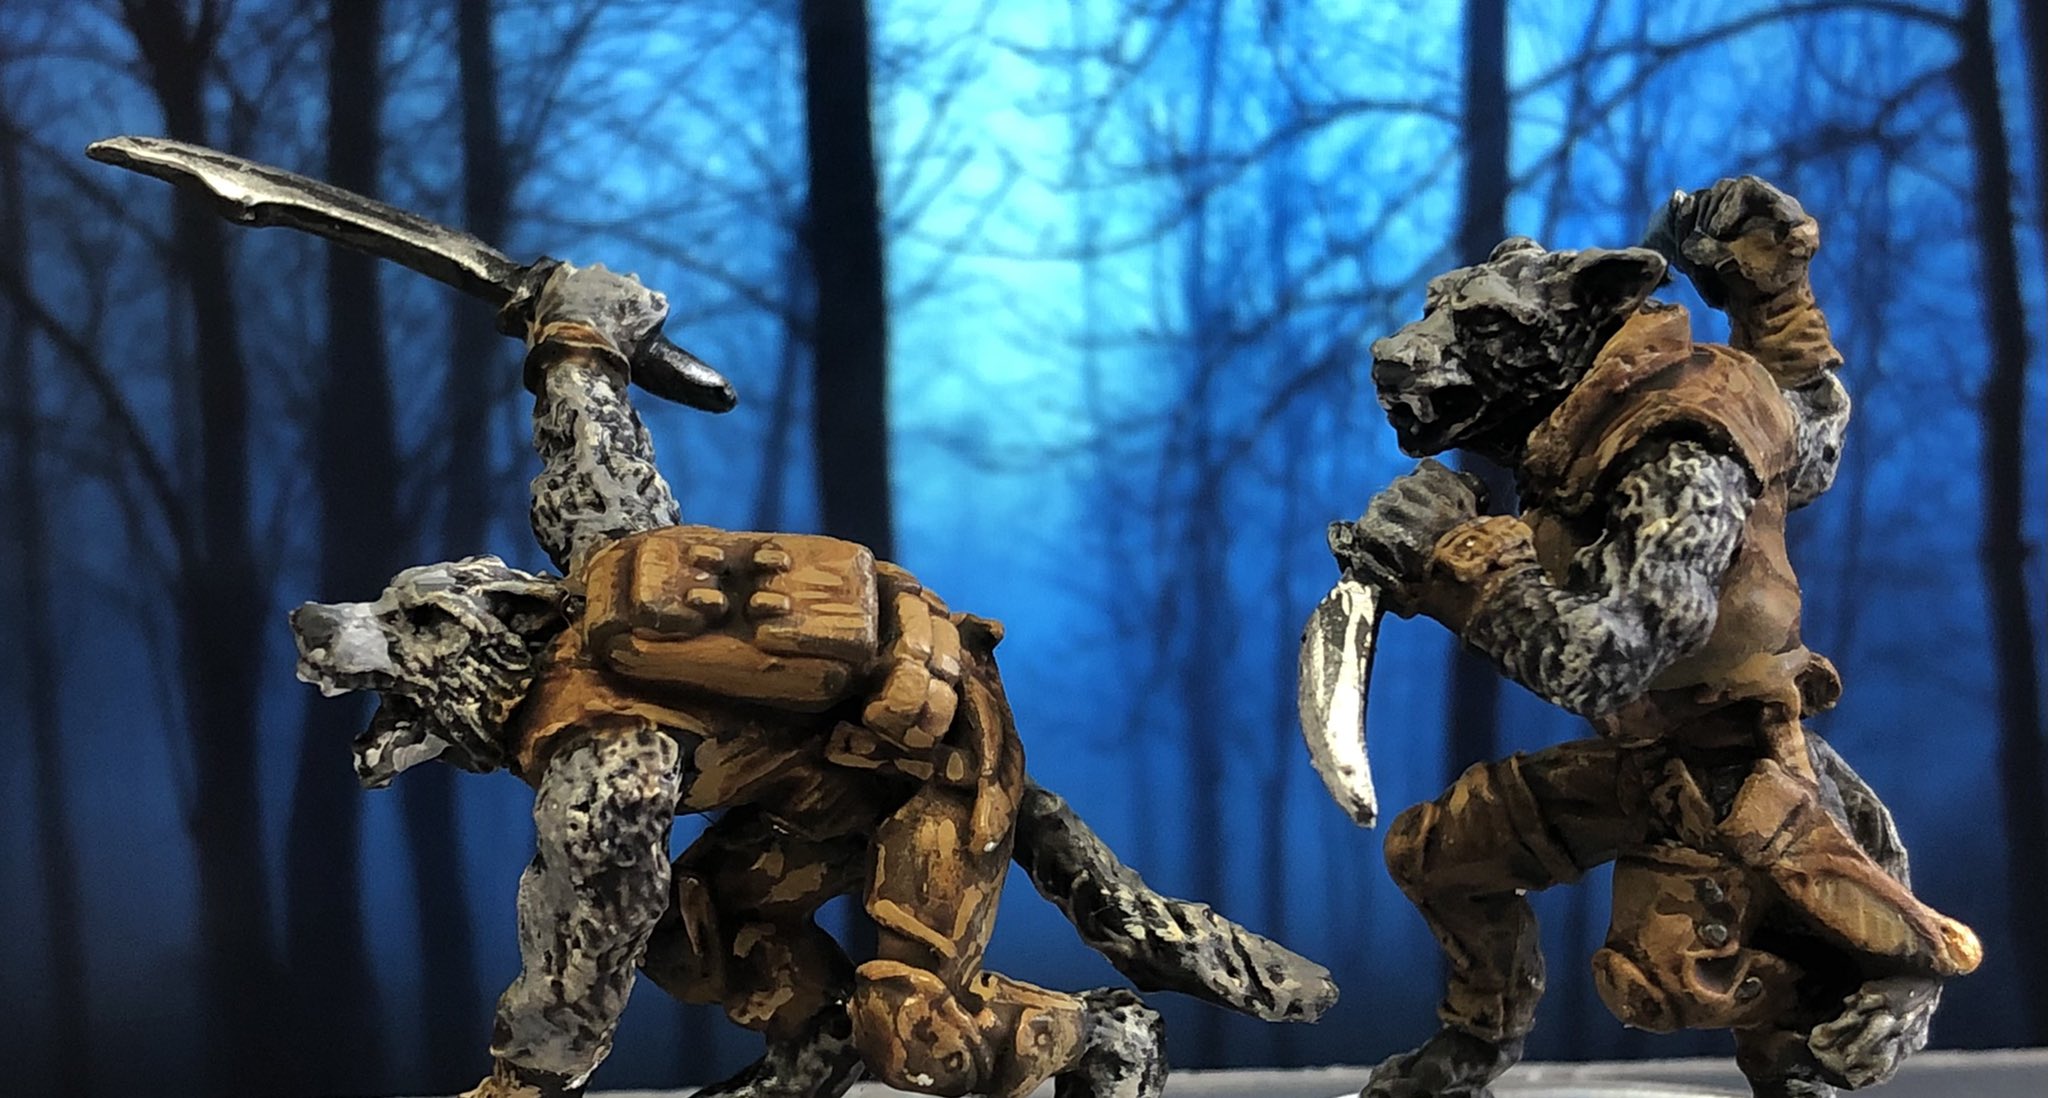
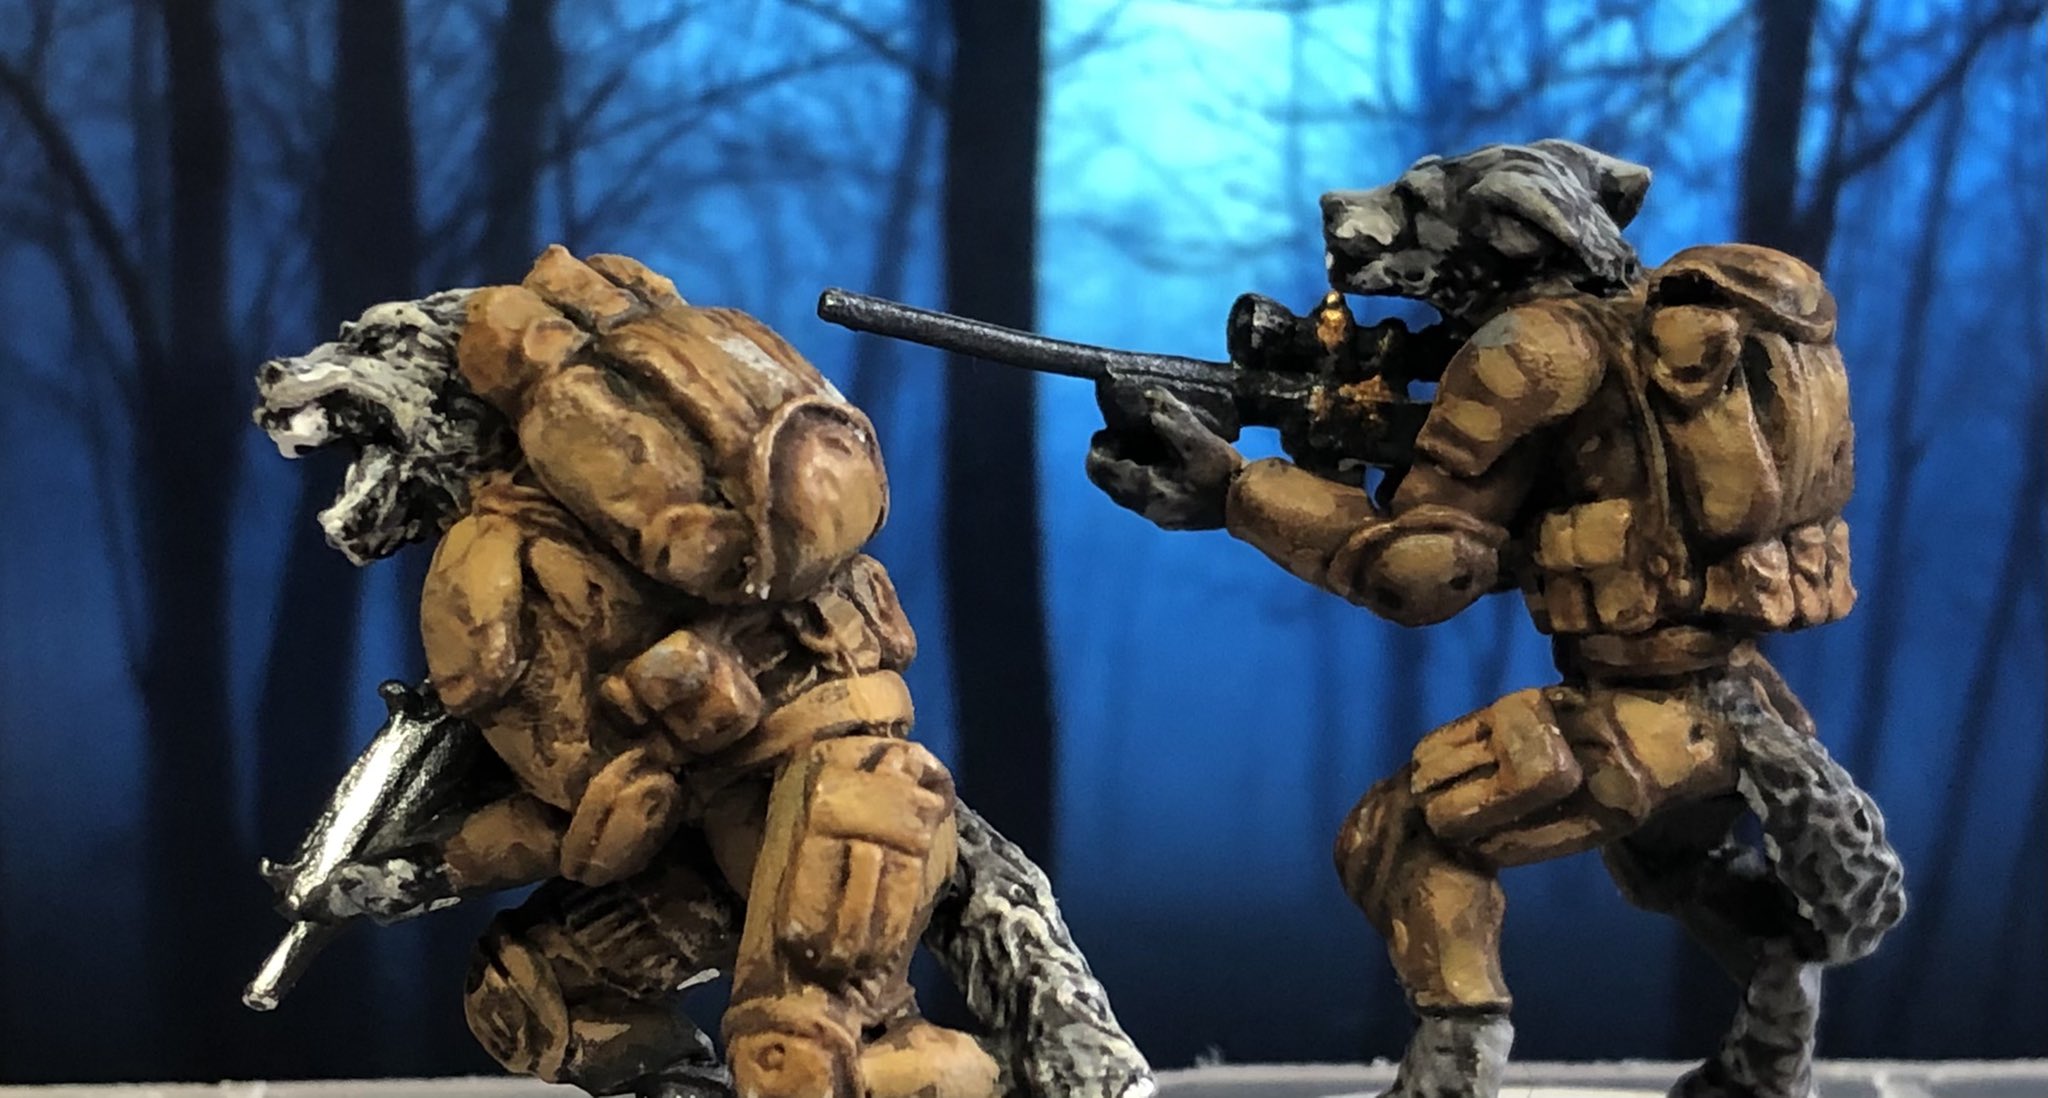
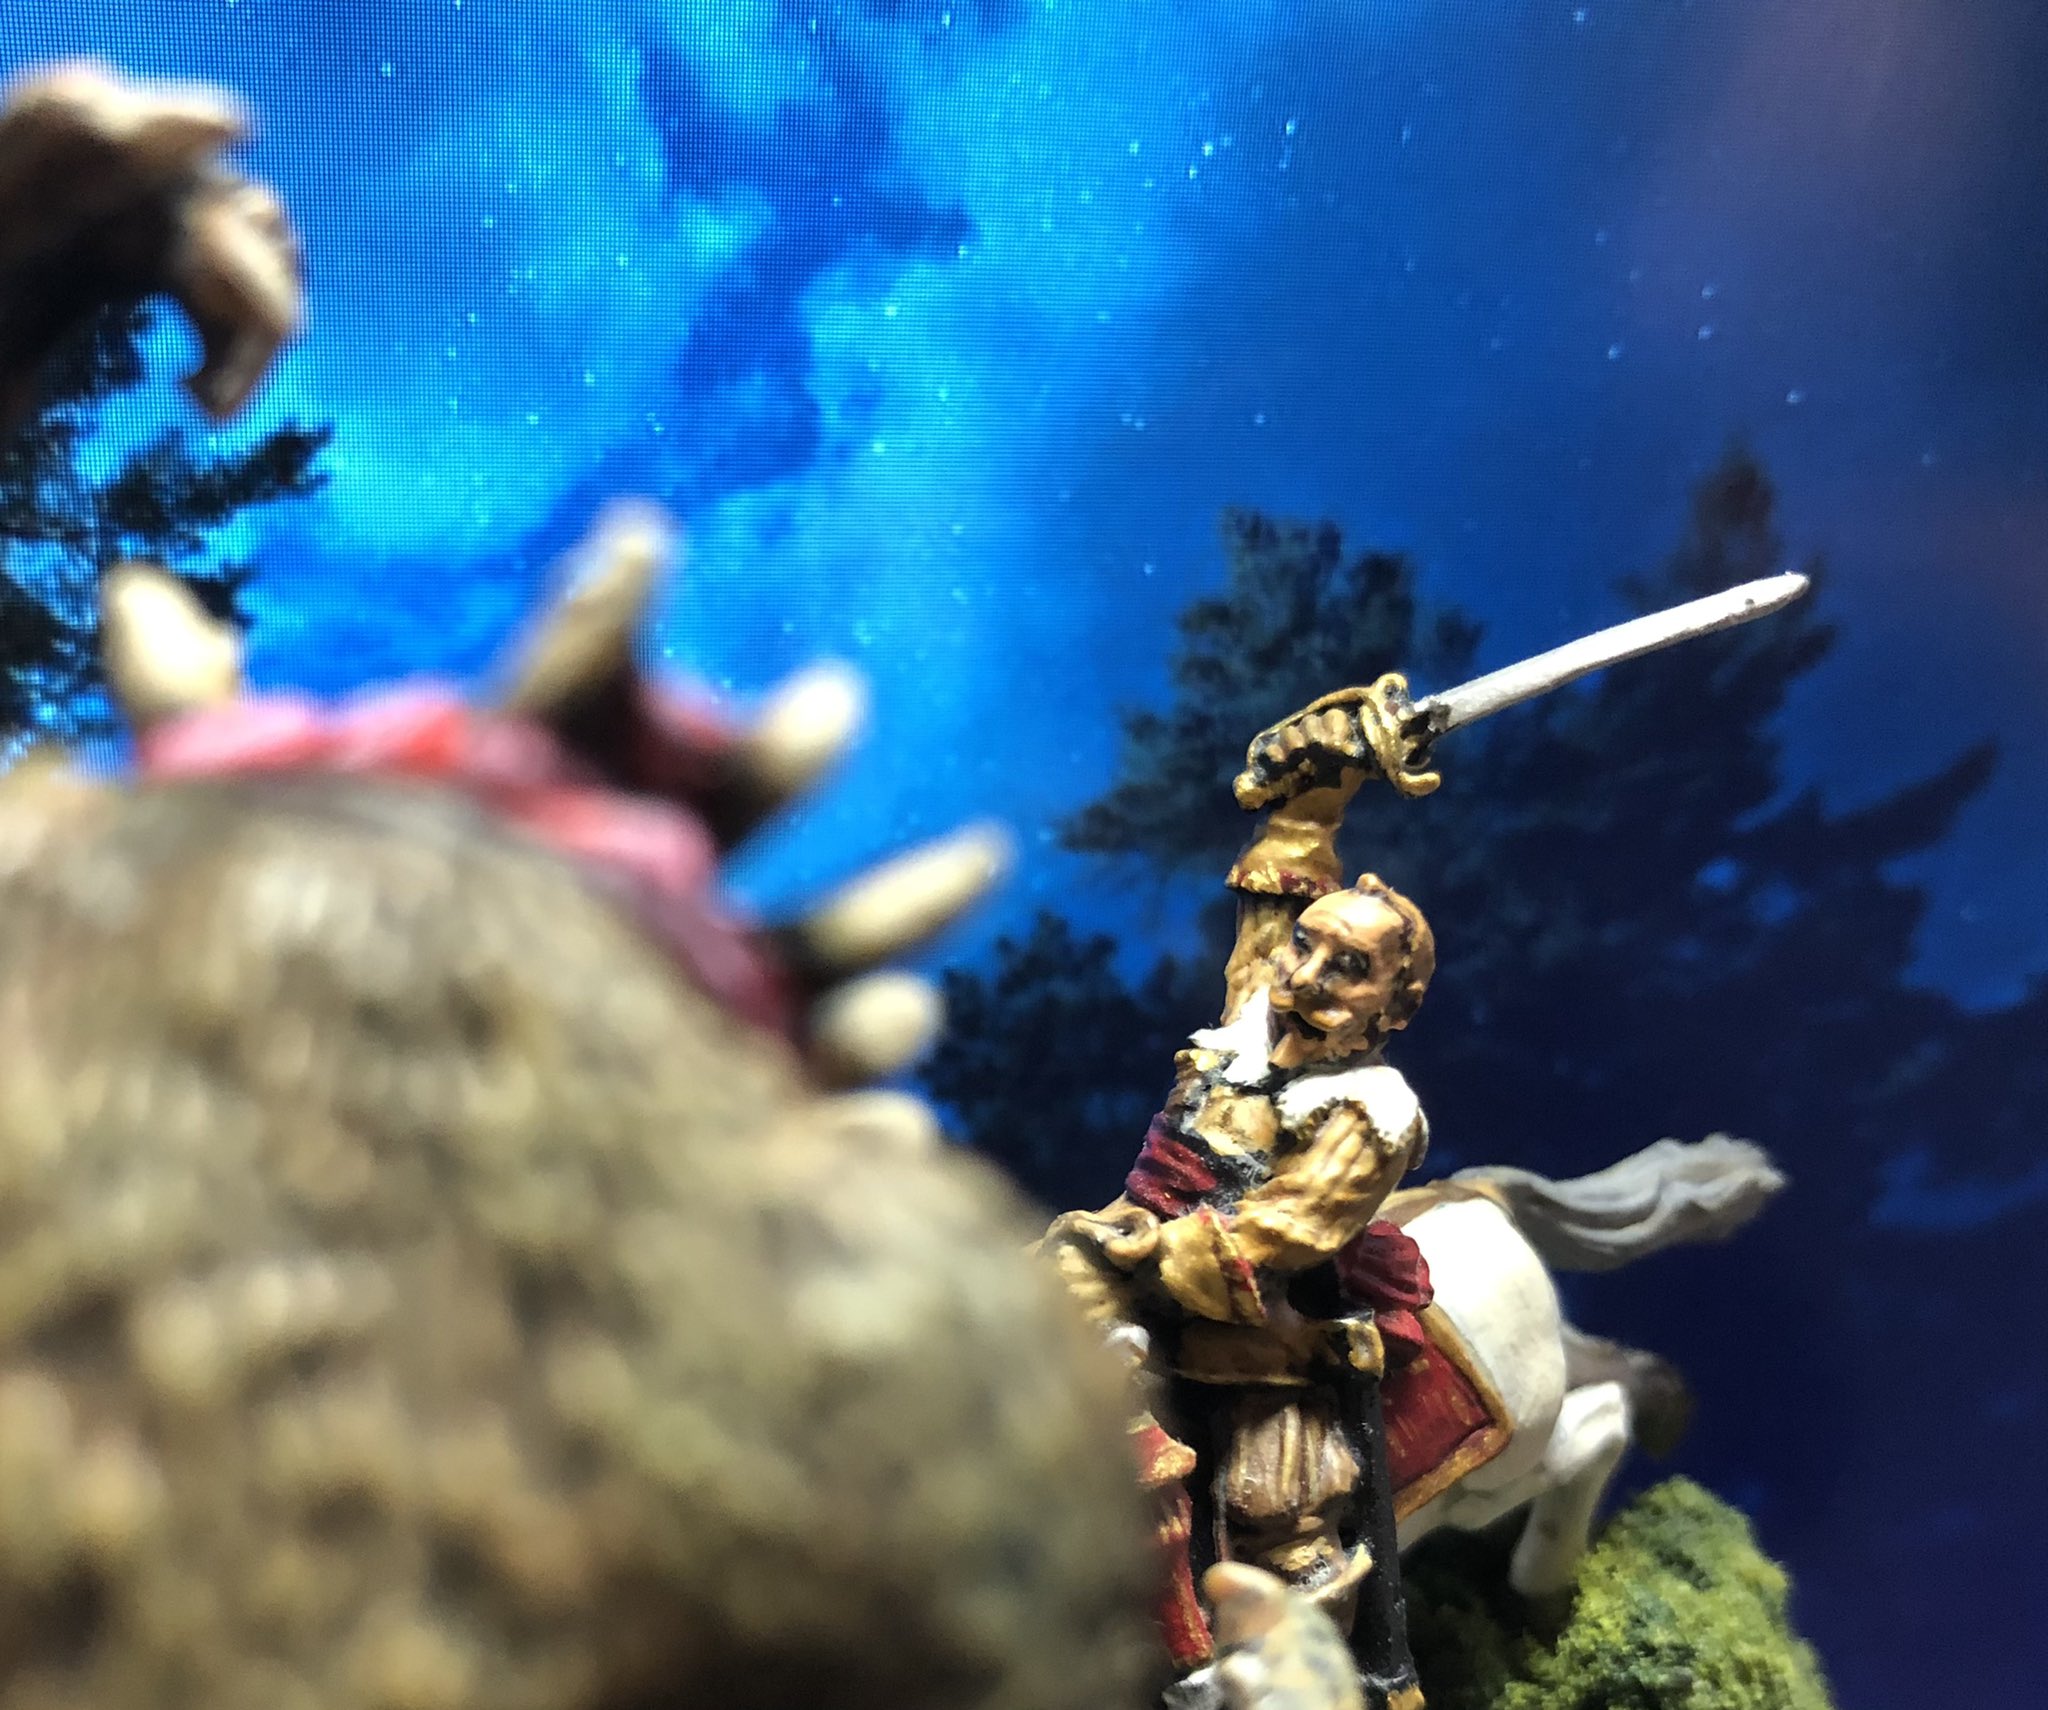
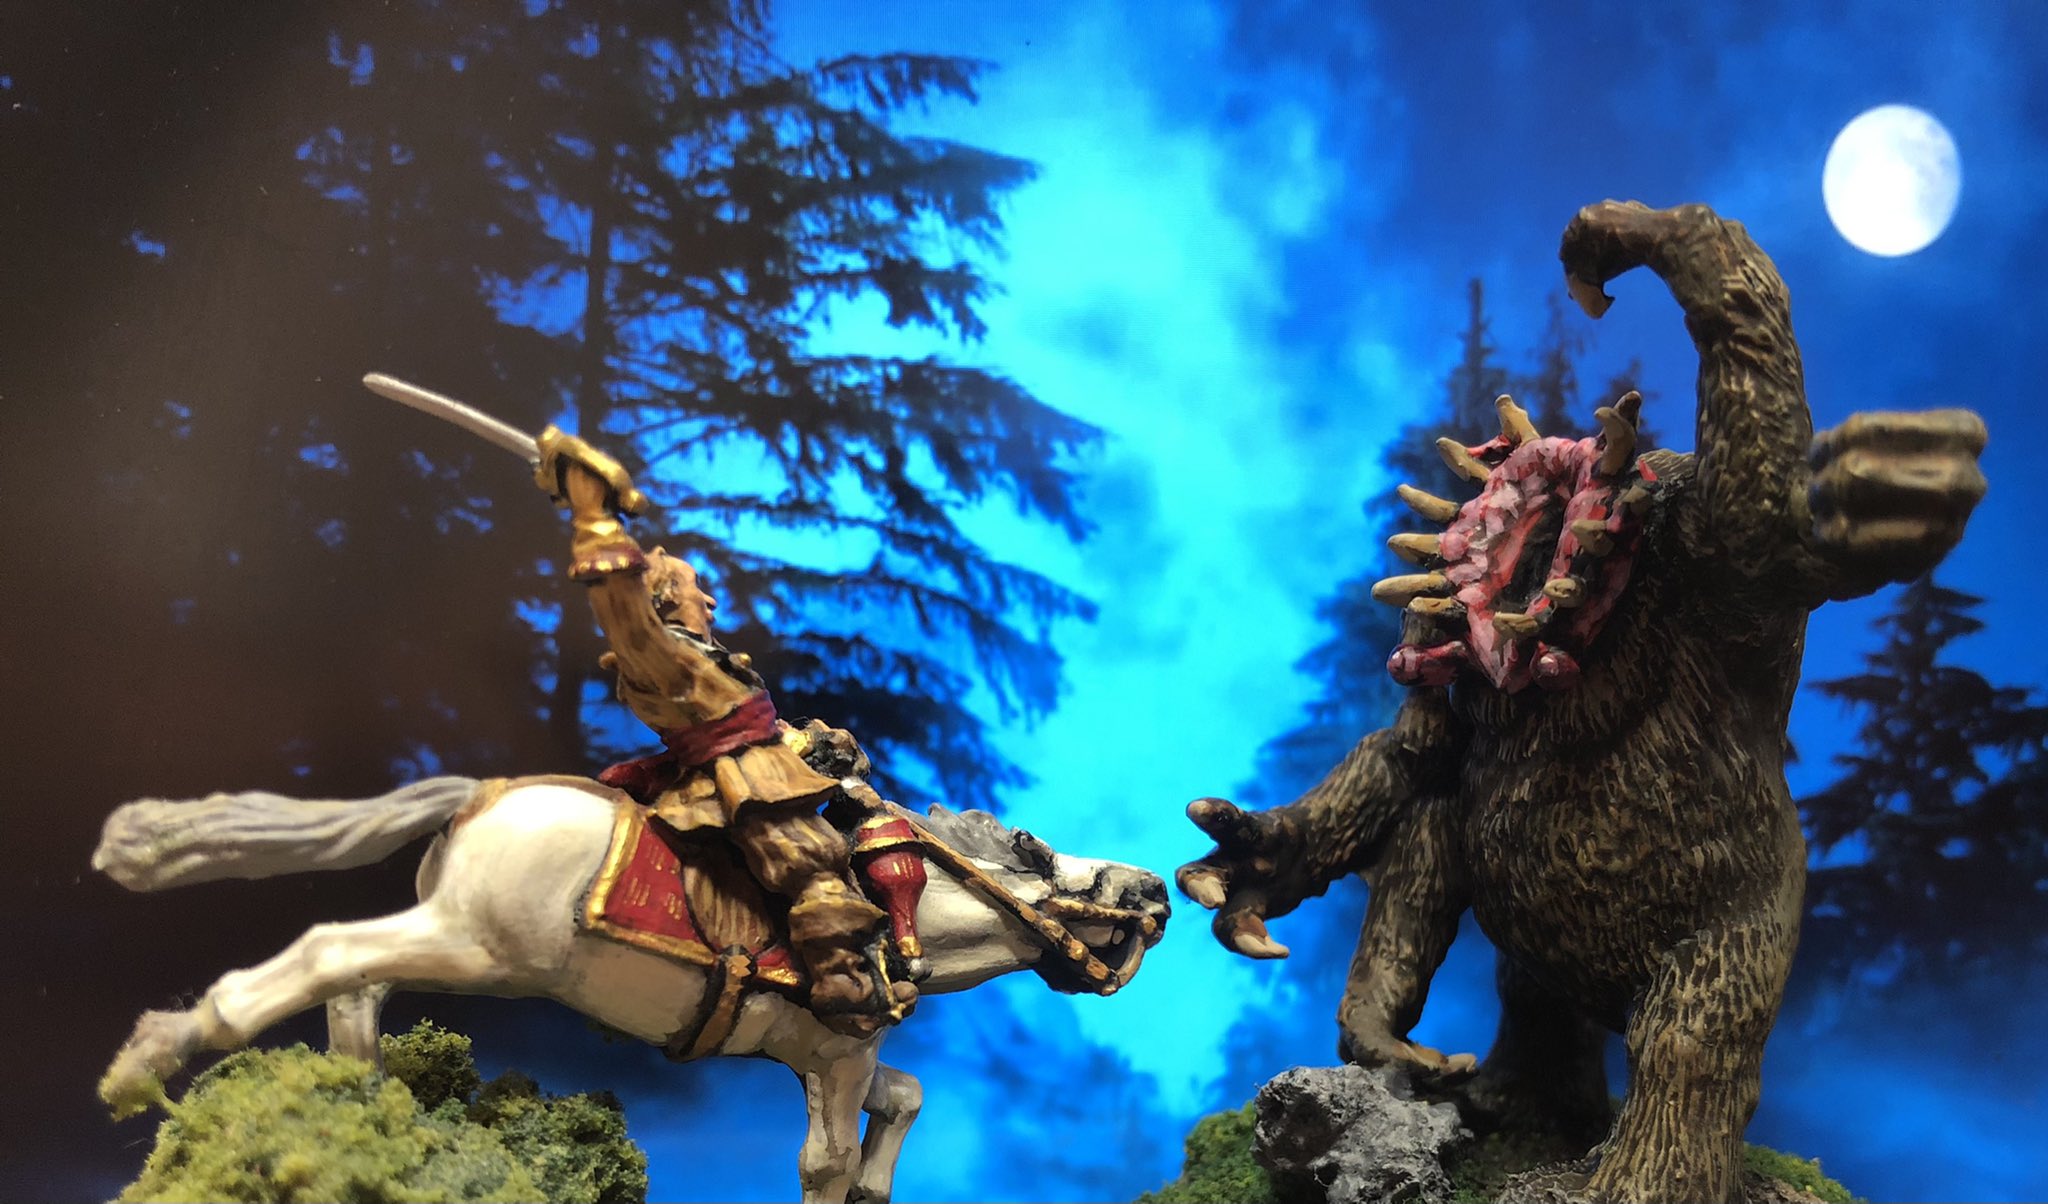
Mutant 1984
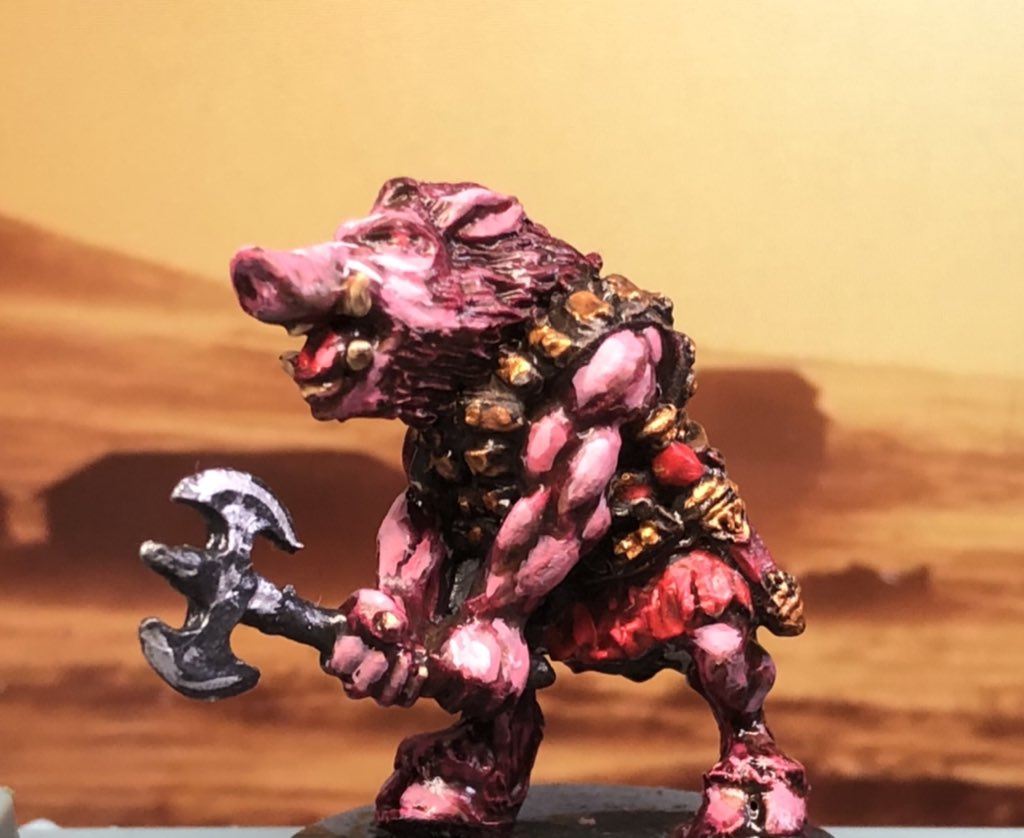
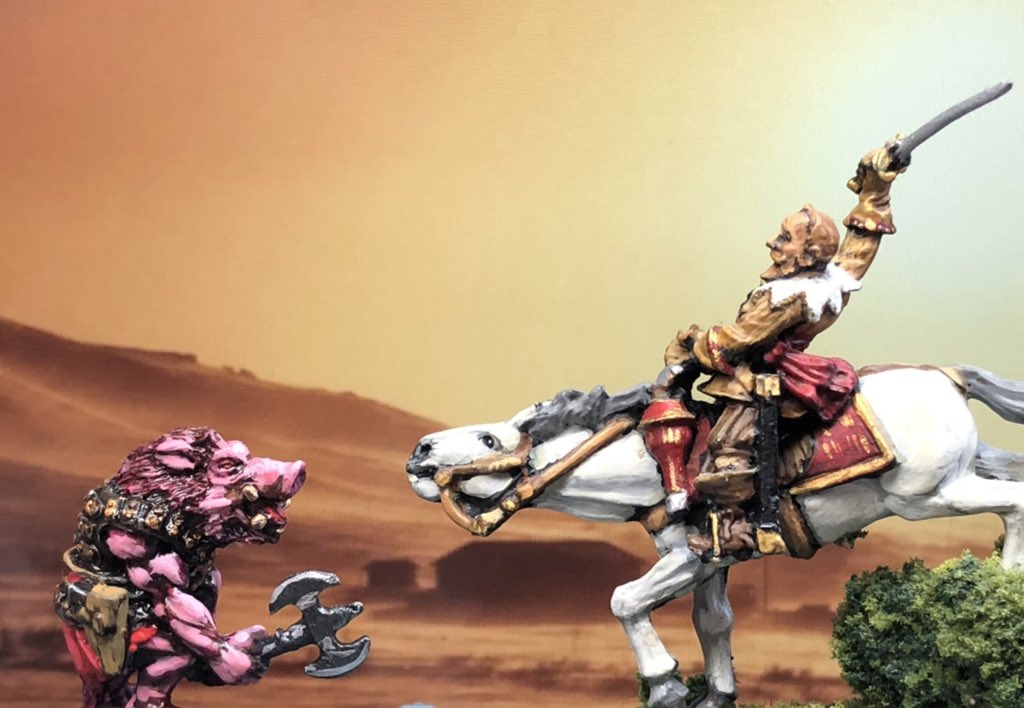
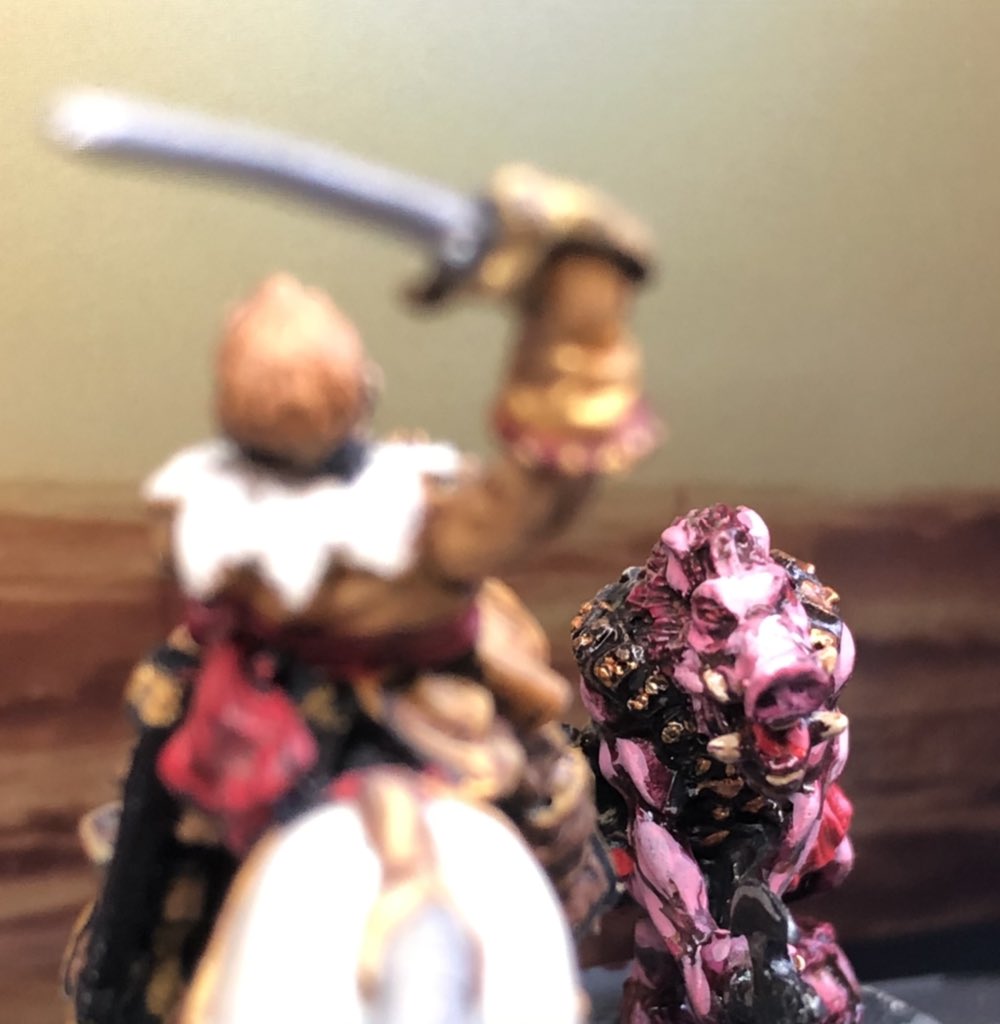
Finally I have had some fun painting some miniatures from Fenris Games for my Mutant 1984 project, as per usual the the nobleman Guss af Edelhus in the forbidden zone in Muskö year 105 has an apperance, he is from Warlord Games.
Jageret Svin – bandit and explorer
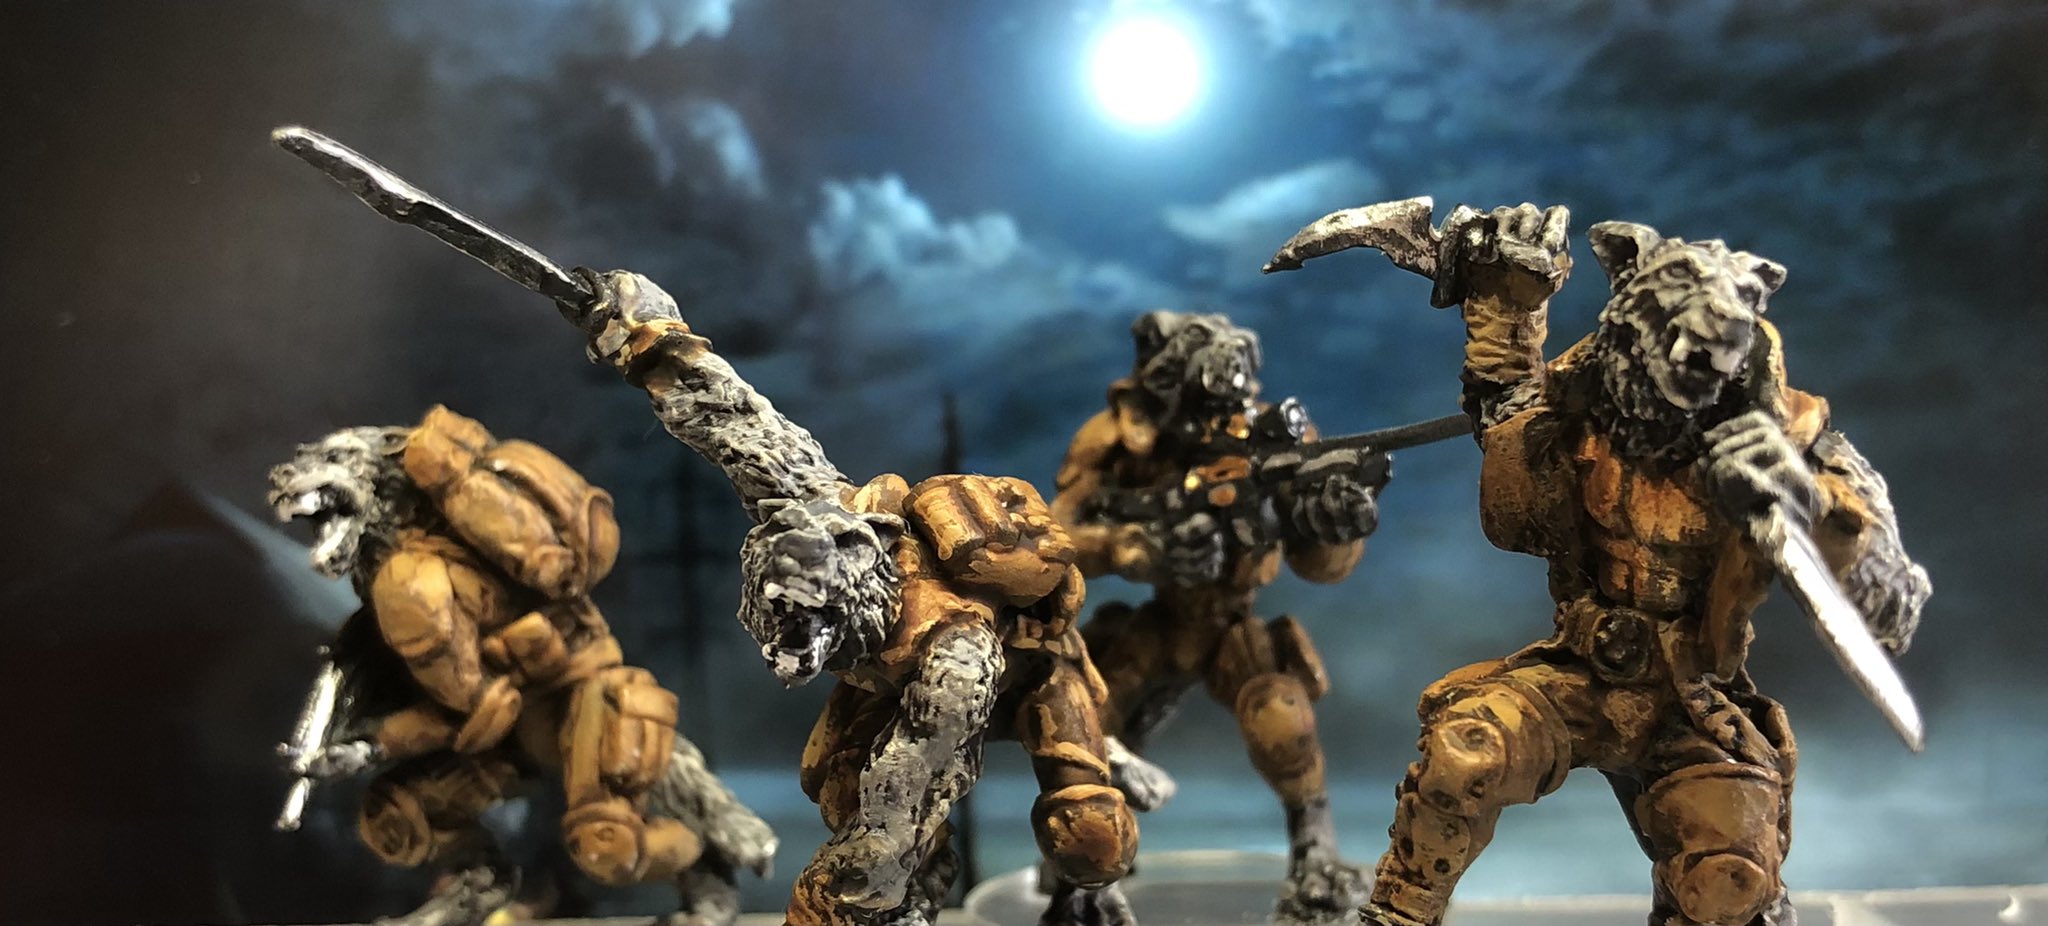
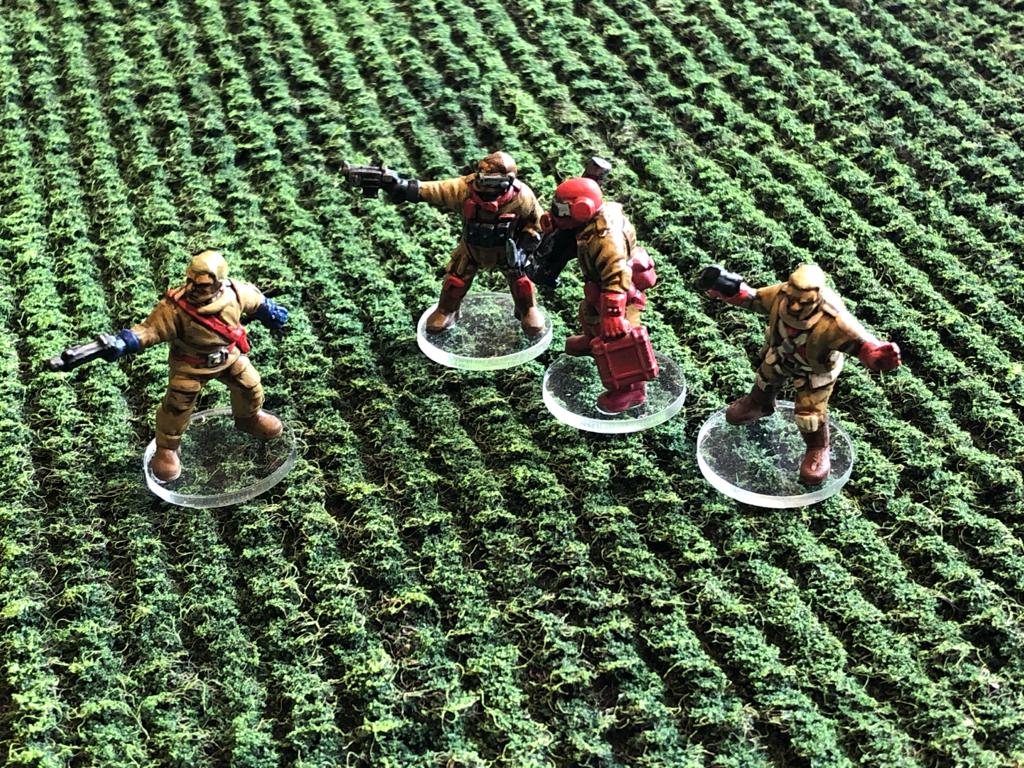
Wolfram Varg and his fellow Hunters, some of the most sought after troubleshooters in the Pyri-Commonwealth
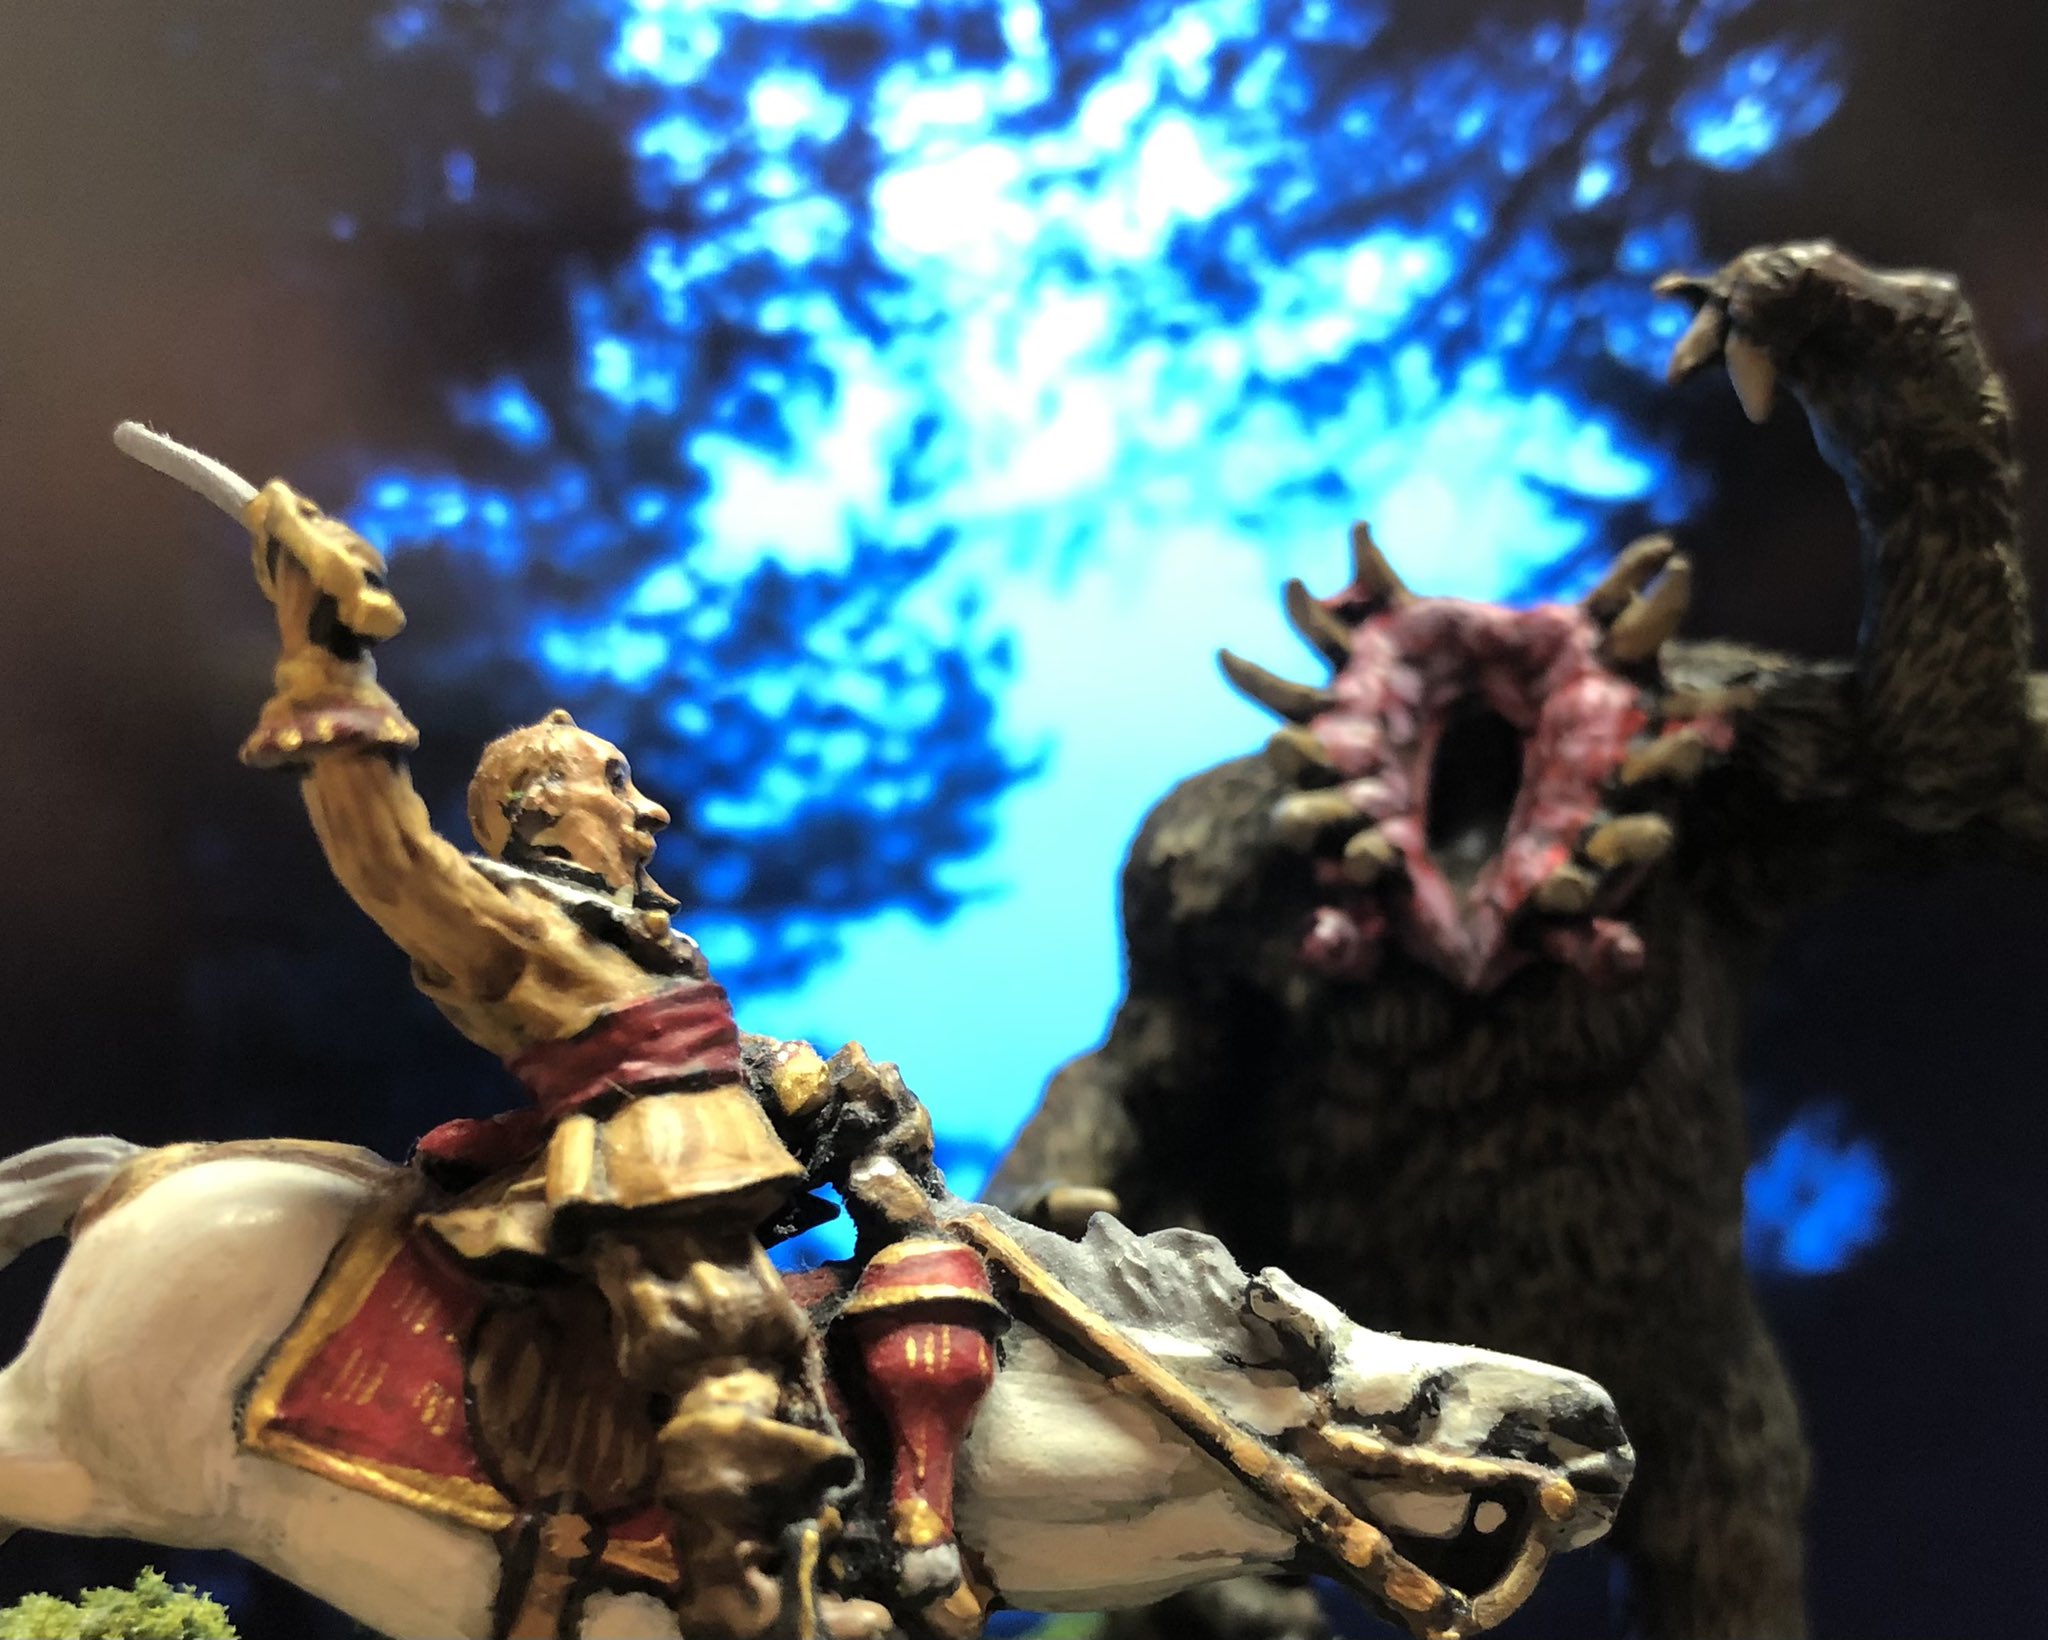
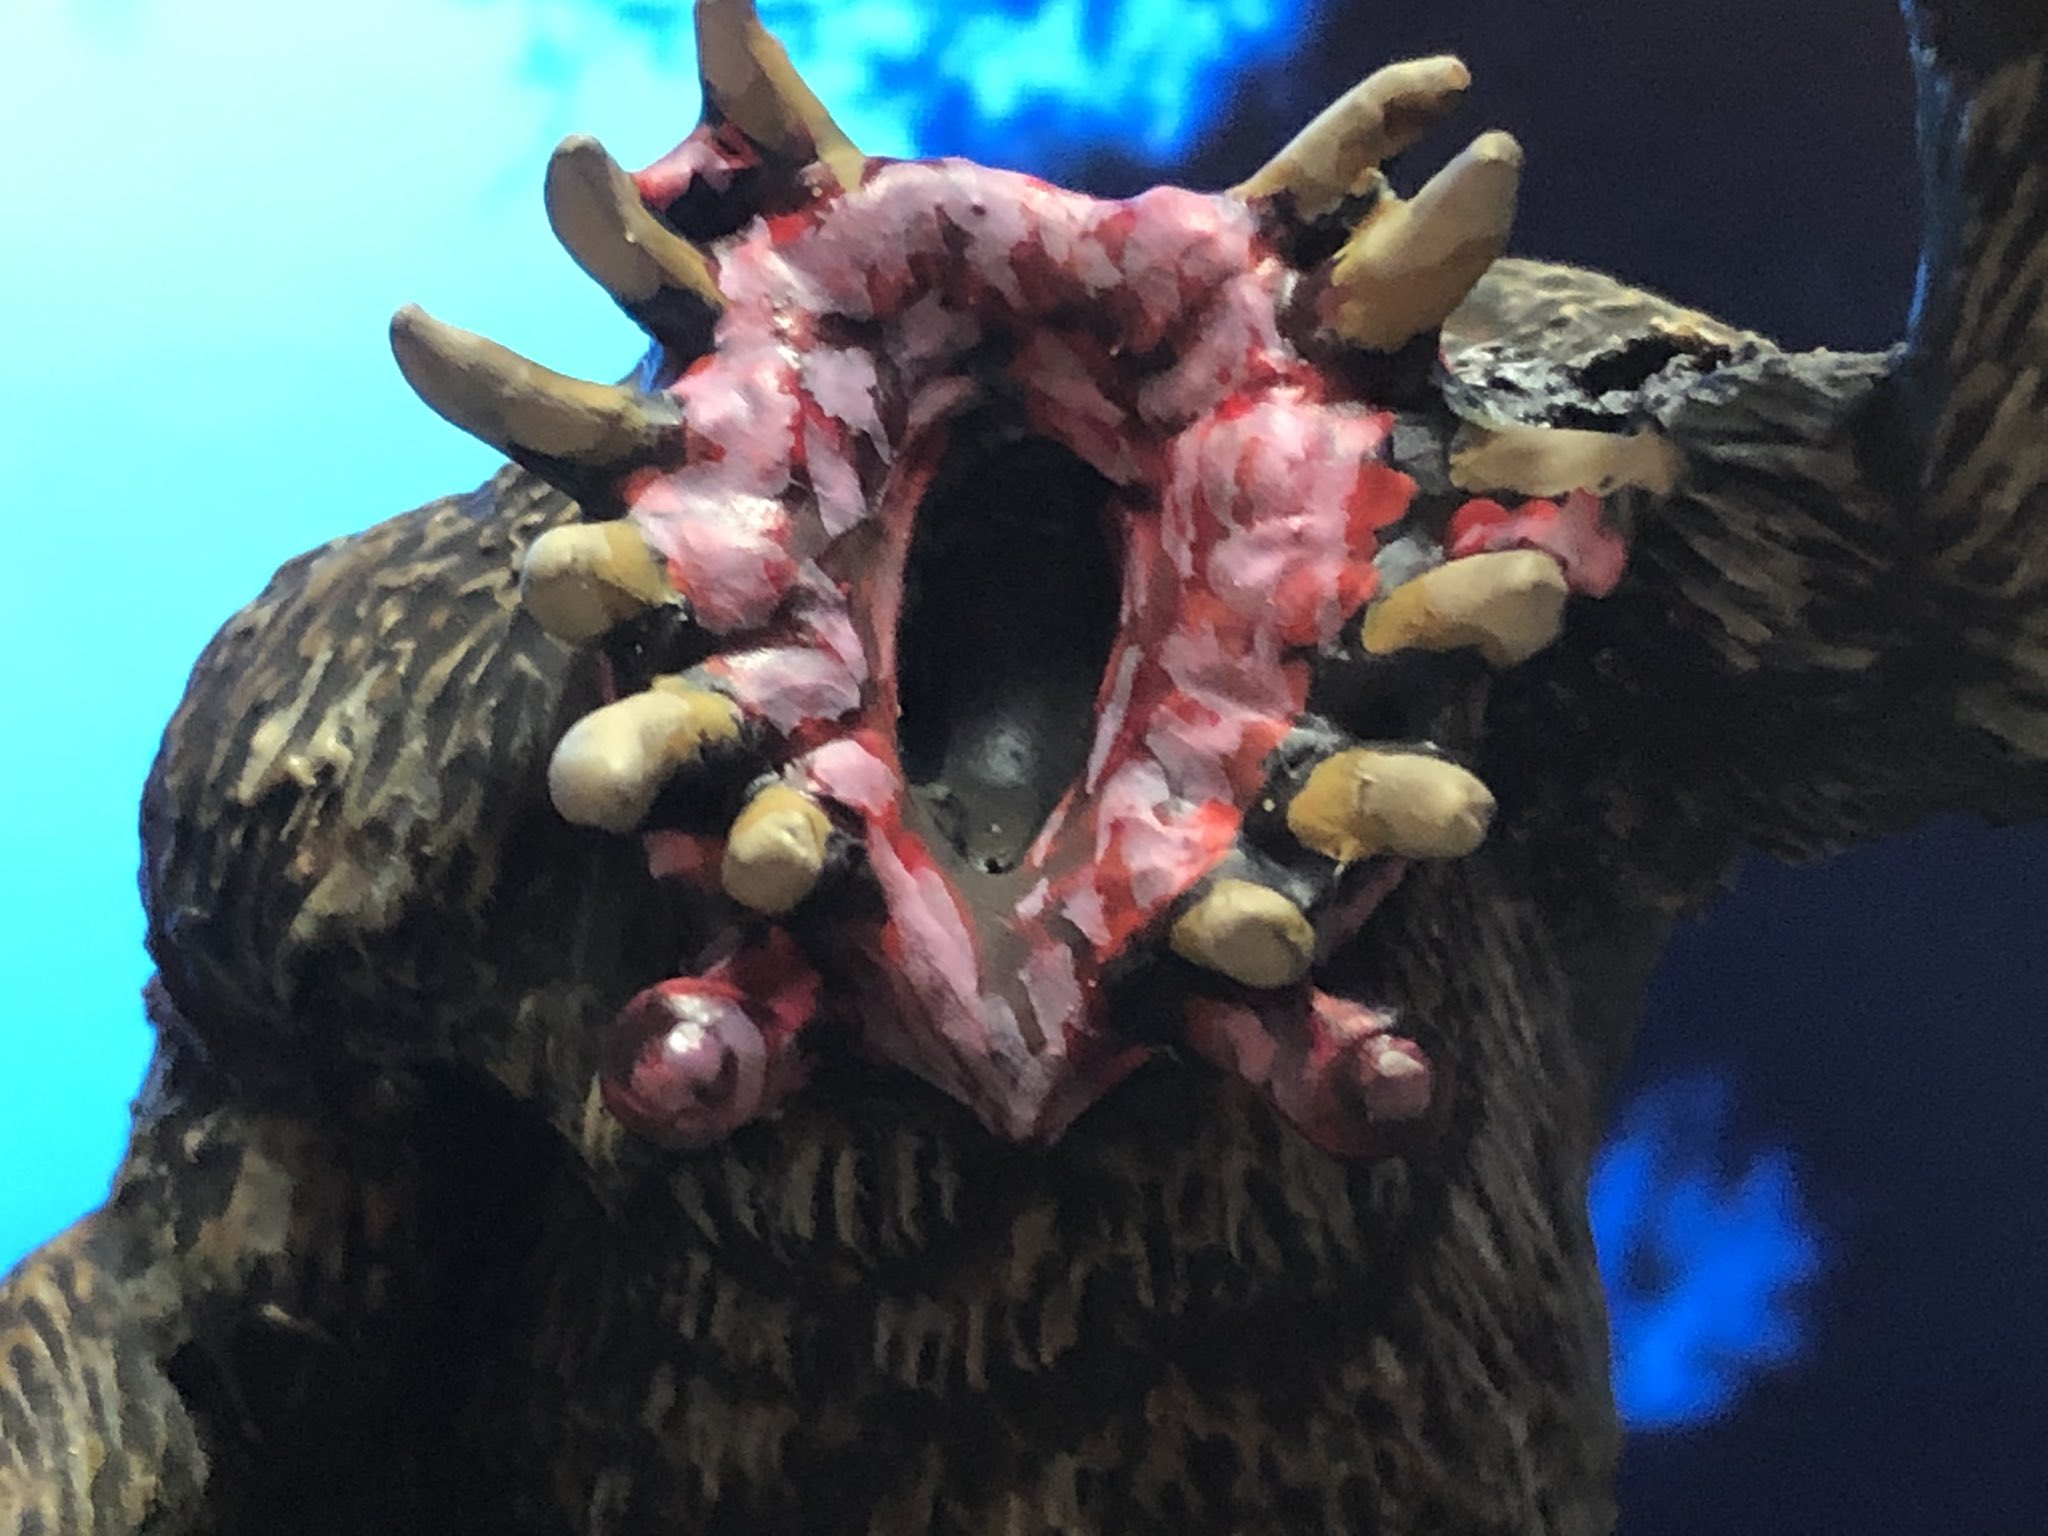
A Pit Guillotine (well actually a Gug from the Cthulhu Mythons)
/ Hope that was of some interest, have a good weekend (eventually)
Last week I wrote about some fields I am doing using £3 doormats from B&Q (link to that blogpost here). The idea is to create something that look reasonable on your wargames table relatively quickly and I think cost efficiently. The approach presented in the original blogpost how to make the type of field shown below, and it is worth checking that out before you read this one.
Now this will allow me to produce a number of Green fields, depending on what flock/scatter I am using. The brown areas between the furrows works really well.
However I have been thinking about yellow fields that typically have a different look and feel to them. the contrast between brown and yellow would not be ideal. I would not even try it. Instead a typical “yellow” field tends to be more dense, i.e. furrows can not been seen just hinted and there is sometimes a green shine through (not that you could also do a more dense green field with this approach too).
I have used yellow pieces of fur, fleece etc but I did not really get a result I was happy with. Now with the door mat approach I realised that it would be relatively simple to do something that at least felt like the field above rather than a shit-brown surface with some strings of mustard.
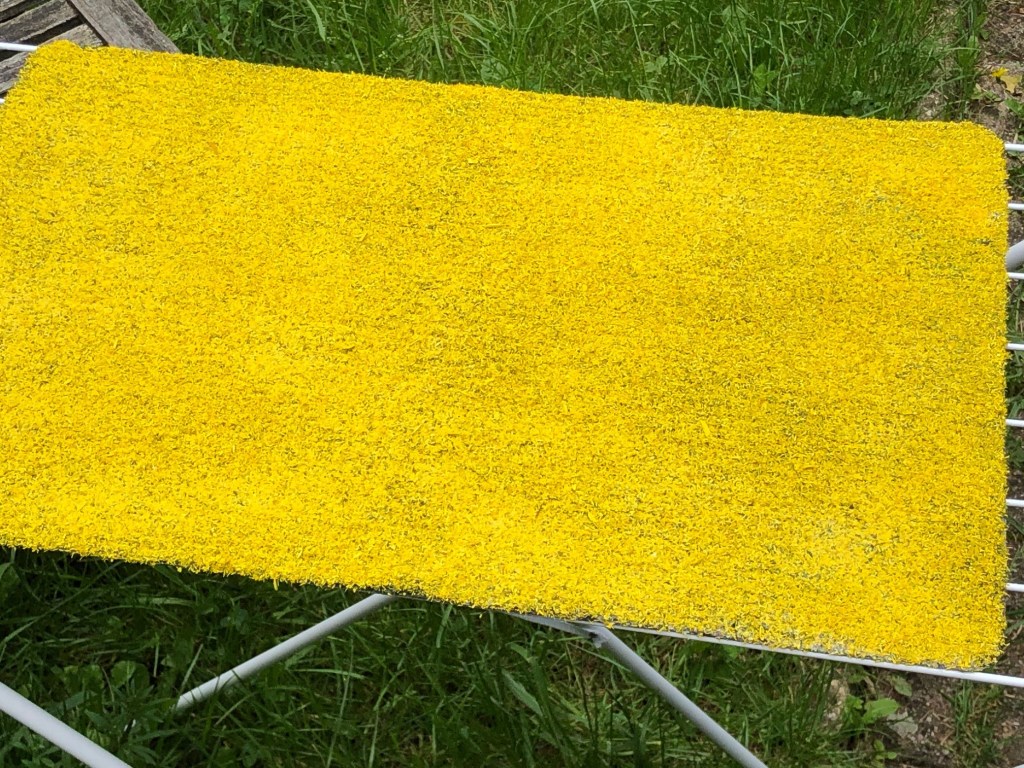
I ended up with something looking like this.
Anyway here are steps from Doormat to Yellow Field
What you need is
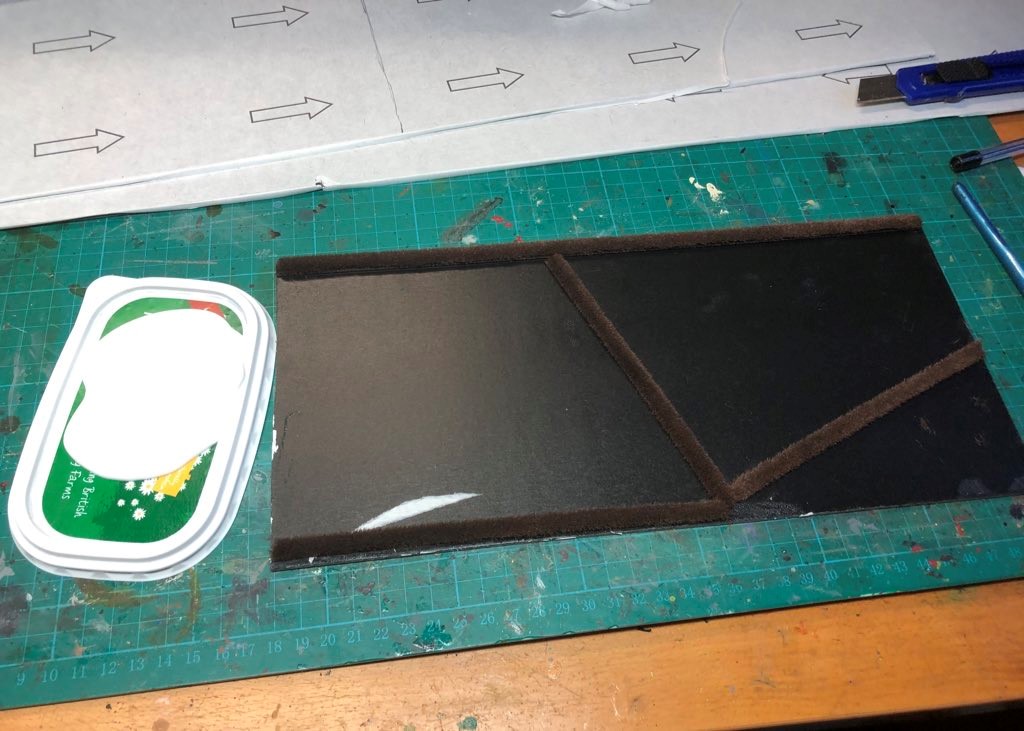
A structured door mat (as described in the previous blog, ok last link here)
Rough brushes
Green paint
PVA glue
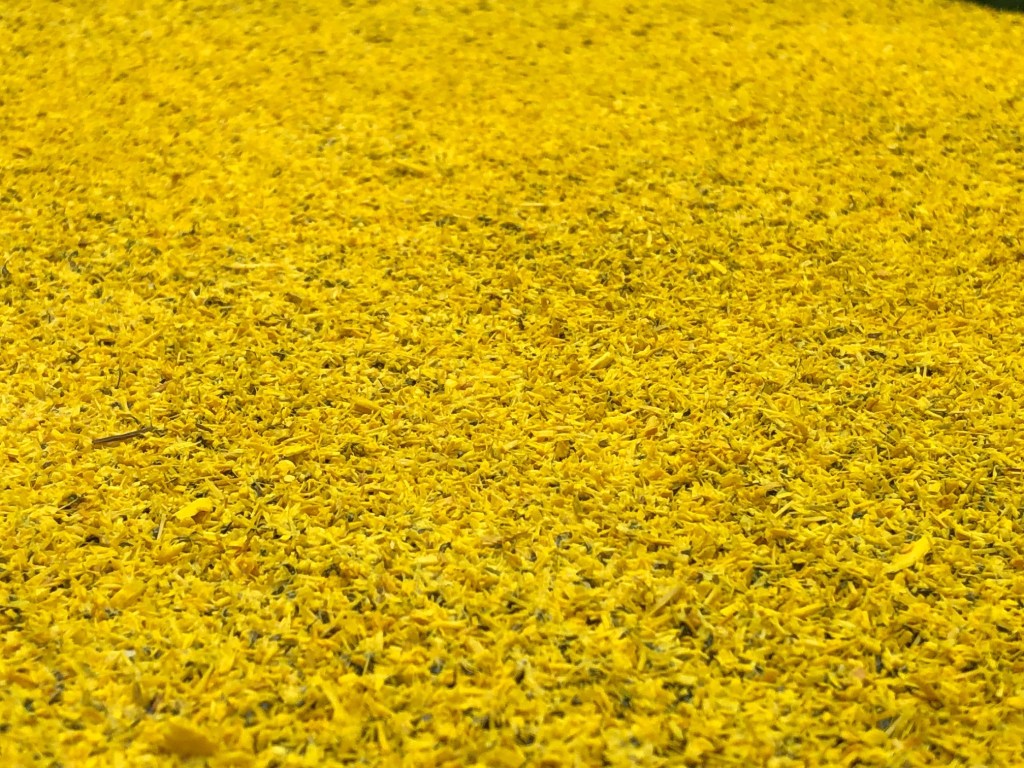
And finally a bag of scatter/flock – needs to be relatively fine like fine turf / sawdust etc. I have ordered a fair few “yellow” varieties and have found that with regards to colour and overall look the Busch 7054 is really my recommendation. You can get a bag from £2 from railway modelling companies. Just search for “Busch 7054”. A bag should last for say 2 of these fields.
The Steps (the best thing would be to do over several days – day 1 (Step 1), day 2 (step 2), day 3 (steps 3,4,5) and finally day 3 (Step 6).
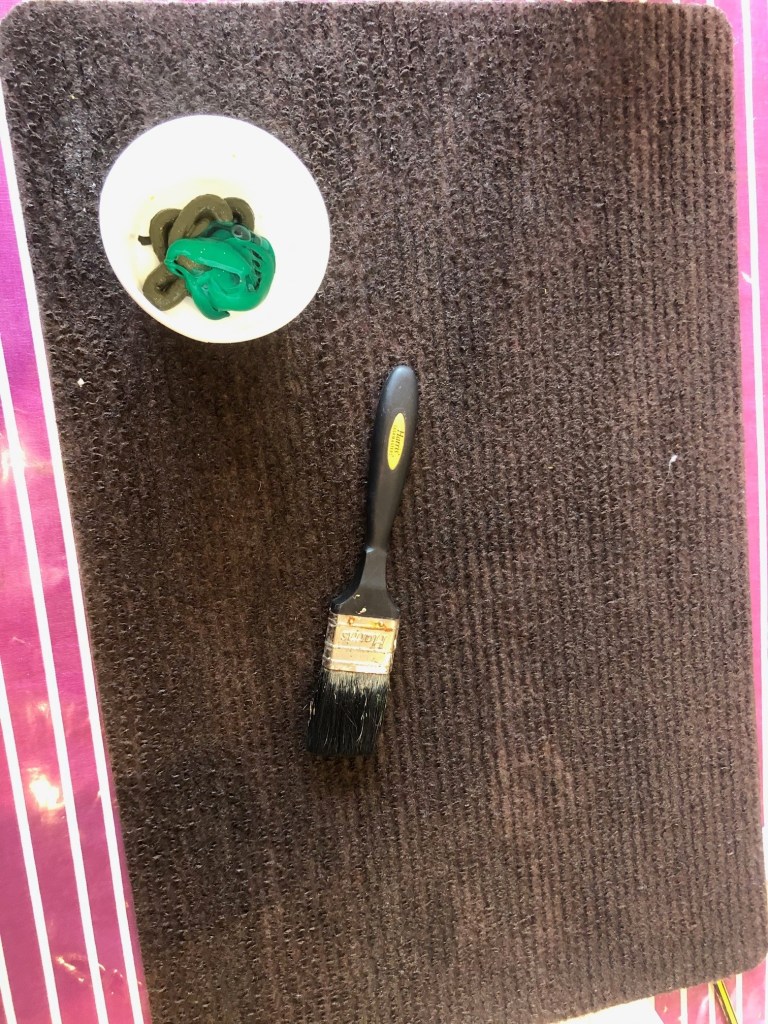
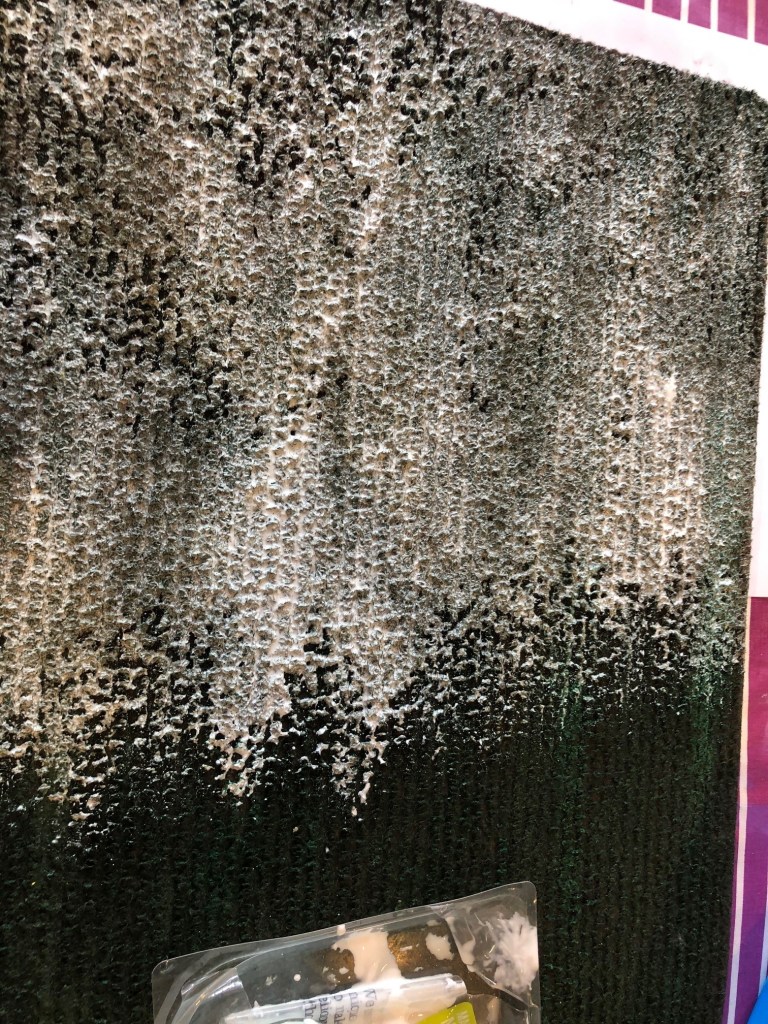
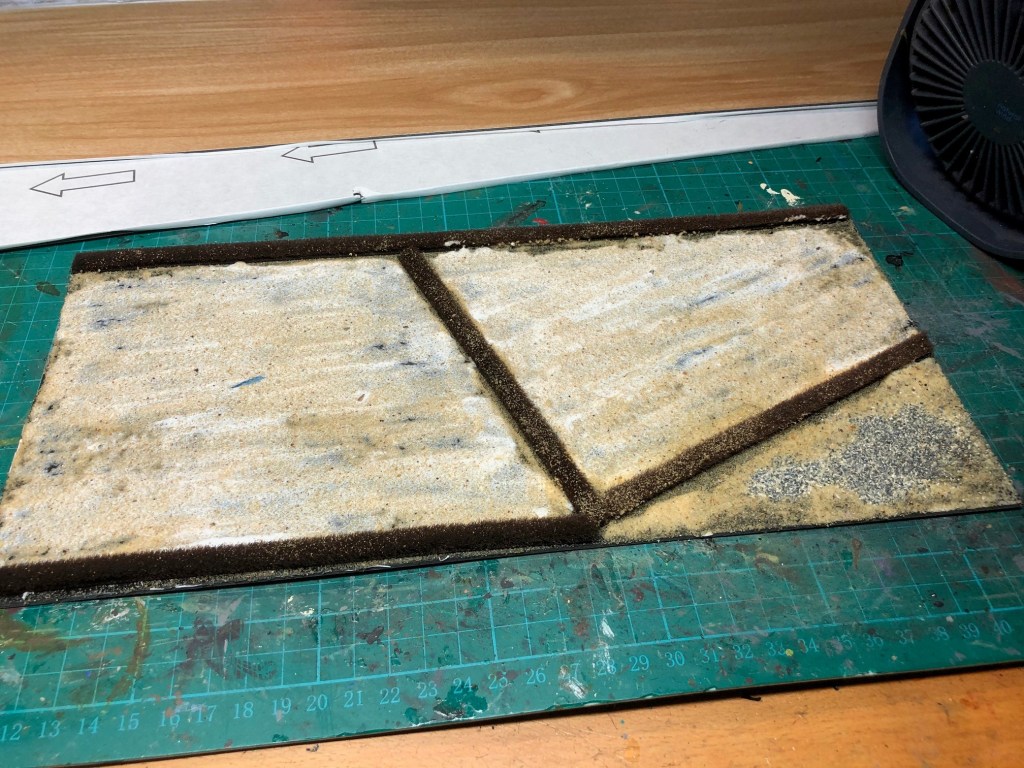
Brown it up – let it dry
Green it up – let it dry
PVA It – do it in stages half the mat 3,4,5 then the rest 3,4,5
Spread
Shake – after this is done for the whole mat let it dry properly overnight
Seal – let it dry (as this is very wet it will take a while to dry)
Shit Brown it
First I painted the mat in a dark brown mixed with PVA and let it dry, this serves to give some strength to the structure.
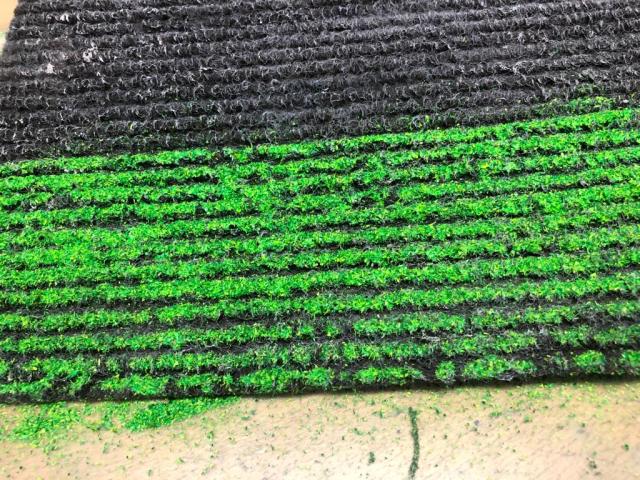
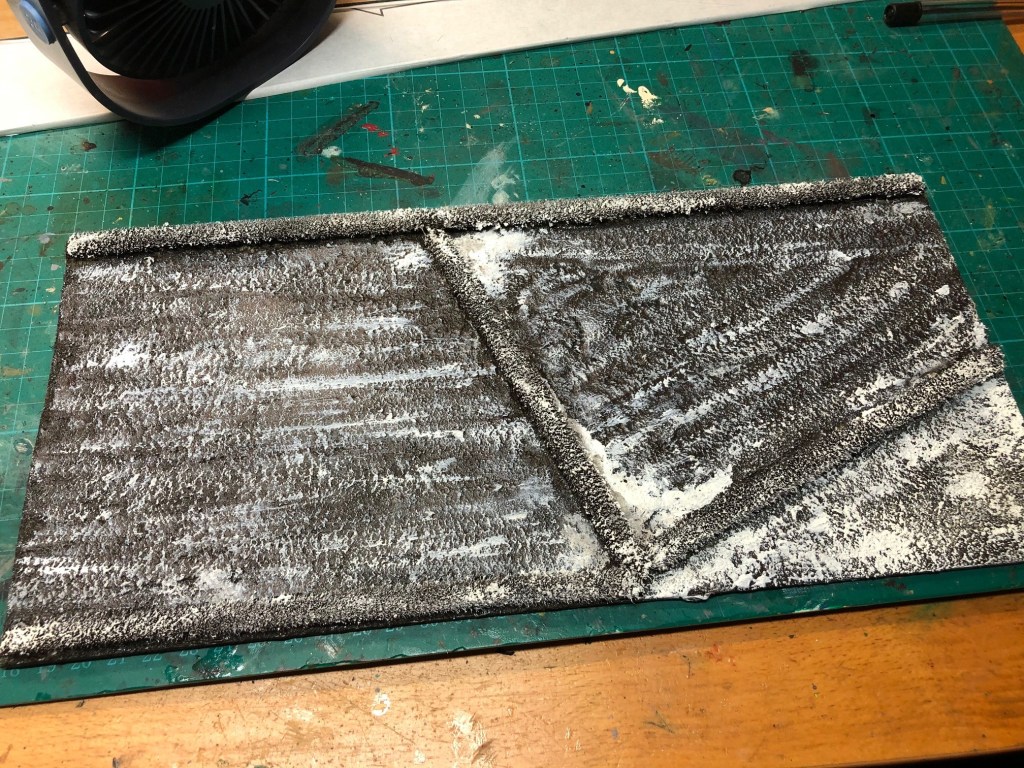
Green it up
This is really a rough wet brush, you want to have a strong green here, just a little brown coming through (you might be able to skip the brown and just start here).
PVA it
Now last time we applied with finesse, I am using 2 parts PVA and 1 part water mixed and just brushing it on. I did about half the mat before I went on to the next step then covered the other part with PVA. Remember to cover all of the mat not just the furrows.
Spread
Then just cover the mat with your flock
Shake
Shake off the excess
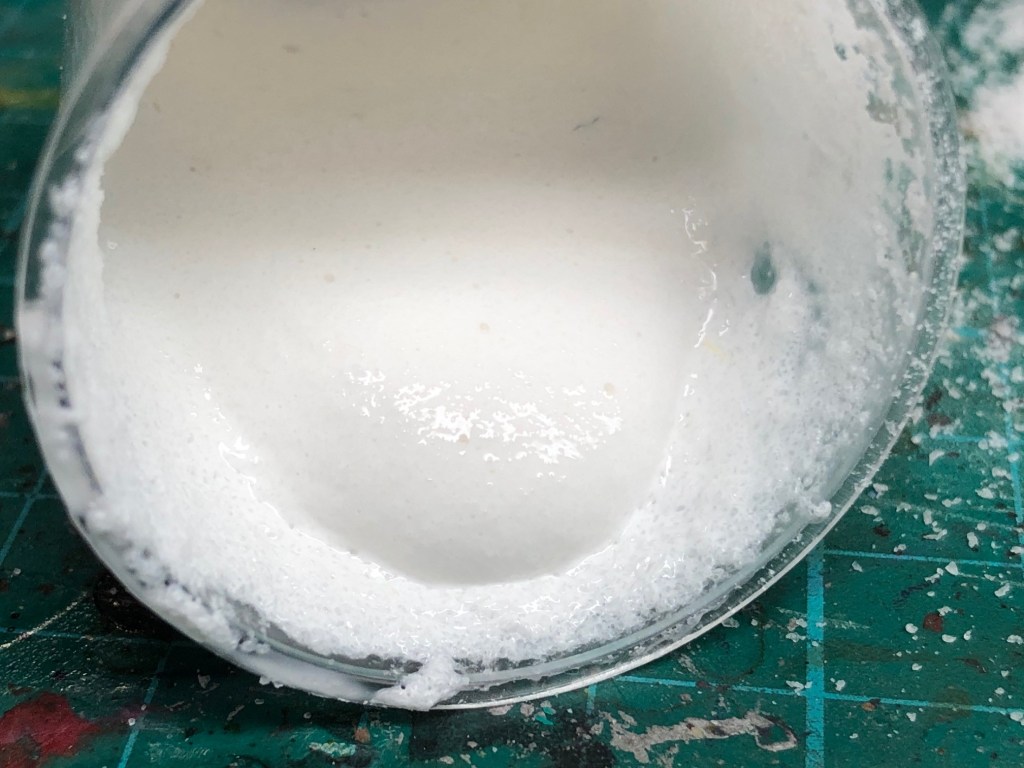
Seal
This is really important, dilluted PVA sprayed over the mat
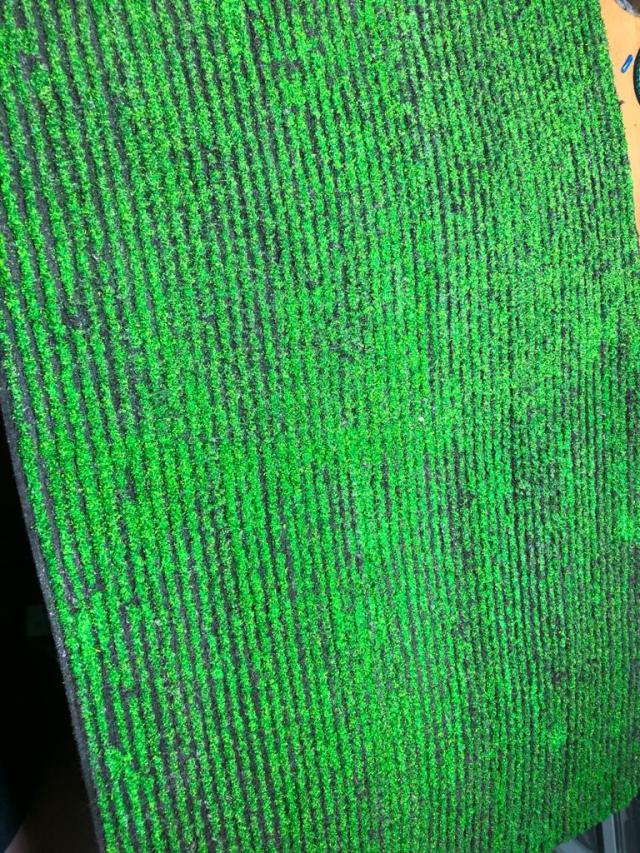
The finished mat, there is a little hint of green shining through and alos we can see the lines, albeit faint.
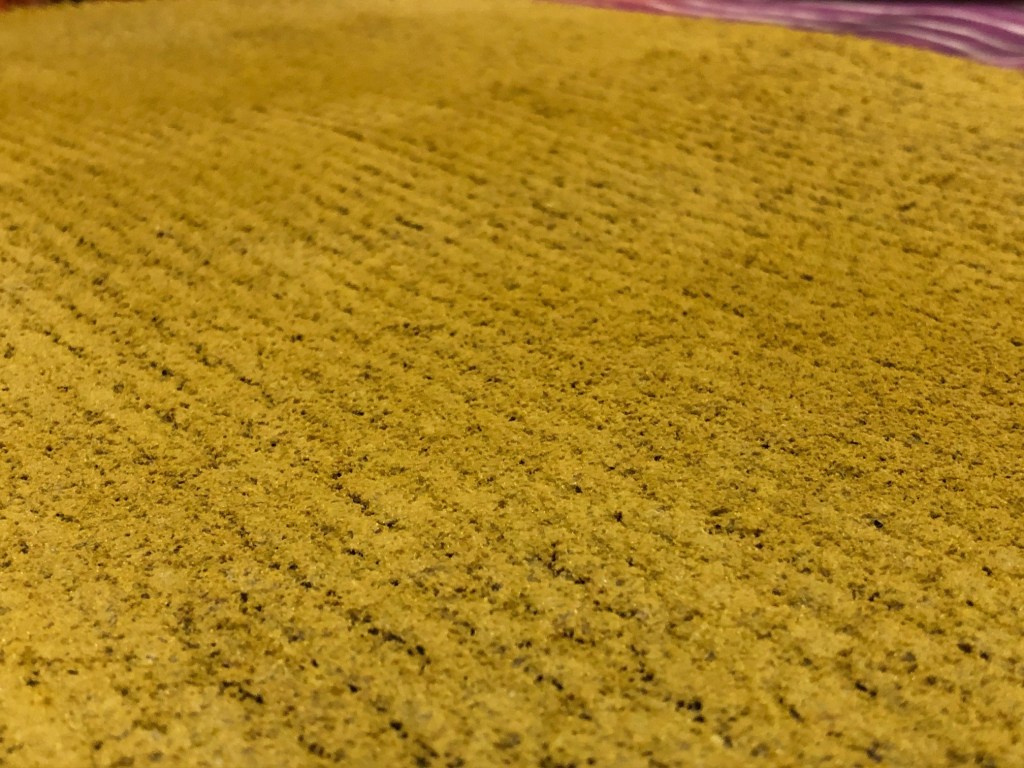
Here is one I did without allow the green paint to dry before I added the PVA and the flock, it created a more Green shinethrough (this is a little bit more experimental and tempramental and I let you explore this yourself, remember you could “repair” this with a yellow spray can if it goes too green).
And one I did using Woodland Scenics Yellow Grass
I hope this one and the last blog (see links above) gives you an idea on what you can do with this kind of mat.
I have done 5 of them so far – it should be enough to cover a normal wargames table and give that illusion of different crops and fields, with the cost of the mat, then paint, pva and scatter say a total cost of £5 per mat. That is a good deal and really not a very difficult project to do. You can then cut them into the sizes you need and perhaps add some further edge detailing etc. I will show in a later blog post how I will use the mats for my table.
This is a write up of my explorations of turning some of the cheap door mats to fields for your wargame. When gaming in ground scales of 1:100, like chain of command, a foot (30 cm) equates to about 30 meter in on the table. So a field measuring say 6 by 6 inches (15cm square), is hardly more than a small garden. I have a number of field tiles that I have used for my 6mm wargaming that kind of works because the grand scales are significantly smaller and a field represents areas with cultivated land as opposed to individual fields, etc.
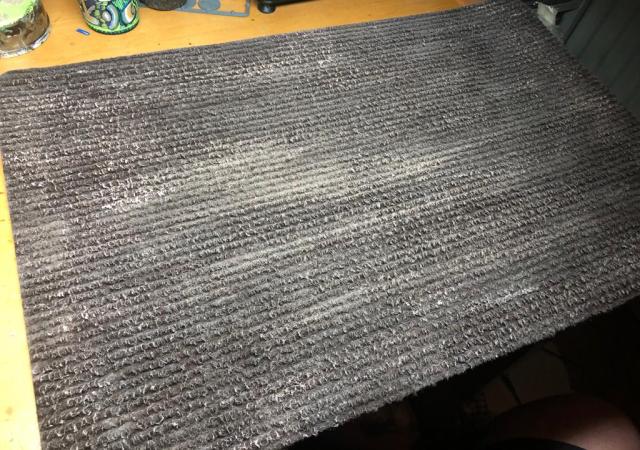
However I found this door mat from B&Q in the UK, they sell at £3 each. They measure 60 by 40 cm (this is about 2 foot by 1 and a quarter foot).
The idea with the mat is the hairy corduroy surface, this forms the basis of the furrows (the elevated aspect) and the base for the scatter (the hairiness). Oh, and a short note. people have used this kind of material before for their wargame fields – this is an attempt to apply a straightforward process with some additional elements to add some depth to the final result rather than claiming originality.
This is a close up of the mat
Anyway lets get started.
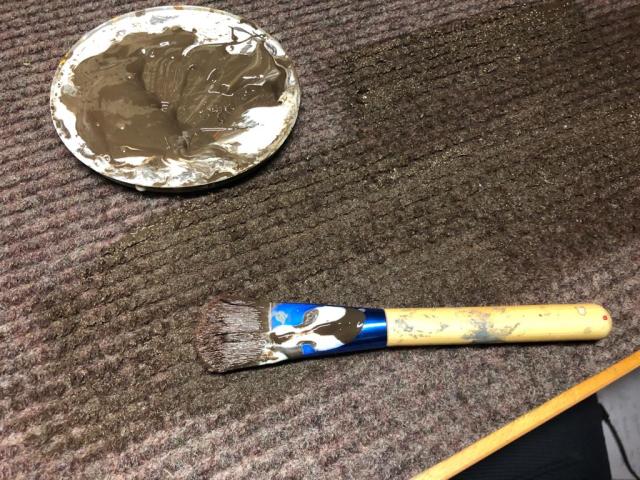
Step One – Shitbrown it!
The first thing I want to do it to add some colour to the mat I use a cheap acryloc burnt umber of something like (you could us an emulsion too) that I mix with a generous amount of PVA (this serves to stiffen the surface)
Just work the mess in, you could use a bigger brush than this. Then let it dry before the next step – I would wait about 24 hours.
Step 2 – Highlight it with Bailey’s
For the next step you need a light brown colour similar to the drink Bailey’s in colour. Again this is cheap hobby paint territory, the key is a light brown.
Then just drybrush it over, you do not need to be too careful and remove a lot of excess paint like if you would drybrush say a miniature etc. Do a few strokes on the top (this will be covered anyway) to get rid of excess paint then work it to look something like this, get some of the contrast into the areas between the furrows as this will be mostly visible. The whole idea is to get away from a monotone brownish area. You could leave to dry for a short while but it should not take long to be ready for the next step.
Step 3 – Slap on the PVA
For the next step you need PVA mixed with water at say 50/50 ratio (this is assuming a thick builder type of PVA) if you have more runny PVA then use a little bit less water. Mix it properly. You also need a fine top applicator – this is a typcial 18ml paint pot similar to a vallejo paint bottle. I have a fair few of these and I think I used about 7 or 8 for a mat so if you have a bigger bottle would be more efficient, just make sure you can control the amount that come out carefully.
Apply the glue to the mat on top of the “furrows”, the idea here is that the PVA will capture the scatter we apply for the next stage of the process. DO NOT do the whole mat in a go, I tend to do about a sixth of the mat before I do the next step of applying the scatter. I
Step 4 – Apply some Scatter let dry and Seal with PVA
Next we need to apply the scatter, but what do we use?. I have used two products with good success; (i) Woodland Scenics Fine Turf and (ii) Javis Scatter. In this example I have used a mixture of different Javis scatter shades of green. Too clumpy stuff (like the Yellow Coarse Turf from woodland scenics, that would be ideal for creating yellow fields is a little bit too clumpy) is more difficult to work with and I am currently avoiding it. Would be great to find a sawdust type of yellow scatter like the Javis one for making nice yellow fields. If you use a monotone mix perhaps you could add as a final thing before sealing with PVA a drybrush stage of a light colour then the one you used.
Apply the scatter and shake off, a few taps will suffice until you finished the whole mat.
Not the quickest work but the patience pays off. Now wait for it to dry (give it a day) and then give it a proper shake off, then spray some dilluted PVA on top (this is a strongly dilluted milky consistency mix with a little bit of fairly liquid, if you need to know how to do it, try this video https://www.youtube.com/watch?v=qGFmNUTfQr8) and let it dry to ensure that the scatter stays of top.
Effectful and simple to do. Looking pretty decent.
Here is another one that was done with some single colour scatter, then drybrushed with a ligther green as an example. BUT seal it with PVA before you drybrush and do it carefully so you do not loose the scatter. An additonal step. I prefer the first approach as it saves time and gives the contrast/depth in itself.
Single colour scatter with drybrush – works too.
Now of course you cut cut these into the sizes you need and that is what I will do. I intend to use these for 15mm groundscale games, making each filed 60 by 40 meters but also for some smaller scale games.
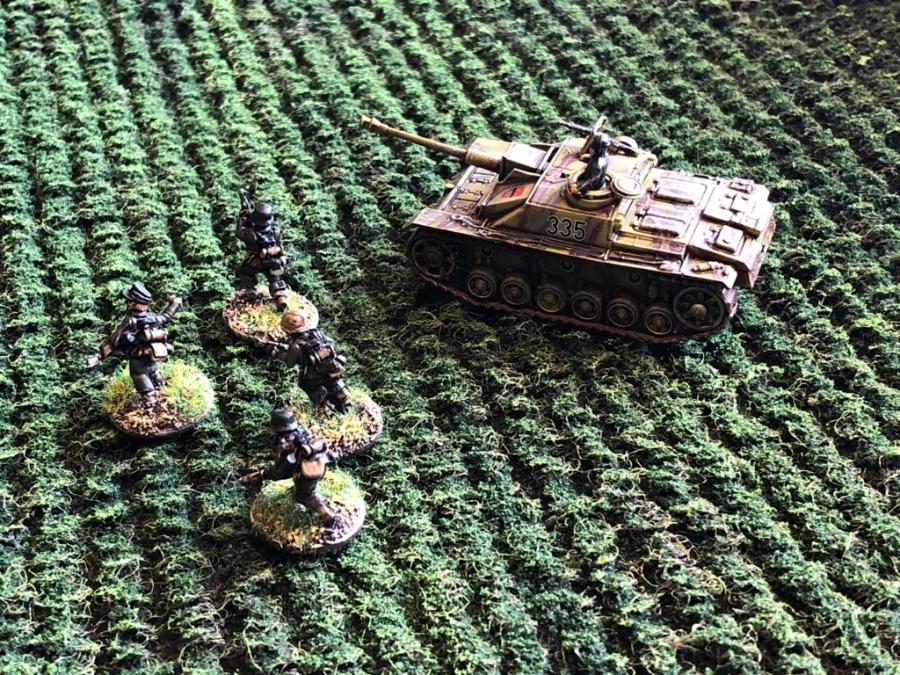
Here is a little bit of how they look versus 6mm, 15mm and 28mm miniatures (not the best light). I think they kind of work with all scales perhaps best with the 15mm.
6mm
15mm
28mm – these being from the Little One’s Crew he has designed for Stargrave and Five Parsecs From Home, but that is for another Podcast.
/ Hope that was of some interest, and if you do come across a sawdusty yellow flock or scatter let me know.
As you may know I like using adhesive vinyl floor tiles that you can get cheap from Poundland as bases for my terrain projects and have used both the long plank variety as well as the square foot type (as shown in a few old posts, like this one way back (link) or this one (link).
They sell at £1 for 3 in Poundland, I suppose you could use them for your floor too. I like that they rigid yet flexible. They warp but you can kind or bend them back. Store them flat.
Use in practice, each farm in my Sweden 1943 project has a separate tile made from one of the vinyl floor planks.
A selection of Farm Tiles giving each farm as more immersive feel.
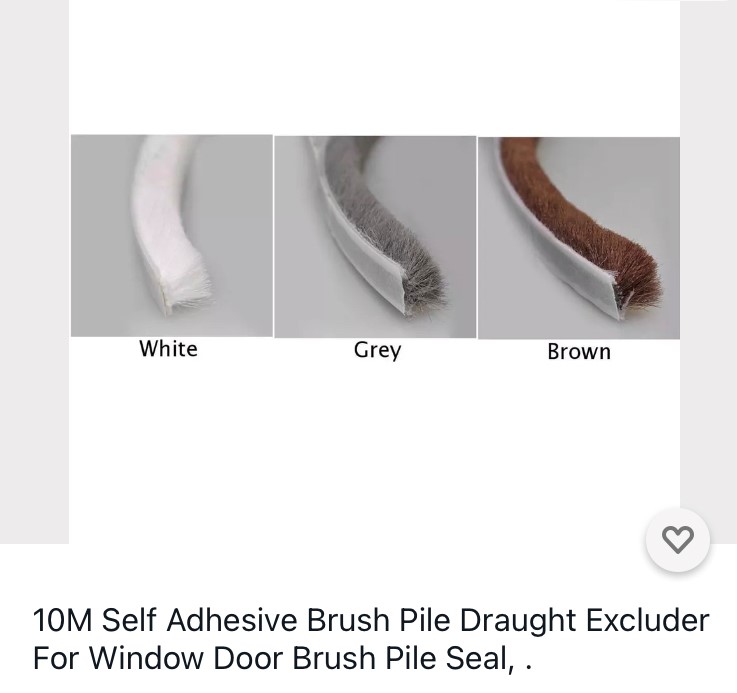
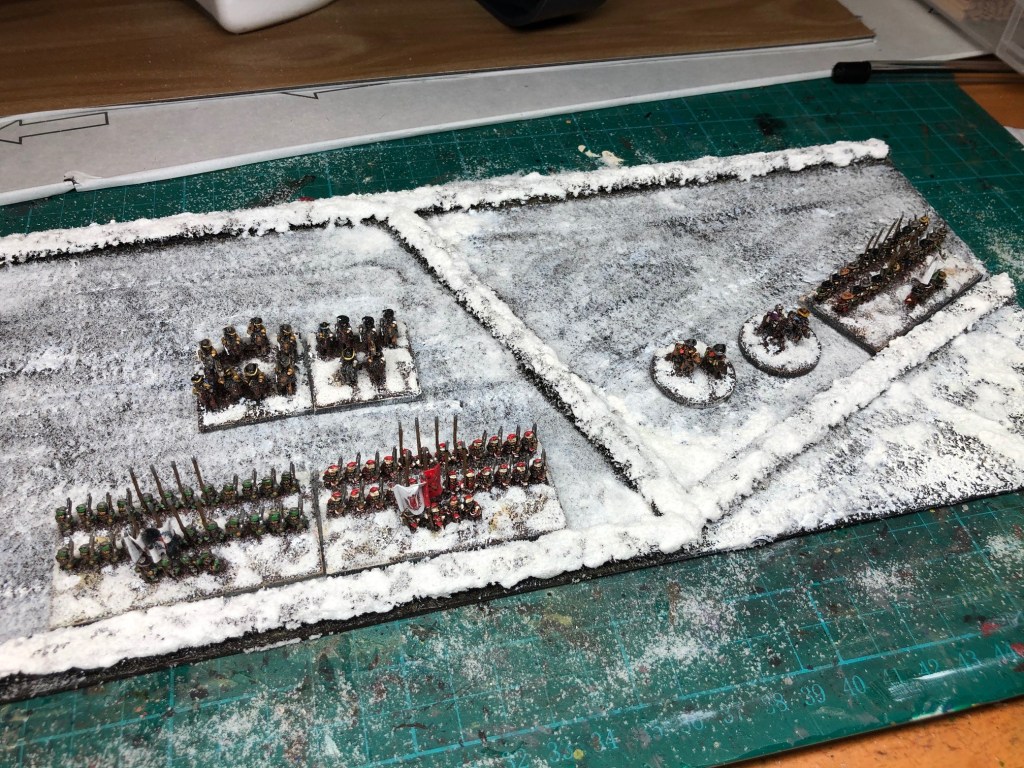
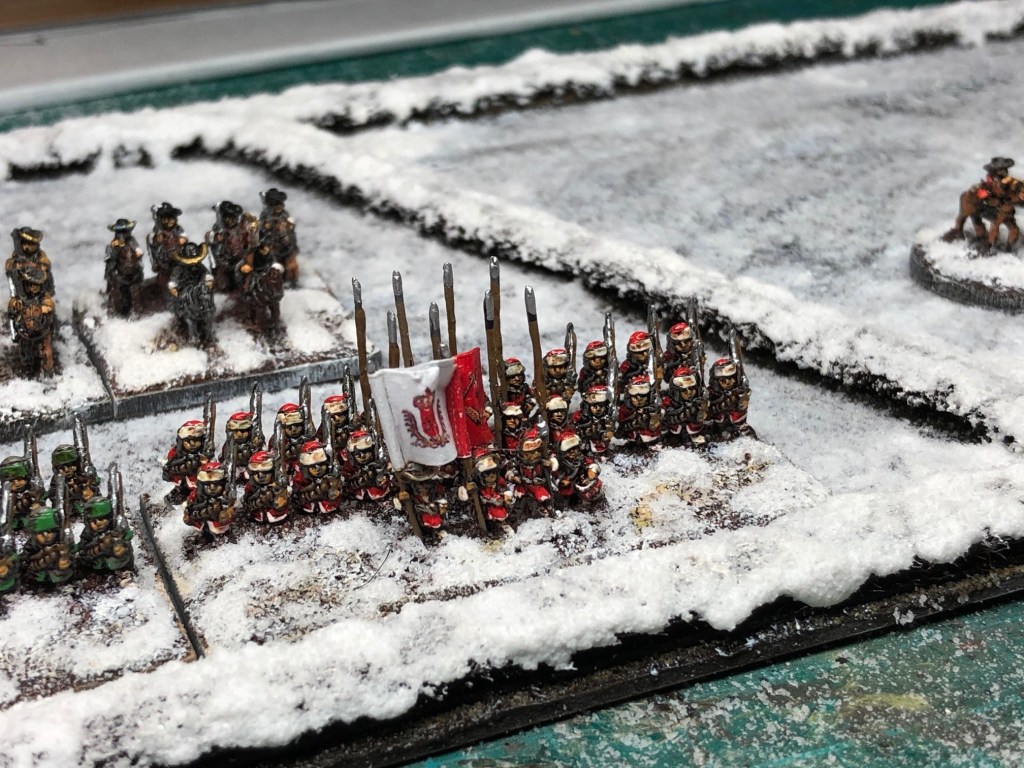
For the Lund 1675 project I want to make a wintery mat (later post) and also add some frozen fields with bushes etc around them. These would be stand alone fields and I wanted to make a test section to see how it would work out using some tiles and well as draught excluders. I got some of ebay, and the smallest one 9X6mm or something like that, they are handy in that they are adhesive. I think they are sent in container from China.
The ones I bought
The steps in the captions
First I cut out a piece of nylon plan, and attached some of the draught excluder. Both the tile is adhesive as is the excluder. Easy and quick.Added some glue and then sprinkled some sand (bird cage sand) on the non-hedge parts.I tried to use the brush to go in one direction when spreading out the sand. Let Dry.Paint it shit brown, Let DryDry brush the base with whiteMix 1 part PVA glue and 2 parts of Snow Flock with a little bit of white.Add it to the top of the draught excluders and the ground that is not fields (try to do a 80-90% cover) you want some dark to shine through. Water down some of the mix (pva, snow and white) say 1 part to 2 parts water and spread over the fields and sprinkle some snow flock all over.Good to go…Add some miniatures (you may want to add some more snow flock, I like it when it is not totally white)Looks the part…
Hope that was of some use, these tiles will enhance the table and I will make them bespoke to the scenario and then a few generic ones. They are really easy to make and relatively cheap.
Now I just need to get some more vinyl floor tiles,
You may recall this picture from some of the previous blog postings,
It shows some Birch trees I bought from NOCH and comes in a box of 7 for about £20 (if you shop around). The are ok, but I wanted to make another 30 of them, this would cost me another £80 and frankly I did not really thing it was worth it and thought that maybe I could do some cheaper. In a online interchange with Adam Bengtsson (@paganfury on twitter) he suggested using some poly fibre to make trees – I bought some and made a few trial trees, here is what I did.
I had a bundle of these tree armatures I had bought for another project some time ago.
Tree armatures – I bought these from a seller in china a long time ago, there are some non-Chinese based sellers who sell the same kind of trees (slightly higher price). Search for Bare Trunk Trees on ebay, the ones I got were about £8 for 30 armatures.
I pruned them a little bit and painted them black, with a cheap acrylic paint.
I guess I could have used a spray paint, but not sure how it would react to the plastic the trees are made of. I takes a minute or some to do a tree, so I used a brush with generous about of paint.
Let dry and then a coat of white, do not paint the branches white.
Then some decorating with grey and black and some more white here an there, trying to make the illusion that it is a birch tree, there is no right or wrong here as the look varies. Leave the crown black as shown.
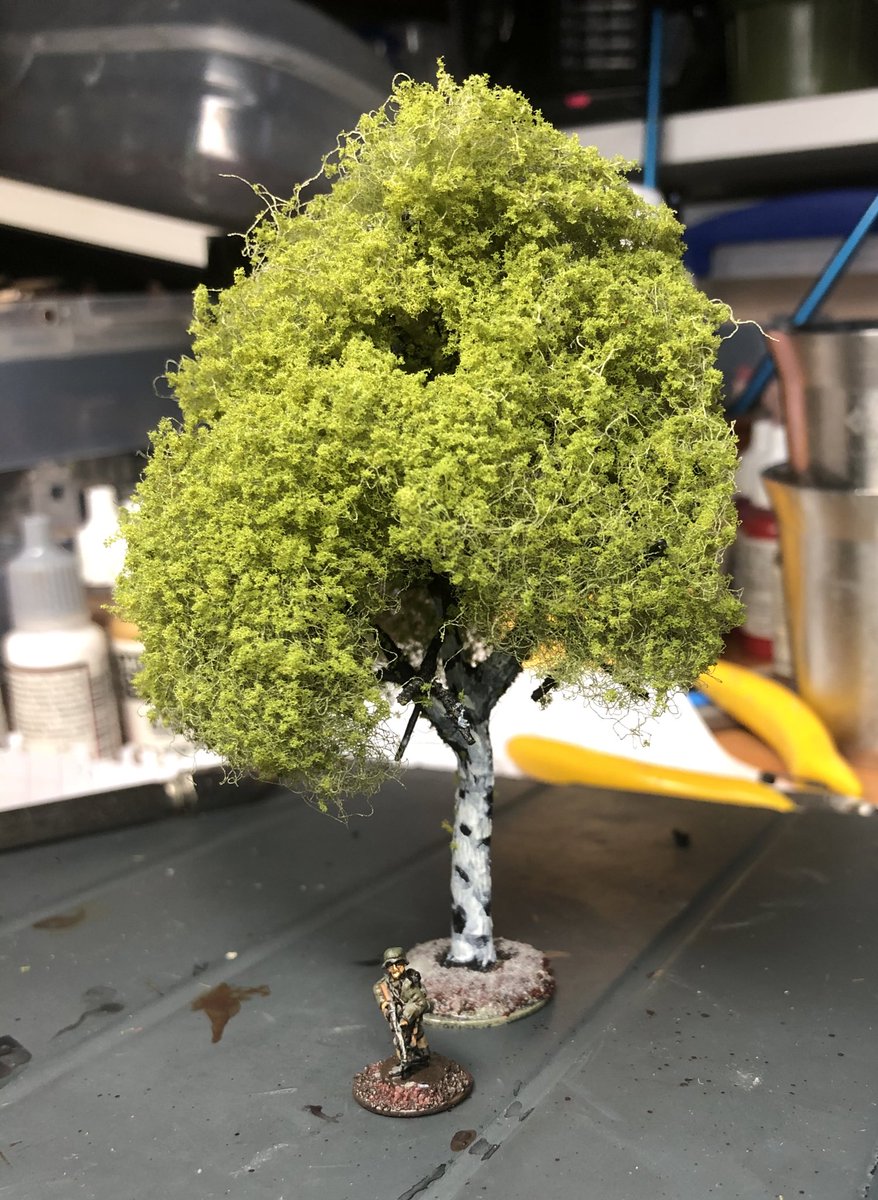
When the tree is dry take some green poly fibre (I got mine from Woodland Scenics) and carefully cover the tree with it, do not use too much (I probably will reduce the amount I use for my next batch).
Time to go outside and use some spray mount/adhesive – I did about 6-8 quick sprays (press and release, hold the trunk and avoid spraying on the trunk mainly hit the fibres) on each tree and after this covered them with some Woodland Scenics Coarse Turf (Light Green). I suggest you spray one tree then add the turf immediately. Do it with the bowl or a box under so you can re-use anything that does not stick to the tree.
I think they look great! (Currently based on some Washers but will think about what I do moving forward).
Ok there are a few issues to consider, so at least I can say I told you so.
Birch trees tend to have an overall thinner appearance than this method gives (the Noch Trees gives this illusion form a distance) – but for me these work.
They are a little bit fragile so I intend to buy some cheap hair spray and spray them a few times to seal them, this should make them more durable.
Anyway let me know what you think, nothing new really but this will allow a quick production of a lot of trees for, Say at a cost of less than £1 per tree compared to the £3 from the ones from Noch. I think they look better too.
Writing this after another day working from home during the Corona lock-down in Greater London – I am happy to report that my immediate and extended family are all ok. It all feels very surreal, and I hope as always that this blog will give you a few moments of being away from it all in a safe place.
Today,
More pictures from the Dalarna 1943 Project and being contacted by Swedish Radio
A note on my appearance on the Grognard Files
Dalarna 1943
I was contacted by the Swedish Radio last week, their regional Dalarna branch, about this project and recorded a short thing for their morning show today. It made me happy, I hope I did not come across as too much of an idiot whenever it is being aired.
Here is a sound file containing the segment (in Swedish, aired 03 Apr 2020)
A lot of recent progress on this project as I have finished the third batch of Prints from Sabotag3d (link here). I am really happy to see that Paul has been shipping some round pole fences (gärdsgård) over to Sweden and consequently me not being the only one fascinated by this type of Fence. So if this appeals to someone get in contact with Paul and see what he can do for you, he makes these fences in 1/100 scale (15mm size miniatures) as well as for 28mm miniatures. But I suppose you can get them in any scale you like – it really takes us straight into the Dalarna landscape of old (and new) without to much leap of faith. We should also add that Paul also did a few damaged sections for me, to be used to illustrate the impact of an explosion or that a tank has driven through them.
A similar piece to that used in the picture above as delivered by Sabota3d
Last time around we had done the basic village tiles and the round pole fences and it allowed to create something like this (there is a link here to an earlier blog that covers this is some detail and talks about the Falu Red colour used for the houses, etc).
For further detailing I wanted to have some mail boxes, typical of the Swedish country side. So I sent Paul the idea and as always he returned a fantastic little print (truth is that the state post box may not have had the colour scheme and the symbol at that time, but I felt it just needed to look that way).
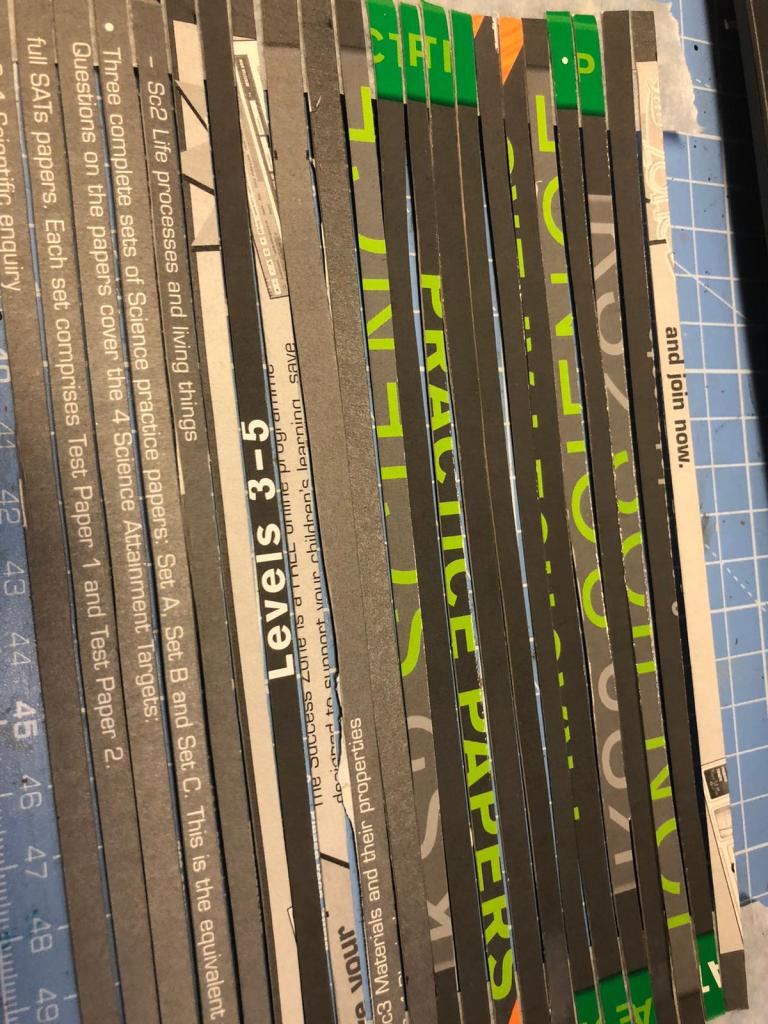
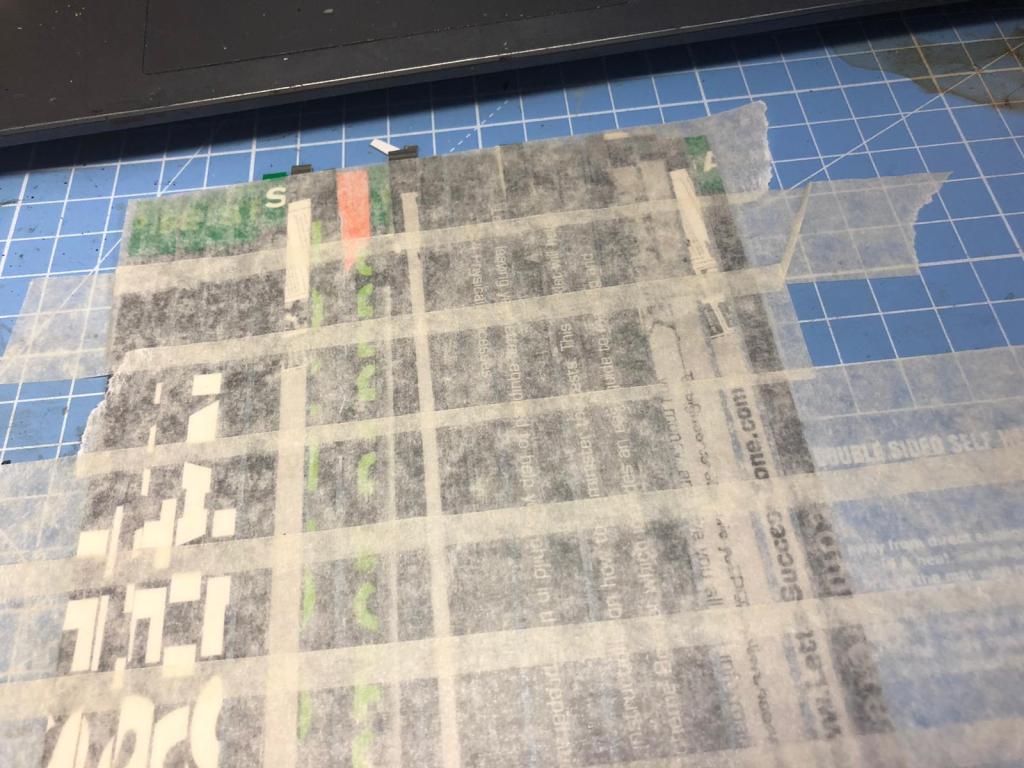
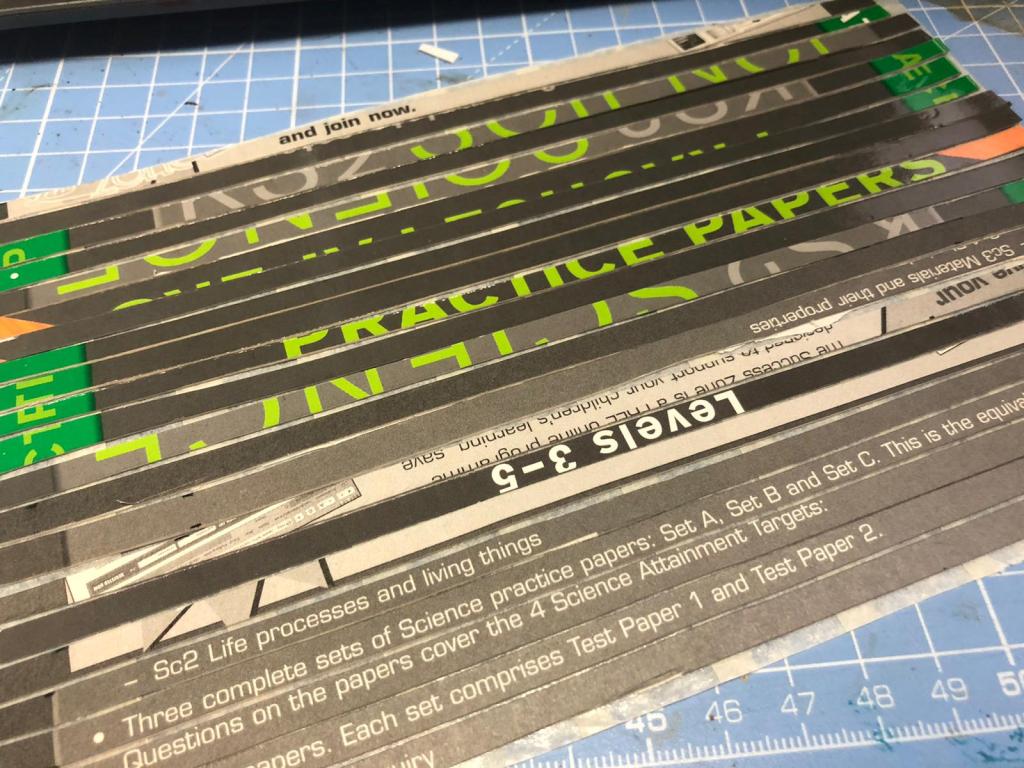
I miniaturized some documents to represent some kind of messages having been posted up (perhaps about what to do in case or war, or the latest football results!), a Proganda Poster and an old Film Poster (this one a homage to my Dad, as it was the first movie he remembered seing on the big screen at a matinee viewing sometime in the 1950ies, it is the Sea Hawk with Errol Flynn – Slaghöken in Swedish), these were just printed small on a normal laser colour printer on normal print paper and cut out and glued in place. The label on the yellow post box was made using a lable paper for a laser printer (Model by Sabotag3d)
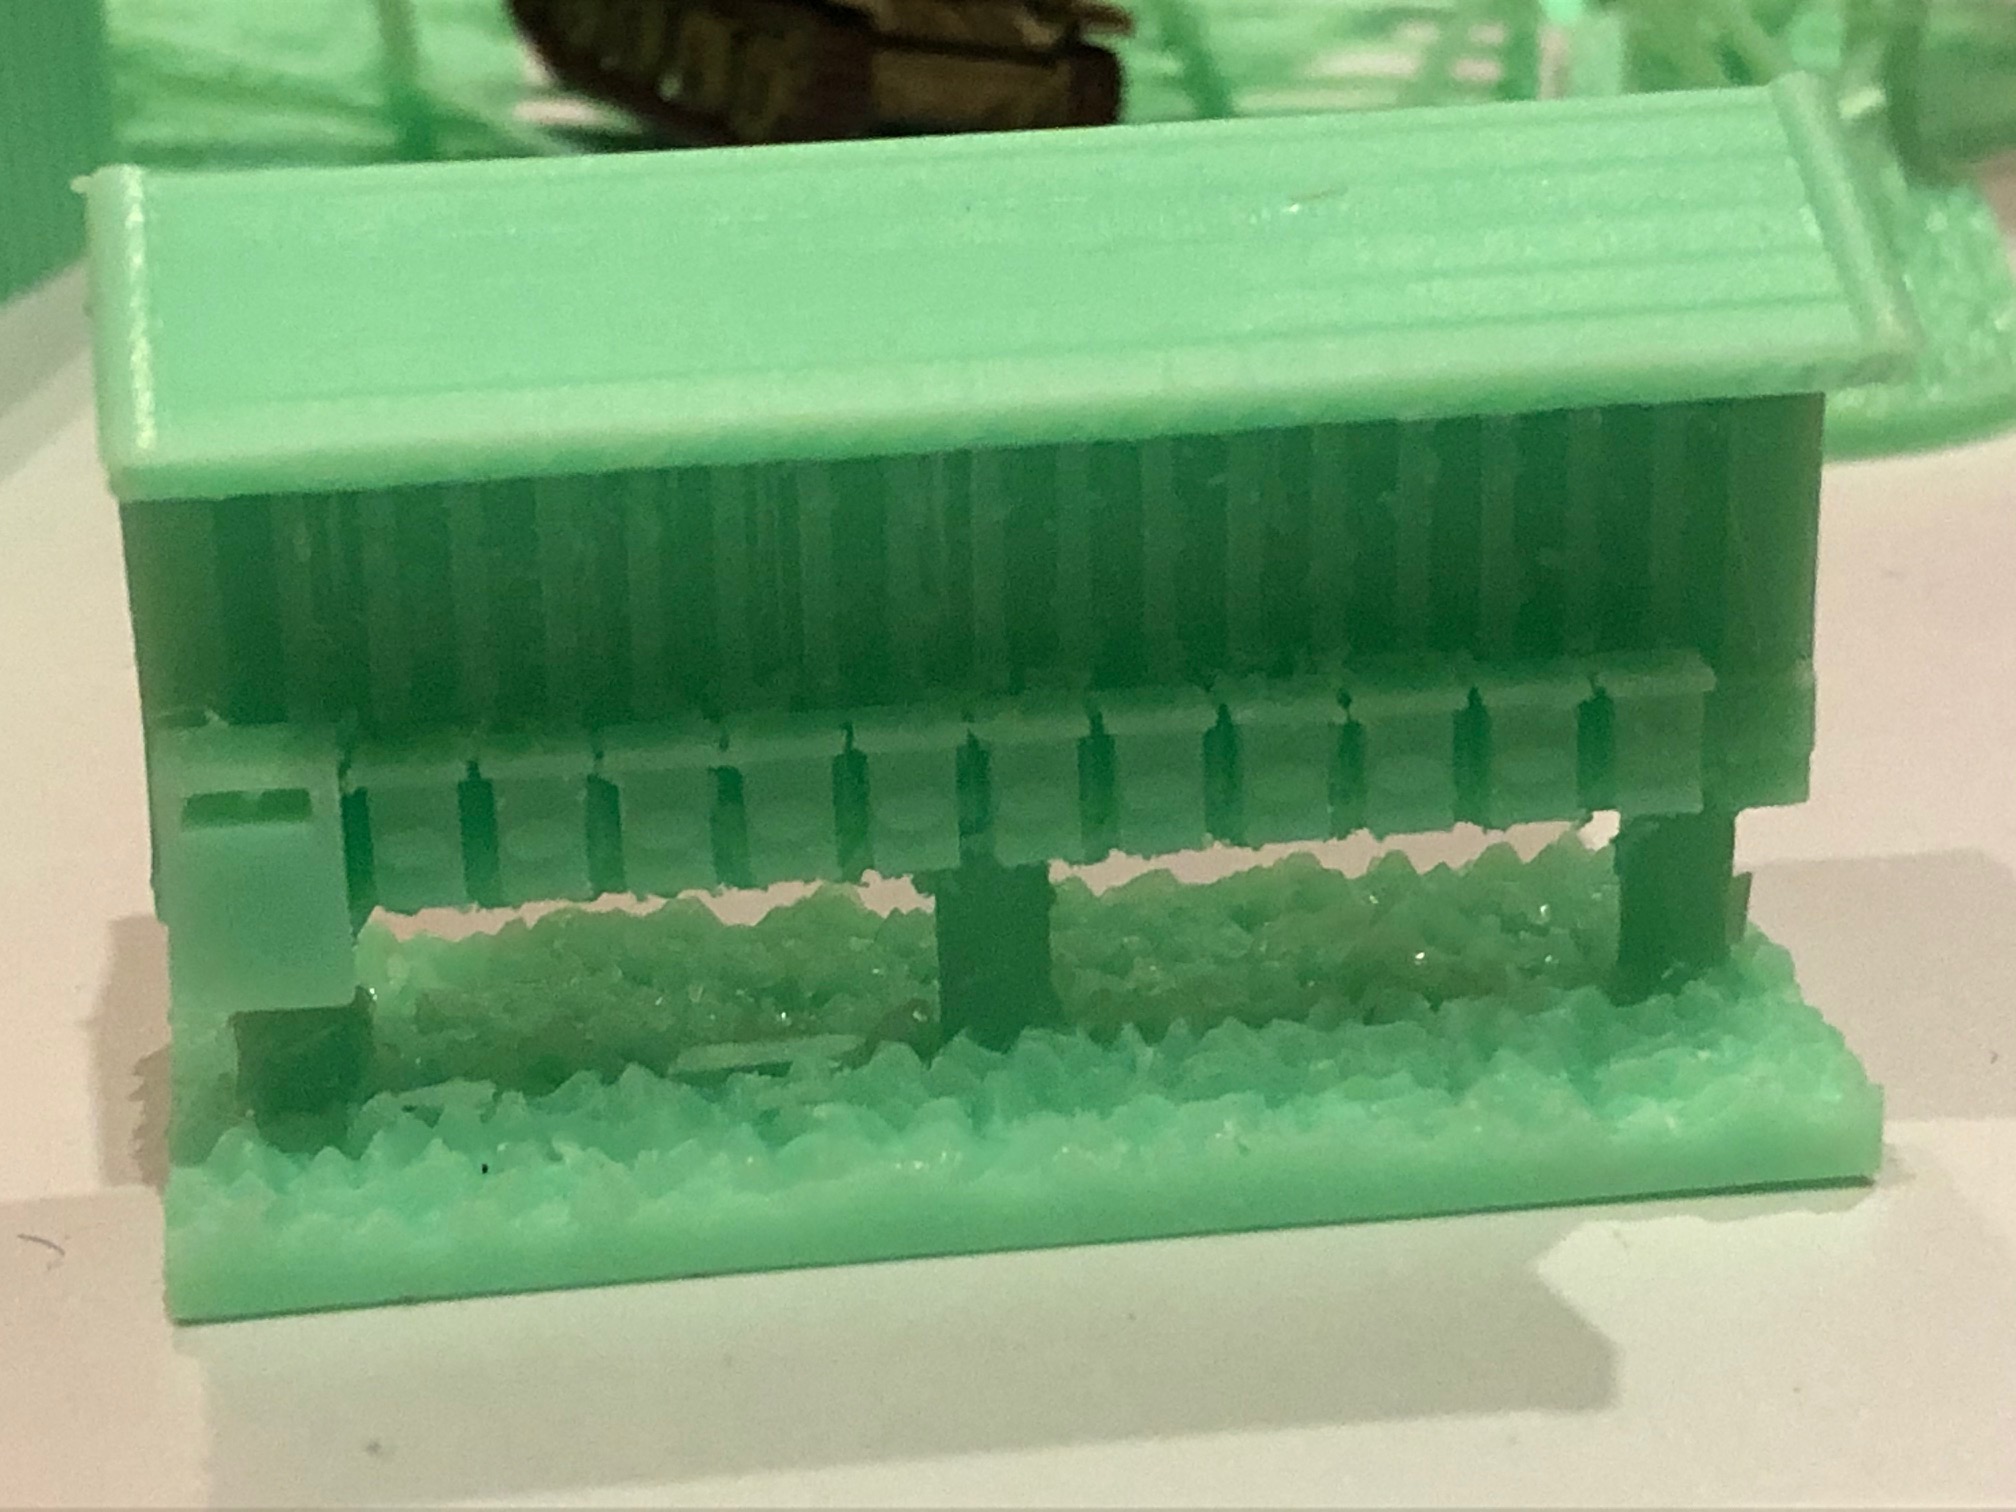
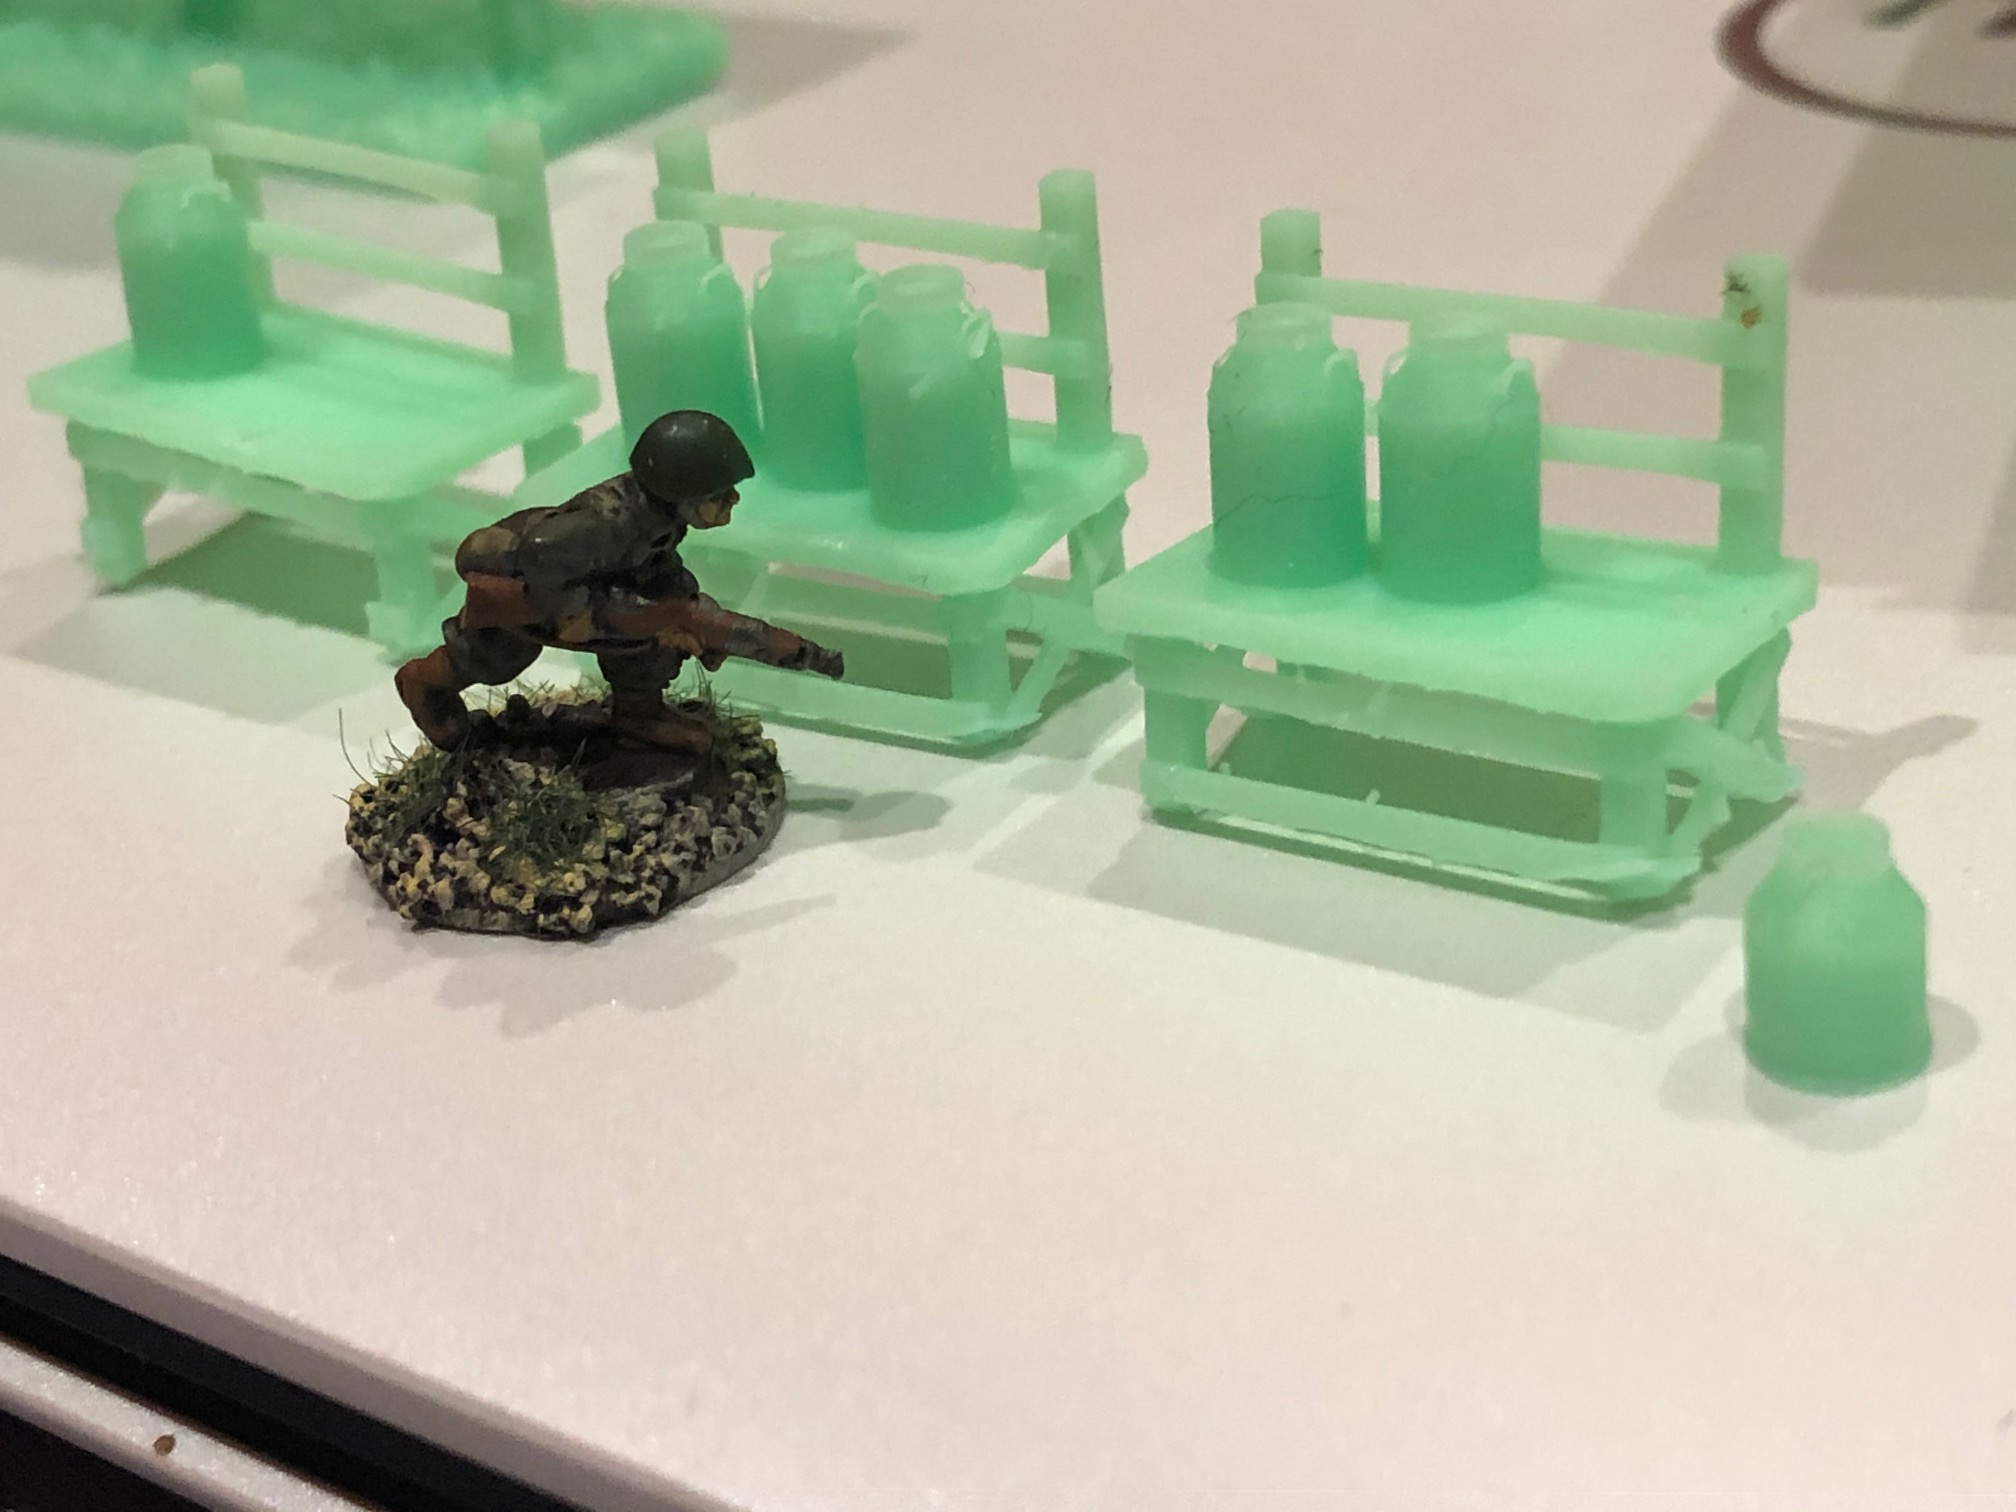
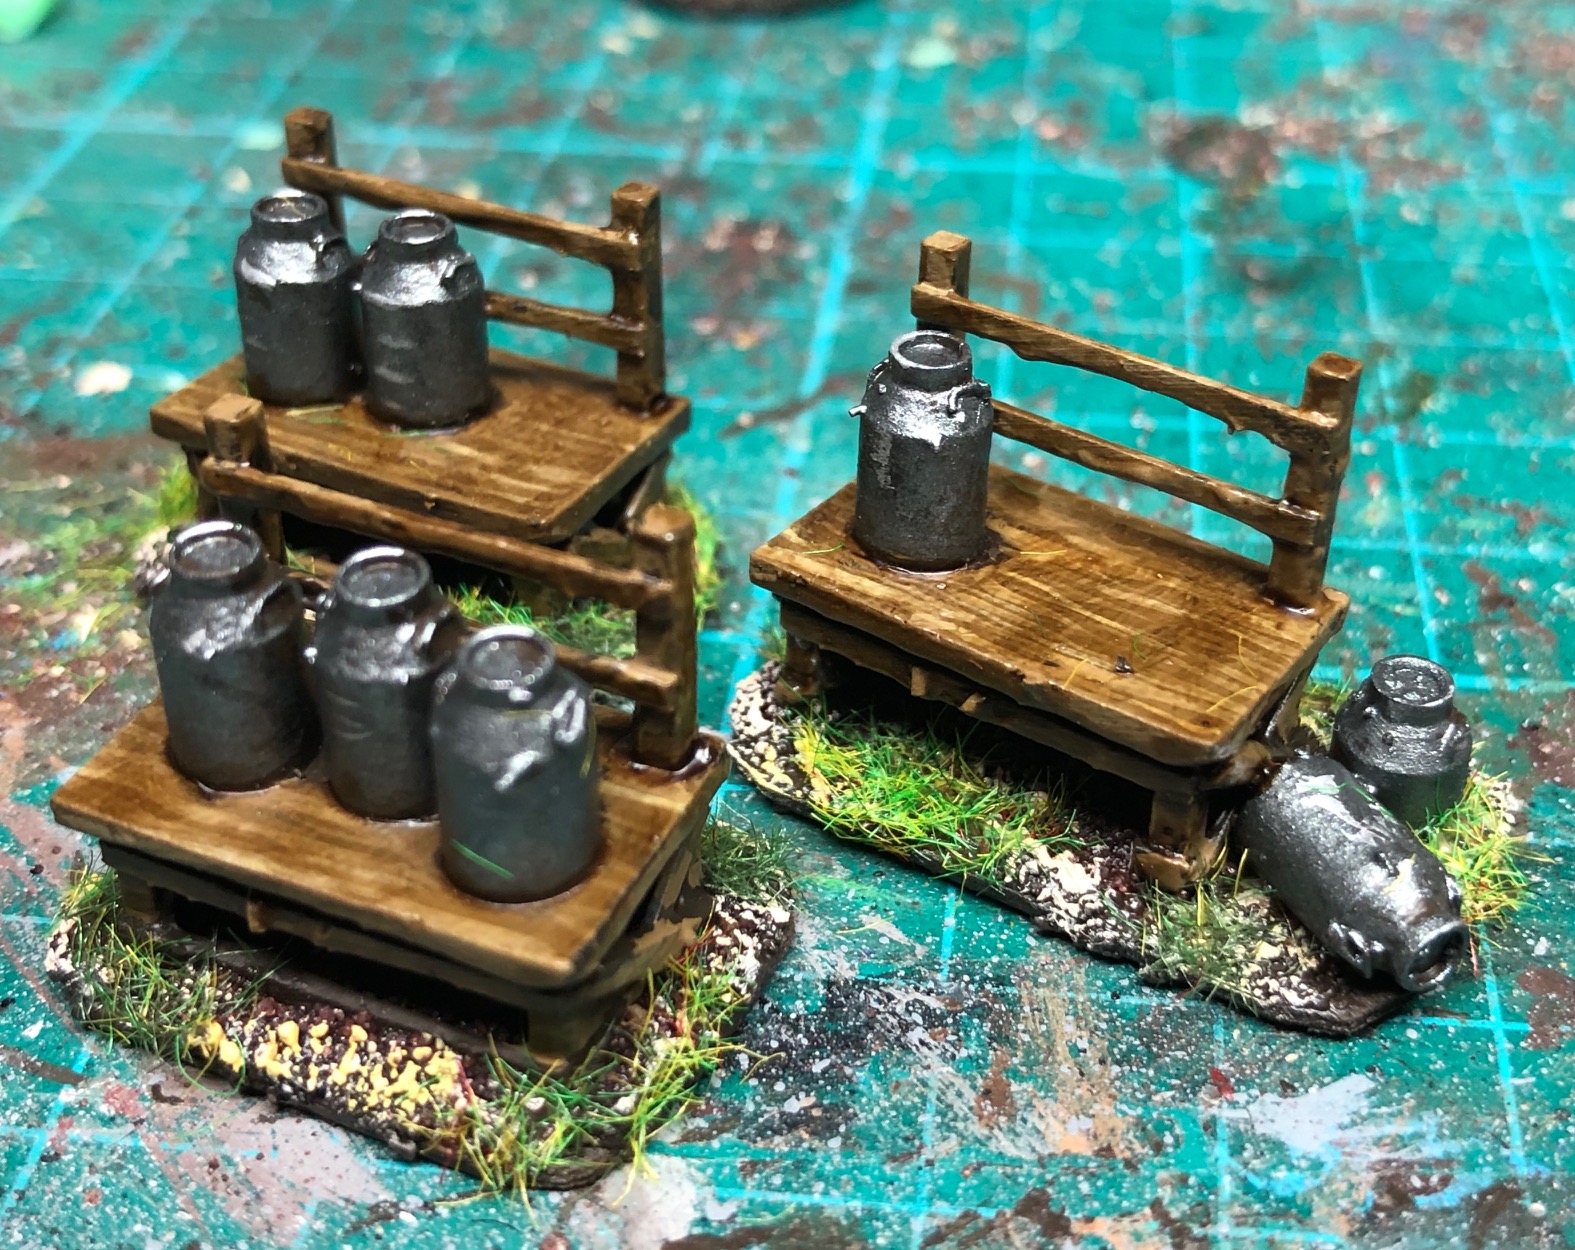
Milk of course was collected differently in those days and milk churns would be standing on tables alongside the road, ready for collection on the morning.
(Model by Sabotag3d)
The centre of the village is the Lanthandel that would sell you the supplies you needed.
Ready for business (Model by Sabotag3d)
Again some posters from the time used to add some immersion to it all. Some of the brands are still popular today.
And finally a little petrol station, probably not that operational due to rationing, but again a not to uncommon feature in the Sweden of 1943.
Petrol Station (model by Sabotag3d)
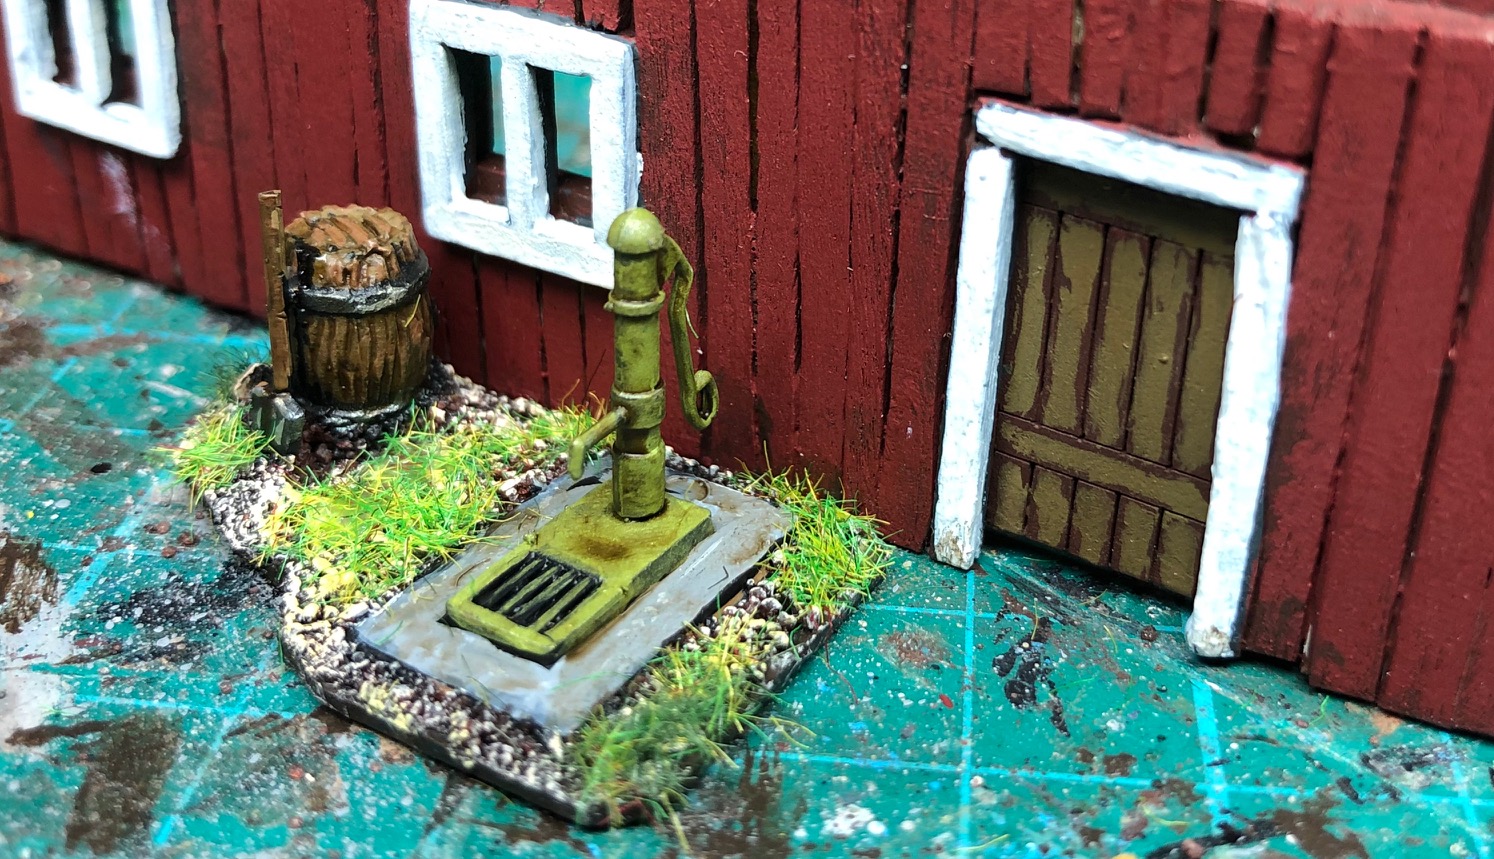
On top of this I have spent some time doing further features to add to the landscape and increase the immersion factor on the table.
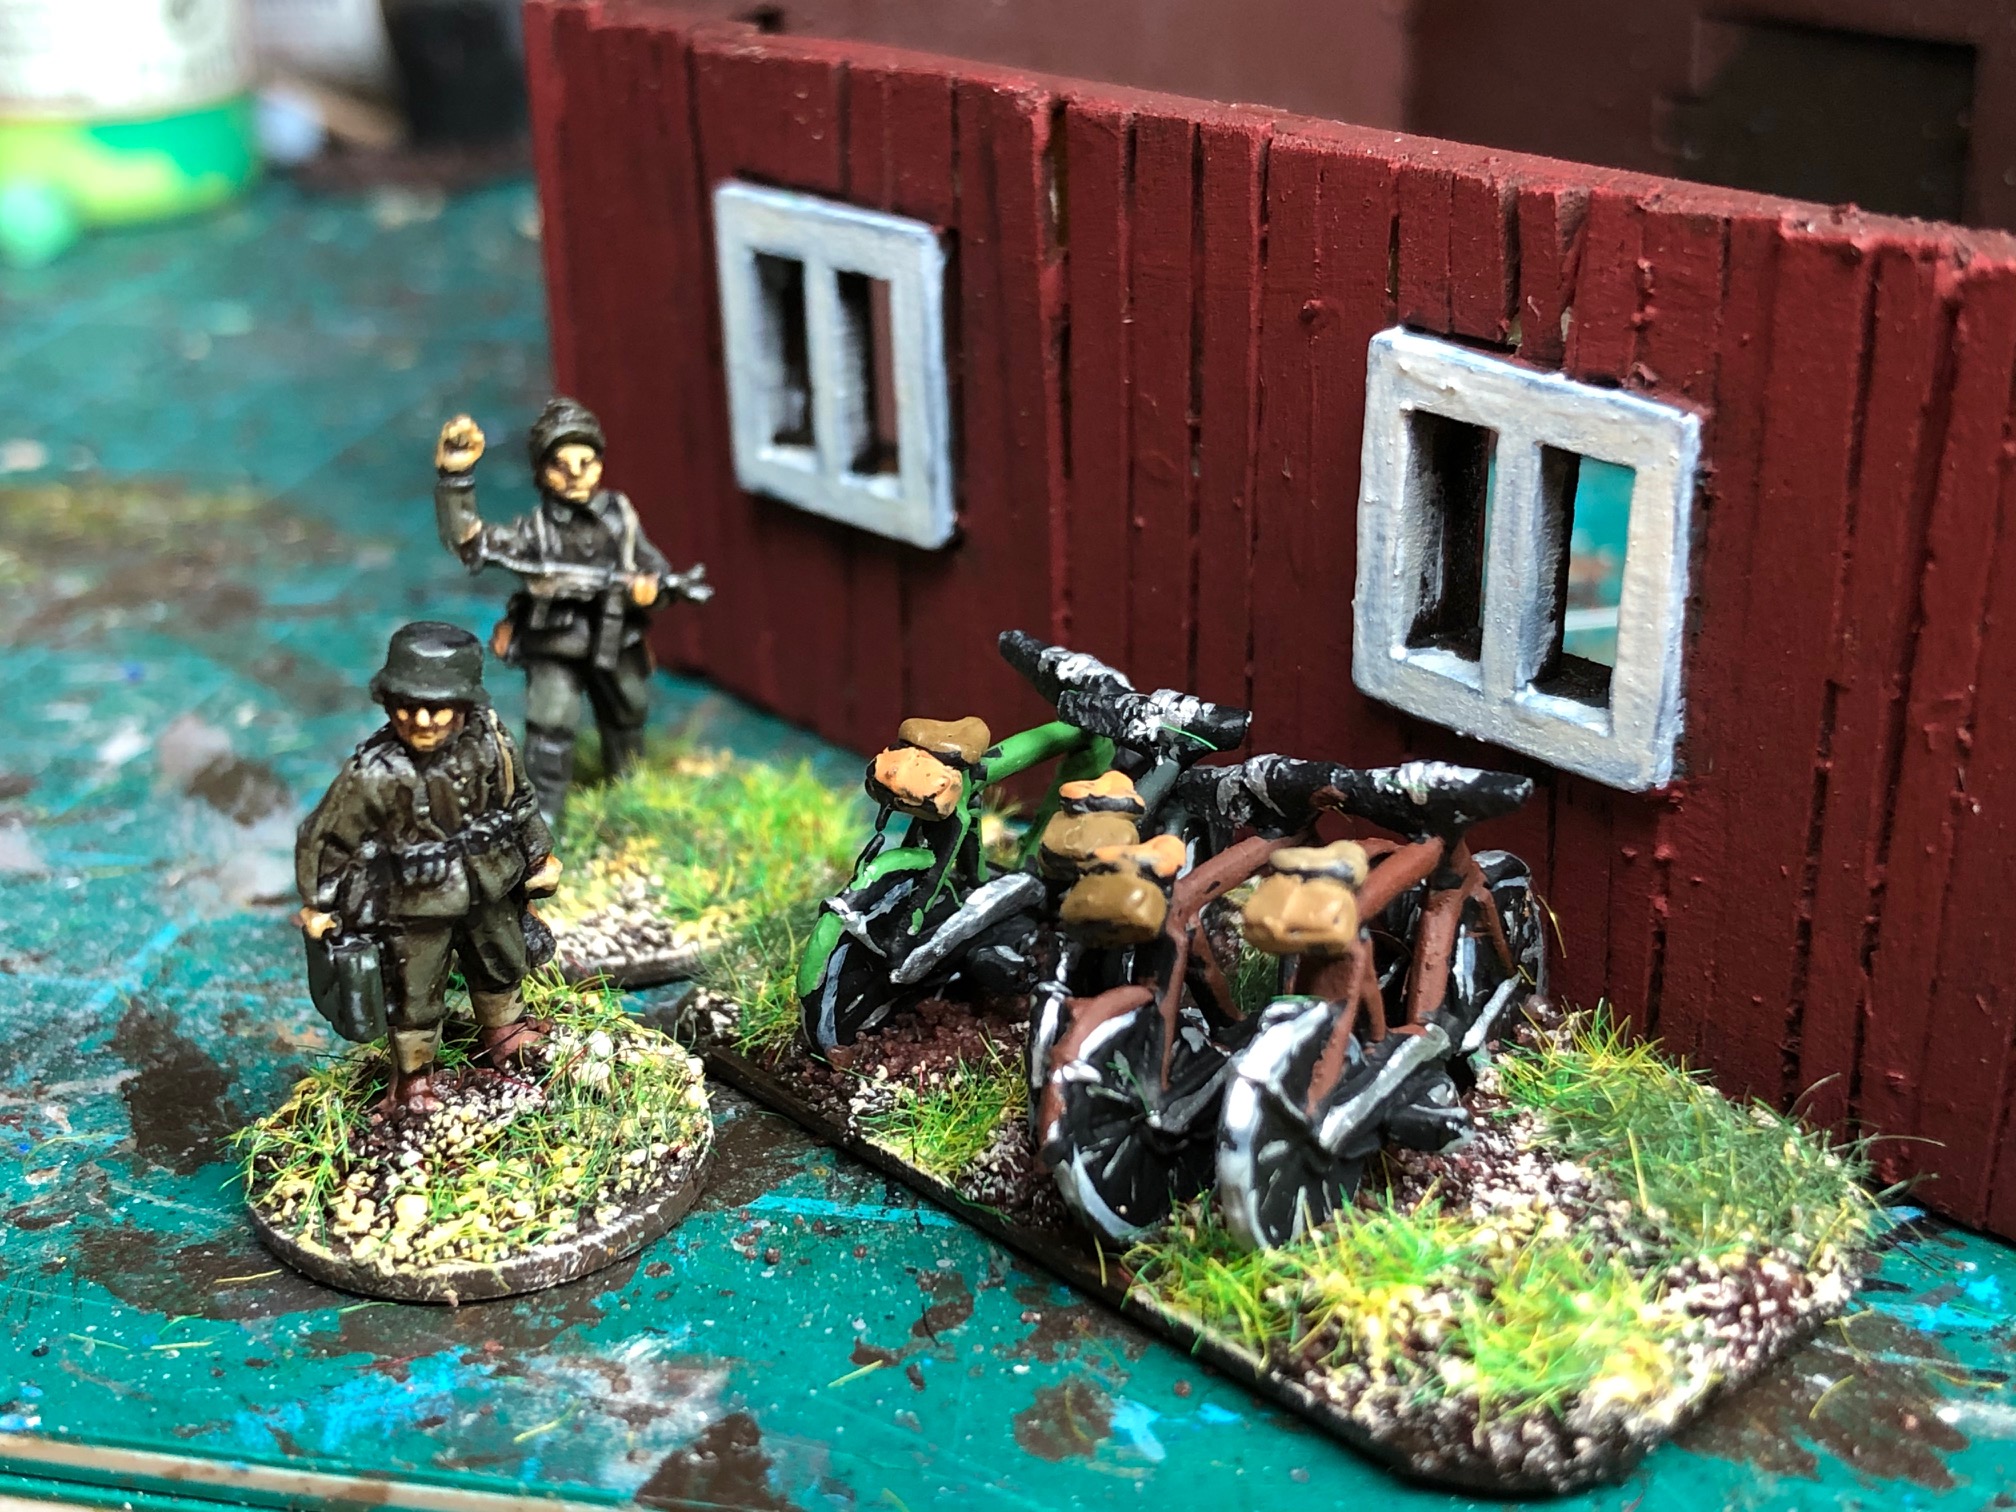
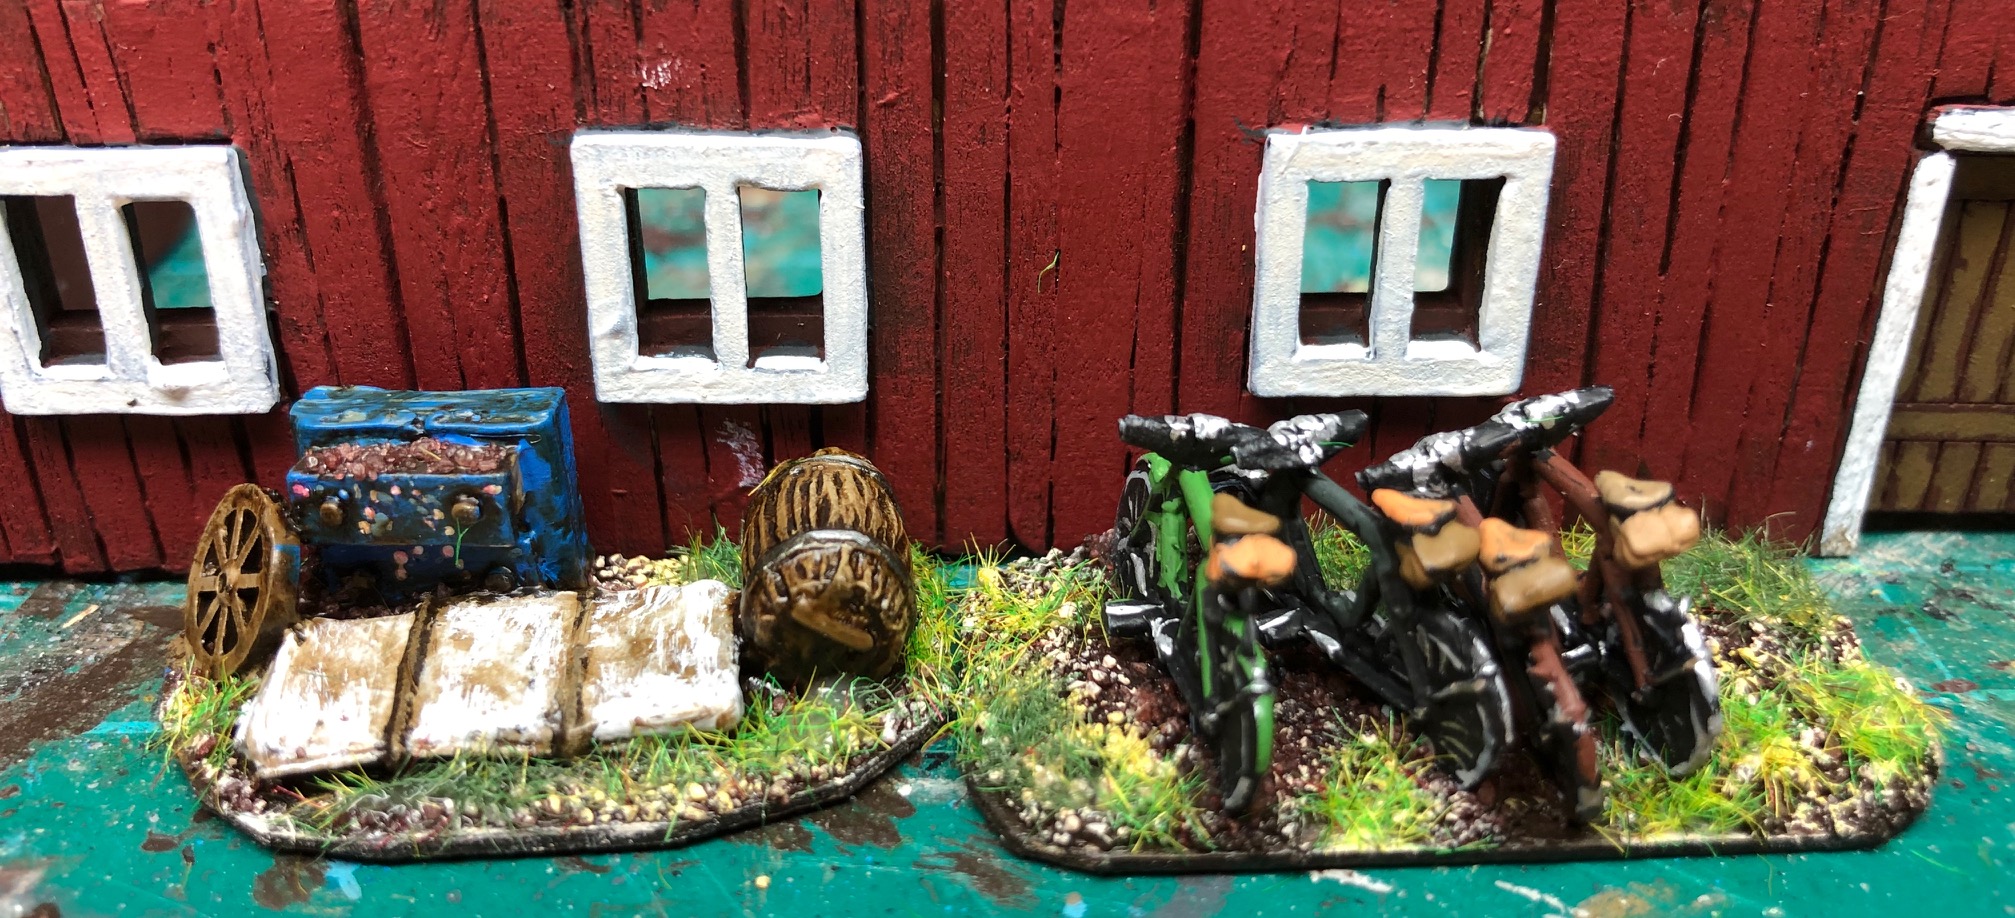
Made from various stuff tt scale benches (railway stuff), MC from HQ Pack, some cycles from Peter Pig, the wood piles are just cut matchsticks and looks great, and some other stuff.
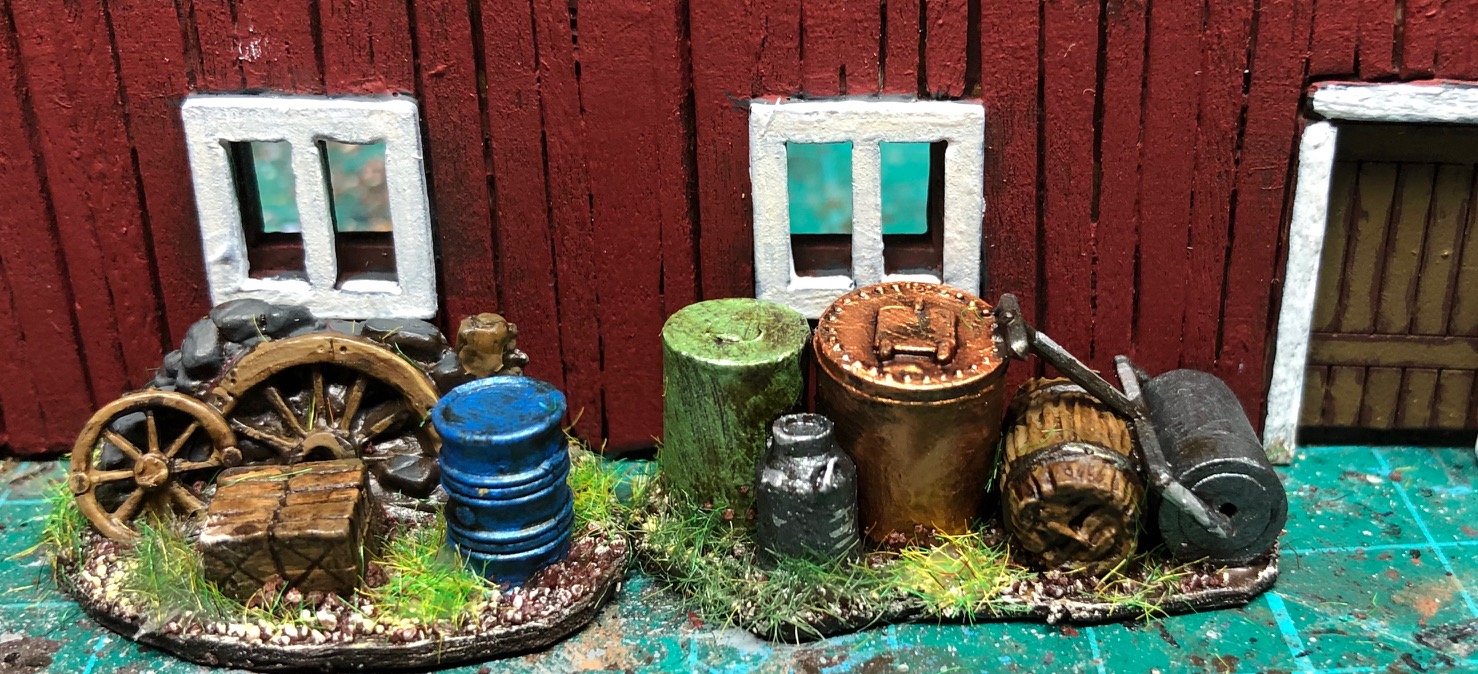
The table from a Peter Pig command set and the tools from some railways set I bought ages ago.
Bikes from Peter Pig
The wagon wheels and wall from Peter Pig the other stuff from the kit box
That drawer has some Kurbits – a popular art form in my home county (Dalarna)
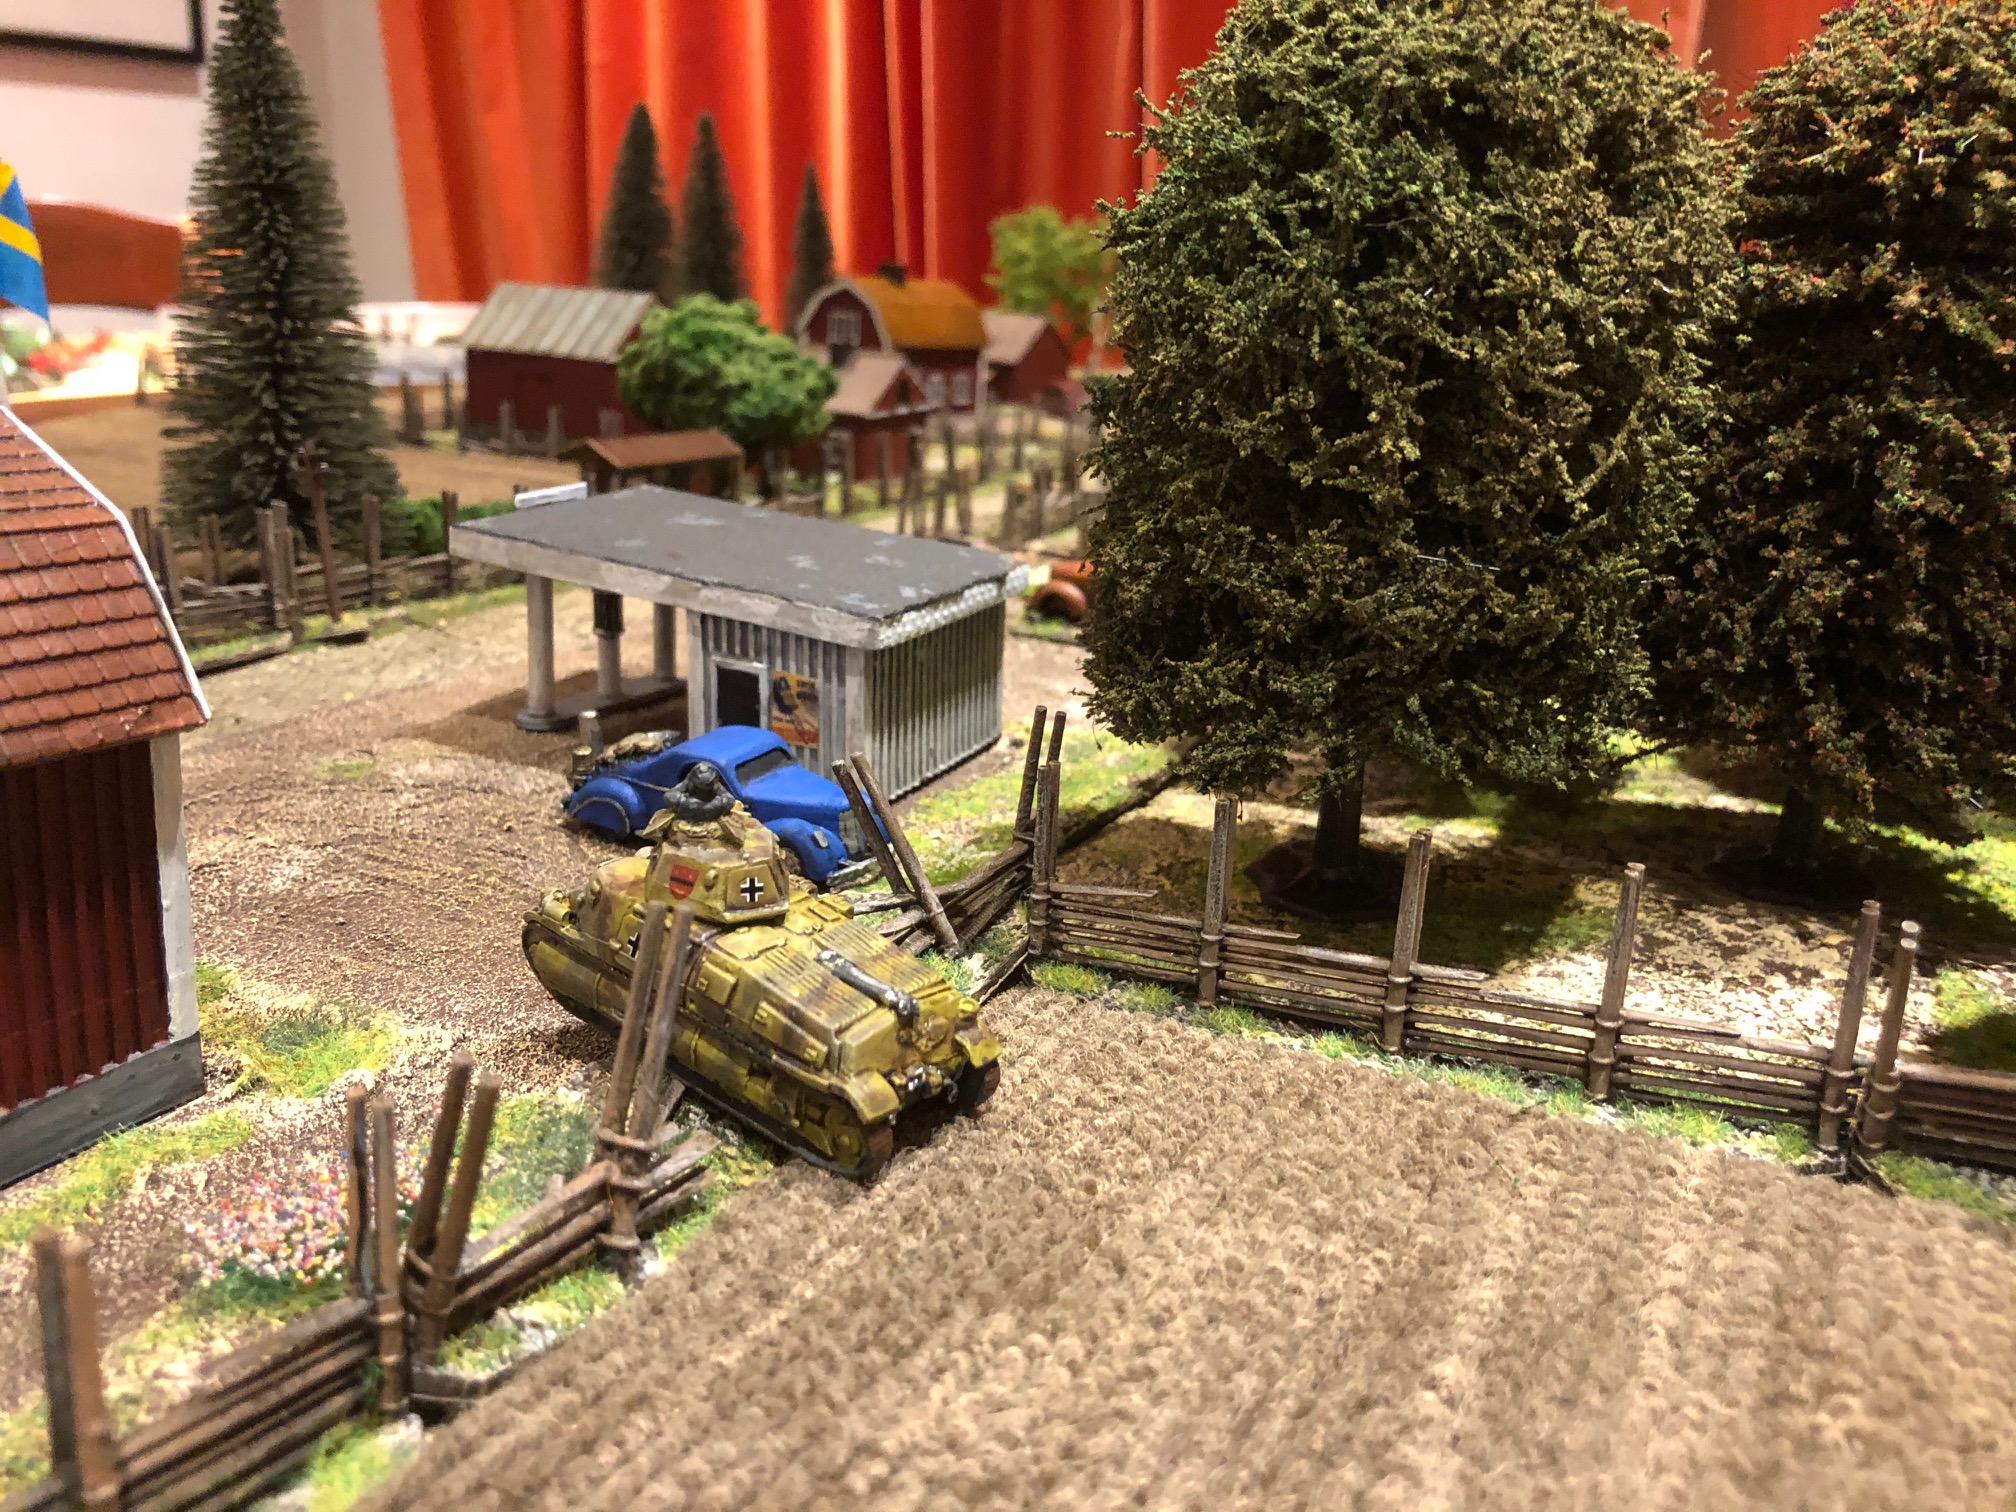
We laid out another table and had a game with the Little One last weekend (using the Chain of Command rules by Too Fat Lardies, link here) and then we did a lot of shots of vehicles because we could.
A Little Game
Some random shots of Swedish WW2 Vehicles
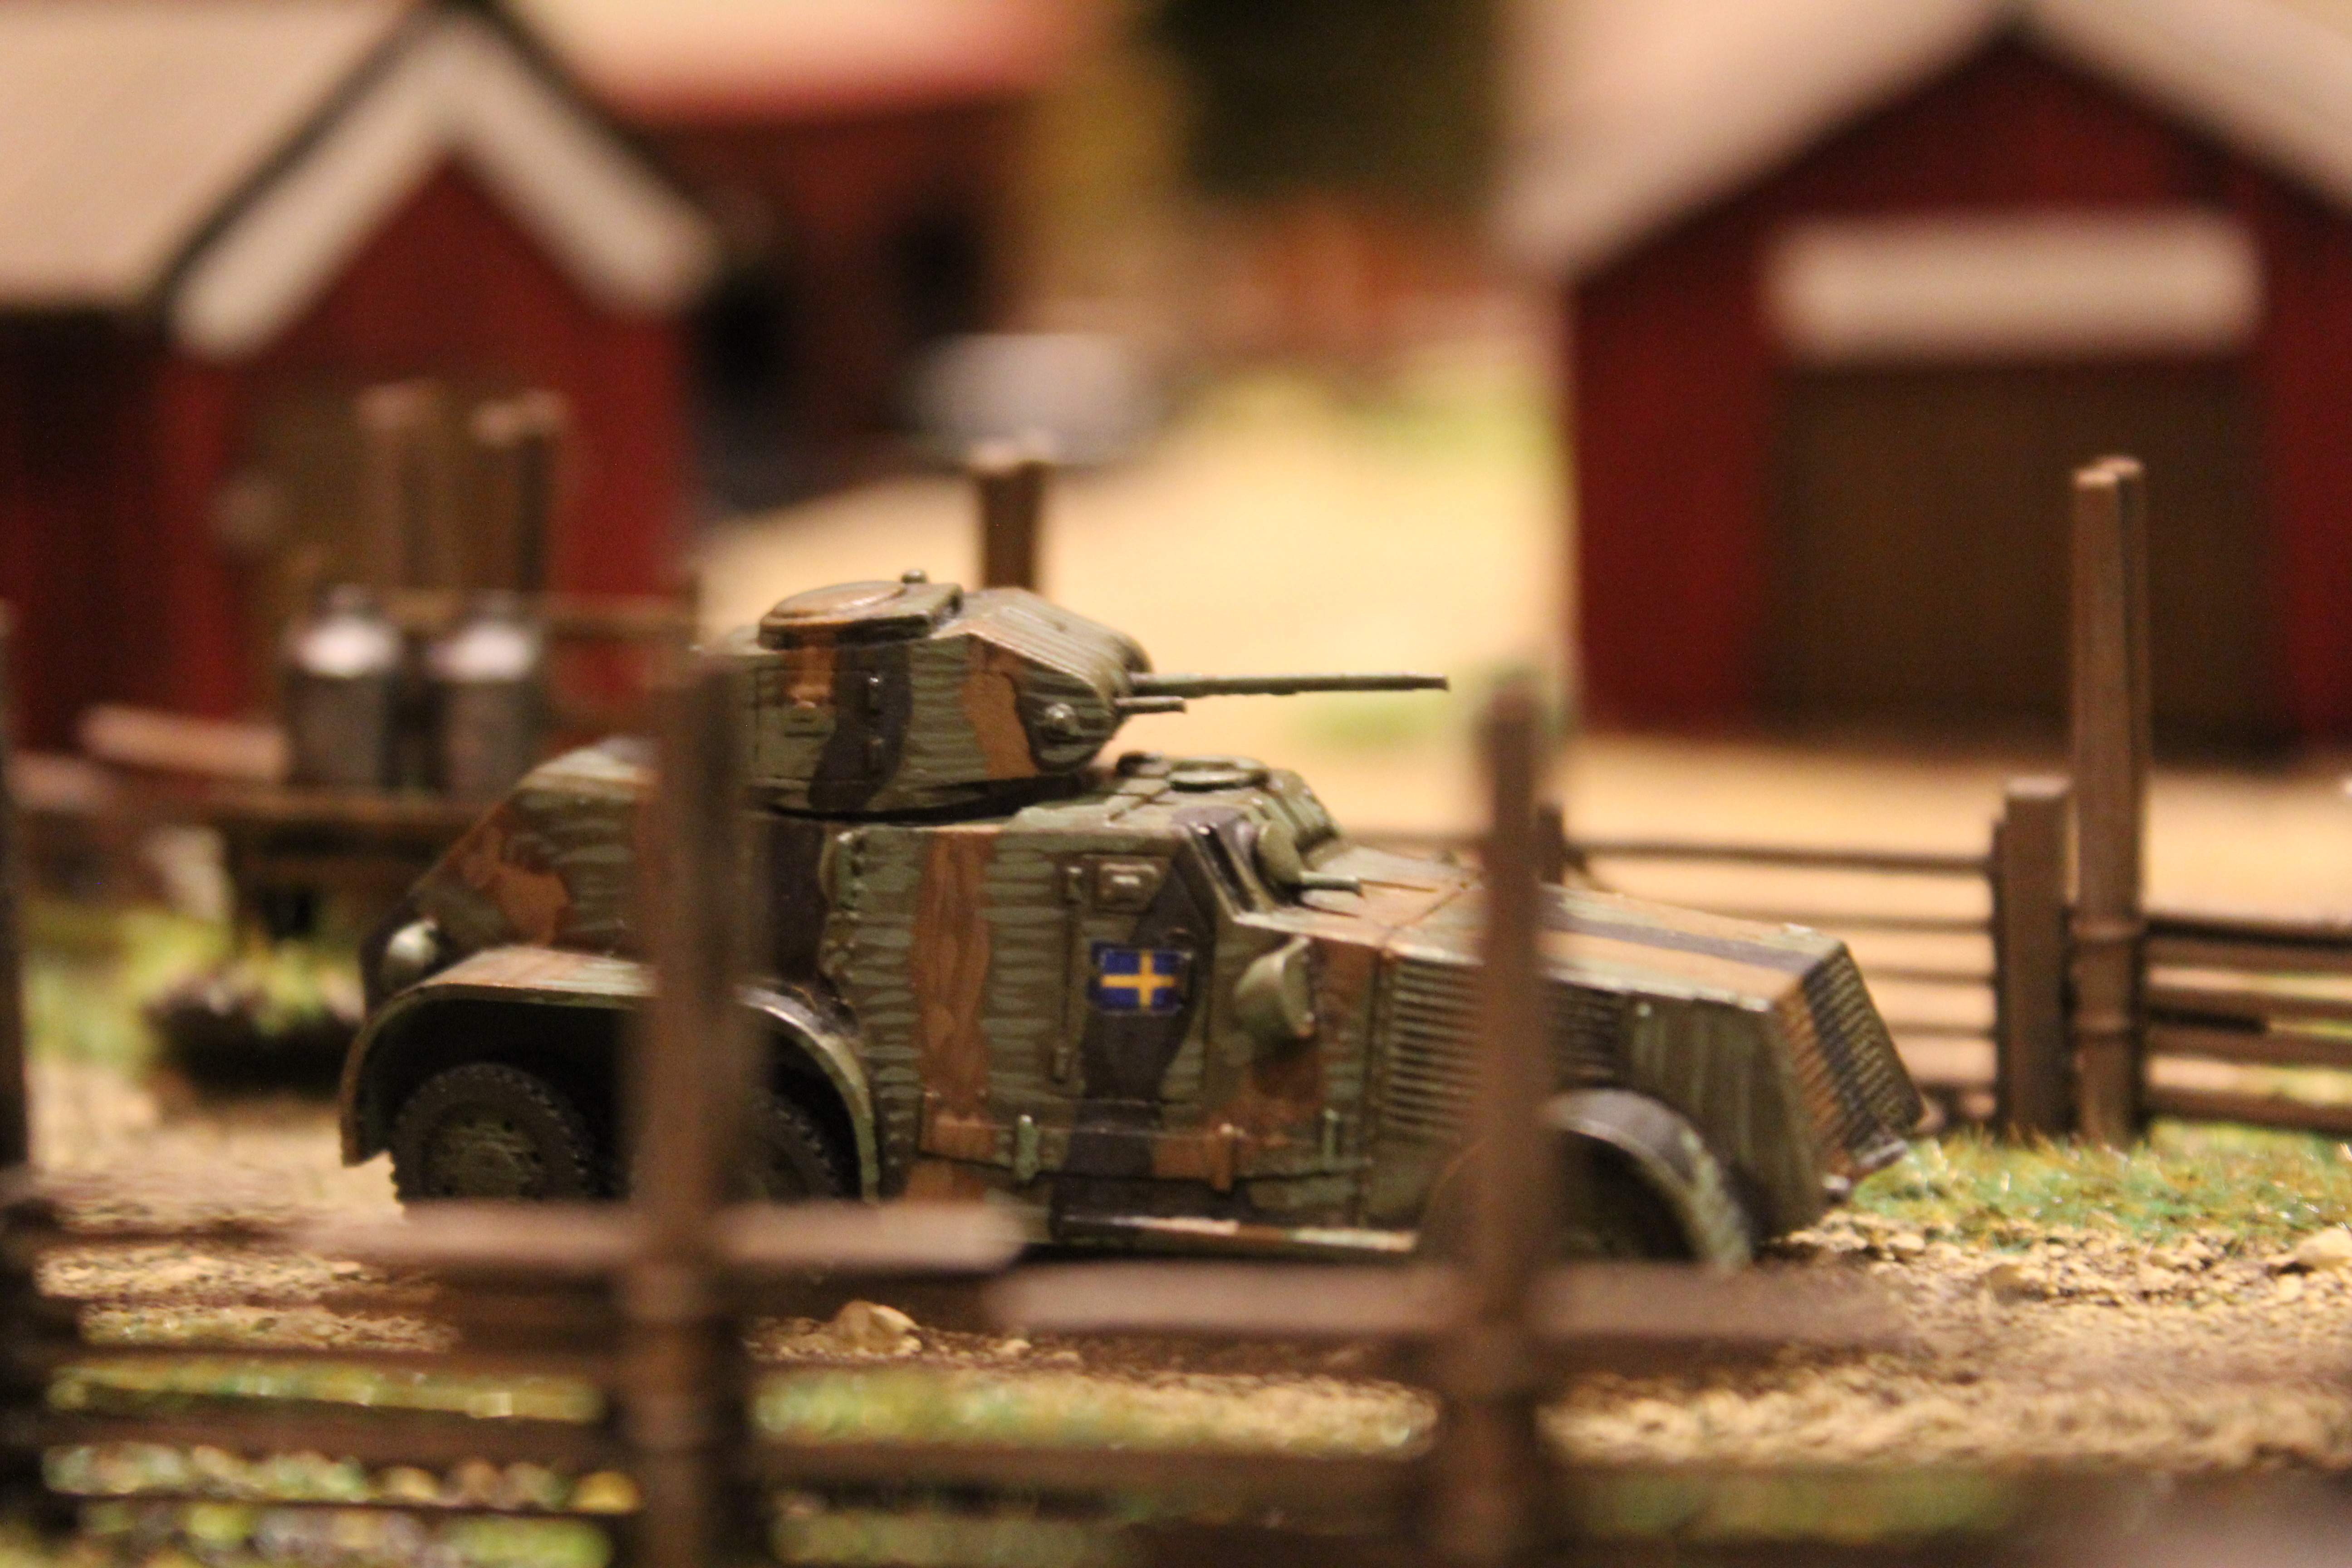
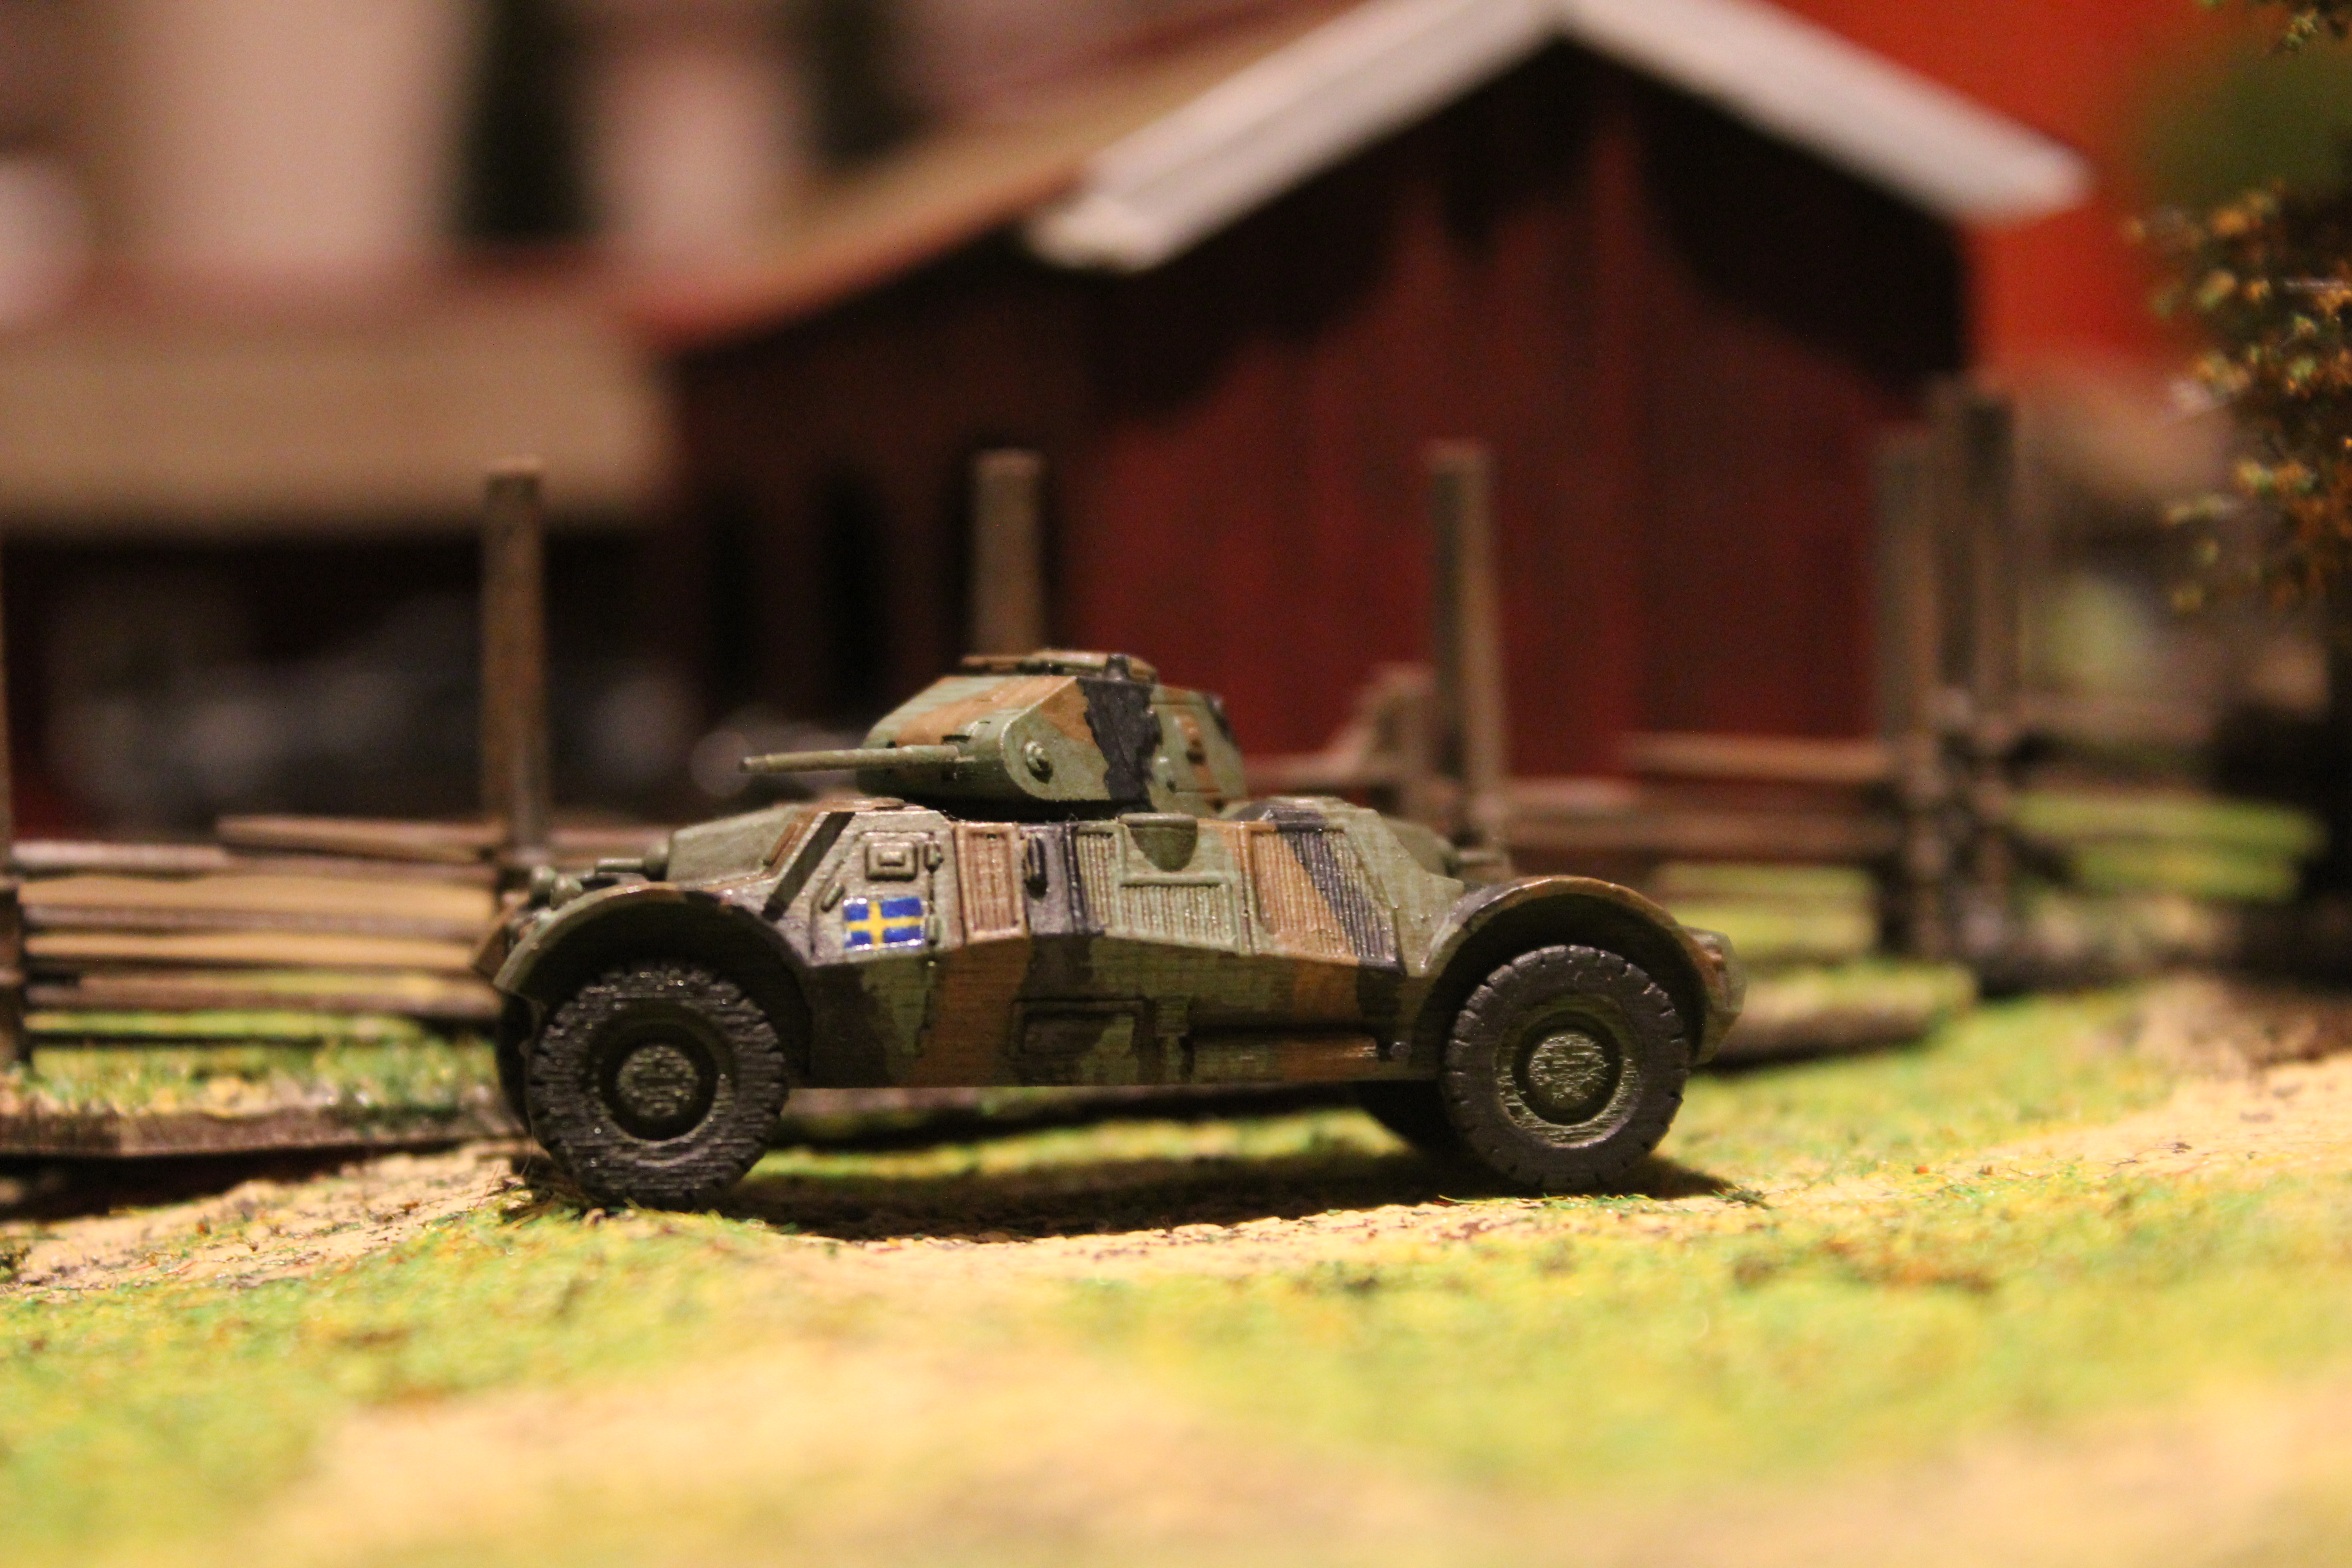
First out the L-series of armoured cars developed in the 1930s (1/100 model from shapeways).
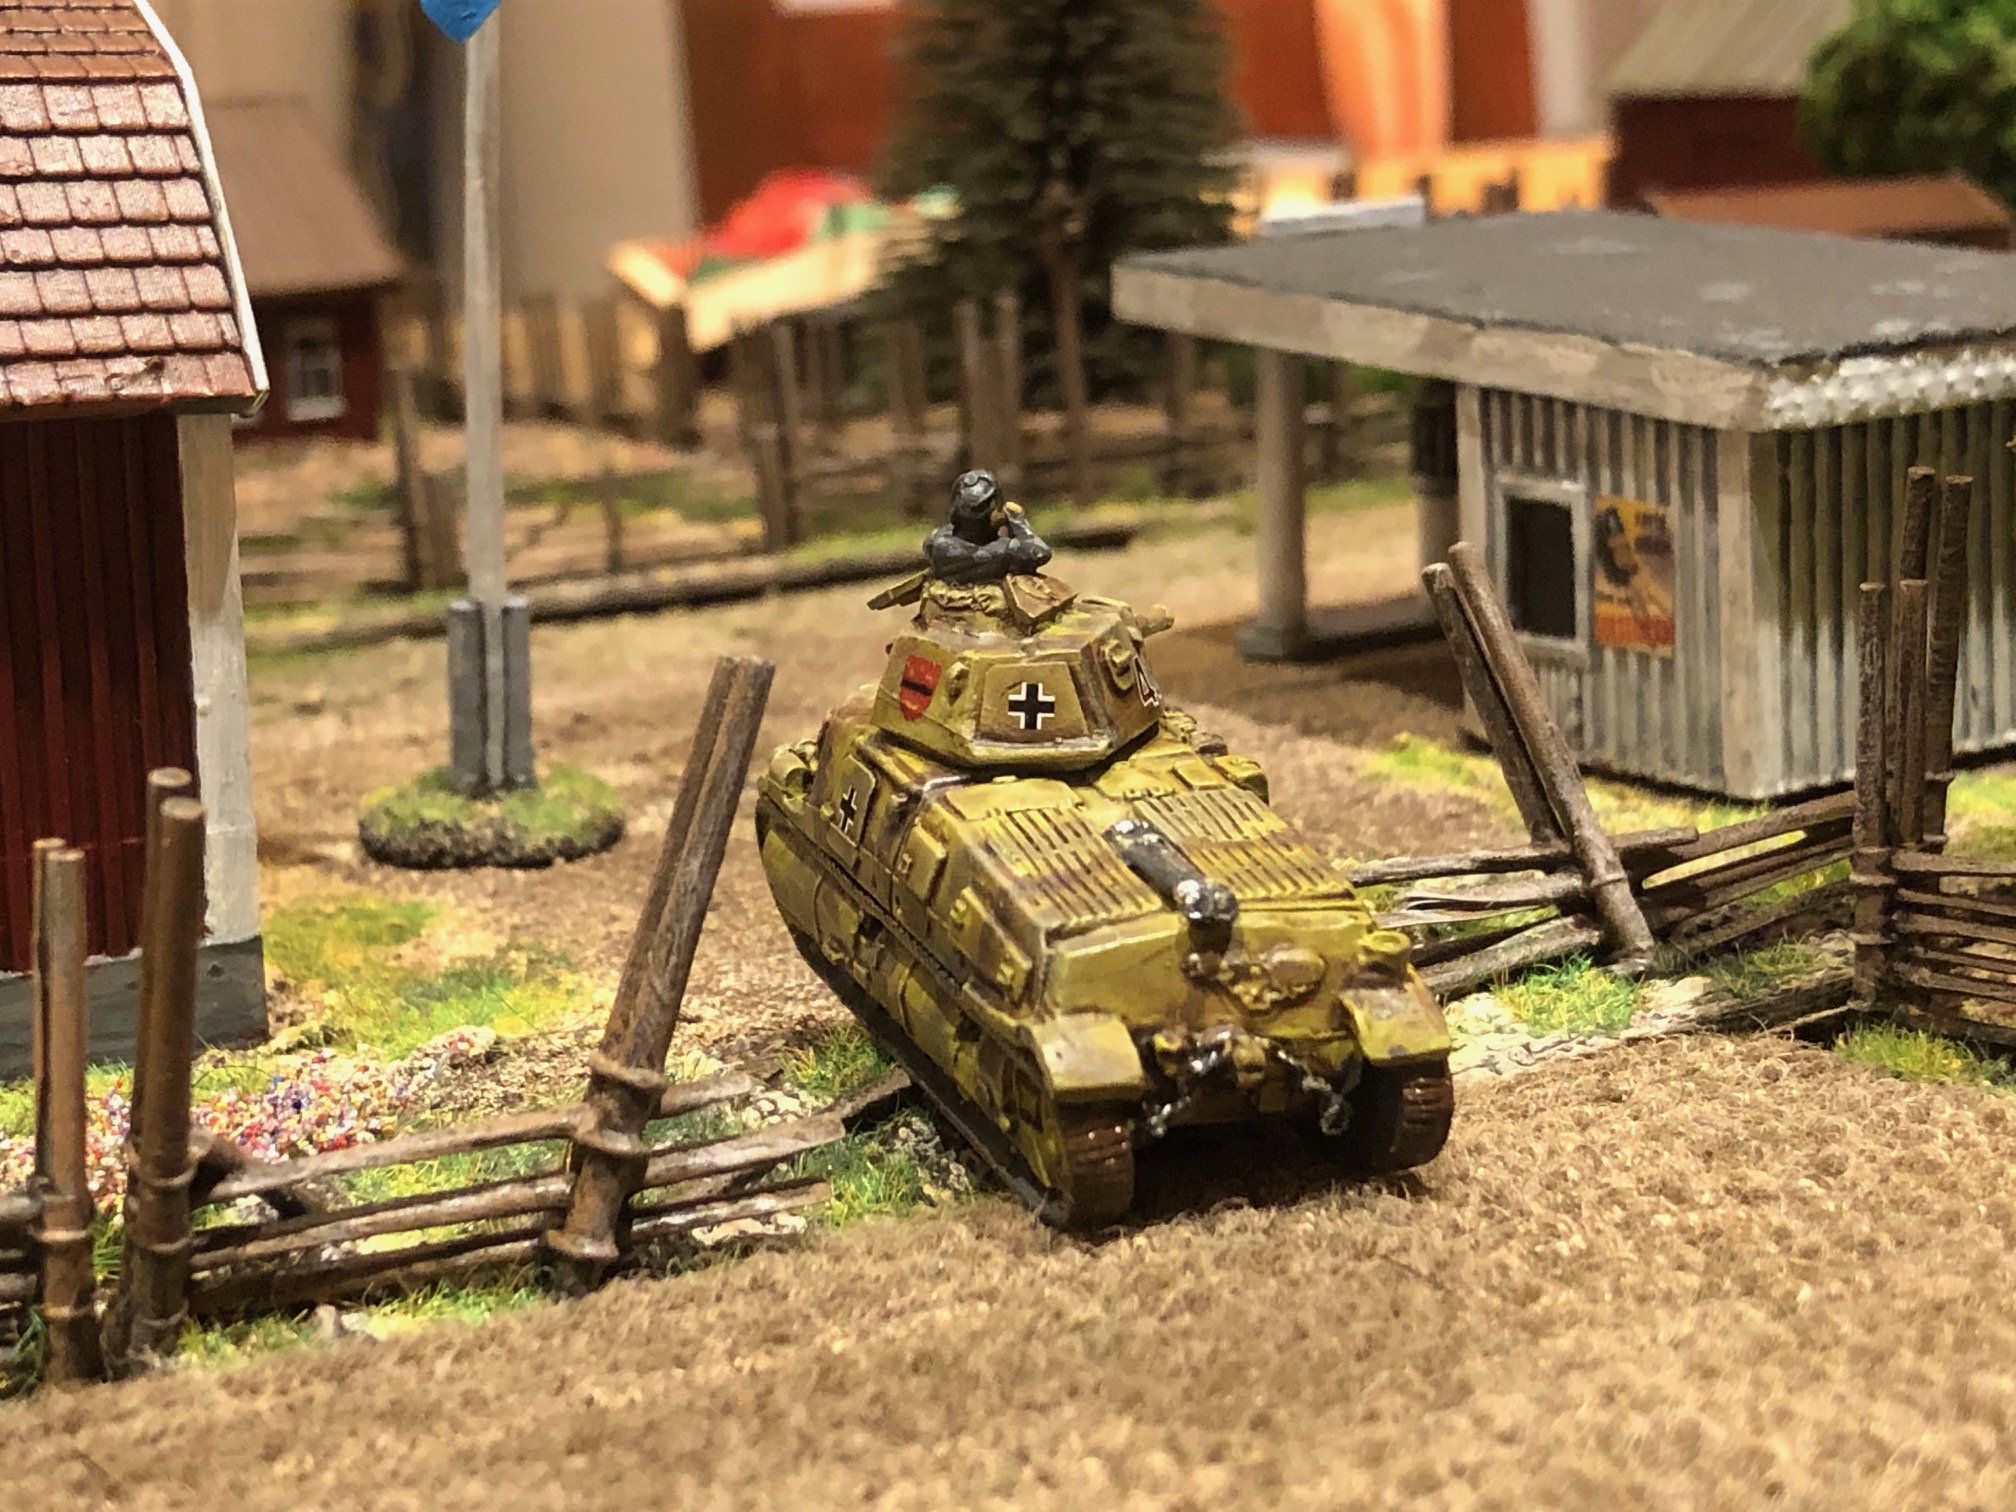
The Pansarbil M/39/M/40 was a better solution for the need of the Swedes, with improved off-road cability and maneuverability and double drive. I find it beautiful (1/100 model from Shapeways).
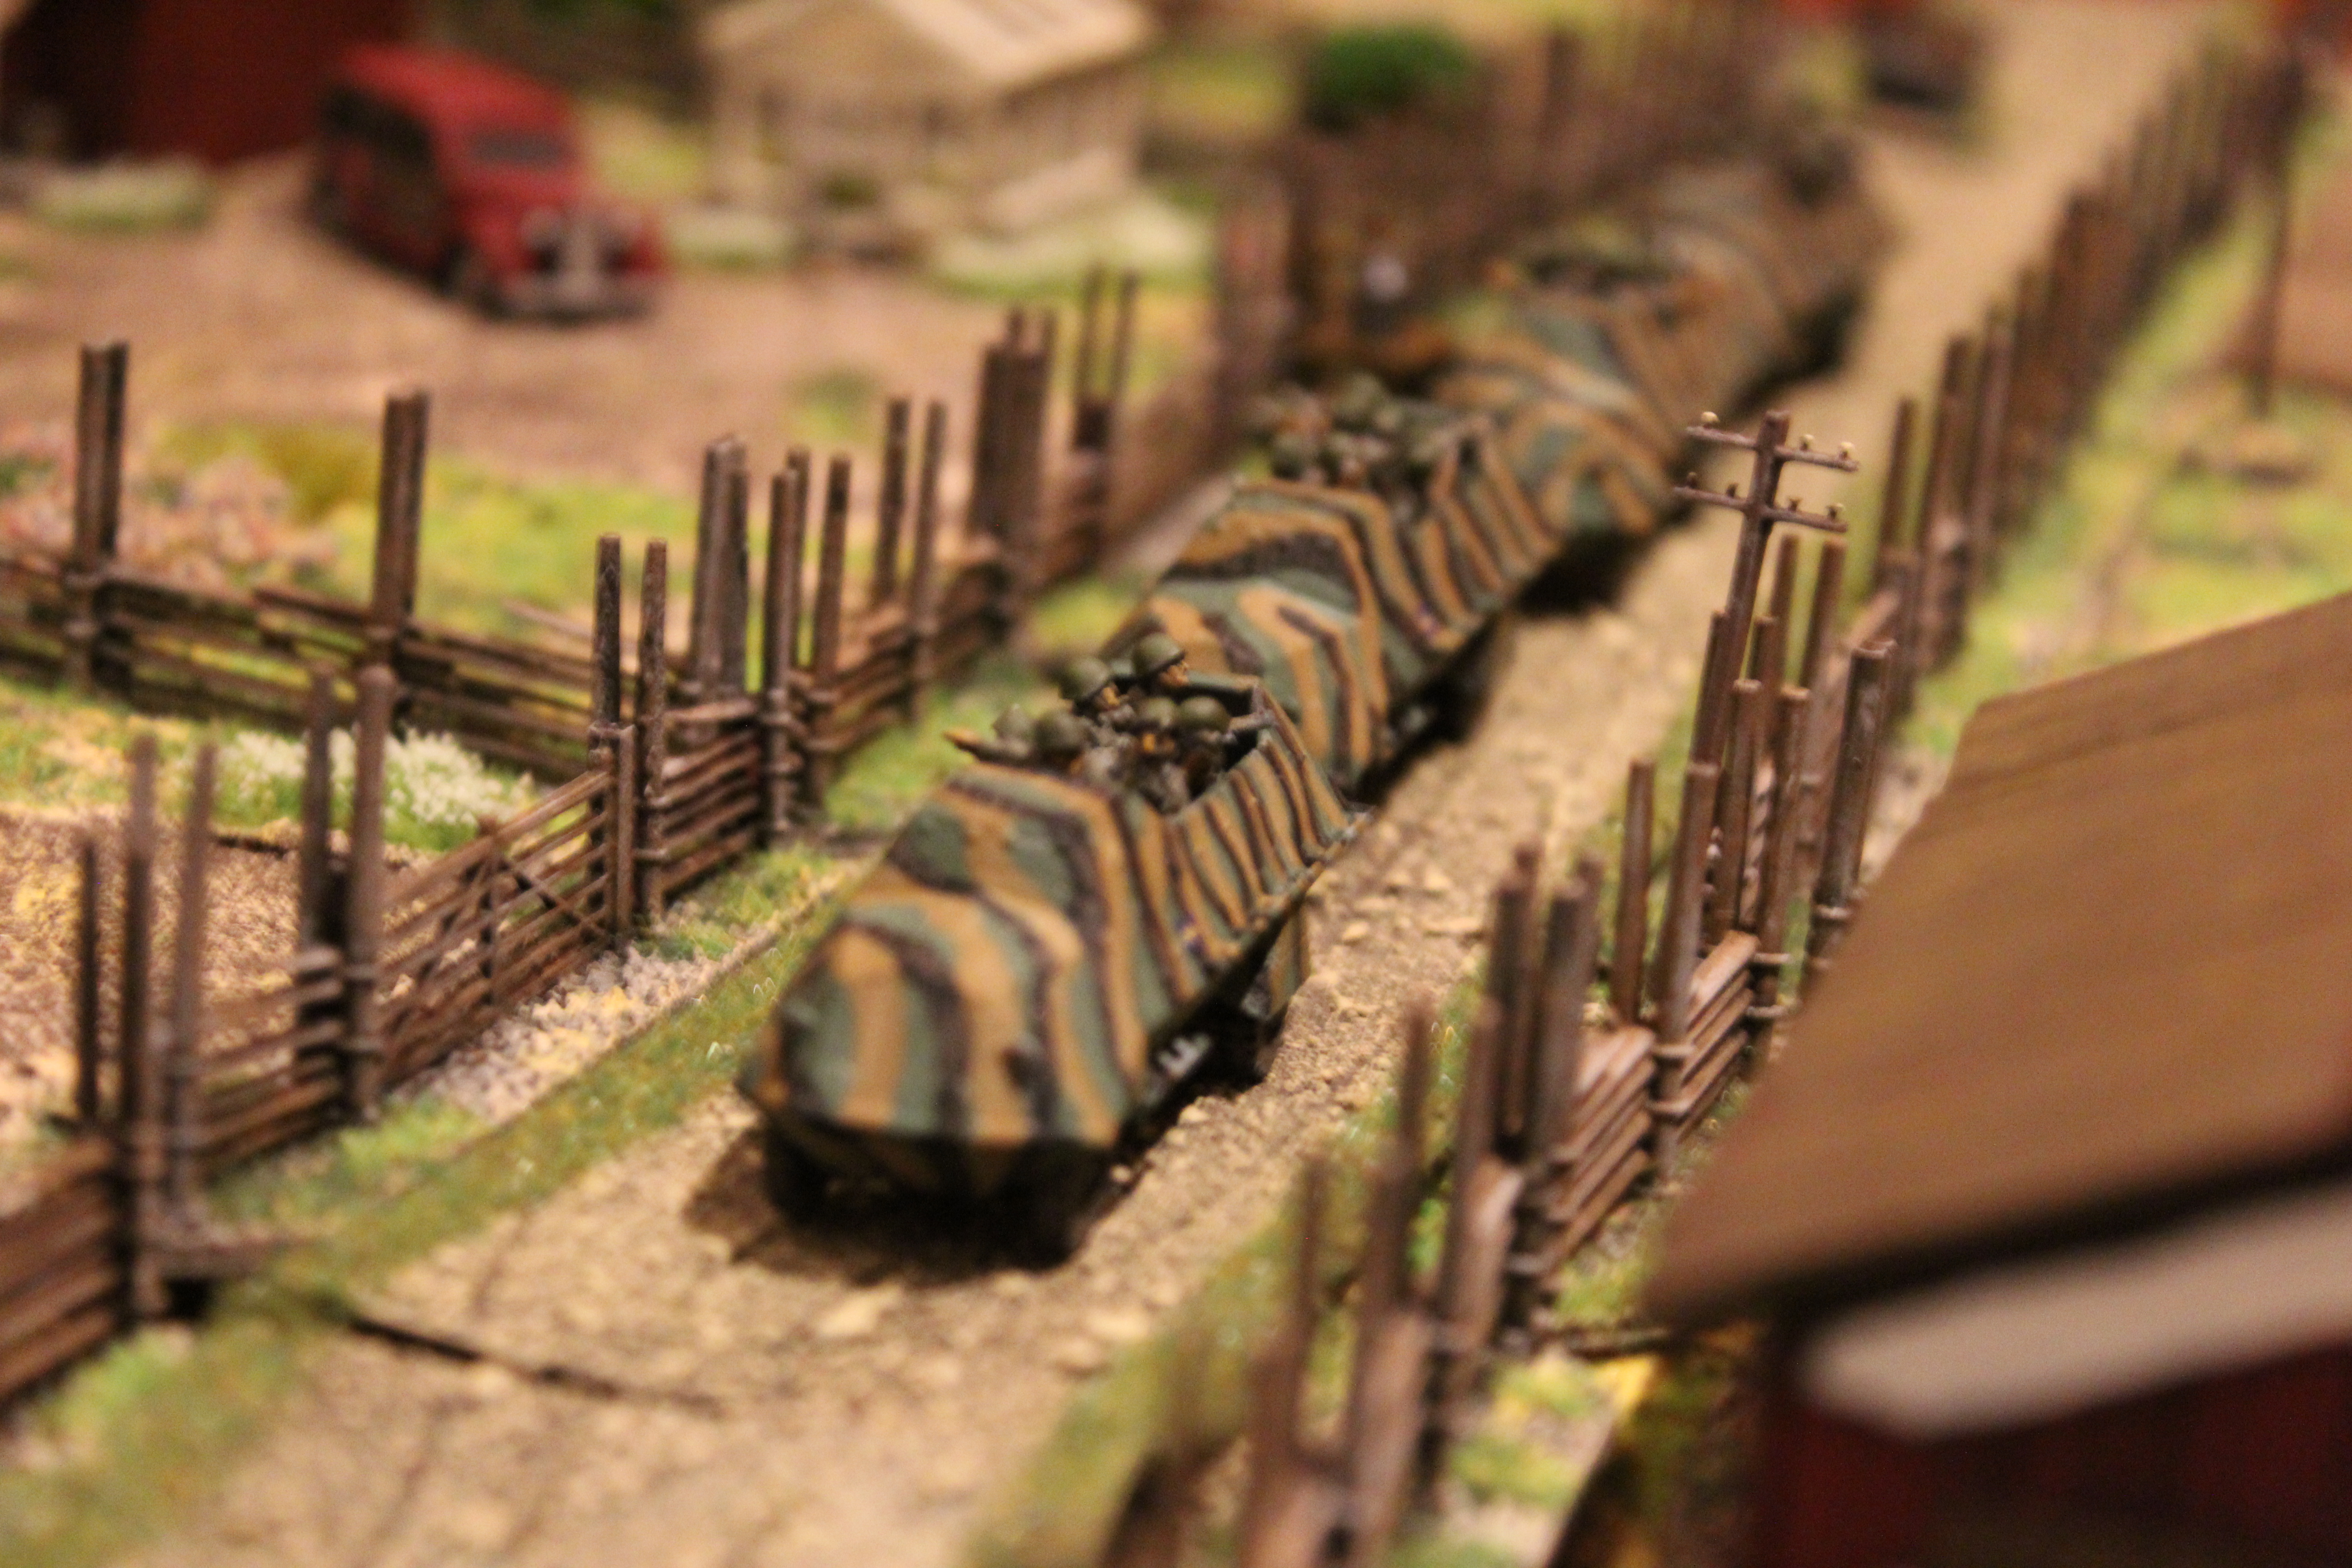
Perhaps the most iconic Swedish vehicle the Terrängbil m/42 KP. It was a domestic development and allowed the infantry to keep up with the tanks and provide protection from artillery and small arms fire. You can read more about this vehicle and how this 1/100 Shapeways model was modified slightly and the riders added in an old blog post (link here). Still in trials in 1943 and sent back due to inadequate armour plating but if the Germans invade we take what we got.
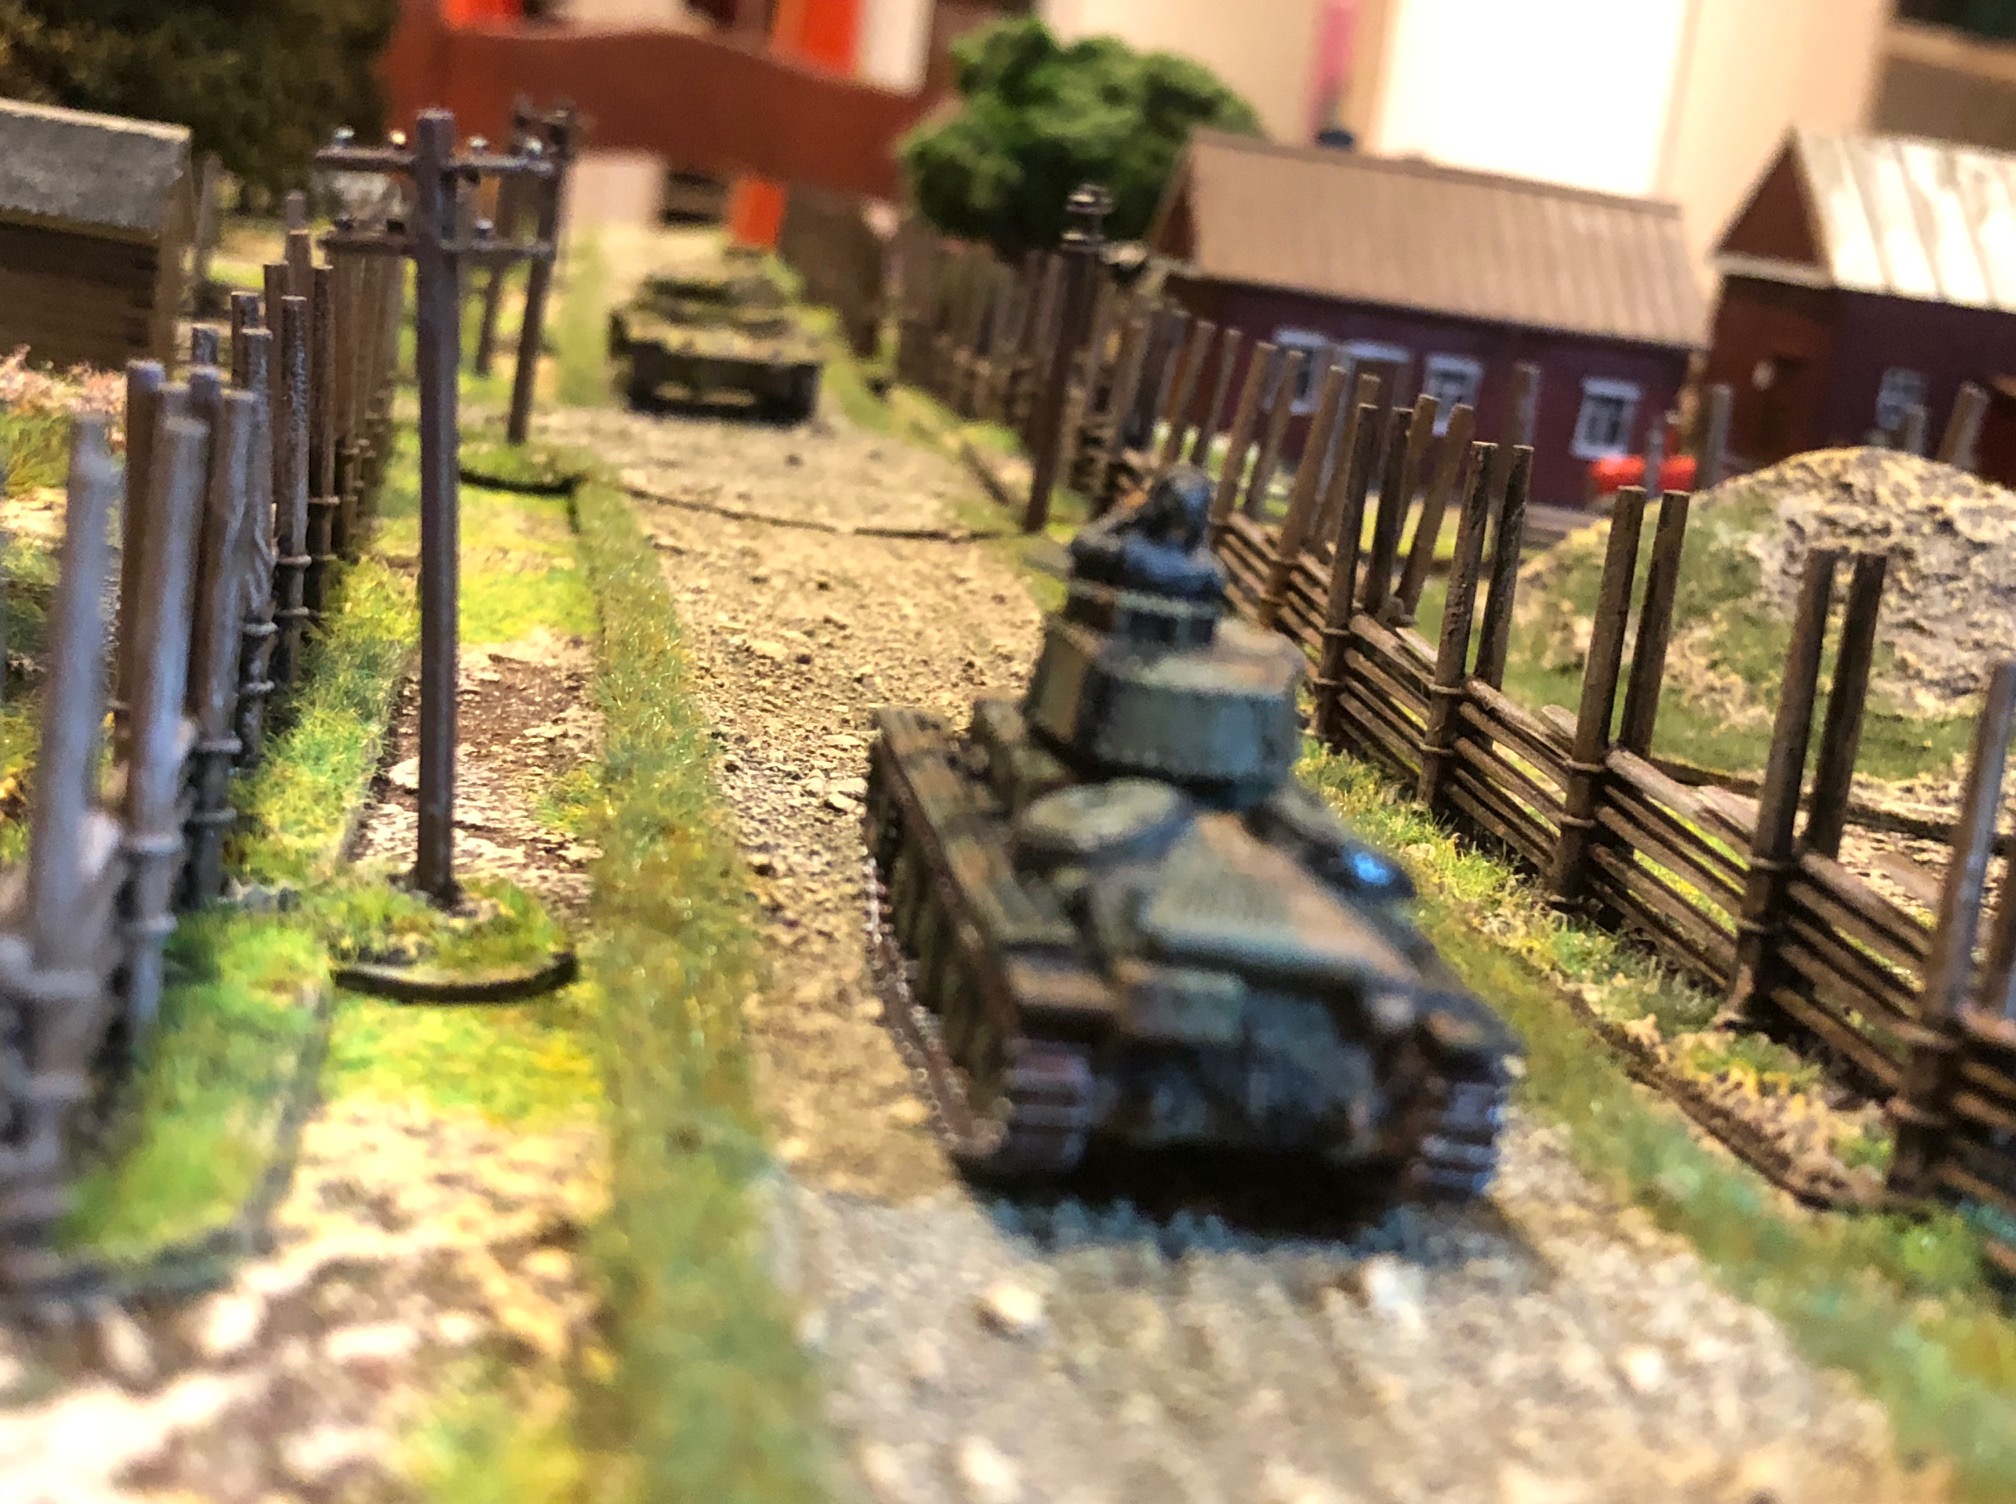
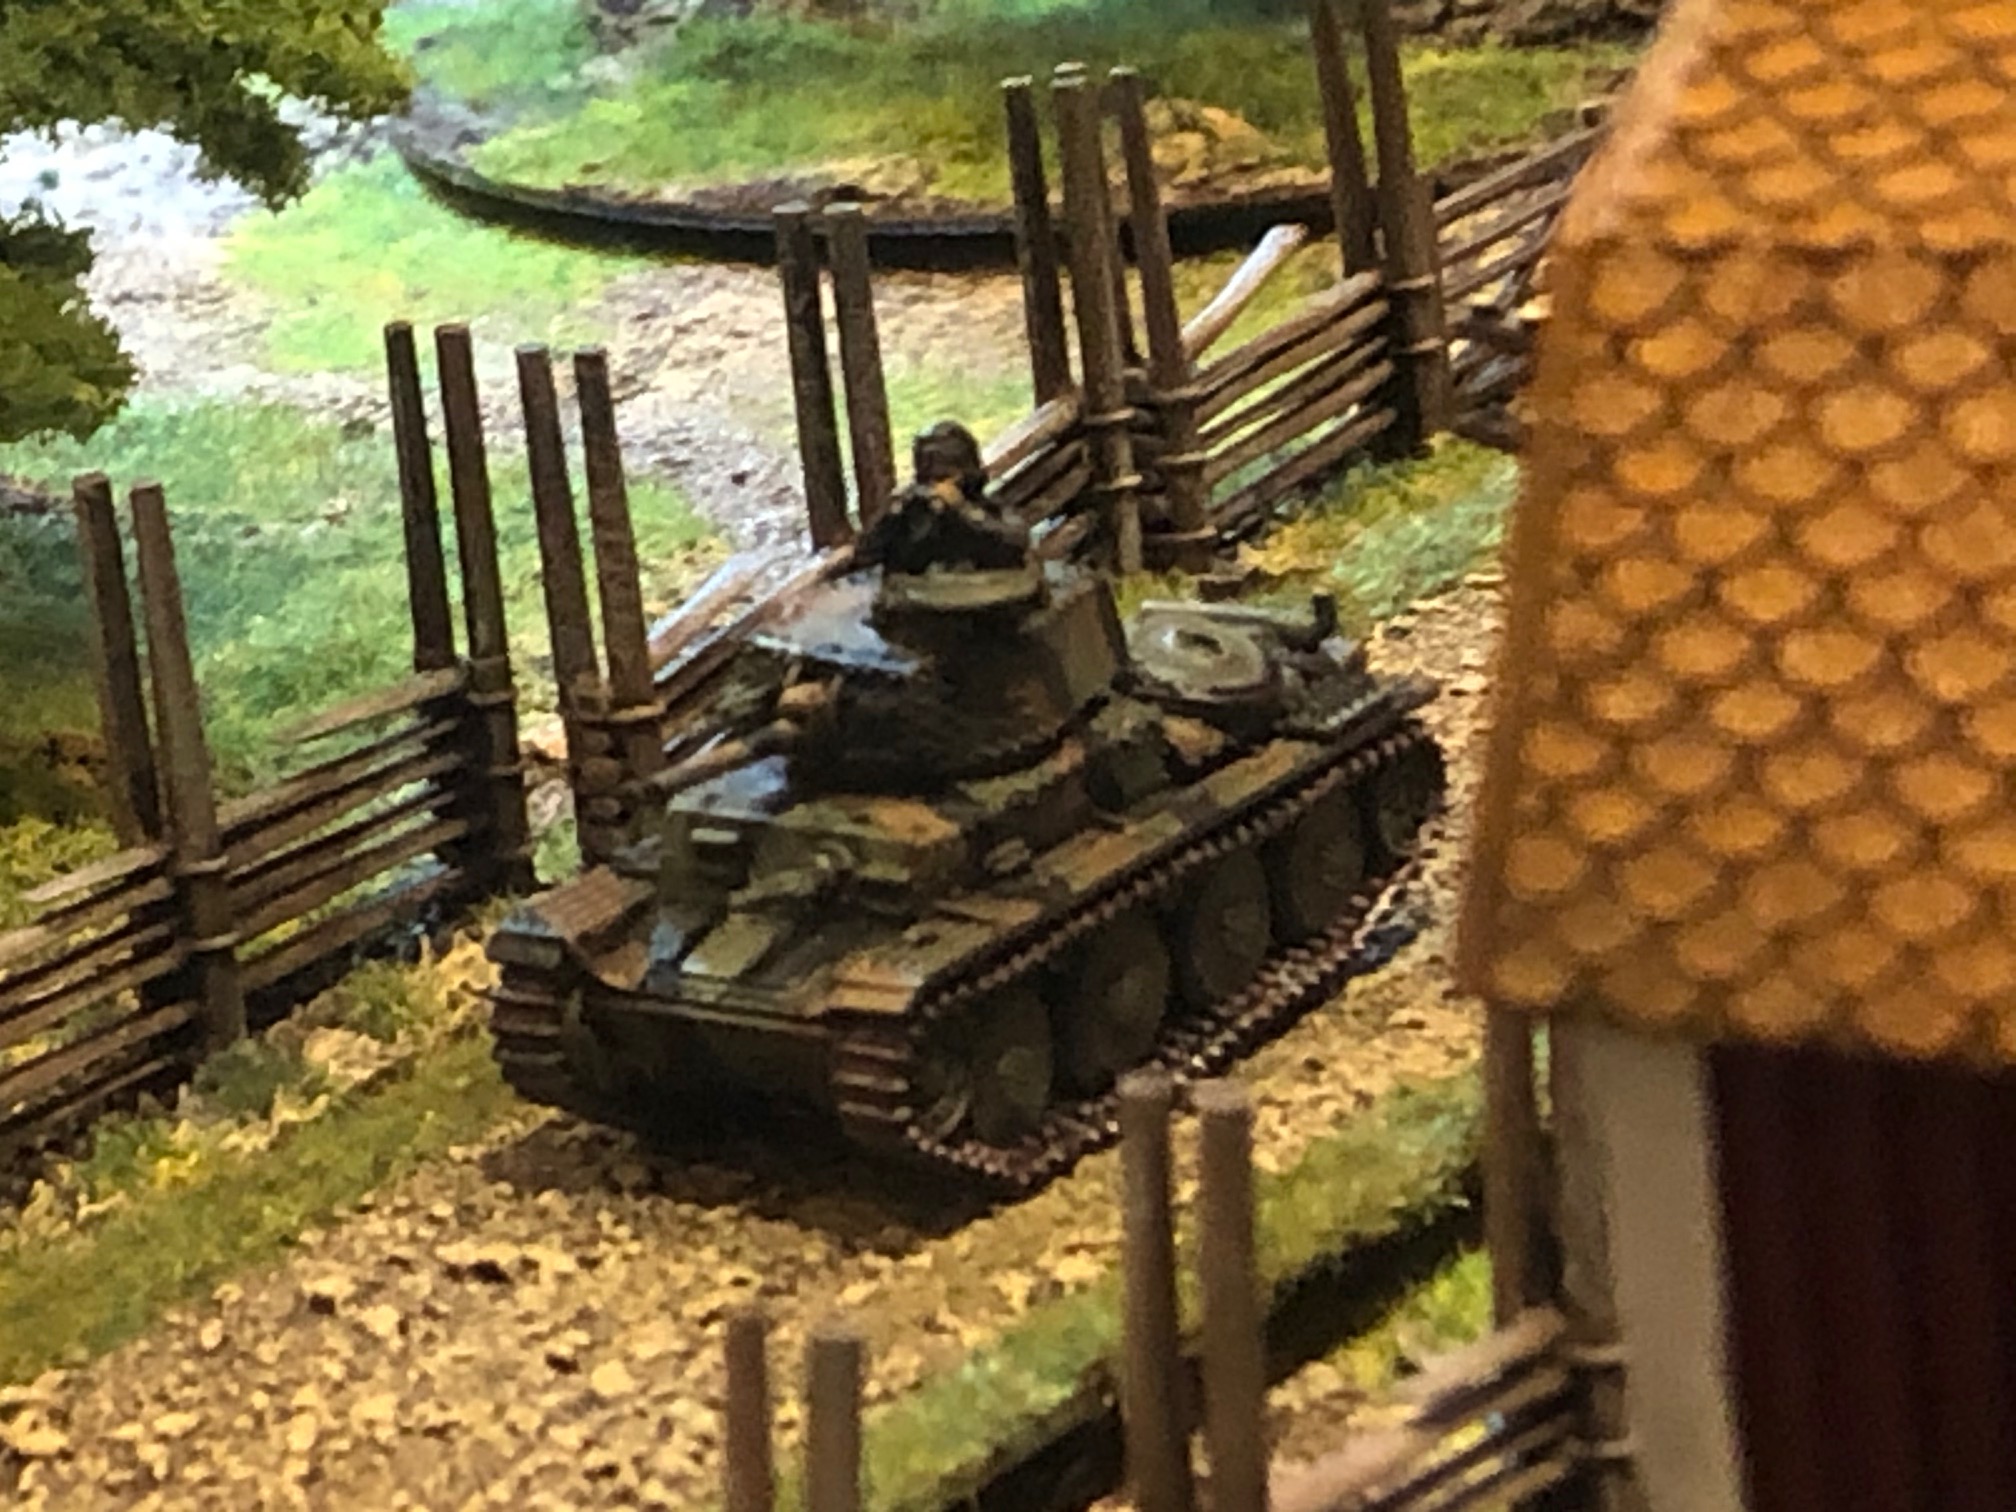
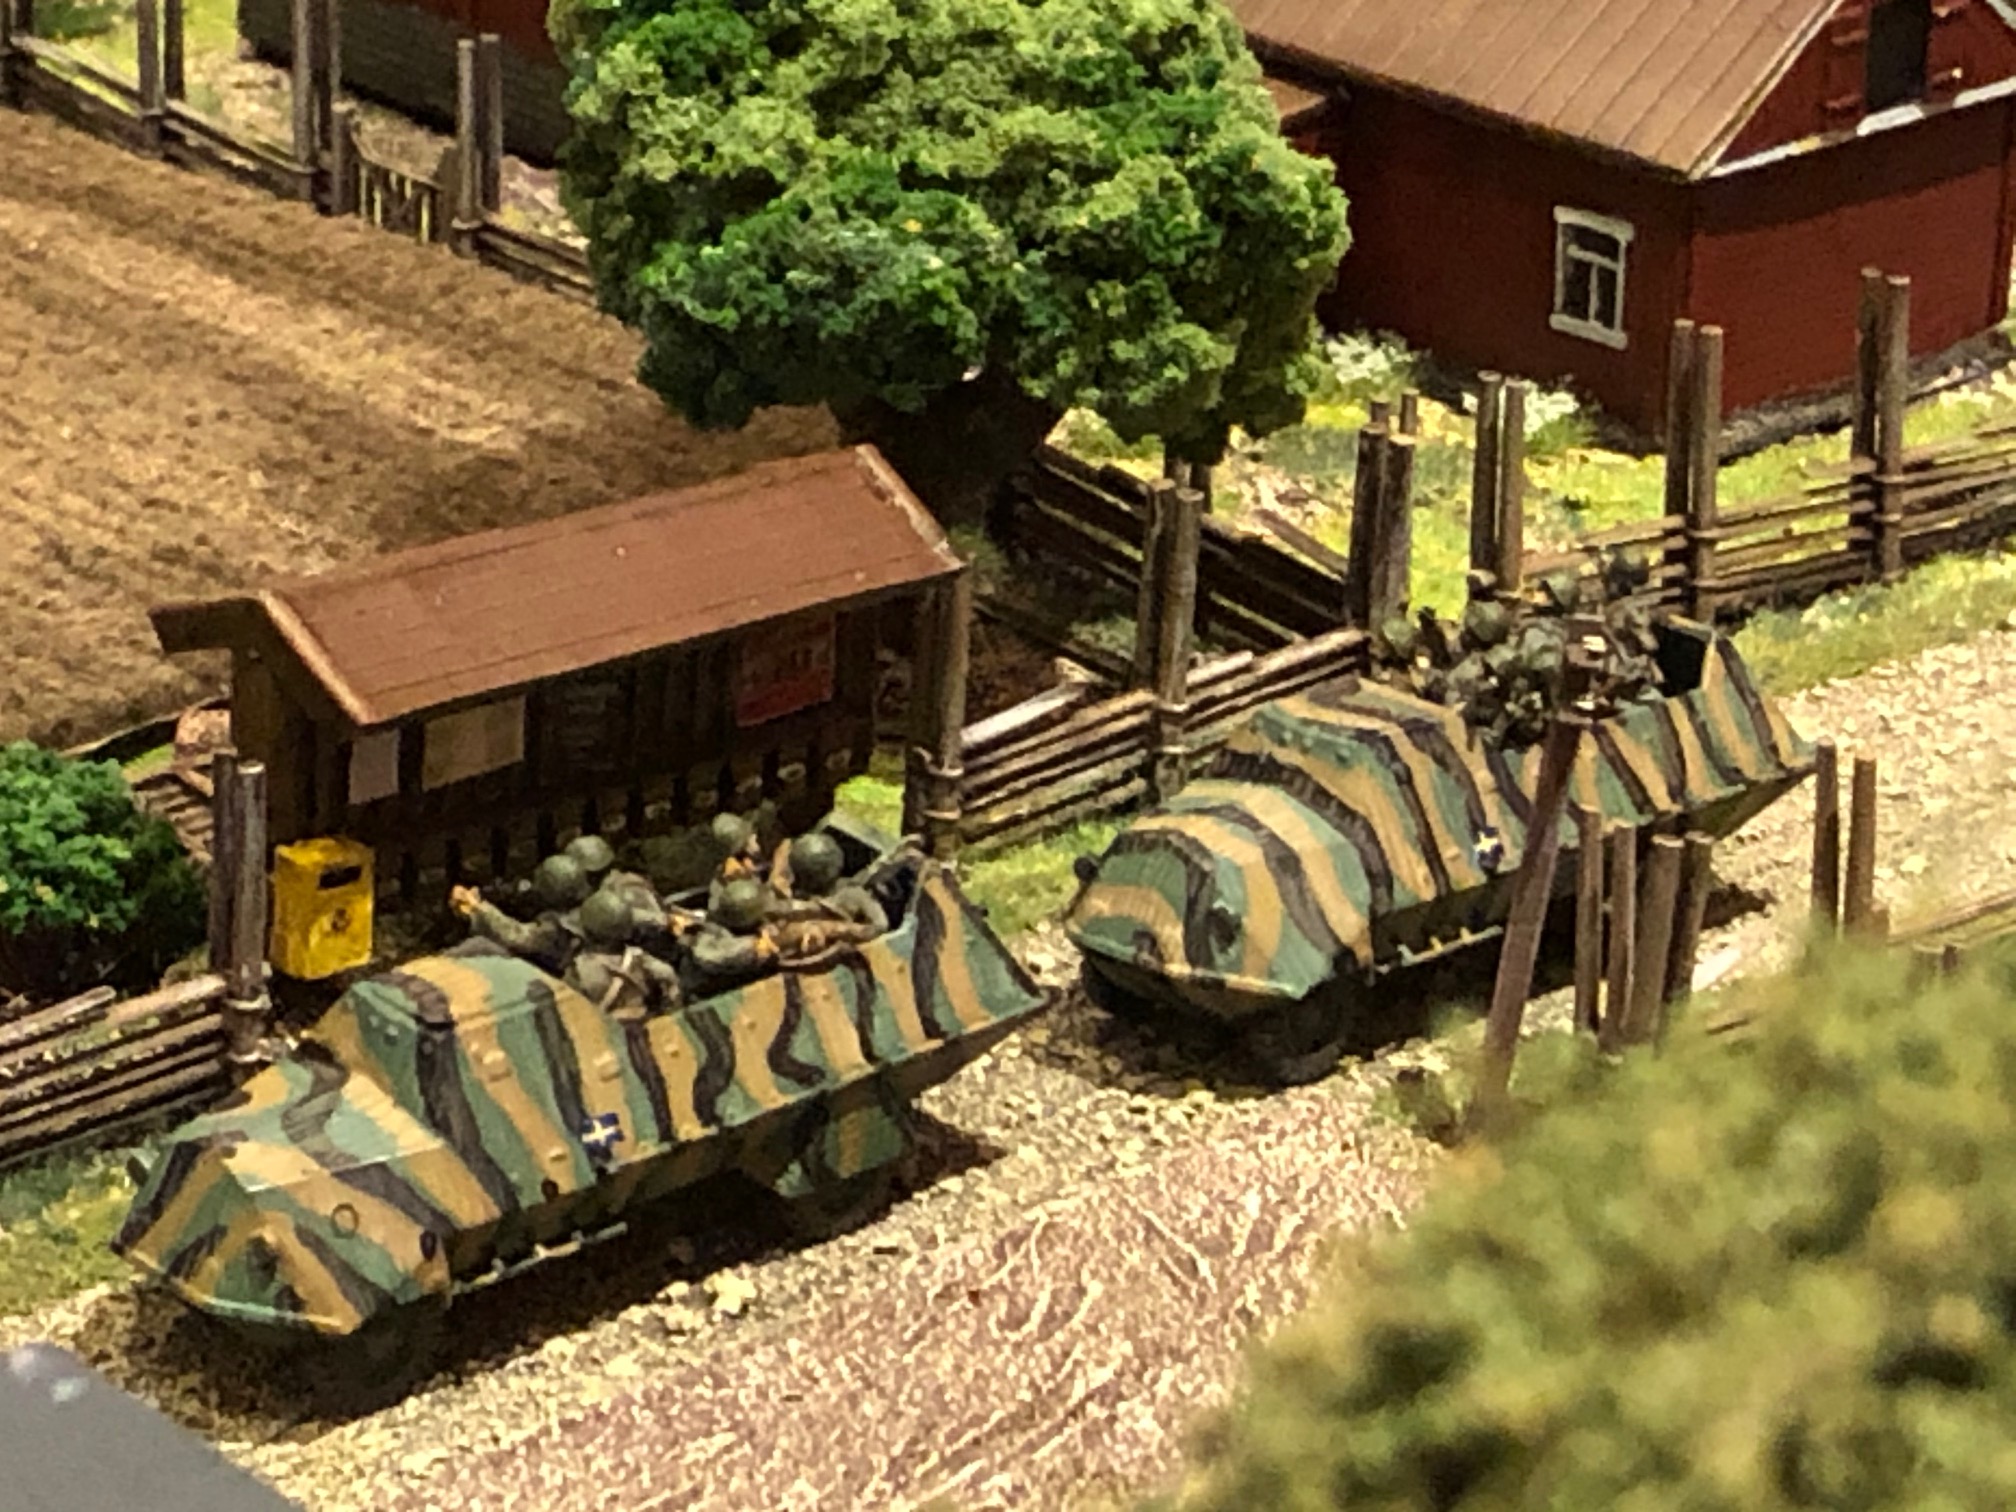
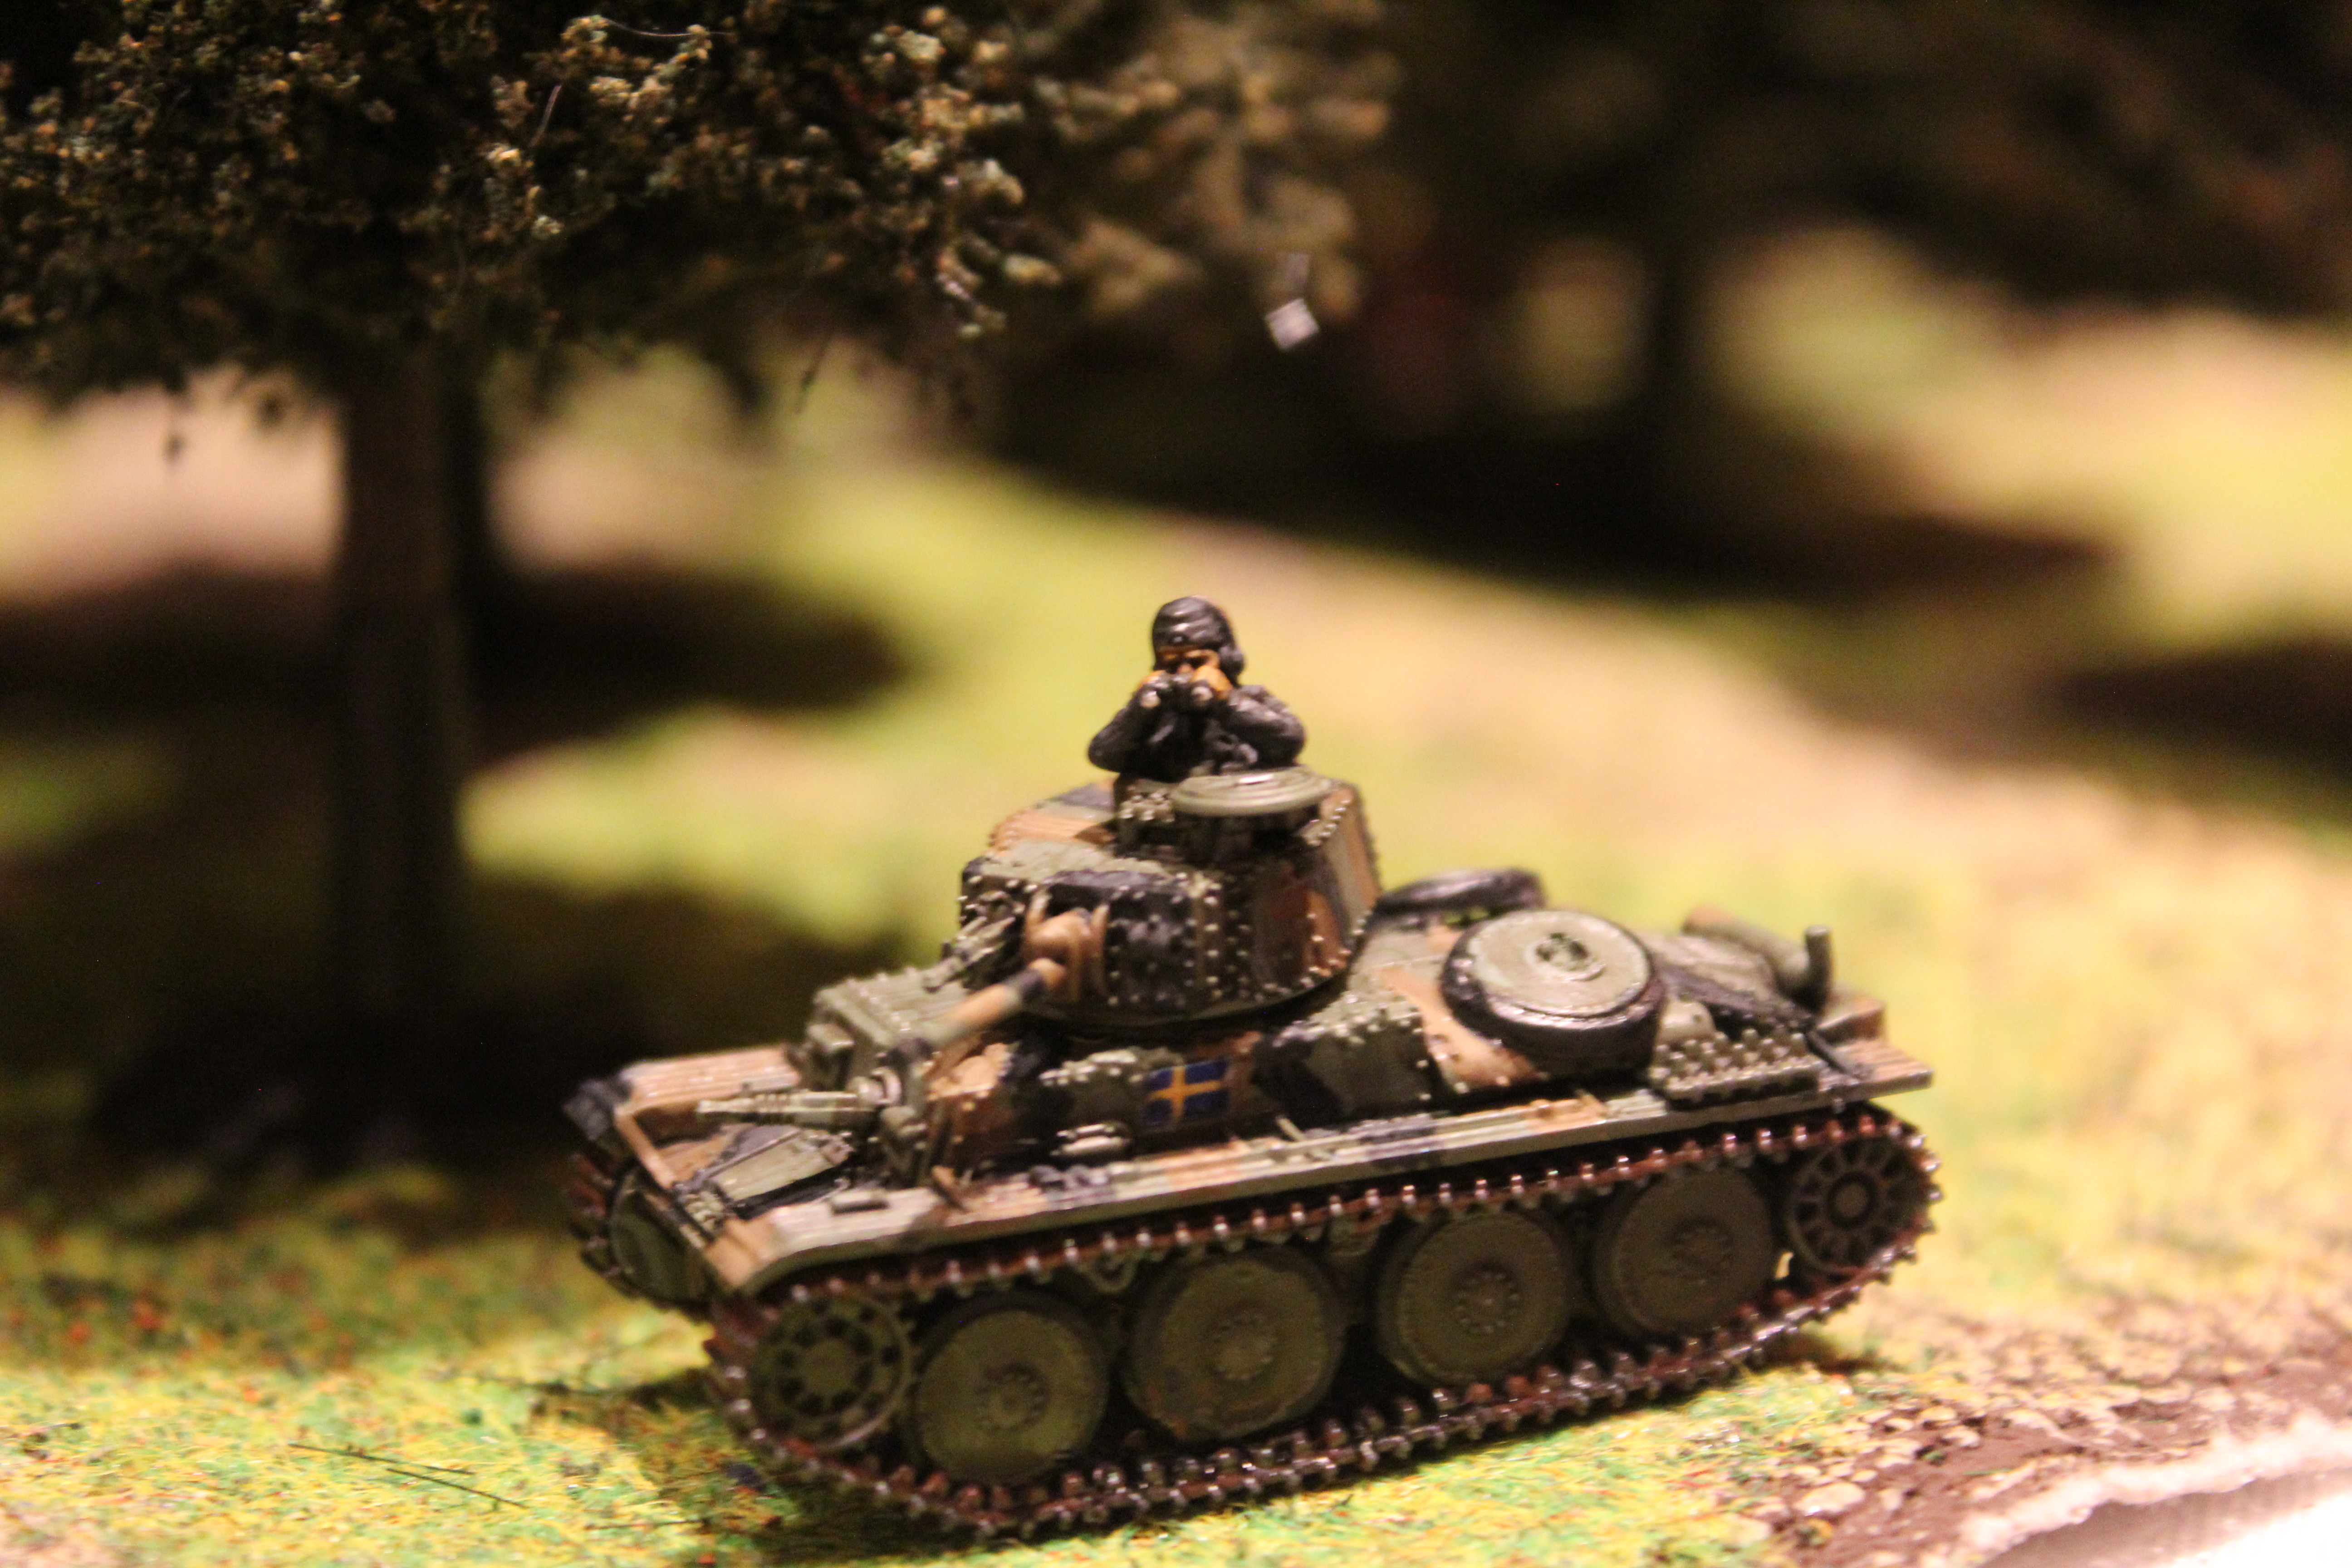
Finally we will look at the Swedish Tanks available in 1943. First the Tankette Stridsvagn m/37. There is a previous blog here that shows the how this conversion was made from and the details for the other tanks below (link here).
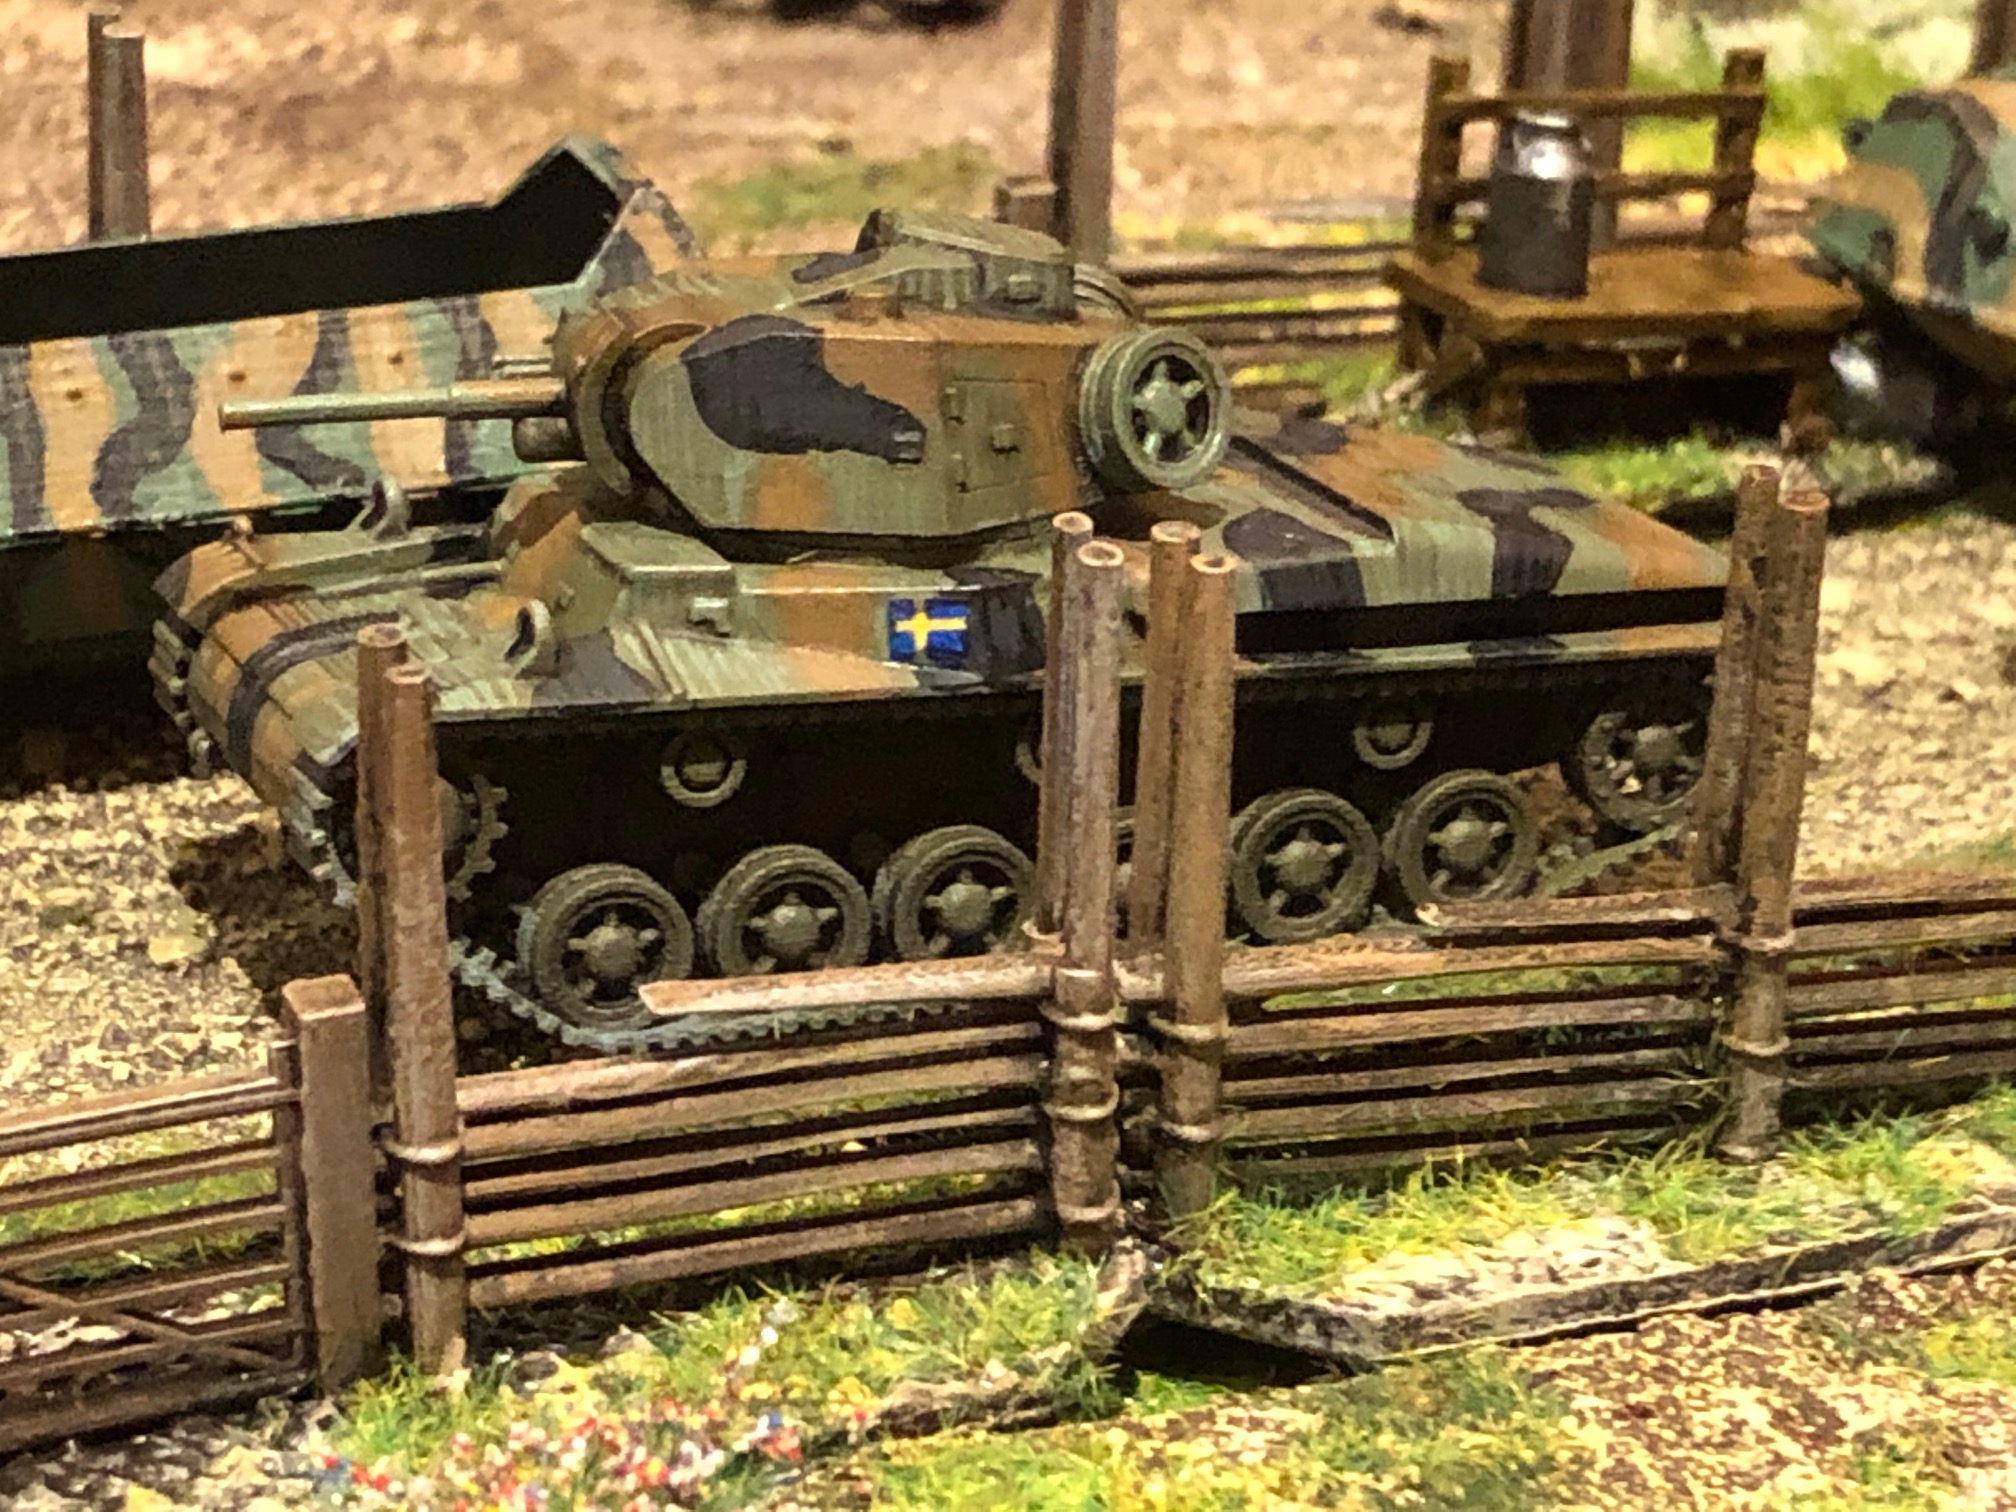
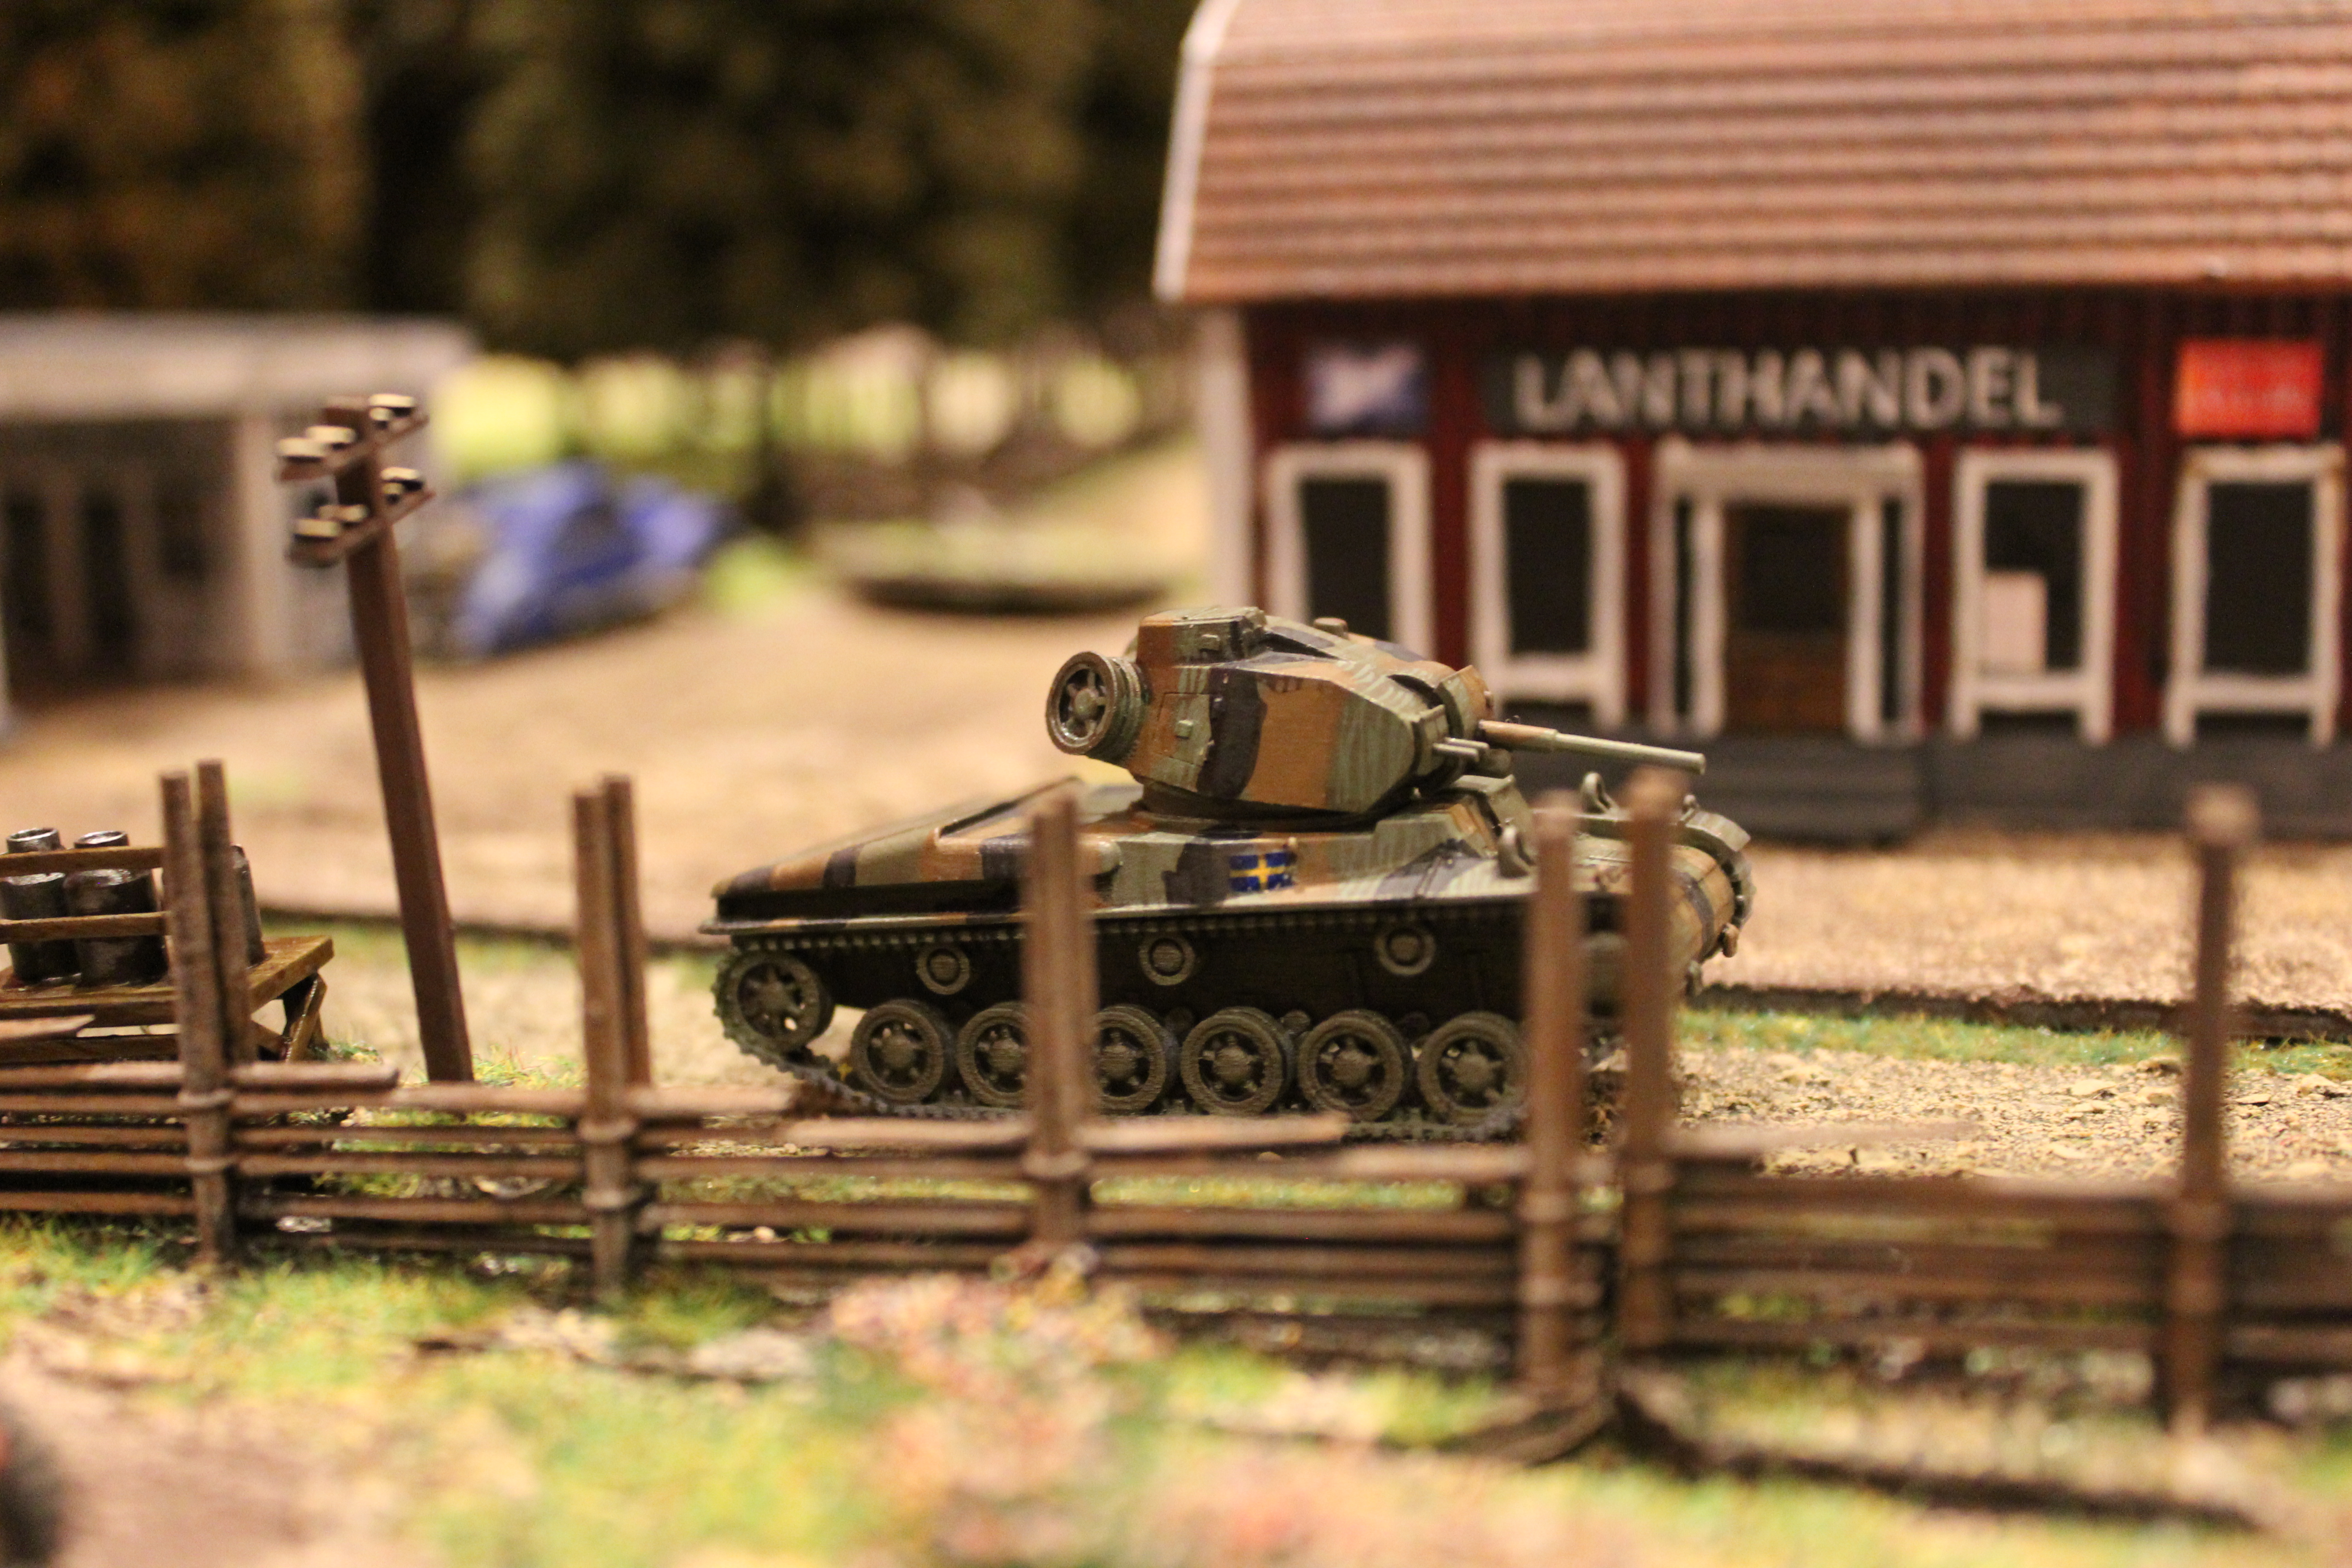
Next “beast” is the M/40 Light tank Stridsvagn M/40 – many models and versions. I used this as the Generic one – an early print by Paul Edwards. I love them. (Formed the backbone of the Irish Armoured force in 1937 and developed into the Hungarian Toldi)
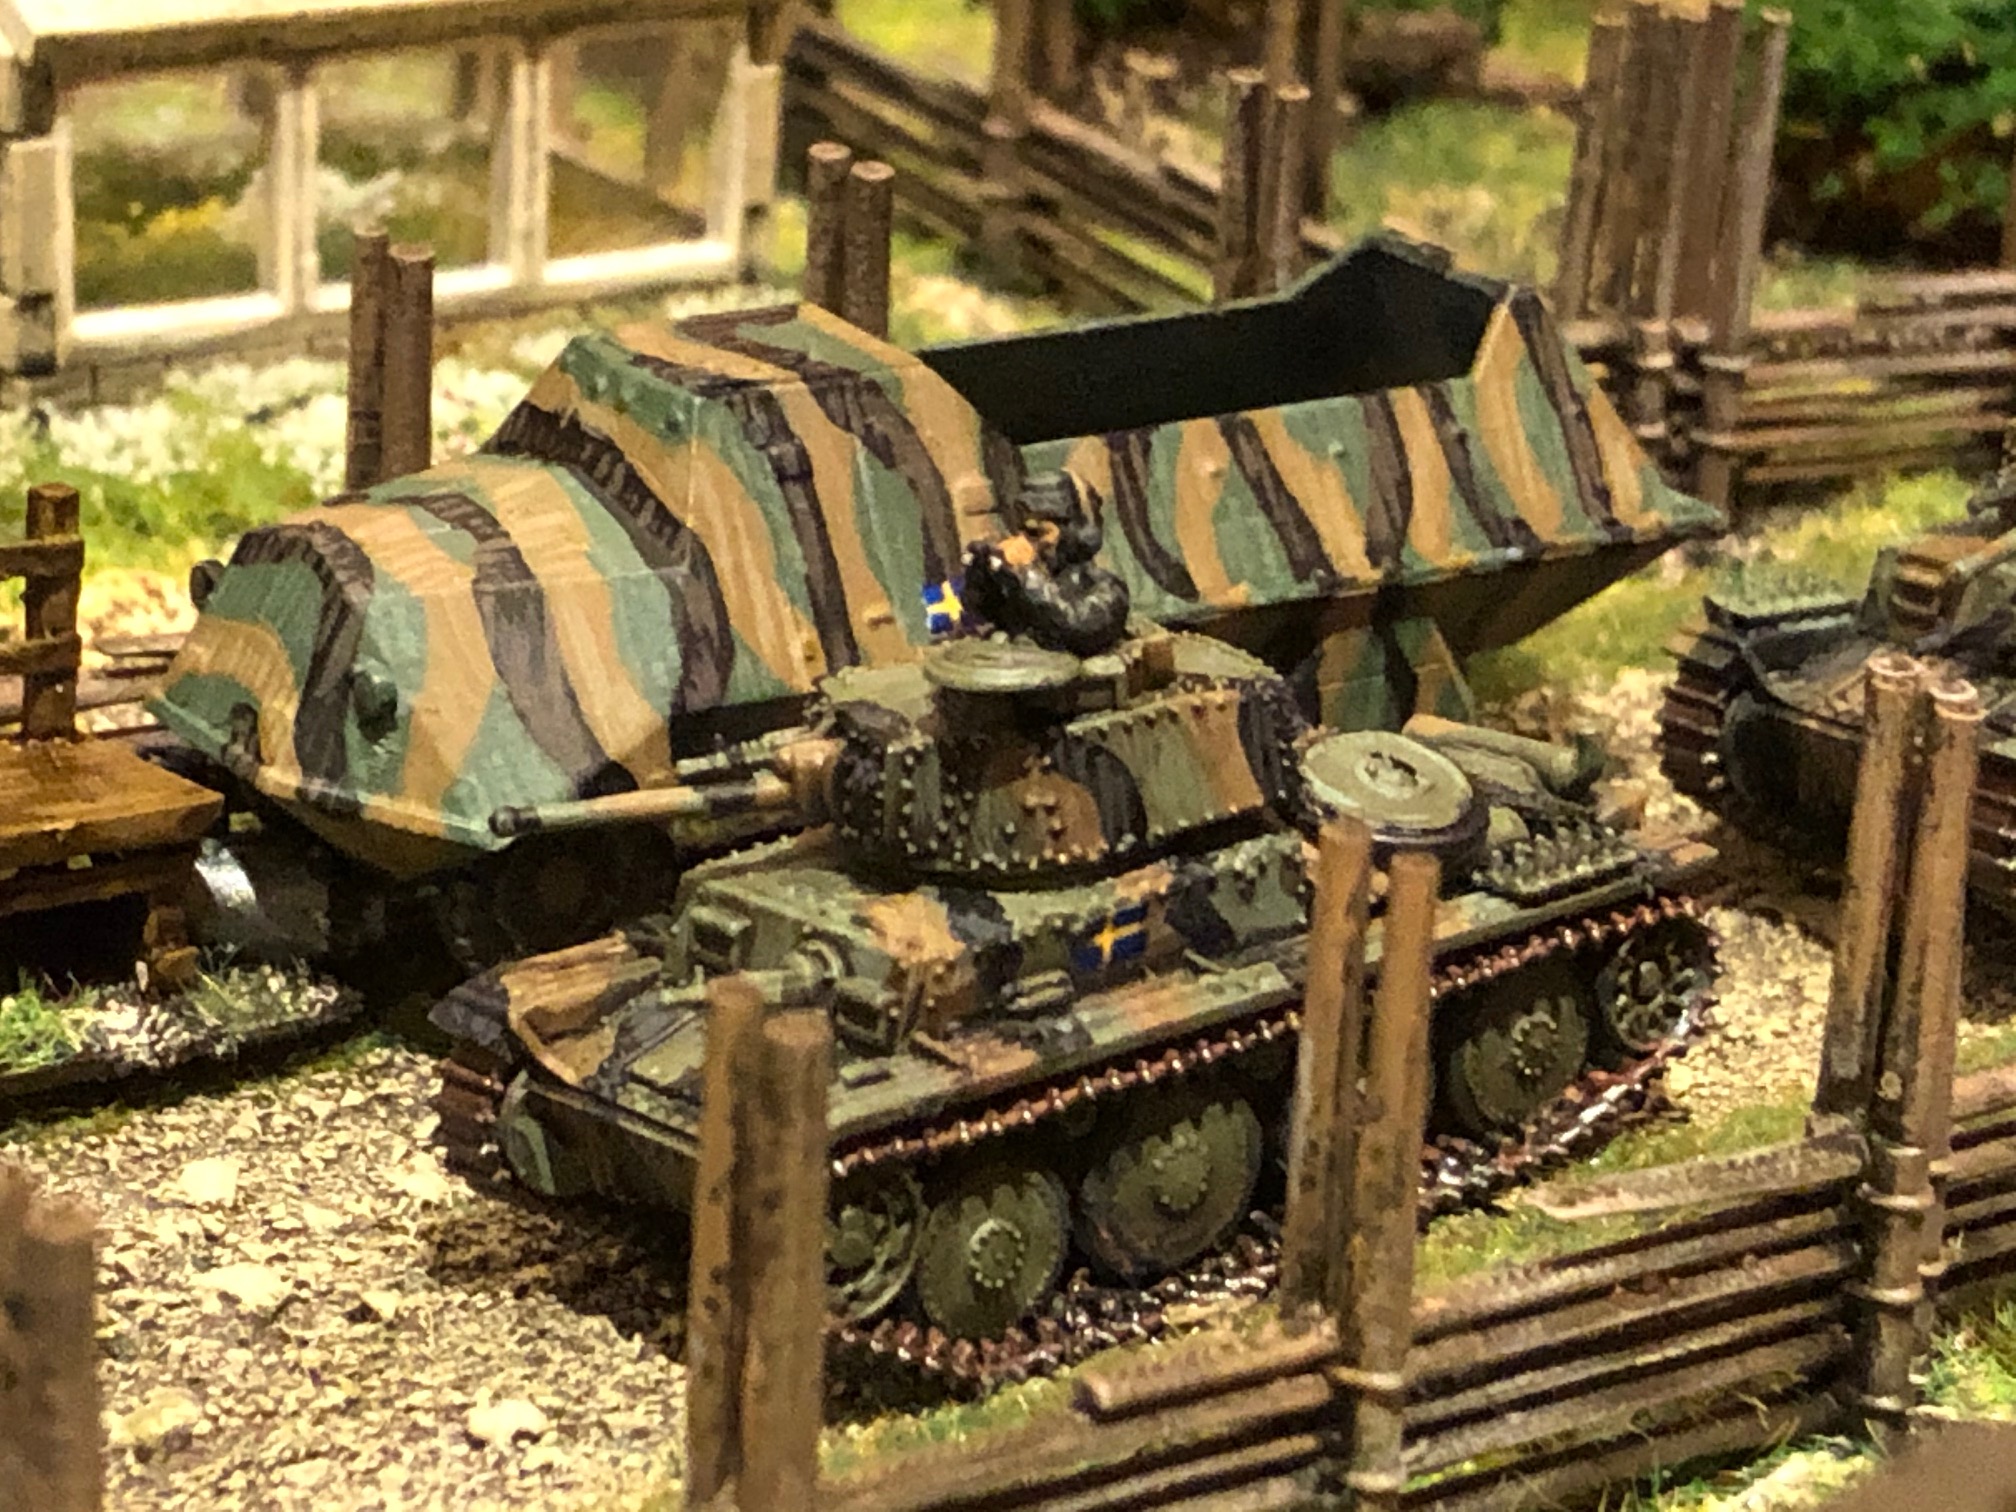
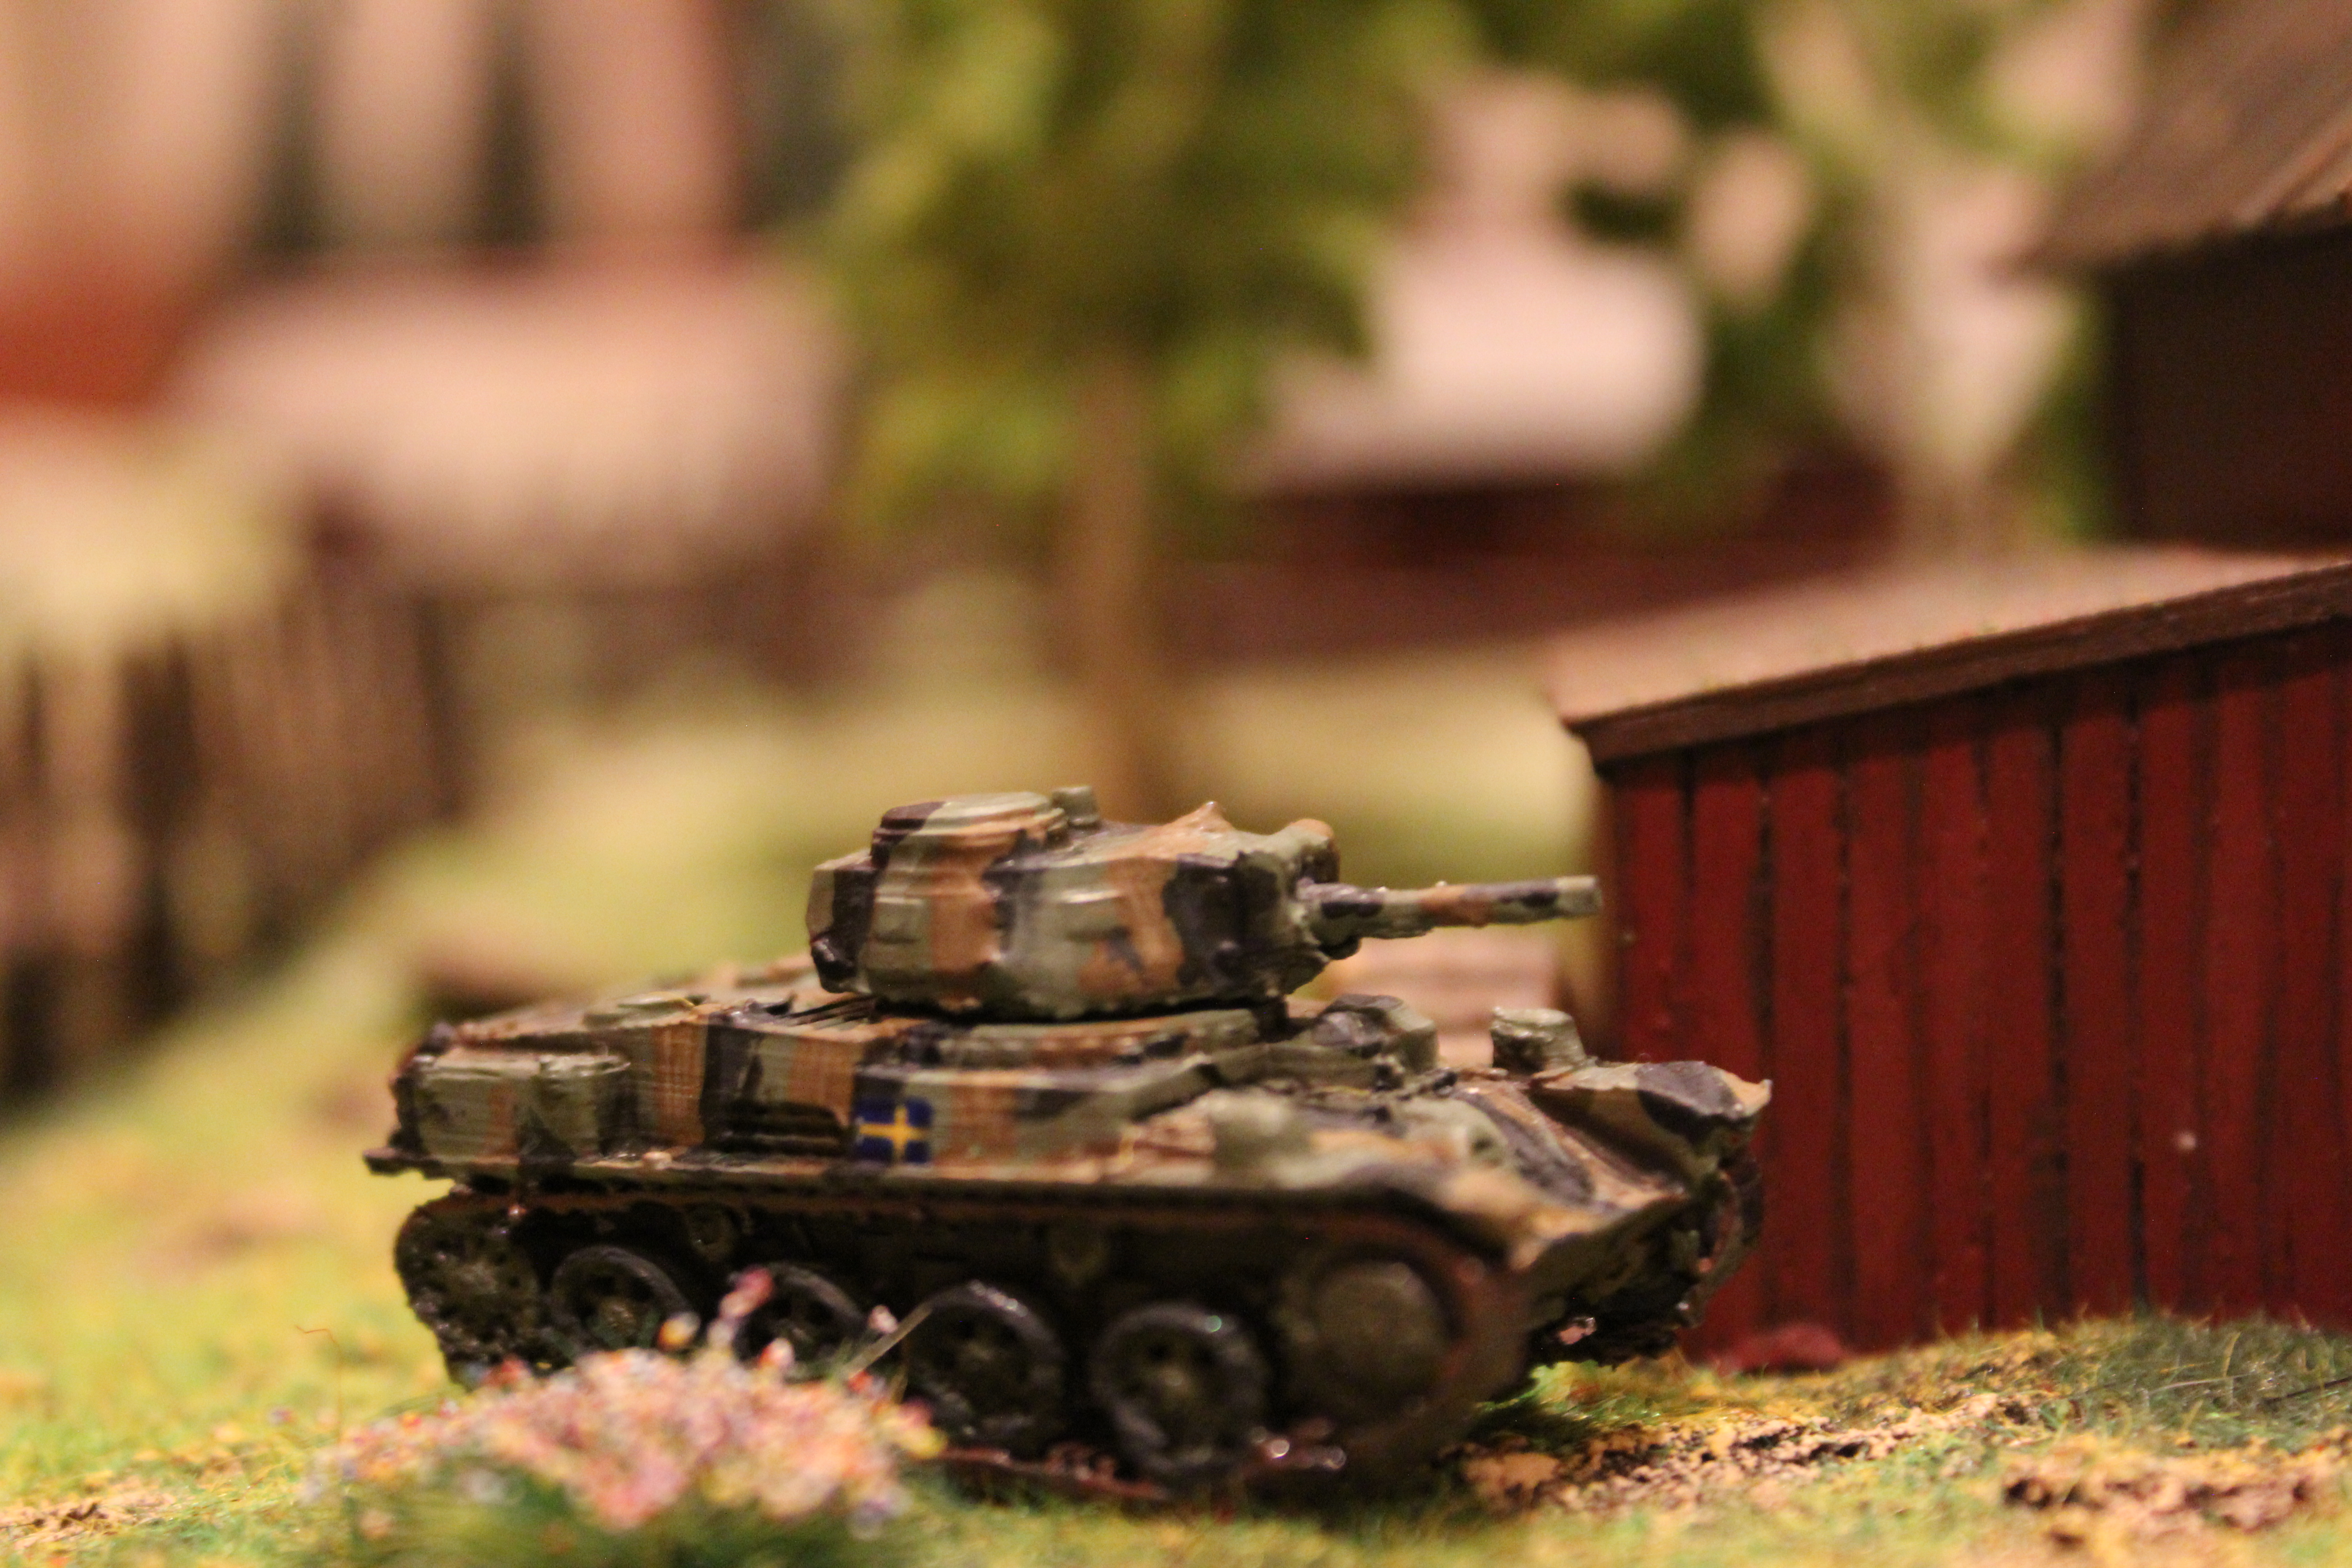
And in the medium tank class we have the M/41. These were licence built TNH Tanks (perhaps more known as the 38(t) and used by the German army in the early War Period. Later a lot of them were rebuilt for other roles)
Finally, In the almost heavy weight class (well big medium) we have the M/42 – My favourite with – like the M/40 a domestic development.
The Grognard Files – First, Last and Everything
For you not familiar with the Grognard files here is Dirk’s own summary what it is all about (stolen from his webpage).
I’m Dirk the Dice and this is the GROGNARD files podcast, talking bobbins about table-top RPGs from back in the day and today. The Armchair Adventurers are small FRPG group that meet monthly in Bolton. We first got together thanks to a ‘small ad’ in WHITE DWARF in 1983. We got back together in 2010 to play Call of Cthulhu Masks of Nyarlathotep monthly for 3 years. Playing again reignited our passion for RPGs, so we returned to some more classic campaigns from our teenage years: RuneQuest BORDERLANDS, Traveller ADVENTURE, RuneQuest GRIFFIN MOUNTAIN and Call of Cthulhu FUNGI FROM YUGGOTH. Our interest began to shift towards what had happened to RPGs during our period away from the hobby.
I have been, in a friendly way, been pestering Dirk to do a podcast about the Middle Earth Roleplaying Game for a long time (check out #grogmerp on twitter if you do not believe me). Last month he released part 1 of the MERP (Middle Earth Roleplaying) show and he asked me to do a “First, Last and Everything” segment for Part 2 – that is a presentation of my first, last and overall favourite RPG games. I went for (because it is true) the first being the old Swedish RPG game Mutant (from 1984) that I have written about here on a few occasions (link some of it here, here, here and here), MERP as it is the last one I played and you can find out more about it in the two Episodes below, my everything is the classic Call of Cthulhu Rpg.
Here are the links to the two parts of Episode 36 – Middle-Earth Role Playing (MERP) with Liz Danforth:
I did write a script for my part and it is appended below would you be interested, it may be cool to listen to it first though. In the text there is a mention about some scenarios I prepared back in the day, here is a link to those (in Swedish mind you) https://alexandria.dk/en/data?scenarie=8040 and https://alexandria.dk/en/data?scenarie=8041
/ As always I do hope that this was of some interest, stay safe during these and any other times
First, Last and Everything
Hi, My name is Per and I am delighted to deliver my first, last and everything. You can find me on Twitter as Per at RollaOne or on my blog rollaone.com.
It was 1984 and I was 12 and my slightly older cousin Mika was visiting us in our little provincial town in the heartlands of Sweden, Dalarna, where if you take the wrong fork you may come upon a lonely and curious country, in areas that remind you of some Lovecraftian environment – desolate, quiet and with the occasional character sneaking around, or looking through the windows with empty stares and some doors hanging on rusty and consequently noisy hinges blowing in the wind. These are places where they say shoot-dig-keep quiet – that kind of thing. I mean all that Nordic Noir crime stuff must have come from somewhere? But most of it are quaint red houses with white trimmings, surrounded by, wait for it, round pole fences.
He, my cousin, cajoled me into buying this new game that he had played called Mutant, a game set after the catastrophe in a future Scandinavia. You could play as mutated humans & animals or be a robot from the old time (but with a messed up memory bank, with a tendency to obey orders from pure humans or those who had not too obvious mutations – later I learned they were programmed to follow Asimov’s 3 robotic Laws). You could also be a PSI-mutant with mental powers, shunned by most people with or without fur. They were like magic users but very often with defects like madness or confusion triggered by failing to use a mental ability – making it very frustrating at times, or pure (non-mutated) humans considerable sturdier and more clever than we are today and with a patronising at best to a disrespectful view on mutants. The society that had risen was roughly at the technology level of the early 19th century – you could arm yourself with a musket if you had the cash but equally common were a baseball bat and an old bin lid, or traffic sign with a moose, as a shield. It was a more organised society than in movies like Mad Max – things had calmed down. There were forbidden zones to adventure in and the dungeon equivalent were old research labs or other underground facilities with the chance of finding old tech, crazy cyber computers, frozen people from the old times or mutated beasts – sometimes all at once. The dragon equivalent were giant beetles and land sharks that swam through the earth It was my fist role-playing game and we had never heard about anything like it and it also came with some funny looking dice, but no gaming board. Just a little cardboard sheet that was used to resolve whether the character understood what the old tech item he has just found was. My cousin had never GM:ed before and actually as it turned out he had never played the game – however he spent a day reading it and the following evening a few friends and I made some characters – mine a mutated moose, a hunter, with a big club and a musket – then he very ably played us through the introductionary scenario “Mission in Mos Mosel” until the small hours ….it was love at first play….
This game has evolved to what today is known as Mutant Year 0, and a number of the modern products has given more than a nod to the old modules and adventures.
However we quickly advanced to non-Swedish rpgs – it was not as cool to play the Swedish games – at least not in those days.
We went on a School trip to London in Year 9, this was 1987, and the trip was funded to not a small part of us selling loaves of home baked breads outside a local shopping centre and we also set up a school show and invited all the parents and students – I and yet another cousin and fellow gamer Sebastian played two drunk characters and we made some crap jokes pretending to be pissed and we had a grand finale with the song “Shut uppa you face”, by Joe Dolce. In London we, equipped with a Summer of earnings from working for the local council’s real estate department cutting lawns, bushes and collecting rubbish, delivering leaflets at weekends or selling the Sunday issues of a broadsheet newspaper, bought a lot of RPG games and modules from Orcs Nest (still on Earlham Street today), Games Workshop and The Virgin shop on Oxford Street. We got Judge Dredd, MERP (Middle Earth Roleplaying Game), Call of Cthulhu, and “who ya gonna call” Ghostbusters, Top Secret, Chill, Timemaster, Paranoia and Warhammer Fantasy Roleplaying and god only knows what else, I remember the only non-rpg stuff I bought was the God Save the Queen single by Sex Pistols and Bob Marley’s Exodus (movement of Jah people).
But also a shout out to the Amazing swedish shop Hobby Huset in Uppsala – they had an amazing selection of RPGs in their catalogue and excellent shipping service. We sometimes even took the 1.5 hour train trip and visited the cellar it was located in and got some strange stuff from the bargain bucket. It was this shop that really opened up the hobby for us country boys.
We played so much RPG games in our youth, in people’s houses but eventually in a shed with a heater that made it bearable. We hated splitting up the group as we had to stand outside in the bloody cold freezing our Dirks off (remember this was Sweden when we had proper seasons). Later we asked our school if we could use one of the class rooms in the evening and weekends and the head teacher gave us a key and we had a hell of a good time. We had a good group with a few changes along the way, but then playing in death metal bands, national service, university education, and moving abroad split the old gang. We had our ups and downs but now 30 years or so later I can only recall the positive aspects, so to my old Grogsquad Jonas, Petri, Sebastian, Tommy, Thomas, Magnus, Micke, Reidar, Erik, Petter, Christer, Anton, Fredrik and the guy who only came once and played Pendragon with us and anyone else I forgot, but also to my new Grogsquad the Adventurers Club led by Dirk, Blythy, Ed, and the Daily Dwarf, I raise my glass of vodka to you all!
Although there was a lot of fear mongering around the Rpg hobby in the mainstream media at the time, thinking we would become too introvert, turn into extremists or jump from buildings imagining we could fly, I think our parents were grateful for the fact that instead of being out drinking moonshine vodka, a speciality of the region, and making the town unsafe, we instead sat in the shed telling each other stories and rolling dice. I think we all turned out ok in the end.
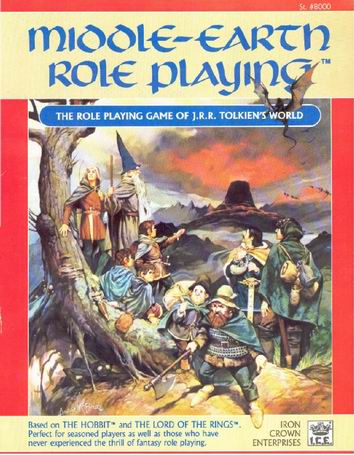
In the day we shared the burden of Game Mastering in our Little but Merry band, but the longer campaigns were usually game mastered by myself or Jonas and one of the first games he ran was MERP – Middle Earth Roleplaying. Jonas was amazing with regards to preparing for campaigns and game sessions and his knowledge of Middle Earth was very deep – he had even read the Silmarillion and the Lost Tales! Later Jonas were to run a very long AD&D campaign (2nd Edition) and although I never really liked the system, his overall campaign with a mixture of shorter episodes, long running plots and reappearing protagonists was probably the best one I ever played. However back to MERP. The rules today feels old-fashioned, being a Lite version of the bigger Rolemaster System but at the time offered us some kind of balance between the always fragile characters in the basic Roleplaying system kind of game and rise of your AD&D characters toward immortality – with MERPs open-ended rolls there was always a chance that an opponent could score critical hits and do some substantial damage whatever the differences in character levels, armour class etc. You had to be careful and not every encounter would be a question of drawing a sword. And the magic system was definitely not Tolkienesque but then Jonas did not allow us to be wizards. But what was more on top of this and perhaps the real legacy of MERP was the many fantastic modules and not the rules. The modules had some fantastic drawings and amazing covers that shaped our vision of this amazing world. There were many talented artists contributing to these modules but for me there are two I would like to mention especially – first the legend Angus McBride who did some exceptional cover art for many of the MERP modules. The second artist is of course Liz Danforth who created an outstanding visual presentation of the various characters, races and creatures of this wonderful world, and by the way a big thanks to you Liz for your support to the #grogmerp campaign on Twitter. But there was more, the modules contained information about the people and lands and it felt like it stayed true to the lore but expanded where there were white spots. Herbs, requires a special mention, and were like modern mobile phone apps – there was an app, sorry I meant a herb for that. It is actually my last RPG, I played and a big part of my recent interest in the hobby.
However, there was only one game that I really really immersed myself into in the day and it was the Call of Cthulhu rpg – I guess it does not need any deeper introduction. The first time I played it was at the RPG club in my hometown that some of us used to go to and play as well as playing with the core group, the club was founded by Magnus Seter and Dan Algstrand who today are well known characters in the RPG Industry. It was an excellent way in getting to know likeminded and try out a wider array of games. The club even run a few conventions and I wrote the Call of Cthulhu Scenario for the first two – with the imaginary titles of – the Shadow in Darkness and the Dweller in the Shadow (You can actually find these on the net, but mind you they are written in Swedish). Our little band played some of the epic campaigns like the Fungi form Yuggoth (later more adequately renamed the Day of the Beast), the Spawn of Azathoth and even the Horror on the Orient Express – although our campaign derailed after a few stops. But for me it was the Arkham county series of books that really made the game come alive – we played scenarios in the Miskatonic Valley – in places straight from the Lovecraft stories like Arkham, Dunwich, Innsmouth and Kingsport. The players included Professors working at the Miskatonic University, a PE teacher who could throw a javelin like no other, a retired Major from the British Army (yes he was a hell of a Marksman with his Webley Revolver), Private Investigators, a daredevil pilot and a Medical Doctor at the Arkham Asylym. The scenarios both readymade and homebrewed focused on local events – it made it more scary and intense when reoccurring NPCs asked for help, suddenly disappeared, ended up at the Asylum, or were found dead. When you could weave in characters family trees into the scenarios with the realisation that great grandfather Elijah Waitrose was a Cthulhu cultist or that Great Aunt Tess Collie was an adventurer lost in Dreamlands. As For anyone who may not be familiar with the literature I really recommend that you read the wonderful but not for the faint hearted stories like “The Call of Cthulhu”, “The Dunwich Horror”, “Escape from Innsmouth”, “The Whisperer in Darkness” and “The Colour out of Space” to name some of my favourites. Yes, having moved on more than 30 years from that initial fascination, I know that H.P. Lovecraft probably was a man I would end up arguing with in the pub – he was a racist, homophobe etc, revealed by studying his letter and analysing some of the stories – I get it! But I was never in it for that, I was in it for the chill, sense of hopelessness in a world full of unknown things that humanity at best had a very limited understanding of, the desperate fight against overwhelming odds of getting either permanently insane or ending up dead. The sheer joy of game mastering a group of seasoned investigators in gathering clues from libraries, local newspapers, speakeasies, weird locals, etc. They, the characters, were never flashing heroes with shiny armour and glimmering swords or caped crusaders flying the flag , they were mostly normal people who endlessly fought on. Call of Cthulhu is my everything!
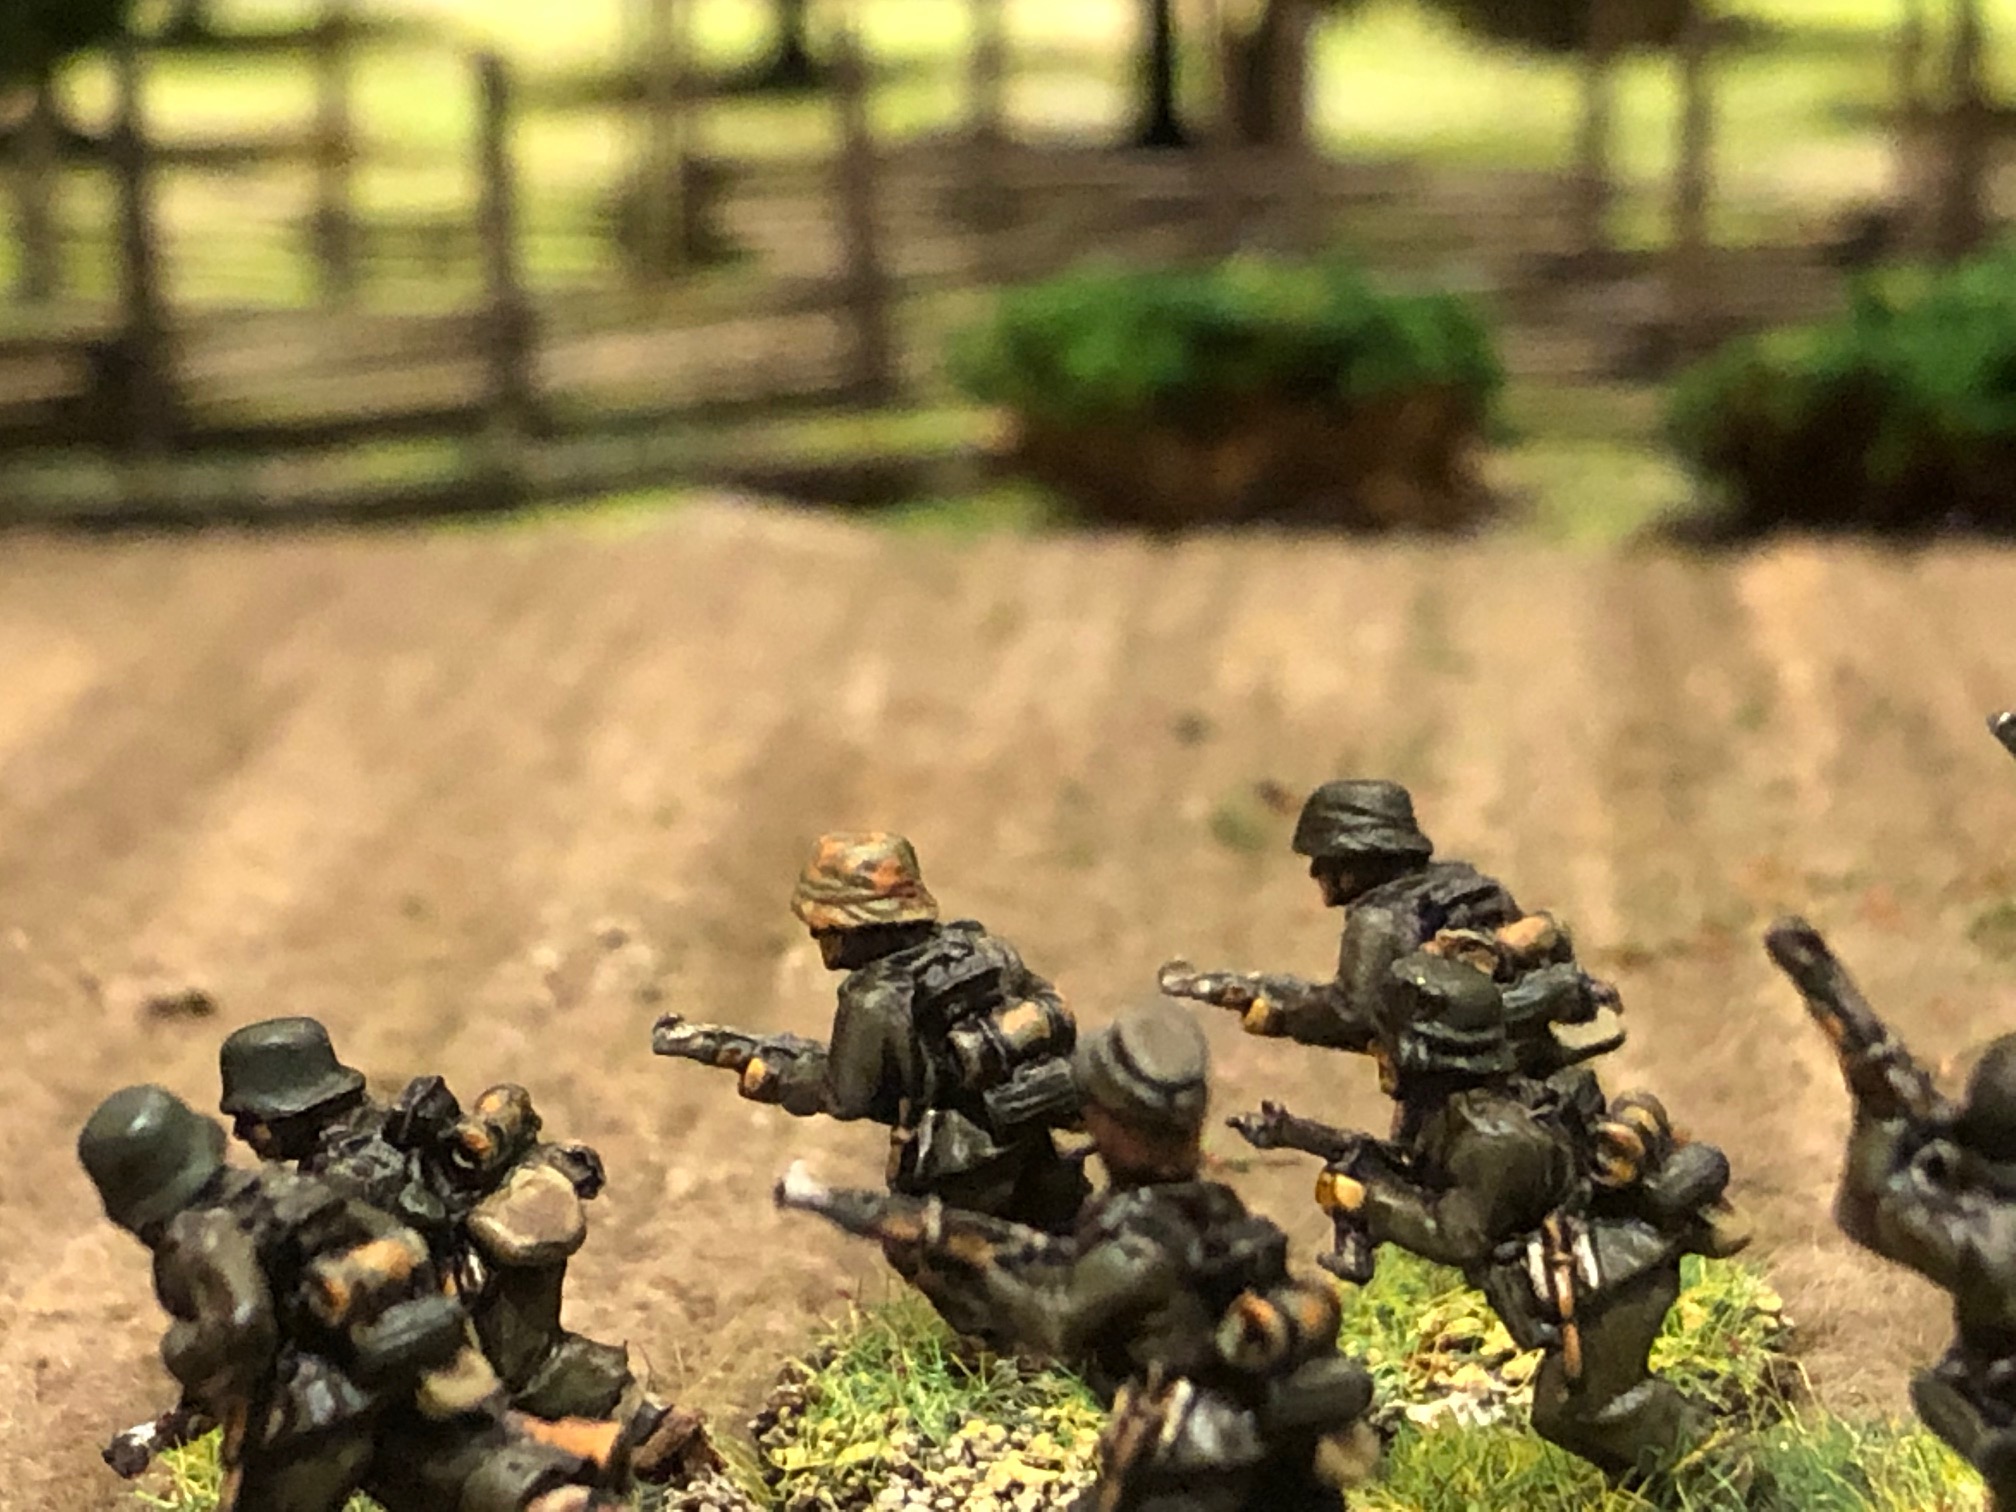
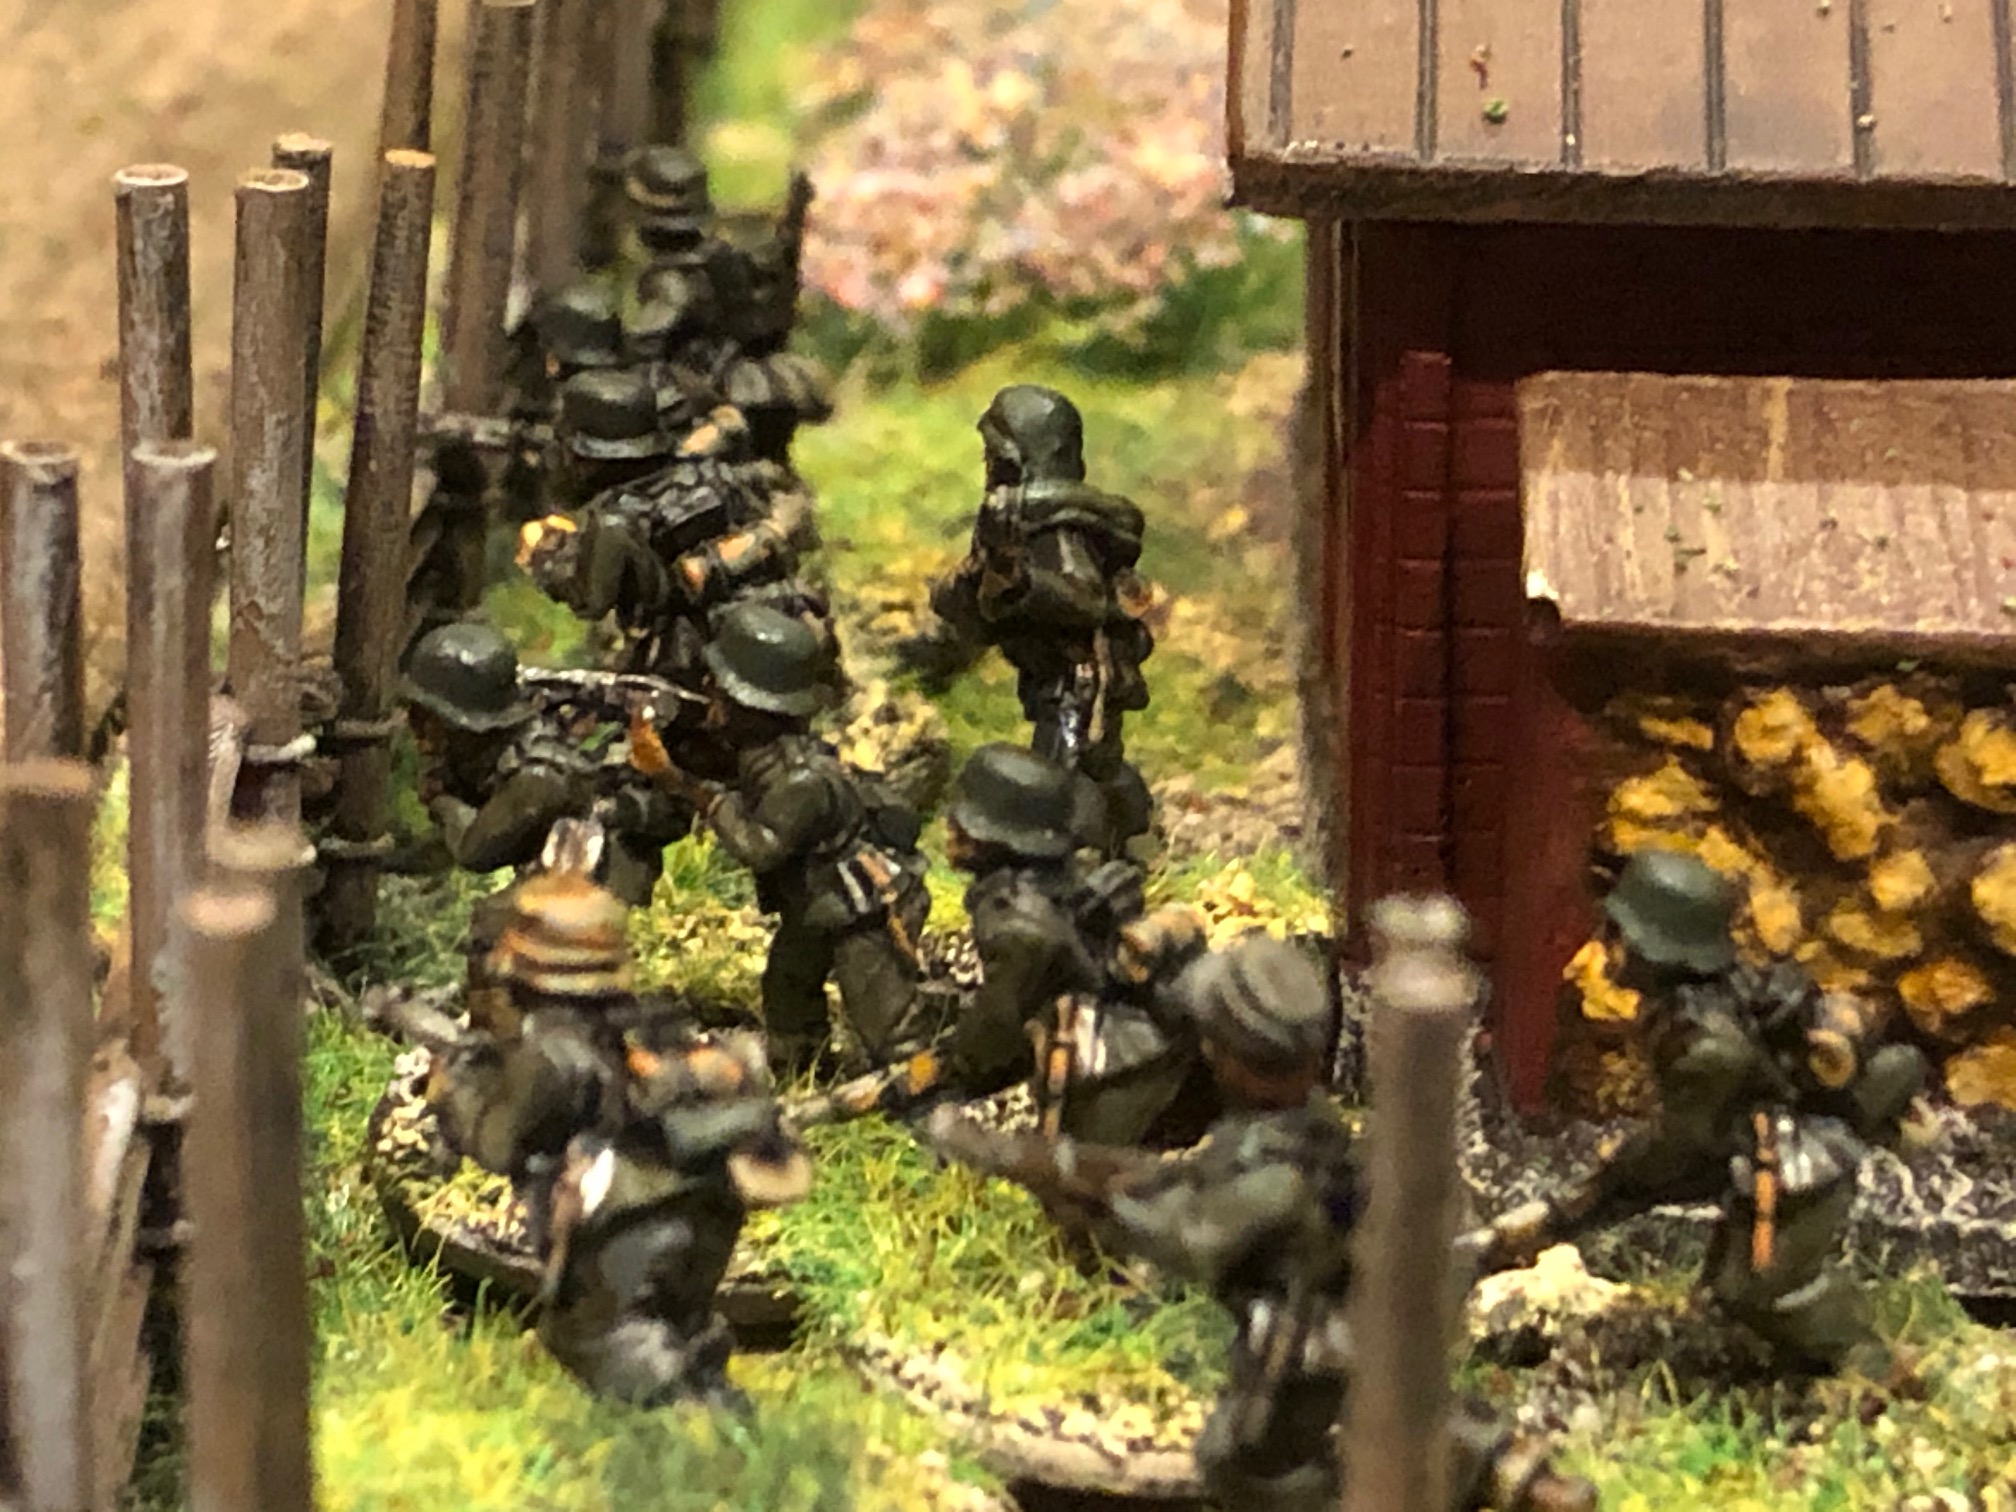
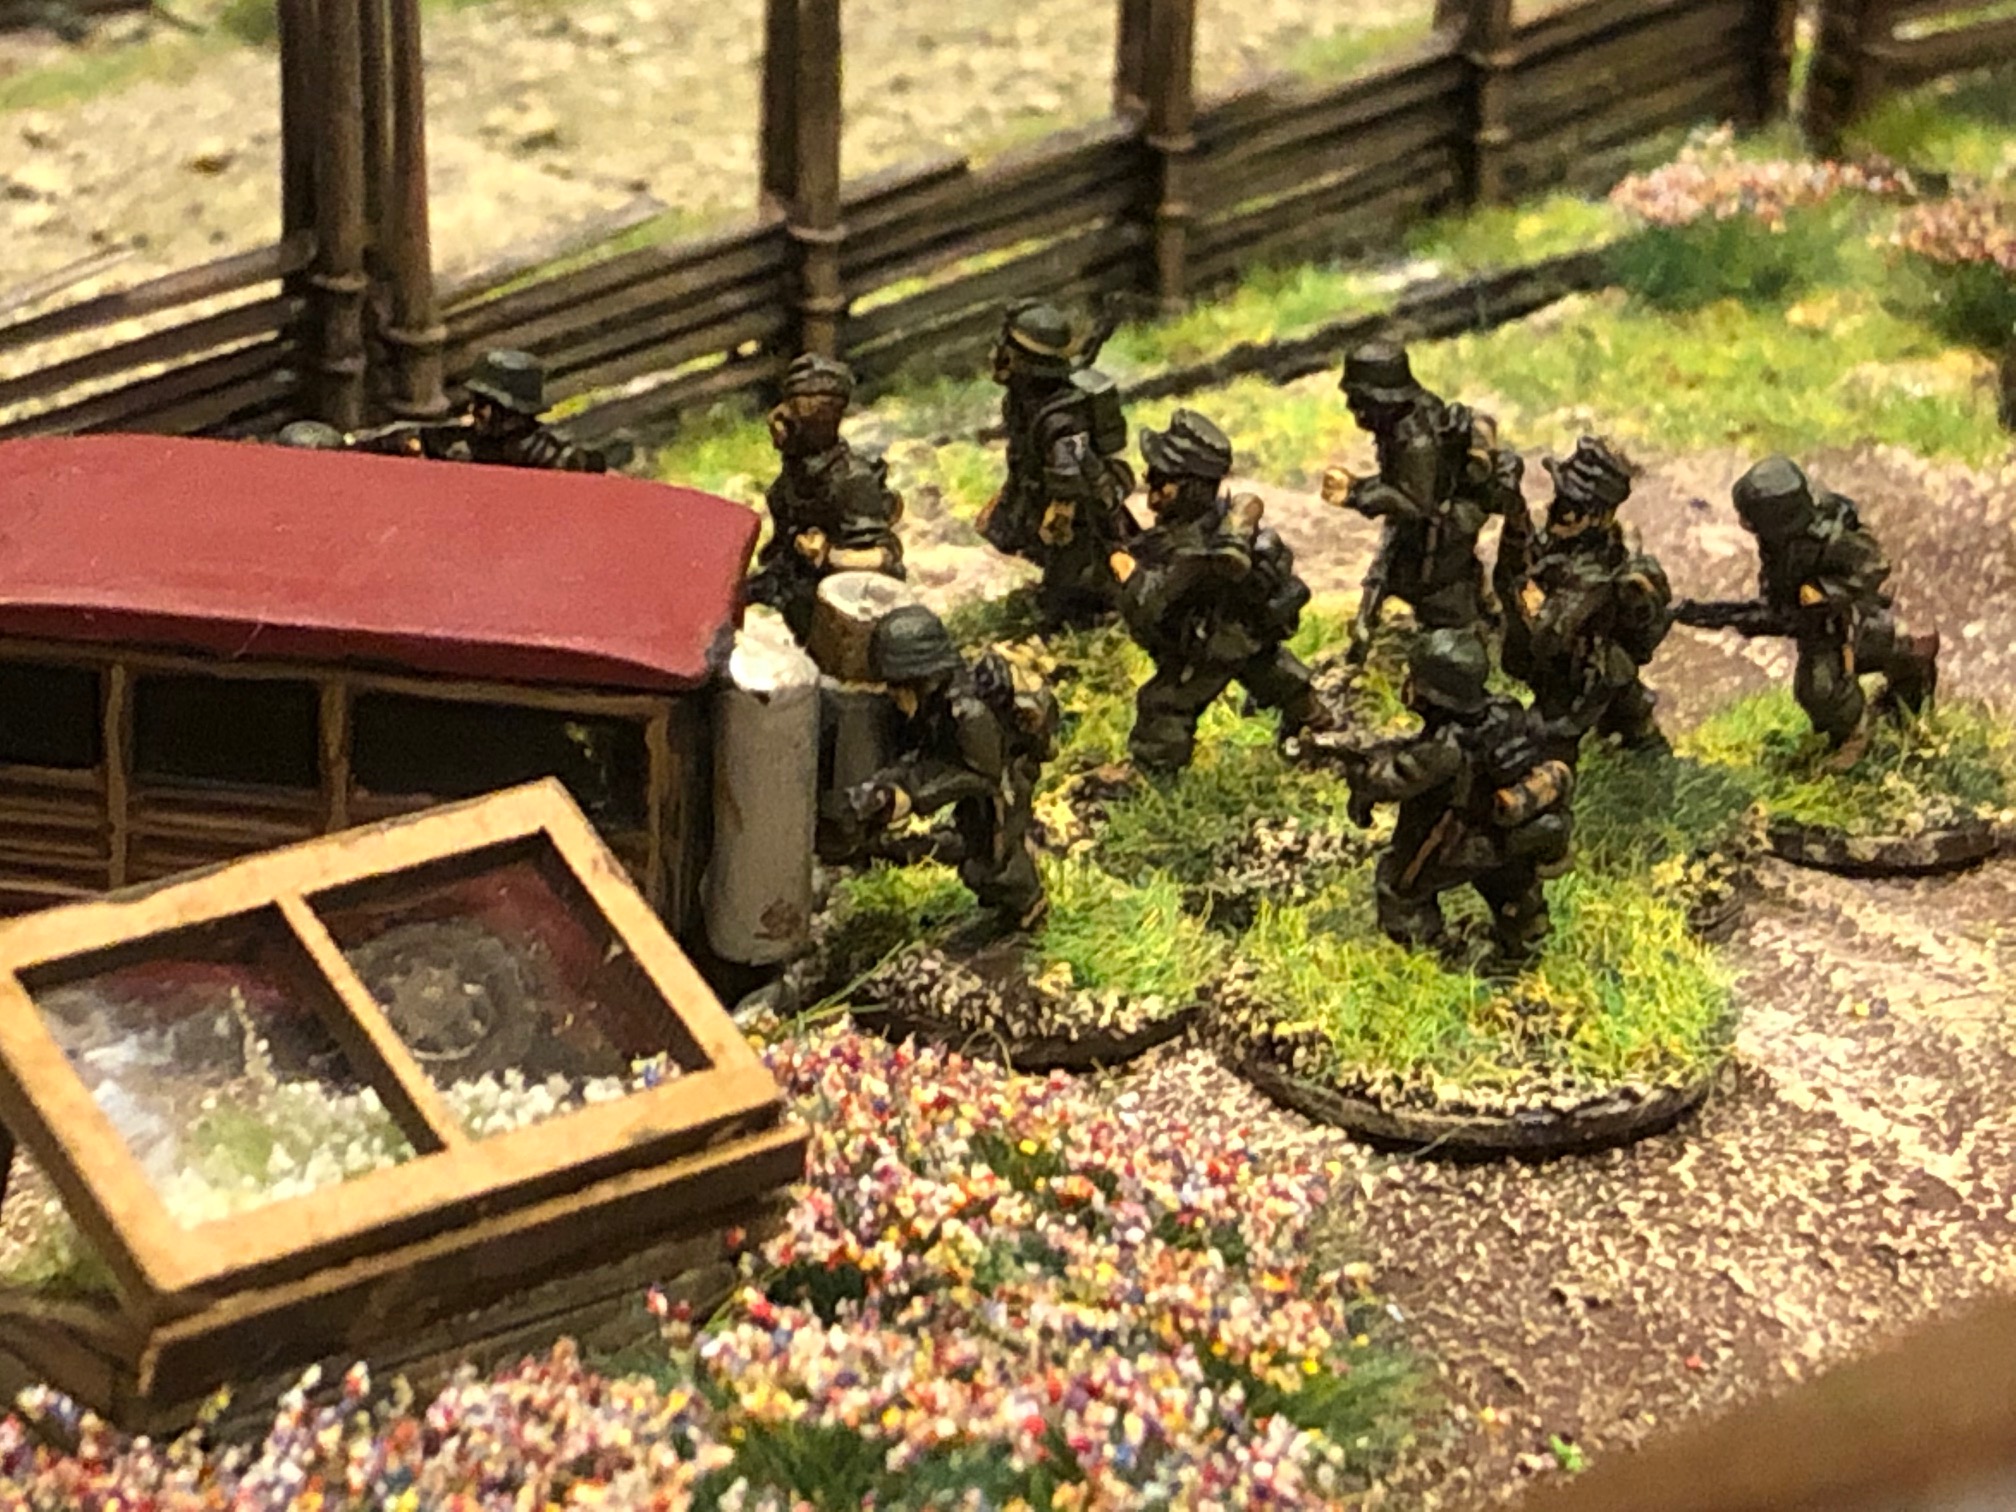
If you have followed this blog you may recall that I have been working on a project relating to a “What-if” German invasion of Sweden in 1943 through the Dalarna County – where I “incidentally” was born and grew up. There is a good summary of where I got to with this project to date in a previous blog post (link here).
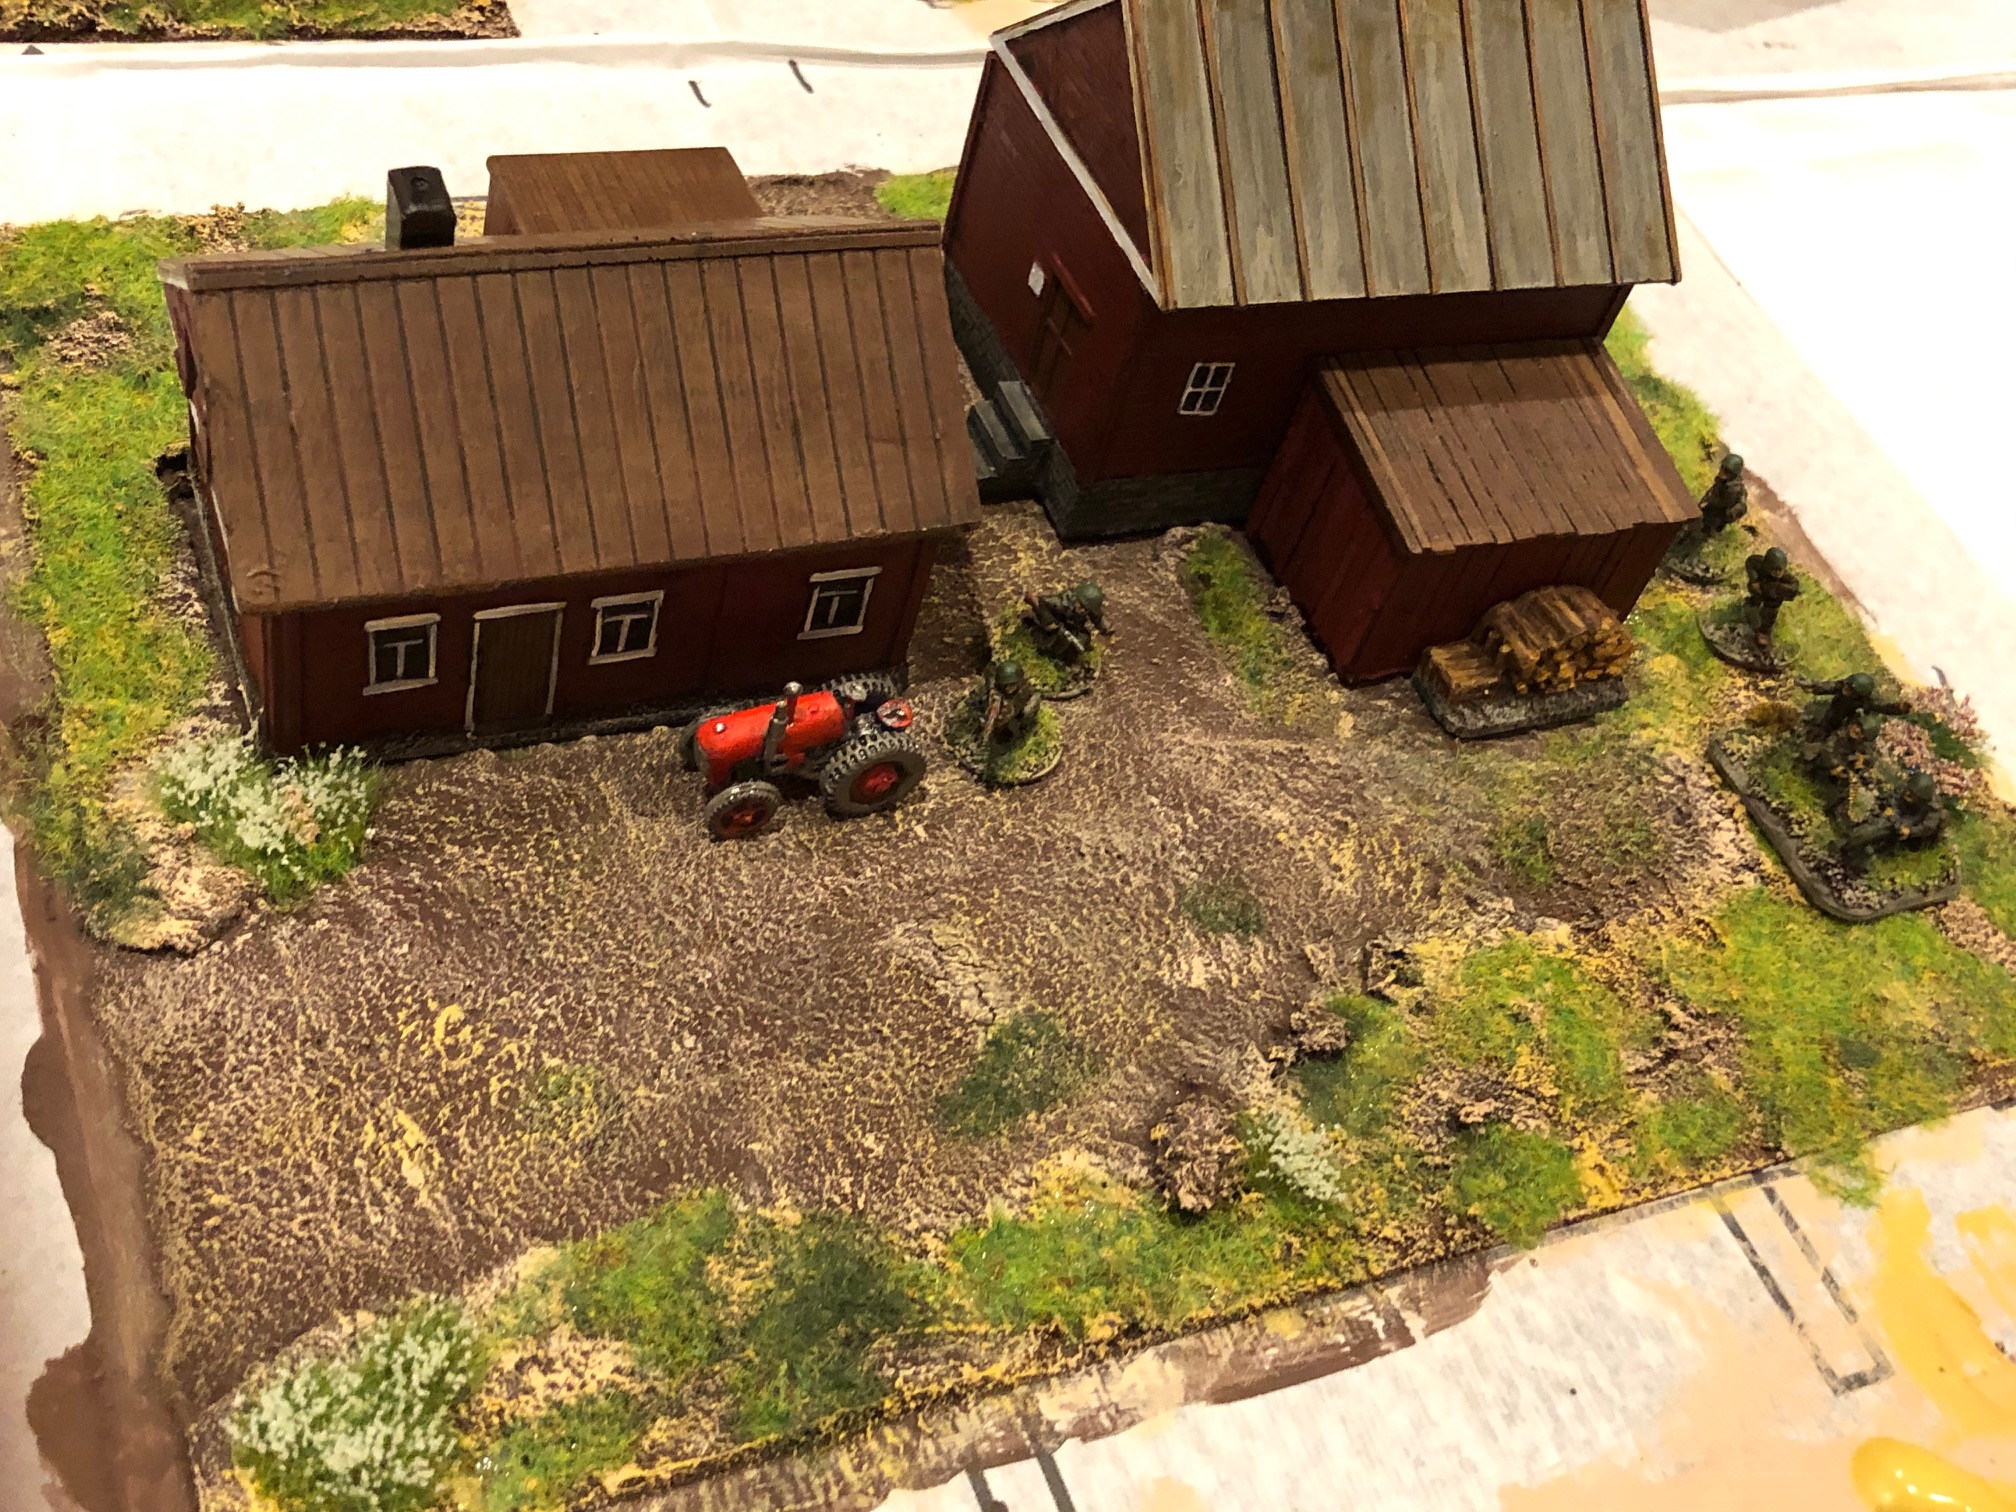
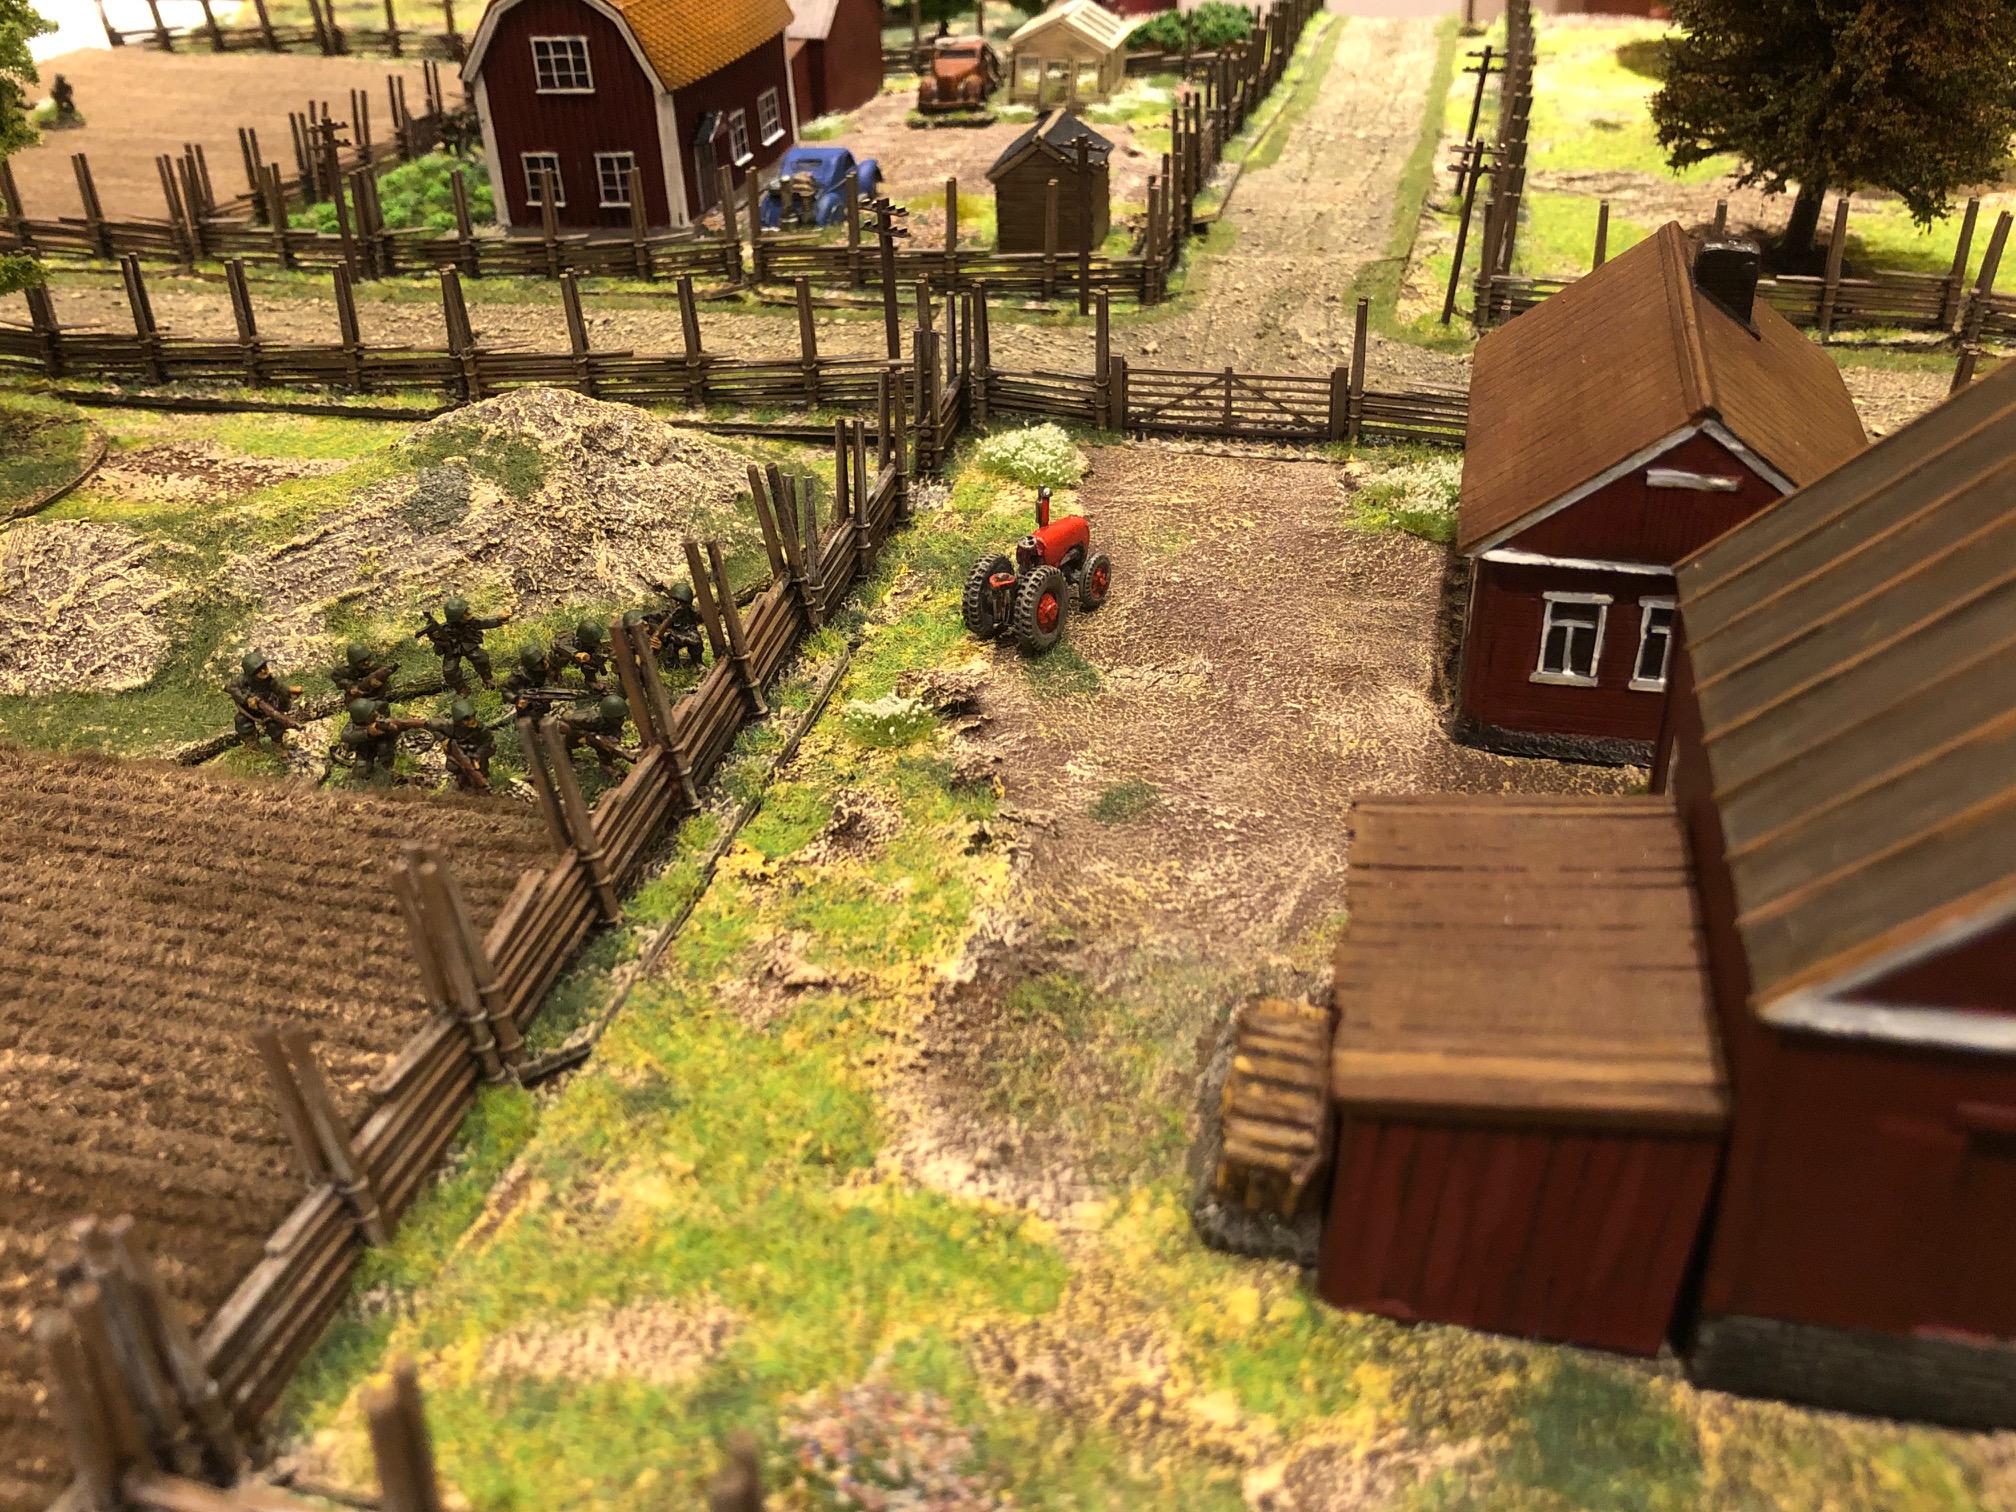
Dalarna, Sweden in 1943 does not look like Normandy or the Eastern Front and one of the challenges to create the immersion is to create an overall look that feels right. A lot of the existing wargames buildings and terrain are not suitable for this theatre – the Normandy buildings looks totally out of place whilst the typical eastern European houses, whilst in wood, does not neccesarily have the right look (the common thatched roof on many of these houses are not really suitable). However I have found a few houses, barns etc that will fit.
The house on the left in the picture and the excellent round pole fences are made by Paul Edwards. Paul does some amazing work (Sabotag3d.com) and future blogposts will show more of the stuff he has been doing for me once I have painted them up.
The other houses shown in the pictures above and below are from Timecast (Eastern European 15mm buildings, link here) and Ironclad Miniatures (link here).
I have also, previously, talked about the typical red colour that was predominant, and still is, in the area – The Falu Red Colour (Falu Rödfärg).
Although the paint fell out of favour in the Urban areas during the 18th century the paint still survived and in the countryside, even today, is still the dominant type of colour.
The origins of the pigments used for this paint was a rest product from the process of calcination of copper ore at the Mines in Falun, in the Dalarna county. In the 16th century it was found that these pigments mixed with lineseed oil and rye flour worked as an excellent anti-weathering and preservative when applied to wood.
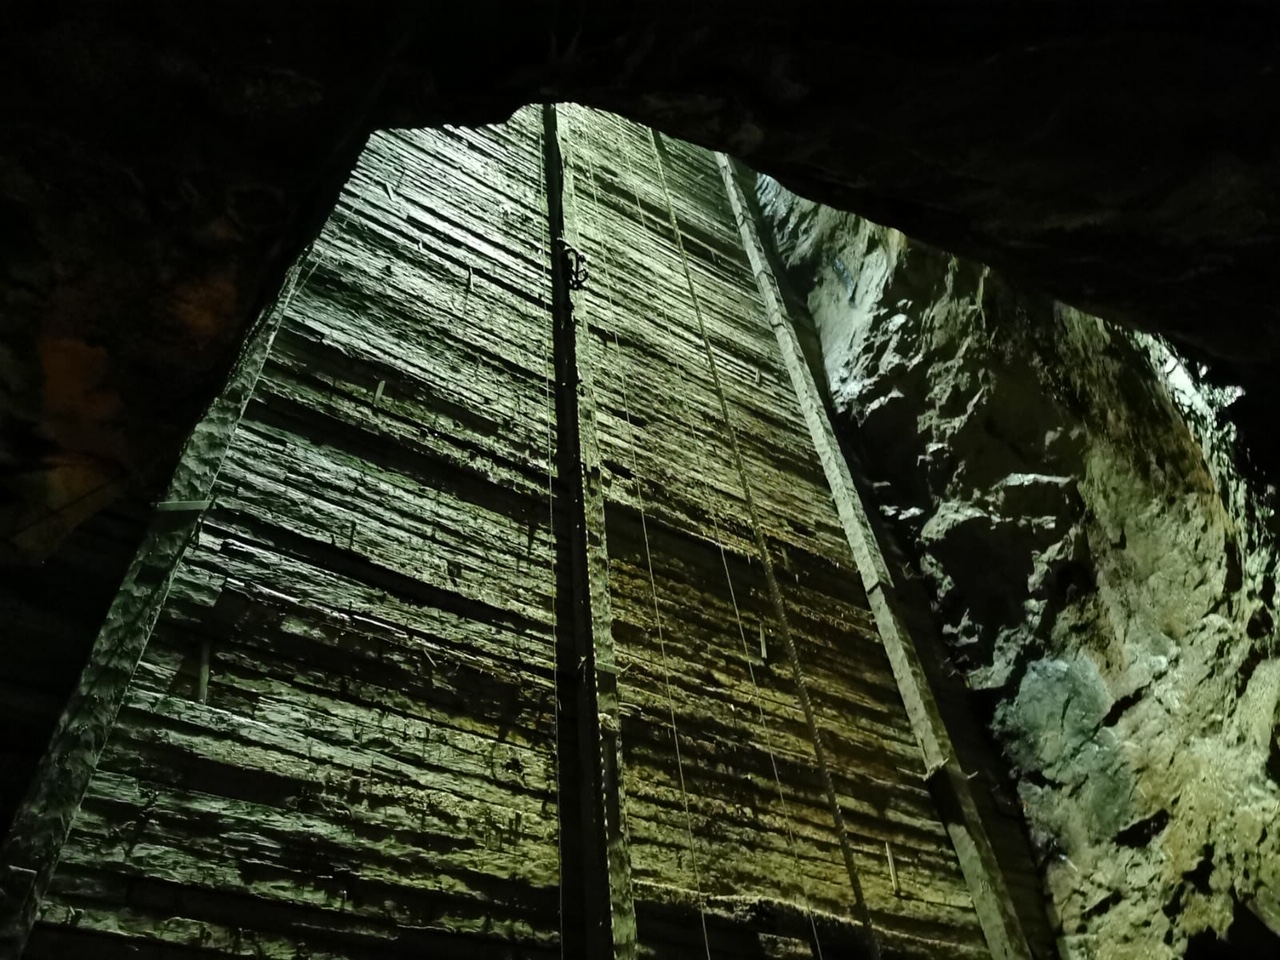
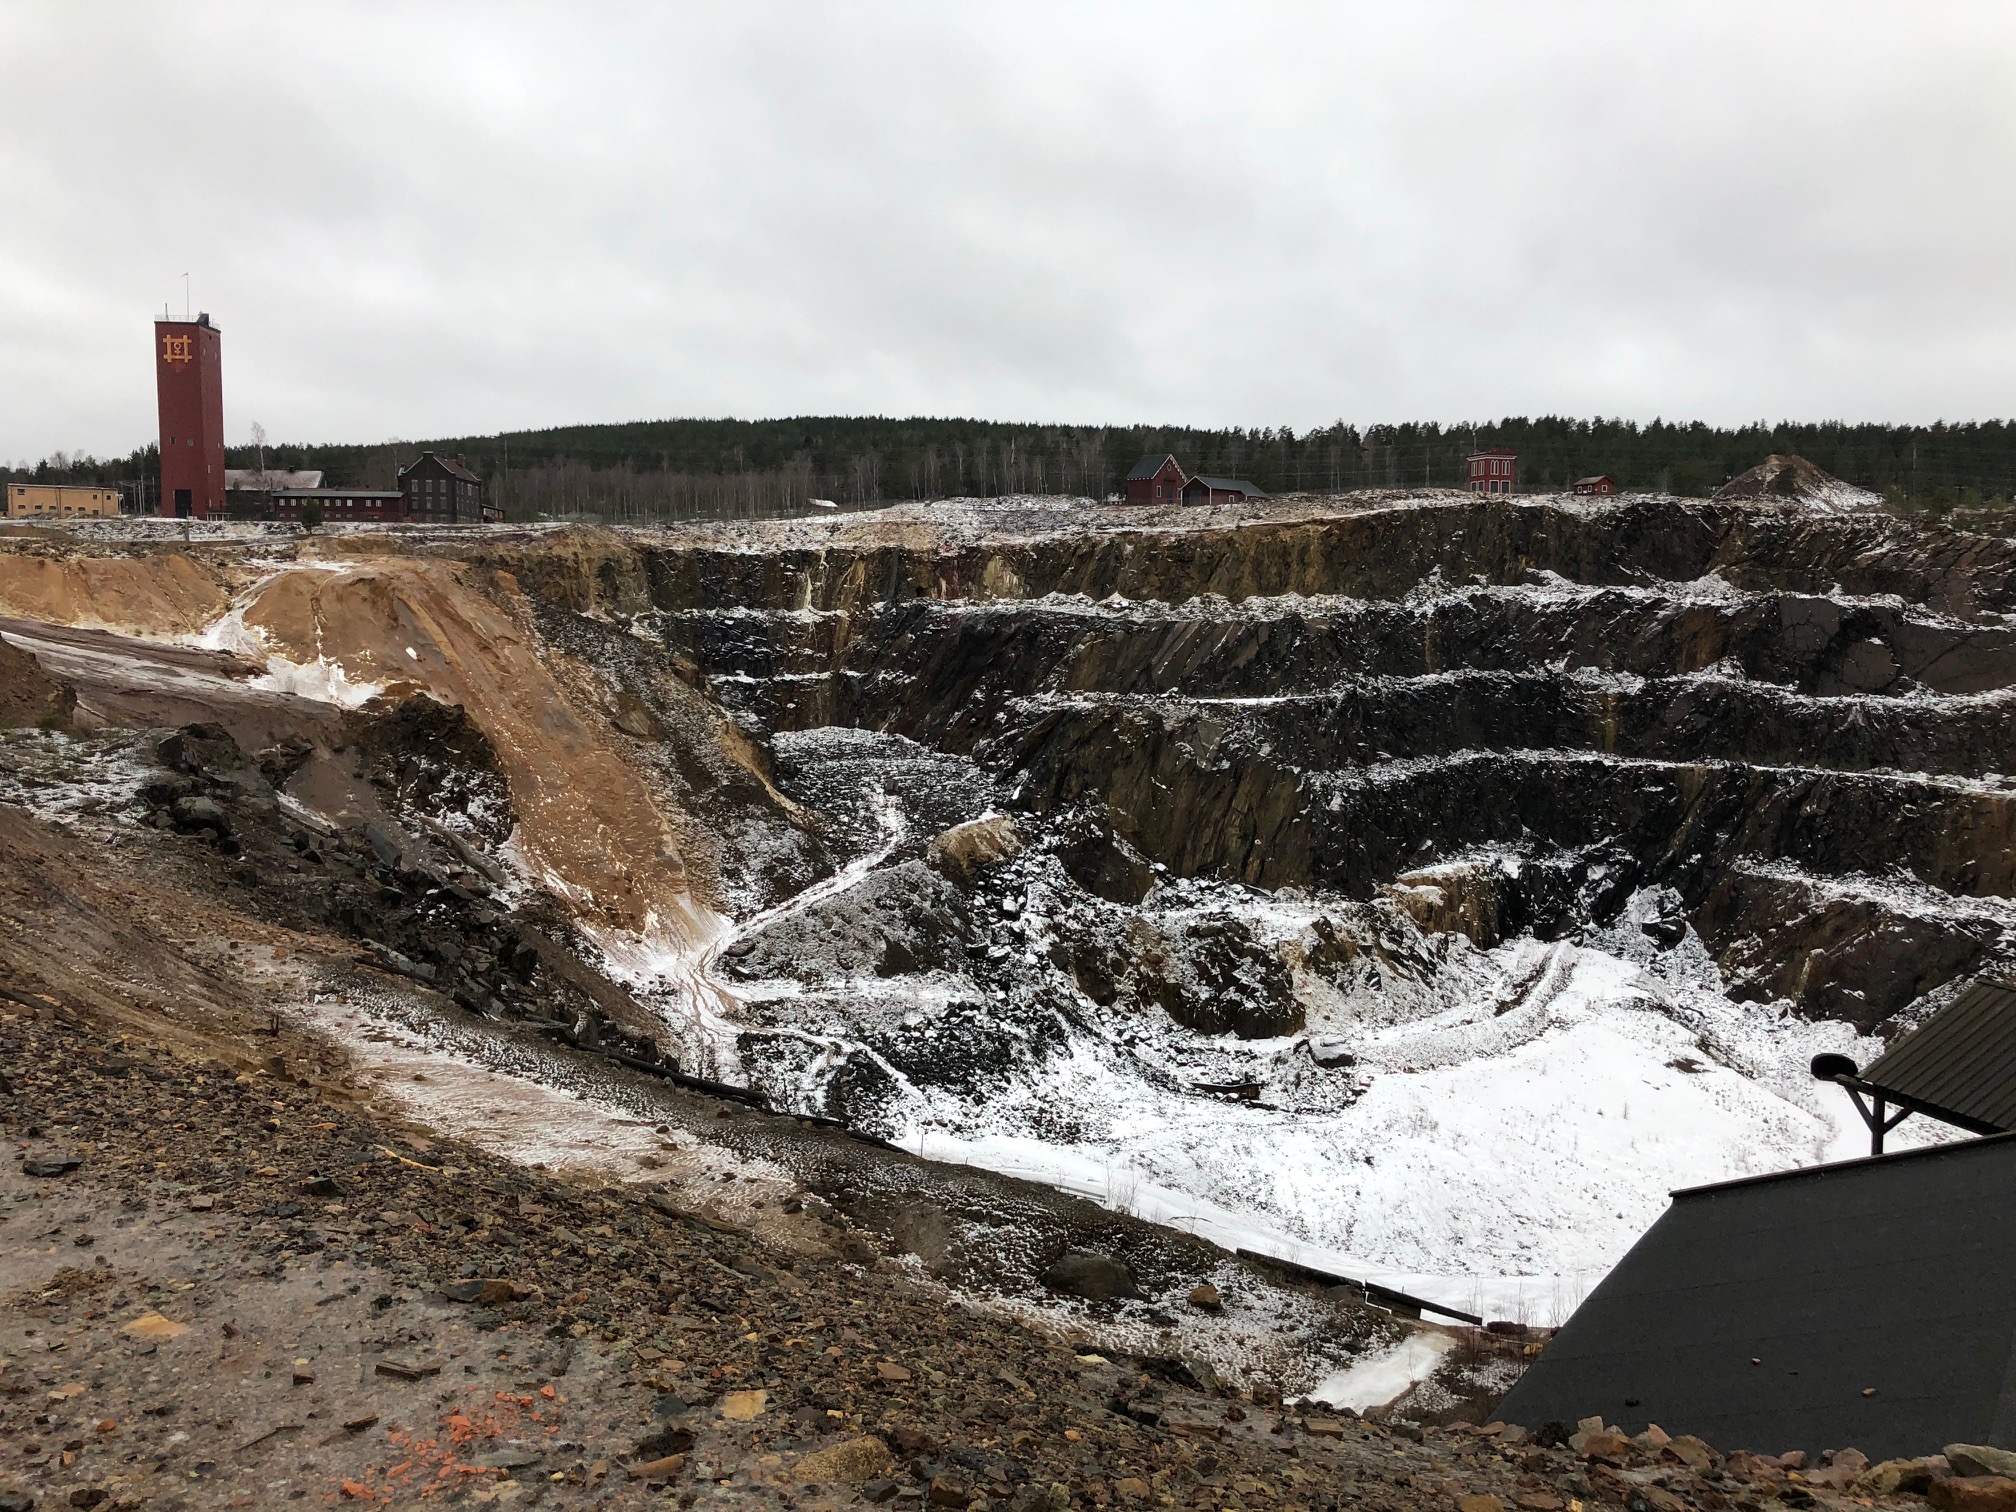
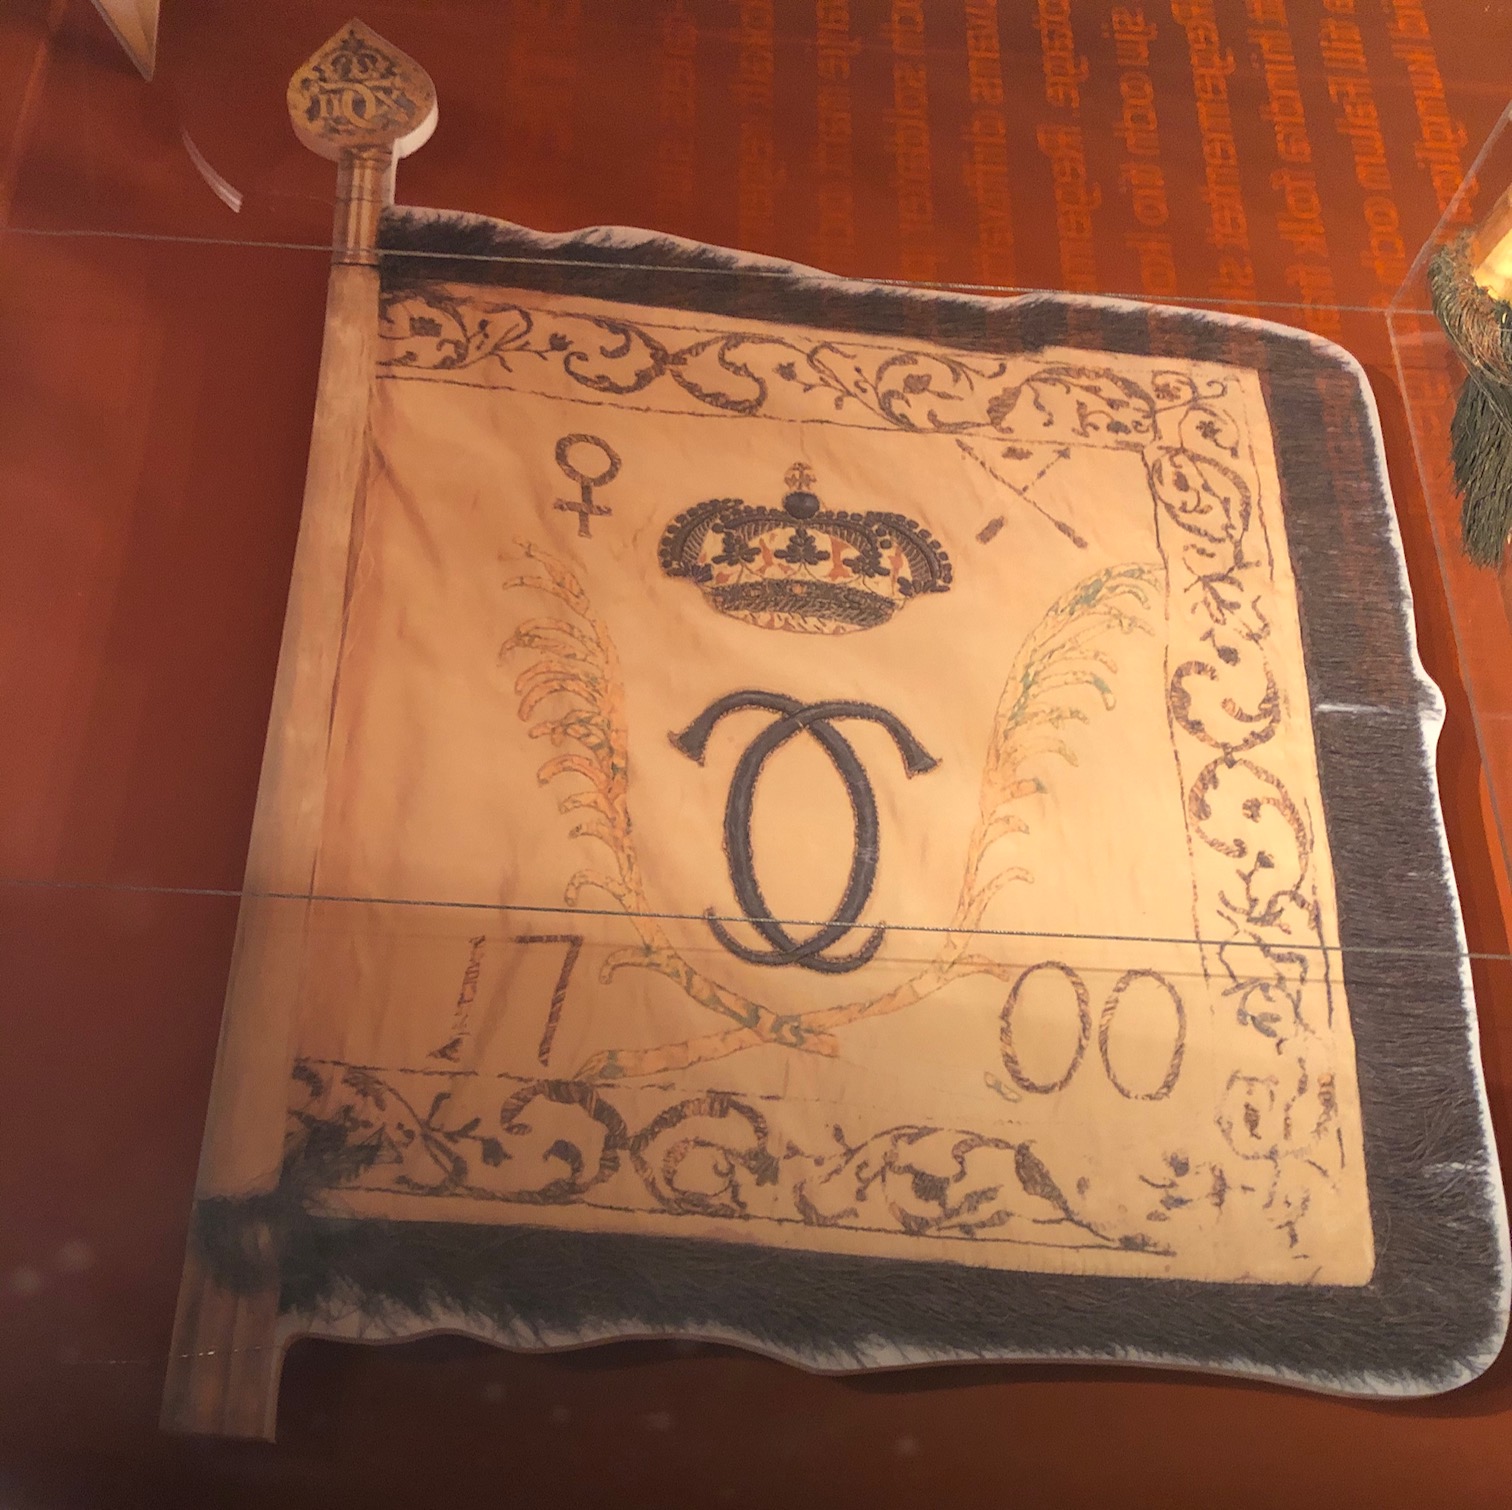
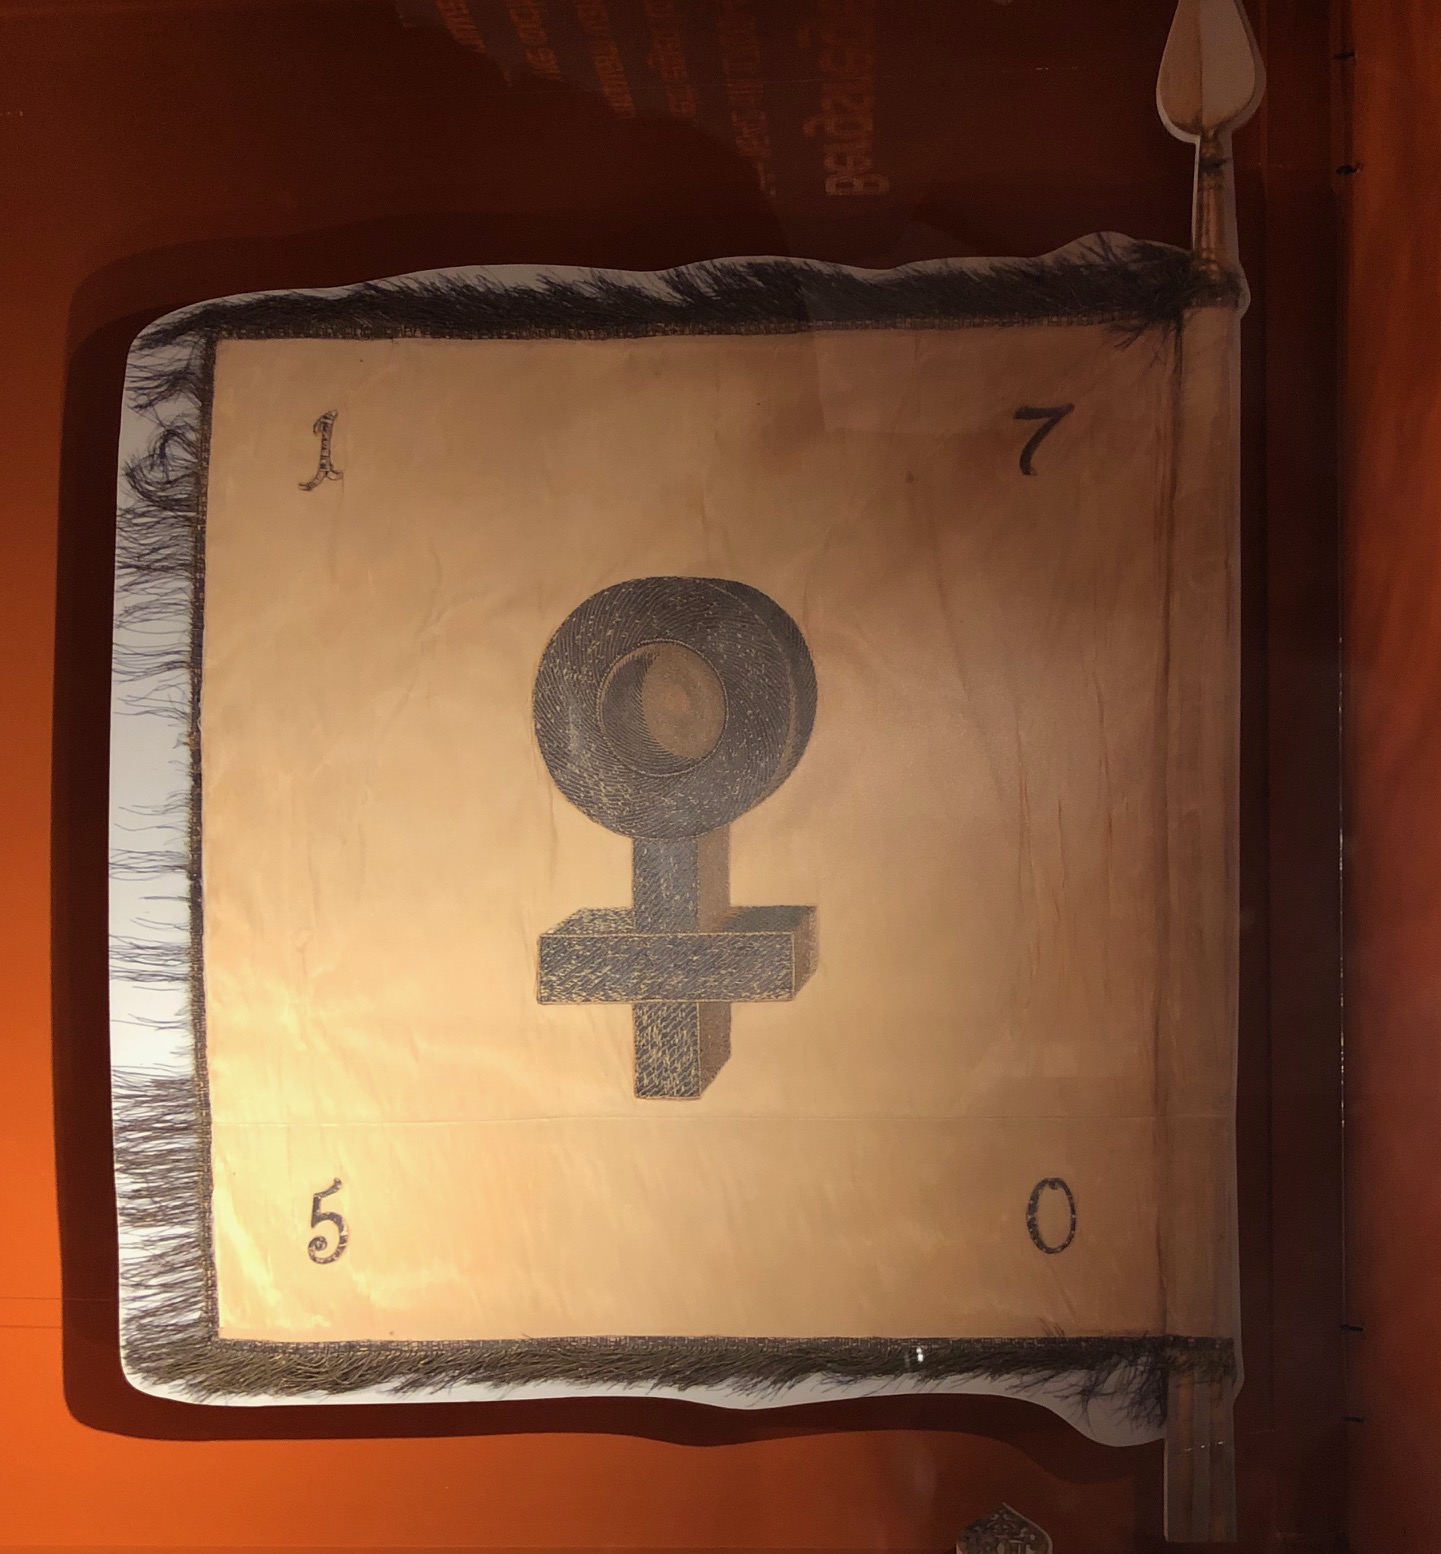
The Falu mine itself deserves a mention as it operated for 2000 years and at its most productive phase in the 16-17th century it produced more than 60% of the copper in Europe. It even had its own regiment (with some infantry and cavalry units) during the Scanian War and Great Northern War era.
Every School child in the county visits the mine to learn about its glorious past – today it is not longer a working mine but a fantastic museum with a permanent exhibition as well as the opportunity to travel down to the depths of the mine.
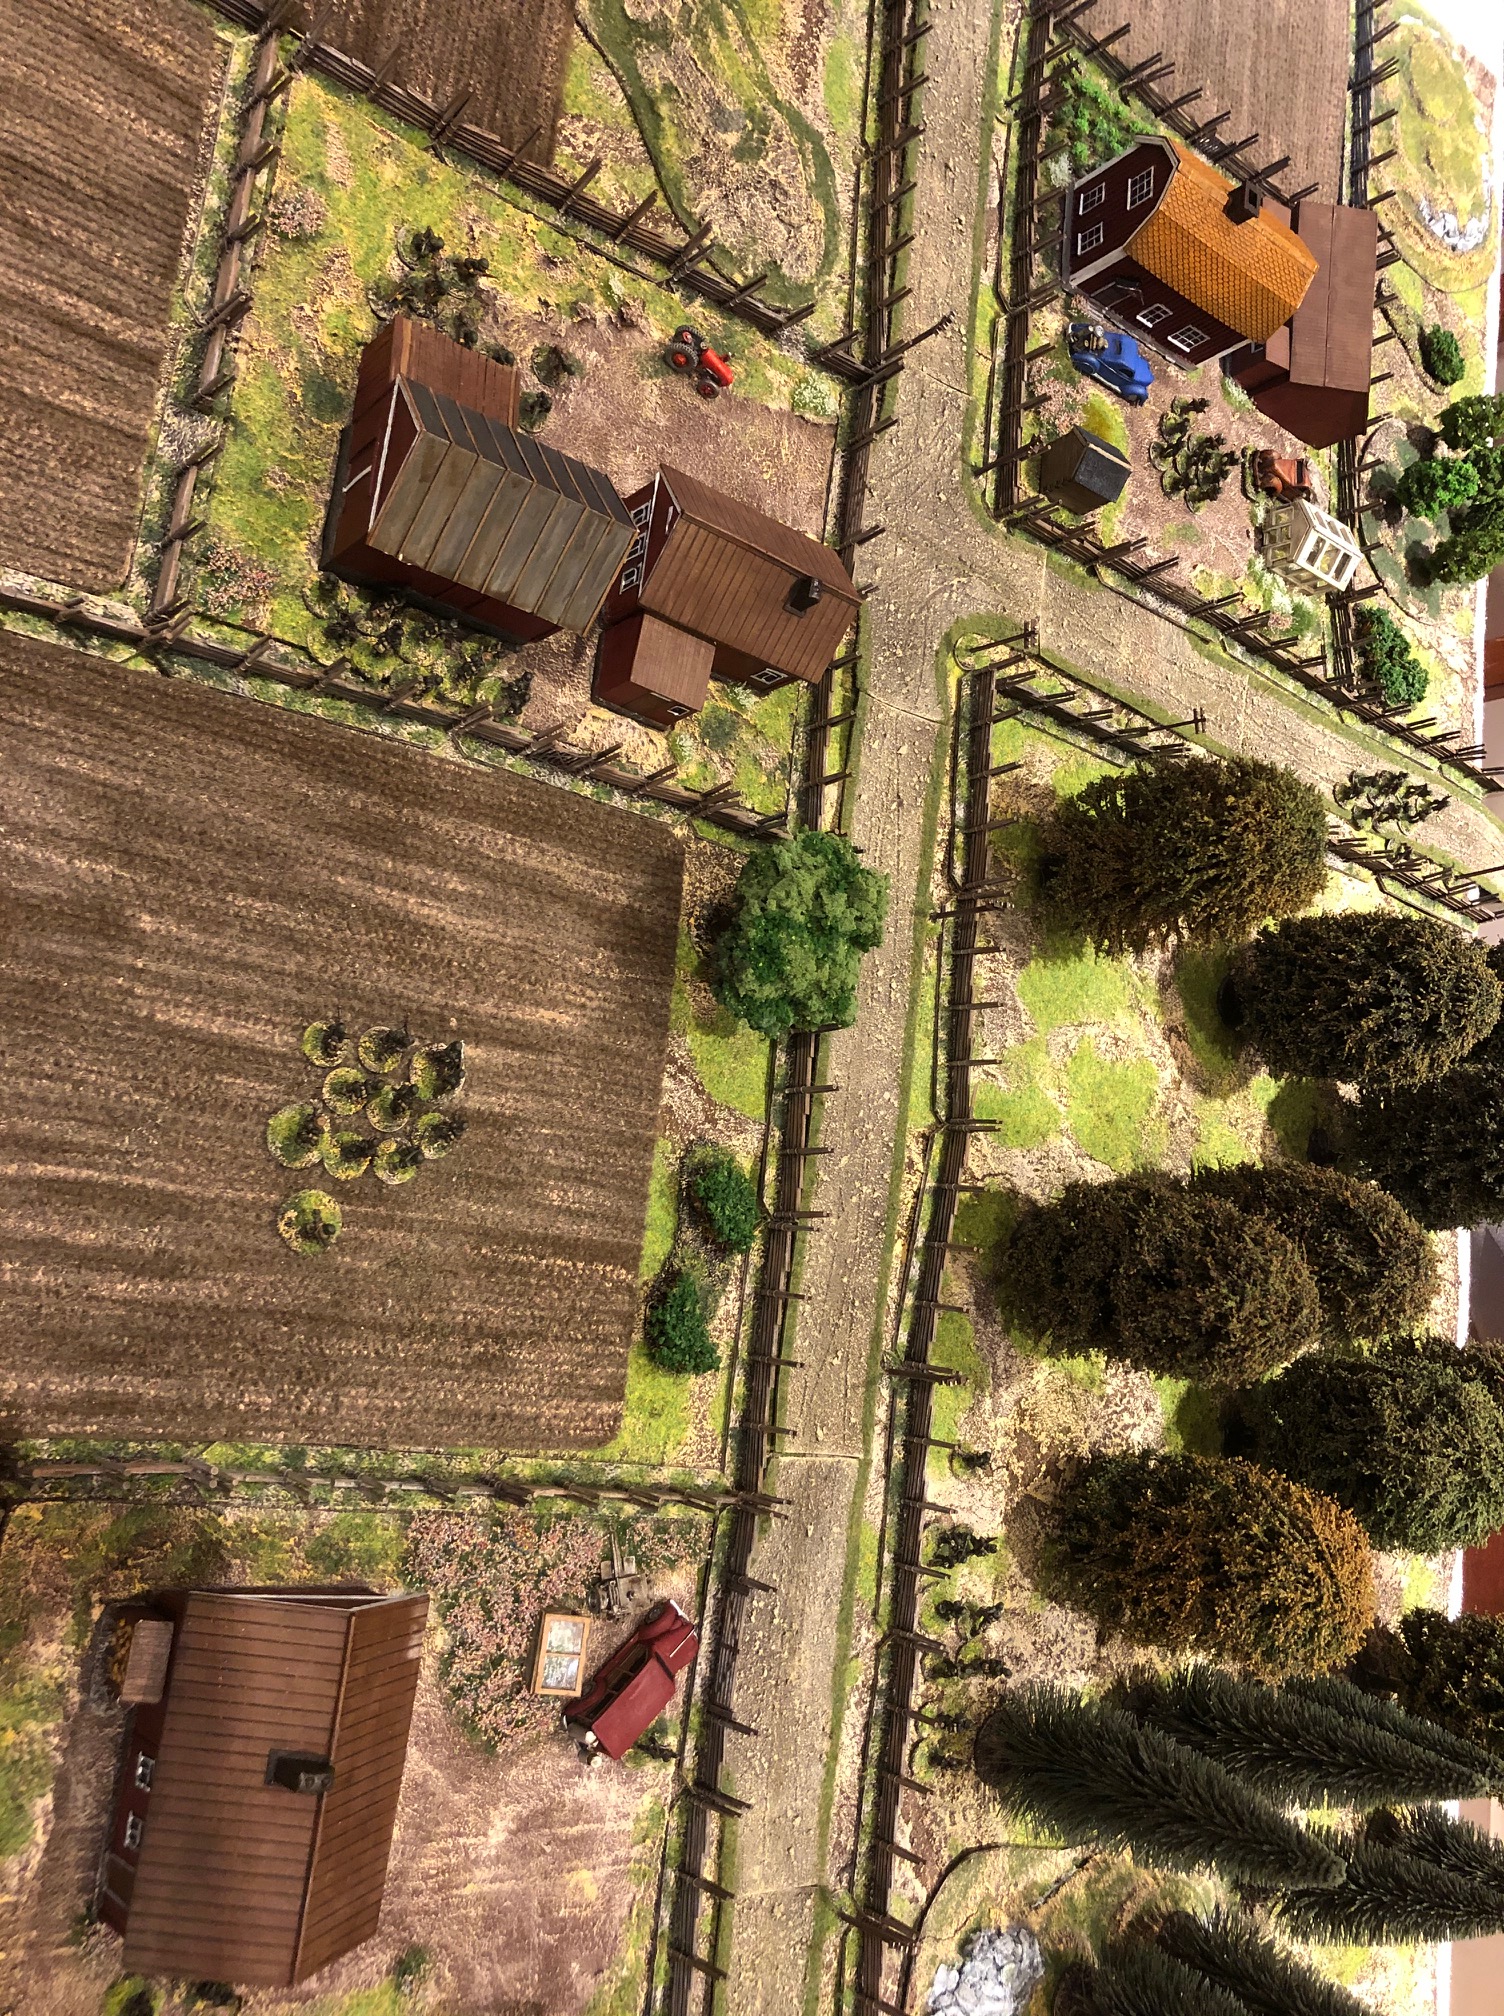
Farm tiles and Gas Wood Cars
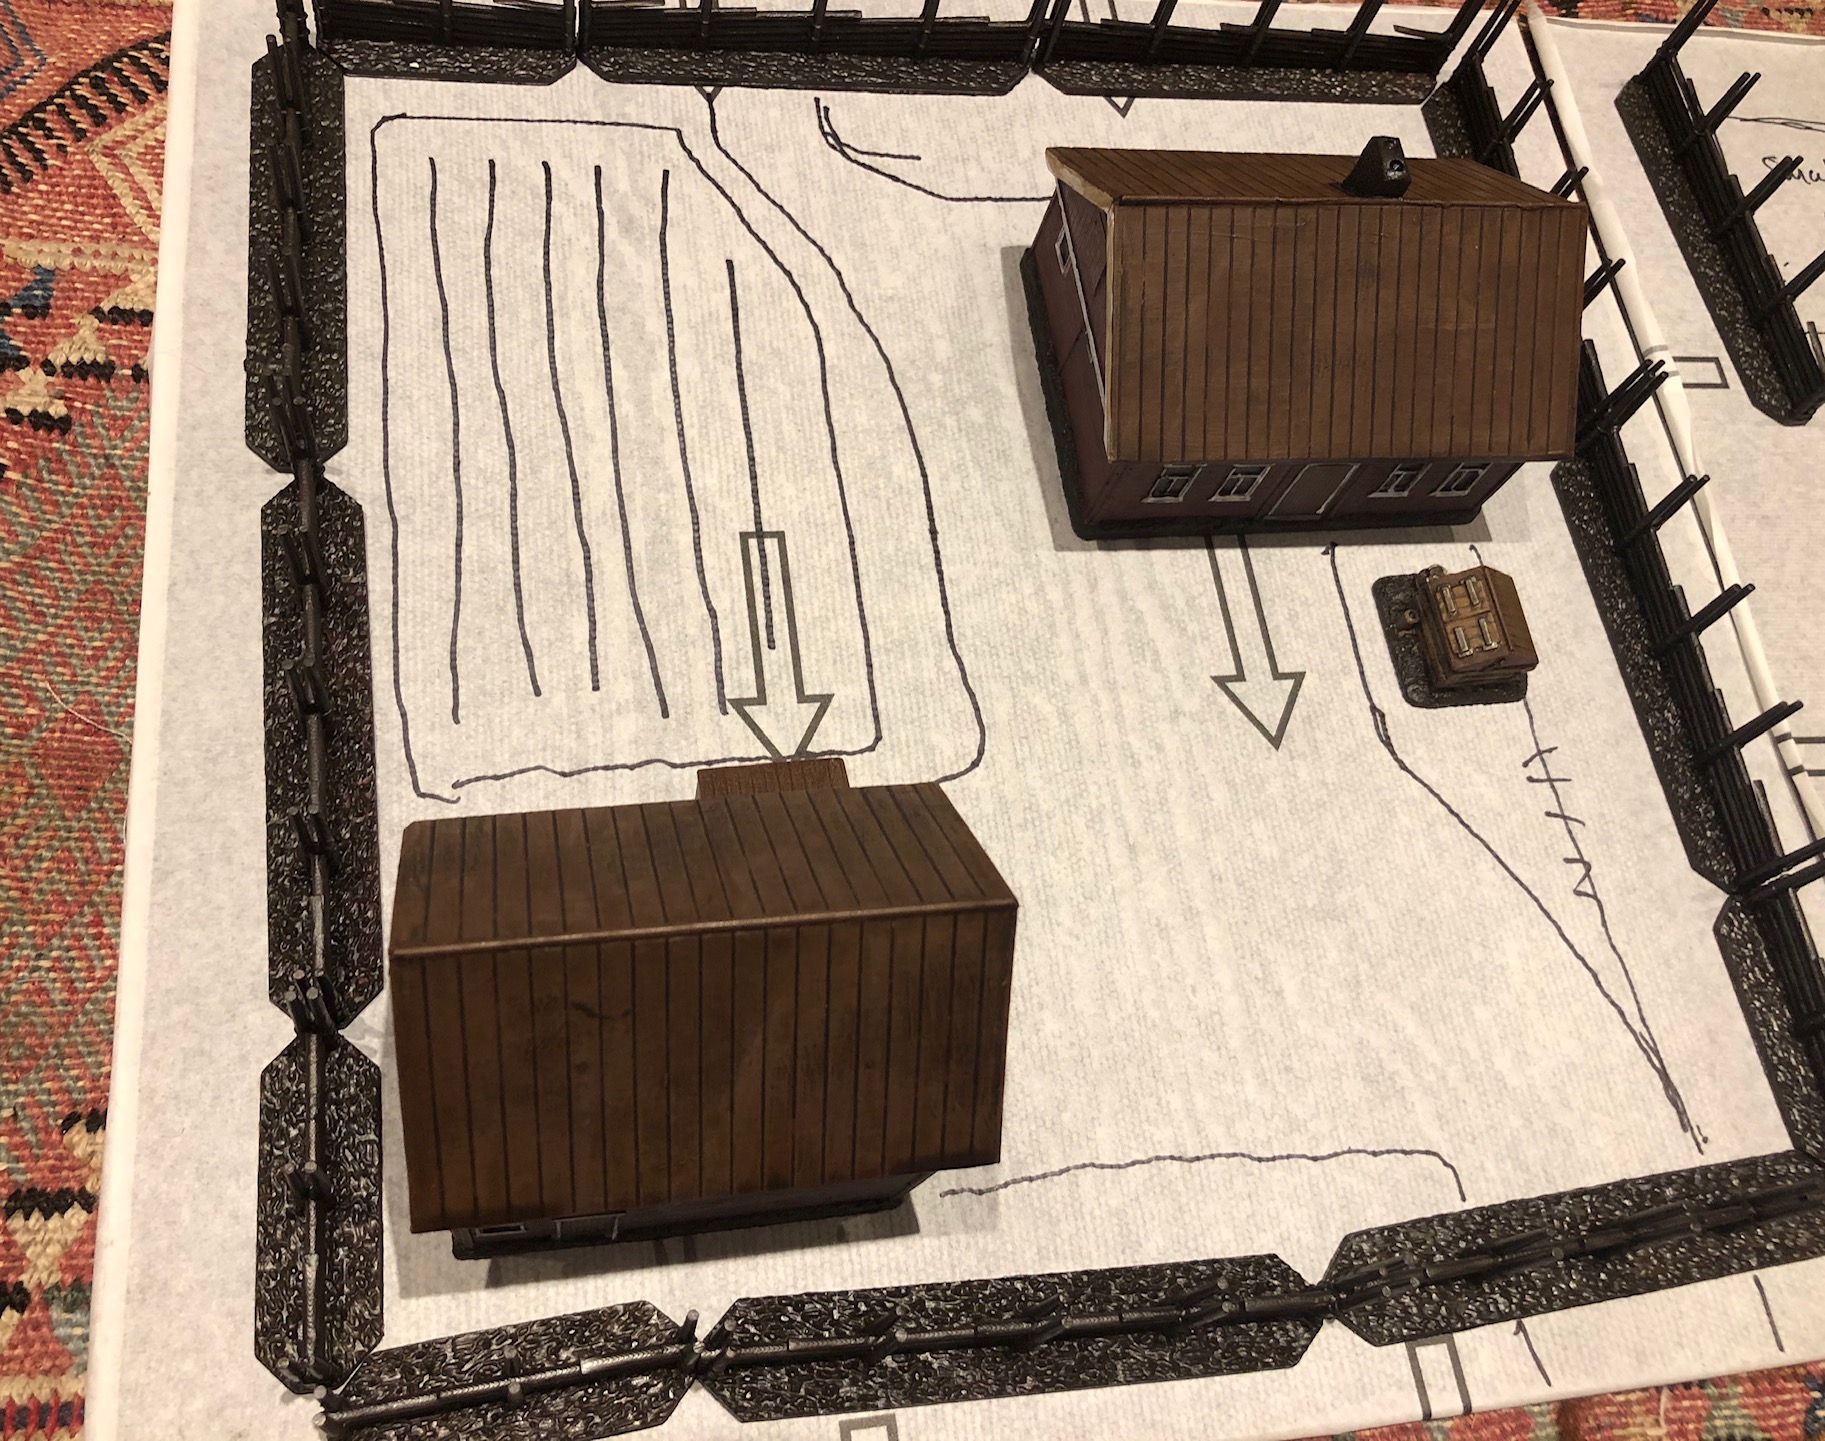
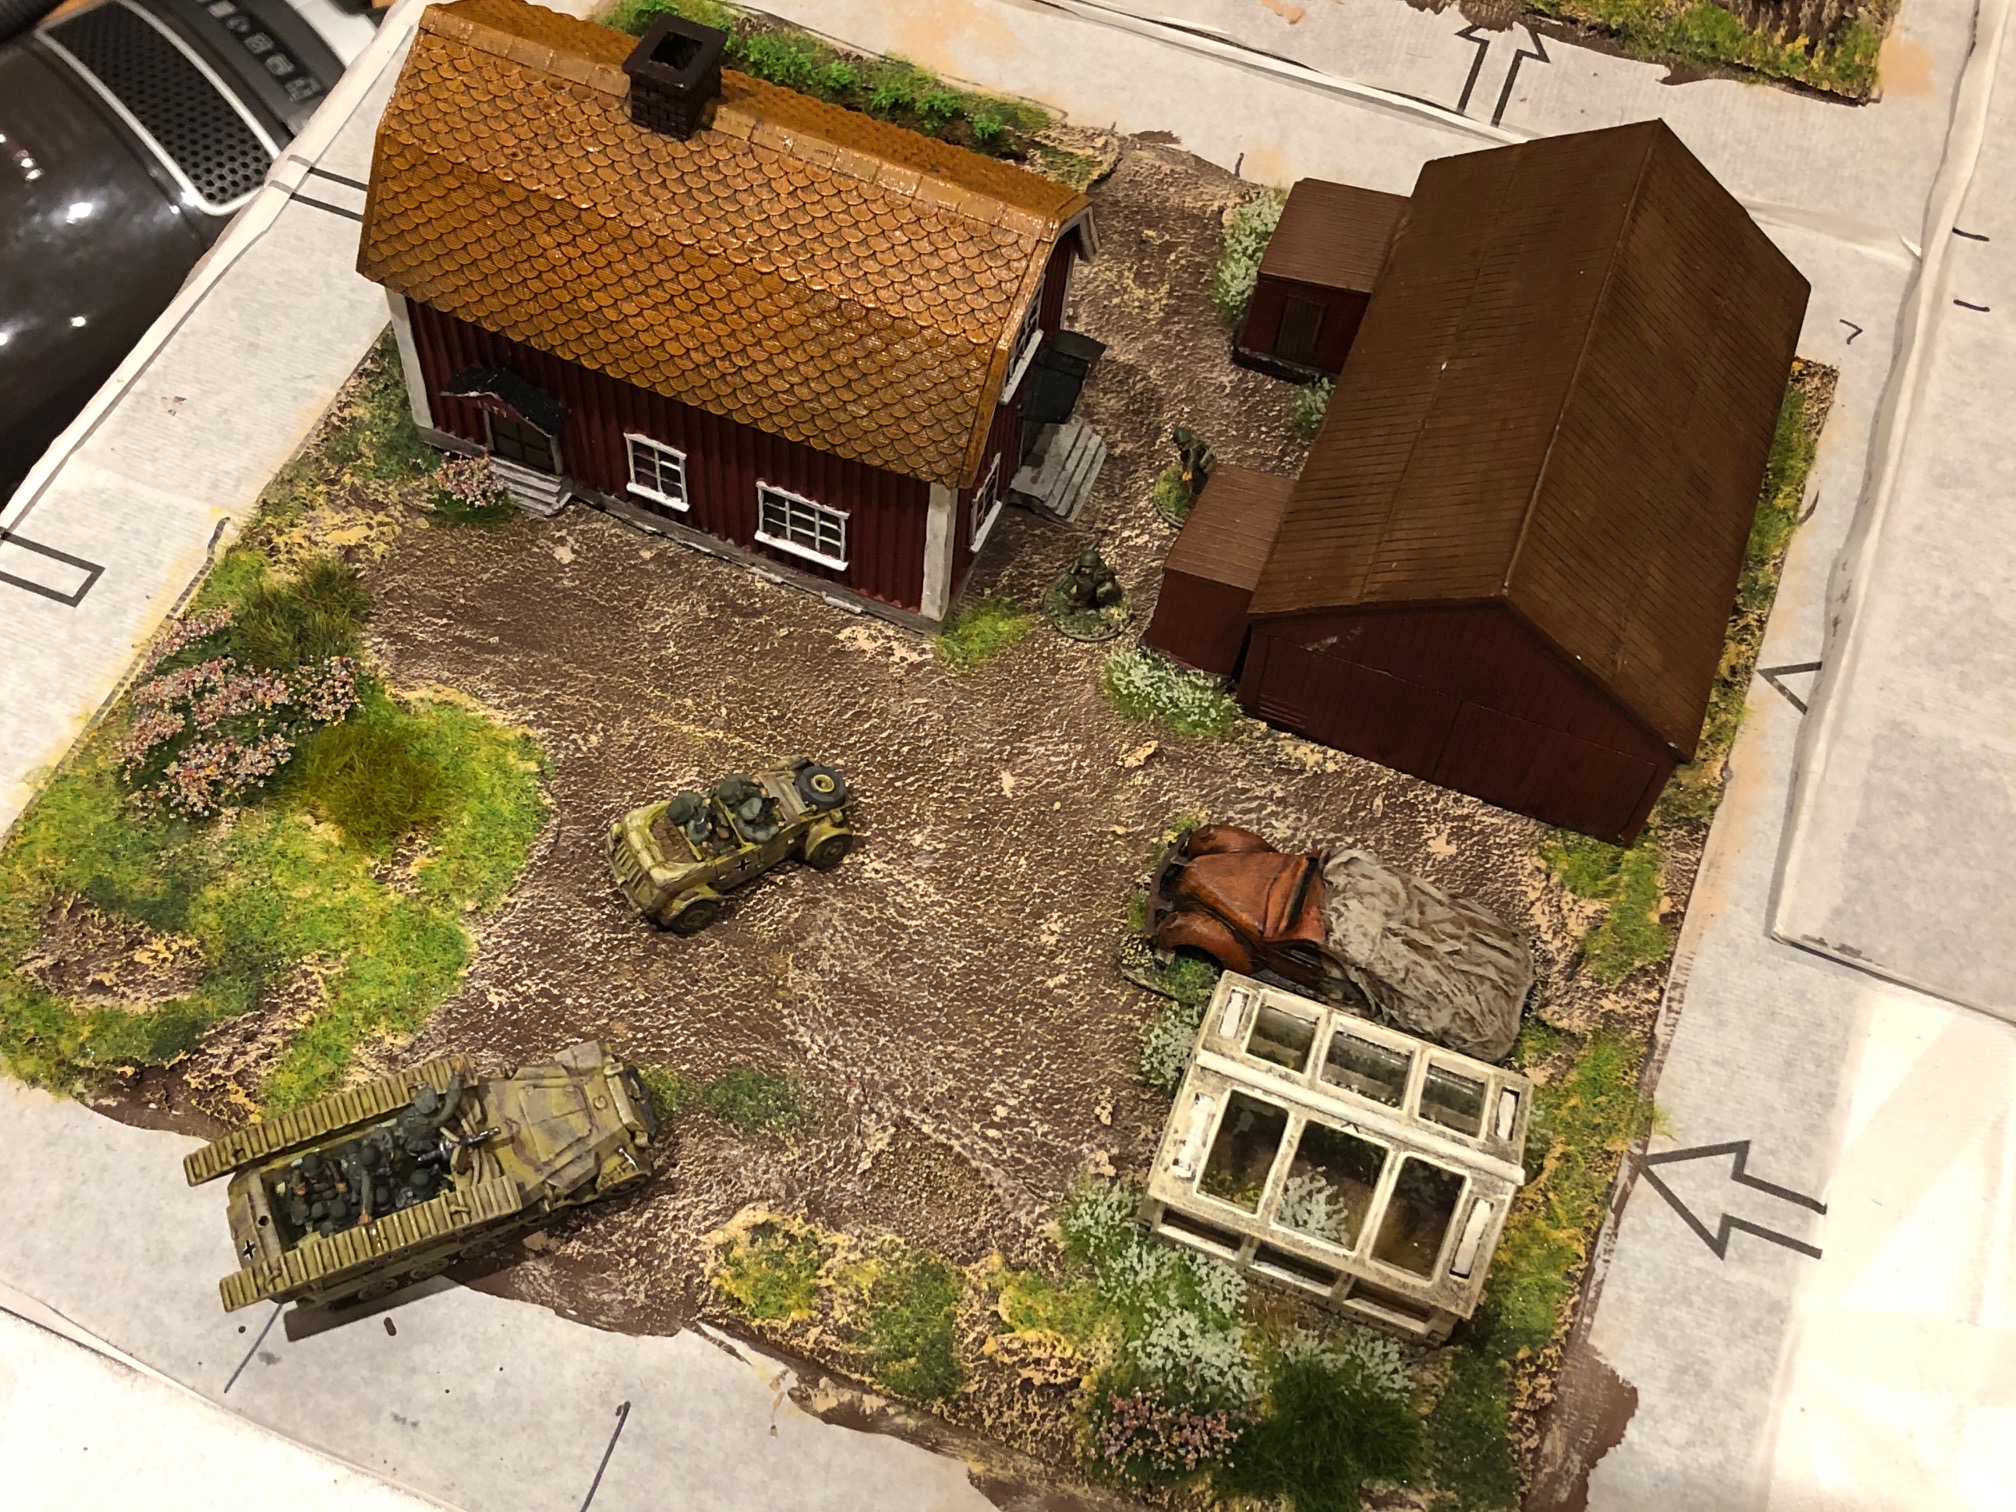
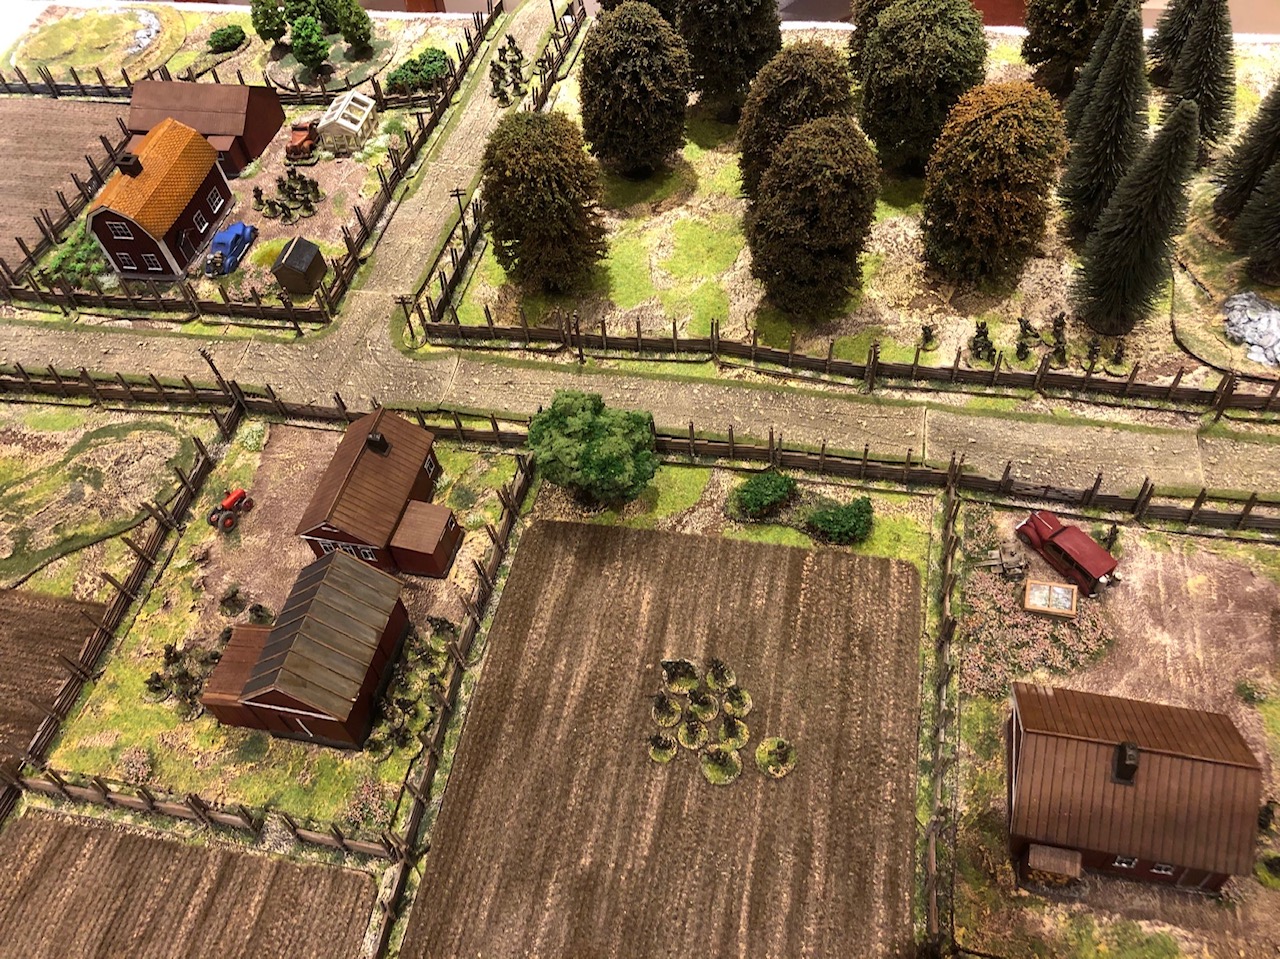
As easy way to integrate your built up sections is to make tiles for a building or a set of buildings. This allows a more defined look on the table and makes the buildings blend in better in your layout. I made mine from adhesive floor tiles from Poundland (they are made from vinyl) some acrylic paste (caulk) and sand.
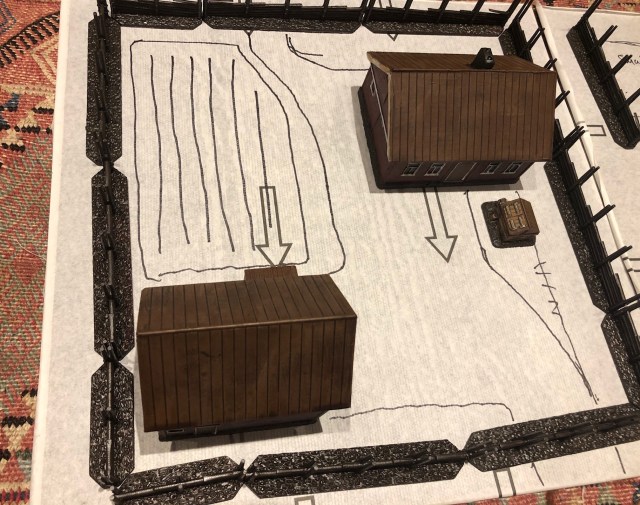
Start by marking up where you want your buildings to go. I also consider the size of the fencing around the farm.
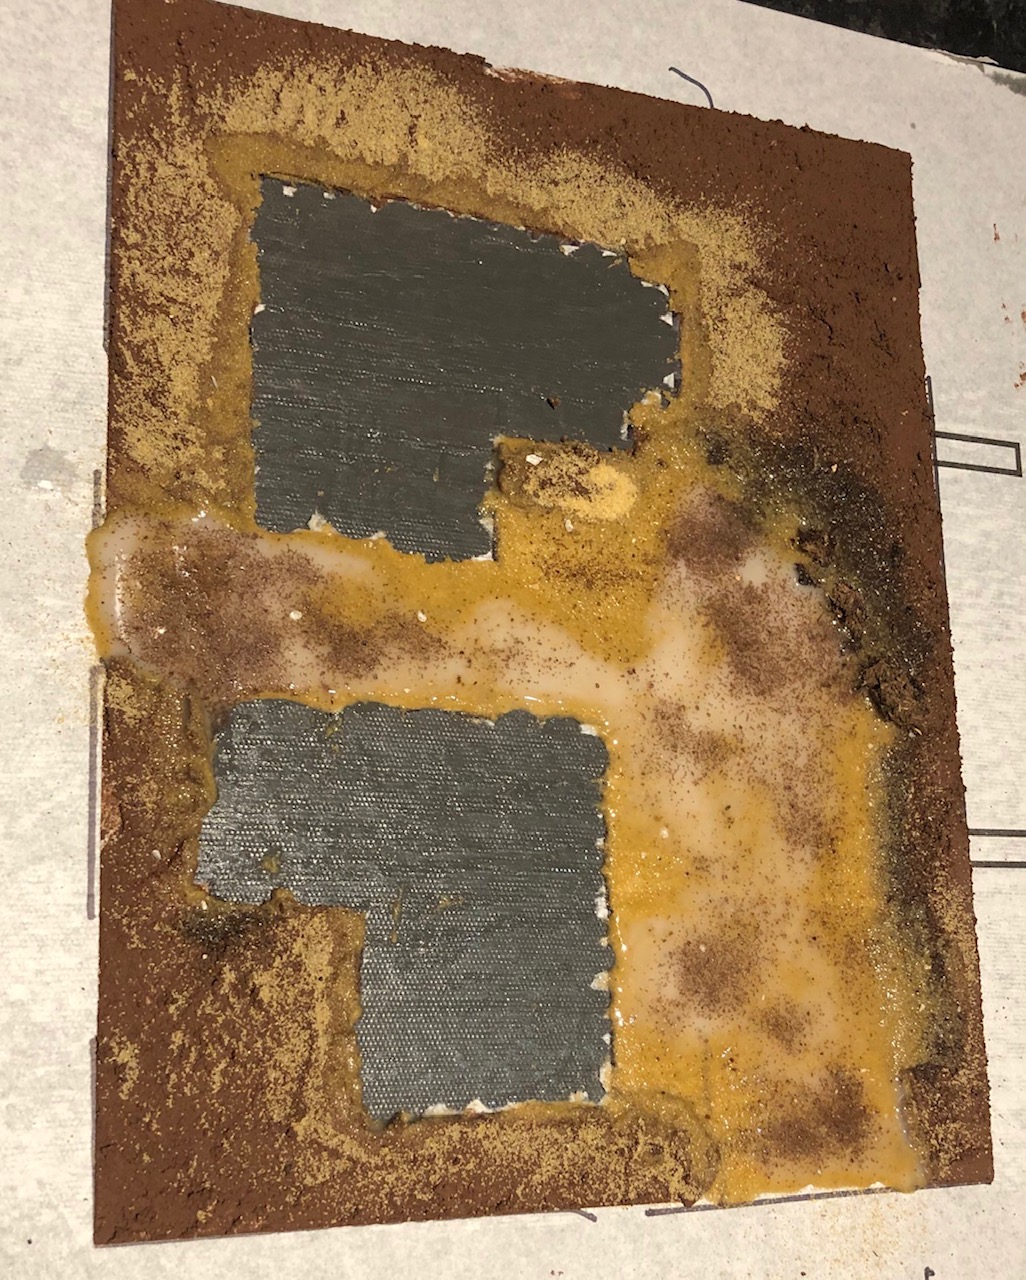
Then it is time to start the messy bits, with acrylics, sand and paint.
Leave some space for the buildings but otherwise do whatever seems to fit – make sure there are paths and roads, etc.
Paint it all brown
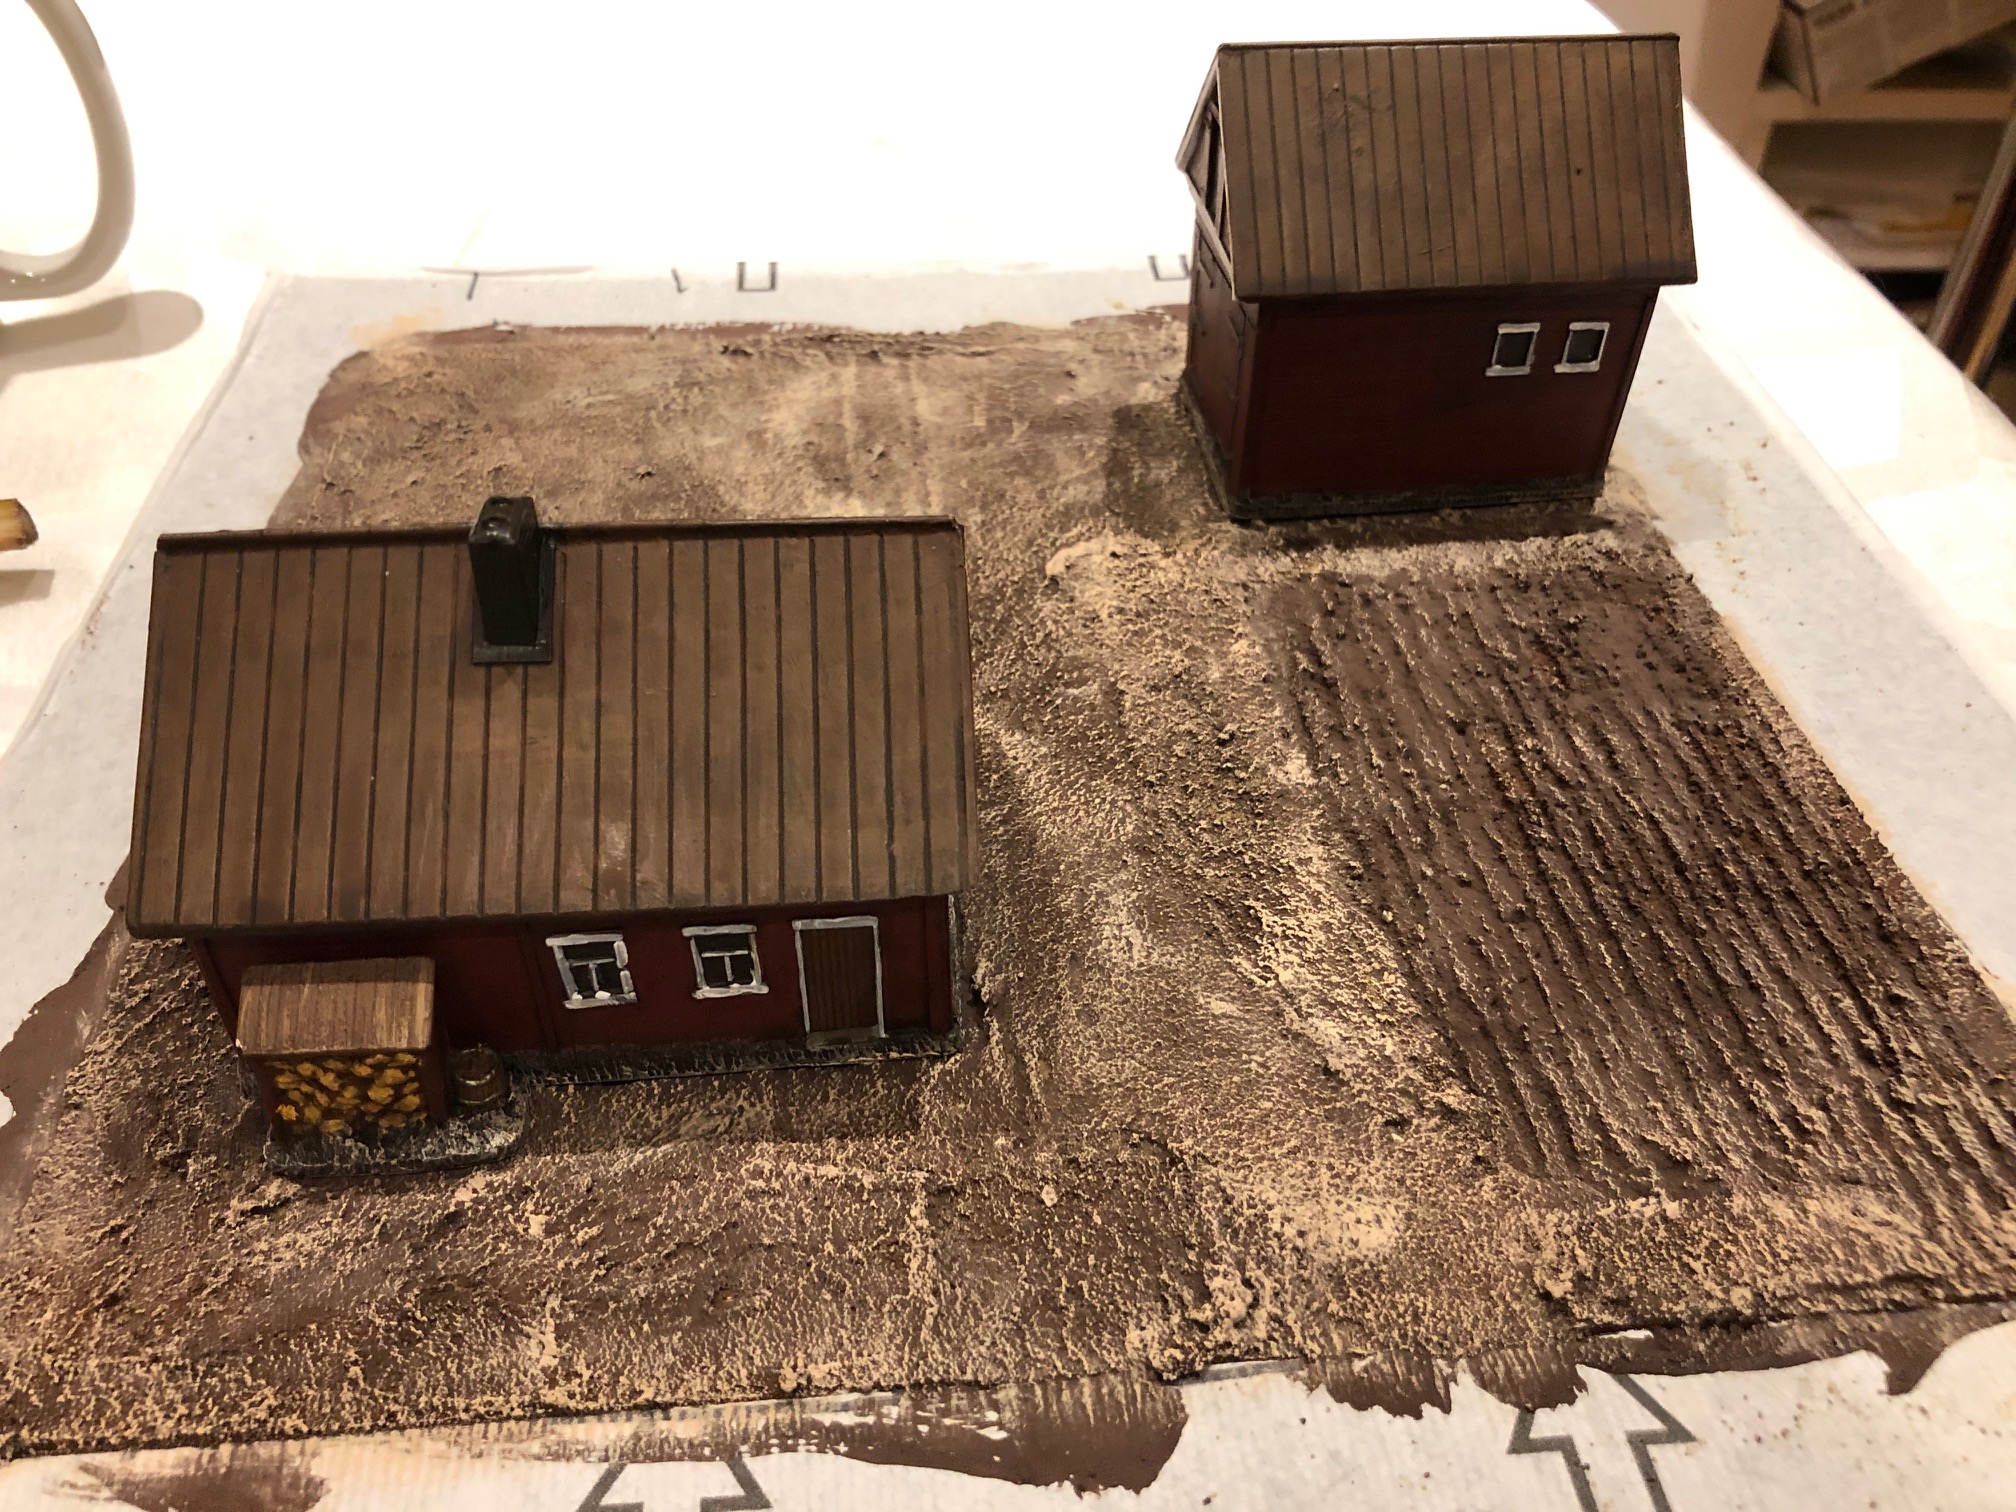
Start drybrushing the surfaces. I work from a pale brown, the terracotta and then finally a pale yellow. The same as I use for all my non-desert and witner bases.
Add some static grass and tufts
With a little bit of clutter it creates small dioramas instead of putting the houses directly on the mat. it took two short evening session to make them.
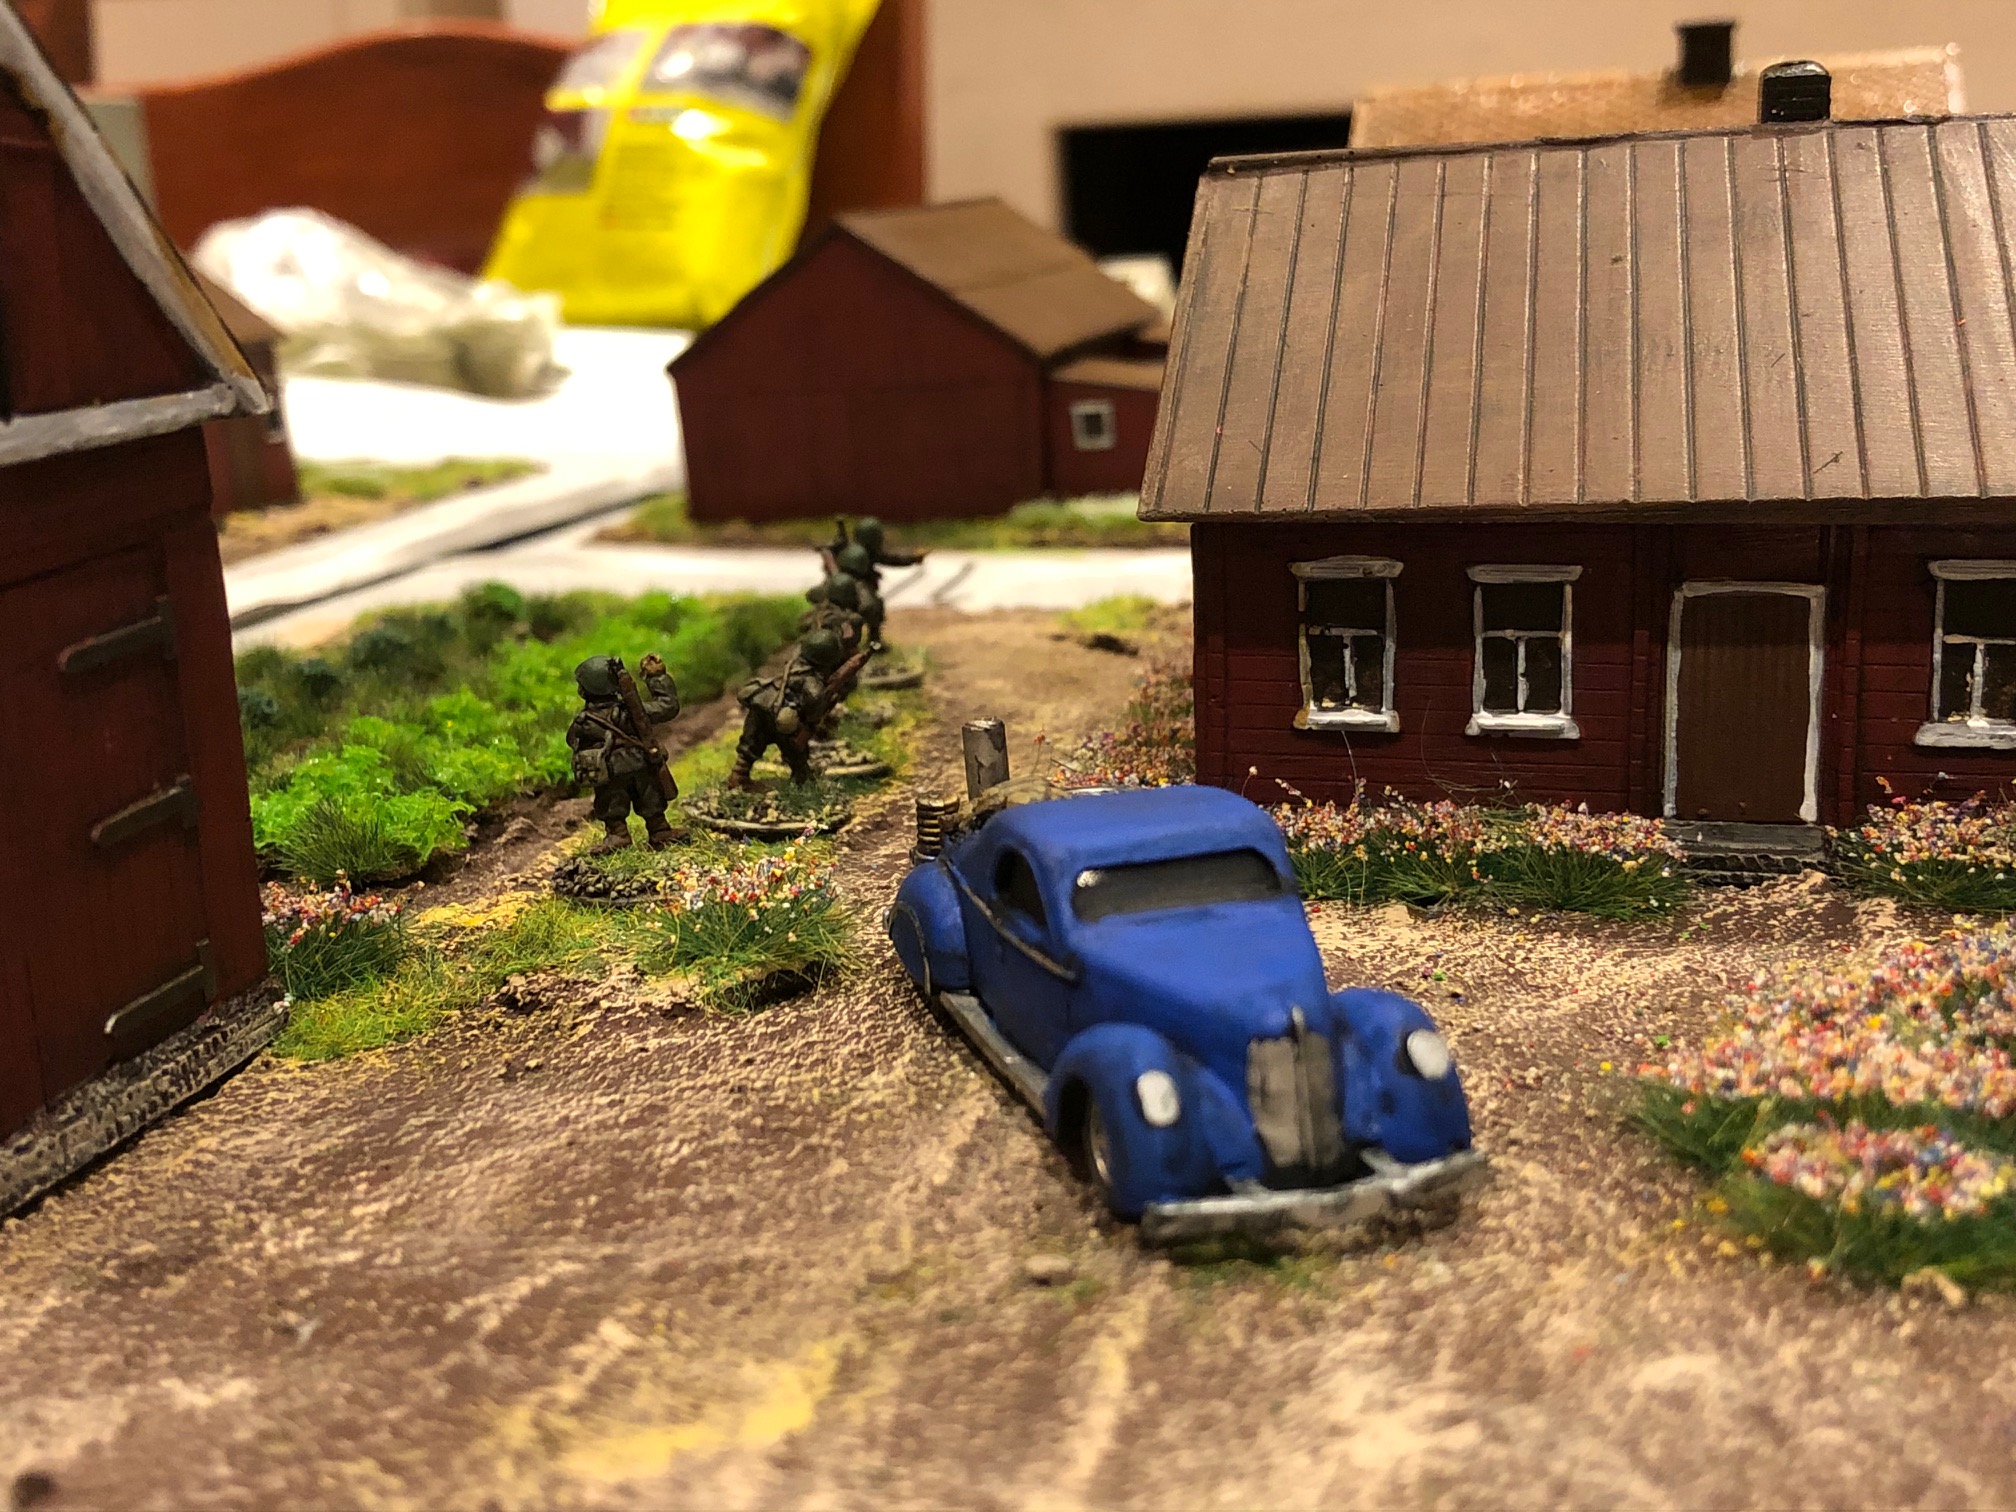
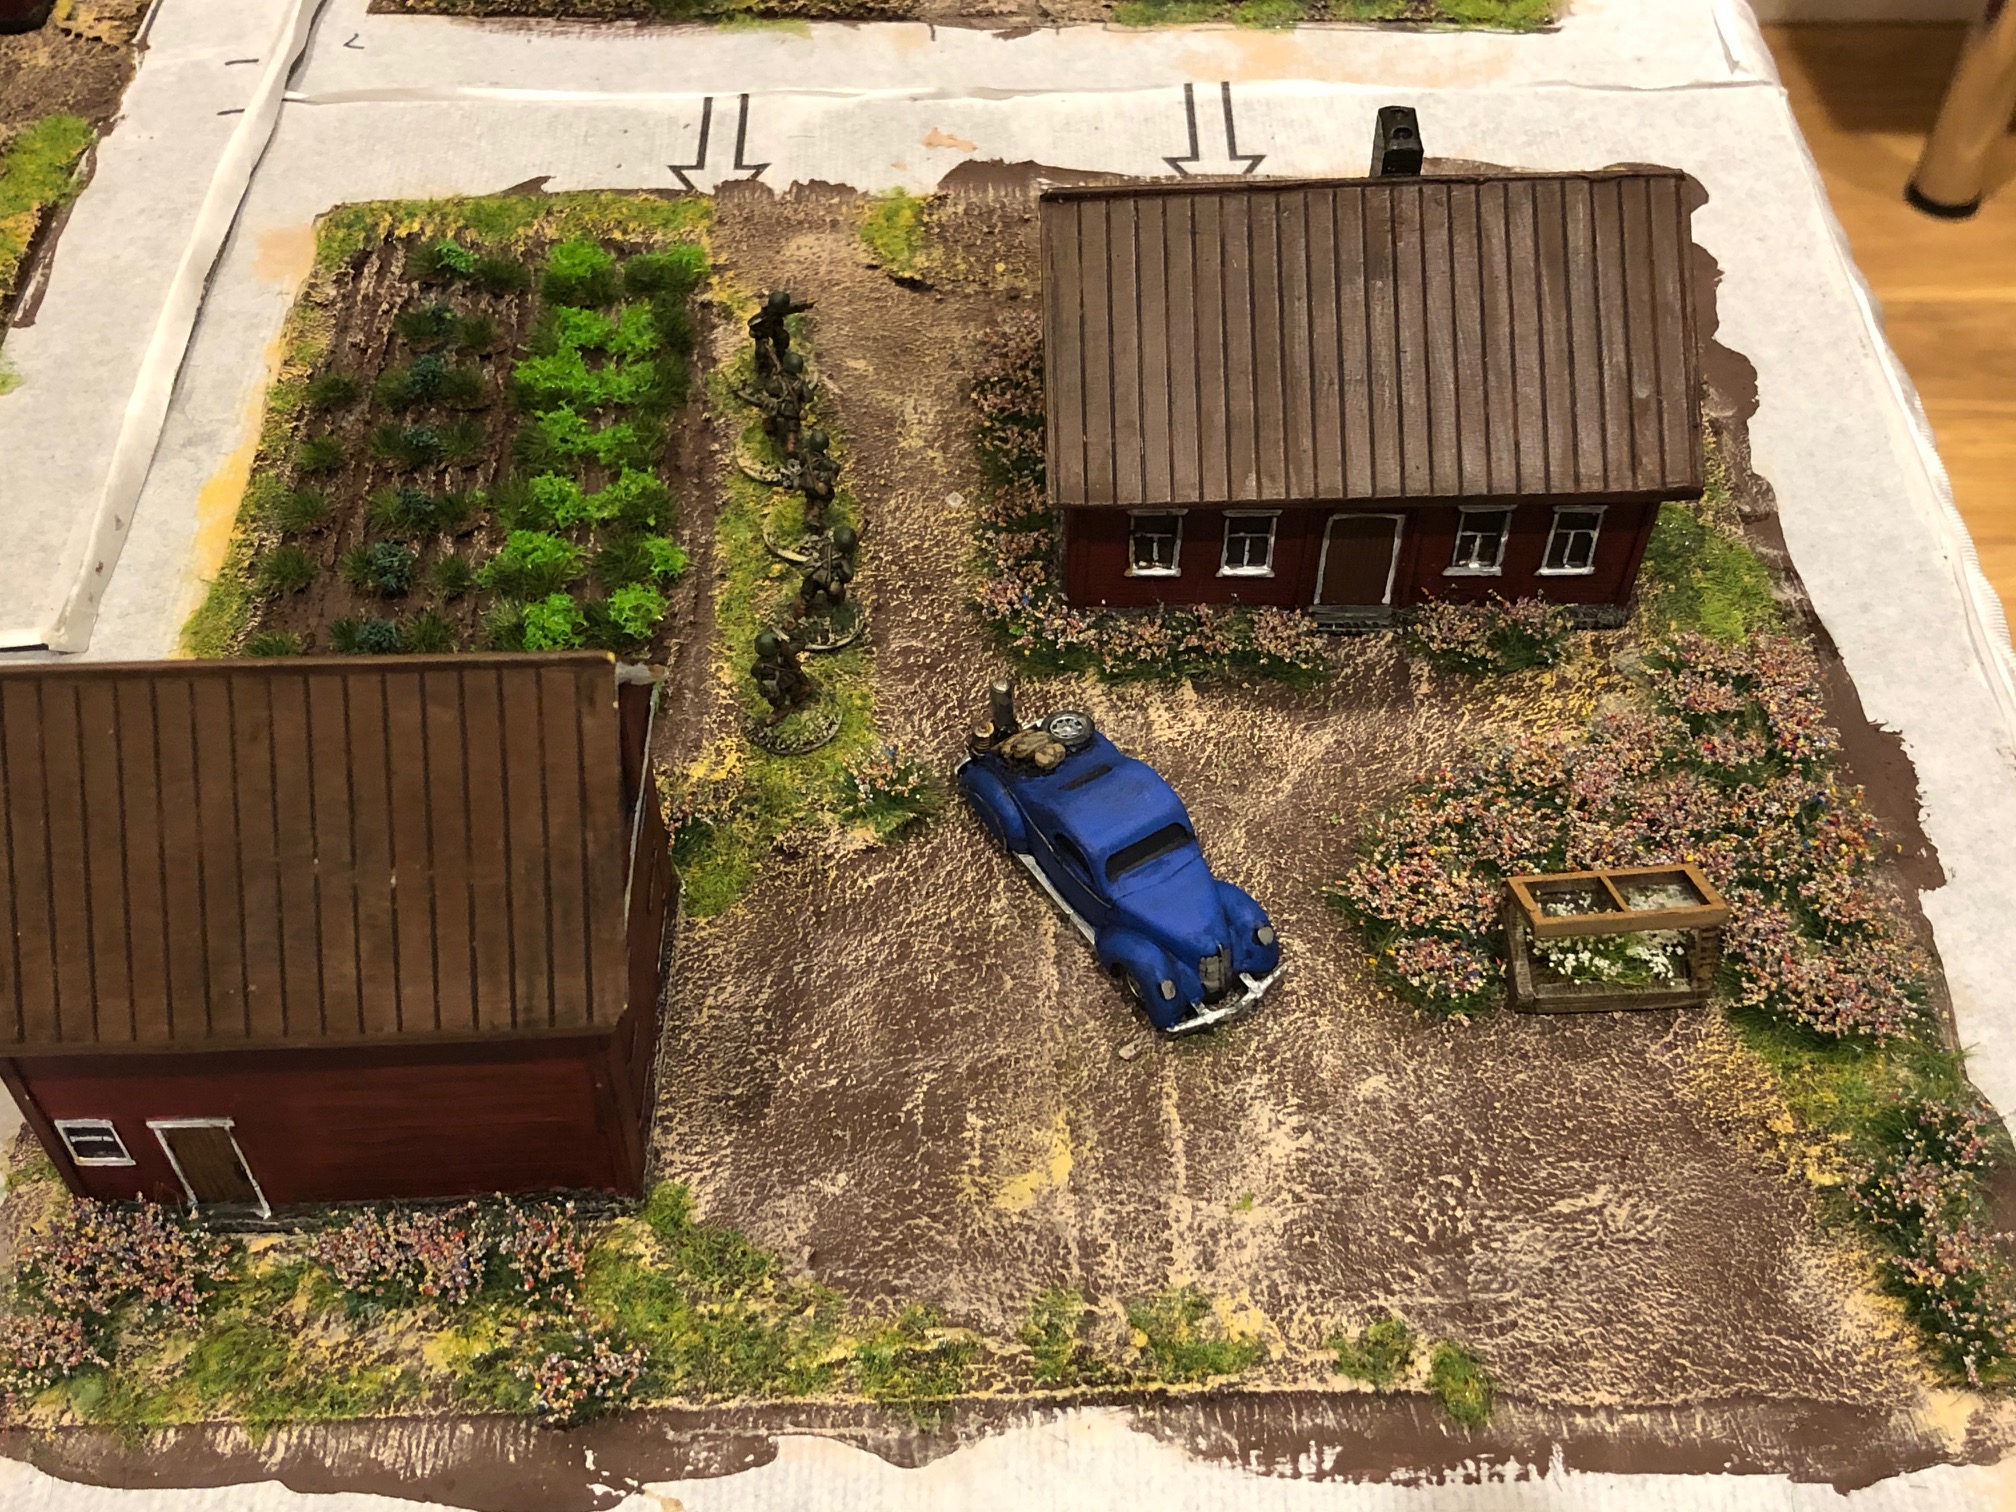
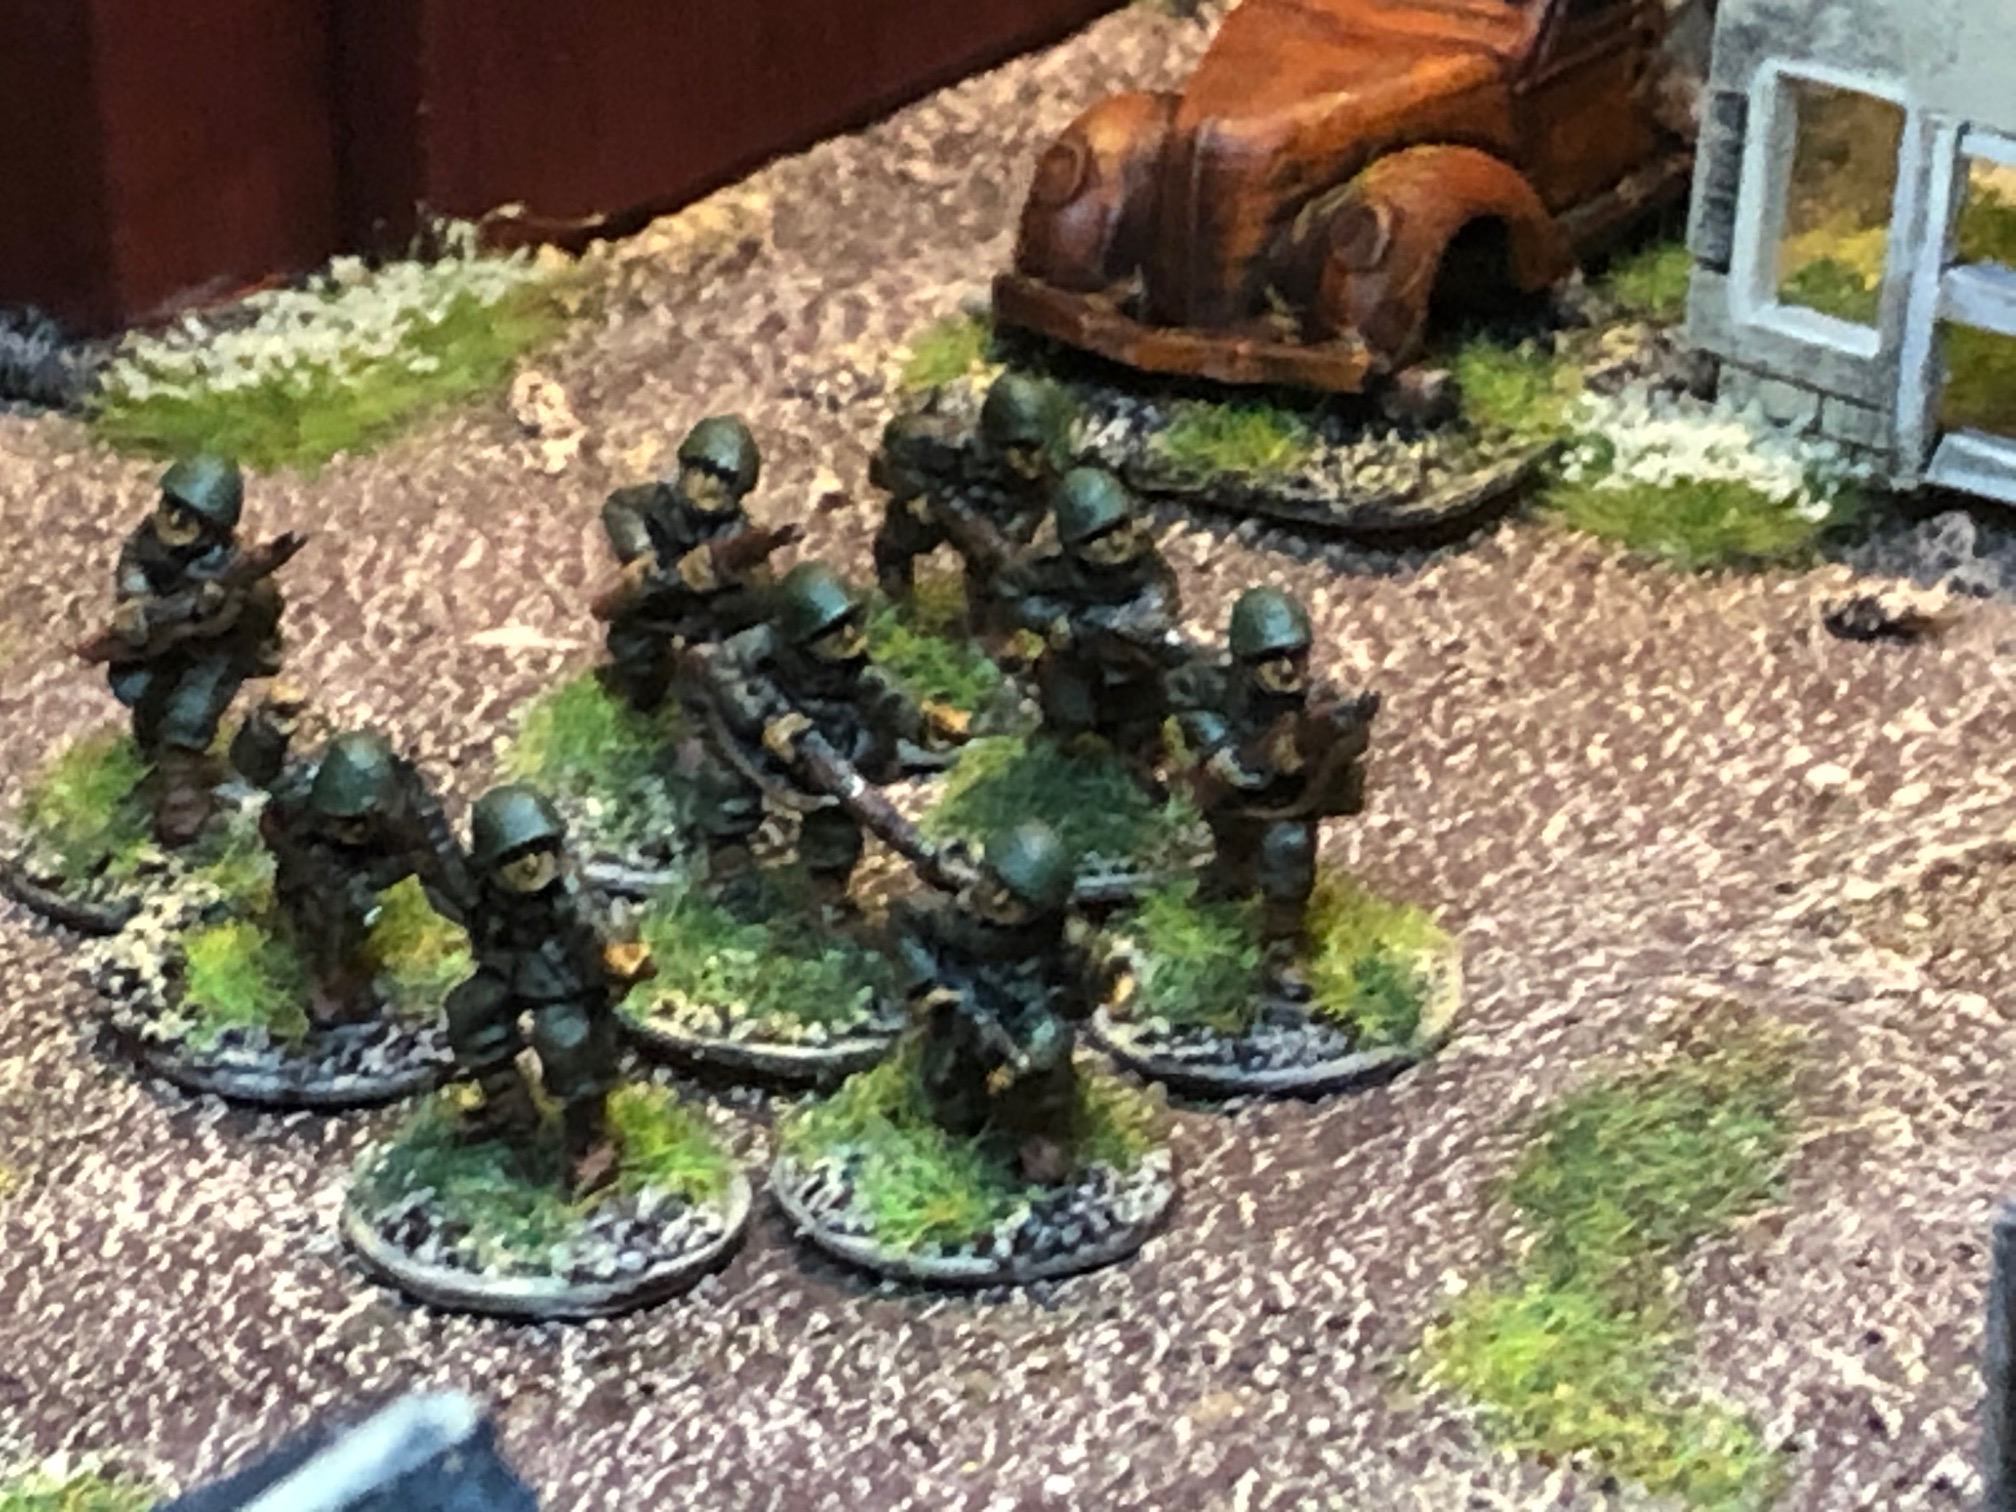
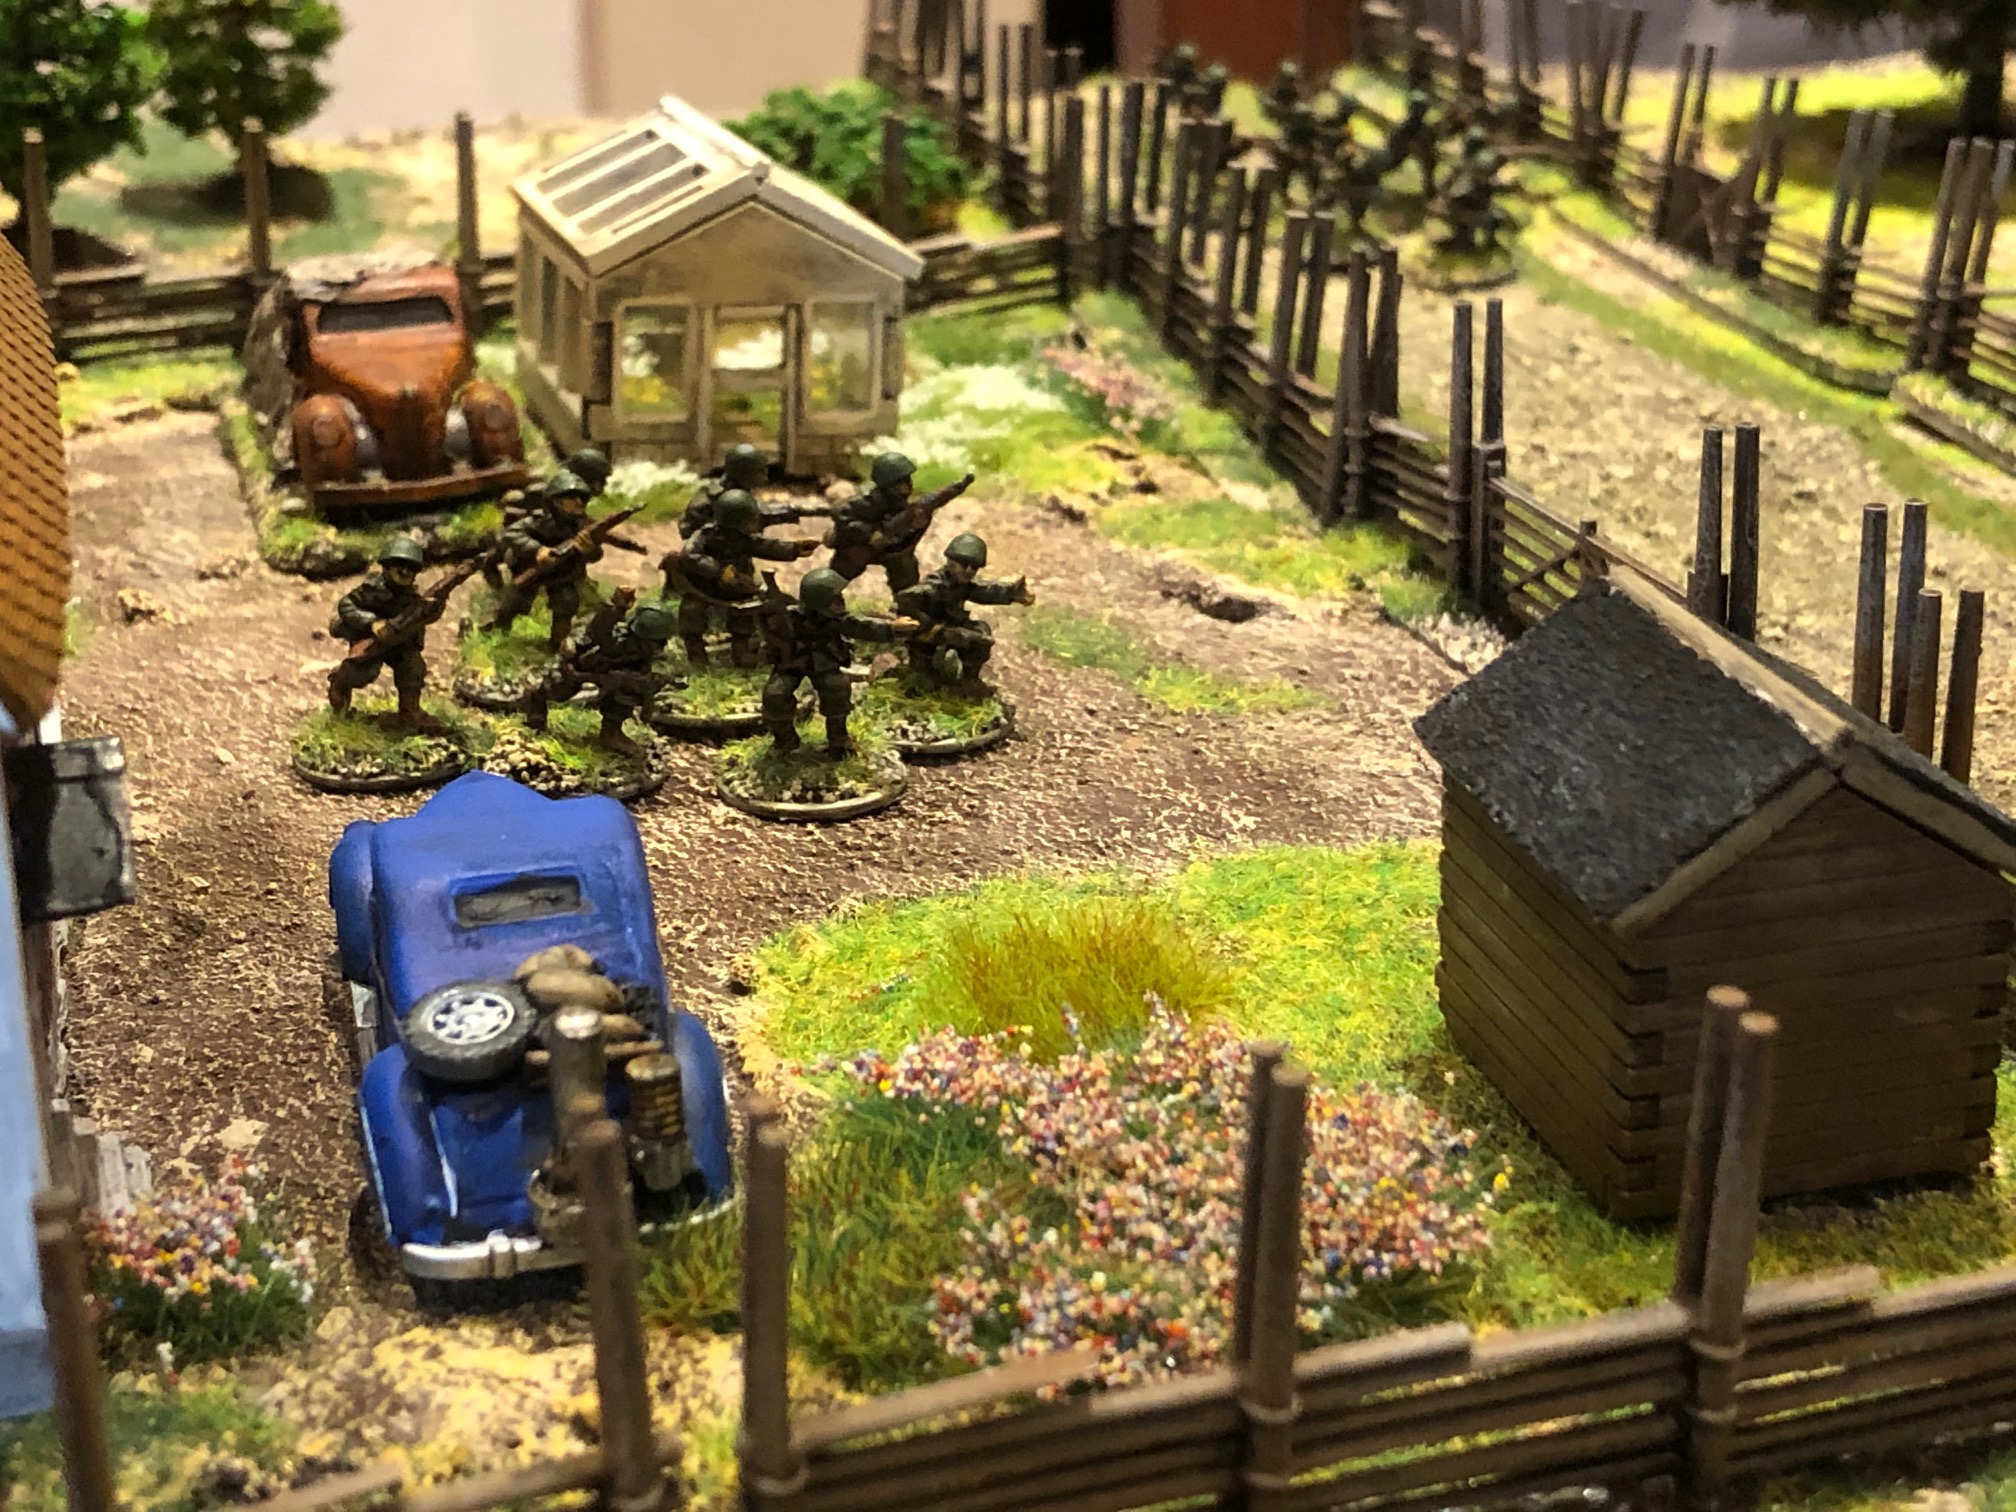
But what about these strange cars? Well if you study cars during this era, not just in Sweden you will notice the strange burners on other arrangements attached to the cars. These are utilising wood gas to power the vehicle due rationing of fossil fuels. I have rarely seen these on WW2 tables but very often in pictures so I made a few (based on some Kinder Egg vehicles I bought off ebay).
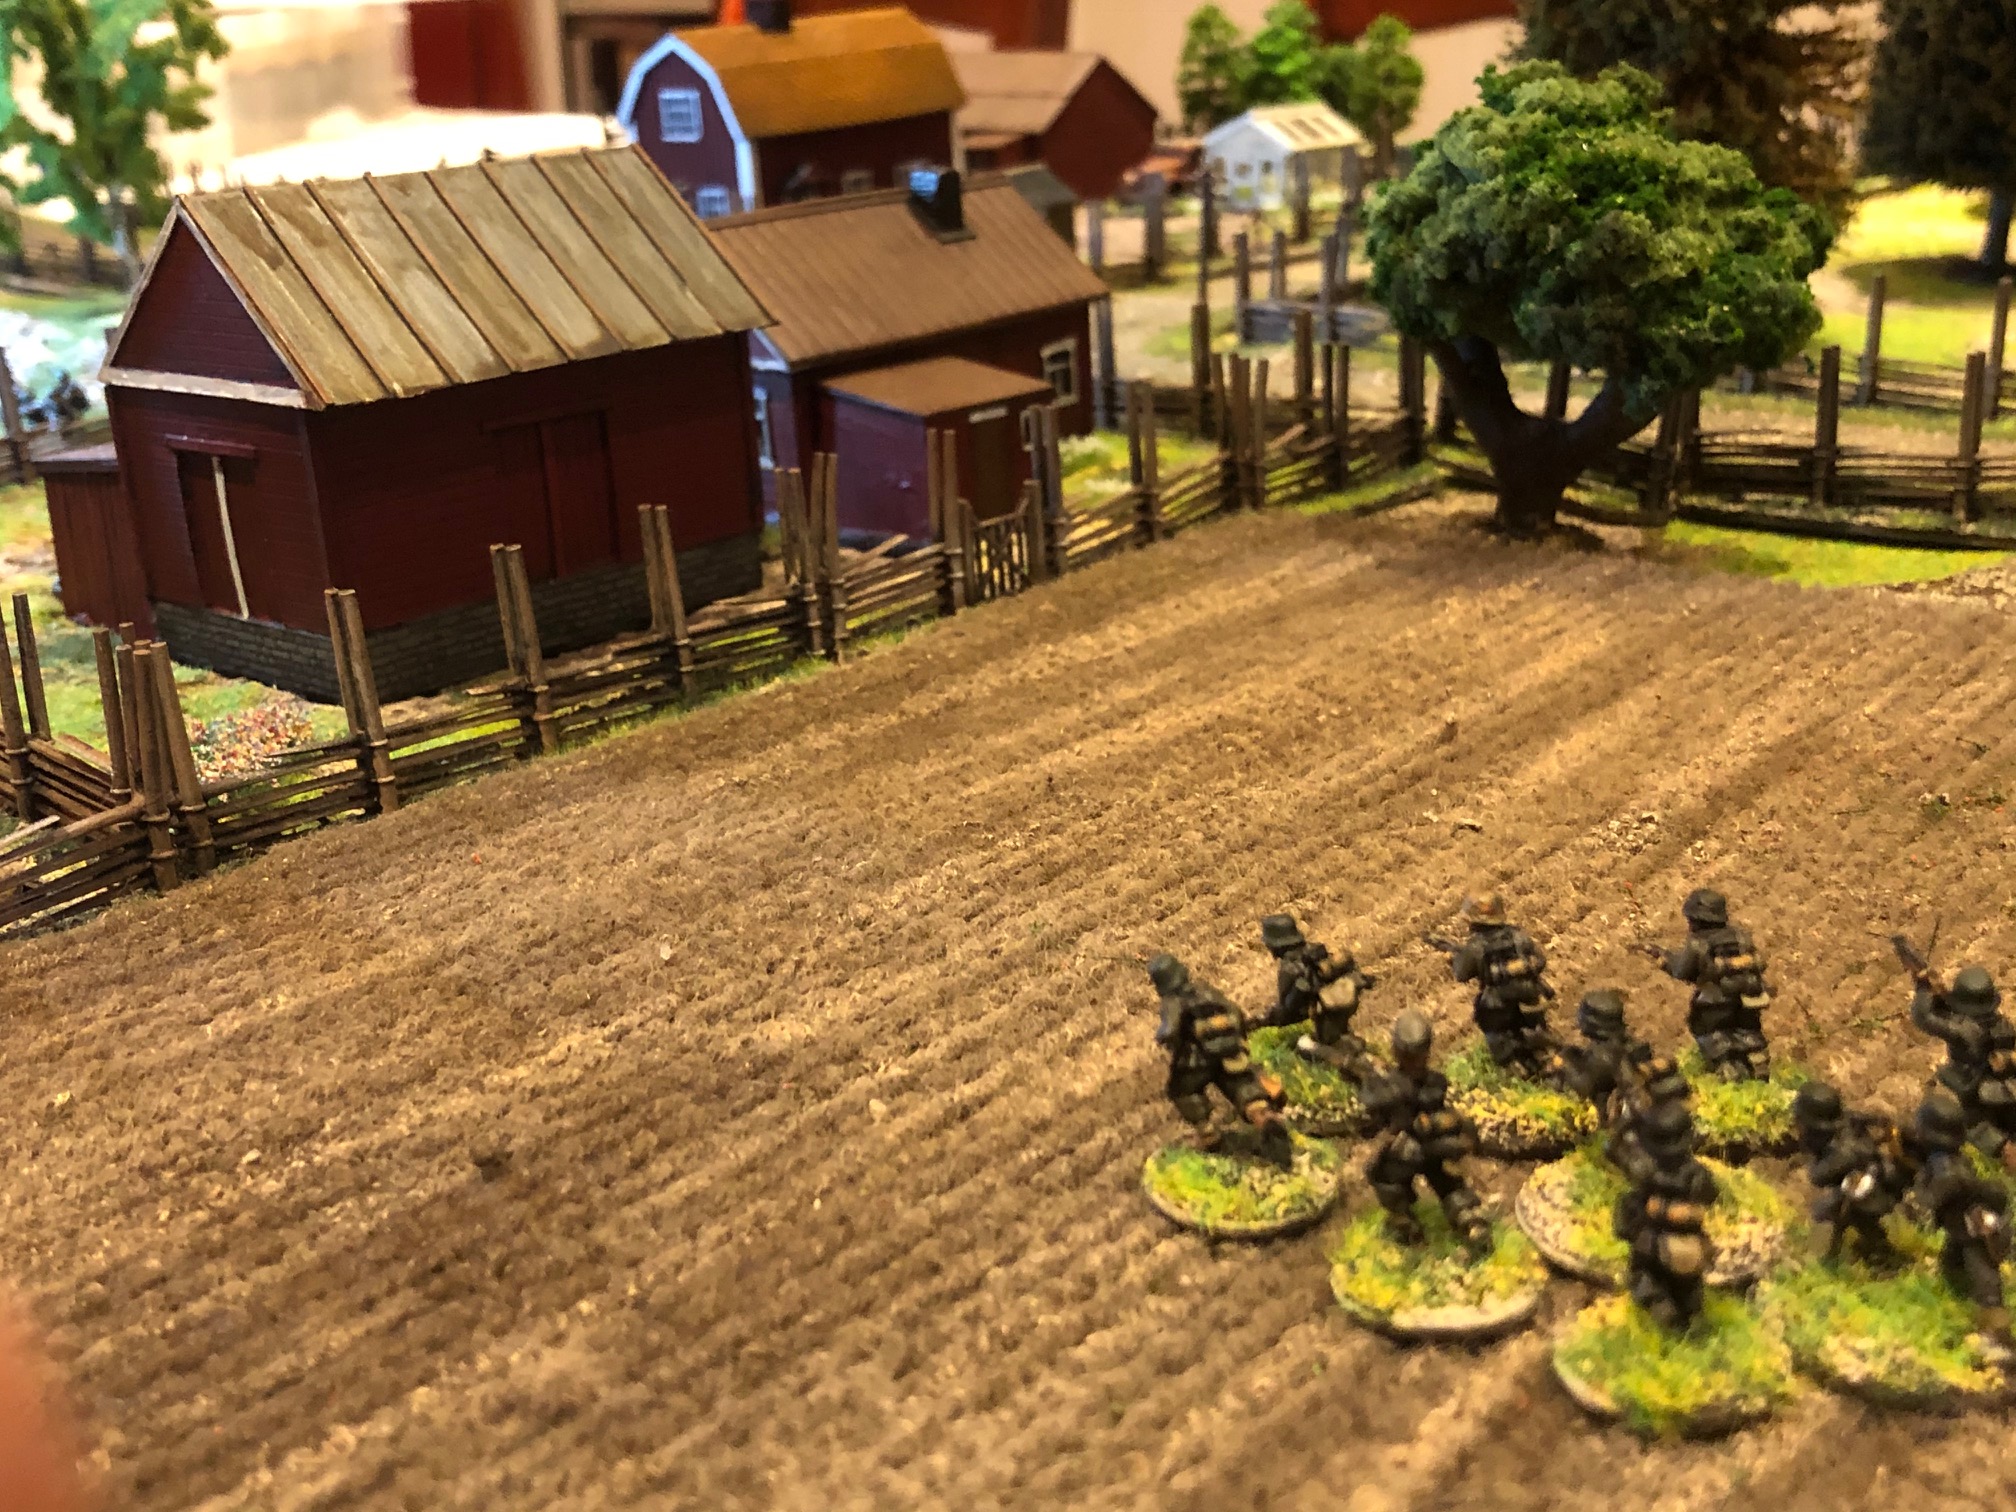
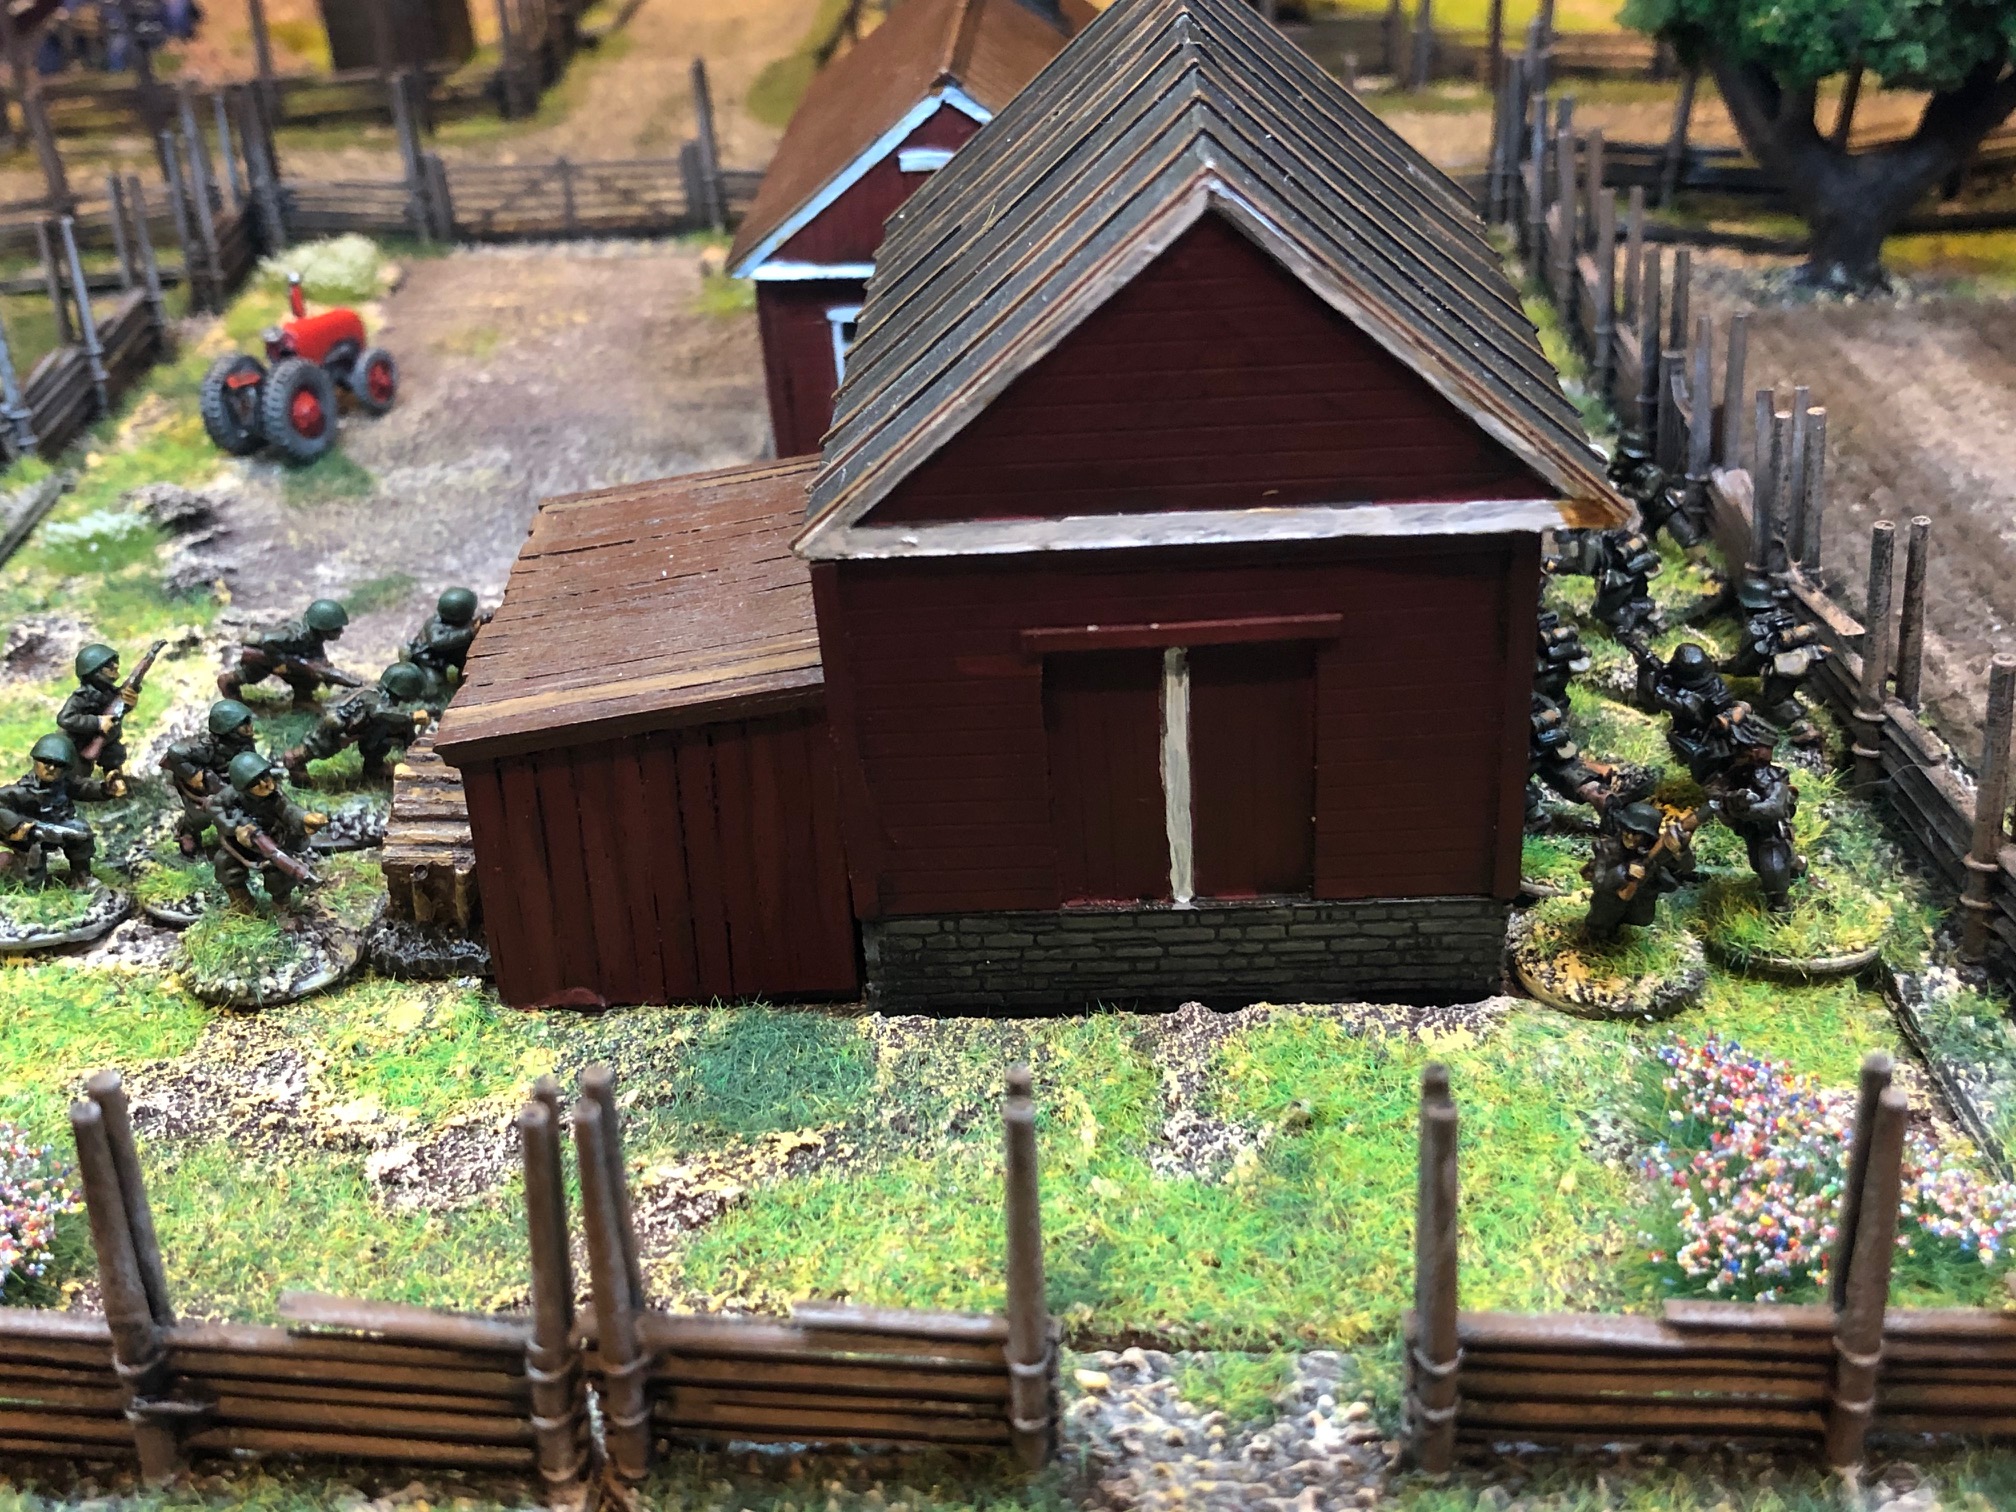
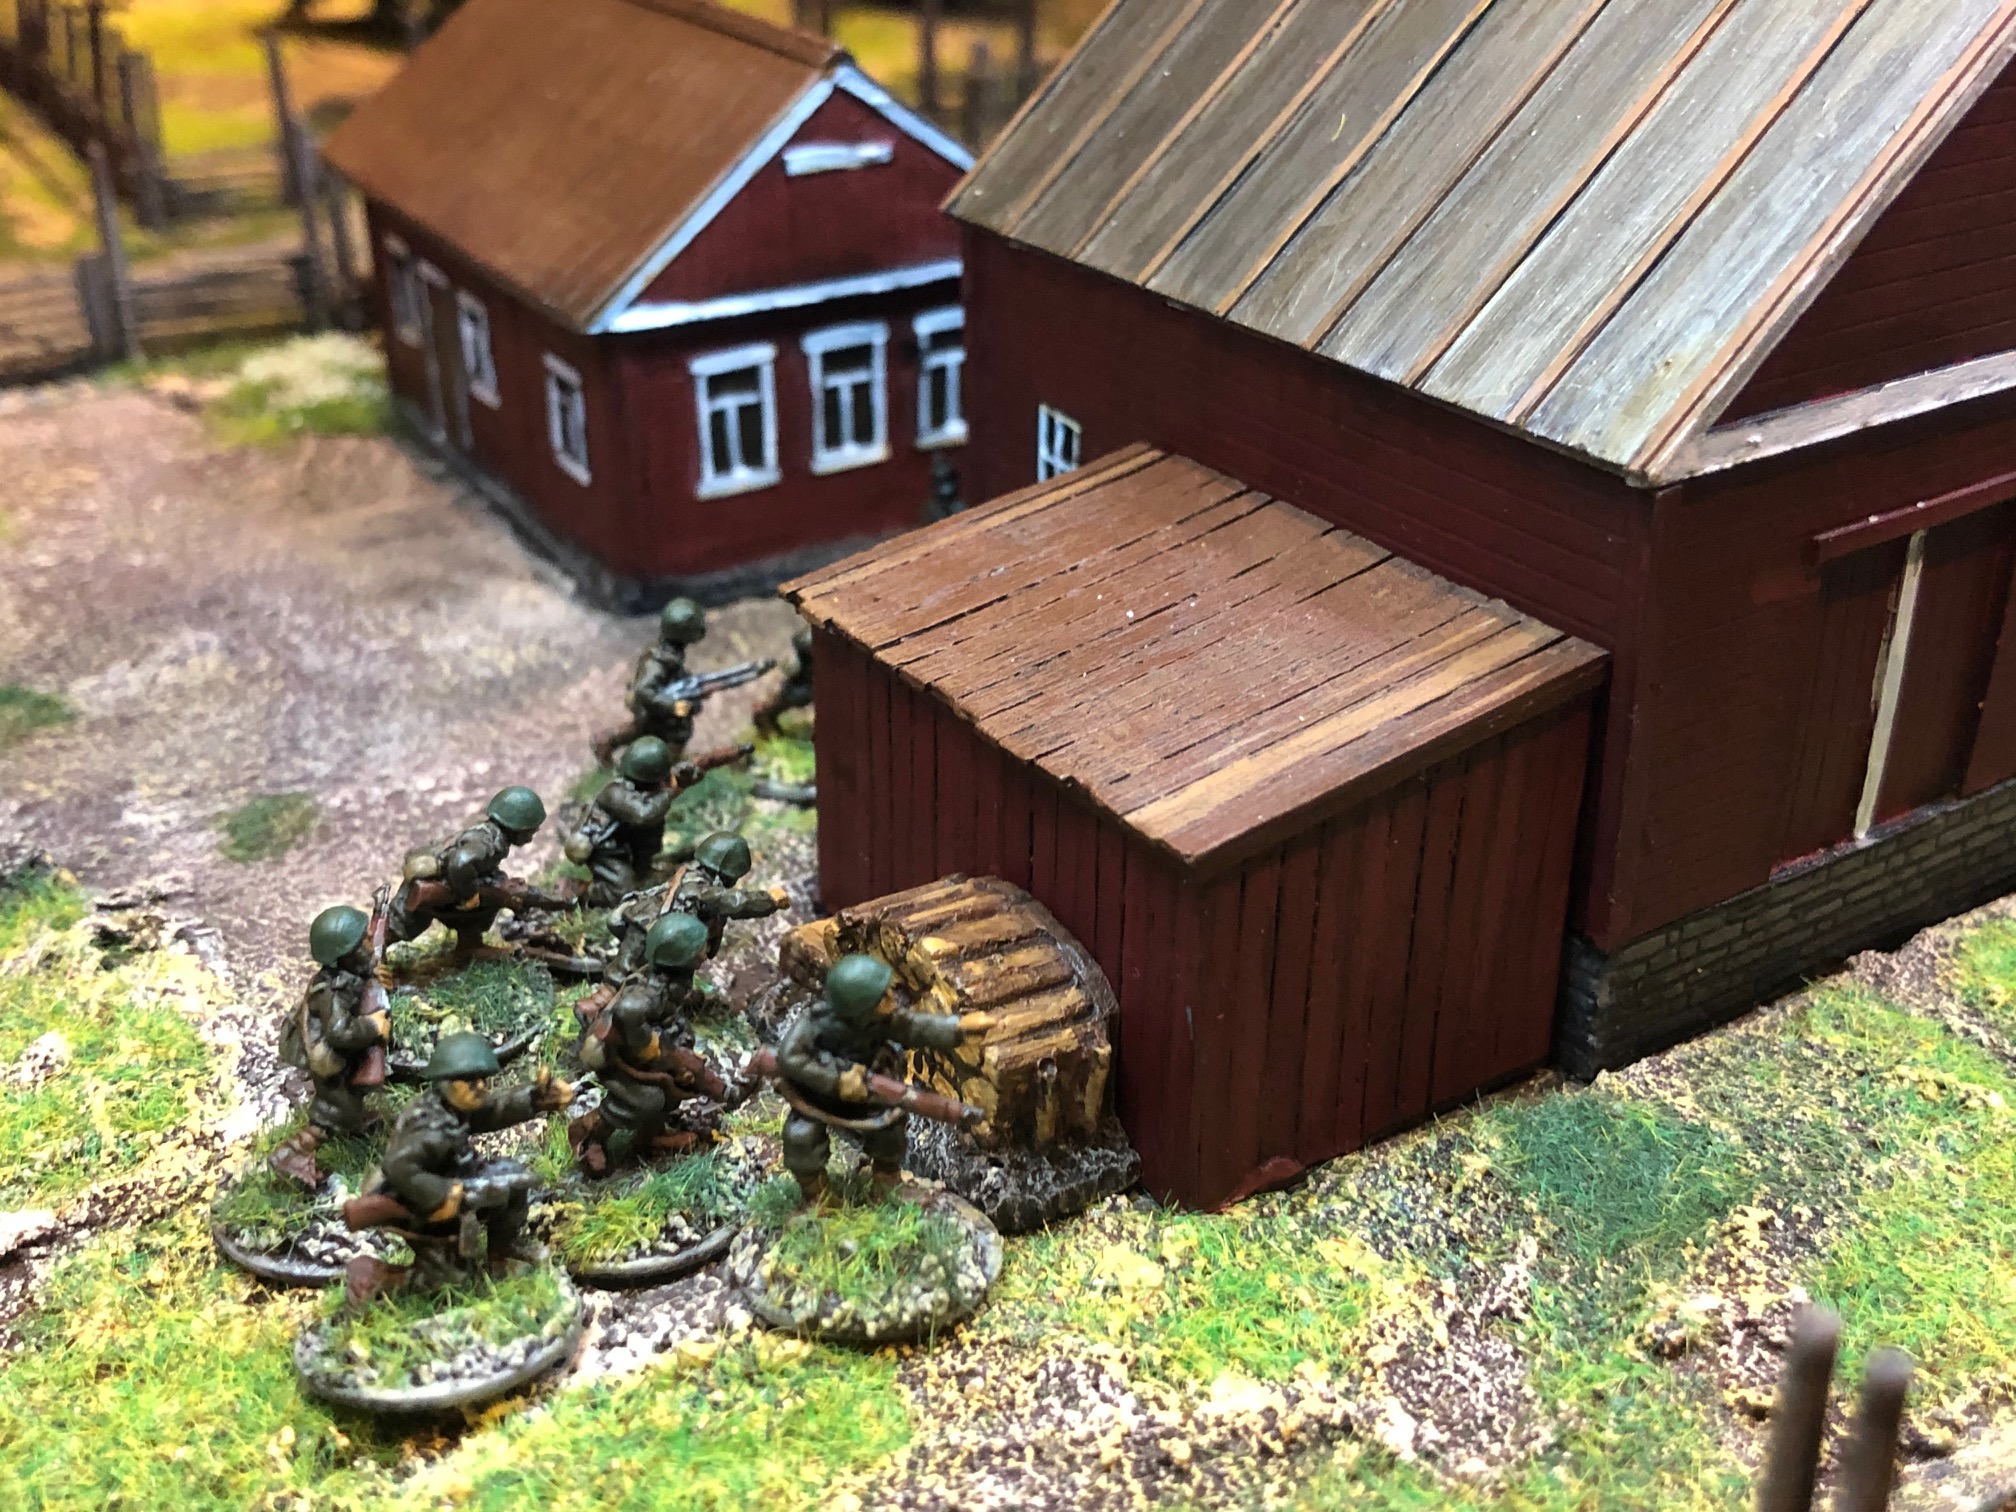
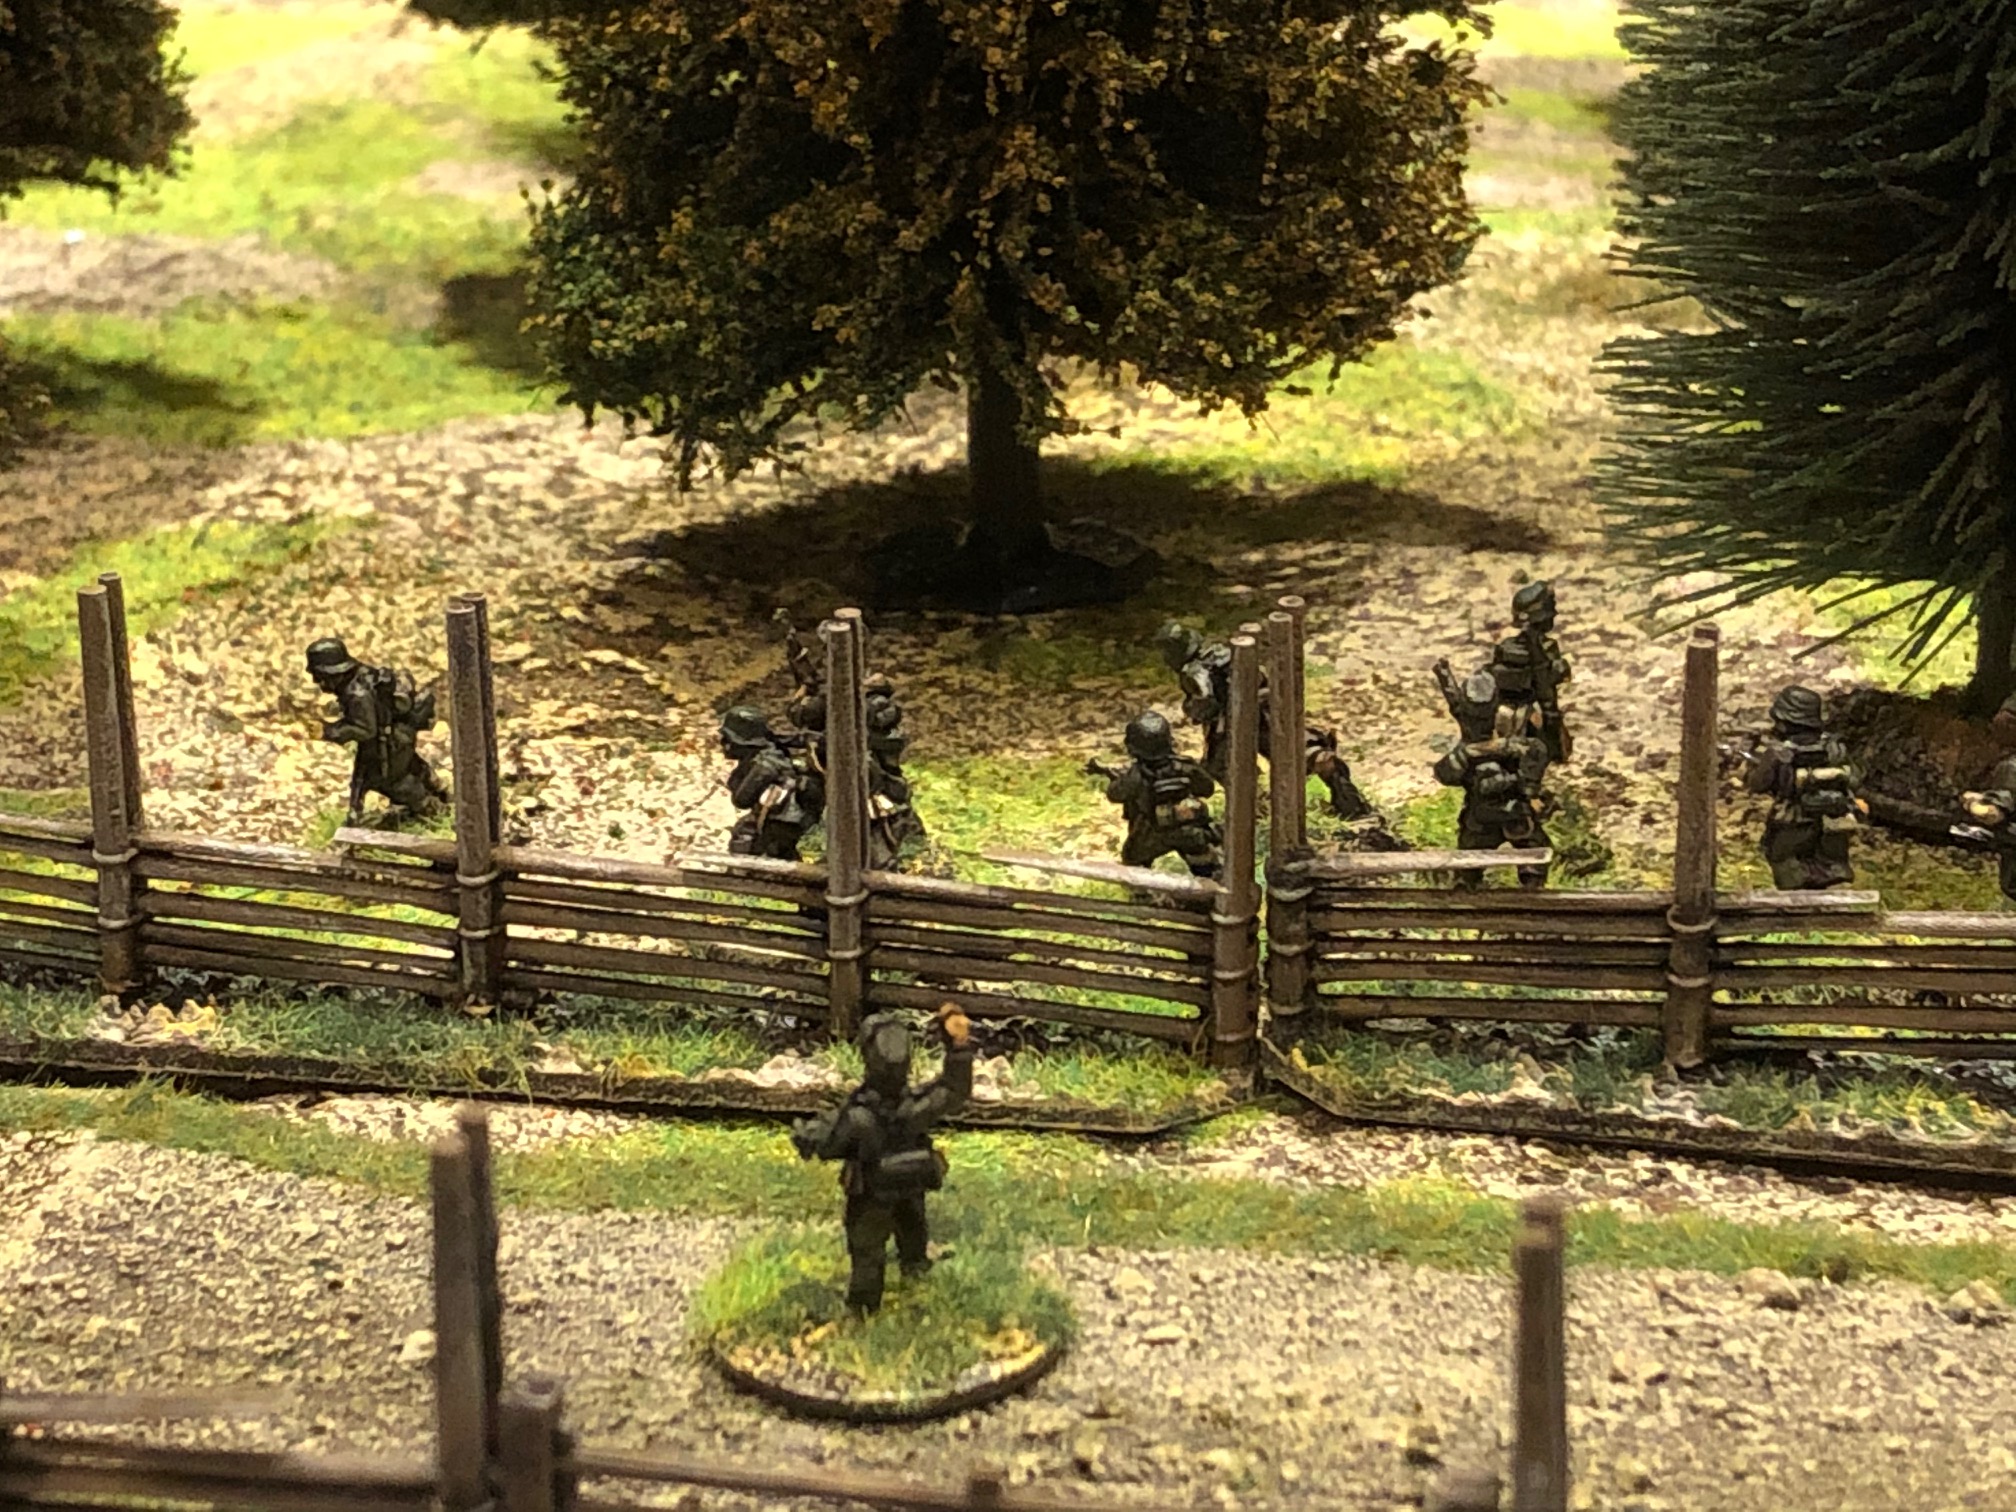
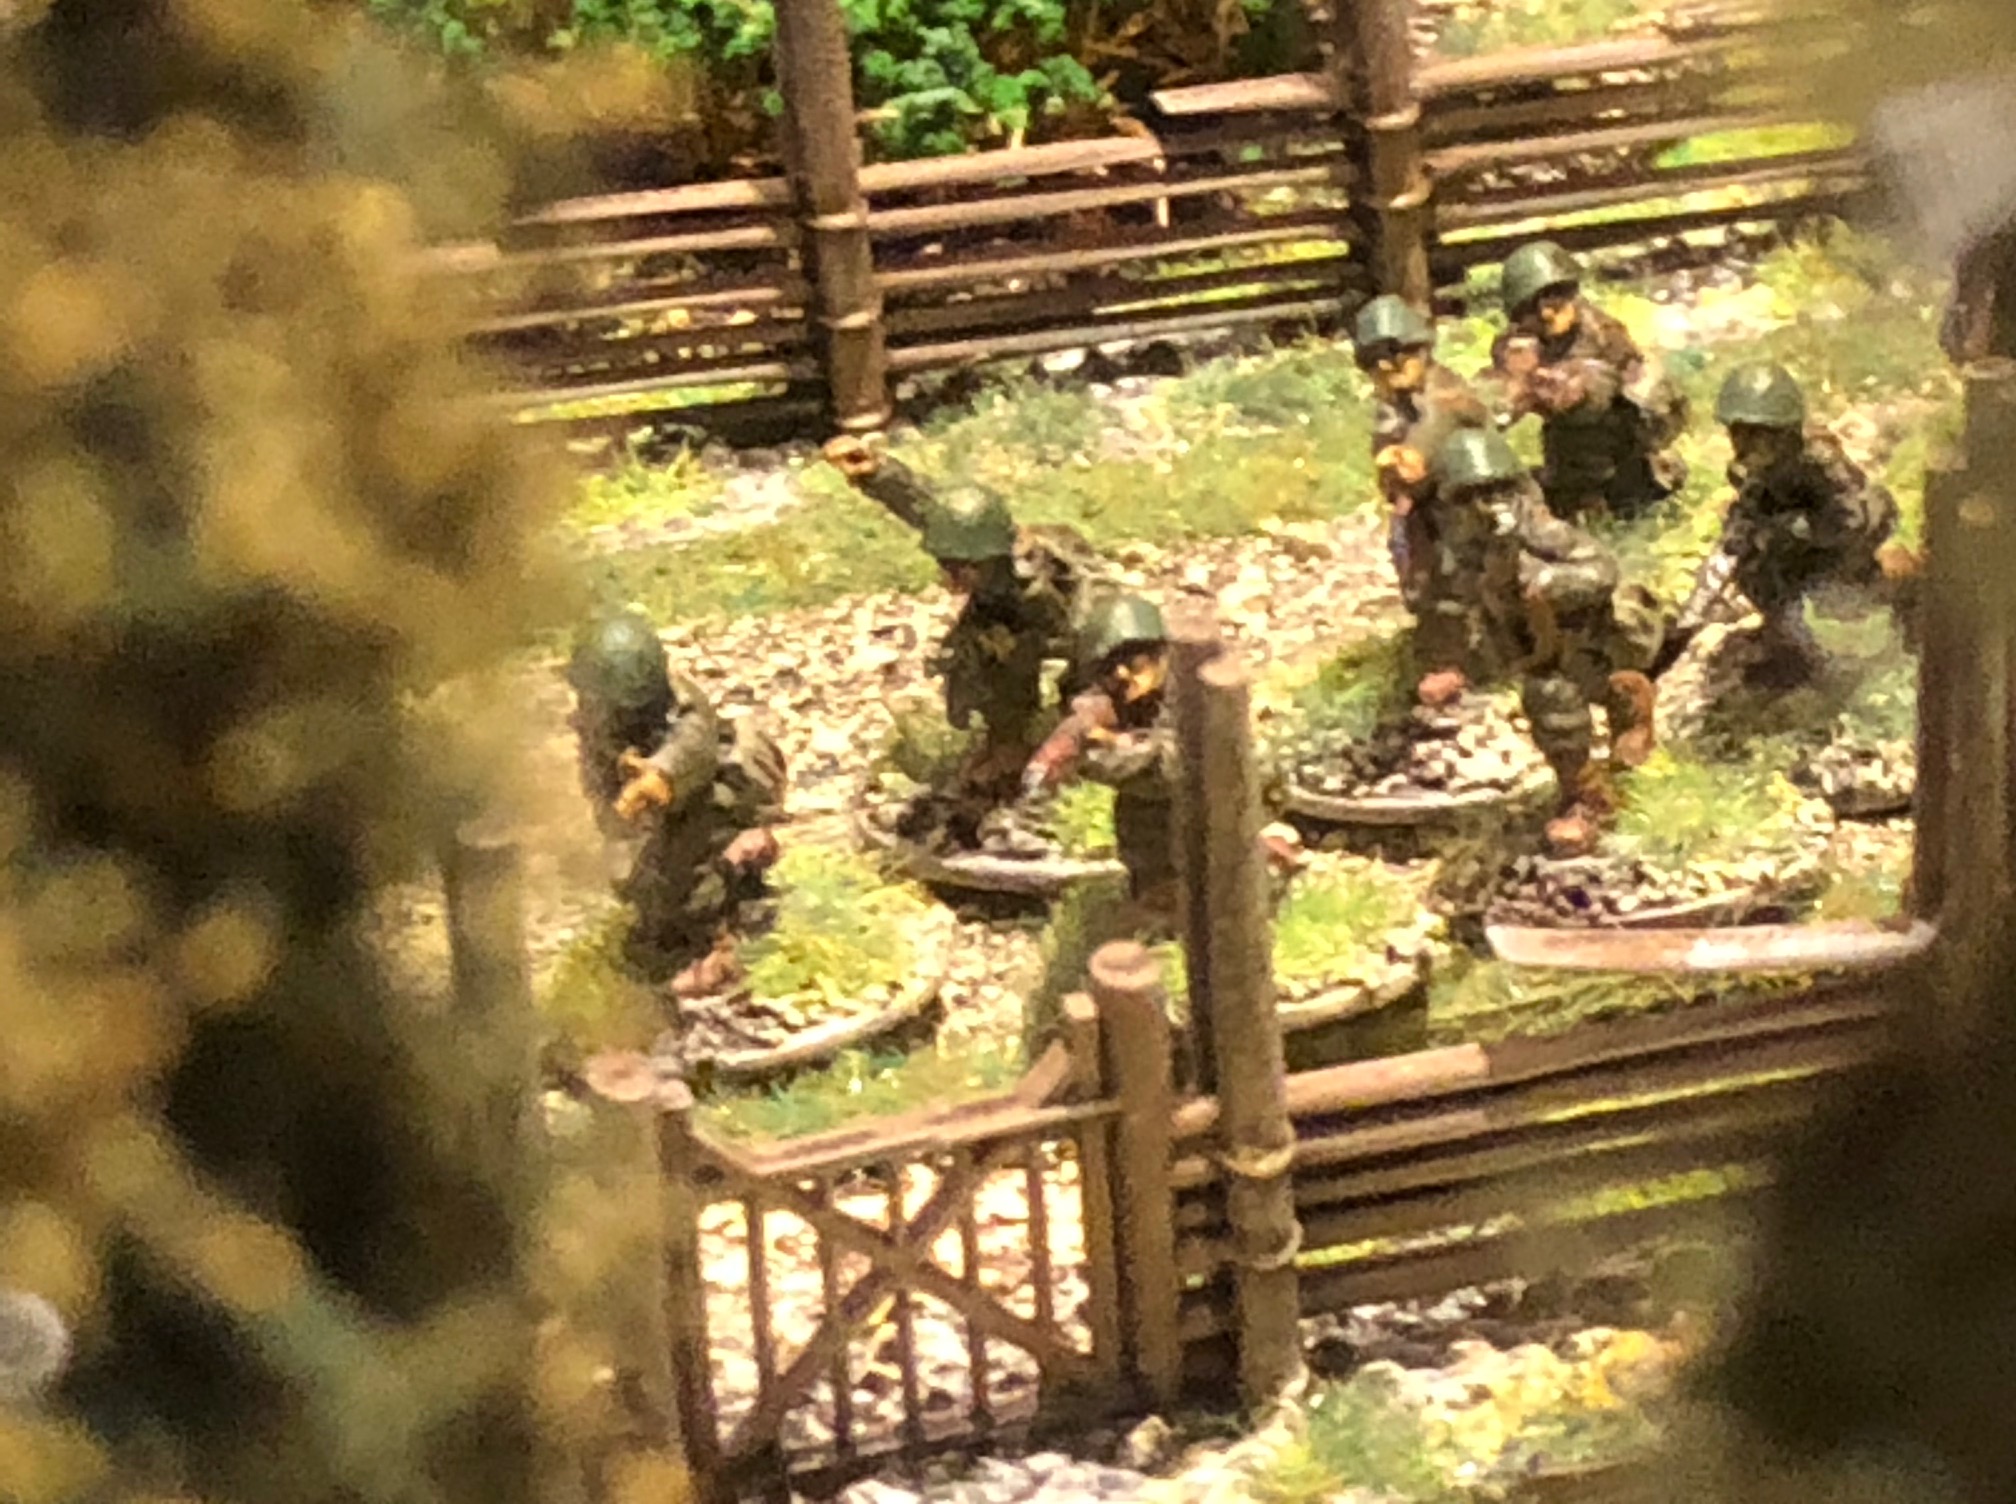
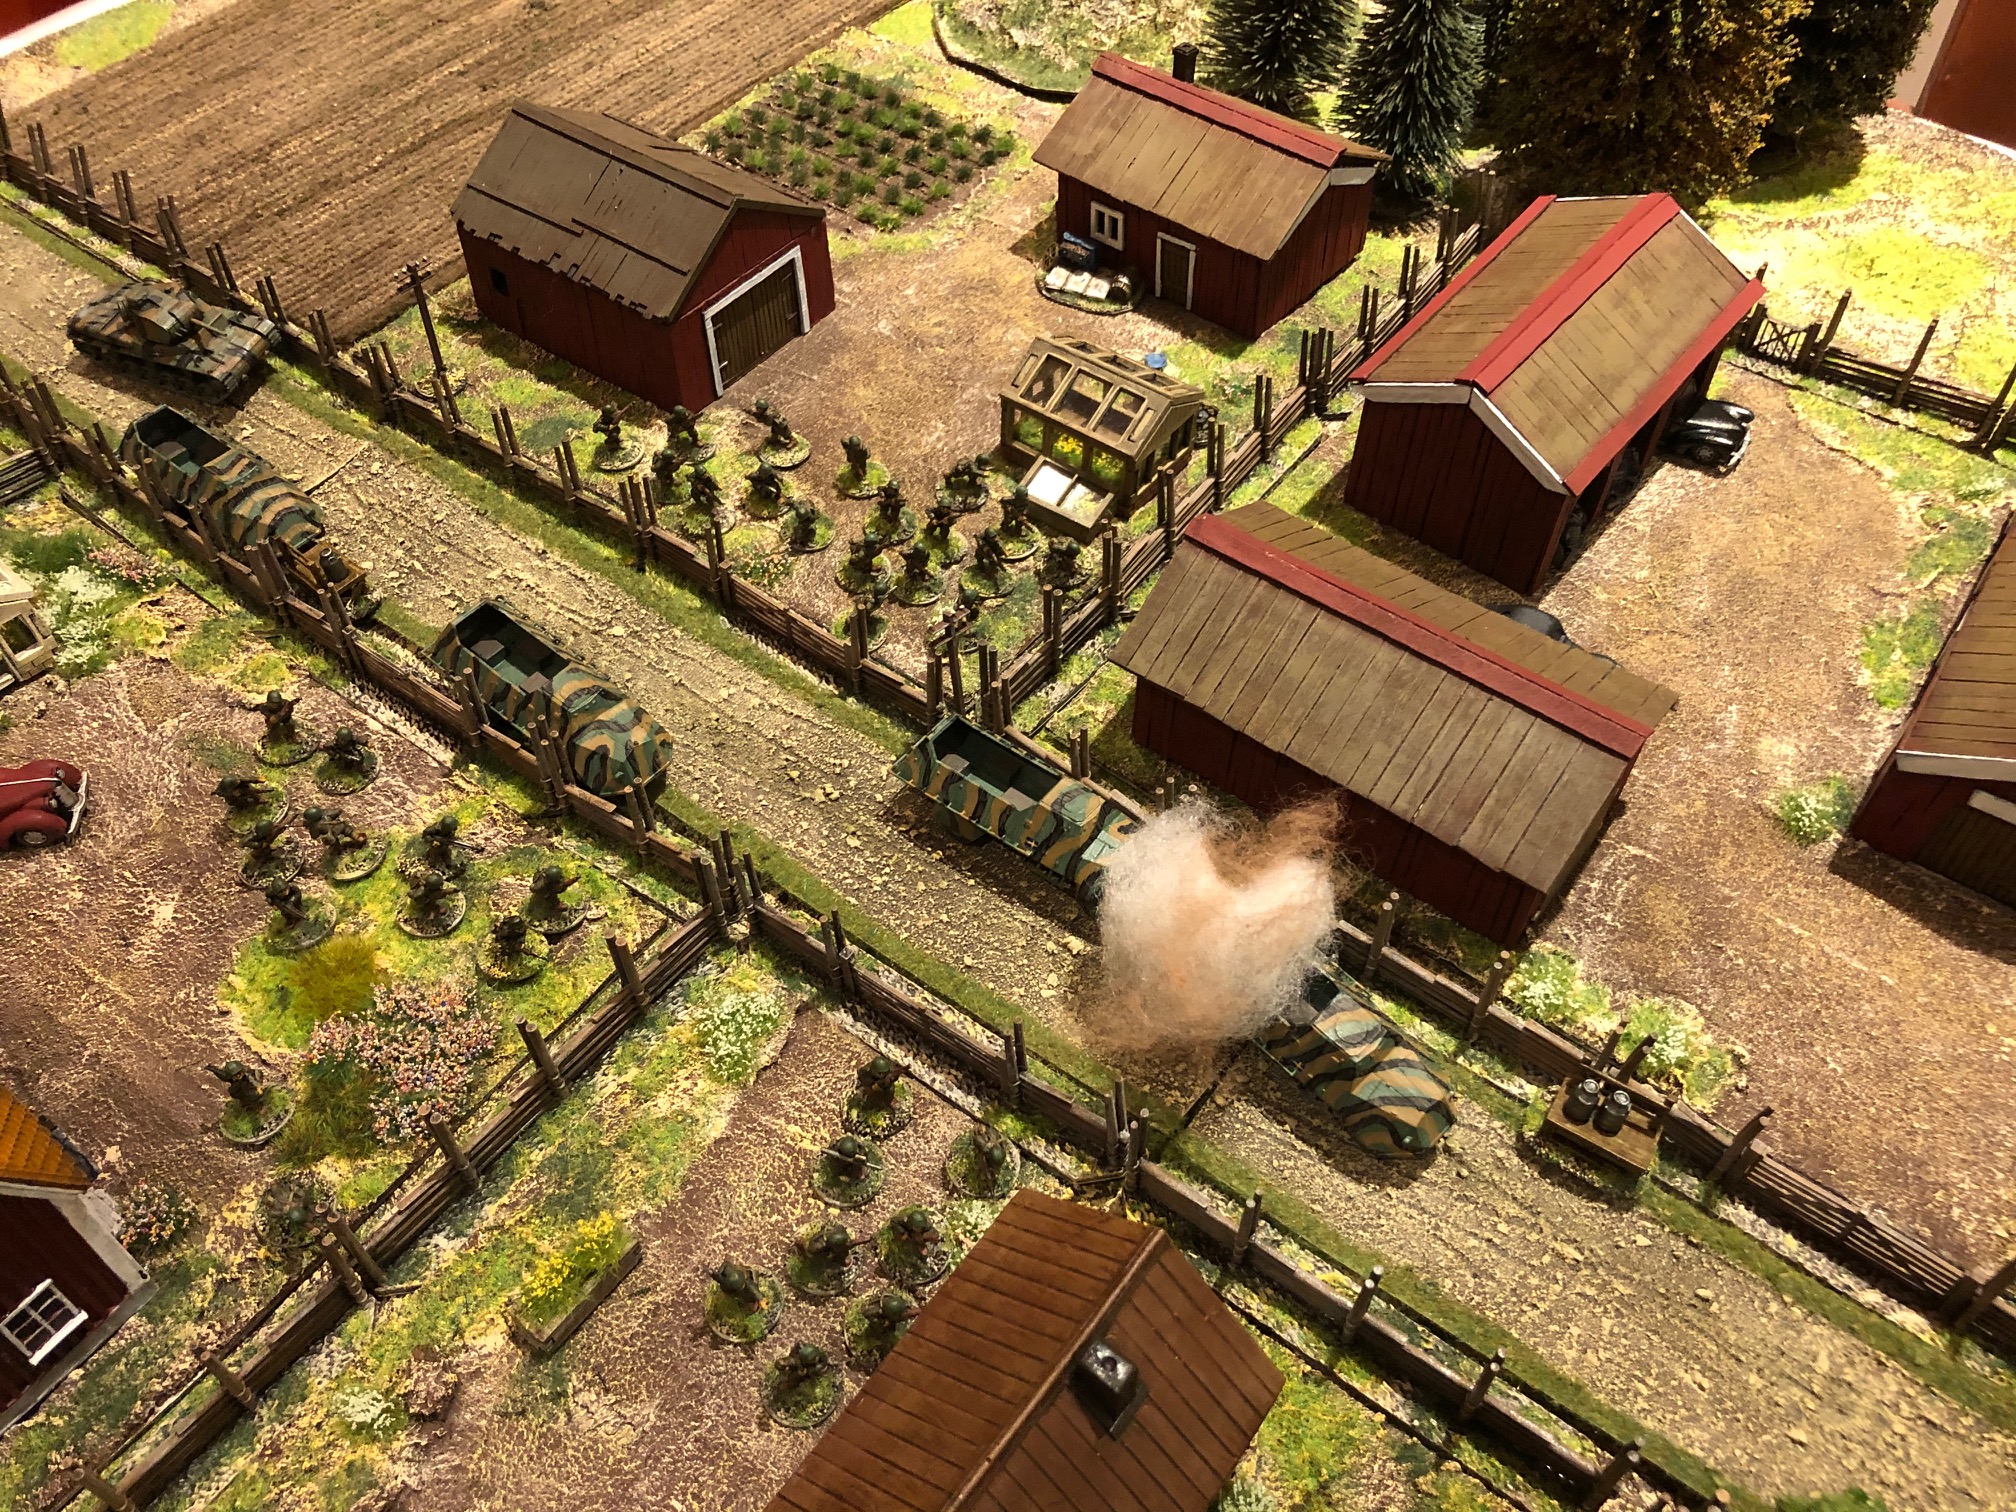
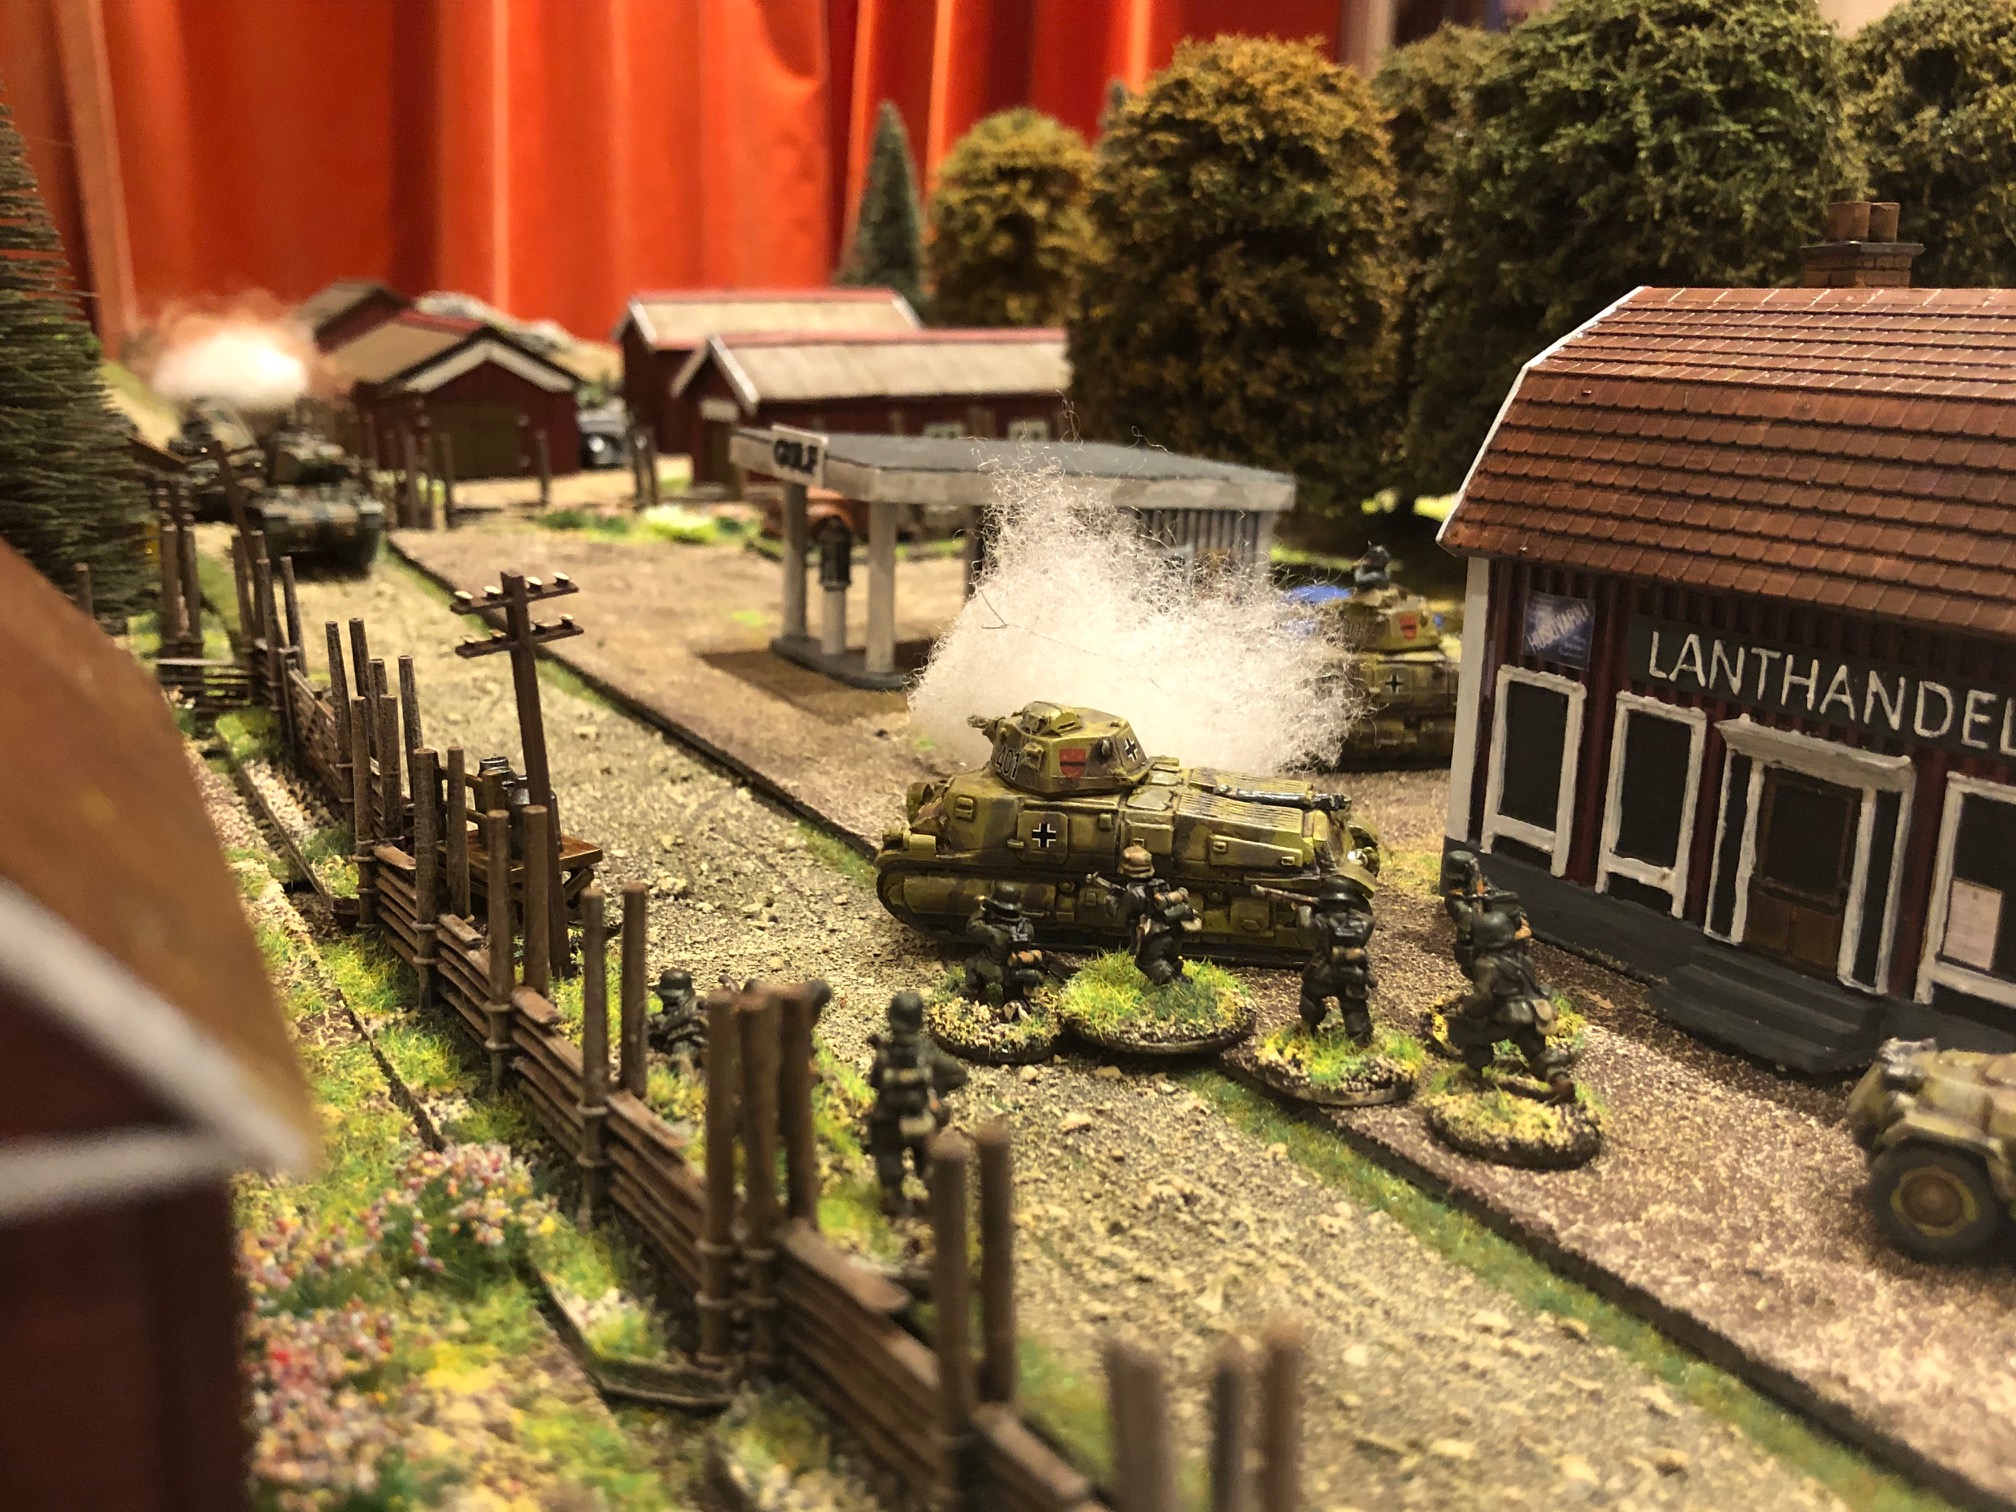
A game of Chain of Command
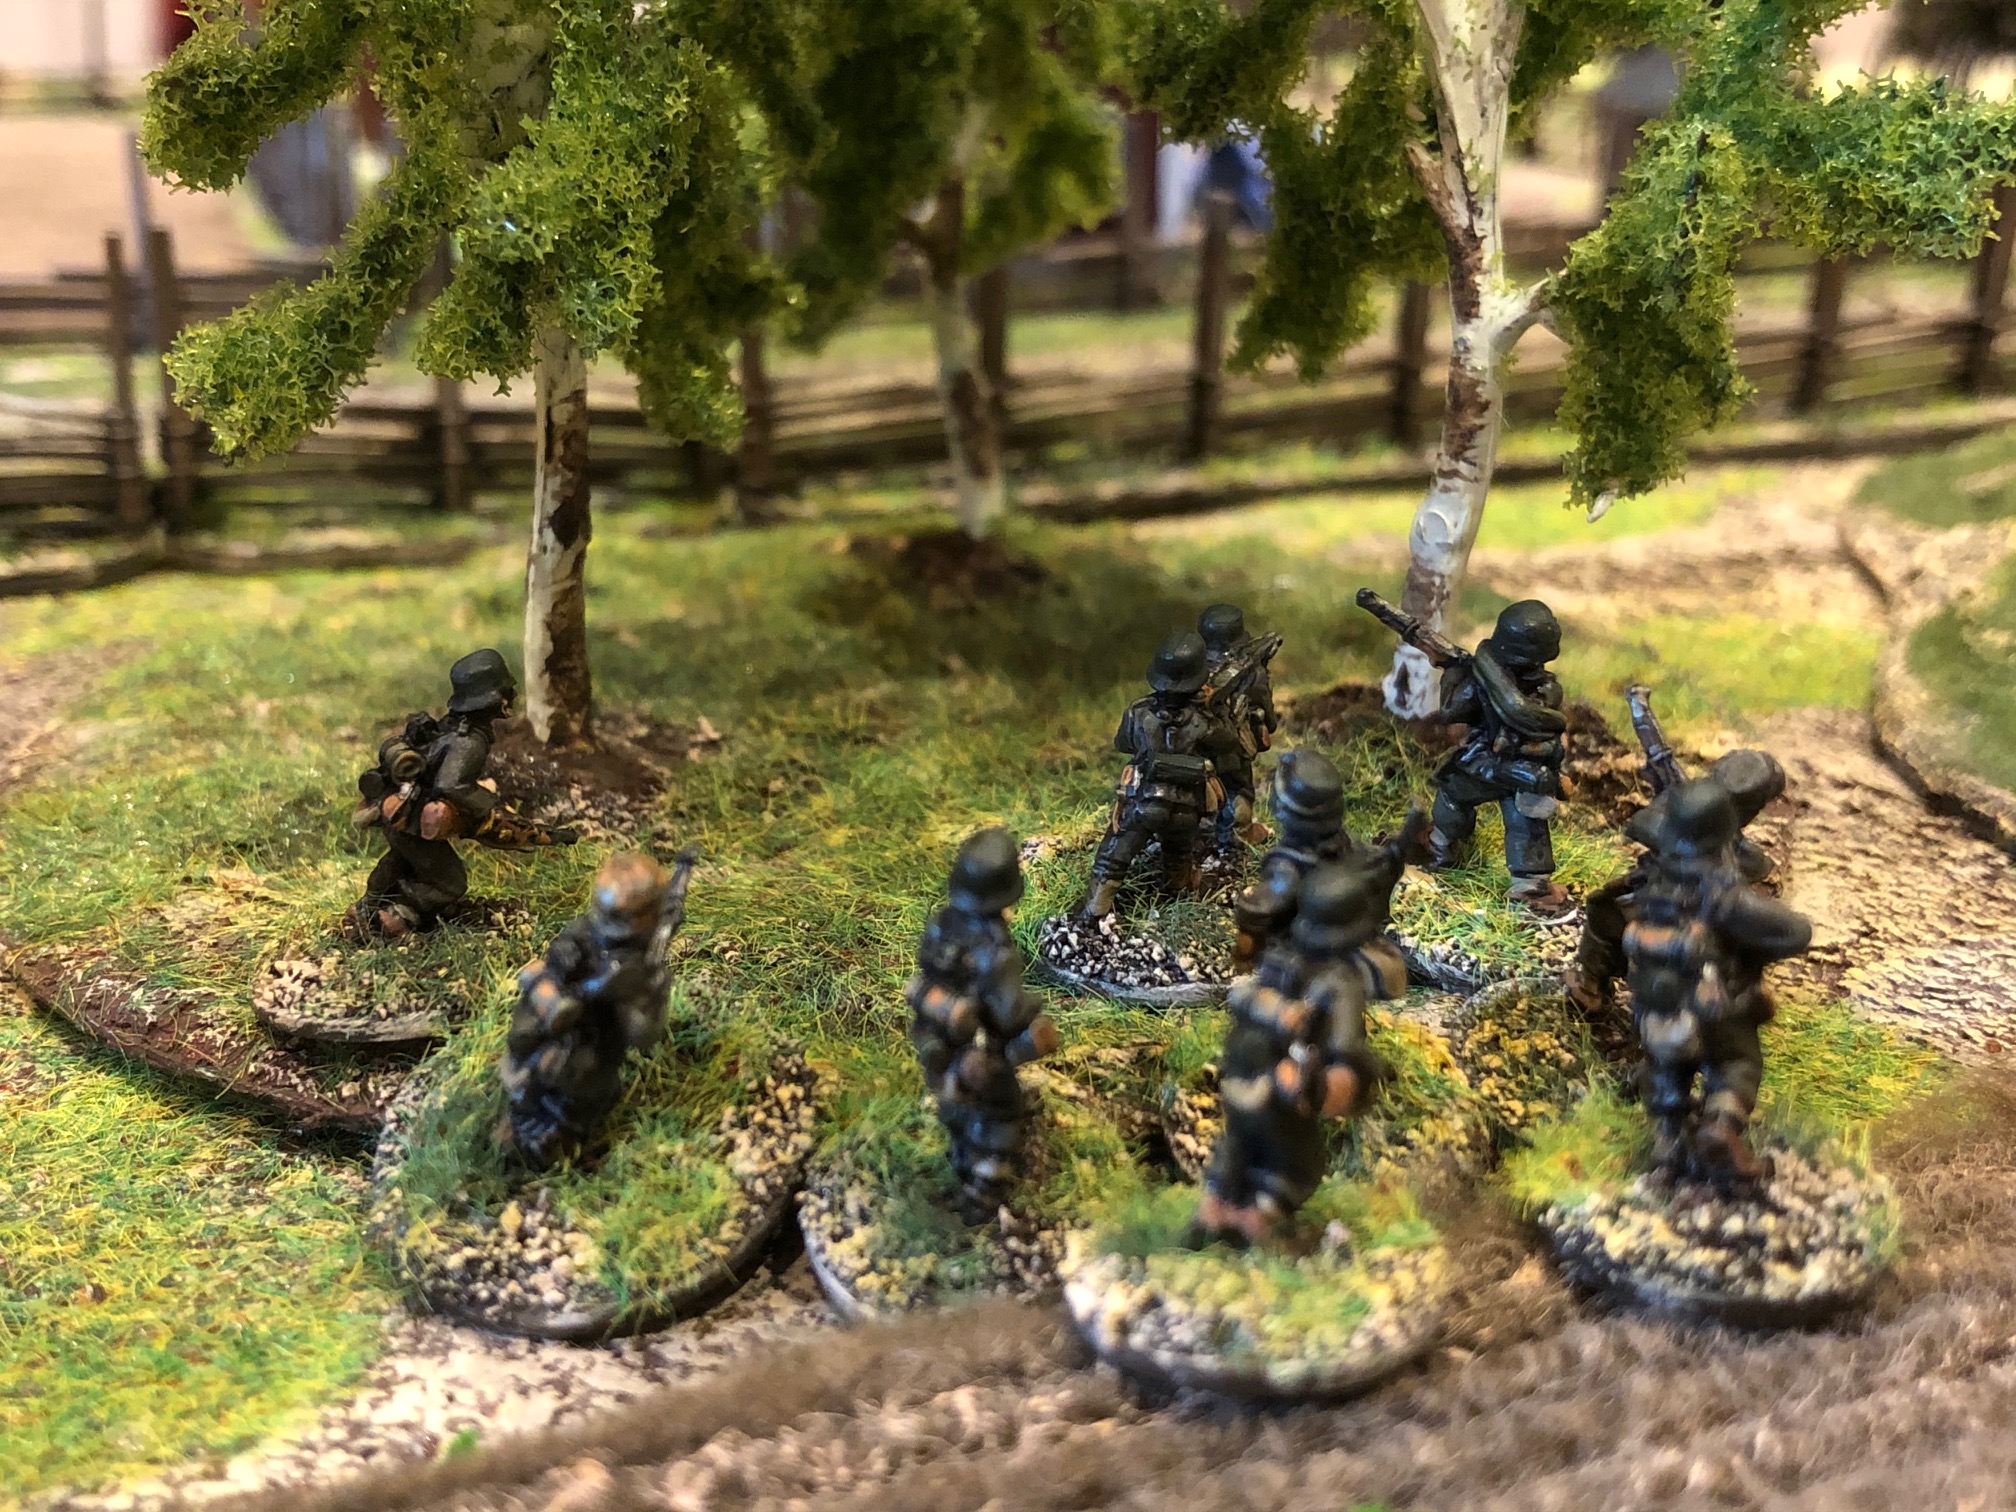
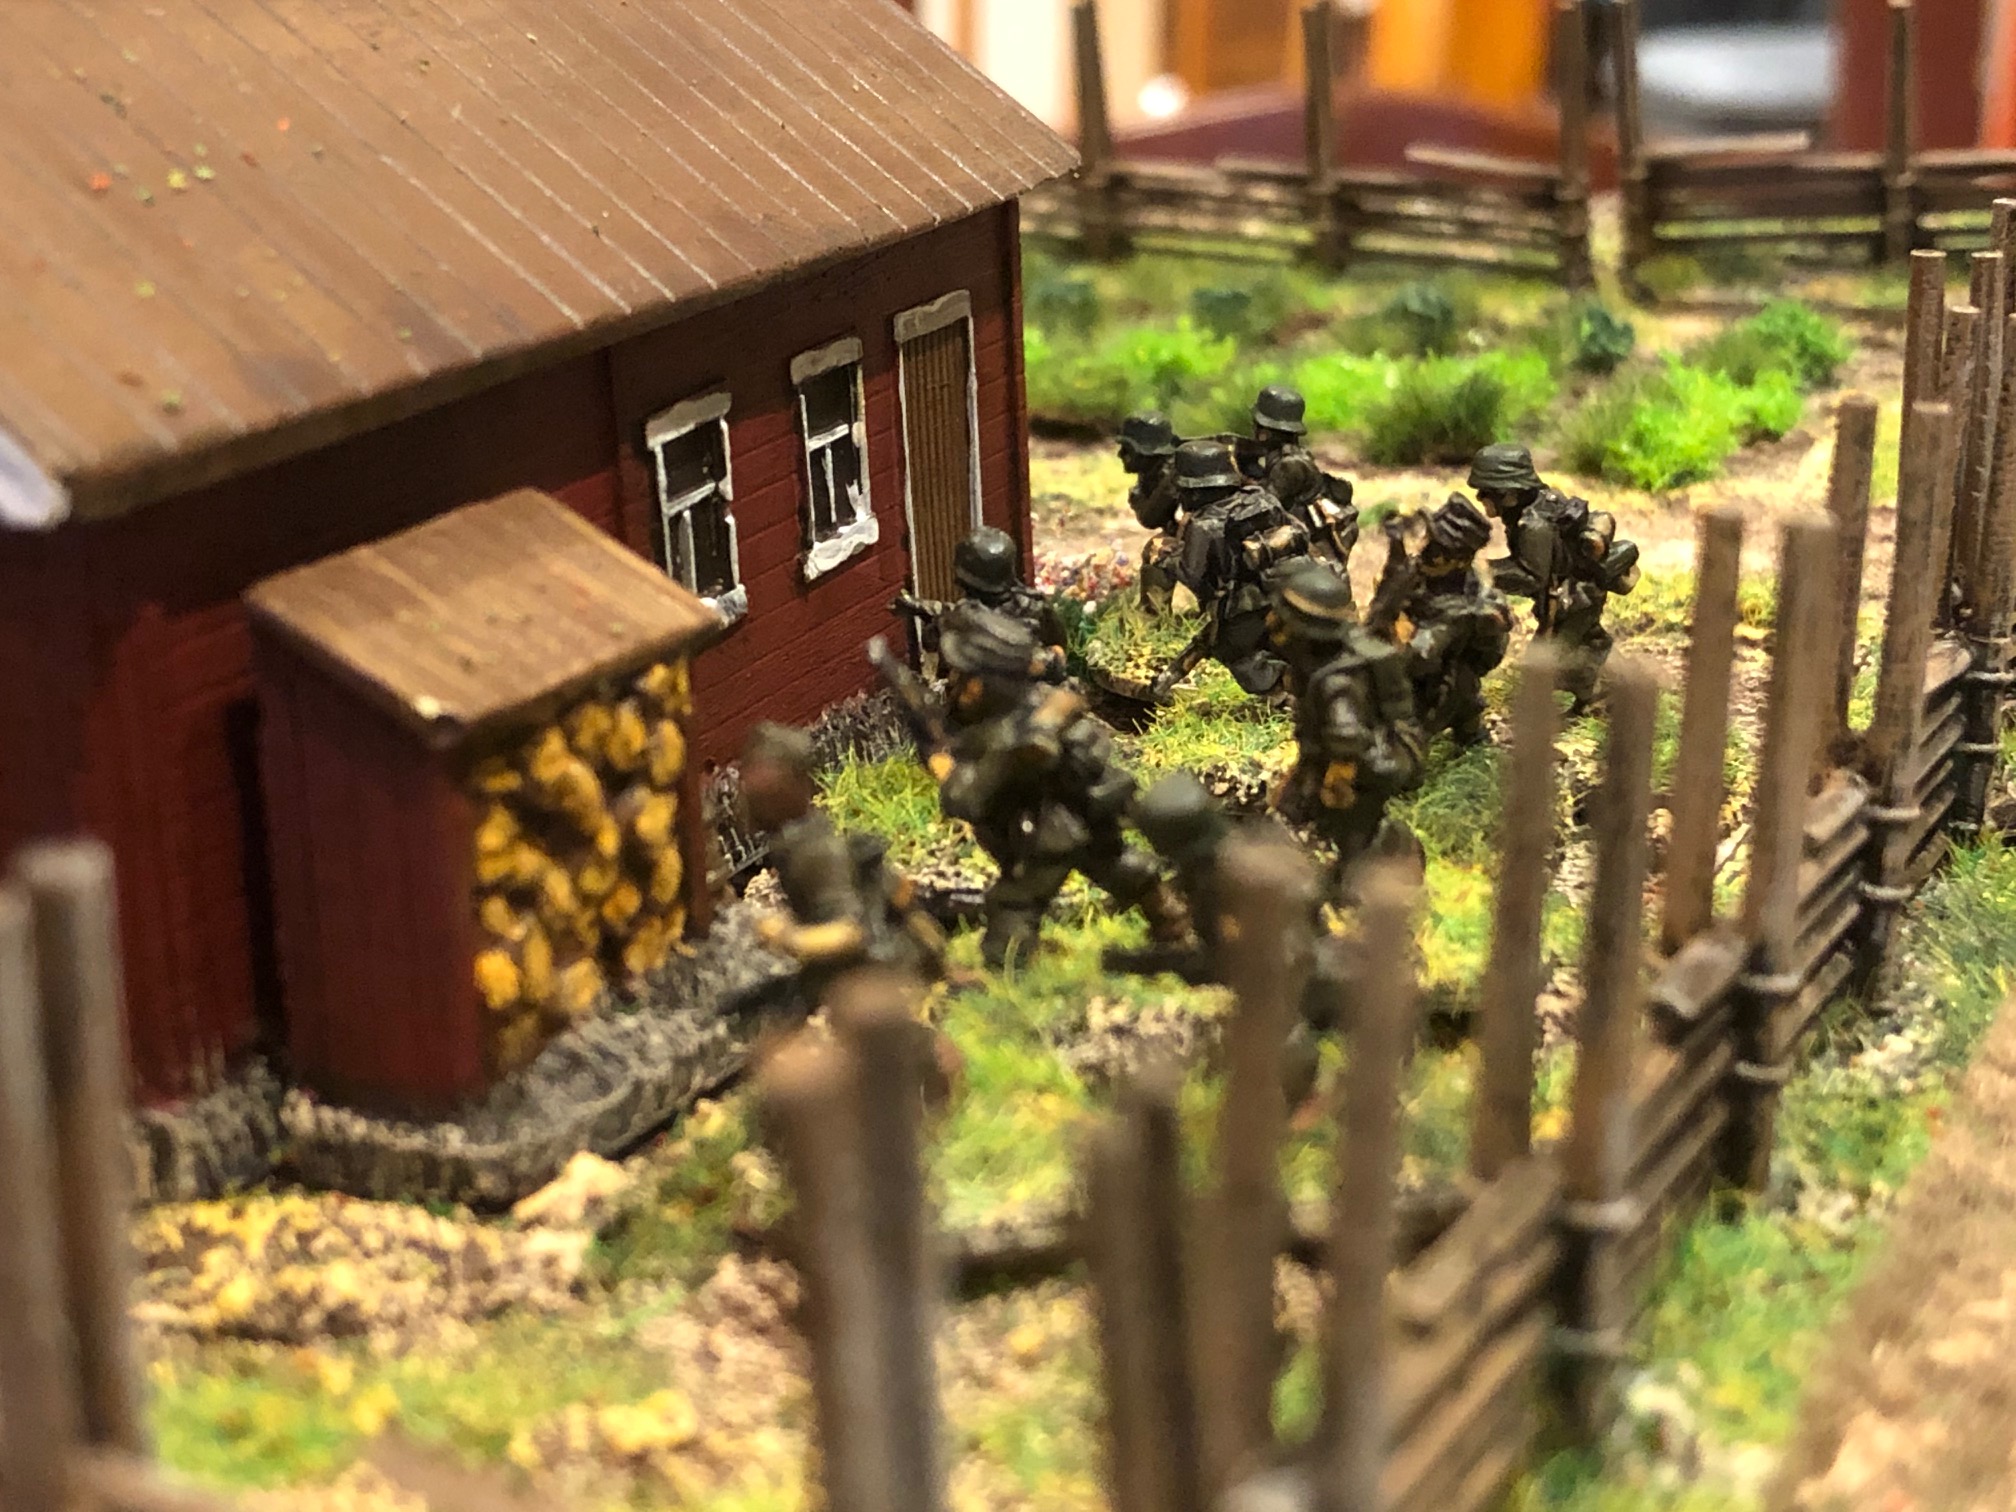
A few weeks ago the Little One and I had a small CoC (Chain of Command) infantry vs infantry game (with a tank each) mainly to test out the terrain and how it all looked together, we have a blast and we were really happy with the overall look.
I will let the picture talk for themselves.
Whilst I love playing in Normandy or the Eastern Front I have to admit that there is something special for me with this project in terms of passion and immersion. For this table all it really took was a type or Fence and the colour of the houses to transport us straight to Dalarna 1943.
Yes the whole thing is made up but I am trying to make the rest of it justice. As you may have figured out by now immersion is very important for all the projects I do. It takes an extra effort, but an effort I am more than happy to make.
If you have a what-if idea or a project based on some obscure location spend some time reflecting on how things looked – study photos and find those key elements that immediately gives it away – that is your primary focus for your wargames table. If these items do not exist – consider making them yourself or contact someone like Paul who has the talent to design something in 3d for your, make it printable, print and send it to you! (Sabotag3d.com).


 I have been, in a friendly way, been pestering Dirk to do a podcast about the Middle Earth Roleplaying Game for a long time (check out #grogmerp on twitter if you do not believe me). Last month he released part 1 of the MERP (Middle Earth Roleplaying) show and he asked me to do a “First, Last and Everything” segment for Part 2 – that is a presentation of my first, last and overall favourite RPG games. I went for (because it is true) the first being the old Swedish RPG game Mutant (from 1984) that I have written about here on a few occasions (link some of it
  Here are the links to the two parts of Episode 36 – Middle-Earth Role Playing (MERP) with Liz Danforth: