Russian Scout Platoon for CoC, Painting Rig and Strelkovy


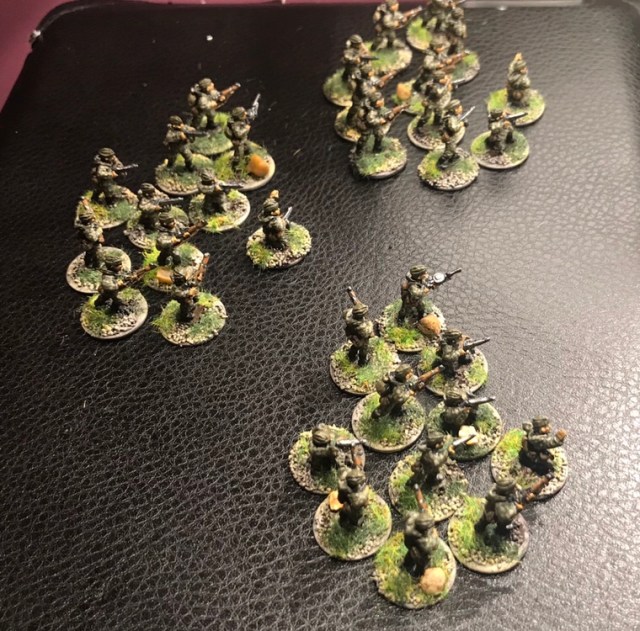
This week, actually the last few days, I have been working on a 15mm Scout/Recon Platoon for Chain of Command to fight the Finnish platoon I did last week (see here).  The organisation of the platoon is based on the list found in the Too Fat Lardies Christmas Special 2016 (link here).  They are all from the Peter Pig (link here) range and are in 15mm scale.  I really enjoyed painting them and I think they are really nice models. If you are not familiar with Peter Pig, go and have a look at what they do – they have a very comprehensive WW2 range and a lot of specials like different type of Uniforms, Sniper, engineers, etc.

In addition Peter Pig has a lot of ranges covering War of the Roses, Samurai, English Civil War, Pirates (and even small 1/450th pirate ships), American War of Independence, American Civil War (and again some naval ships in smaller scale), Vikings & foes, colonial, wild west, great war, Spanish civil war, Vietnam and Modern Africa.  Further they sell Scenery and some fantastic rule sets (http://www.peterpig.co.uk/).

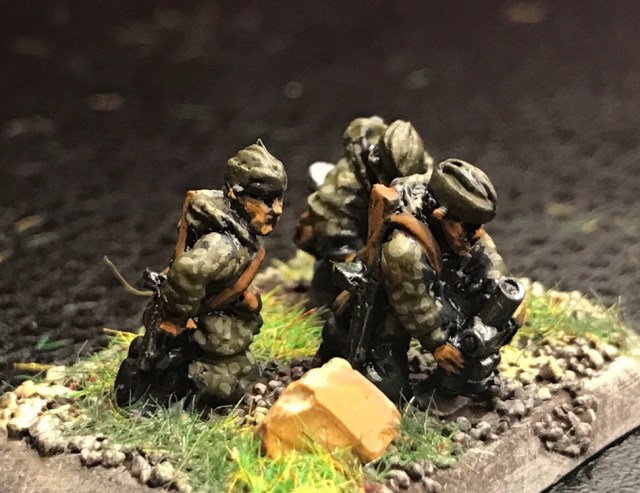
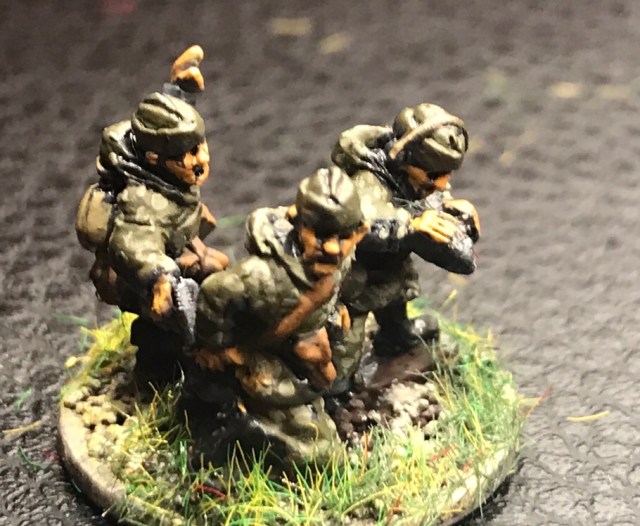
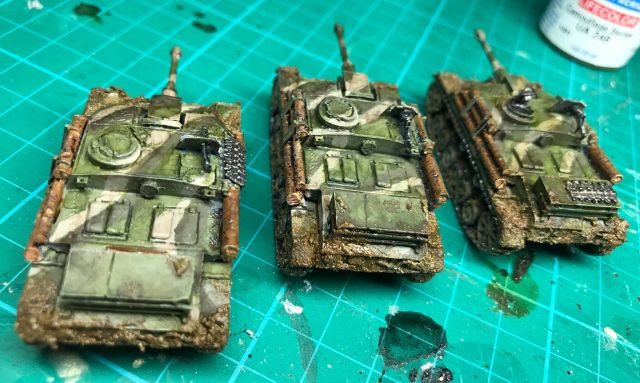
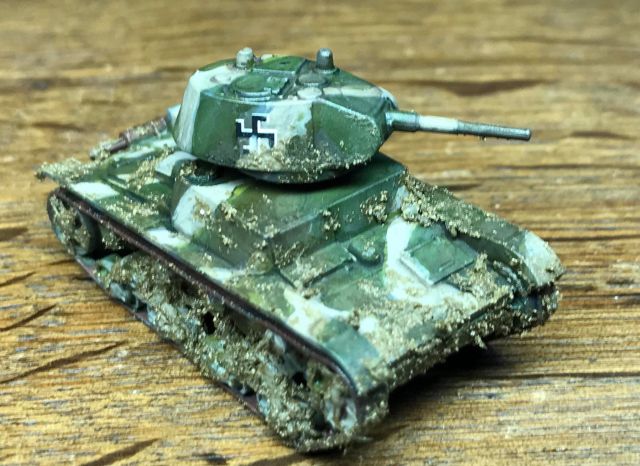
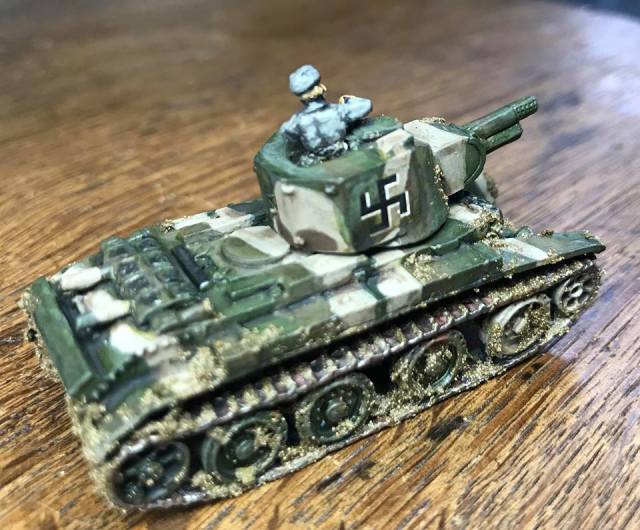
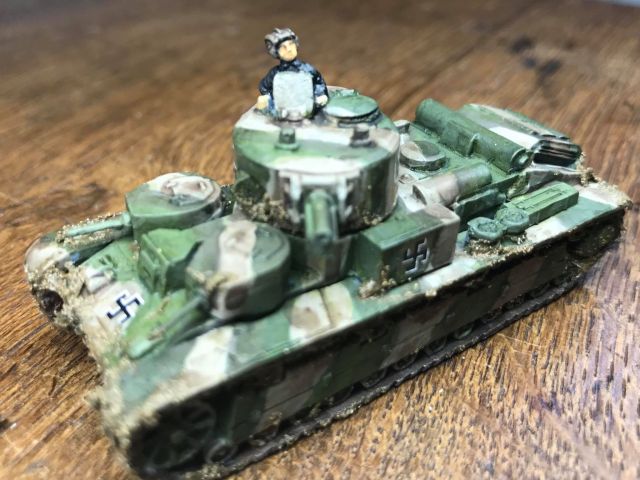
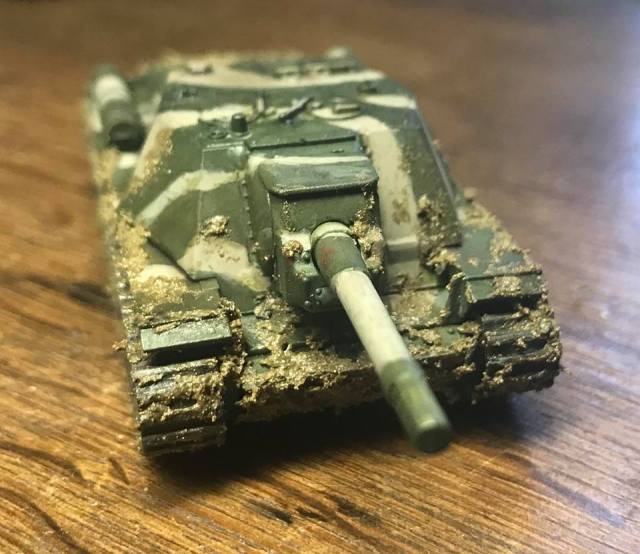
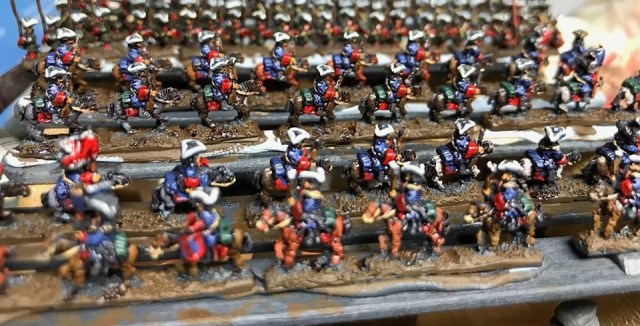
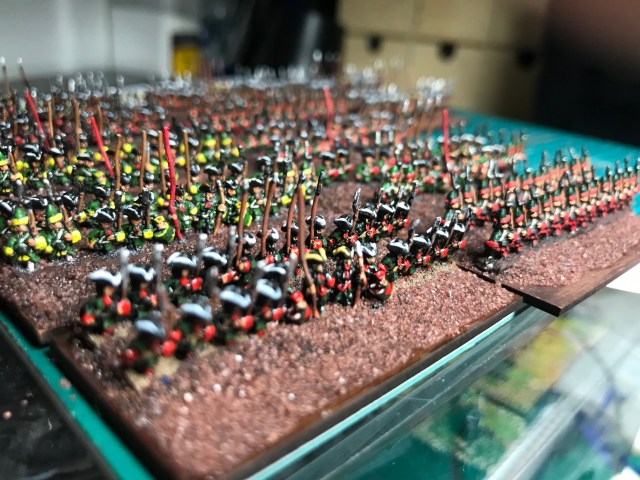
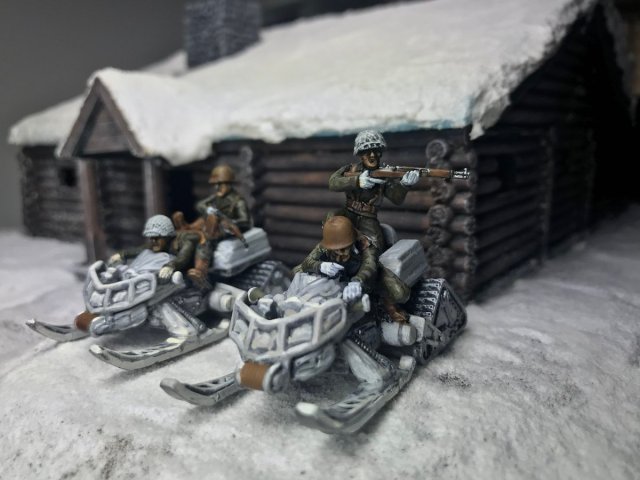
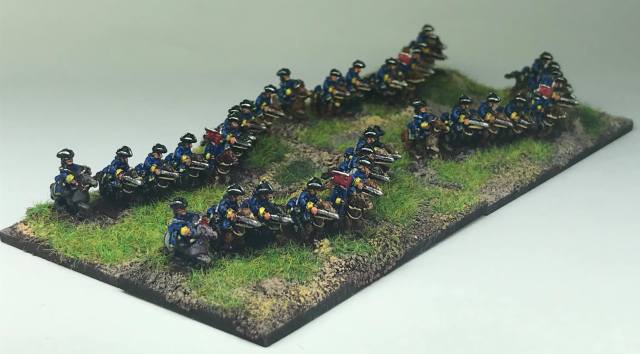
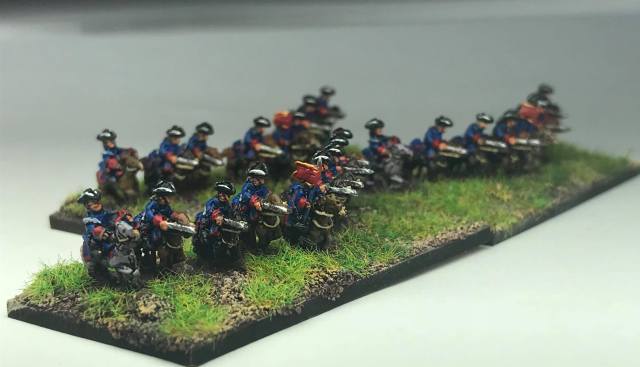
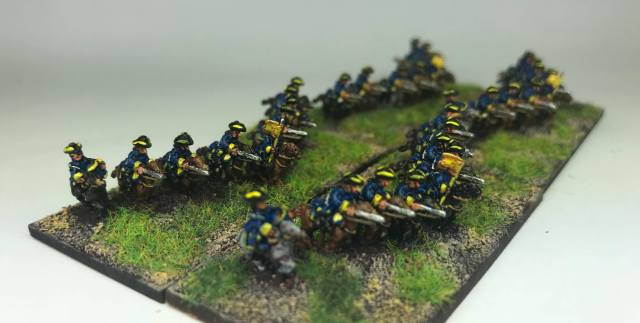
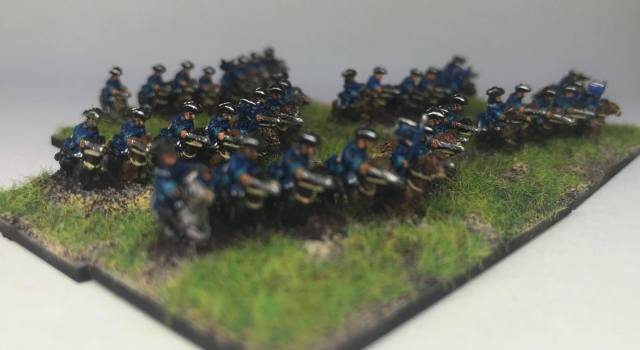
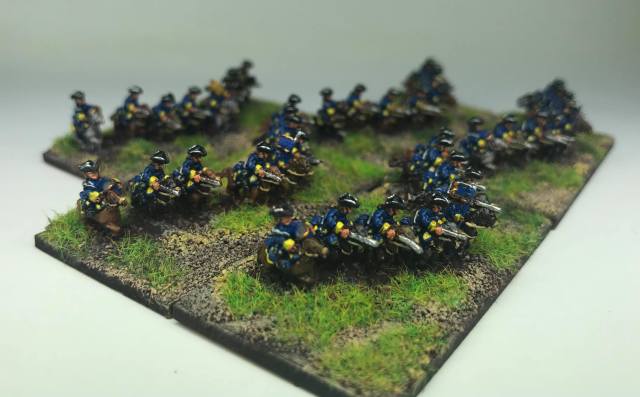
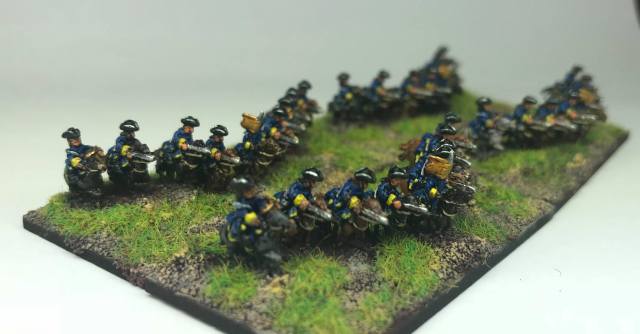
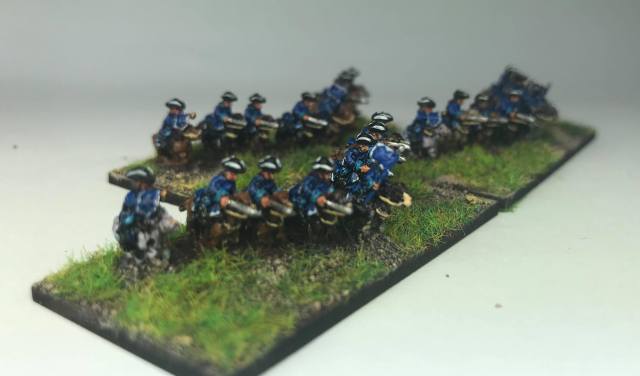
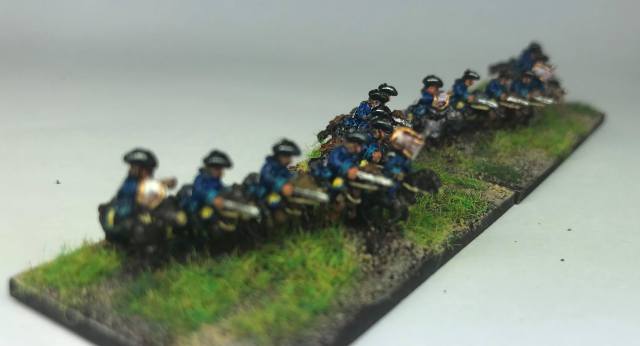
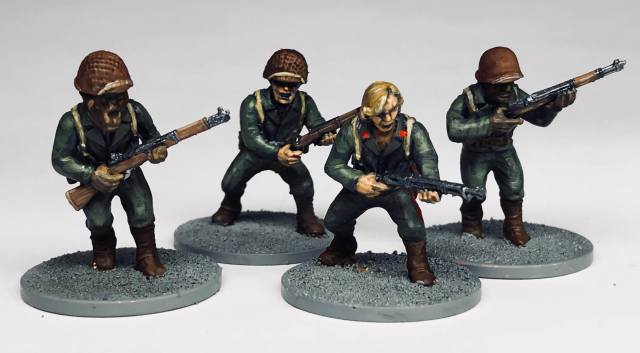
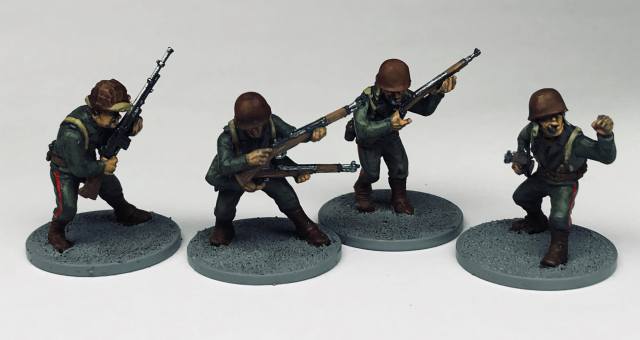
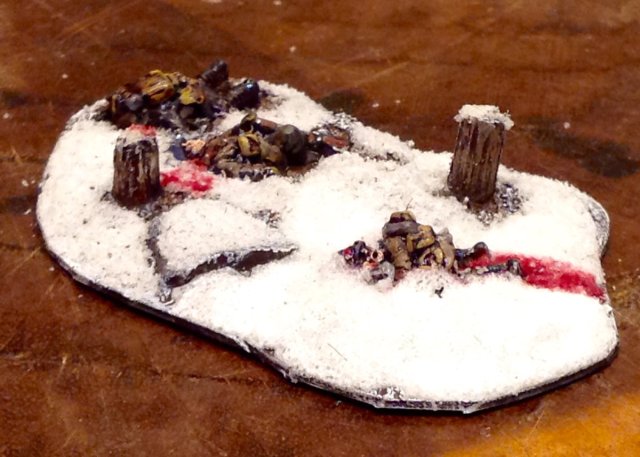
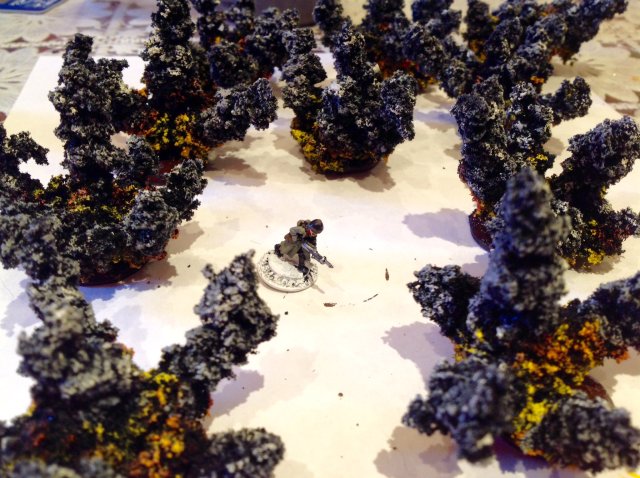
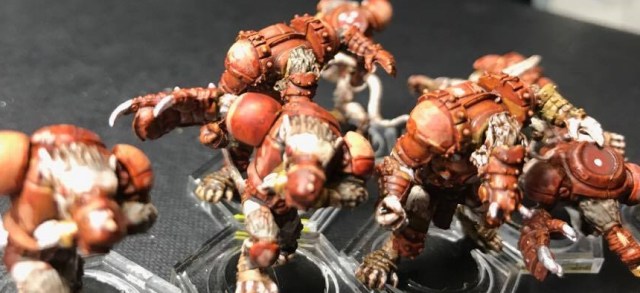
I could have painted the Scouts in a one colour  uniform but were keen to have some kind of camouflage to make them look  a little bit cooler. Artizan design have some very useful Painting Guides produced by Mick Farnworth on their webpage (link here), I found one showing Russian Leaf Patterns that I liked (link here) with only two nice contrasting colours. I then found two good colour matches (Vallejo 886 Green Grey and 887 Brown Violet – it may be called US Olive Drab nowadays).

Stuff1
It is great to have these kind of guides. I just place paints until I find matches.

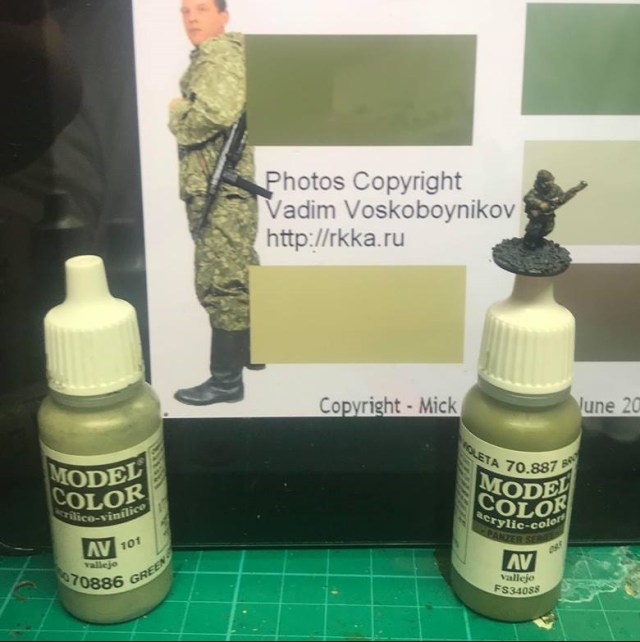
Then I painted the Uniform in the 887 and made small random dots with 886 on top and I think it looks good from the distance they will be looked at.

Stuff2
Very happy with the test model. It certainly looks like he has some kind of camouflage on him and it looks good enough from here (yes I have since sorted the moustache from that skin tone).  Black boots, some gun metal, light brown on dark brown for leather details and the rifle.  US field drab on skin, highlighted with Medium Skin tone.  Relatively quick to do but be careful with the dots – I used a fine detailed brush for this.

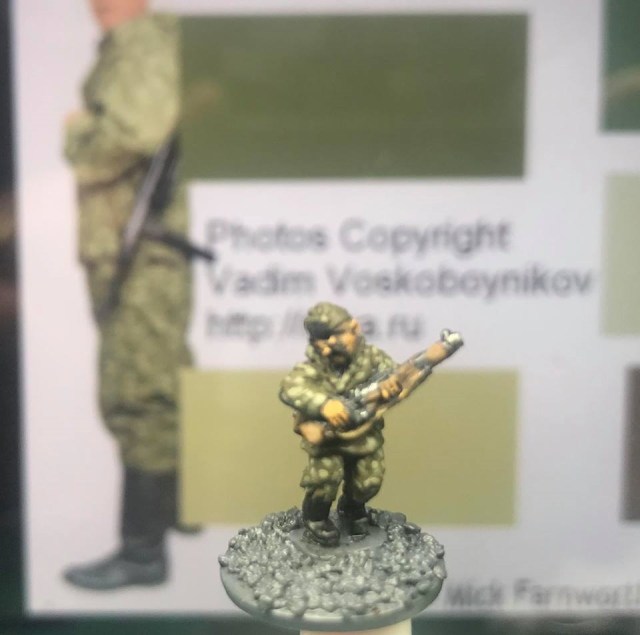
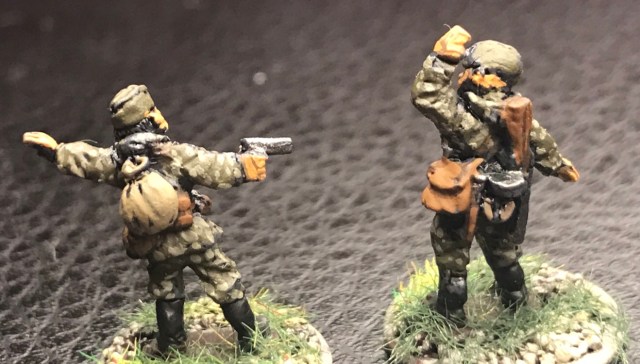
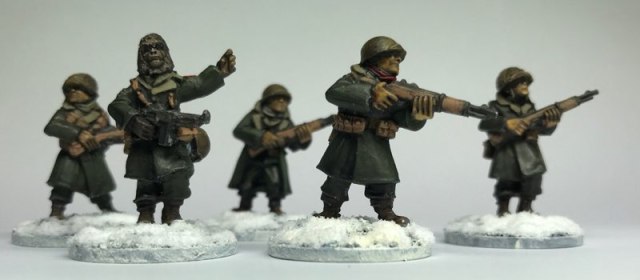
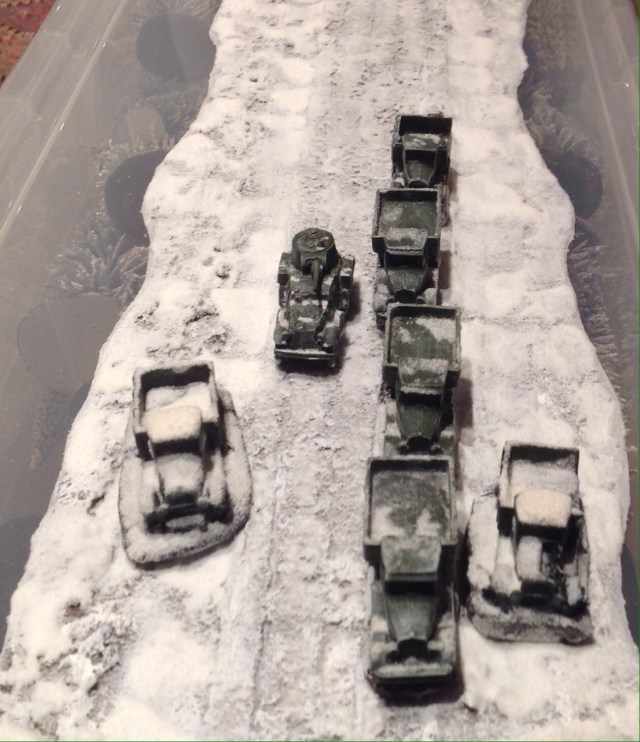
Anyway, here are the completed miniatures.

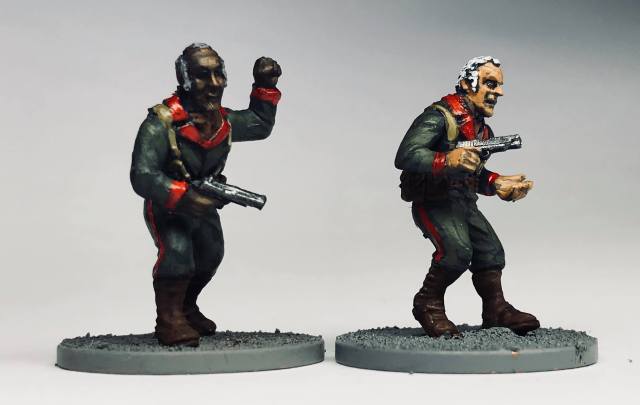
Platoon Headquarters

Leytenant, Senior Leader, with Pistol

Serzhant, Junior Leader, with SMG

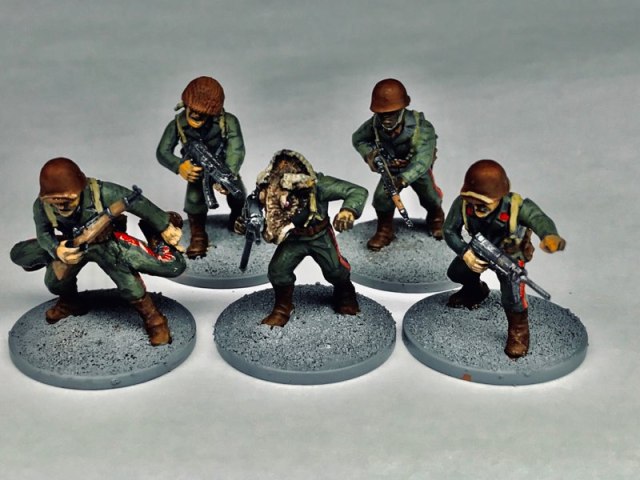
3 Squads each consisting of;

Serzhant, Junior Leader, with SMG

Light Machine Gun (LMG) with 2 crew

4 No. Submachine Gunners

4 No. Semi-Automatic Rifle Men (SVT40, not sure the models are, but hey!)
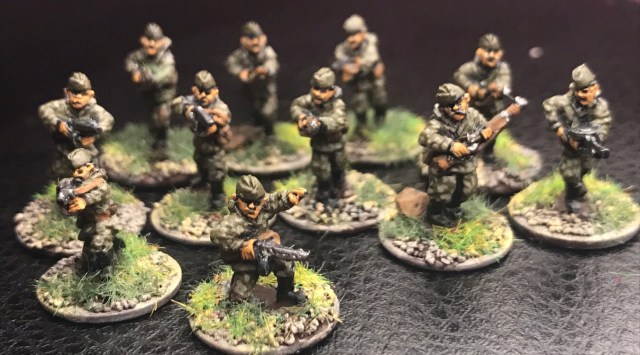
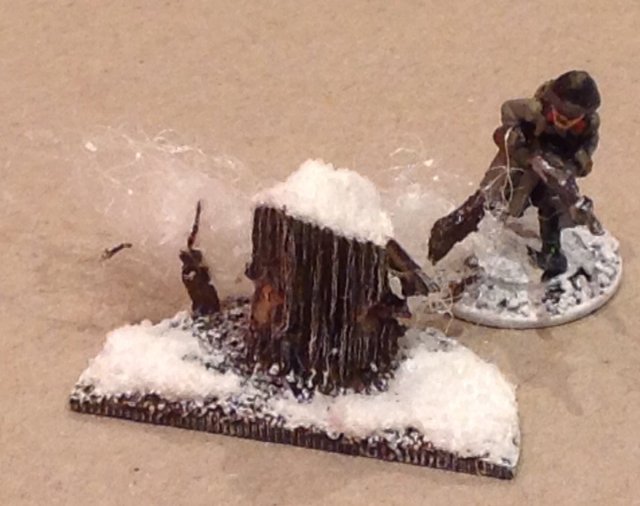
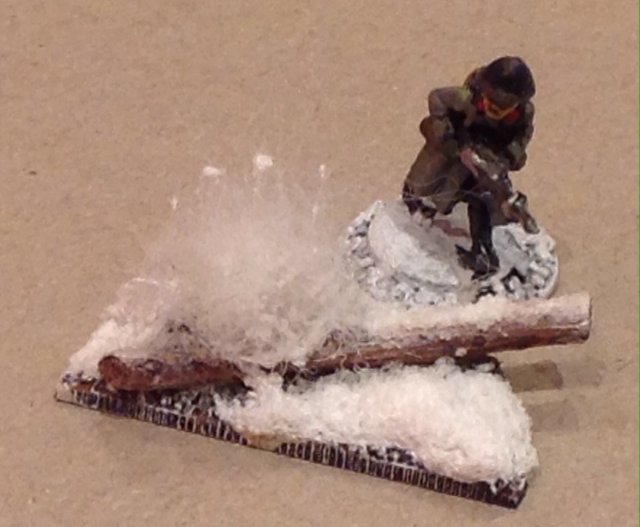
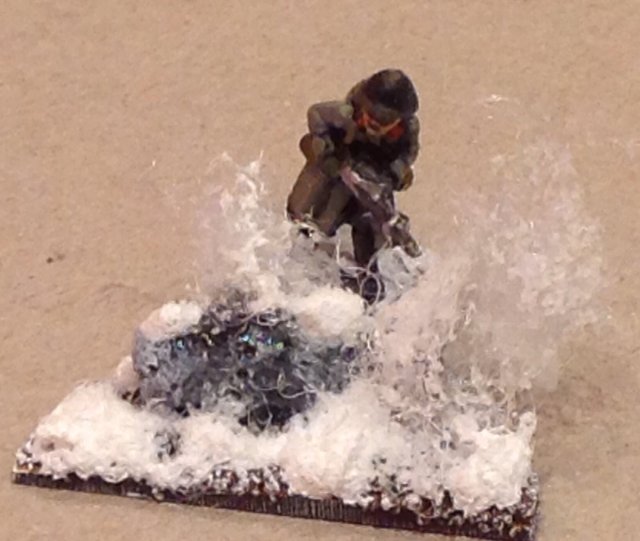
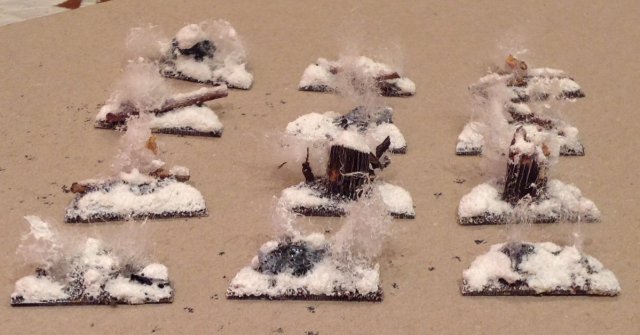
Support Options

Anti-tank rifle teams
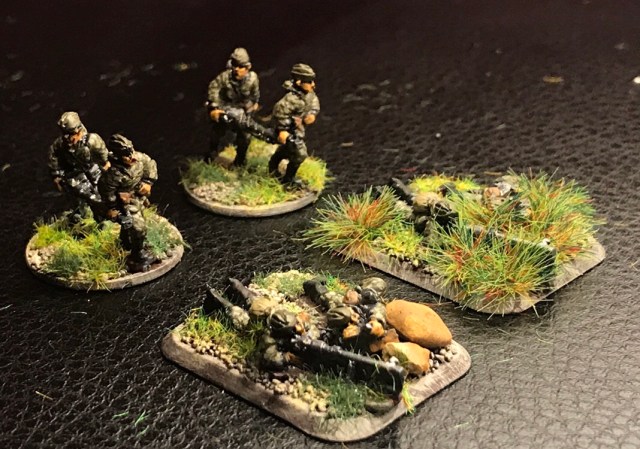
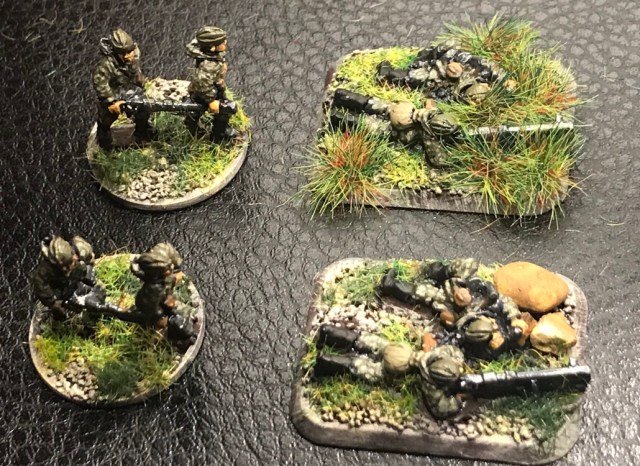
50mm Mortar teams

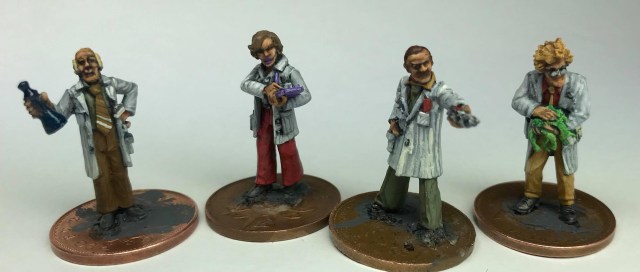
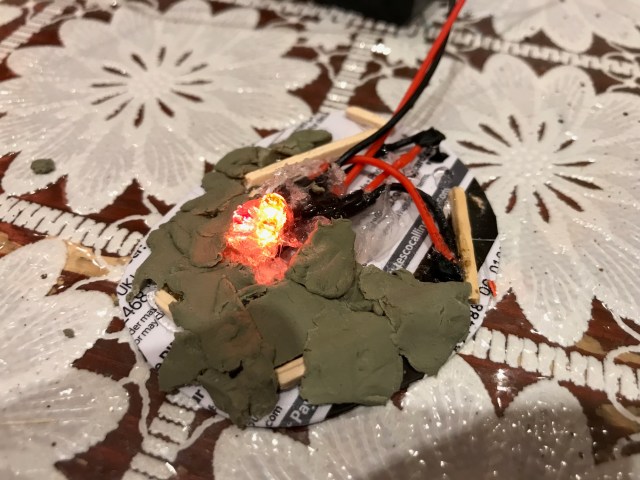
Generic Engineering team (more a marker)

Commissar, to give the troops a kick in the arse (sorry, I meant to increase their morale)

img_6254

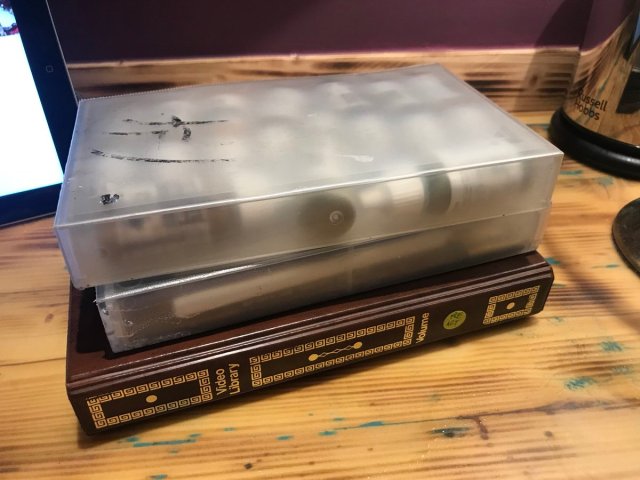
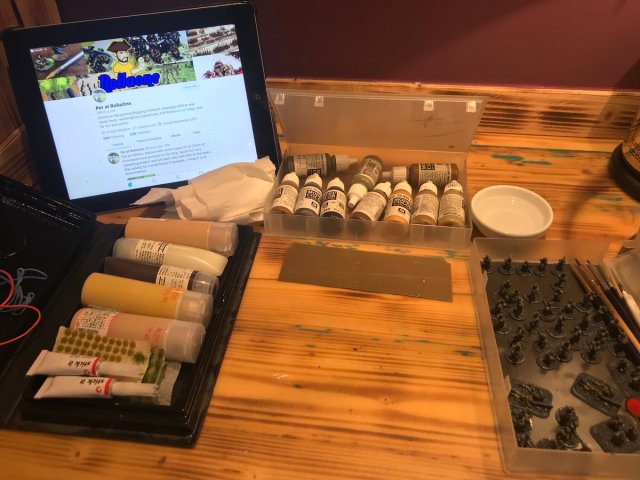
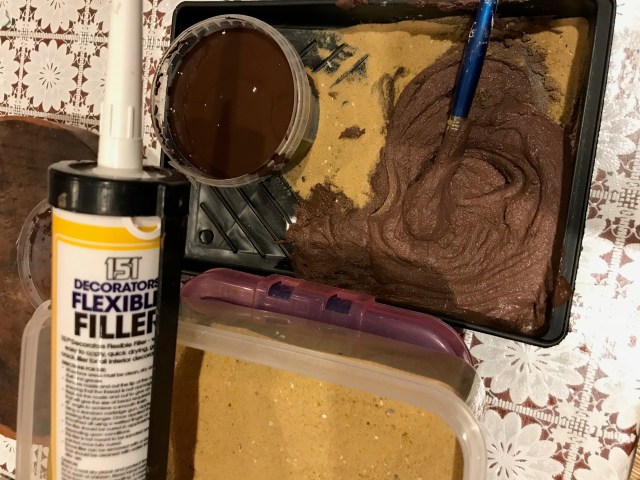
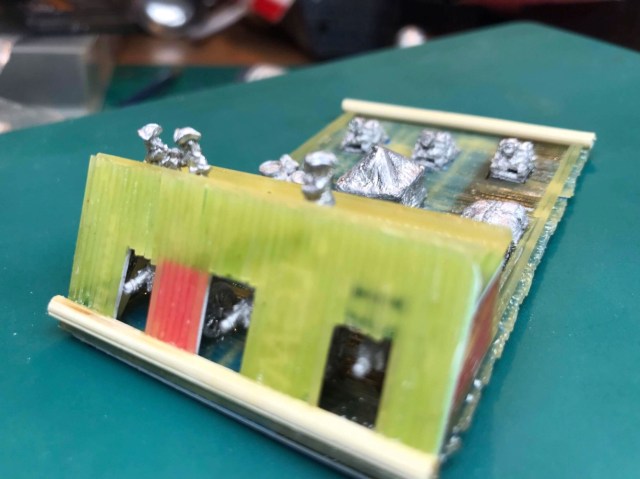
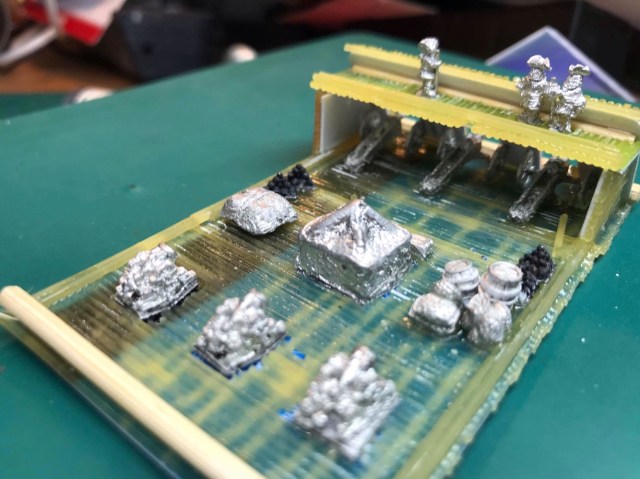
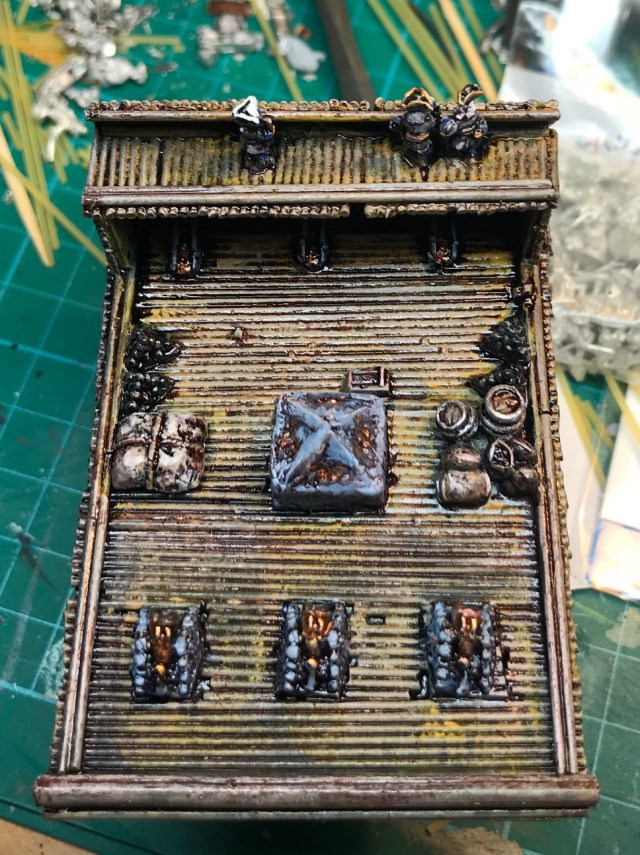
Mid-week Paining Solution – Getting my Hobby time back

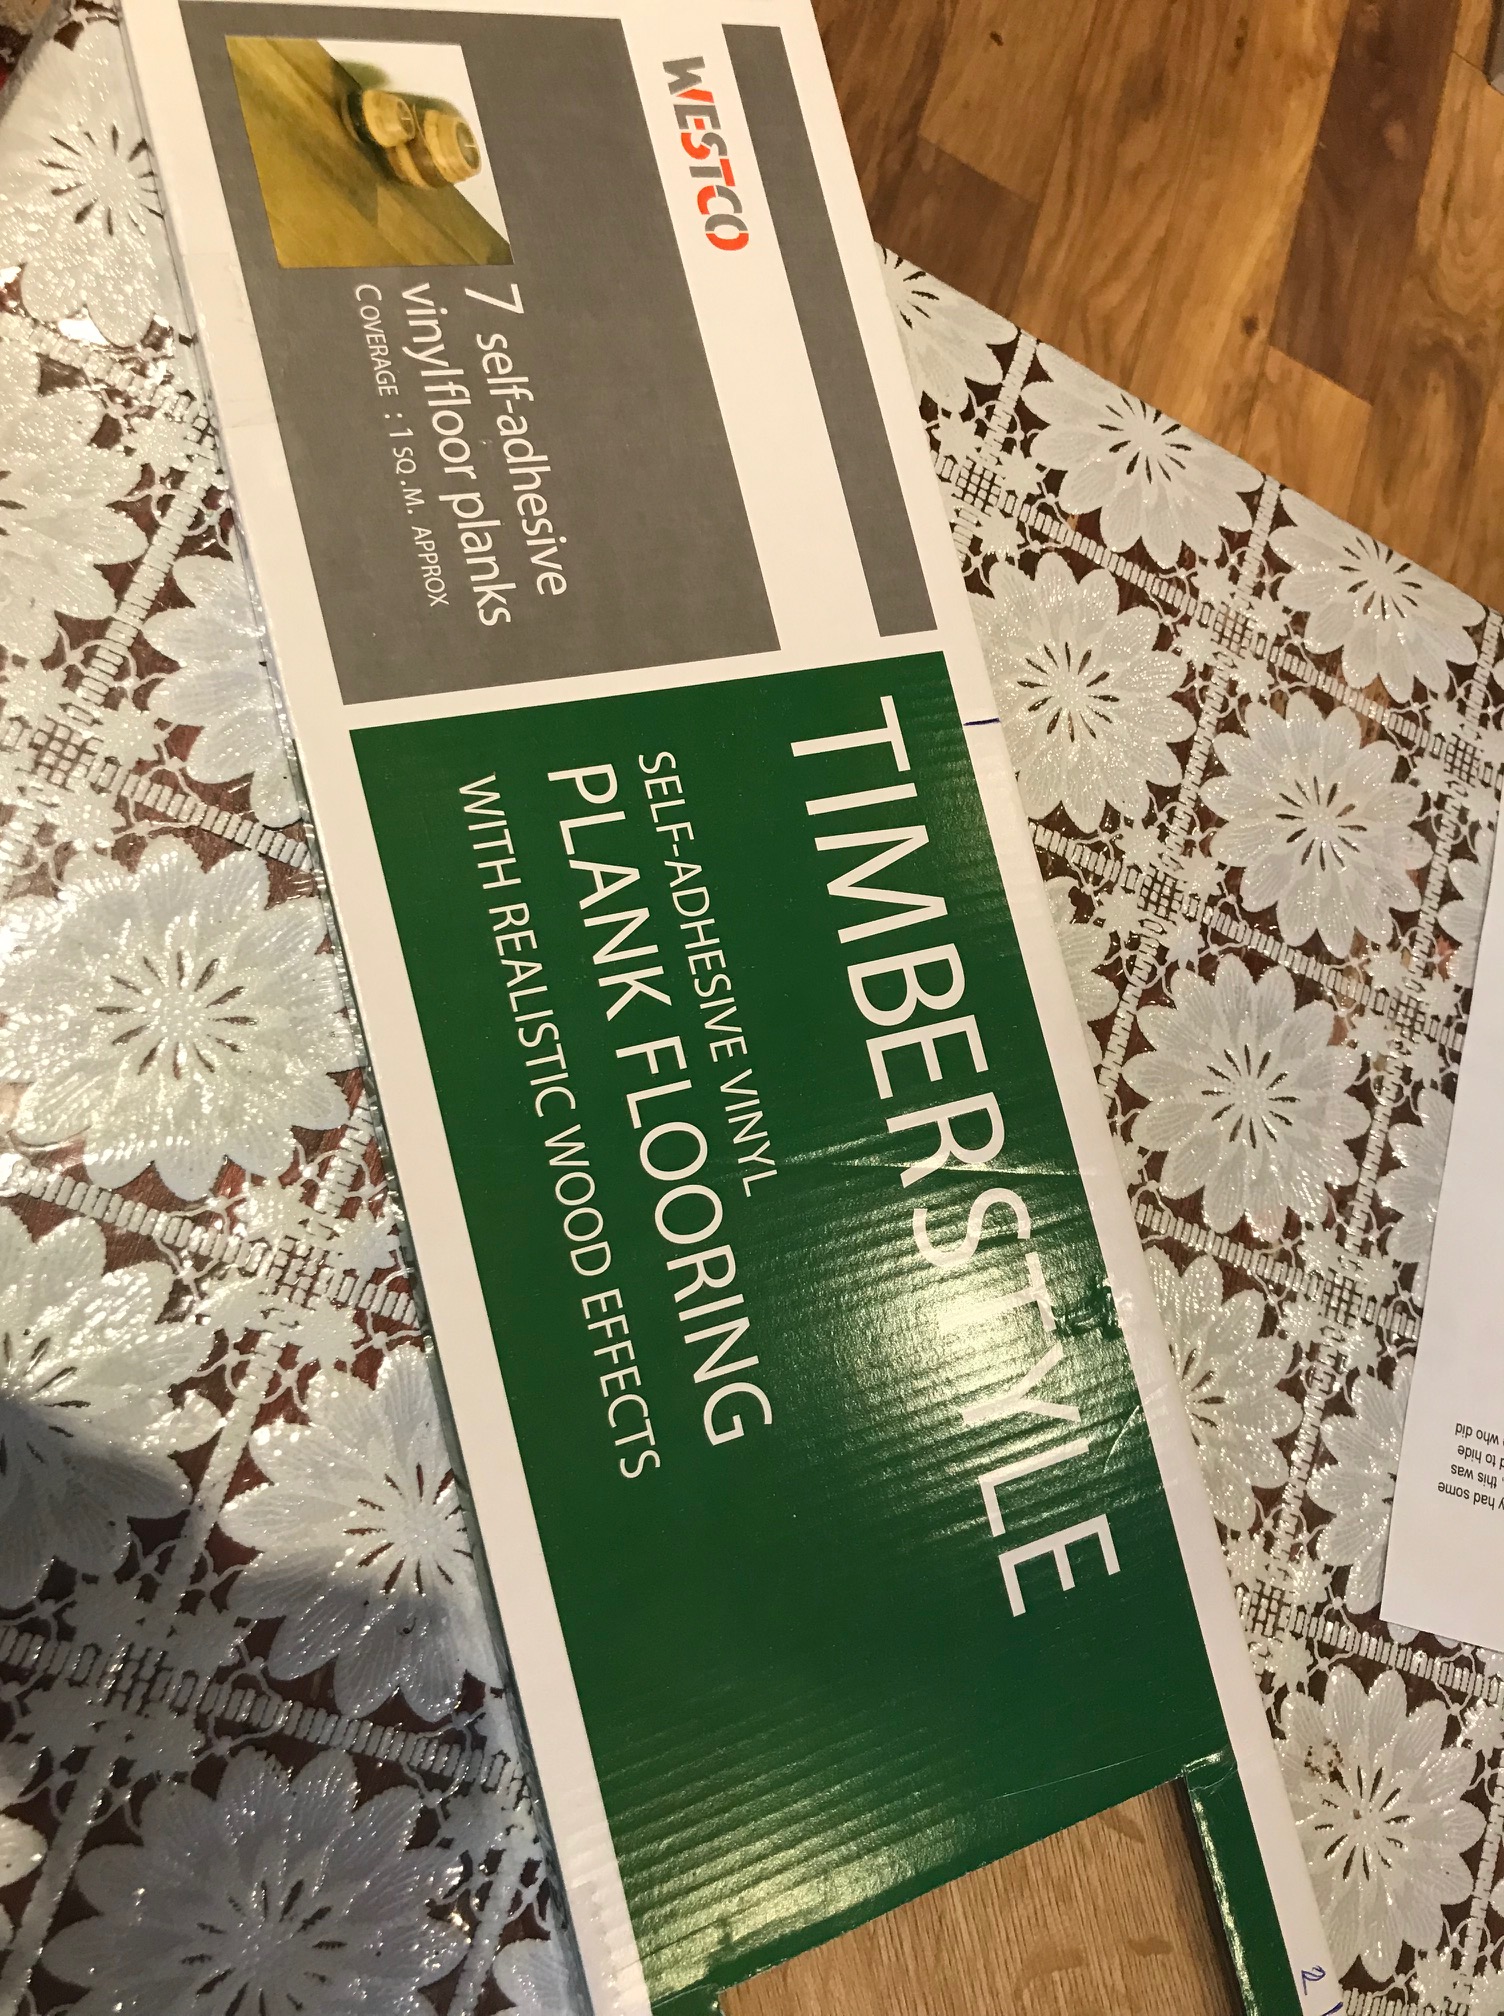
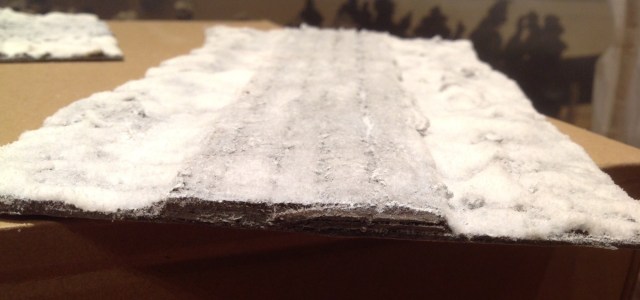
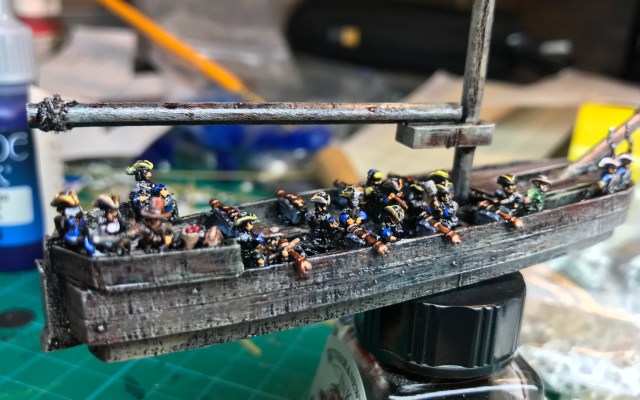
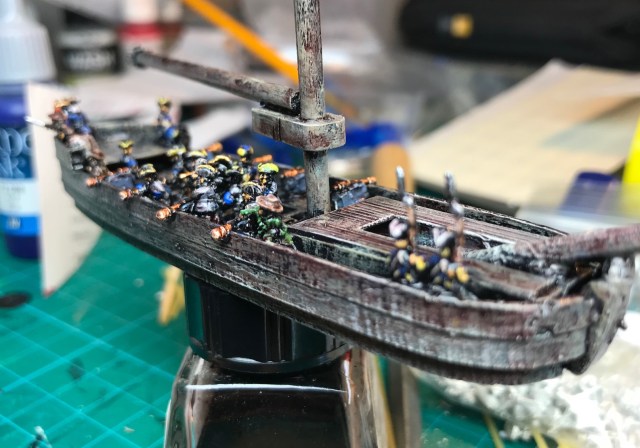
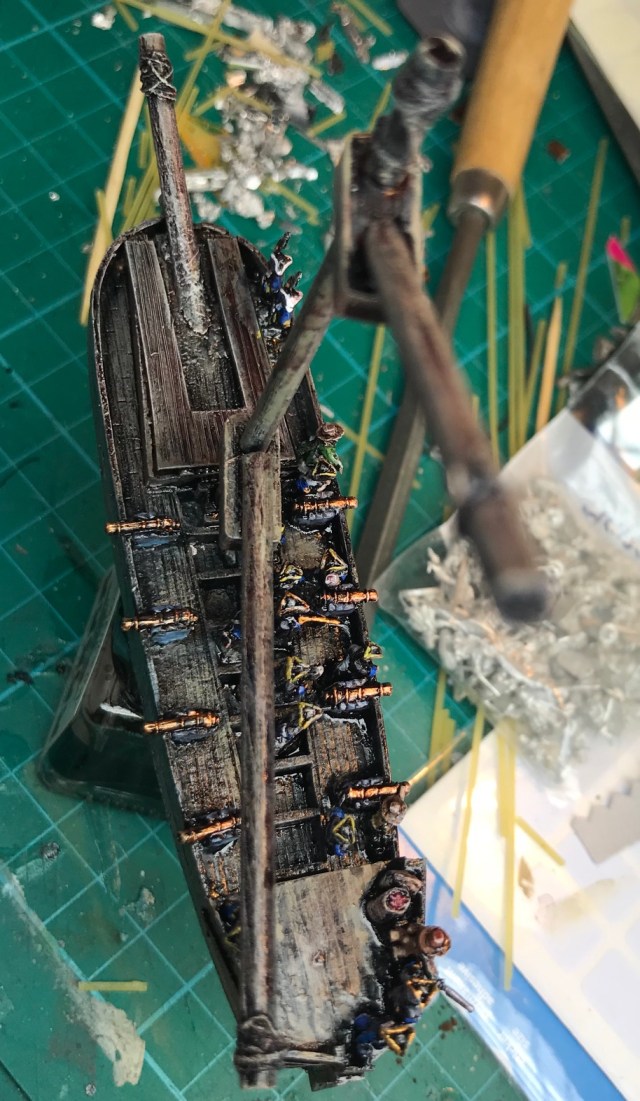
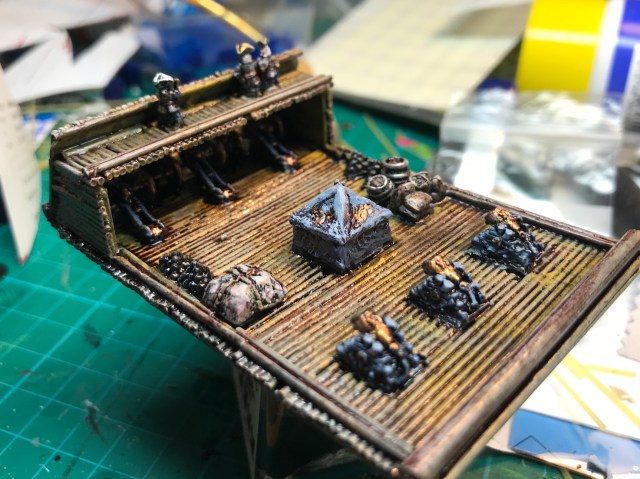
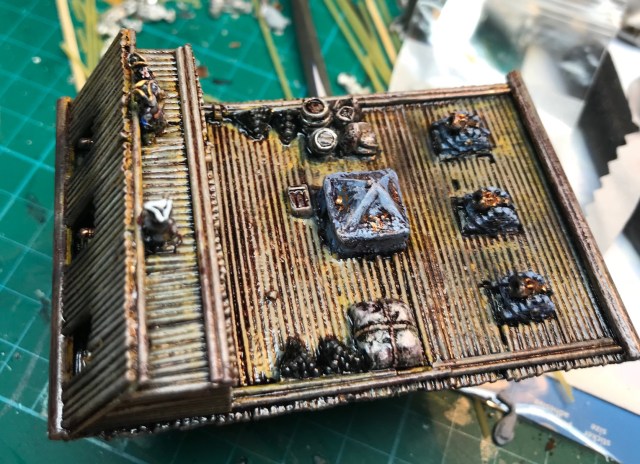
Due to work I currently spend about 2 nights every week in hotels – it is a little bit of a change but I thought I make the best of it.  I am already getting tired of hotel bars.  I have decided to do some painting on these evenings, if I can, and have set up a little “paint-rig!”. Not very high tech and based on three old VHS boxes, and the system is modular as you can add more boxes ;).

rig1
The three VHS Boxes
rig2.jpg
The set-up! – (1) basing box on the left. The dark brown base, the three tone for dry brushing on top of the base layer, pva/water mix for static grass, superglue for tufts, tufts and 2 colours of static grass in bags under the paints! (2) Colours needed for current paint project in the middle box (10 Vallejo bottles can easily be fitted) and (3) the brushes and miniatures (magnetic sheet in the bottom, magnetised washers for bases, primed grey and black washed, ready for painting).  Piece of plastic for the paint, a little bowl of water and some paper, and your favourite podcast or audiobook on the iPad.

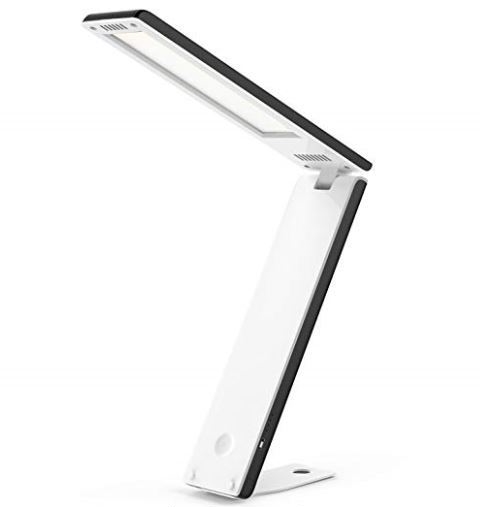
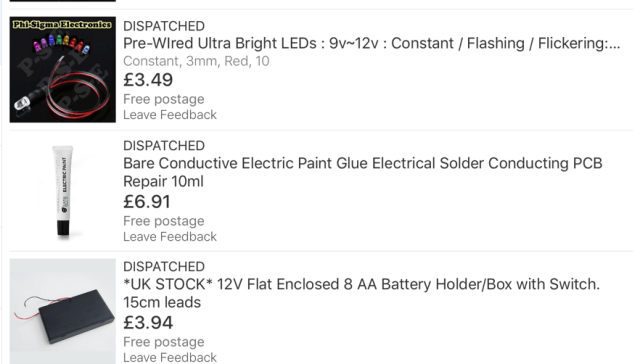
Light is a problem in hotel rooms and I have invested in a travel led lamp that will be a very welcome addition to the “rig!” but it is waiting for me in the house at the moment. I will get back to you with my verdict.

Capture

With regards to Podcast there is a new one out from the Wargames Soldiers and Strategy team that I enjoyed whilst painting yesterday, it is about participation games (link here). I wrote a blog a few weeks back that relates to this about engagement at wargames shows (link here).  Give it a go.

wss

Future Plans

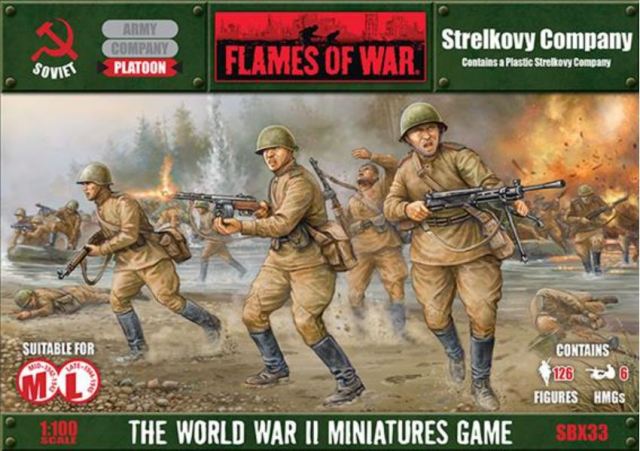
I also plan to do 4 No. platoons of normal Strelkovy/Russian Infantry and I won a new box of Battlefront plastic 15mm Russians for £18 including postage from Ebay (they retail at about £26).  I checked them out and I like them and think they will paint up nicely. I also looked at Plastic Soldiers company pack but decided to start with the Battlefront ones – perhaps I get a PSC box in the future.  Since then I found out that the Battlefront ones are bulkier than the PSC ones and may not work together that well (thanks Ignacy Kurowski).

plastsoviet

plastsoviet2

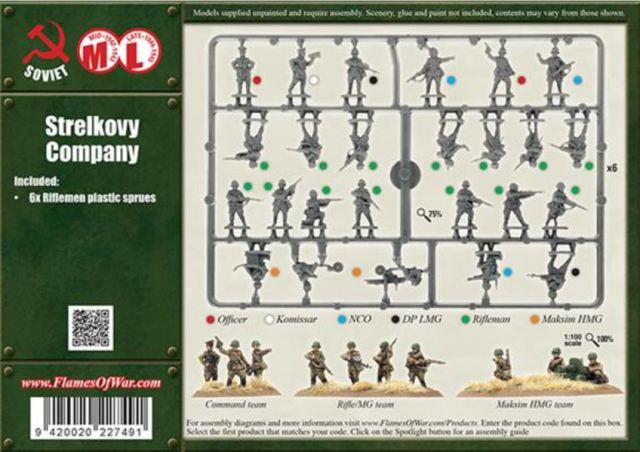
To do 4 No. Platoons I will need:

  • 4 No. Senior Leaders with Pistol (there are 6 No. in the pack)
  • 12 No. Junior Leaders with SMG (there are 12 No. in the pack).
  • 12. No. LMG with 2 crew (there are 12 LMG soldiers in the pack but I would need 12 more Russian riflemen. I have some lying around I think).
  • 84 Riflemen (there are 84 No. in the pack)

In addition it comes with 6 No. MMG. These should keep me busy for a while!, but I will not start it until my Greeks are done (another story) and I have enjoyed a few weeks of leave.

/ Hope that was of some interest!, back in a bit.

img_6250

Who needs a Tiger when you have Sisu? – Finnish Late Continuation War Career Ladder for What a Tanker

fin16

I should have pressed on with my GNW Horka Project but seem to have drifted off doing Finnish Continuation War tanks – I started doing some of these a very long time ago and base painted six tanks in 2016 but had done nothing since (see this old blog post).  But as always in this hobby we do come around to things one day, one day…

The reason for this sudden diversion is of course the excellent What a Tanker game from Too Fat Lardies (link here) – it is a fun game and plays quickly.  The Little One and I have set of German and a few Russian Tanks to play with and the two small games we had to date were a blast.  However, like with most things I do, a Nordic angle seems to motivate me more.  The Finnish tanker career is a limited one but there are some interesting Vehicles on offer – some are absolutely hopeless and others as good as they get – but tell me who needs a Tiger when you have Sisu?

I have the spent the last few days painting a large number of tanks relatively quickly (about 30 including some Russians).  I do not have the ability or time to do much more but I think overall the impressionistic approach with washes and mud effects gives a reasonable look. All of the models used are 15mm and from Zvezda apart from the T-28, StuGs, BT-42 and the Landsverk that are from Battlefront.  I have a few tanks I need to add to this post at a later date for completeness – the T28s and the T34/85.

fin17.jpg

What follows is a  Finnish Career list for the later part of the Continuation War and covers the major Karelian Offensive in 1944 (from June to September).  The career ladder can be used against a Soviet Opponent using the Soviet 1944 list from the What a Tanker rule book.  Of course there are mistakes in it because nothing is perfect – if you find any I welcome them.  I am an enthusiast with regards to this theatre not an expert.

I may extend this to include a few scenarios based on some of the actual encounters I have come across whilst reading about the offensive. However, this should be a good start,

Finnish Continuation War – A 1944 Finnish Career Ladder for What a Tanker (Karelian Offensive / Vyborg–Petrozavodsk Offensive, link to Wikipedia here)

At the start of the  Soviet offensive in June of 1944 the Finnish Army only had one Armour Division (Panssaridivisioona) that that was mainly equipped with the more or less obsolete T-26 tanks.  The only tanks able to take on the Soviet onslaught were a handful of captured T-34/76 and KV-1s in addition to 30 No. StuGs (StuG 40 G) that had been bought from Germany in 1943.  During the conflict further StuGs were delivered, and some more tanks captured including the T-34/85 and the ISU-152.  In addition, and just before the armistice, some Pz IV J were delivered.  It was a desperate time for the Finns and the young nation’s independence was yet again severely threatened by the eastern bear.

Notes on the list: If I found any mention that at least one tank of a type was used in combat, or ready to be put in service during this period I have made the tank available in the list. Stats for each vehicle can be found in the WaT rulebook apart from the BT-42 and the Landsverk that are provided below.  Most tanks are of Russian origin apart from the ones marked with an asterixis (*) that are German.

The list does not include Armoured Cars or Small tanks like the T-37 and T-38.  Also the Finns did capture both T-60 and T-70 tanks during the 1944 campaign but they were never put into service. If you want to run a more what-if campaign you could just assume any Sovietic tank were successfully captured and used.  Alternatively in a campaign setting you could have any Sovietic tank not destroyed but lost, i.e. where the crew has bailed out, being available as an option for the Finnish player in the next game on a roll of 5 or more (or whatever seem reasonable).  This would to some degree simulate what actually happened during this particular conflict due to the limited armoured resources of the Finns.  Anyway, here we go…

Level 1 – T-26 (any version, declared obsolete in July 1944), BT-42 (separate stats below, only used in the beginning of the offensive and as for the T-26 declared obsolete in July 1944.  It was not a very good piece of kit but the only “Finnish” vehicle of the period), T-28 (either type – go for the best one, also declared obsolete in July 1944), Landsverk L-62 (not really a tank or a assault gun, but perhaps a successful commander could start his career in one after using the AA gun against a tank successfully, or perhaps more adequate to use the word, miraculously. Again, added for Novelty and I did paint one!).

Level 2 – T-28E (see note with regards to obsolescence above)

Level 3 – T-34/76 M41-42, T-50, Pz IV J* (did not arrive until the end of August 1944 so not really in play during the main fighting of the offensive).

Level 4 – KV-1, KV-1a, StuG 40 G*

Level 5 –T34/85 M43 (7 captured vehicles were captured during the offensive and put into service during the offensive)

Level 6 – ISU-152 (only one of two captured vehicles during the offensive were used in combat).

Name / Armour / Strike / Features / From / Points

BT-42 Assault Gun  / 2 / 4 / None / None / 1943 / 6 points

Landsverk L-62 AA Gun / 2 / 3 / None / 1943 / 5 points


Level 1

T-26

fin9

BT-42

fin4

T-28 – Battlefront Miniatures (updated 02/07/18)

t28


Landsverk AA Gun L-62 – Battlefront Miniatures

fin3

Level 2

T-28E Battlefront Miniatures (it is the same tank as the T-28 but with another turret) (updated 02/07/18)

t28e


Level 3

T34 M41-42 Zvezda 1/100

fin10

T-50

There are currently no 15mm models for the T-50 and only one was used by the Finns during the period.

t-50

Pz IV J Zvezda 1/100

fin8.jpg

Level 4

KV-1 Zvezda 1/100

fin5

KV-1a Battlefront Miniatures (updated 02/07/18)

KV1s.jpg

StuG 40 G Battlefront Miniatures (Also called Sturmi)

fin15

Level 5

T34/85 Zvezda 1/100 (updated 02/07/18)

t34


Level 6

ISU-152 Zvezda 1/100

fin11fin12

fin13

/ Hope that was of some interest!


Horka 1708 update – Russian Infantry Completed

In the last posting (here) I set out what this blog posting would be about:

Blogpost 98, w.c 02-Apr-18. Some completed stuff for Horka 1708, this will be pictures of the completed Russian Infantry – the 64 bases required.  I just need to complete the basing and add flags to the final ones in the next few days. 

For once I seem to have managed to live up to at least my own expectations. I spent the first day of the Easter Break finalising the basing and then added some flags the following day – boring at hell at times but I figured it would be worth the effort. Here are some pictures (there is a listing the completed unit at the end of this posting).  All models are from Baccus (link here).

infantry4
Aerial shot of the Russian Infantry element of the Horka 1708 army, 64 bases and each base represents a battalion. There are another 91 bases of cavalry to add as well as some artillery and leaders.  Note that I have tried to avoid the lines being too straight as I think this adds a better feel of “movement and maneuvering”.  The units without standards/flags are grenadiers. 


infantry2
A few dudes with flags from Baccus and Tiny Tin Troops


infantry1
The majority of the Infantry have Green Coats with Red Cuffs, but there are some more colours on offers.


infantry3
A lot of the Russian had Karpus/Kartuz it is a type of hat worn by Swedish and Russian Soliders – you can find more on headgear on a blogposting by Boris Megorsky here 


I am doing the final cavalry elements and hope to be able to inspect them on the parade ground shortly before I get onto to finalising the Swedes.

prep4
Last cavalry unit drying following application of Windsor Newton Nutbrown Ink.


In other news I have ordered some stuff over the last few weeks for my Mutant 1984 project (1980s roleplaying in a world that most certainly was), I would like to give a little shout out for the miniatures from Space Vixens from Mars.  They regularly show up at shows and do their games and invite anyone along for a hilarious ride.   Here are a few of the models that I will be using for my Mutant 1984 project (taken from their webpage – link here).

I wanted to have a rock band with mutated Beetles but had to go with Plan B, the Mutated Beetles.  They are famous throughout the Pyri Commonwealth and I will try to find a Walrus head and do a headswap!

Here is their typical set list (length of the show tends to be dependent on the capacity of the steam powered electrical generator of the local venue).

Here comes the Burning Sun, For the Benefit of Mr. Rijn, Baby You Can Ride my Horse, Mutant on the Hill, Got to Get you into my brain, Happiness if a smoking blunderbuss, I am the Mutated Walrus, I want to hold your four hands, Mental Mystery Tour, Mean Mr. Ketchup, Roll Over Justin Beaver, September in the Acid Rain, Three cool mutated cats, Two of Me and finally (and I suppose you also grew tired of the list!) You’ve Got to Hide Your Mental Powers Away.

Anyway, hope that was of some interest.  We have also been playing some games over the Easter Break but those will be presented in some future blogs as per the plan presented last in the last blog.


playingsaga2.jpg
Saga in 6mm played over the Easter Weekend using the new Saga rules – good times were had!


If you are interested in following the blog you could like it on facebook (link here), become a follower on twitter (link here), or sign up here as a wordpress user or by leaving your e-mail.

/ See you

Russian Infantry units at Horka 1708

(now 100% completed)

Unit Type Ref Bases ToTSK Unit Models
Preobrazhenski Infantry R01 3 Large Unit 72
Semenovski Infantry R02 3 Large Unit 72
Ingermanlandski Infantry R03 3 Large Unit 72
Astrachanski Infantry R04 1 Small Unit 24
Moscowski Infantry R05 2 Normal Unit 48
Sibirski Infantry R06 2 Normal Unit 48
Pskovski Infantry R07 2 Normal Unit 48
Kazanski Infantry R08 2 Normal Unit 48
Vologodski Infantry R09 2 Normal Unit 48
Nizhegorodski Infantry R10 2 Normal Unit 48
Busch’s Grenadier Regiment Infantry R11 2 Normal Unit 48
Repnins Grenadier Regiment Infantry R12 2 Normal Unit 48
Kievski Infantry R13 3 Large Unit 72
Narvski Infantry R14 3 Large Unit 72
Schlüsselburgski Infantry R15 2 Normal Unit 48
Novgorodski Infantry R16 2 Normal Unit 48
Butyrski Infantry R17 2 Normal Unit 48
Rostovski Infantry R18 2 Normal Unit 48
du Bois’ Grenadier Regiment Infantry R19 2 Normal Unit 48
Rentzel’s Regiment Infantry R20 2 Normal Unit 48
Lefort’s Regiment Infantry R21 2 Normal Unit 48
Kargopolski Infantry R22 2 Normal Unit 48
Koporski Infantry R23 2 Normal Unit 48
Tobolski Infantry R24 2 Normal Unit 48
Belgorodski Infantry R25 2 Normal Unit 48
Luzhski Infantry R26 2 Normal Unit 48
Olonetzski Infantry R27 2 Normal Unit 48
Ryazanski Infantry R28 2 Normal Unit 48
Vjatski Infantry R29 2 Normal Unit 48
Chernigovski Infantry R30 2 Normal Unit 48


Painted Cabin and Snowmobiles – Mutant 1984

As stated last time I am bulk finishing stuff for Horka so not much to show with regards to progress overall.  I realised I am approaching the 100th blog posting and I thought I would make a little bit of a special going back to Saga and do something with regards to the new rules.


IMG_4368.JPG
Basing in progress, followed by drybrushing, final detailing, flags and static grass. Getting there!


This is the plan, for the next 4 postings.

Blogpost 98, w.c 02-Apr-18. Some completed stuff for Horka 1708, this will be pictures of the completed Russian Infantry – the 64 bases required.  I just need to complete the basing and add flags to the final ones in the next few days. 

Blogpost 99, w.c. 09-Apr-18. – Gaslands in Microscale/6mm, this will have some shots from some games we have played and my impression of doing it with 50% measures.

Blogpost 100, w.c. 16-Apr-18. – Special about Saga 2 in 6mm, this will be some reflections, changes to rules and pictures from Gameplay with the new rules over the Easter Period.

Blogpost 101, w.c. 23-Apr-18. –  My take on Salute on the 14th.  Looking forward to see Michael Leck’s Stäket 1719 and Too Fat Lardies Demo game of What a Tanker!, to mention a few things. I also have a few things to pick up (some more Mutant 1984 stuff).

A little bit of progress on the Mutant 1984 stuff

I did put some paint on the Cabin I built and added some snow, I still have to do the doors and windows and a final fix of the snow cover but I think this will give an idea on how it will look in the end.  There is a note on how I built the cabin from the Blog post two weeks ago (link here).  (More on this overall project here)

logsnow7.jpg

logsnow5.jpg

I also finished some Snowmobiles I will use for the Mutant 1984 project for a little scenario involving a motorised chase scene.  These were bases on some matchbox models I found whilst looking for some stuff for Gaslands – they are a different scale than the normal Matchbox stuff and work reasonably well with 28mm.  I used some Warlord Plastic Americans that I cut up a little bit (e.g. legs and hands) that allowed me to create something resembling drivers for these cool vehicles.


logsnow3
Got two of these.  They are called the “Snow Hopper”. I liked the look of them and they had some detail that could be utilised in a repaint.
logsnow4
Add some Plastic Americans (later I added some filler here and there) and we were good to go.  Later I skipped the wind screen as this was in blue plastic and I liked the look without. I guess I should have got heads with googles but I did not have any. And if you ask about the thin clothing I will pretend you did not.
logsnow2
“I just light my Cigar then we get going mate!”
logsnow1
Simple, but I like the way they turned out and a good deal at £1 each. Yes they have to stretch a little bit to be able to Steer but I think the fit is close enough.  Yes I can also see the blue foam, but it will be dealt with!


Hope that was of some interest.

/ Take care


Pushing forward towards Moscow and Nekropolis

Some progress on the Towards Moscow Trilogy Project with some Swedish Horse done for Horka 1708 and some further progress on the Mutant 1984 project.

Swedish Horse for the Horka 1708 Battle

As I have promised myself I finally did another push on the Towards Moscow project and finalised another batch of Swedish cavalry (30 bases). More background on this project here.  Most facts from the book “The Great Northern War 1700-1721 – Colours and Uniforms”, by Lars-Eric Höglund and Åke Sallnäs.  That concludes the Swedish cavalry needed for the Project (a total of 66) – next I will “attack” the Swedish Infantry.

Dückers Dragonregemente

duckersdragoons.jpg
Dückers Dragonregemente, also known as the Preussiska (Prussian) dragonregemente. Colonel/Överste Karl Gustav Dücker. Raised in 1704, recruits from Bremen, Pomerania, Livland and Courland. 1000 men at the Battle of Horka. Captured at Poltava 1709  and not raised again. 

Gyllenstierna Dragonregemente

gyllenstiernadragoons.jpg
Gyllenstiernas Dragoonregemente formed of six companies (750 man) in 1707 when the Gortz regiment was divided into two smaller regiments. Captured at Poltava and never raised again.

Stenbocks Dragonregemente

HielmStenbockDragoons.jpg
Stenbocks Dragonregemente, enlisted regiment formed by Magnus Stenbock in 1704 through enlistments.  Colonel for the Horka Battle is N. Hielm.  Captured at Poltava and never raised again. 1000 men (initially 600 but increased in size in 1707).

Meierfelts Dragonregemente

meierfeltdragoons.jpg
Meierfelts Dragonregemente, enlisted regiment since 1703. Colonel Meierfeldt, 1250 man since 1707, initially 600 men.  Captured at Poltava and never raised again.

Skånska Ståndsdragonregementet

skanskastandsdragoner.jpg
Skånska Ståndsdragonregementet was a temporary regiment that was raised from the households from the clergy, persons or rank and the well situated in Southern Sweden. The Colonel of the Regiment was the Prince of Würtemberg, and 1,250 man strong at the time of the Horka Battle. Captured after Poltava.  Raised again in 1712 and then broken up in 1721.

Taube Dragonregemente

taubedragoons
Taubes Dragonregemente (also known as the Schlesiska Dragonregementet). enlisted regiment with recruits from Bremen, Pomerania, Livland and Courland.  Established in 1704, captured at Poltava and was not raised again.  Originally 600 but 1000 man strong at the time of the Battle. Colonel G.A. Taube.


Upplands (Livregementet och Östgöta) Tremänningsregemente till Häst

upplandstremanningar.jpg
Temporary cavalry regiment raised in 1700 from regions in central Sweden. Colonel at the time C.G.Kruse and 834 man strong.  Captured at Poltava and reestablished in 1712.

Adelsfanan in Sweden and Finland

Adelsfanan.jpg
This was a very old unit at the time of the Great Northern War and had its origins from the feudal times when the nobility needed to provides Knights in service of the crown. Adelsfanan can be translated as the Cavalry Corps of the Nobility and all officers were of Noble birth. The regiment was 600 man strong at the time and the Colonel was A. Ramsvärd.


Nekropolis Bunker Guard Unit and Scientists

I also managed to get some time to do some of the miniatures I need for the Mutant 1984 project (see here).  This time some soldiers for the bunker.  Basic models are Warlord American Infantry Plastics (see here – although I got a very good deal from eBay).  These models require some assembly that is great for this project as I wanted to do some headswaps and specials – I used Tamya Extra thin cement for this (apart from the metal bits with a glued with gel superglue) and it works very well (here is a review about it).

17273-300087038.jpg
This product made me drop the hate in my previous love hate relationship to the hard plastic miniature stuff.


It also fills my bit box with some cool stuff that can be used for other things (bazookas, backpacks, smgs, pistols, rifles, etc).

The only direct description we have from the original scenario book are that the uniforms were green and the trousers have red stripes.  Did these in a sitting – wargames standard I suppose and happy overall.  I think I will make the Bunker floor grey concrete but not sure yet – so maybe I will change the base colour later.  (Note to self: Uniform bronze green with german field grey).

soldiers4.jpg
Oberstløjtnant Hintz and  Major Rantzau (I used two of the Scientist heads from Crooked dice – see here).


soldiers2.jpg
Another Scientist head was used for Sekondløjtnant Tamyia Sand, and for the Baboon soldiers head I do not remember were I got it from.


soldiers1.jpg
I glued some extra legs on a guy and added a rams head to another (again some old miniature I had lying around got brutalised) – this is Chefsergent Niels Laudrups team.


soldiers3.jpg
Some more soldiers, I think my favourite is the guy with four arms and two rifles.

I also painted the 4 scientists, these are from Crooked dice and are fantastic models.

scientists.jpg
You can find the first 3 models here and the other one here.

I also update the write-up page (here) with this one as well for the soldiers in the border cabin (after snow basing them).

28458570_1928918987178174_1389830826_n

/ That was all, until next take care.


Boxing up the Winter War for a while

Second blog update today, as I was a week behind due to various reasons…

I made a New Year resolution of getting my Winter War progressed and I think I have done so during January and February (if you go back and check some of the previous blogs). However it is time to box it up for now and progress with the hobby day job of getting ready for Joy of Six this year – I have no idea about my current progress on this project as I do some stuff on it every now and then. I will spend the next few weeks getting this back on track – I suspect that I will need to paint a fair few Swedish infantry units.  So the Winter war gets packed away …. (links to the relevant blog entries forming part of the winter war stuff at the end of this blog posting).

….and the 6mm Great Northern War is back in focus.

However before the snow melts let us have a look at some of the Winter War stuff I have been working on since the last Winter War blog update 2 weeks ago.  First some road tiles and then a log fire.


Doing Winter Roads

I wanted to make some wintery roads and got myself some self-adhesive vinyl planks.  I have used these before and they come in 3 foot lengths. At these lengths they are fragile and can easily snap but it allows the creation of longer pieces – which I like. If I am not careful enough I have to make a new one! – no problem.  You could make shorter lengths if you are worried about handling and storing them.

IMG_4181.JPG
About a tenner from Wickes – 7 planks.

The width of the Raate road was 5m (so in 15mm the same as 50mm).  The planks are 150mm so I used the whole plank width to be able to model the cleared sides of the road as well as the elevated road surface in the middle. I did this by cutting 50mm wide lengths from a plank and sticking them on the top of the base plank I was doing.

IMG_4176
Like this!

Then I mixed some brown emulsion, caulk (decorators  filler, or alternatively an acrylic sealant), bird sand until I get a Nutella like consistency!

IMG_4170.JPG

Then I covered the roads with the brown mix, I added some extra sand on the sides and added some tyre tracks with a kebab stick.

IMG_4133.JPG

Then I let it dry for a an evening and then shook of any excess sand and trimmed the sides to make them less straight.

IMG_4163.JPG

Then I drybrushed the road sections with white acrylic hobby paint.

IMG_4189.JPG

Then I added (on the sides of the road only) the snow flock mixed with mod podge (matt) or PVA glue and a dash of white paint (acrylic) – I think I prefer the mod podge but pva glue is more affordable.  On the top of the road surface I use mod podge mixed 1 to 2.5 with Water (you could use PVA instead of Mod Podge) and sprinkle some snow flock over it (I did not include any acrylic paint in the mix that went of the road).  Let it dry and apply some Varnish on top (matte variety).

IMG_4132


IMG_4131
Looks pretty good to me!


Log fire prototype

I wanted some fires on the table for a scenario where the column of Sovietic vehicles have stopped and the Sovietic soldiers have dug in and Finns attack at dawn while it is still dark.  I had seen some LEDs being used for fire/smoke markers in the past (using the round LED flickering candles).

I went on eBay and ordered a set of red constant light LED 3mm 9v-12v (I got ten for £3.99 including postage)  and the same but orange flickering (random flashing).  I also got a tube of bare conductive electric paint glue (to avoid needing to solder the wire) for £6.91 and a battery holder with a switch for £3.94.

IMG_4178.PNG

Then I connected up 2 of the orange and one of the red LEDs with the battery box (adding 8 1.5V batteries of course).  If you do this, be careful and do not leave it unattended until you are sure it is working as sparks can fly and cause devastation even at these low voltages. Anyway here is how it looks like.

Then I put the construct and some of the cabling on a base and glued it down with hot glue, covered it up with non-drying clay, put some stones around the fire, a dollop of clear silicone on top and pulled it up a little bit to look like flames.

IMG_4169.JPG
Halfway through the process!


Here is the finished article.

I really enjoyed doing this, a few notes:

  • Unless you have a permanent setting where the cabling and LED are in you board there will be an elevation around the fire – I suspect no one would put a fire on top of a little hill surrounded by enemies, if they would make a fire at all!  If I develop this further I may look at incorporating this into the roads with fires on the sides (in the ditches) or having small hills on the sides with the fires at the start of the slopes.
  • There are some lower voltage LED that would required smaller flat batteries, I may look into this instead.
  • It was a fun little diversion.

/Until next

Winter war related blog postings to date

Christmas, TMT Progress and Talvisota / Winter War Chain of Command – Part 1 The Soviet Platoon

Year End and Talvisota / Winter War Chain of Command – Part 2 The Finnish Platoon

Markers for Winter War Chain of Command, Marching Colours and Henry Hyde

The Winter War effort continues – Making tall pine trees

More Markers for Chain of Command and Command & Colors Romans

Vulgar Display of Power – Just a little bit of progress on the Winter War Stuff

IMG_4174.JPG

Vulgar Display of Power – Just a little bit of progress on the Winter War Stuff

cas2

Work is taking more than its fair share of my time at the moment, but it happens to most of us.  However, I have had some time to get some things done over the last week or so, this is just a summary of that.  As always, I do hope it is of some interest.

  • Chain of Command – dice, casualty markers and suppression markers
  • Gaslands – finally a game

Finnish and Sovietic dice

I am currently working on some terrain and markers for winter war Chain of Command.  I wanted to have some dedicated Finnish and Sovietic dice so looked around and found a fair few Sovietic options but only one Finnish (very nice ones, sold by Dice of War in Australia, see here). These are not specific ones needed for the game, just the type where the 6 is replaced by a unit or a country symbol and could therefore be used for any game that uses D6s. I wanted to have blue ones for the Finns and Red ones for the Soviets, and thought I could perhaps do some myself.  I found some 16mm blank dice on ebay and got myself a few different colours (these are from China so will take a week or two to arrive!, at least if you live in the UK).

Capture.JPG

I then ordered some labels/stickers from Amazon (13mm).

Capture2.JPG

From Label Planets website (link here) you can get a word template for this label set and buy bigger quantities as well.  From this you can design your own labels.

I wanted to have 1 to 5 in the same font as used for the Chain of Command rules.  This font is called Vulgar Display of Power (download it here).  In addition I wanted the hammer and sickle for the Soviets and the hat emblem that the normal enlisted men had for the Finns, replacing number 6.


vulgardisplayofpower.gif

Here is are the files with the sheet I made for the Soviets (Russian Dice) and sheet for the Finns (Finnish Dice), these are word files.  You can change these to add your own colours and symbols.

I have to admit that I had some problem with the laser printer I was using in aligning the sheet so that it printed out correctly (I wasted three sheets but luckily managed to get two done, which was all I needed)- the final result is not perfect and if you have trouble I can only say I am sorry.

This is how they turned out.

dice.jpg
I will make some yellow Sovietic ones and some white for Finns for Command Dice rolls.

Dead Soviets

One of the striking things with the Winter War are all the pictures of dead Sovietic soldiers especially in the fighting North of Lake Ladoga. Behind my romanticised view of the war and Finnish bias, I am not immune to the hell those Sovietic soldiers had to go through trapped on those wintery stretches of roads, with inadequate supplies of just about everything.  Go to the Wikipedia page and read about the Battle of Suomussalmi (link here) and check the losses on both sides – 50% losses for the Soviets and less than 10% for the Finns.

To create a reminder of this I did a few terrain features with dead Sovietic soldiers (I keep on using this term as the soldiers in the Red army were not only of Russian nationality).  They were based on Peter Pig casualty markers (based on anything with a great coat and headswaps to pointy Russian hats and early war helmets).


DUi9V2oXcAE7eVA.jpg
Some Casualties, clay, stones and twigs from the garden


…and here with some painting, winterization and blood (sorry!).

cas1cas2cas3cas4

Suppression Markers

These are based on the concept of snow flying around as bullets hit the area.  I used something called Universal Cooker Hood Filter to do the effect. It is like cotton but much stronger, I attached a part of it with superglue and when dry I dragged it out and trimmed it. I also added a little bit of snow flock carefully on the cloud.  I think they do the job well enough.


sup1
Ivan with his LMG is under fire and splinters are flying from the tree stump
sup2
A simpler construction
sup3
Snow splashing around a stone
sup4
The full collection

Explosion Markers

I have seen explosions markers made out of clump foliage and wanted to make some for the winter war table as it will contrasts nicely with the snowy background, and also have some practical game purpose.  So I searched around the net for some ideas and found a few different options.

explosion.jpg
Ivan successfully rolled 12 saving throws

I made my set of  explosion markers by following the recipe by the Terrain Tutor (link here).  Always excellent, this time he blew me away again!

capture3.JPG
Terrain Tutor – check him out! Excellent.


I also had a game of Gaslands with my micro cars! (using 50% templates), and it was great, but more on that another time.

gas1gas2

/ All the best (yes I know I should be doing GNW!)

Keeping Afloat – Great Northern War support for Düna 1701

front

I am a secret fan of the Saxon army during the Great Northern War because they seem to live up perfectly to that idiom of “Live to fight another day”.  They successfully avoided a final decisive confrontation with the Swedes for more than 5 years until the Battle of Fraustadt in 1706 (see here).  But this may not have led to a peace treaty unless the King (Charles XII, or Karl XII as I prefer to call him), as he did, marched into Saxony and more or less forced the Saxons to the negotiation table.   The Saxon army kept its arrogance towards the Swedes during this period and famously the Senior Officers at  the Battle of Klissow 1702 (see here) asked the servants to keep Lunch warm as they set out to “crush” the Swedes!. One of the key early confrontations between the Saxons and the Swedes was at the Crossing of the Düna in 1701 (here is the Wikipedia page about the battle).

In a recent blog entry I mentioned this battle when discussing the Twilight of the Sun King’s Second scenario book (see more here).  As I said then, I have played versions of this battle with some other rules in the past and have treated the supporting artillery from Riga and the gun boat as off board pieces.

In addition I used a big base and placed some artillery bases on to represent a floating gun battery, but it did not look very impressive.  I want to do a refight of this with the Twilight rules but thought it appropriate to make a more inspirational floating gun battery and to pimp up the 10mm boat I got at SELWG a few weeks back (see here).  Here is a short note on how I made these. These are 6mm.

The Gun Boat

For pimping up the Gun boat I used some of the Baccus field guns from their early 18th century range (link here) but I cut them down to create the look of guns you would have on a ship as opposed to being dragged around the countryside in your normal artillery train.  I was going to add small wheels but felt that it was not needed.  I also added some Baccus Artillery crew and a few normal officers and musketeers.  I had a few Microworld duelists and a model from their peasant rabble to indicate some civilians on the deck as well (see here).  I thought a sack of apples on the deck from the Perfect Six range would seal the deal (see here).  I arranged them to show activity on one side only, bombarding the Saxons in their entrenchments.

Apparently it was a 16 gun sloop in reality instead of this 8 gun vessel that probably makes any person “navally” astute turn their stomach inside out – but it works for me.

IMG_3910IMG_3911

I then base coated it and painted it up, I did it quickly and I may go over it again when I have time and I also need to add some sails and perhaps a Swedish flag or two – but that is for another time.

ship1ship2ship3ship4

Floating Gun Battery

I had seen the following drawing (taken form the Wikipedia page on the crossing, link above) of a floating Gun Battery. However but this kind of model would create a very big footprint, Remember the frontage of a battalion is 60mm (with a front row of 12 No. 6mm, not 150 or so men), the way I have based.

Float_batter.jpg

In my searches also saw a the nice floating mortar battery on the eminent League of Augsburg page (see more about this  here),

big shot.jpg

My design is some kind of halfway house between these two designs – with both mortars and field guns and tents as per the original drawing, but shamelessly I stole the viewing platform idea from the League and made my platform roughly the same size.

I used a credit card sized base (a Health Lottery Card), and then some pieces from another card to build the front structure and viewing platform. Glued on three Baccus Mortars in the back, a Baccus tent in the middle (for the gun powder, being protected in case of rain), some cannon ball stacks, and some other stuff from perfect six – barrels and sacks. I then put 3 Baccus field guns in the front and cladded the whole thing with my special spaghetti that looks pretty good as 6mm timber [I have used this material for a number of applications, including snake rail fencing (see here), bridges (see here) and a fort (see here)].  However remember that most spaghetti stuff you find in your local Tesco will not work for 6mm – however pasta called Angel hair or Cappelini seems to be the ones to use.  I bought Garofalo Capellini from Amazon in the UK – about £8 for four packs. I kept one for modelling and the rest went to normal consumption. It is fragile, but if you use it like cladding it will work and it does do a recent impression of being timber.  I glue it on with super glue and trim it afterwards,  I also glued on some Baccus officers and a artillery man on the viewing platform and then cladded this with spaghetti as well.

IMG_3909IMG_3908

Card.JPG

It painted up nicely and at some point I need to add some more artillery crew to make the base more dynamic, I like the front and the soot, form the firing, around the timber.

front 3frontfront2front4

Really happy with these and it will be good to see them in action soon.  Will need to do some work on a Pontoon bridge and some mobile defenses for the Swedes – as for the miniatures they are proudly standing painted in storage waiting for the gear to be sorted.

I said I was going to do some comparison shots between 6mm Post-Apocalyptic cars, but I am afraid it will be for the blog entry next week.

/ Hope that was of some interest, All the best

Dreadballs of Fire and waiting for Command and Colors Tricorne

Sometimes the work-life balance does not swing favourably in terms of time left to do hobby related activities. This week, and I suspect the next week, will be one of those times.

The little time I did have this week was spent progressing on the Rats for Dreadball and they are now ready for some detailing. When they are done it will give a full Season One painted set-up with 4 teams (including the a full complement of MVPs).  Not great paint jobs but far better than the base grey colour of the plastic and I managed to do it in about 3 weeks of limited hobby time.  The fact that the Little One is into it as well makes it more motivational to crack on with.

rats3.jpg

The Little One and I had a few good games of Dreadball using two human teams to get to grips of the rules – and we really like it.  I really recommend the series of videos by Andy2D6 on YouTube, the first one “How To Play DreadBall – Part One: The Board” can be found here.

Capture.JPG
Very straightforward Tutorials on the Basic Game of Dreadball by Andy2D6

The following are a few shots from the games we played.  The Little ones blue guys was a bonus we got when we bought another base set of eBay – to add a few more Season 2 teams cheaply.  As per usual he rolled high and I rolled low, his Jacks (all-rounders) were as good slammers as my Guards (heavy hitters) and his ability to use the Strikers was very inspirational.  Nevertheless after a few games we got a nice flow and we really enjoy playing it (did I say we like it?).


Since I prefer my hat Tricorne I have been looking forward to the latest version of the Command and Colors rules (e.g. Memoirs 44 and Command and Colors Ancients) called Tricorne Command and Colors – The American Revolution.  I got my copy from Boardgameguru (see here) and I think that is the best deal currently on the net (or at least that I found browsing around).   I have to admit that I felt that the price was a little bit steep but I had already made my mind up and I suspect the first print run will sell out fast and then it will cost even more to get hold of a copy later.

tricorne command and colors


The rules booklet is downloadable here.   The following scenarios are covered:

scenarios
Extract from the Rules and Scenario Booklet

The following units are included (as the classical wooden blocks) to play the scenarios and I am tempted to do something with it in 6mm – at some point in the future. Baccus make all the miniatures needed (link to their AWI range here) and I think it would look absolutely fantastic.

units
Extract from the Rules and Scenario Booklet

/ I hope it will be like a Carlsberg – Worth waiting for!  Incidentally I am also waiting for some magnets I have ordered to push on with the Rommel bases (see previous post here).  Have a good week!


DreadBall Season One – Old shiny never rusts

Slow week, again. But nonetheless some progress…

I did put the final touches on the two basic DreadBall teams this weekend, I am now ready for Season One! The season was originally “aired” in 2014 or something like that.  I am looking forward to this! If you know nothing about DreadBall then check it out here.  However if you are late to it, there are other variants and I believe a second edition in the making.  Having had a little look this weekend, the second hand market on eBay is favourable if you want to pick up some of the older stuff.

I promised the Little One a game but he fell asleep long before I had finished splashing paint – maybe we will get another opportunity this coming week! I did put them on the board to see how they would look.  Well what can I say it is me doing 28mm so I feel like the object of that famous Sting/Police song about the possessive lover – Every Breath you Take (slightly modified I must admit).

Every brushstroke you make and every detail you overpaint
Every mold line mistake, every inky stain, I’ll be watching you
Every layer you add, every wash you make, I’ll be watching you

I’ll be watching you!

I am very happy though and the Little One will love thrashing me on the field!


Droid.jpg
I wanted the RefBot to look a little bit C3POish!  It is a mean looking lady!


However, as always, when I do get the finger out and finish an old project I tend to get some new inspiration so I got about 6 additional MVPs from eBay – they are mercenary veteran players that can be used to enhance a team.  The cosmic order will be restored on the lead, or in this case the plastic, mountain.  Old Shiny never rusts!

I suspect I will get the Ratmen (Veer-Myn) and the Dwarves (Forgefathers) team as well in a not too distant future – but I have decided I would do so as a reward when the MVPs are home and dry following the paint job (Sounds far too disciplined, doesn’t it?).  As stated already,  I am looking forward to this and the Better One did say that she would like me to do more sports – so here we go!

I also did some progress on my 6mm SciFi project – the Blue and the Green army.   We intend to give the Future War Commander rules a go using these.

Progress.jpg

Next week I hope to start the Rommel bases (as discussed last time here, I got the miniatures this week but wanted to get some things off the workbench before getting into it. The 3mm tanks are SMALL!, but I suppose they should be) and also do some aircraft for the Sci-Fi project as I have some nice models I got before the holiday.  I want each army to have recon forces, infantry, tanks, artillery and air forces to allow combined arms type of games.

And yes I need to get started with this years large GNW project at some point – but not yet!…Not yet! (as Juba said in the Gladiator!).


/ Take Care