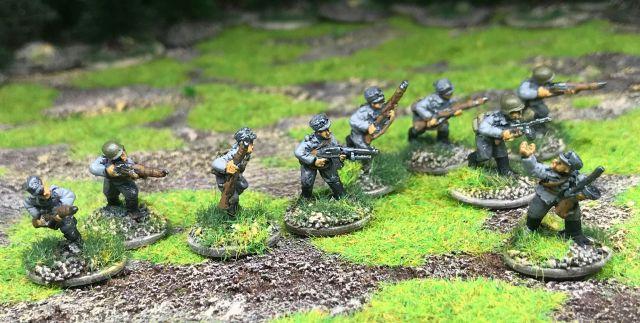
I have bought all of the Too Fat Lardies Pint sized campaigns for Chain of Command to date, but I have to admit of not yet played any of them. I have used Chain of Command for some very fun Games in a Finno-Russian Winter war setting and for the Continuation war period. I am currently struggling with time to do any bigger gaming ventures apart from some gaming with the Little One as I spend more time than I would like away from home due to work. He had up to recently not been to interested in Chain of Command but now, out of the famous blue, he would like to do some Normandy actions, so I thought the first campaign Richard Clarke did could work well (and I have to admit I fancied painting some Americans and Germans).
I really enjoy the format of the “Pint Sized” campaign books and you can find this one and others on the Too Fat Lardies webpage (link here), you would need the Chain of Command Rules as well as At the Sharp End campaign supplement for the full experience – but I dare say you could use this with any WW2 plutoon based rules and have fun they are great products. The campaign covers the advance of the US 175th Infantry Regiment and their struggles in linking the Omaha and Utah beaches.
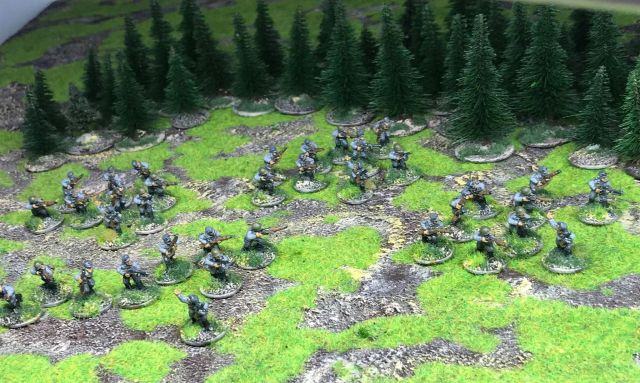
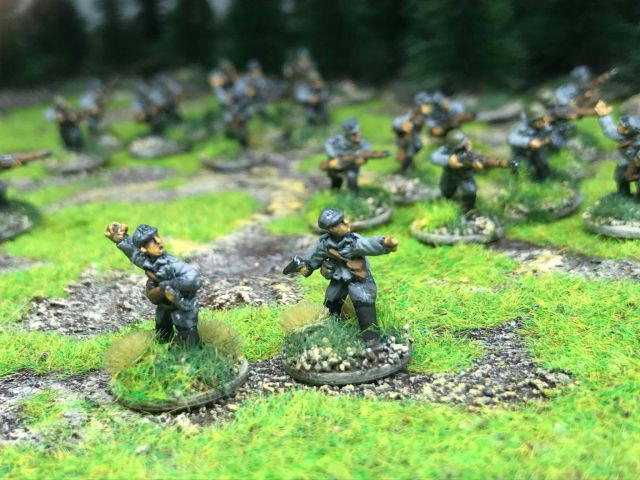
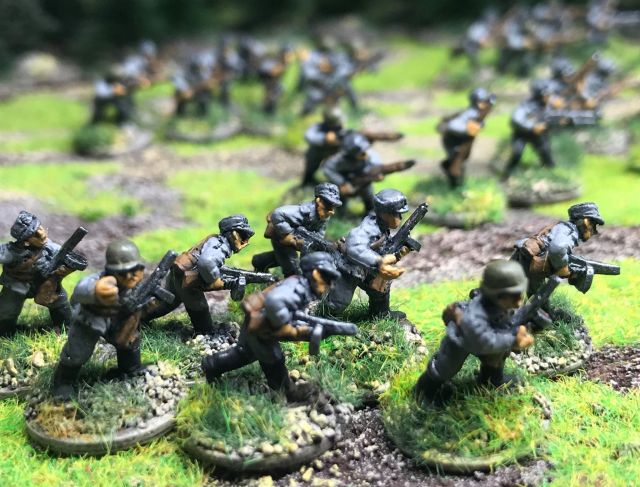
To play the scenarios you basically need a platoon or US Infantry and a Platoon of Germans, with some support options.
I am also using this project as an opportunity to get the Little One a little bit more involved in the terrain making aspect of the hobby, this time we did some roads and telegraph poles – which was great fun and with immediate gratification (at least for us) in the pictures below.
The Little one dry brushing a road with great care and precision, I wish I had that dedication but I do not have the time. Joke aside he was a great help and it is nice to have some company doing this kind of stuff.
We also did some Telegraph poles that we bought from e-bay, they are laser cut MDF but I think they work very well and saved us some building time and 24 for a fiver (£5) is much cheaper than some alternatives – that perhaps look better, but for us this was perfectly adequate.
The one we bought, but I battlefront, Galeforce 9 and I believe Peter Pig does versions too.
We did not use the base it came with instead installed them on top of thin washers with superglue (some of them on bases) and made a few damaged ones.
We also have a set to winterize for some other theatres, but that is for another colder day.
American Rifle Platoon
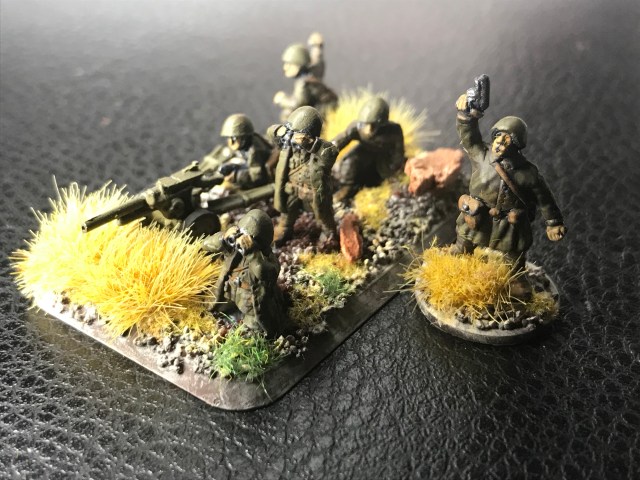
The American Rifle Platoon and the support options is more or less completed – there are a few I have not done yet and I will pick these up from Peter Pig at SELWG. The basic Platoon is based on the Battlefront US Rifle Company pack – this is not the plastic one they are currently selling but the old metal version, it gives you everything you need for the campaign except for some Shermans, Flamethrower, 50 cal. HMG and some Engineers (the new plastic box should do the same too).
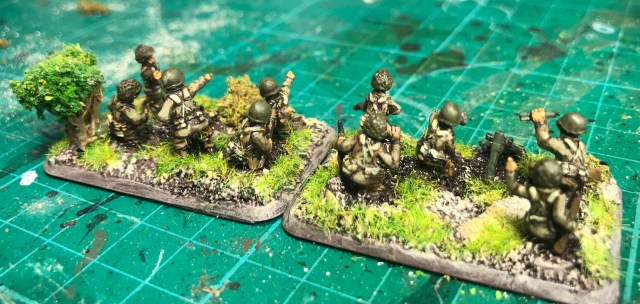
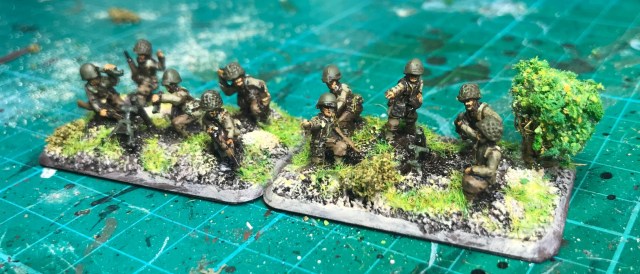
Here are the models…
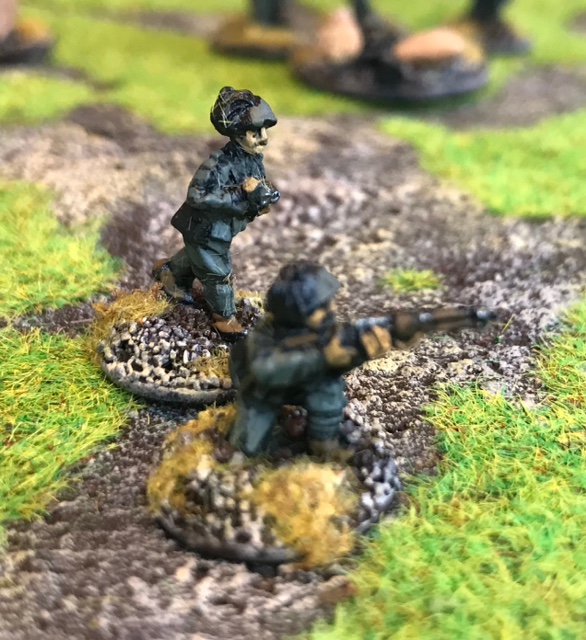
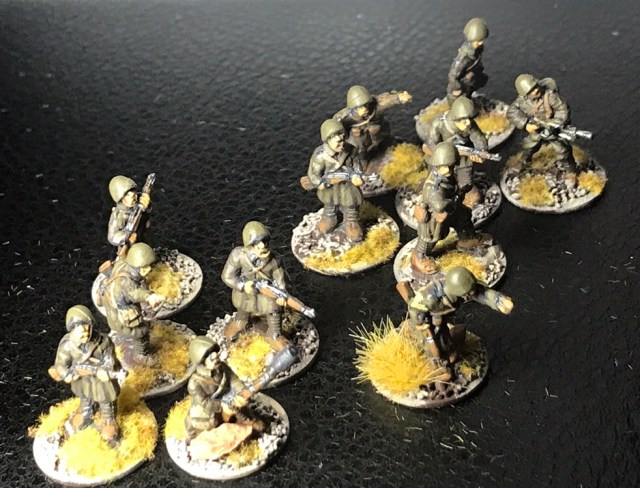
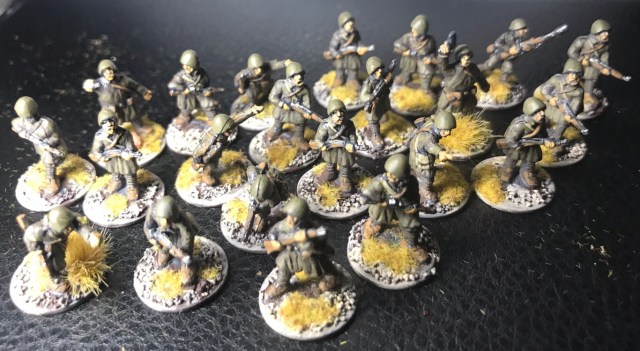
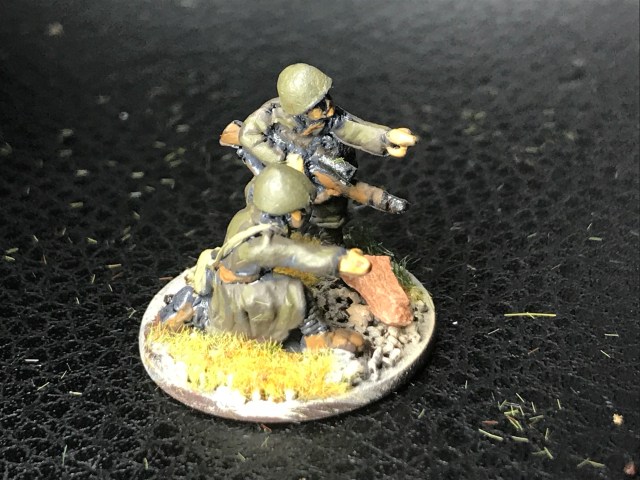
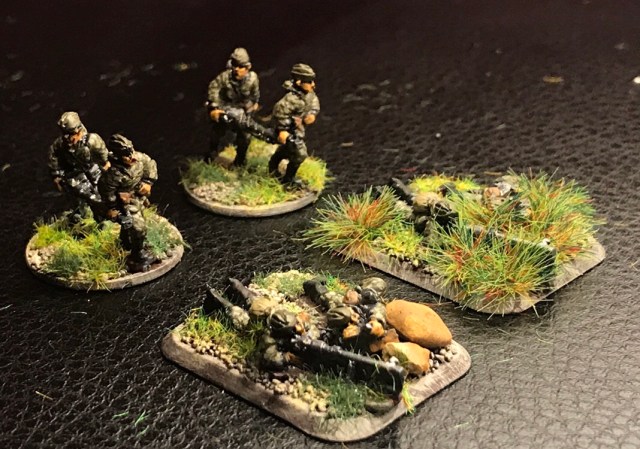
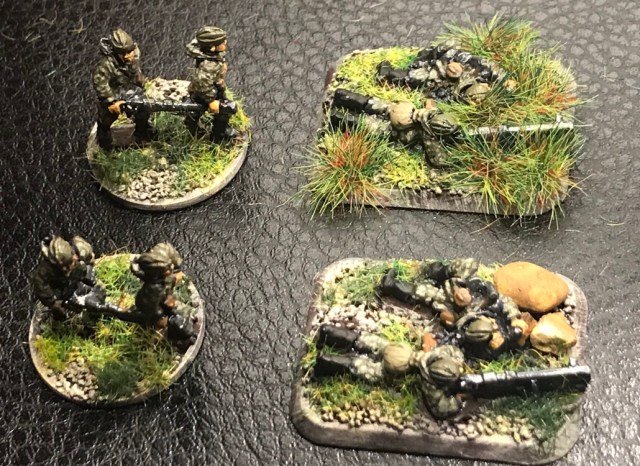
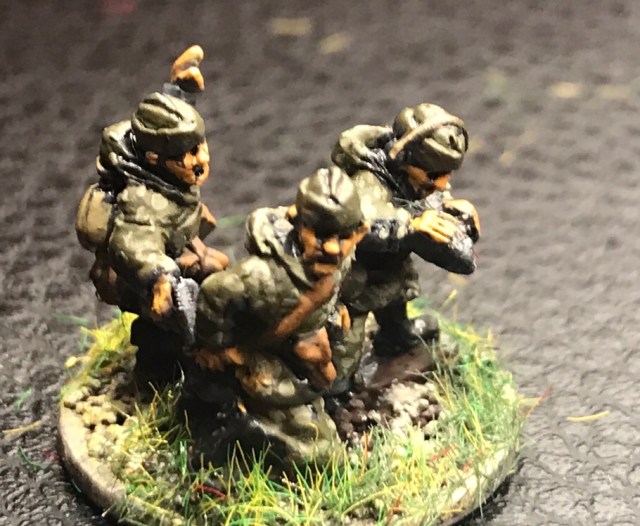
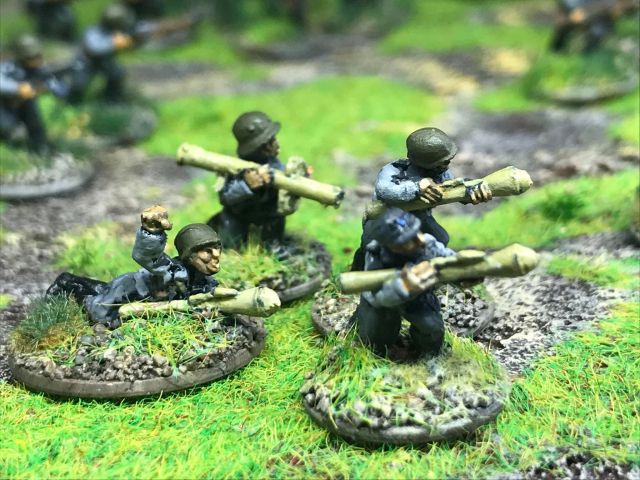
One of the three Rifle Sections, those Shermans will also come handy for the Scenarios.An extra Bazooka Team taking a careful aim
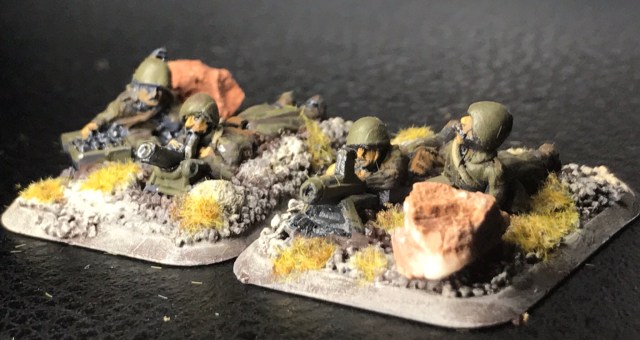
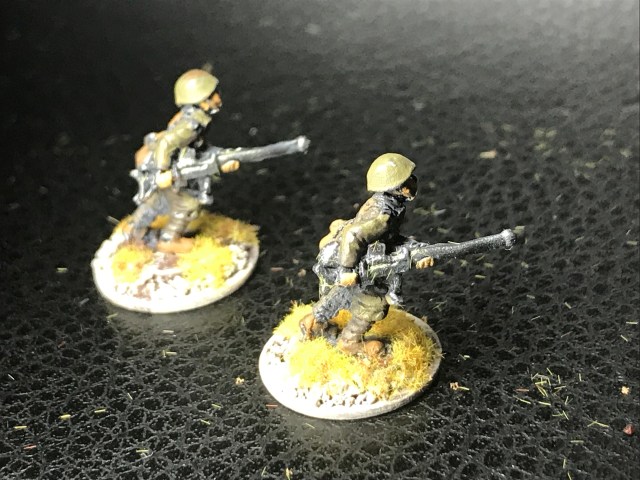
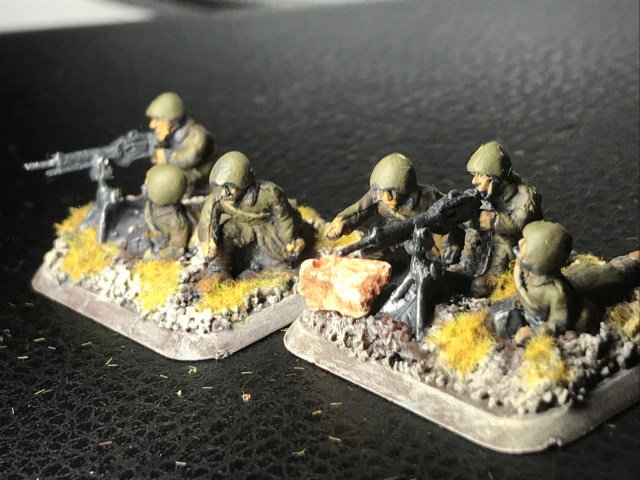
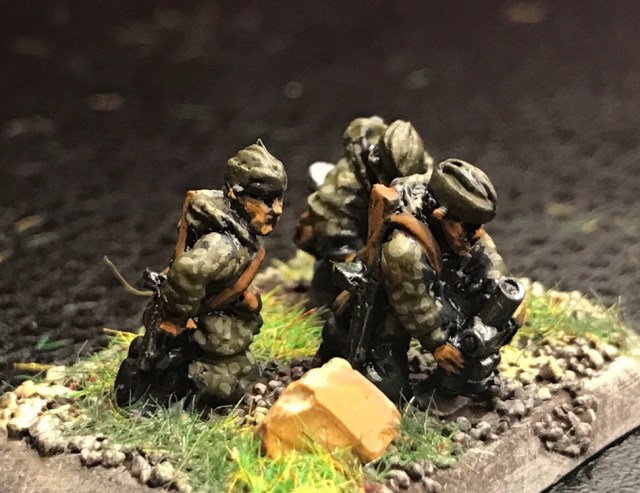
Some 30 cal. MMG teams in a little bit of an awkward position.A Sniper Team – taking out a Tank CommanderThree Sniper teams
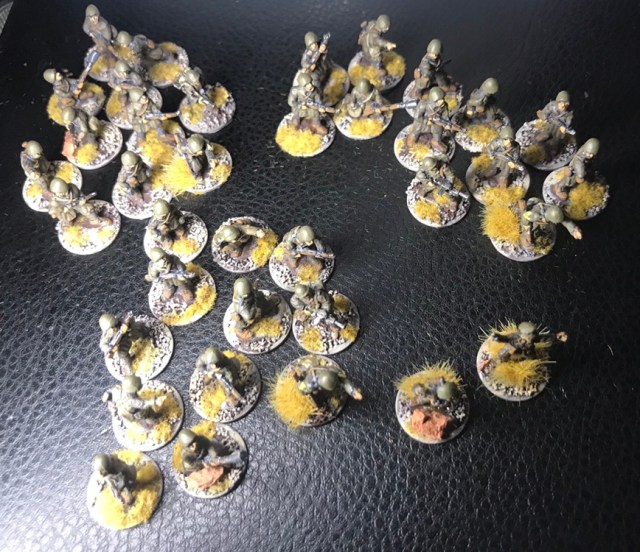
Some extra BARsThe Whole Platoon with the Options
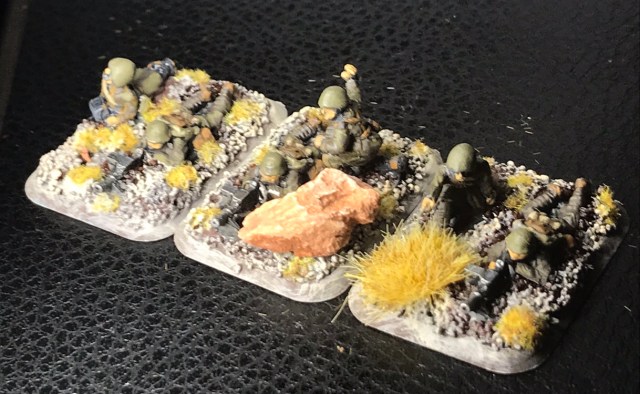
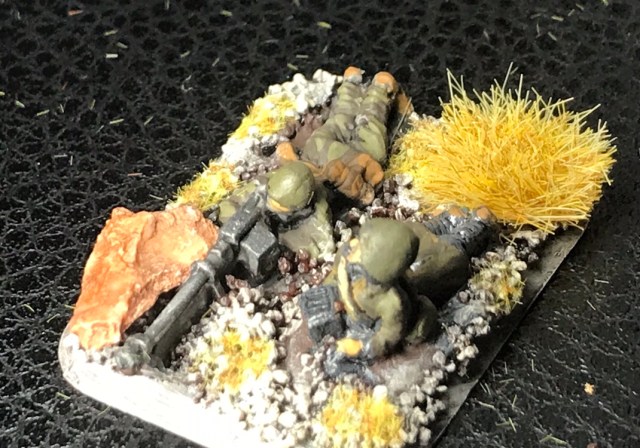
And then two mortar teams finished today (apart from gun metal colours – I realize now),
That is all we need for the American side, next the Germans….
Soviet Platoon/Company for Chain of Command (Finnish Continuation War)
Bersaglieri Platoon for Chain of Command (Greek 1940-41)
My lighting solution(s) for my travel rig
Soviet Platoon for Chain of Command (Finnish Continuation War) with Support
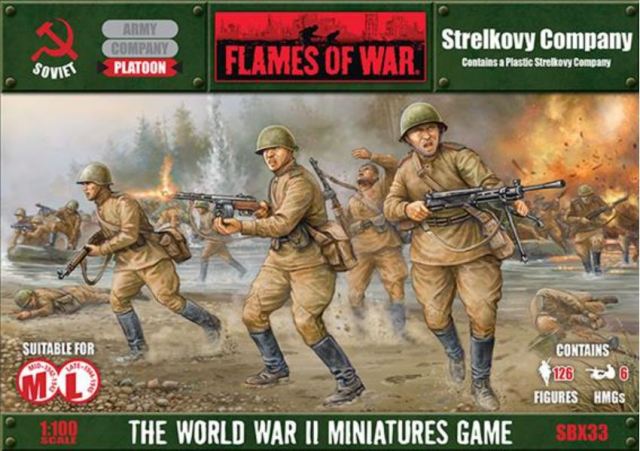
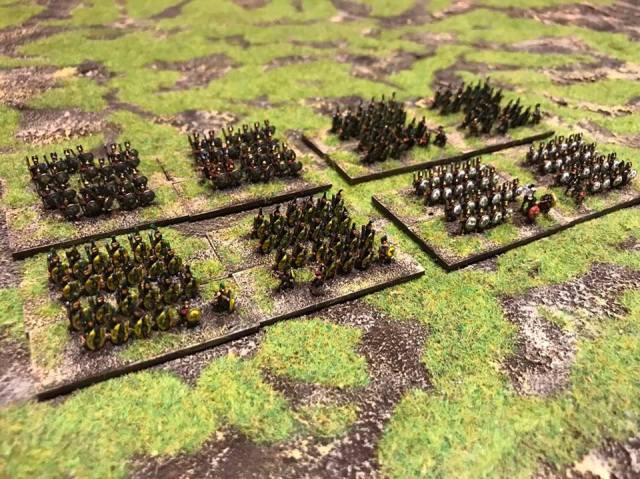
Had some marathon sessions last week to paint up a company box of plastic Russians/Soviets from Battlefront (Product code SBX33 Strelkovy Company in Plastic, at £28, but I got mine cheaper on ebay), with some additional miniatures from Skytrex (LMG second men, AT Rifles), Mortars from Peter Pig and further SMG men from Battlefront. I did the photos after having based them so there is still some static grass on the figures in some places – sorry!
These guys will fight the Finnish Platoon I made earlier (link here).
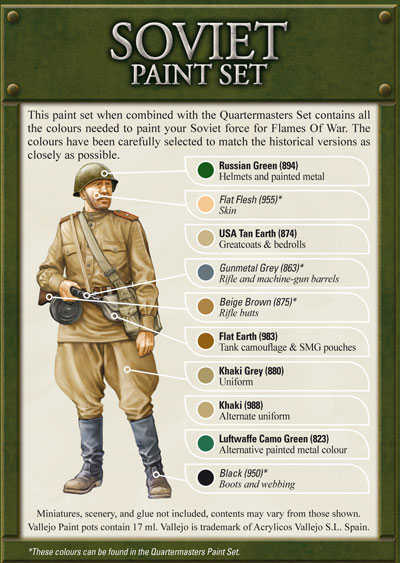
This is an overview of some of the Poses (go back to my earlier posting here as there is a link to a review of these miniatures there from another blog highlighting some issues – I agree with this review). Great models to paint.I used this as a guide for the painting for the helmets, the two uniform colours (drybrush it first then highlight with the same colour) and the boots. However for the bedrolls I used German Camouflage Beige (821 Vallejo) and the for the bread bags (Plague Skin from Warpainter). I gave them a light wash of brown at the end.
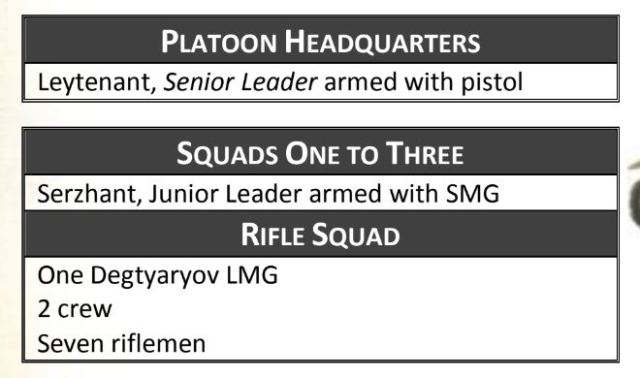
Using the list from the Chain of Command book we find the following information for a Russian Rifle Platoon.
Screen capture from the Chain of Command Rulebook
So let us start with that Leytenant
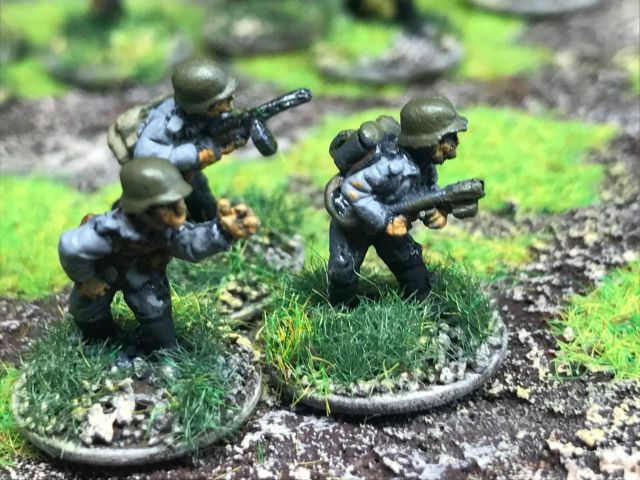
A LeytenantA SerzhantA 2-man LMG team (the ammunition carrier is an old Skytrex miniature I had lying around – they are cleary from different districts of the Great Motherland – but it works. Try it by standing up and carefully taking 5 steps back and have a look)The rest of the Squad, the Seven Riflemen
Add two more squads and we have our Rifle Platoon (I did 4 or these Platoons)
Some of the support options I made this week (in addition I have plenty of tanks from my What a Tanker stuff I made earlier this year, just need to add some Infantry Gun and Anti-tank Guns:
A Commissar teamSome extra Sub-Machine Gunners (these were from a separate Battlefront Pack)An anti-tank rifle from SkytrexHeavy Machine Gun from SkytrexMedium Machine Gunners (from the Plastic Company Box)Mortar teams (Peter Pig and Skytrex)Flamethrower team (Peter Pig and the pointer from the Platoon Box)Anohter Anti-tank rifle from Skytrex with the pointer from Battlefront (I had lying around)Forward Observer
Having placed all that on the table I still had this left.
So there is enough for more Platoons for a large game of Chain of Command, or even a IABSG.
Bersaglieri Platoon for Greece 1940-41 with some Supports
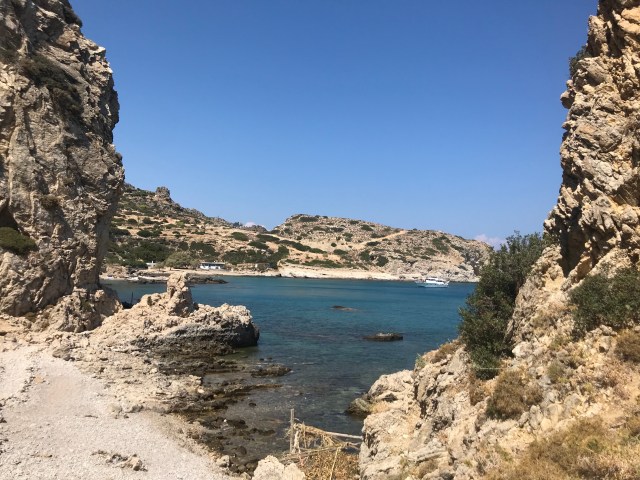
Whilst I was on holiday in Rhodes, Greece, I painted a Greek Platoon that I had lying around on the lead mountain (here is a link to that one). Below some picture of this platoon.
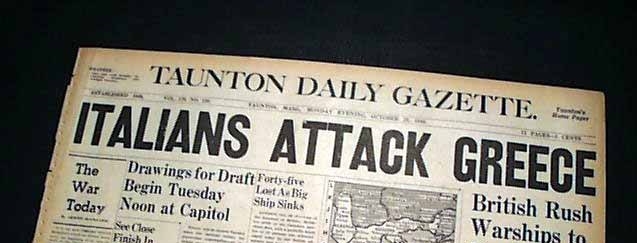
I got really inspired and decided to paint up a platoon of Italian Bersaglieri – Italian light elite infantry with those cool black feathers (actually capercaille feathers). To fight these brave Greeks. By the way Bersaglieri means marksman.
I love the intensity in this video showing them in action in the beginning – it is a propaganda video and I have no idea what they are saying and I especially like the part where they are pulling the AT Gun up the slope about 30 seconds in – quality.
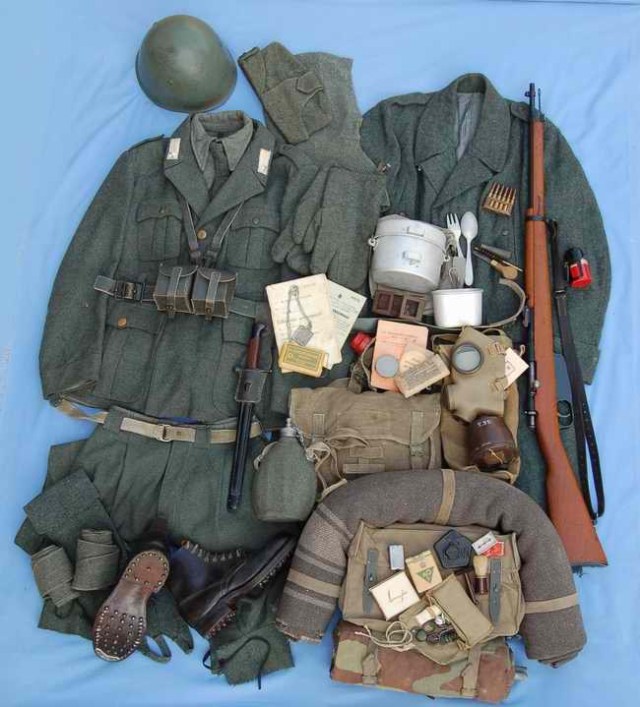
I have seen these previously on the wargames table in the North African Theatre with the tropical helmets and light coloured uniforms and later in the war during the Italian campaign with a light khaki top and brown trousers. However for the Greek campaign the sources I found suggest a much darker uniform at this point and I have gone for this in doing these. I guess this uniform would work for the attack of Southern France in 1940 as well as for Barbarossa.
I had this picture on my laptop but not sure where I got it. It is the colour I was after but I made the shoes in a lighter brown. For the uniform I dry brushed heavily the uniform with Vallejo German Camouflage Dark Green (879) and then highlighted with the same colour mix with Stone Grey (884) at a ratio of 2 to 1 (2 parts 879 and 1 part 884). I painted the helmet in German Field Grey (830). The bread bag was painted in Khaki (988). This is similar to what is advised by Battlefront.
I got the models from Battlefront and I used the following packs (unless stated otherwise stated in the text) to make the platoon and the supports (prices in british pounds from Battlefronts webpage, I got mine about 10% cheaper from ebay). I really like the models but there is some flash especially on the two firing rifle poses and some of the rifles are a little bit weak so be careful.
I need to get some more infantry Guns and perhaps a small tank, anyway this is the platoon and the support option at this point in time.
Overview Picture
As a basis for the platoon I used the list from the Too Fat Lardies webpage (link here), however this is a list for a Fucilieri platoon in Africa so may not be correct (if yoy know it is not and are reading this could you please let me know through the contact or comment on this blog). Anyway it is an assumption for now.
By the way Too Fat Lardies are soon to issue a new supplement for Chain of Command that maybe will contain further information on the Bersaglieri at this point in time. I am very excited about this as I have painted platoons for Germans, French and BEF (and a few on the lead mountain). In addition they will include rules that will be useful for my Continuation War scenarios as there will be rules for bikes (remember Lt. Eero Perkolas platoon in the movie Ambush [ Rukajärven tie] ) and boat assaults (see this link, if you do not understand why I am excited about this).
So really looking forward to this one, for many reasons.
…back to the Italians.
The Tenente and one of the Sergente.Two Light Machine Gun teamsA Caporale with his Rifle GroupThe Platoon with the two Squads (sorry for the half second squad and the missing Sergente.Anti-Tank Rifle, I made by cuting the head of the normal Italian AT Gun from Peter Pig and replace with one of the head from the battlefront models, and added a Battlefront as a number two.Some SMG armed gents – for later war?Medium Machine Gun team (not very good picture)Flamethrower teamMortarAnother Anti-tank rifleSniper team (kind of)An AT-Gun made from a Peter Pig AT-gun and then some left over figures from the packs. Not very happy with this one, but good for now.
Let there be light!
Earlier (link here) I wrote about my current work situation requiring me to stay away form home in hotels a few evenings every week and about taking back the hobby time in bringing a “painting and basing rig” with me.
From the earlier blog
However there was an issue and I made a promise.
Light is a problem in hotel rooms and I have invested in a travel led lamp that will be a very welcome addition to the “rig!” but it is waiting for me in the house at the moment. I will get back to you with my verdict.
I find it difficult to focus if I paint in a poor light environment and I quickly get tired – affecting both quality (can’t see properly) and output (can’t do it for long). So something needed to be done.
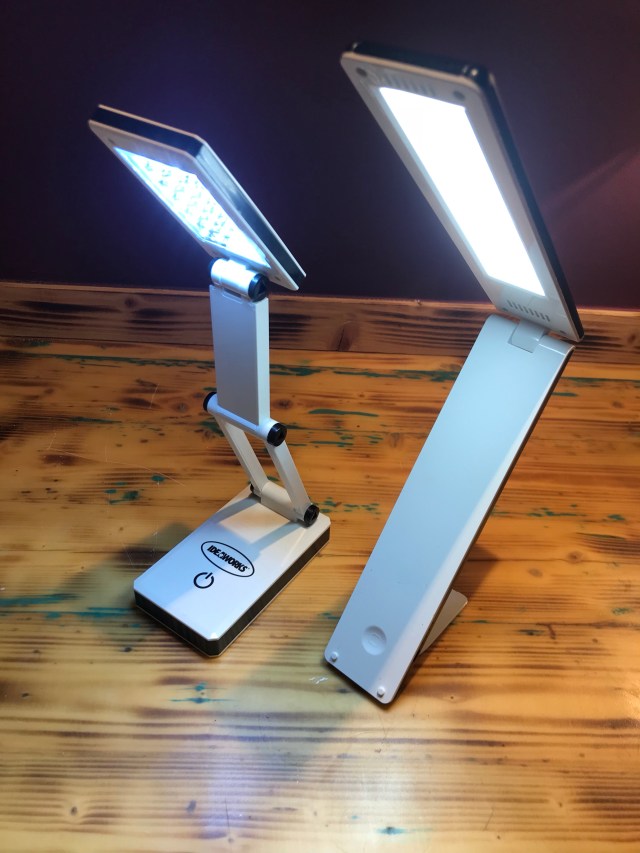
I actually “splashed” out and bought two slightly different lamps and what follow is a little bit of a discussion or a review if you wish. I did not do any research prior to buying these so there may be better and more cost effective ones – this is just my view on the two I did buy. I have no technical knowledge of light and it is just based on my opinion and what seems to work for me – have I caveated myself sufficiently?
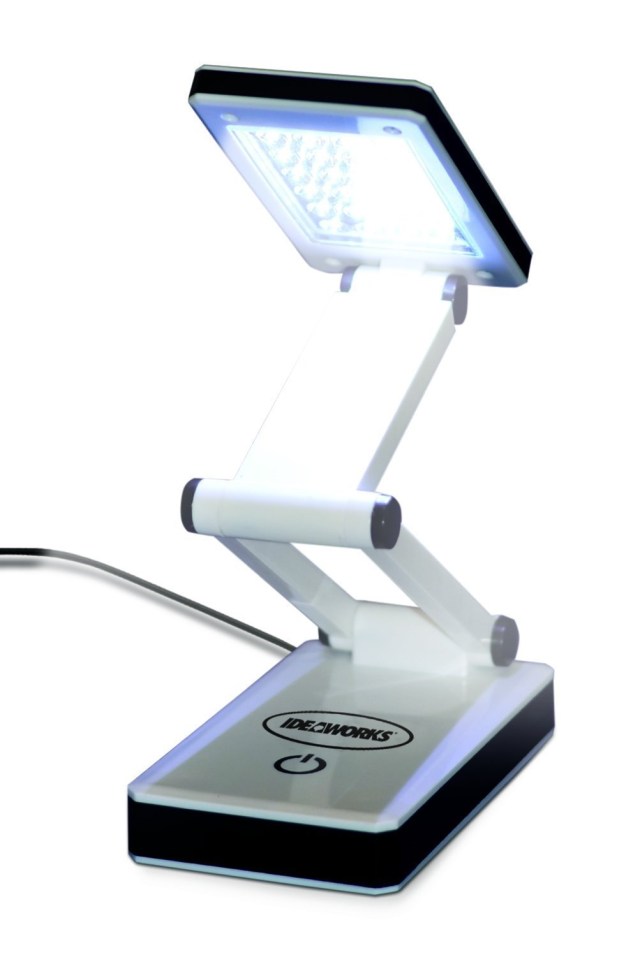
First out is Ideaworks super bright portable LED lamp, I call this one Gimli.
Gimli – £9.27 from Amazon UK
This one folds into a little compact box (13 X 7 X 4.5cm) and is powered by 4 No. AA batteries or by USB cable. I have only used this one using the USB cable so I do not know how long the batteries will lasts. There are also three levels of light that can be used 30%, 50% and 100%.
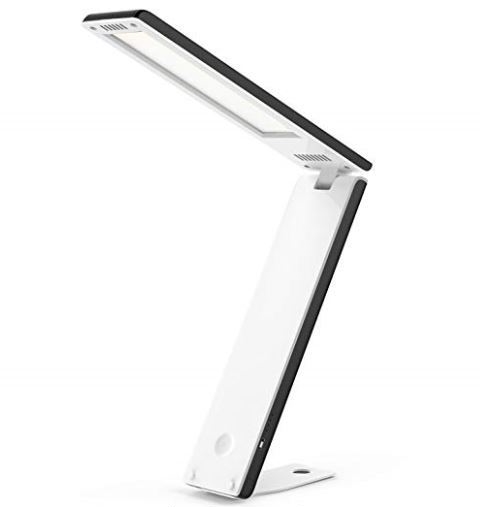
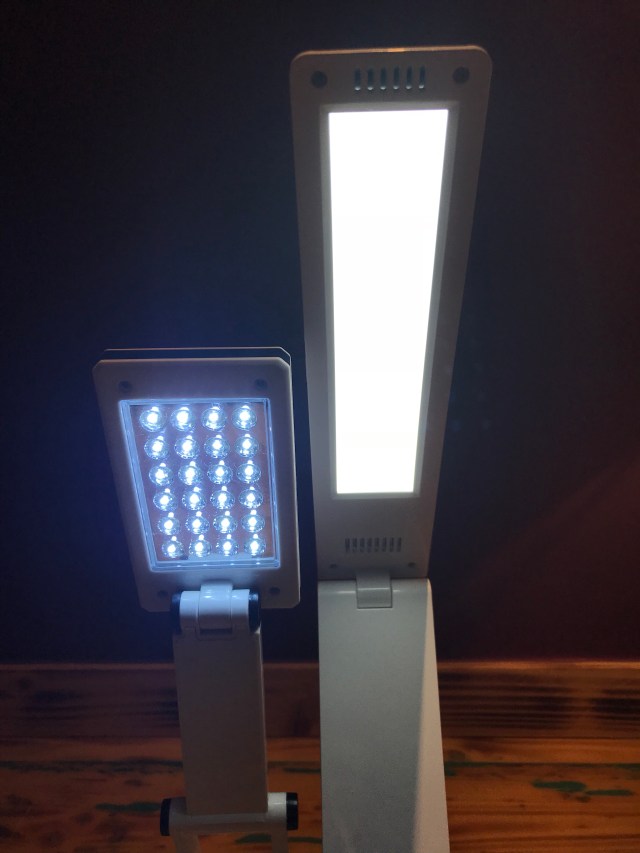
Second is the taller but with more sleek design, MoKo Portable LED Desk Lamp, I call this one Galadriel.
Galadriel – £22.99 from Amazon UK
This taller but slimmer lamp (23 x 5 x 2.5cm)has an internal rechargeable battery and can also be powered via USB cable. The battery can also be used as charger for your other gadgets (2800 mAh, this in theory is more than sufficient to charge an iPhone from 0 to 100% once) – so a handy additional feature. Further the battery lasts for about 7-8 hours according to the product blur (but there is a deterioration of strength during use).
Compacted versionsSide by Side – brutal vs elegant (however Galadriel may be a little bit unstable on uneven surfaces).This picture sums it up – Galadriel is the brightest and the most pleasant light – the key criteria for me.
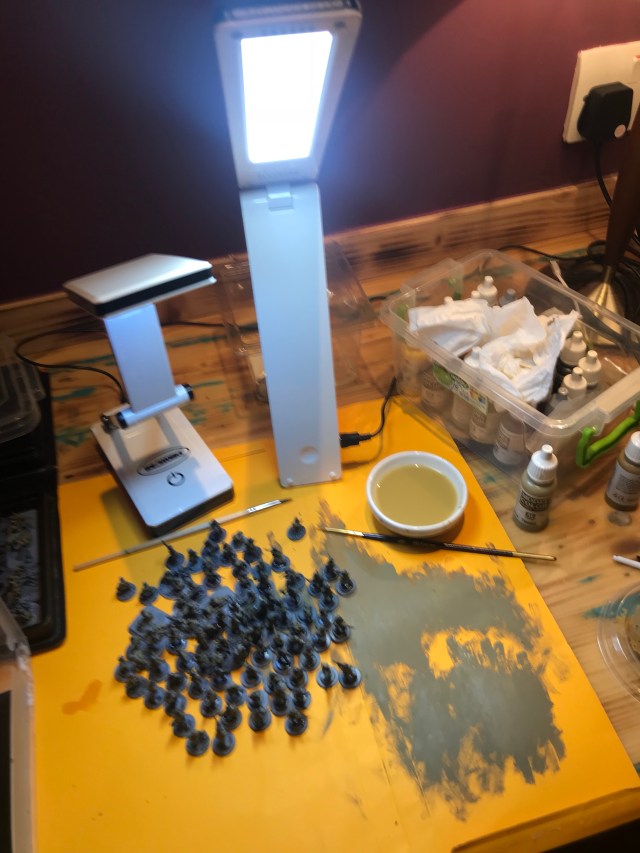
So overall I am most happy with Galadriel as the light is better, but in addition she takes less space (they both weight about the same, when Gimli has the 4 AA batteries added) and further she has the added feature as a back-up power bank. I recall one of my University Lecturers saying that price is an information carrier and in this instance it is correct. I used it whilst on holiday and I am more than happy with the product.
However, as I now have them both I think I will use them together as this gives the even a better light experience. They are my two Towers.
Two Towers in action – great stuff.
“Dark is the water of Kheled-zâram, and cold are the springs of Kibil-nâla, and fair were the many-pillared halls of Khazad-Dûm in Elder Days before the fall of the mighty kings beneath the stone. She looked upon Gimli, who sat glowering and sad, and she smiled. And the Dwarf, hearing the names given in his own ancient tongue, looked up and met her eyes; and it seemed to him that he looked suddenly into the heart of an enemy and saw there love and understanding. Wonder came into his face, and then he smiled in answer.
He rose clumsily and bowed in dwarf-fashion, saying: „Yet more fair is the living land of Lórien, and the Lady Galadriel is above all the jewels that lie in the earth!
from the Two Towers by Tolkien
The point is whether you are painting at home or roaming the land, make sure that you have good light as it make the experience easier, more enjoyable and less tiring.
/ Hope that was of some interest, time to put on a few colours and then switch off the light. By the way here is a picture from the movie I referred to earlier Ambush/Rukajärven tie showing the Finnish soldiers with their bikes.
“Direct your fire over there Pössi!, the clearing is full of Russians”
I often see posts like “What movies/books inspires you to Wargame” on forums and it is an interesting question and very often the answers leads me to find new and interesting potential projects. As I have mentioned on a number of occasions I went to the Cinema when I went “home” to Sweden over Christmas last year to see “Unknown Soldier” based on the book by Linna. It is one of the most famous Finnish books and is set during the Continuation war (you can read more about the book here) 1941 to 1944, between Finland and the Sovietic Union (or Russia if you prefer) – you can find out more about this war here.
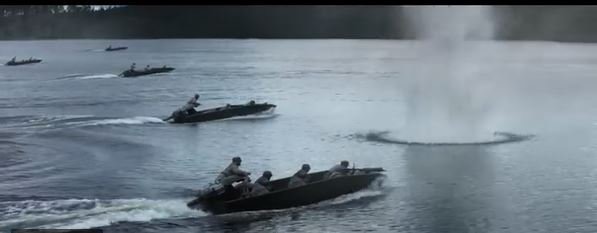
One of the scenes in the Unknown Soldier movie shows a Finnish attack using assault boats – I really found this scene inspiring and have been thinking about doing a scenario starting with a reinforced infantry platoon, and a half Machine Gun platoon, in six boats pushing forward during a Finnish Barrage off the opposing side (with unknown effect) and with a chance of individual boats being hit by enemy fire, with some possibility of doing the Russian side some further damage with the Machine Gun or perhaps even Rifle fire. Then the boats would be used as initial Jump-off Points and then the scenario would play as a normal Chain of Command (or Bolt Action or whatever platoon based rule set you prefer), with the possibility of having lost units/men on both side before the actual engagement.
Here is a screenshot of the scene from one of the movie trailers on the net.
Here is the picture. Looks very scary.
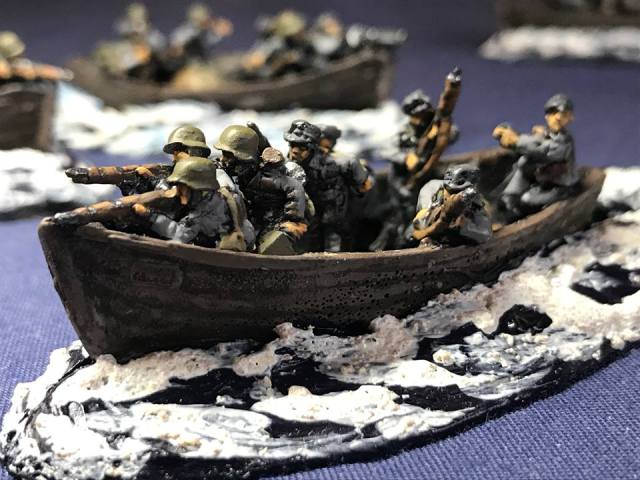
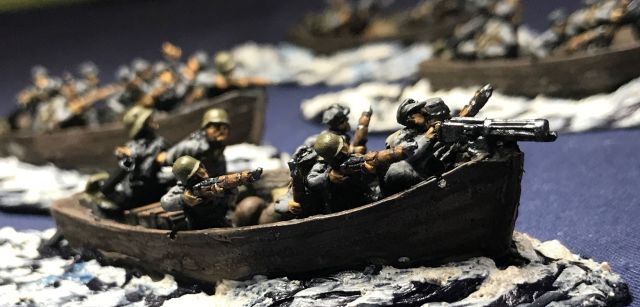
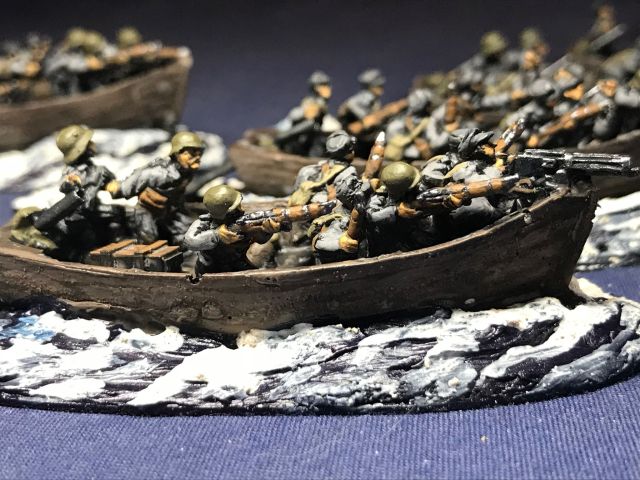
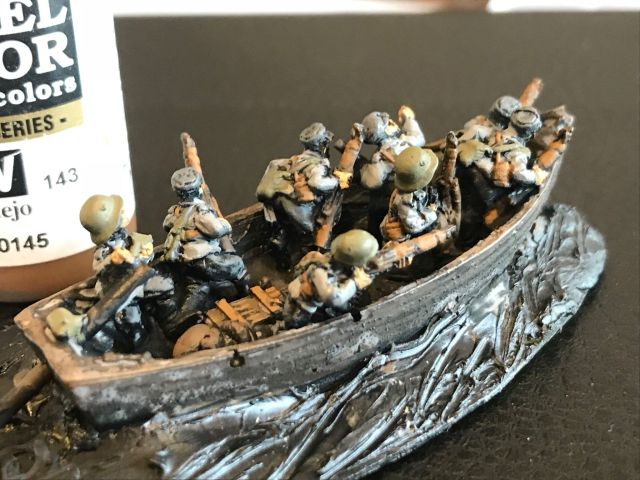
I recently did a Finnish Rifle Platoon in 15mm (here is a blog write-up) and have got enough miniatures to do another one, however in doing this I ended up with a pile of Finnish Soldiers I did not need. I also had a few boats I had made for another project some time ago (do not ask, but it involved making molds and using clear resin). These boats are not based on the Assault Boat in the pictures and the men, as you will see, on them are more dynamic and all-over the place than would be the case in reality. but I felt inspired yesterday so they had to do – and what the lack in historical or procedural accuracy I think they make up in looking cool!
Here are a few pictures on how they ended up, for anyone interested there is a little discussion after this on how they were made and the painting (more writtten as I guide for myself, if I want to do more).
Here we go… (all miniatures by Battlefront, from their Finnish range, 15mm scale). I think they are good enough for a game.
Thanks for hanging on so far, now some notes on how they were made and some notes for me on the painting.
Assault Boat Notes
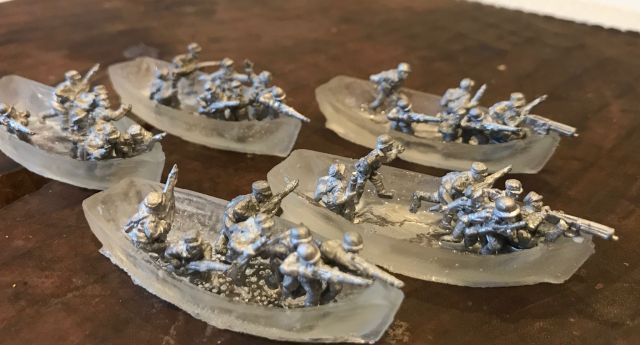
I had six boats I had made previously lying around and I still have the mold somewhere to do more if I need – I used a clear casting resin I had used for some water effects. I cut off the bases on the miniatures and bent some legs when required and tried to get a look of some action maybe just as the boat enters the “final destination” and the section are ready to jump off and attack.
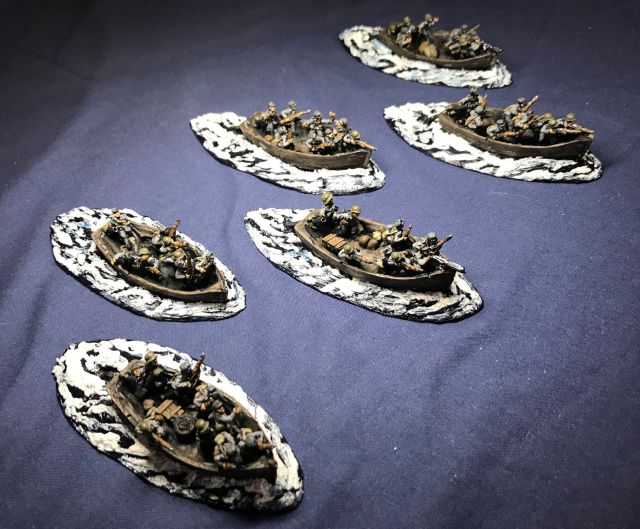
I made six boats (yes one is missing), two representing a machine gun team and four representing rifle squads.
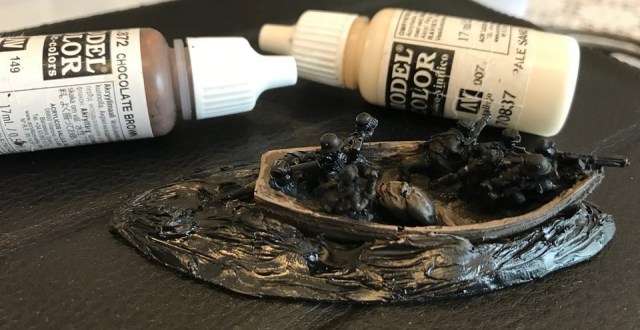
I then glued each boat on a plastic base (I used two dvd covers) with the front end slightly elevated. I then added some filler around and tried to give it some irregular shape and waviness!.
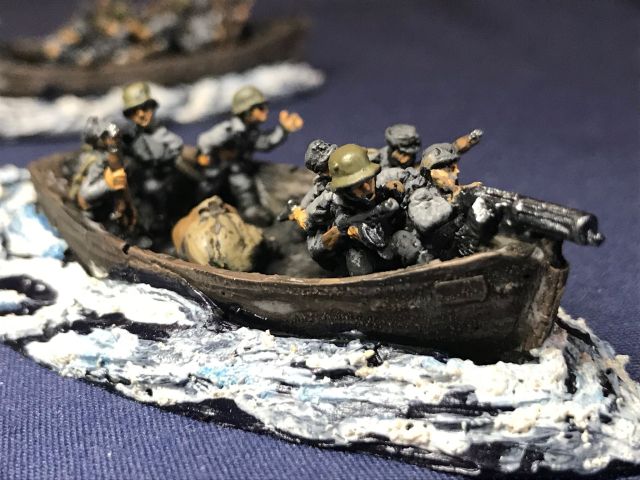
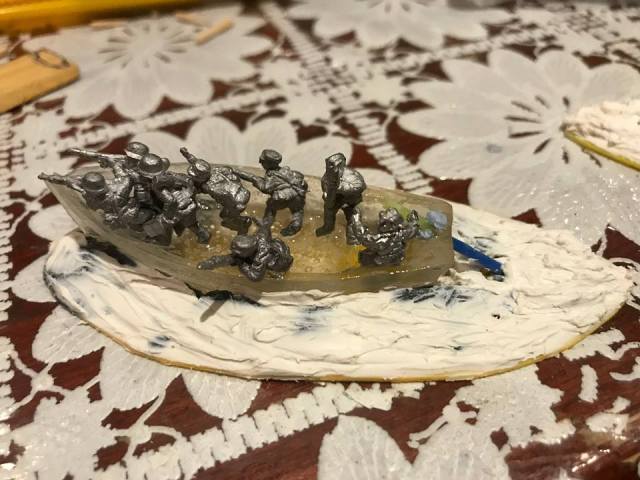
I also added the driver and an very crude engine (using some very thin drinking straws). I will work out something that looks better at some point.
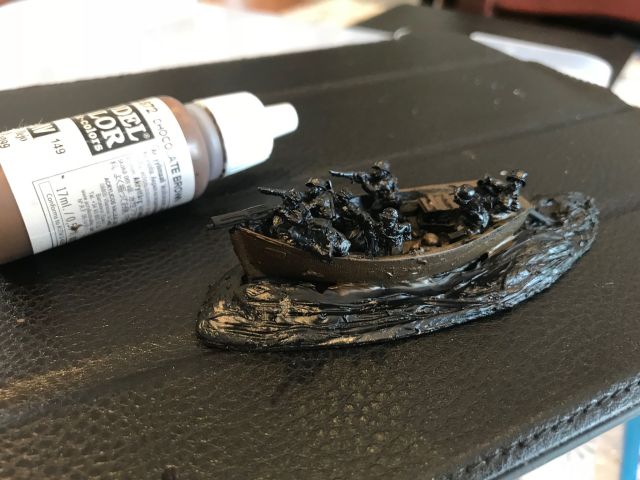
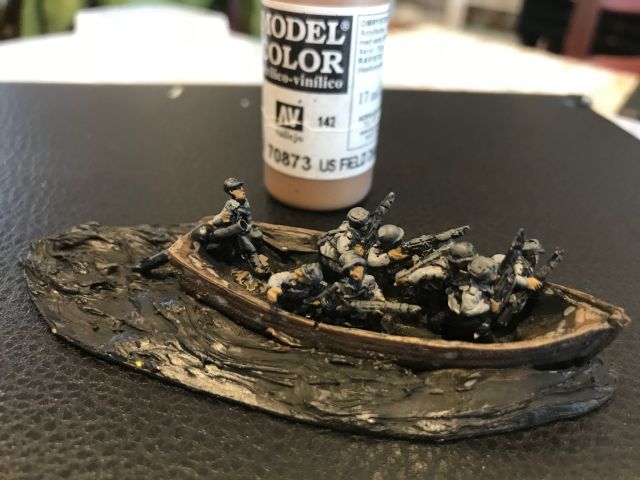
Next priming black. let dry and get on with it.
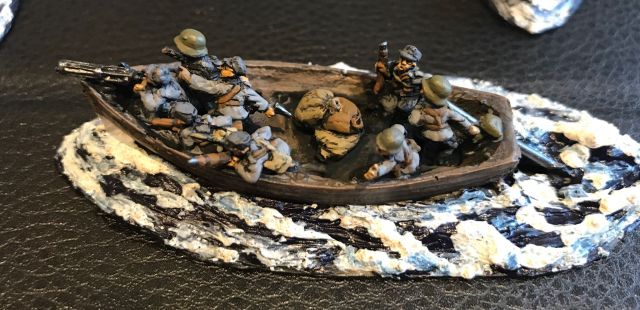
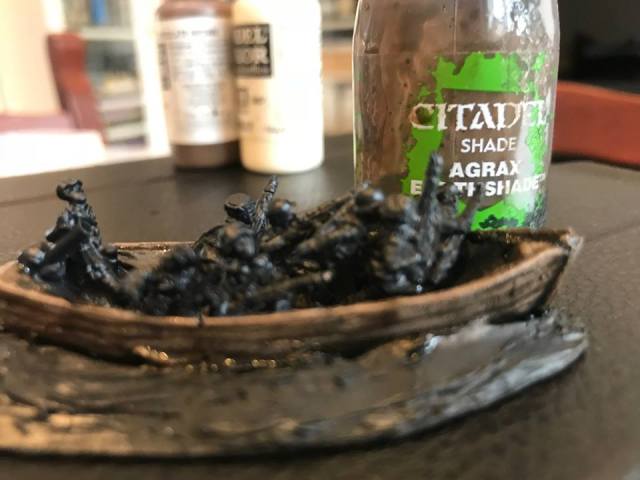
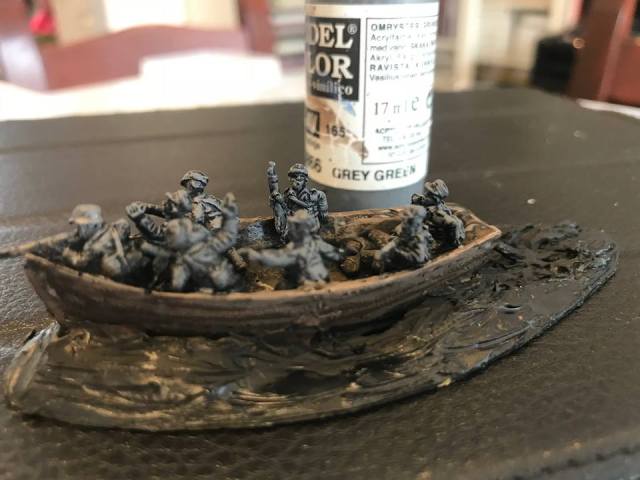
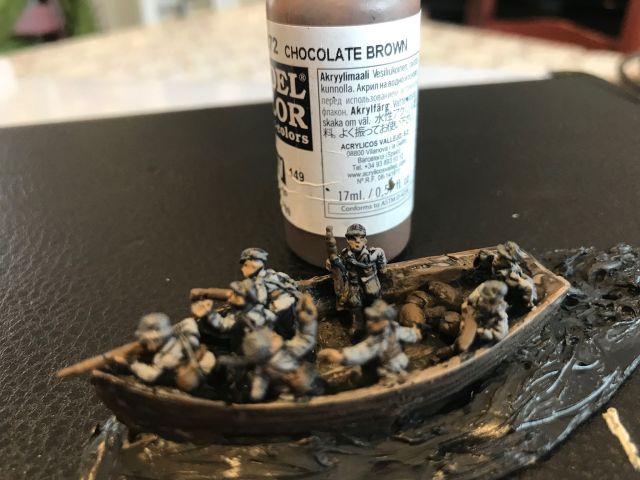
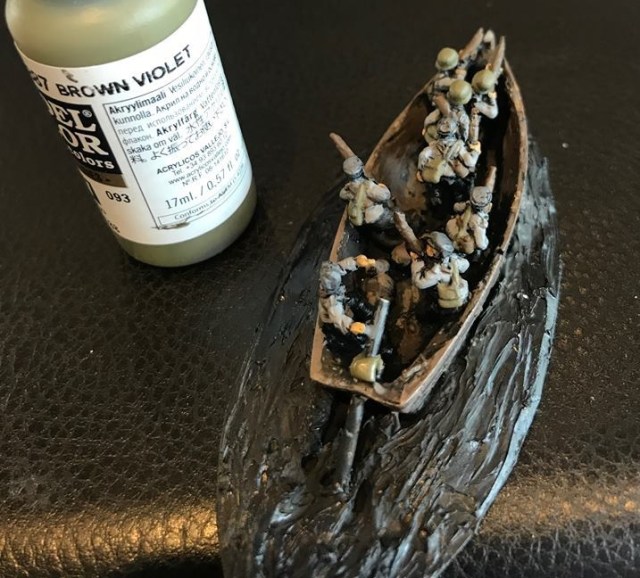
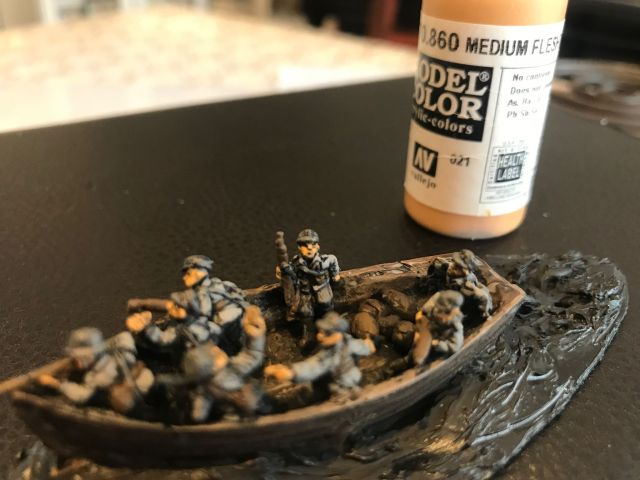
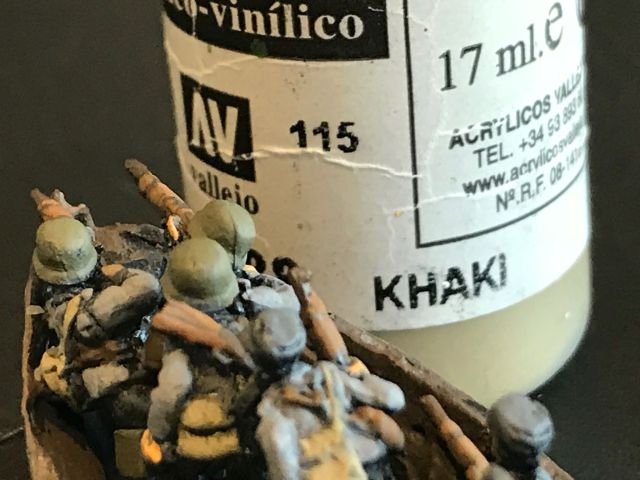
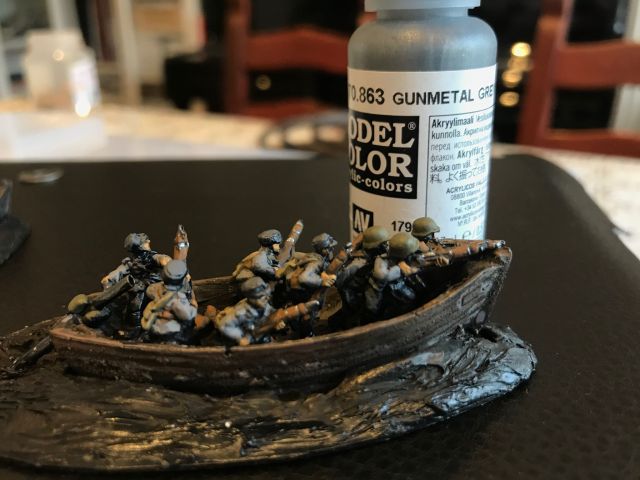
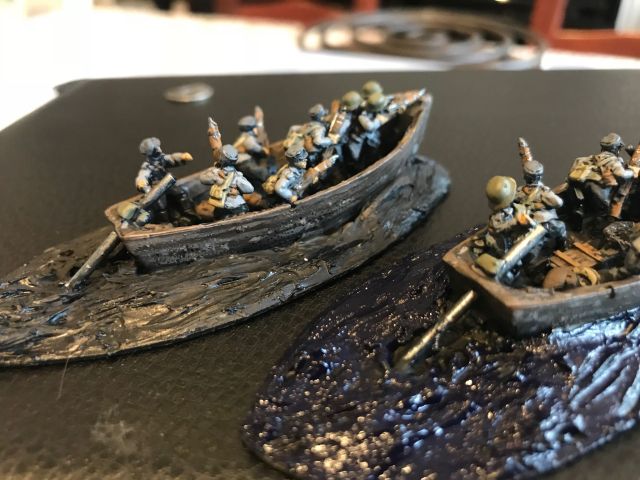
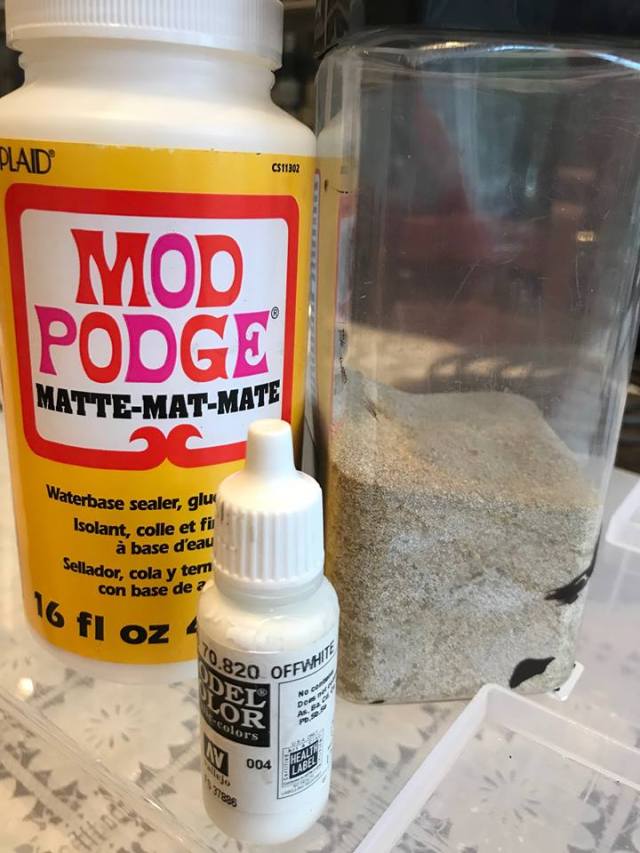
Boat painted in Chocolate brown (rough brush or wet brush). I had also added some boxes and bags in the boat and painted these Chocolate Brown too.Mix down the brown a bit and make some detailing making it look a little bit more like a wooden boat. Make rough lines on the side.Add some brownish wash.Drybrush the soldiers with Grey Green (Dark Grey that will be the base for the jacket, be the trousers and the hats). Avoid the boots (let them stay black).Paint the Jackets in a lighter grey.Paint skin in US field drab.Paint leather and rifles brown (note the bread bag is not leather – see notes below).Paint Helmet and breadbag Green (or Brown Violet!).highlight flesh with FleshHighlight Leather and Rifles with Flat Earth (lighter brown really)Highlight breadbag in KhakiGunmetal on Rifles and SMG, also the makeshift engine.Paint the base in a dark blue.Next I mixed Mod Podge (but perhaps PVA will do), some white colour and chinchilla sand.
Apply the mixture to represent the “disturbed water”. The Sand creates a little bit of an effect that could be mistaken for some foamy water (if you have a good imagination).
/ that is all for this time, hope it was of some use.
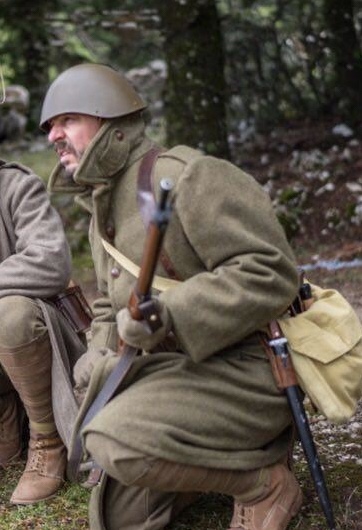
Spending a few days in Greece, so I thought I would do a Greek Rifle Platoon based on some Burns 15mm miniatures from the lead mountain, I also had bought a pack of Flames of War Greeks in the past (there is a HQ pack or something). In trying to make what I had into a platoon with some supports, I bought some Italian LMGs (walking and lying down) and AT Rifles and an AT Gun from Peter Pig. Although not strictly the same type of uniforms it did not bother me so I lived with it. As for all these Platoons I am doing I have decided to get them done quickly and the painting is done in that fashion – 2 to 3 sessions per platoon and support – that is it.
I based my painting on some great re-enactor images I found on the net (link here). The uniform I painted was basically Vallejo US Olive drab highlighted with Brown Violet.
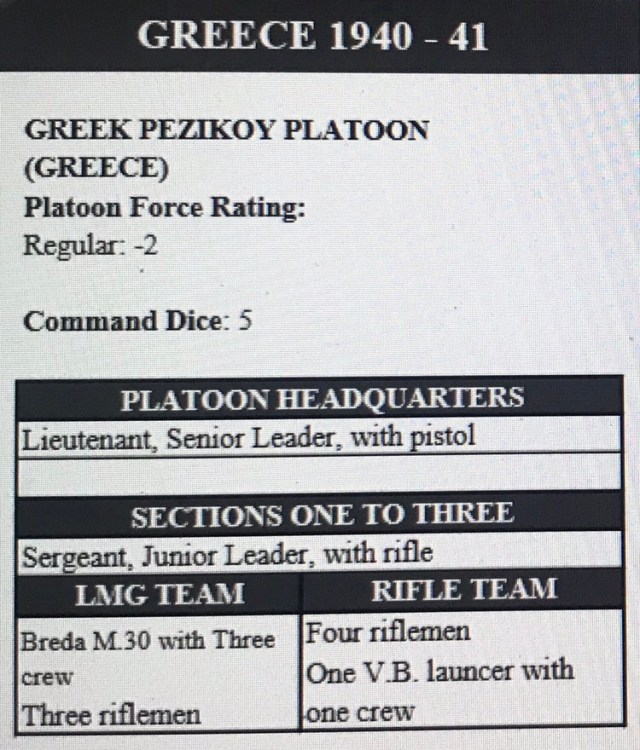
The platoon composition I found on this (link here) really good source that contains a lot of different platoons.
Here is the one for the Greek Platoon.
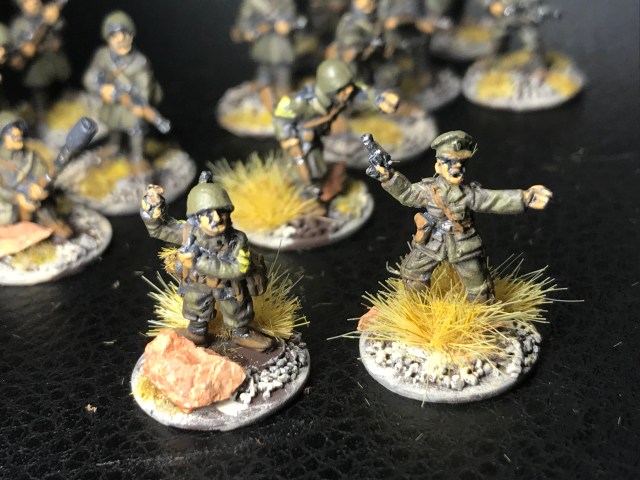
And here are the models I made…
The Platoon HQ – Lt. with a gun and I did a second in command as I did not read the list correctly (ignore him for now).
One of the three squads.
All of the squads
Lying down LMG teams
Support options
Some extra rifle-men
Anti-tank gun
Mortar Teams
Anti-tank Rifle teams
Sniper Team
HMG Teams
Good enough for the table!
/ Hope that was of some interest, now I am doing s##t all for a while.
Next up some Russians to fight the Finns, then perhaps some Italian Bersaglieri to fight these Greeks.
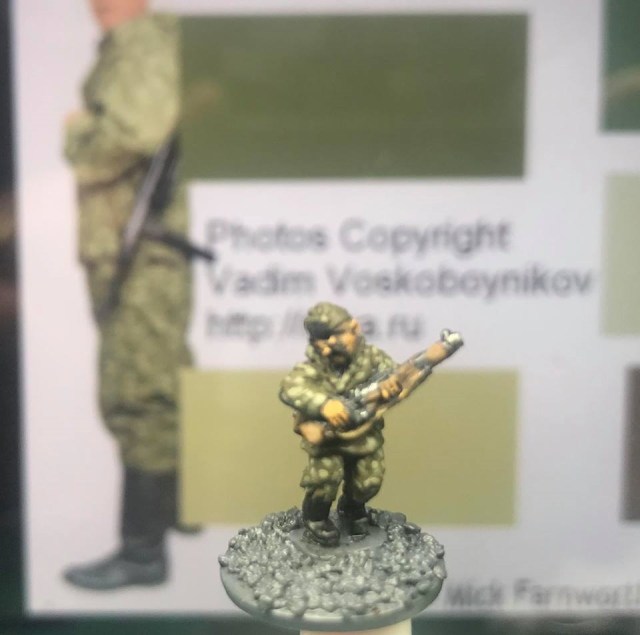
This week, actually the last few days, I have been working on a 15mm Scout/Recon Platoon for Chain of Command to fight the Finnish platoon I did last week (see here). The organisation of the platoon is based on the list found in the Too Fat Lardies Christmas Special 2016 (link here). They are all from the Peter Pig (link here) range and are in 15mm scale. I really enjoyed painting them and I think they are really nice models. If you are not familiar with Peter Pig, go and have a look at what they do – they have a very comprehensive WW2 range and a lot of specials like different type of Uniforms, Sniper, engineers, etc.
In addition Peter Pig has a lot of ranges covering War of the Roses, Samurai, English Civil War, Pirates (and even small 1/450th pirate ships), American War of Independence, American Civil War (and again some naval ships in smaller scale), Vikings & foes, colonial, wild west, great war, Spanish civil war, Vietnam and Modern Africa. Further they sell Scenery and some fantastic rule sets (http://www.peterpig.co.uk/).
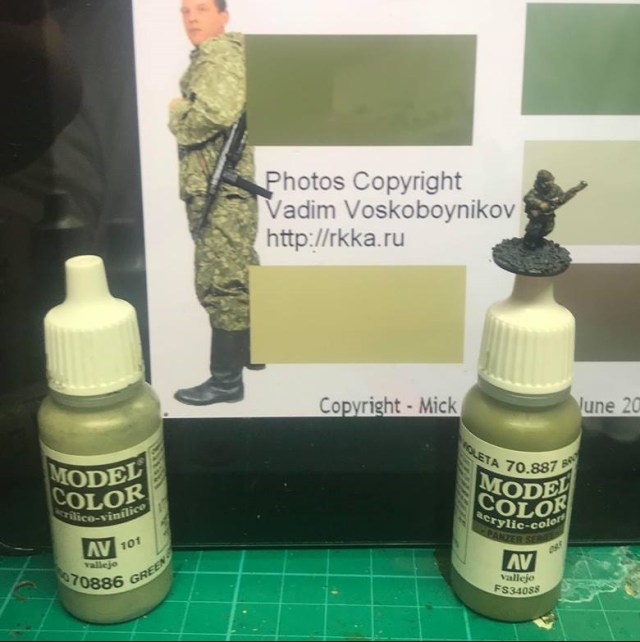
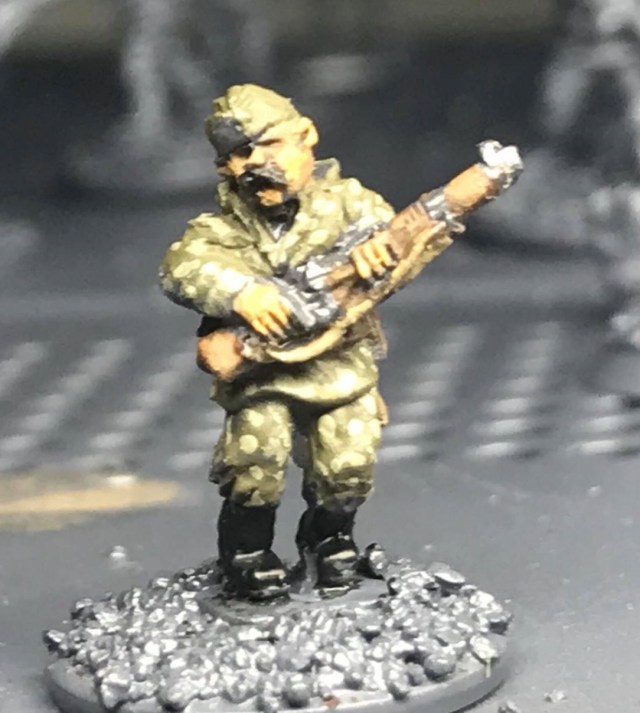
I could have painted the Scouts in a one colour uniform but were keen to have some kind of camouflage to make them look a little bit cooler. Artizan design have some very useful Painting Guides produced by Mick Farnworth on their webpage (link here), I found one showing Russian Leaf Patterns that I liked (link here) with only two nice contrasting colours. I then found two good colour matches (Vallejo 886 Green Grey and 887 Brown Violet – it may be called US Olive Drab nowadays).
It is great to have these kind of guides. I just place paints until I find matches.
Then I painted the Uniform in the 887 and made small random dots with 886 on top and I think it looks good from the distance they will be looked at.
Very happy with the test model. It certainly looks like he has some kind of camouflage on him and it looks good enough from here (yes I have since sorted the moustache from that skin tone). Black boots, some gun metal, light brown on dark brown for leather details and the rifle. US field drab on skin, highlighted with Medium Skin tone. Relatively quick to do but be careful with the dots – I used a fine detailed brush for this.
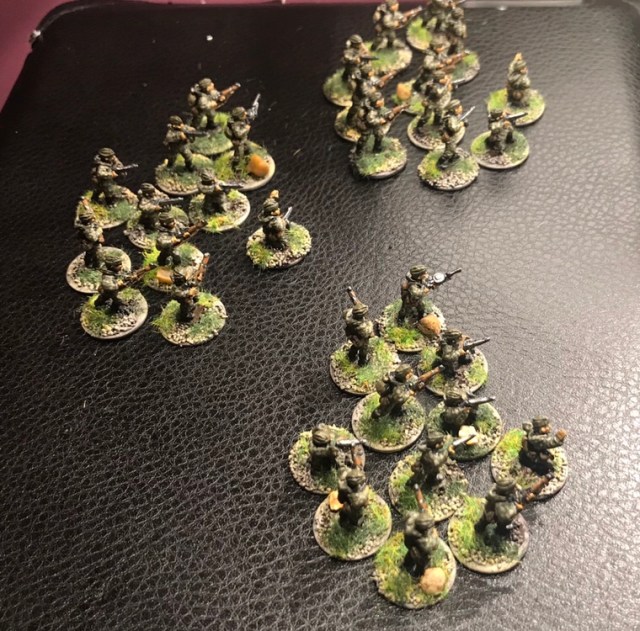
Anyway, here are the completed miniatures.
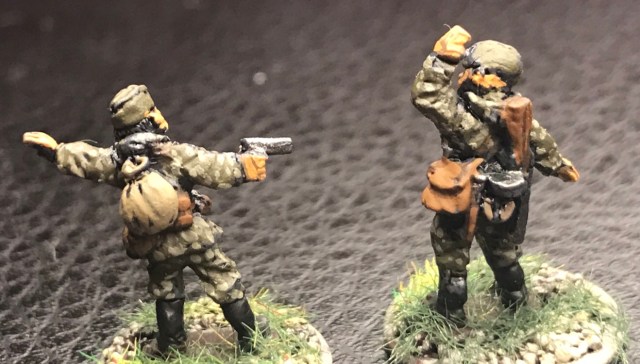
Platoon Headquarters
Leytenant, Senior Leader, with Pistol
Serzhant, Junior Leader, with SMG
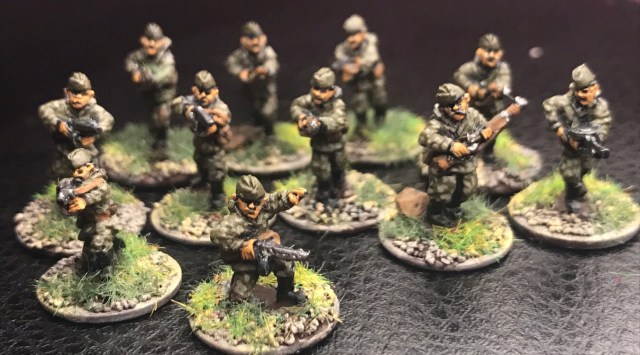
3 Squads each consisting of;
Serzhant, Junior Leader, with SMG
Light Machine Gun (LMG) with 2 crew
4 No. Submachine Gunners
4 No. Semi-Automatic Rifle Men (SVT40, not sure the models are, but hey!)
Support Options
Anti-tank rifle teams
50mm Mortar teams
Generic Engineering team (more a marker)
Commissar, to give the troops a kick in the arse (sorry, I meant to increase their morale)
Mid-week Paining Solution – Getting my Hobby time back
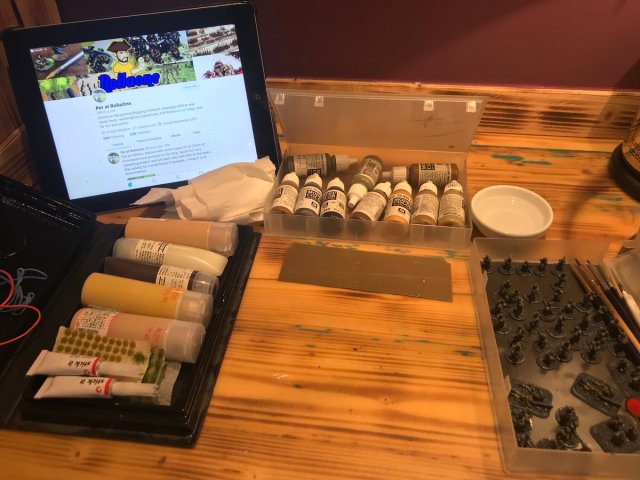
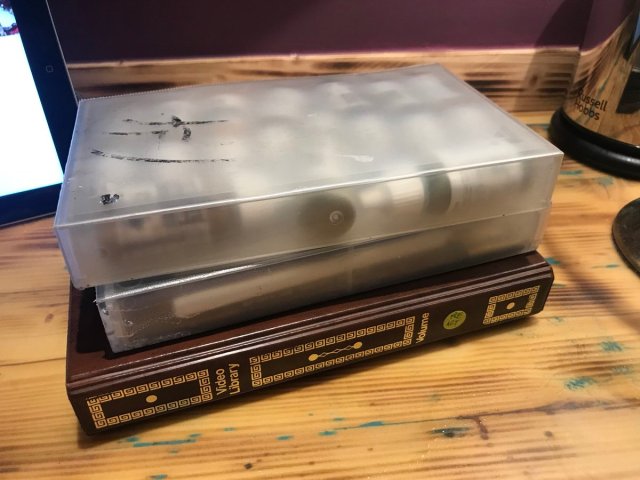
Due to work I currently spend about 2 nights every week in hotels – it is a little bit of a change but I thought I make the best of it. I am already getting tired of hotel bars. I have decided to do some painting on these evenings, if I can, and have set up a little “paint-rig!”. Not very high tech and based on three old VHS boxes, and the system is modular as you can add more boxes ;).
The three VHS Boxes The set-up! – (1) basing box on the left. The dark brown base, the three tone for dry brushing on top of the base layer, pva/water mix for static grass, superglue for tufts, tufts and 2 colours of static grass in bags under the paints! (2) Colours needed for current paint project in the middle box (10 Vallejo bottles can easily be fitted) and (3) the brushes and miniatures (magnetic sheet in the bottom, magnetised washers for bases, primed grey and black washed, ready for painting). Piece of plastic for the paint, a little bowl of water and some paper, and your favourite podcast or audiobook on the iPad.
Light is a problem in hotel rooms and I have invested in a travel led lamp that will be a very welcome addition to the “rig!” but it is waiting for me in the house at the moment. I will get back to you with my verdict.
With regards to Podcast there is a new one out from the Wargames Soldiers and Strategy team that I enjoyed whilst painting yesterday, it is about participation games (link here). I wrote a blog a few weeks back that relates to this about engagement at wargames shows (link here). Give it a go.
Future Plans
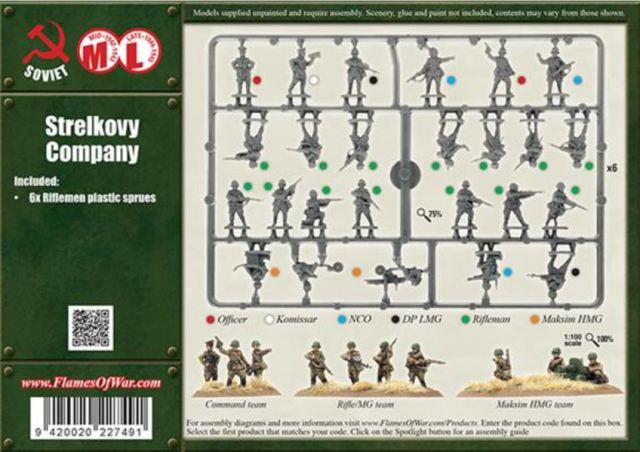
I also plan to do 4 No. platoons of normal Strelkovy/Russian Infantry and I won a new box of Battlefront plastic 15mm Russians for £18 including postage from Ebay (they retail at about £26). I checked them out and I like them and think they will paint up nicely. I also looked at Plastic Soldiers company pack but decided to start with the Battlefront ones – perhaps I get a PSC box in the future. Since then I found out that the Battlefront ones are bulkier than the PSC ones and may not work together that well (thanks Ignacy Kurowski).
To do 4 No. Platoons I will need:
4 No. Senior Leaders with Pistol (there are 6 No. in the pack)
12 No. Junior Leaders with SMG (there are 12 No. in the pack).
12. No. LMG with 2 crew (there are 12 LMG soldiers in the pack but I would need 12 more Russian riflemen. I have some lying around I think).
84 Riflemen (there are 84 No. in the pack)
In addition it comes with 6 No. MMG. These should keep me busy for a while!, but I will not start it until my Greeks are done (another story) and I have enjoyed a few weeks of leave.
If you follow this blog you are aware that most of my projects end up getting some kind of Nordic twist in the end. The Little One and I have enjoyed the What a Tanker rules (link here). We have been playing this during the 1944 Summer offensive of the Finnish Continuation war. In two earlier blogs I wrote about a Finnish Career ladder based on tanks actually available as well as tanks that could have been (more in the links here and here). In doing this I felt that I wanted more continuation war so I have painted up a Platoon of 15mm Finns from Battlefront (the same guys who makes Flames of War) and some supports, that I intend to use for playing Chain of Command by Too Fat Lardies (link here, but I suppose that the platoon can be used with any WW2 Platoon based rules).
Incidentally Osprey’s book vote this month offers the following potential title (with only a few days left).
Soviet Rifleman vs Finnish Infantryman: Continuation War 1941–44
From June 1941, Finnish troops fought alongside German and other forces against the Soviets. After recovering territory lost in 1940, the Finns participated in the siege of Leningrad before facing a renewed Soviet onslaught in mid-1944.
In my option there is far too little produced on the Continuation War in English – if you find this period interesting please click and vote here. Back to the platoon.
From the excellent Jaeger platoon webpage (link here) we find the following information on the Infantry Company from 1943 to 1944 (there is also information there if you would like to run a Machine Gun platoon or an Anti-tank platoon, both these could offer some interesting battles):
Command Squad
Gas Protection Section
Antitank Squad
3 Rifle Platoons (4th Platoon usually only on paper), in each rifle platoon
– 8 men (light machinegun + submachinegun + 6 rifles)
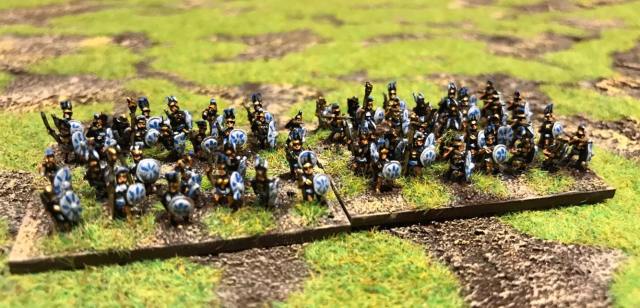
Relatively straightforward, here is a Rifle Squad.
The Finnish squad, the Alikersantti (Corporal) in the Front with a Suomi Submachine gun, leading his squad of six rifle men, submachine gunner and a light machine gunner (the domestic Lahti, that was relatively unpopular but since I do not have any with captured Russian LMG this will have to do). The LMG comes in the Jalkaväki Platoon (FI702), this is standard infantry, see more below of what the pack contains (however I have had some variation in the content for the packs I have bought). To get sufficient amount of SMGs you need to buy the Jääkari Platoon (FI703). This will give you what you need.
and all of the squads
I made all the squads the same combination of miniatures.
…and finally the company command (note that the runners are not included as per normal Chain of Command praxis).
Vänrikki Ruotsalainen and Kersantti Pössi
In a discussion on the Too Fat Lardies forum the potential of more Submachine Guns in the squads were discussed (link here), so I did a few more submachine gunners (some of them have very big hands!).
Some extra Submachine Gunners
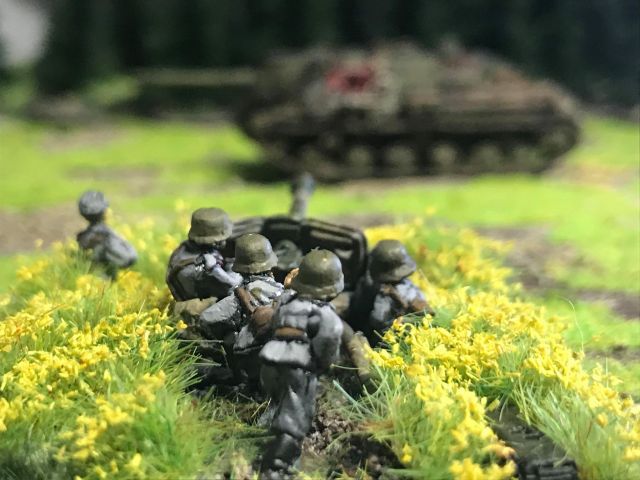
In addition the Finns were equipped with both Panzerfaust and Panzershreks in the Summer of 1944.
Some punch against those Russian Monsters! (They were being used from June 1944). The Panzershrek was called Panssarikauhu by the Finns and the directive was to repaint them in Finnish Camouflage Colours before being used – I need to rectify that or pretend it was pressed into service without a repaint. The Panzerfausts were called Panssarinyrkki. Before this (and after) the Finnish infantry man would have used Anti-Tank Mines, Anti-Tank Rifles, logs and Molotov cocktails in trying to stop the metal machines.
I also some did some other supports,
Sniper Team
Some Medium Machine Guns
A medic (a artillery chap with a green stuffed bag on the front)
An anti-tank gun
I will try to get some more types of anti-tank guns and also some Anti-tank rifles, but in combination with the tanks I already have (see the link above) the force is ready to go and try to stop the Russian Onslaught.
Here are the contents of the various platoon packs from Flames of War (to build the platoon above you need to get FI703 and FI702) :
FI703 Jääkari Platoon – 1 Officer with a Pistol, 1 Officer with SMG, 5 No. NCO men (I think, 3 Rifle and 2 SMG), 1 No. SMG man with AT Grenade, 8 SMG Men, 24 Riflemen
FI702 Jalkaväki Platoon – 3 officers (one with pistol, the other with binoculars), 5 NCOs (I think, 3 Rifle and 2 SMG), 1 SMG man with AT grenade, 4 LMG, 29 Riflemen.
FI706 Pioneer Platoon: 1 officer, 5 NCOs (I think, 3 Rifle and 2 SMG), 13 Pioneers with AT grenades, 18 Riflemen, 2 Flame-throwers.
In addition I got the following packages for supports:
You can buy this directly from the Flames of War website, your favourite retailer (like element games) or occasionally get some good deals on ebay. The total cost for the above, excluding the Pioneer Platoon, is about £55, excluding postage. This gives a lot of spare miniatures but I have a cunning plan for those at a later date – it is from one of the scenes from the recent Finnish 2017 blockbuster “The Unknown Soldier”.
Here is a trailer that contains the scene in question., 54 seconds in.
I actually bought the Pioneer Platoon pack, but as for variety and uniqueness it only offers the flame-thrower model. For £12 to £14 for a pack it is perhaps not really worth it, anyway here is a flamethrower team.
I also have some gents carrying Anti-tank mines, they can also serve as an engineering team, or part of a anti-tank hunter section (with the Panzer knockers! above).
The platoon can now report for service, where is the enemy?.
A lonely man is observing the advancing FinnsHe stays hidden and signals frenetically towards the Roller of Ones
Ok, ok, I only have painted one of the opposing side yet. I thought I start out with some Russian Scouts and make a Recon Platoon (as presented in the Lardies Xmas special 2016). But in writing this I have only done a test miniature. This one is from Peter Pigs excellent range of Russian Scouts (link here). But that is for next time…
Привет (Hello), Roller of Ones, Now get you act together and do my platoon!
Second blog update today, as I was a week behind due to various reasons…
I made a New Year resolution of getting my Winter War progressed and I think I have done so during January and February (if you go back and check some of the previous blogs). However it is time to box it up for now and progress with the hobby day job of getting ready for Joy of Six this year – I have no idea about my current progress on this project as I do some stuff on it every now and then. I will spend the next few weeks getting this back on track – I suspect that I will need to paint a fair few Swedish infantry units. So the Winter war gets packed away …. (links to the relevant blog entries forming part of the winter war stuff at the end of this blog posting).
….and the 6mm Great Northern War is back in focus.
However before the snow melts let us have a look at some of the Winter War stuff I have been working on since the last Winter War blog update 2 weeks ago. First some road tiles and then a log fire.
Doing Winter Roads
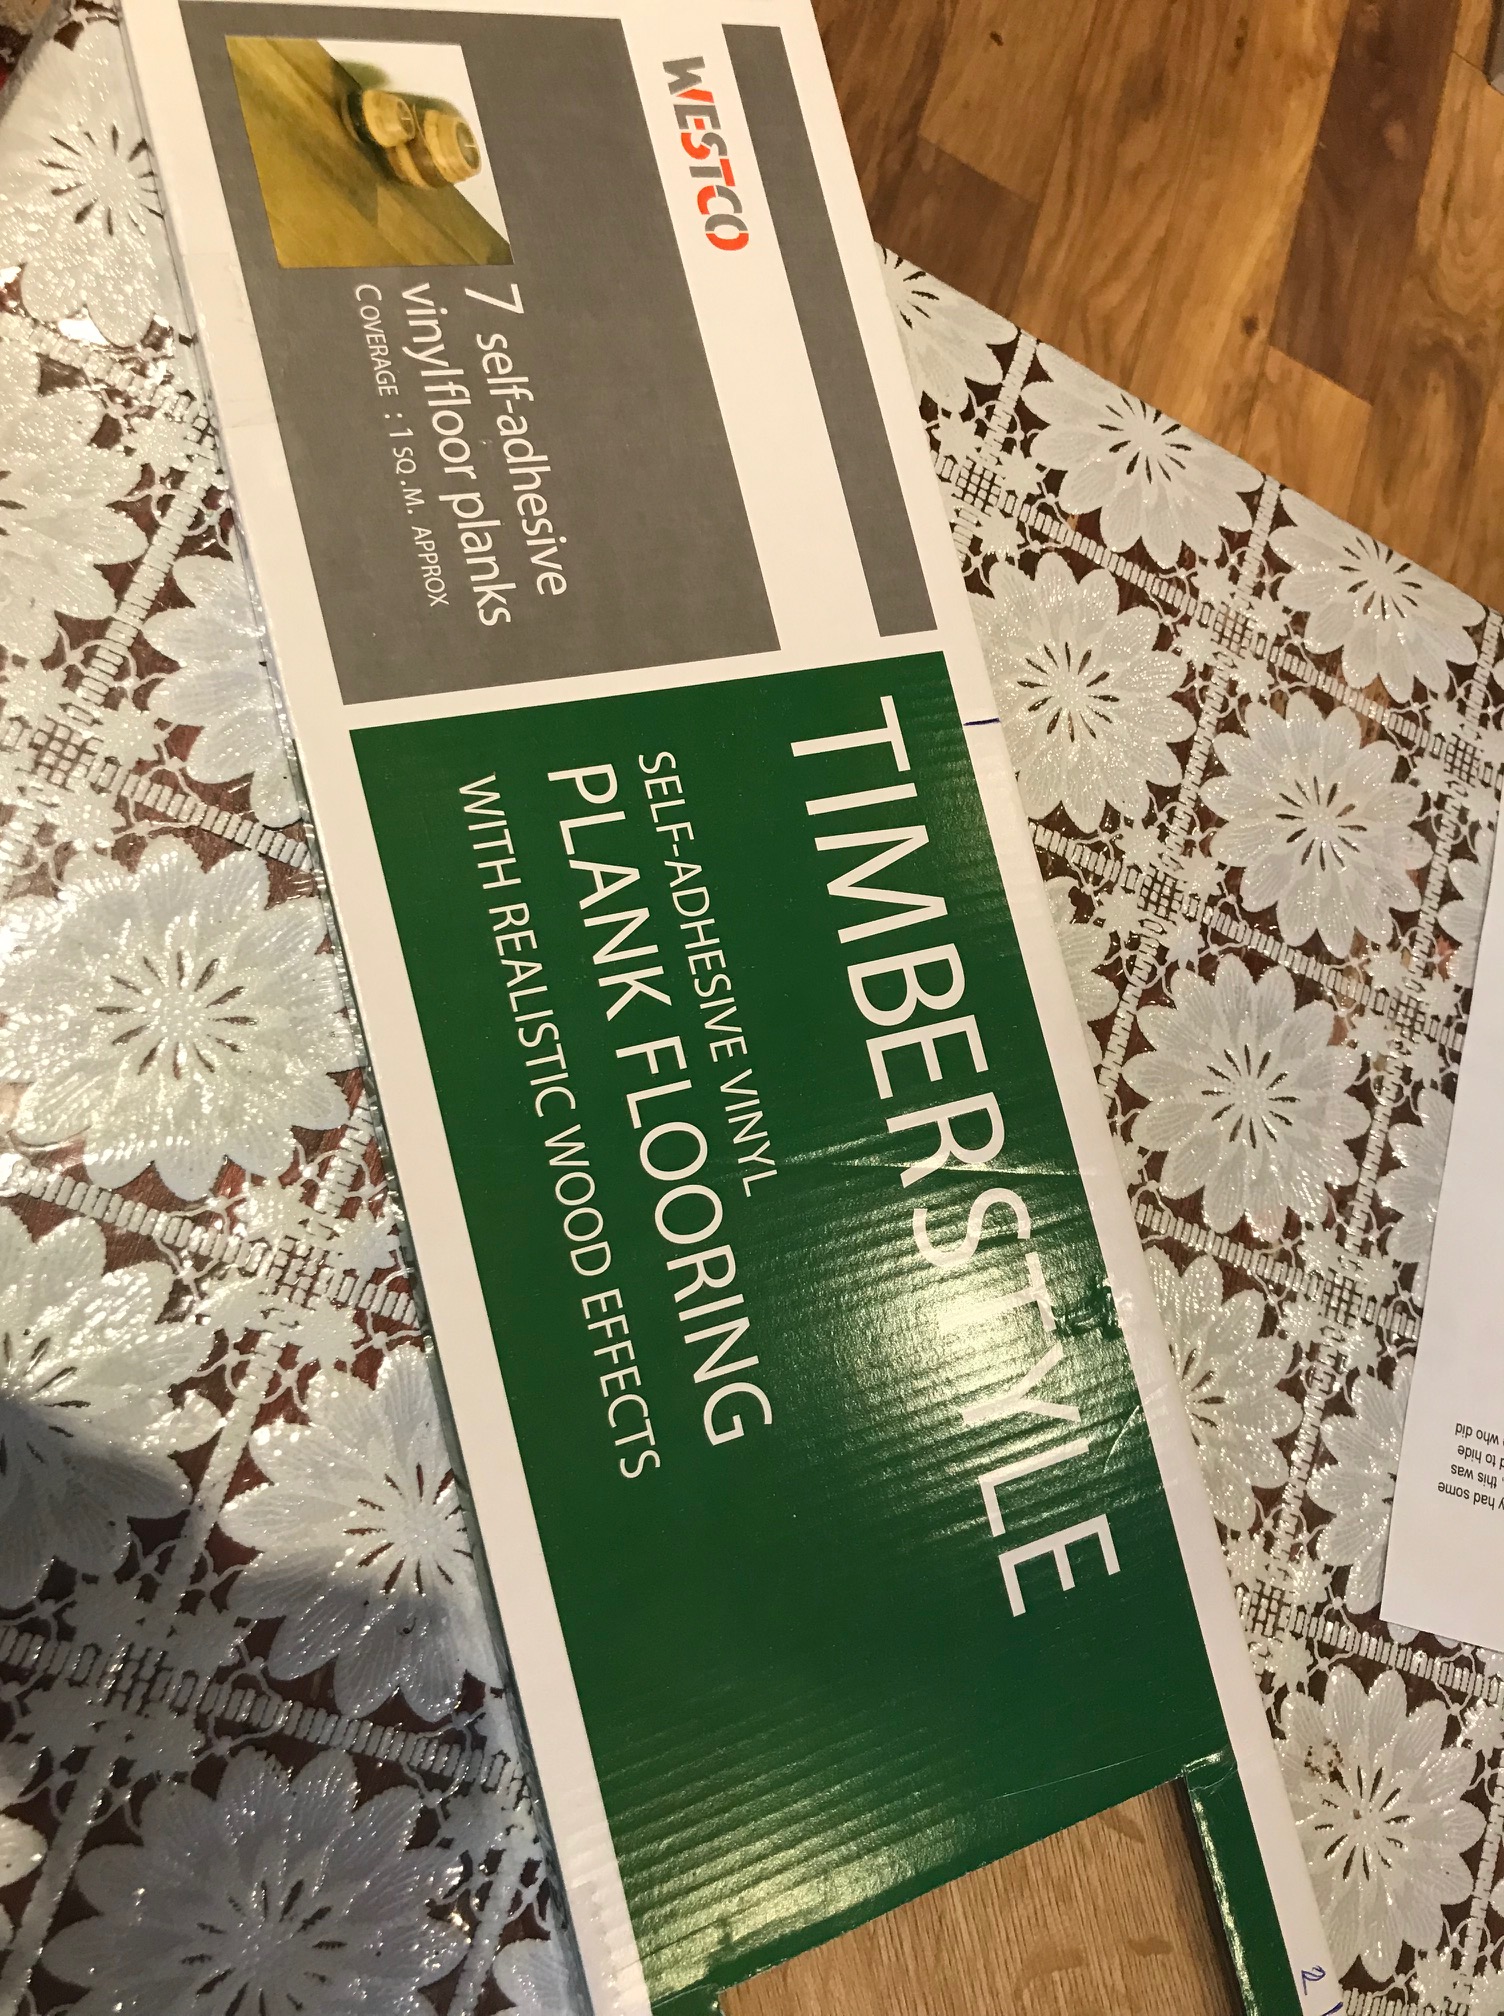
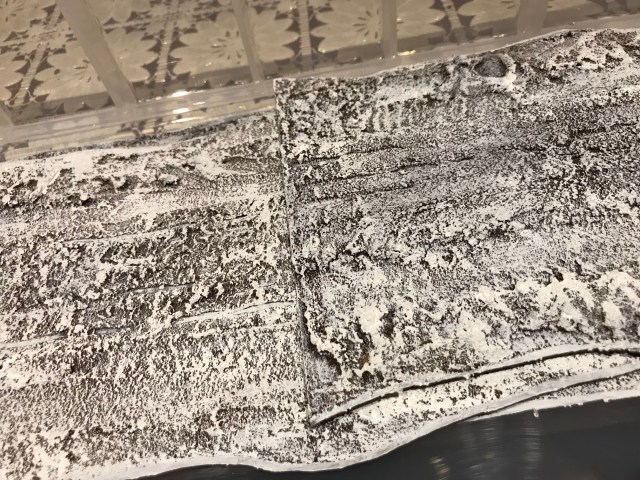
I wanted to make some wintery roads and got myself some self-adhesive vinyl planks. I have used these before and they come in 3 foot lengths. At these lengths they are fragile and can easily snap but it allows the creation of longer pieces – which I like. If I am not careful enough I have to make a new one! – no problem. You could make shorter lengths if you are worried about handling and storing them.
About a tenner from Wickes – 7 planks.
The width of the Raate road was 5m (so in 15mm the same as 50mm). The planks are 150mm so I used the whole plank width to be able to model the cleared sides of the road as well as the elevated road surface in the middle. I did this by cutting 50mm wide lengths from a plank and sticking them on the top of the base plank I was doing.
Like this!
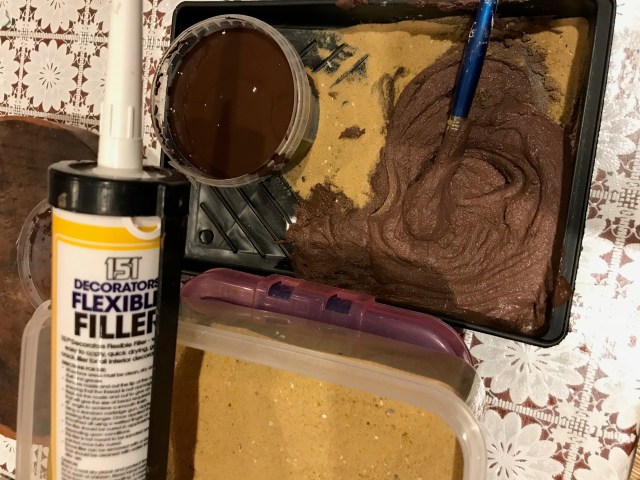
Then I mixed some brown emulsion, caulk (decorators filler, or alternatively an acrylic sealant), bird sand until I get a Nutella like consistency!
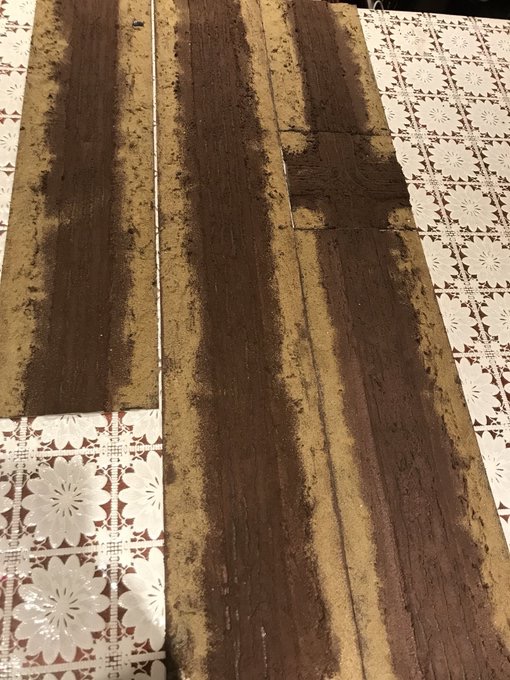
Then I covered the roads with the brown mix, I added some extra sand on the sides and added some tyre tracks with a kebab stick.
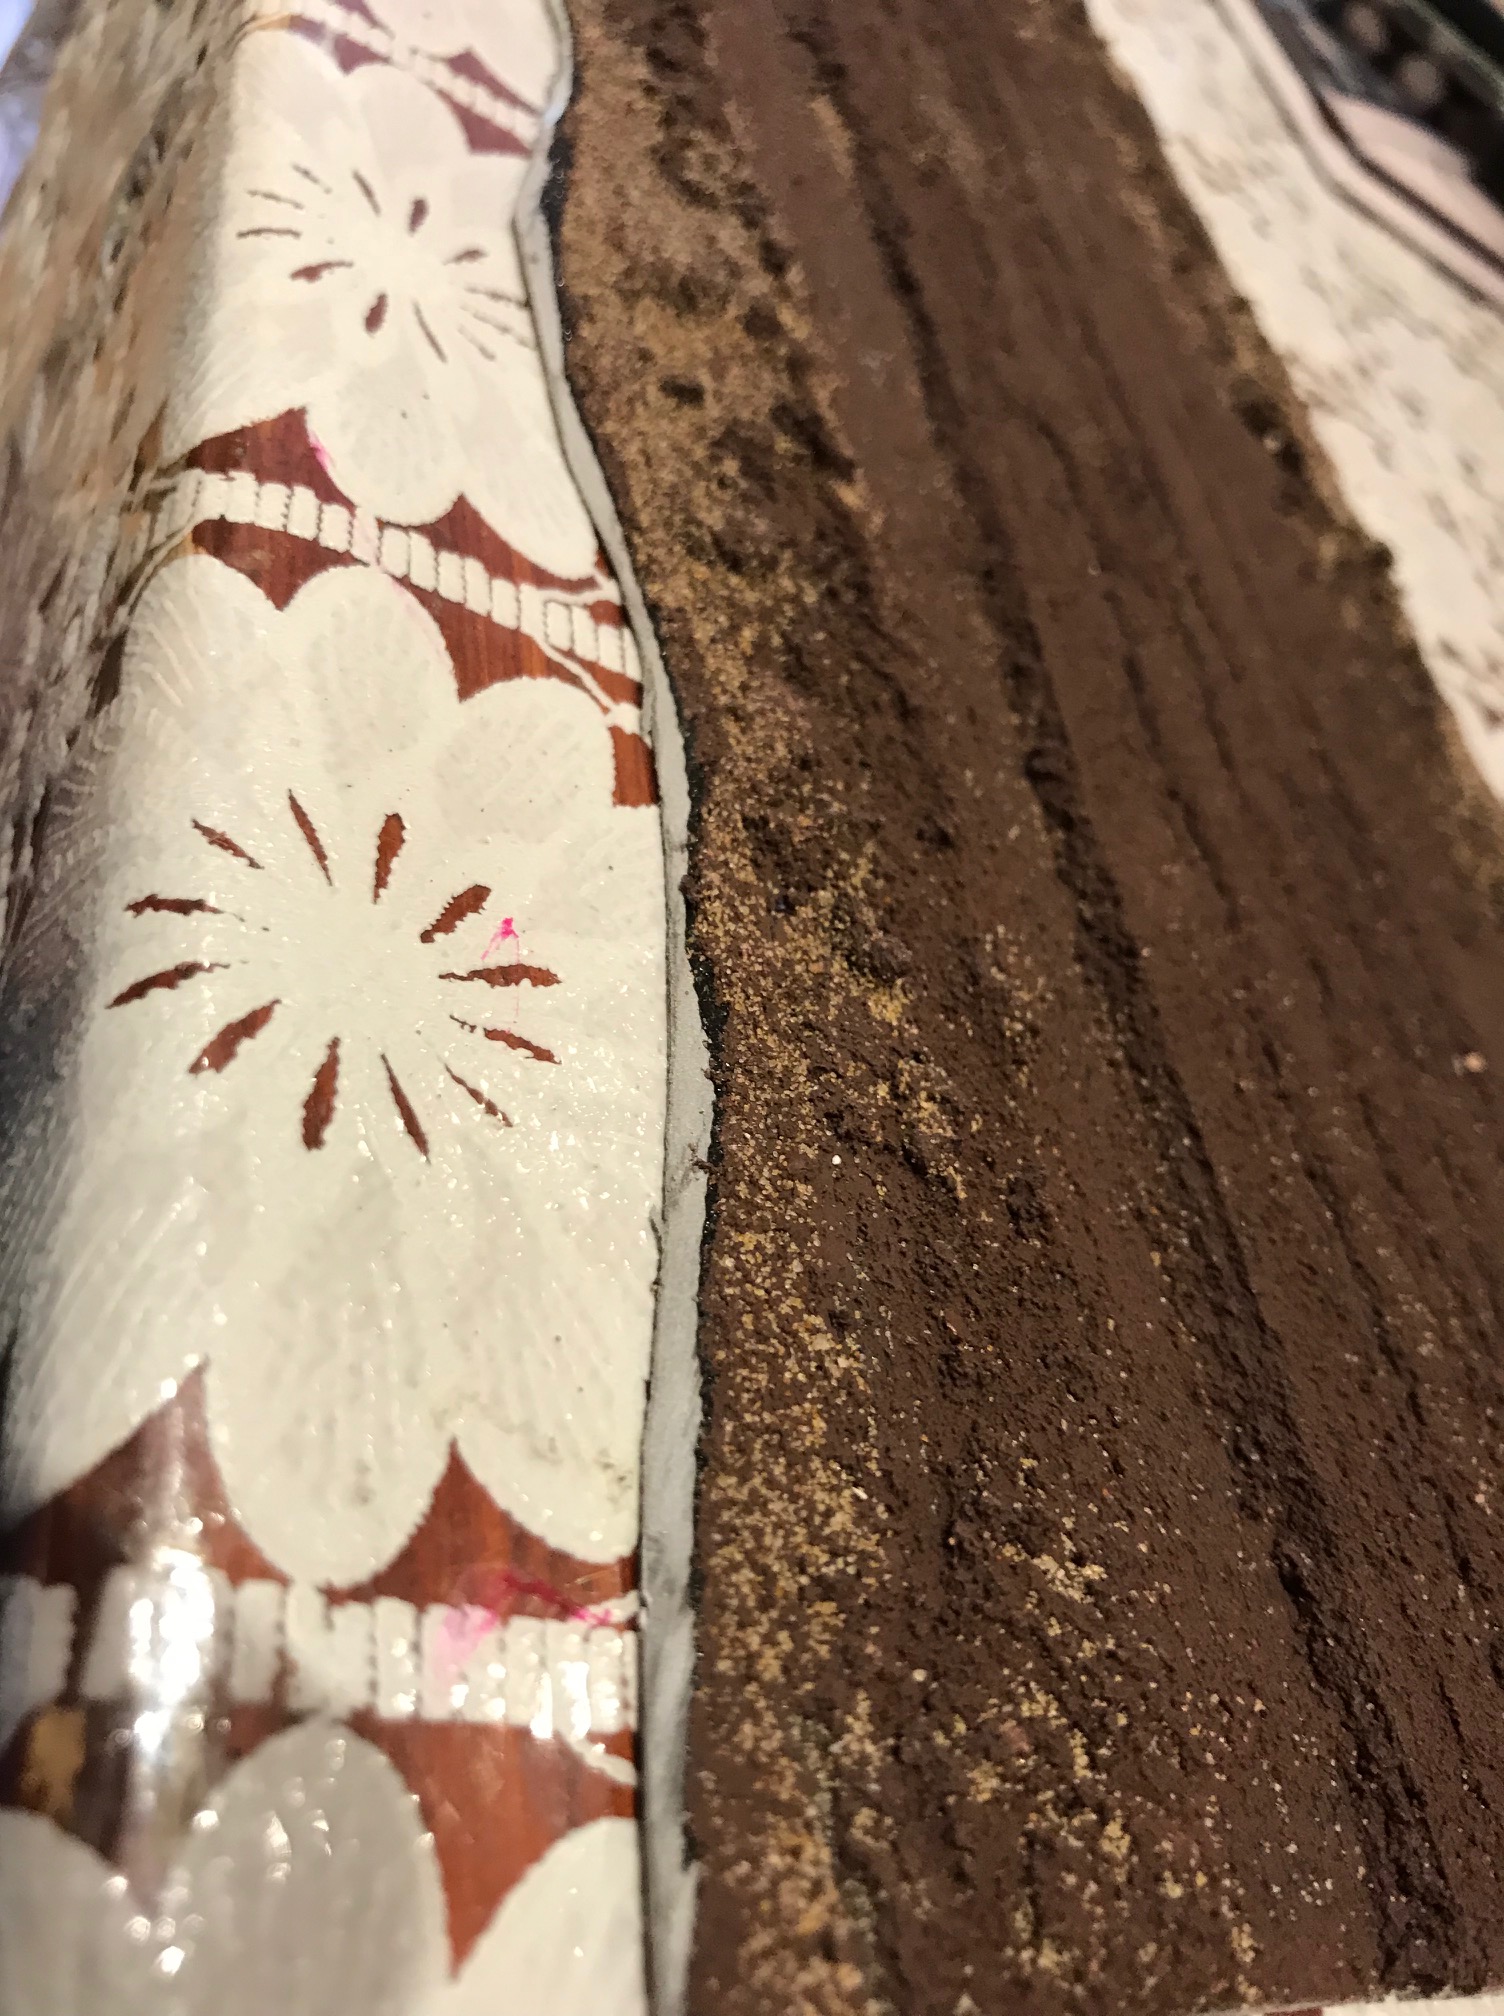
Then I let it dry for a an evening and then shook of any excess sand and trimmed the sides to make them less straight.
Then I drybrushed the road sections with white acrylic hobby paint.
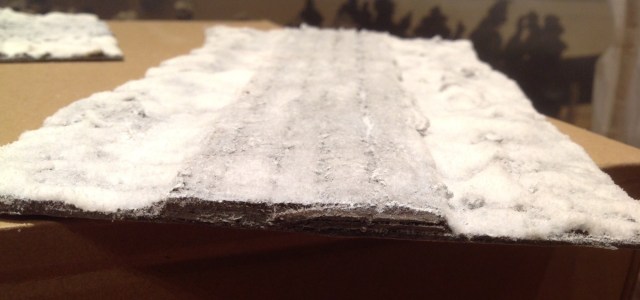
Then I added (on the sides of the road only) the snow flock mixed with mod podge (matt) or PVA glue and a dash of white paint (acrylic) – I think I prefer the mod podge but pva glue is more affordable. On the top of the road surface I use mod podge mixed 1 to 2.5 with Water (you could use PVA instead of Mod Podge) and sprinkle some snow flock over it (I did not include any acrylic paint in the mix that went of the road). Let it dry and apply some Varnish on top (matte variety).
Looks pretty good to me!
Log fire prototype
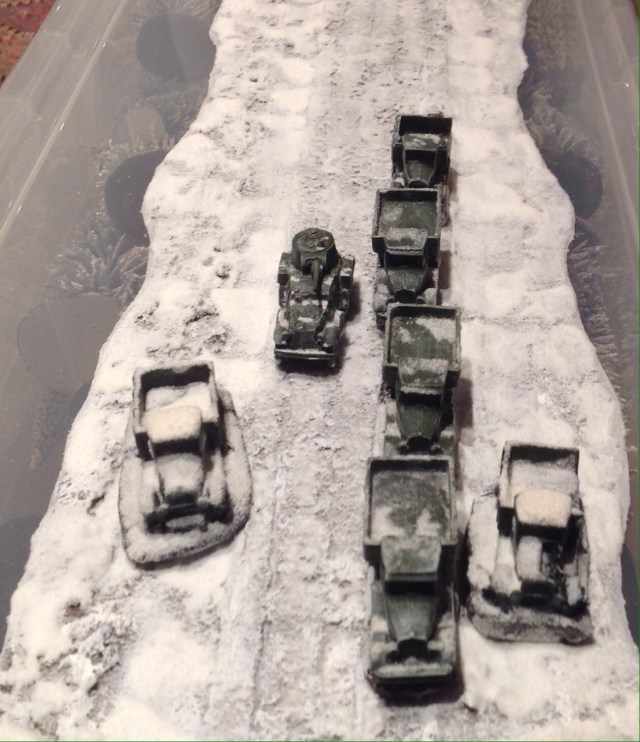
I wanted some fires on the table for a scenario where the column of Sovietic vehicles have stopped and the Sovietic soldiers have dug in and Finns attack at dawn while it is still dark. I had seen some LEDs being used for fire/smoke markers in the past (using the round LED flickering candles).
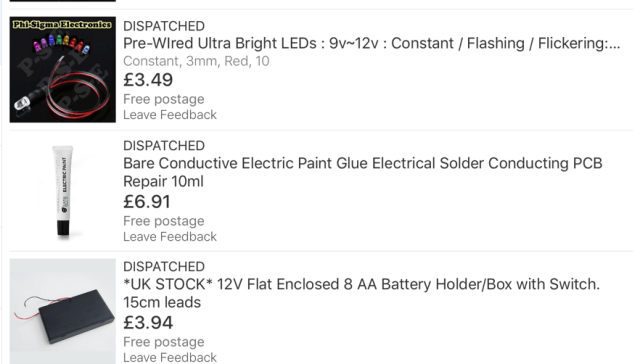
I went on eBay and ordered a set of red constant light LED 3mm 9v-12v (I got ten for £3.99 including postage) and the same but orange flickering (random flashing). I also got a tube of bare conductive electric paint glue (to avoid needing to solder the wire) for £6.91 and a battery holder with a switch for £3.94.
Then I connected up 2 of the orange and one of the red LEDs with the battery box (adding 8 1.5V batteries of course). If you do this, be careful and do not leave it unattended until you are sure it is working as sparks can fly and cause devastation even at these low voltages. Anyway here is how it looks like.
Then I put the construct and some of the cabling on a base and glued it down with hot glue, covered it up with non-drying clay, put some stones around the fire, a dollop of clear silicone on top and pulled it up a little bit to look like flames.
Halfway through the process!
Here is the finished article.
I really enjoyed doing this, a few notes:
Unless you have a permanent setting where the cabling and LED are in you board there will be an elevation around the fire – I suspect no one would put a fire on top of a little hill surrounded by enemies, if they would make a fire at all! If I develop this further I may look at incorporating this into the roads with fires on the sides (in the ditches) or having small hills on the sides with the fires at the start of the slopes.
There are some lower voltage LED that would required smaller flat batteries, I may look into this instead.
Work is taking more than its fair share of my time at the moment, but it happens to most of us. However, I have had some time to get some things done over the last week or so, this is just a summary of that. As always, I do hope it is of some interest.
Chain of Command – dice, casualty markers and suppression markers
Gaslands – finally a game
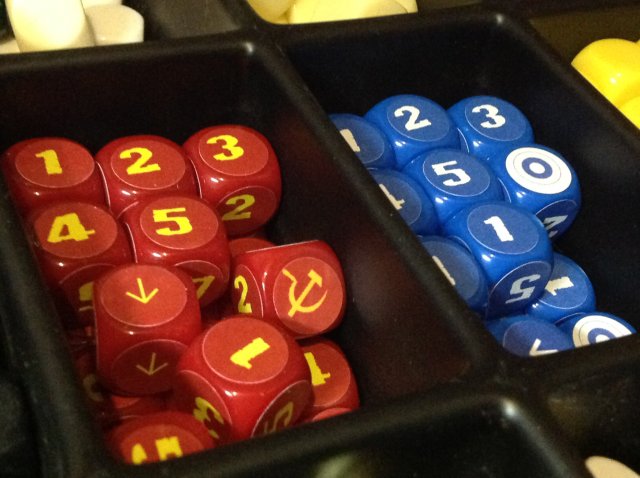
Finnish and Sovietic dice
I am currently working on some terrain and markers for winter war Chain of Command. I wanted to have some dedicated Finnish and Sovietic dice so looked around and found a fair few Sovietic options but only one Finnish (very nice ones, sold by Dice of War in Australia, see here). These are not specific ones needed for the game, just the type where the 6 is replaced by a unit or a country symbol and could therefore be used for any game that uses D6s. I wanted to have blue ones for the Finns and Red ones for the Soviets, and thought I could perhaps do some myself. I found some 16mm blank dice on ebay and got myself a few different colours (these are from China so will take a week or two to arrive!, at least if you live in the UK).
I then ordered some labels/stickers from Amazon (13mm).
From Label Planets website (link here) you can get a word template for this label set and buy bigger quantities as well. From this you can design your own labels.
I wanted to have 1 to 5 in the same font as used for the Chain of Command rules. This font is called Vulgar Display of Power (download it here). In addition I wanted the hammer and sickle for the Soviets and the hat emblem that the normal enlisted men had for the Finns, replacing number 6.
Here is are the files with the sheet I made for the Soviets (Russian Dice) and sheet for the Finns (Finnish Dice), these are word files. You can change these to add your own colours and symbols.
I have to admit that I had some problem with the laser printer I was using in aligning the sheet so that it printed out correctly (I wasted three sheets but luckily managed to get two done, which was all I needed)- the final result is not perfect and if you have trouble I can only say I am sorry.
This is how they turned out.
I will make some yellow Sovietic ones and some white for Finns for Command Dice rolls.
Dead Soviets
One of the striking things with the Winter War are all the pictures of dead Sovietic soldiers especially in the fighting North of Lake Ladoga. Behind my romanticised view of the war and Finnish bias, I am not immune to the hell those Sovietic soldiers had to go through trapped on those wintery stretches of roads, with inadequate supplies of just about everything. Go to the Wikipedia page and read about the Battle of Suomussalmi (link here) and check the losses on both sides – 50% losses for the Soviets and less than 10% for the Finns.
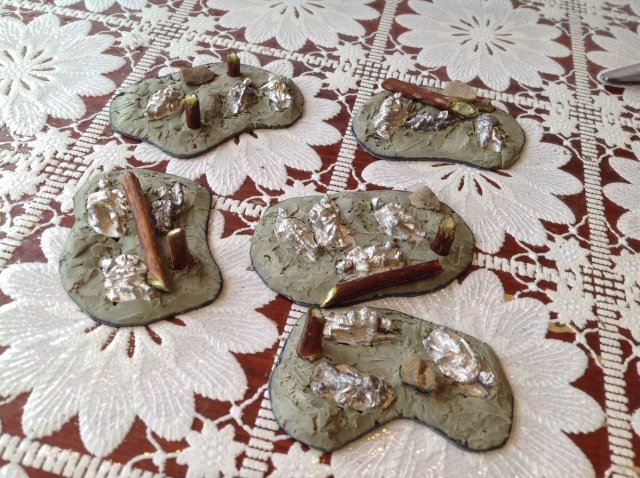
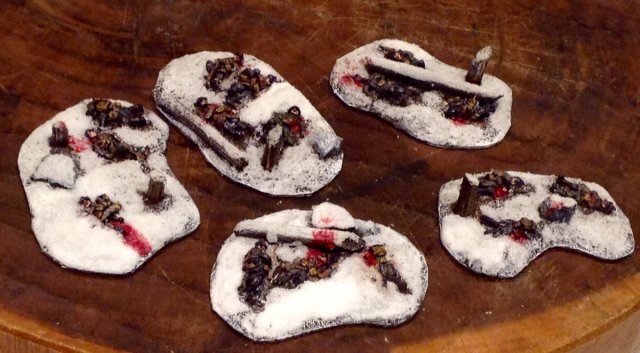
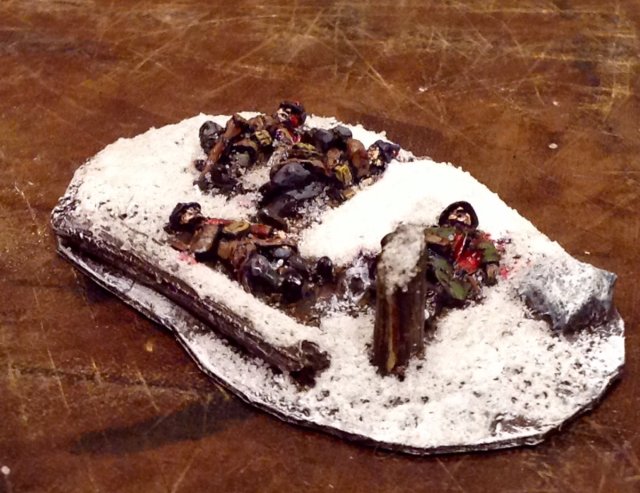
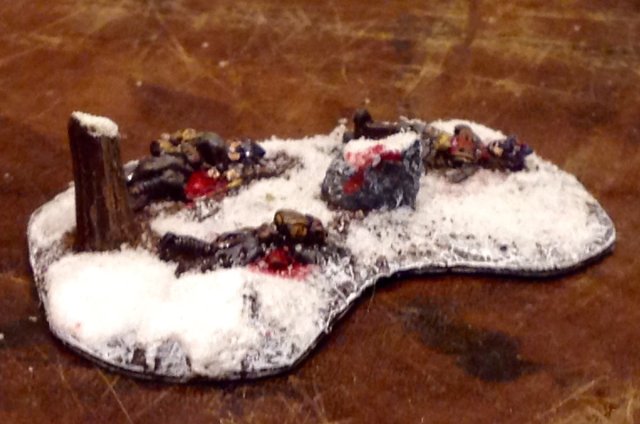
To create a reminder of this I did a few terrain features with dead Sovietic soldiers (I keep on using this term as the soldiers in the Red army were not only of Russian nationality). They were based on Peter Pig casualty markers (based on anything with a great coat and headswaps to pointy Russian hats and early war helmets).
Some Casualties, clay, stones and twigs from the garden
…and here with some painting, winterization and blood (sorry!).
Suppression Markers
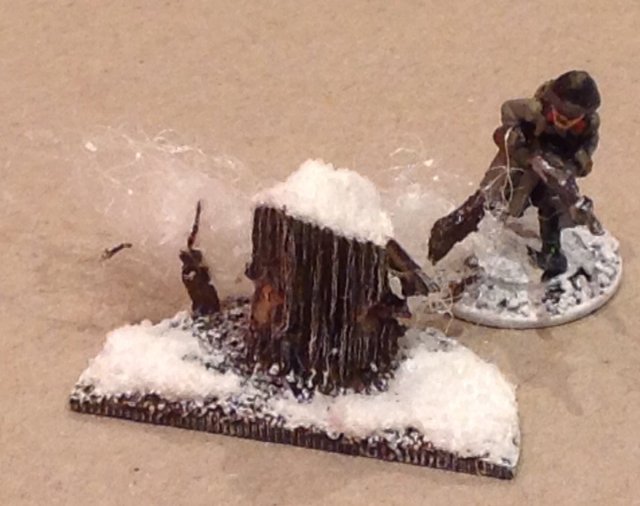
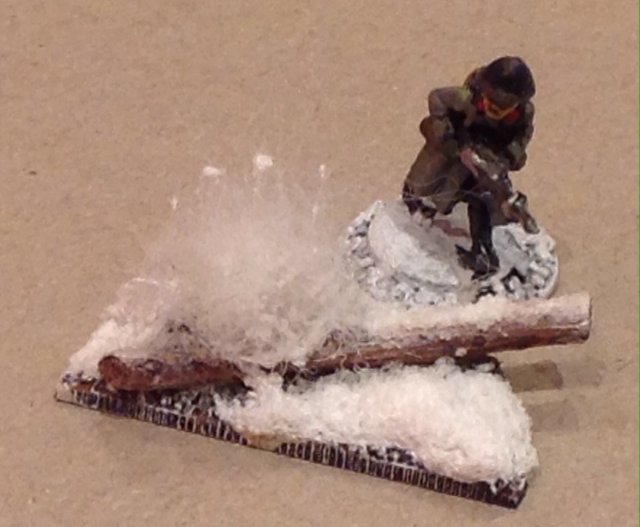
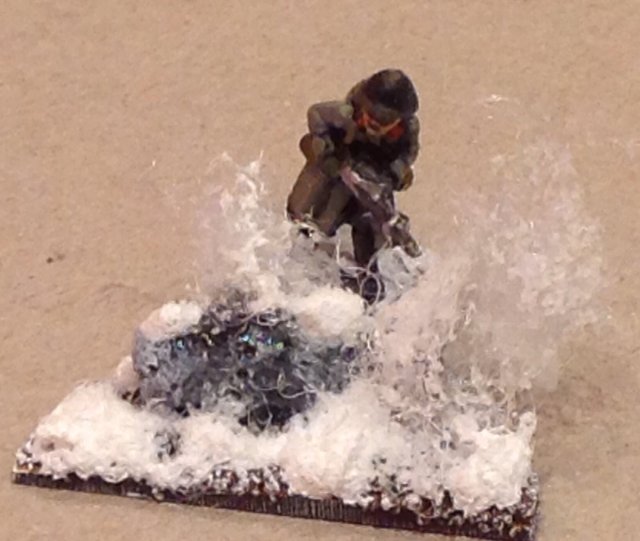
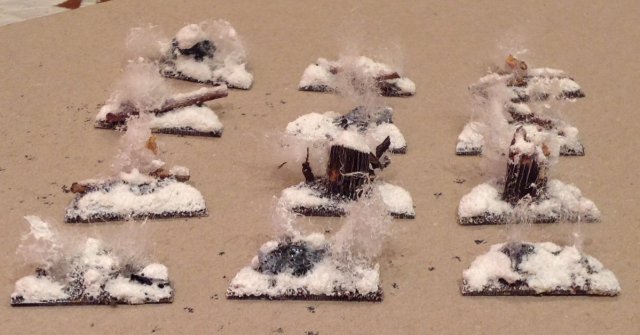
These are based on the concept of snow flying around as bullets hit the area. I used something called Universal Cooker Hood Filter to do the effect. It is like cotton but much stronger, I attached a part of it with superglue and when dry I dragged it out and trimmed it. I also added a little bit of snow flock carefully on the cloud. I think they do the job well enough.
Ivan with his LMG is under fire and splinters are flying from the tree stumpA simpler constructionSnow splashing around a stoneThe full collection
Explosion Markers
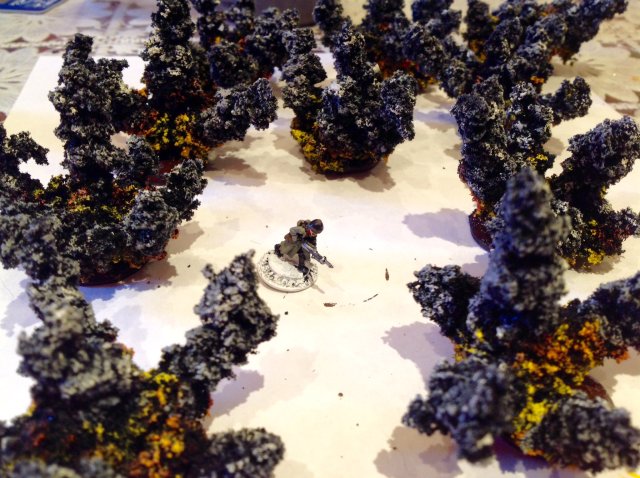
I have seen explosions markers made out of clump foliage and wanted to make some for the winter war table as it will contrasts nicely with the snowy background, and also have some practical game purpose. So I searched around the net for some ideas and found a few different options.
Ivan successfully rolled 12 saving throws
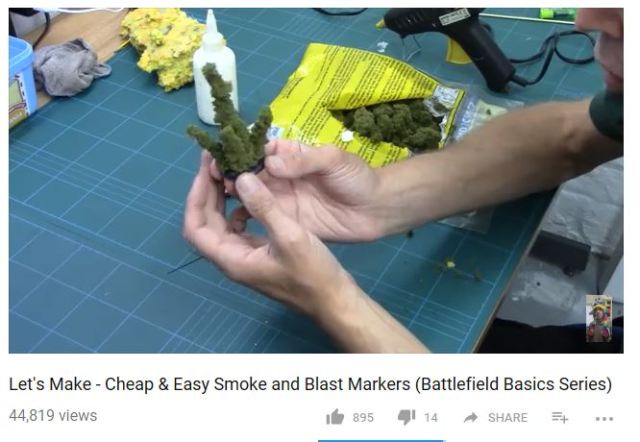
I made my set of explosion markers by following the recipe by the Terrain Tutor (link here). Always excellent, this time he blew me away again!
Terrain Tutor – check him out! Excellent.
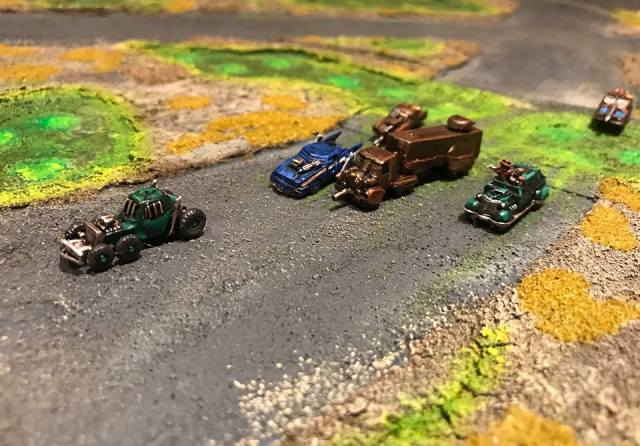
I also had a game of Gaslands with my micro cars! (using 50% templates), and it was great, but more on that another time.
/ All the best (yes I know I should be doing GNW!)
This is a follow-on from the post two weeks show some more Chain of Command markers I need to play the game. These are the ones I have done (for other markers go here):
Patrol Markers – done, see below.
Suppression fire – done, see below.
Patrol Markers
John Bond has a good guide on doing patrol markers and I was going to do them in this fashion using poker chips and then put stickers on – elegant and what you need (link here).
Having read the guide I got myself some Poker chips and found some Finnish and Sovietic symbols on the net to make the stickers from. I then thought that it would be cool to add some skiers on the finish ones and then it all went in another direction, adding stumps, trees and bushes. Overkill – perhaps, but why not? Difficult to turn these around to indicate that they are locked down! Had great fun doing them.
The Finnish Patrol Markers on Blue Poker Chips
“Should I take out the platoon now or tell the others?” (Battle Front Miniature with a twig and some trees)“Can’t wait for this patrol phase to be over so I can get into the Sauna again!” (Peter Pig German Ski Trooper with some trees)“I wished the Russians could have moved Leningrad instead of the border” (Peter Pig German Ski Trooper with a Piece of Clump Foliage pretending to be a bush)“Finally it is a little bit downhill!” (Peter Pig German Skitrooper with clump foliage and twig)“The Officer said that the wolves will eat well this winter – I get it now”, (You guessed it another Peter Pig German Ski trooper with a tree).The Sovietic Patrol Markers“Do not worry about the yellow snow, it was me. I see Finns over there” (Battlefront Miniatures with Peter Pig Russian Early Helmet head swap, a twig and some clump foliage).“Look they are cooking Sausages!” (Battlefront Miniatures , a twig and some clump foliage)“Forward comrade, for the Motherland” (Battlefront Miniatures , a tree and some clump foliage).“Aren’t we a little expose here Comrade?” (Battlefront Miniatures and a twig).“There is something moving over that field” (Battlefront Miniatures , a twig and a tree).
Suppression Fire
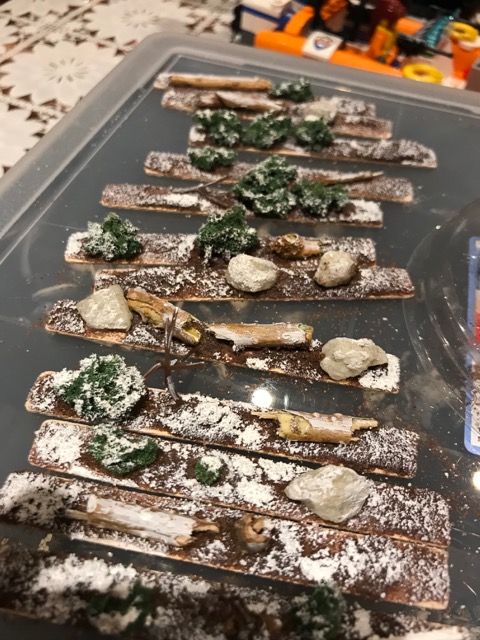
I made these from 10mm wide strips of some wood I had lying around – I suppose I could have used lollipop sticks as well. I added some twigs, green foam, stones and winterises and added some fluffy stuffing mixed with pva glue and some white paint. The last part to stimulate snow flying as shots are being fired.
Bases before snow is added
With snow and flying snow, to indicate areas that are being subject to firing.
I am going to make the suppression markers the same, but smaller.
Romans for Command & Colors
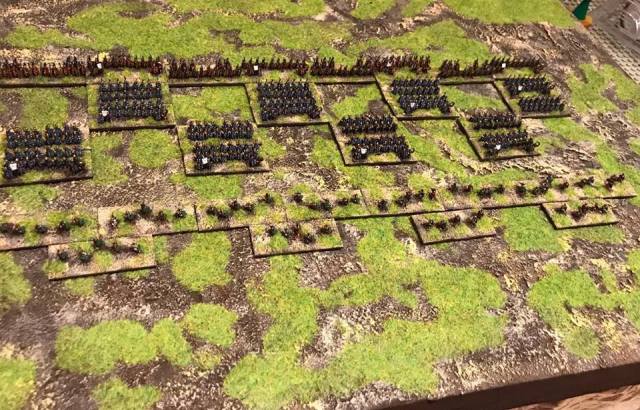
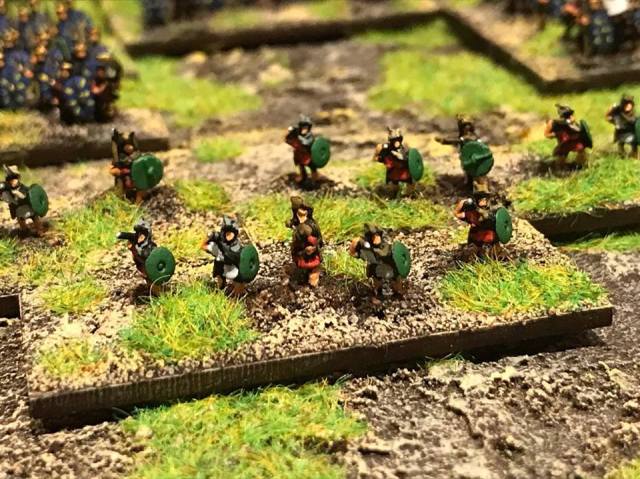
I also had my order in from Marching in Colours (link here) of some various miniatures – excellent as always. I spent the weekend basing and a very limited amount of detailing a large lot of Roman (and allied) infantry that I will be using for my Command and Colors game (see more here although I have changed some of the proposed basing conventions). I will do a write up of progress so far next week and also discuss the amount of bases and hexagons needed for this project. I am also working on the forces that will serve under the Barca family, but that will take some time to complete as I will need to focus on the Great Northern War stuff for the next few months.
The Republican War Machine. I am doing 2 bases per Command & Color unit. Loose one get a dead parrot marker, loose two give it back and loose a base. loose three get the dead parrot marker again, etc. 50 by 20mm bases!Hastati/Princeps/TriariVelitesSamnite WarriorsAuxilia (Italian Allies)
Today marks the 100th anniversary of the Finnish Declaration of Independence from the Russian republic. Incidentally it is also my Sisters birthday, but she is no 100 yet! So double joy. Finland had (since 1809) been part of the Russian Empire and ruled by the Russian Emperor as Grand Duke. Before this Finland had in essence been part of the Swedish Kingdom since the 13th century. The independence and resolve of the Finns have been tested on many occasions, most significantly during the civil war in 1918, Finnish Winter war in 1939-40 and during the Sovietic offensive in 1944. In addition the cold war era was also to become a balancing act in trying to move forward next to the Soviet State. On the whole, this young nation has done an amazing journey as a nation from a very unstable start in 1917, when the deck of random event cards was firmly shuffled, to the current position of strength and stability.
We have put two candles in our window this morning. This was traditionally done to show support to the young Finnish nationalists who travelled through the countryside on their way to Germany (during the Great War) to get military training to aid their fight for Finnish independence. The candles also meant that the house was ready to offer shelter and keep them hidden from the Russian Authorities.
Germany, who was at war with Russia, supported the Finnish independence movement as this would weaken Tsarist Russia. The support was in the establishment of the Royal Prussian 27th Jäger Battalion that consisted of Finnish volunteers. The Anti-Russian sentiment had grown strong following repressive Russification of Finland that up to this date had a certain level of autonomous rule. This had escalated since 1899 and as a consequence many Finns hoped the Russians would loose the war against the Germans.
There is a very interesting article here about the Jägers; covering (i) the time leading up to independence and the actions during World War 1, (ii) their role during the Finnish Civil war that broke out in 1918, and (iii) their influence on the build up of the Finnish army that fought so bravely during the Finnish Winter War in 1939-40 (more here and a further related article here and here). There is a lot of wargaming potential here – but then I have not yet done much with the Winter war Finns and Russians for Chain of Command I completed last year (see more here and here).
However, when Tsarist Russia fell to the Bolsheviks in 1917 the Finns seized the moment – more or less (read all about it here). The rest is history – 100 years ago today! Being one part Swedish and the other Finnish, this is an important day for the family. We will be eating some Karelian Pasty and some Stew and perhaps a shot of Vodka or two (but maybe not the Mango version!).
Also, but a day late, but with reference to the Chain of Command mentioned above, an official “well done” to the Too Fat Lardies on winning the best game category as voted by the readers of Wargames Illustrated. You can find out more about Too Fat Lardies and the Chain of Command rules here. Whilst you are there check out their Podcasts, oddly called, Oddcasts! – enjoy the lard!
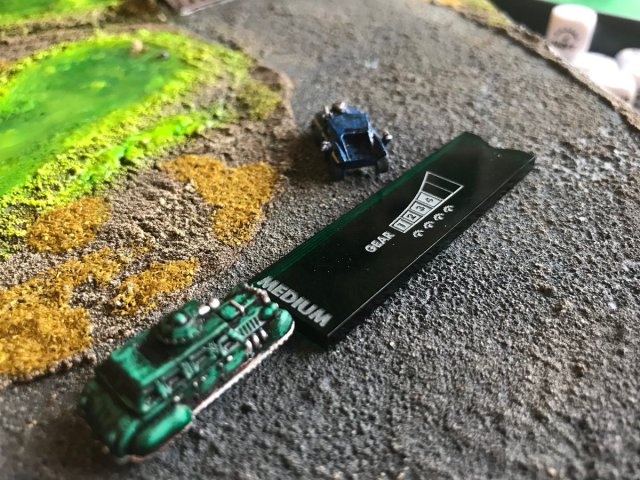
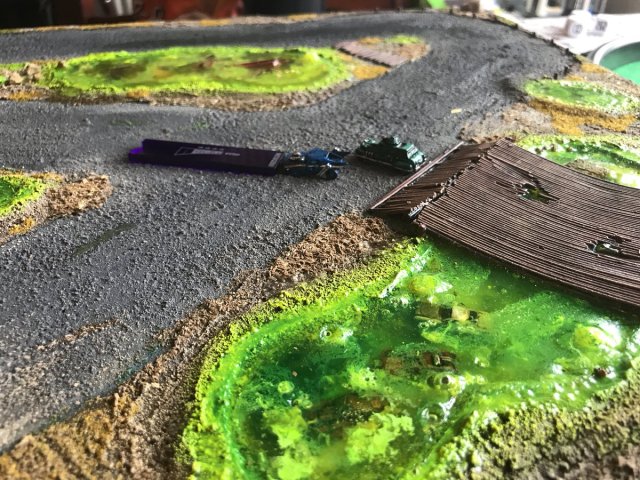
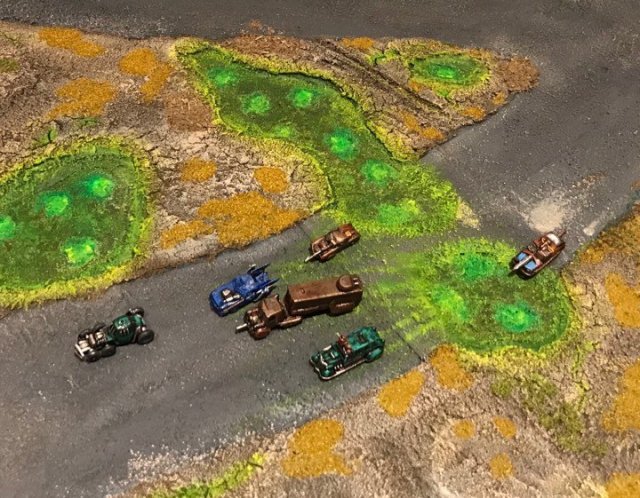
Gaslands moving forward
I have been working on my Gaslands Track I showed last week but did not like it and decided to do a new one – I will pour Resin this weekend. This is how things look so far. We have had the Gaslands Track inspector over and he has given us the Green Glow on the progress so far.
Poltava Anxiety
As you may be aware, I am going to do Poltava at Joy of Six in 2019 as part of the Towards Moscow Project. This is the long term project I am doing with Nick Dorrell and the Wyre Forresters (we did Lesnaya 1708 this year, see here, and are currently working away on the what-if Horka 1708 battle for 2018, link here and here) and I occasionally reflect (or perhaps Stress) on how I want to present it. The Poltava Battle is after all one of the most decisive battles of Swedish history and, I am sorry to say, without doubt a total disaster from a Swedish perspective. I have to admit that I found some of the past Battles that resulted in glorious Swedish victories like Fraustadt, Klissow and Gadebusch easier to present and prepare for than the battles at Kalisz or Lesnaya where the Swedes were defeated. The disaster at Poltava is in a separate league of its own.
One way of doing it is to show the full story including some additional elements on the table than normally are presented. The tables I have seen to date are showing the main action outside the Russian Camp; sometimes the redoubts are included and this is frankly all you need for the Battle. One example of this is the recent Poltava Battle, laid out by Jon and Diane Sutherland, at Crisis (in 28mm). This battle looked absolutely fantastic and as far as I could tell covered the main action and the redoubts. To me it looked as grand as one of Simon Miller’s To the Strongest Offerings (see link here if you do not know what I mean) – a real battle of the era and I wish I had seen it on the day.
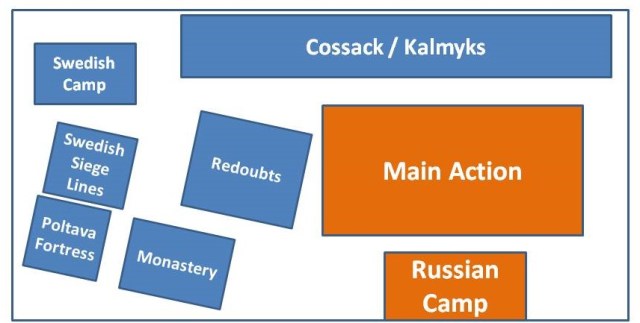
However when we do it, and because we are doing it in 6mm, I will not let practicalities be in the way of creating a different kind of spectacle and will extend the narrative to include further elements that are important to the background of the Battle. So, in short I found myself compulsed to do a little plan/sketch over the battlefield and the various elements I wanted to include in addition to the mandatory Russian camp and redoubts.
Poltava Battlefield Highlights
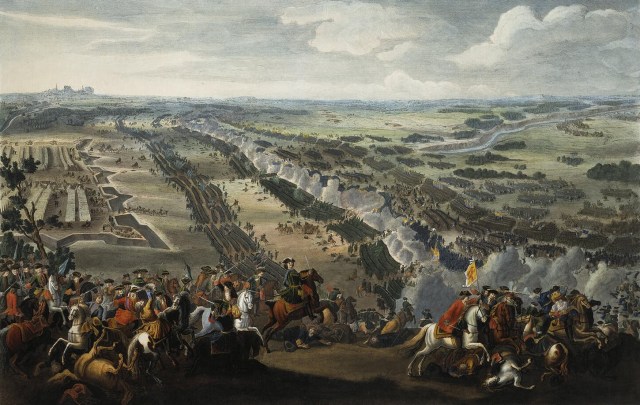
Battle of Poltava by Denis Martens (1726) . The Russian Camp is on the left.Drawing of the Redoubts (more information and pictures here)
Here we go.
1. The Swedish Camp – I want to take all the Wagons that I did for Lesnaya (link here and here) for a spin. The camp will be made from things from the Baccus Equipment Range (link here, EQU04 – Tents and EQU05 – Camp Site). Here is a link to Tiny Troop’s gallery showing some great and very inspirational GNW stuff and what can be achieved with these models as a base.
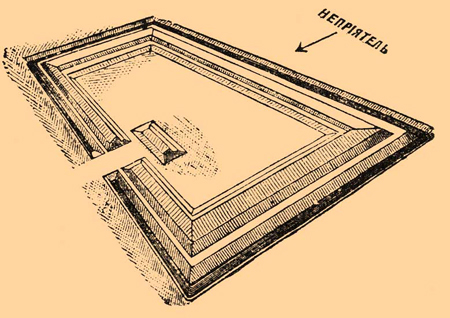
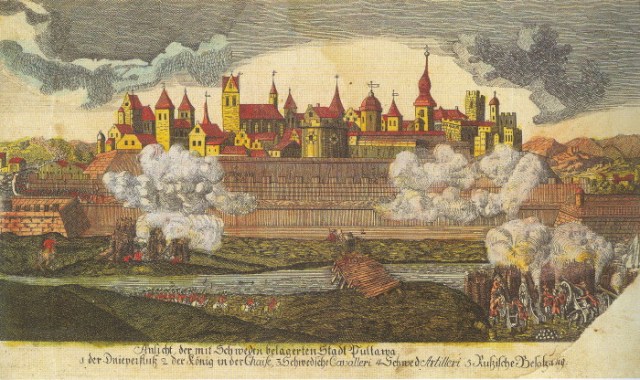
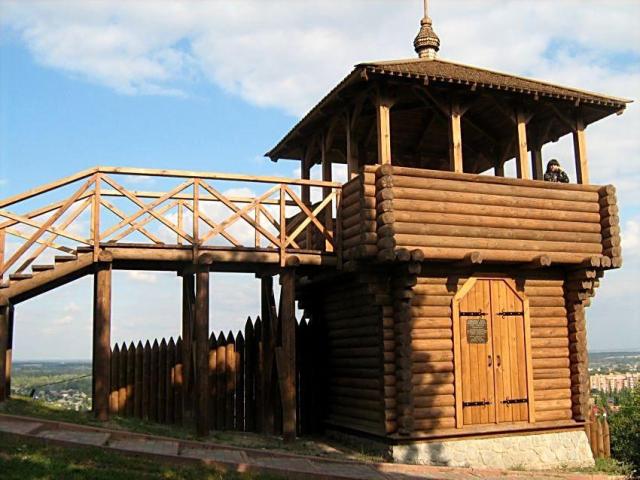
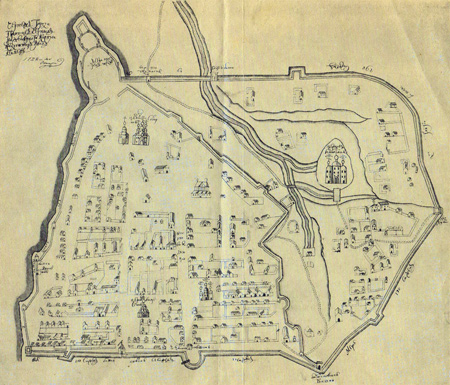
2. The Fortified Town of Poltava – at the time of the Poltava Battle the fortress was surrounded by ravines, had wooden palisades and a number of bastions. It had five gates and each of these was protected by a special tower. I found mainly stock photos, but if you google Cossack Forts you will get the picture – I will do this using very thin spaghetti (see here for how I have used this excellent material in the past). As for some buildings I really like the Total Battle Miniatures range that contains a large number of town type buildings that will work well (link to the range here). Most other ranges contain farm/village type of eastern houses – but for the Poltava battle I want to have the rural look outside the walls and some more “town” character within the walls.
Siege of Poltava – not sure the colourist had been in the region? Actually not sure how accurate anything is in this picture – to be honest.Wooden TowerMap of the Poltava Fortress
3. The Swedish siege lines, with trenches, engineers and artillerists, gabions, siege guns, etc. The Swedish King (Charles XII) had laid Siege to the fortress in an attempt to provoke the Russians to a battle. Again, I will be using stuff from the Baccus Equipment ranges (see link above, EQU13 – Sappers/Pioneers, EQU06 – Military Site) and some Siege Guns and mortars (link here, WSS16 – WSS Siege Guns and WSS17 – WSS Mortars).
4. The Cossacks – the surrounding area is full of Cossacks and Kalmuks and I have a 2 meter frontage worth of these to put up in various places of the Battle (I used these in a similar role for the Kalisz Battle, we last tabled at Salute in 2016, see more here and here).
And finally
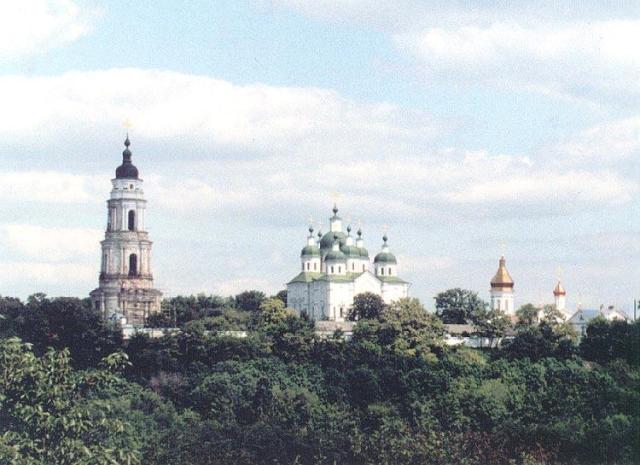
5. The Holy Cross Exaltation Monastery that still exists and have been there since 1650. It sits on top of a wooden hill and it would be shame if this was not part of the table. On the eve of battle it was used as headquarter by the Swedes and the infantry was deployed around it.
I have seen pictures of the Monastery on the net and it typically looks like this.
So in doing this in 6mm with a ground scale with a battalion frontage of about 60mm, some simplification is required, my first thought was to do the centre church and the taller clock tower closer to each other, and that would be it.
I even found two good contenders for the role of the centre church, both beautiful models.
Magister Militium – link here and a very nice model.Total Battle Miniatures – link below.
However doing some further research I learned that the Monastery had been burnt down in 1695 (having been a classical wooden construction) and was being re-built in stone and a the two buildings we can see on this classic picture did actually not exist at the time of the battle.
The left hand clock tower was completed in 1776.
The Cathedral in the middle was completed in 1756.
Leaving us with the following skyline.
So there goes the main features I have had in my mind all these years. As to how it may have looked I have no clue. You can read more about the Monastery (and a lot more on the battle) on this webpage dedicated to the Poltava battle.
So, instead I thought I will represent the monastery with a Eastern type of Church of some kind. There are a number of options in doing this, so what follows is a little bit of a showcase of some of the ones to consider (this is based on browsing pages in the beginning of December 2017).
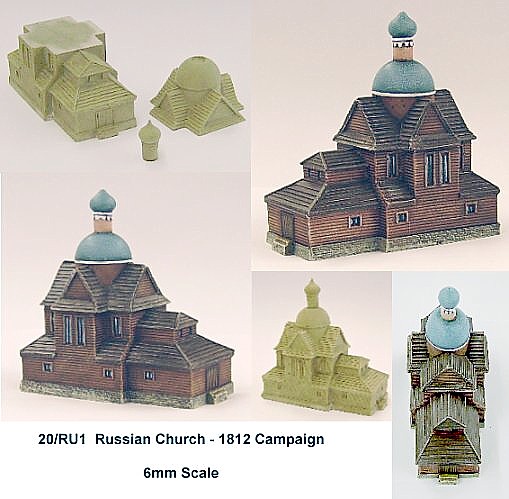
Total Battle Miniatures
I have a few Total Battle miniatures from their Pike & Shotte and Black Powder Europe ranges and they have been used to represent Klissow, Kalisz and some other places in the past. With regards to Eastern Churches there are a few options – with two smaller wooden churches and the massive Orthodox church presented above (link here).
Leven Miniatures
Leven have some options too. I have a fair few of their dark ages range that I use for Saga battles (see more here). They have some fantastic stuff and the range is constantly growing, check out their Vauban fort whilst you are there.
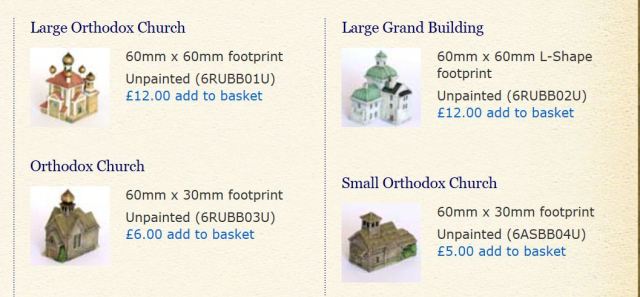
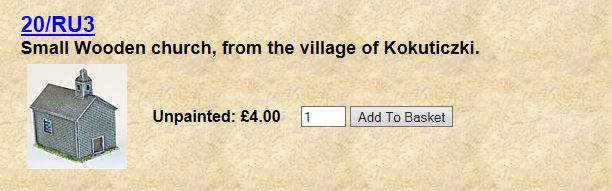
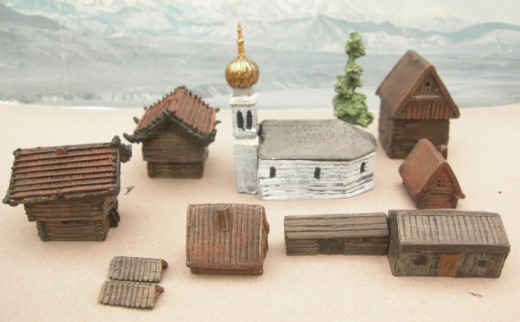
Timecast
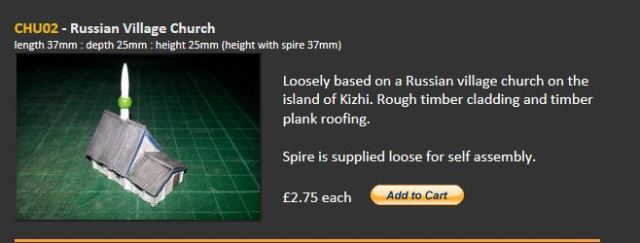
I have a few a number of Timecast’s models including the Small Wooden church. You can also buy a similar small wooden church from Baccus, with a plinth base (More here and here).
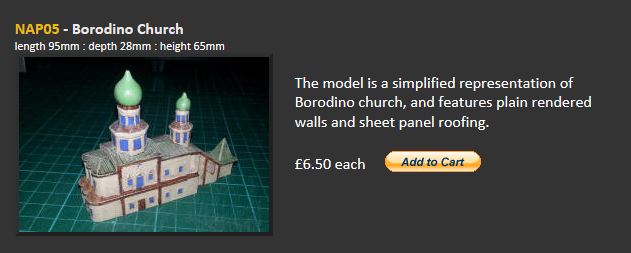
Irregular Miniatures
Irregular offers a Russian Village that includes a Church in their 6mm scenic and assessor range (link here). The full set will set you back £20.
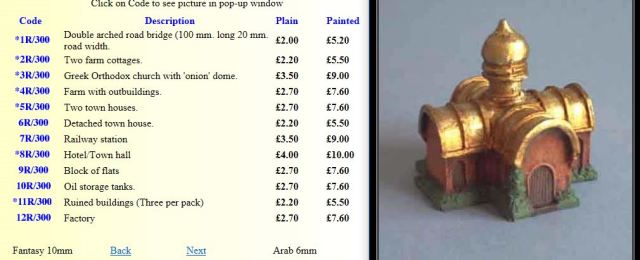
Hovel
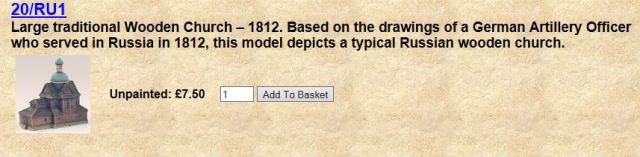
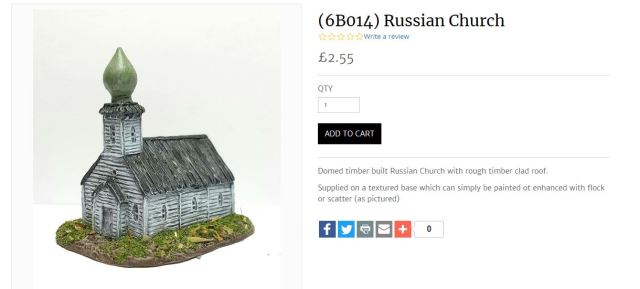
Hovel does a Greek Orthodox Church with Onion dome (link here).
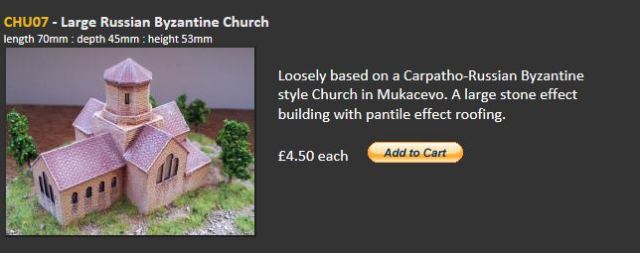
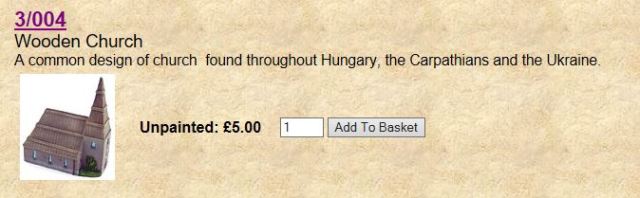
Battlescale Wargames Buildings
I also found this one that I think looks really good from a company I had not heard of before. Link here.
What next
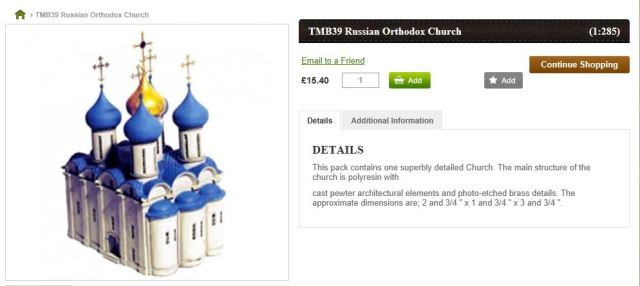
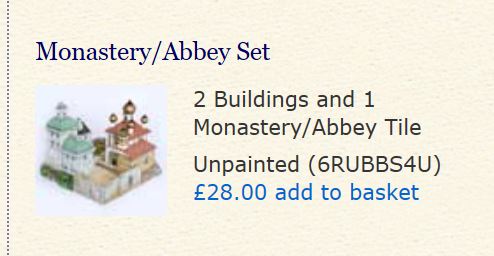
I felt I needed a nice Eastern type of Monastery so although it represents overkill for the time of the Poltava Battle, I went for the more flashy look, and got the following set from Total Battle Miniatures (it includes the monastery and the large grand building on a tile):
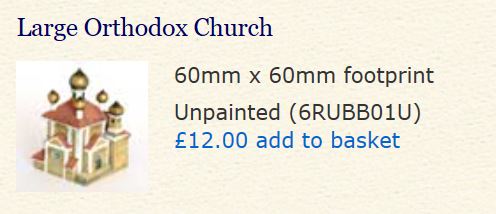
On further inspection I also “fell” for the Timecast large Orthodox Church – this will be my church in the fortress itself, so I got myself one.
I also got the Russian Village church from Leven and the Russian Church from Battlescale Wargame buildings, and maybe one or two other items (like some cottages, mills, Zulu huts!, etc.) as I always feel it is a shame only ordering one thing considering postage. Now, that will deal with my spiritual needs for Poltava (and all of it actually all useful for the Horka battle too) and a few more pieces of resin to toss on that famous pile.


