Handout for Joy of Six 2018

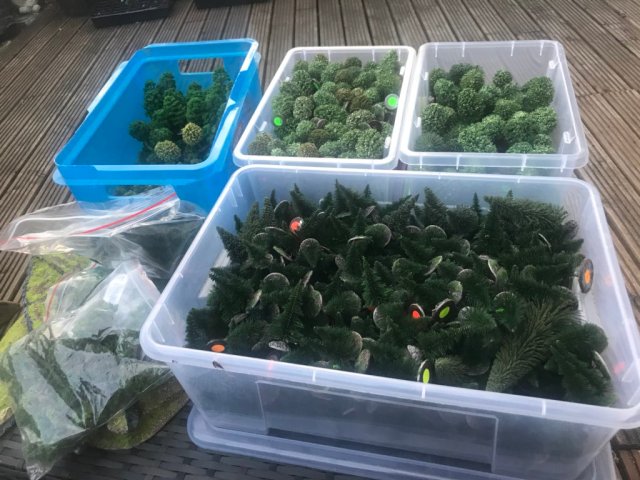
Trying to get organised for the Joy of Six show…

Count Basie! (I hope it is all there).
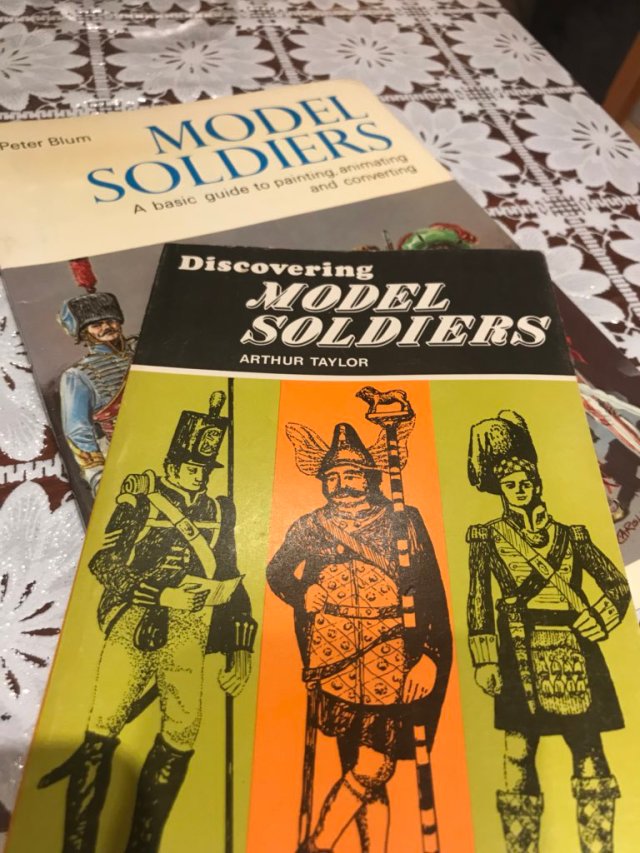
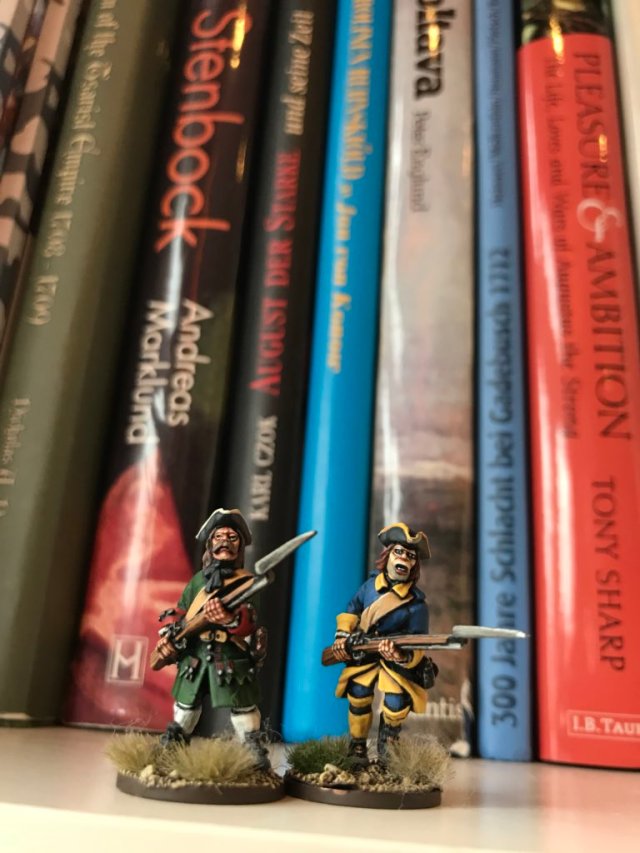
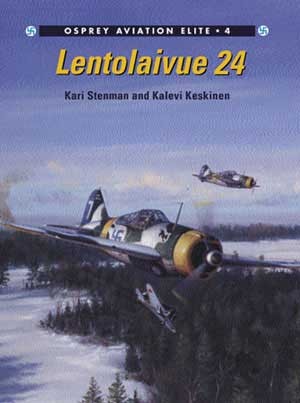
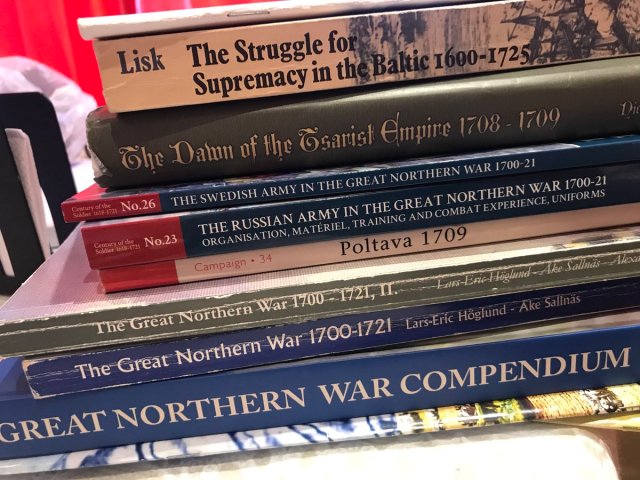
DhkknM9XUAAokHv.jpg

Packing some books

DhkknNCXUAA8suM.jpg

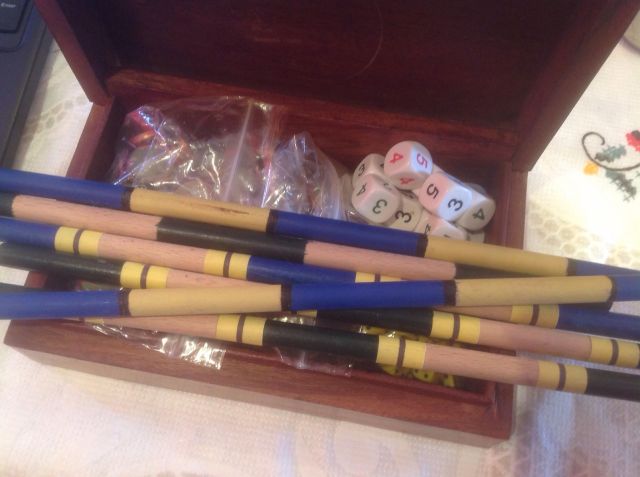
Dice, measuring stick and markers

stick

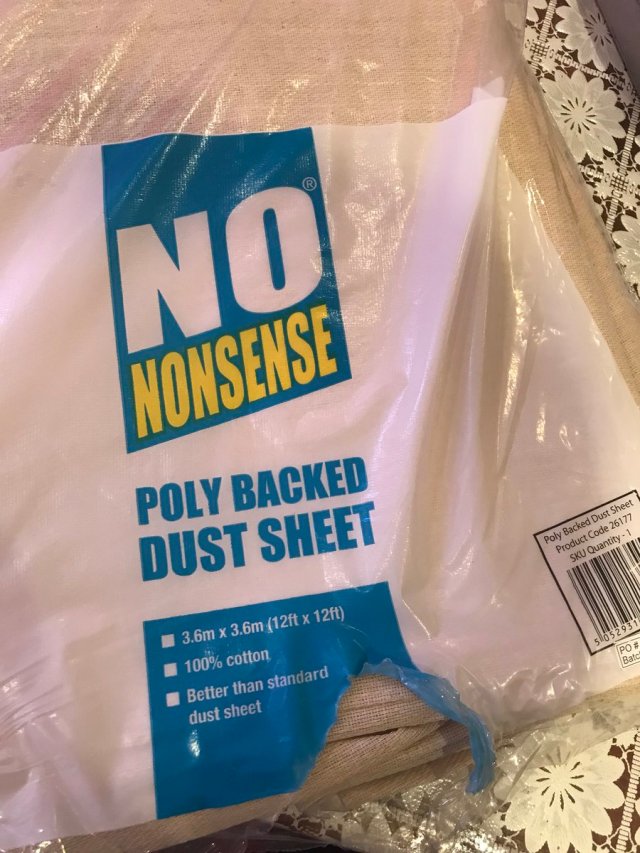
Making the table stand poster…

Horka-map2

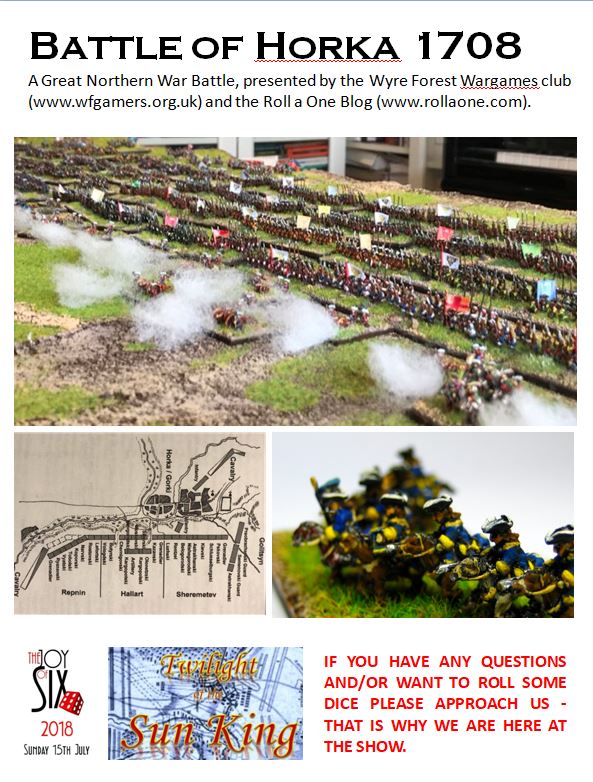
Getting some questions on what we are doing etc so here is write-up for the handout we will be giving out on the day (some of it has been used in previous blog updates), it is to give the passer-by some information on what they are looking at.


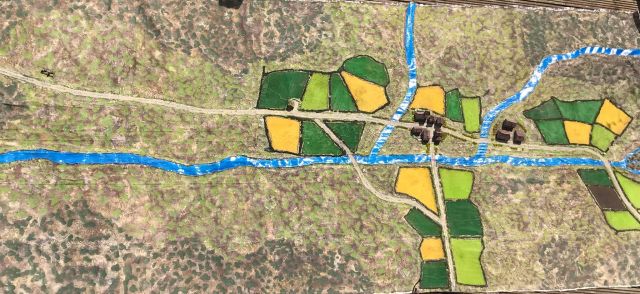
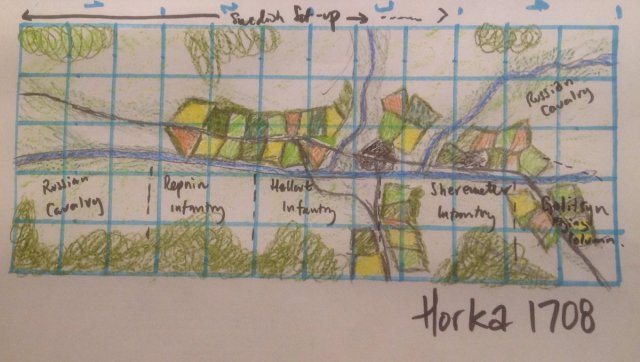
The Battle of Horka 1708 – a what-if battle

POSTSCRIPT – I have provided an updated version of this in a later blogpost (see link here) – there is a downloadable word and pdf document that covers this and also show the forces and the commands we used on the day – I suggest you go to the other blog post and stop reading this).

The Great Northern War started in 1700 when a coalition formed by Peter the Great of Russia, Frederick IV of Denmak-Norway and Augustus II the Strong of Saxony-Poland attacked Sweden. The coalition were formed following the death of the Swedish King Charles XI and based on the belief that the new and very young King would not be able to put up an organised fight.  Following Swedish successful expansion during the 17th century a lot of these neighbours wanted lost territories back, limit Swedish economic dominance and gain access to the Baltic Sea.

However the King turned out to be a skilled warrior and leader of men and the preparedness, quality and efficiency of battle methods of the Swedish army built up by his father was second to none during this era. The King quickly pacified Denmark and a Peace Treaty was signed in 1700 at Travendal. The Russians were defeated at the Battle of Narva in 1700 but then the King turned his attention to Saxony-Poland and Augustus.  However due to a number of factors it took the King another 6 years to defeat the Saxon-Polish and force the abdication of Augustus the Strong from the Polish crown (1706 Treaty of Altranstädt).

But the King still had unfinished business with the Russians and the time had come to march towards Moscow ….

In the beginning of July 1708, shortly after his victory against the Russians Holowczyn, the King had reached the Dnieper river with the Crown Army at Mogilev (in todays eastern Belarus).    It was, he believed, the last major physical obstacle on the road towards Moscow.  The Russians had not made the advance easy as they had applied an scorched earth policy (the same policy that both Napoleon and Hitler would come to know later in history) destroying or removing supplies, burning bridges, withdrawing from villages, harassment of the moving army by irregular Cossack and Kalmuck light horse and dragoons, in combination with the constant rain (it had rained for about 4 weeks almost every day) that destroyed the crops and the hay and also affected the roads that further slowed down the March.  The Russians would not give the King the decisive battle he needed.  An army does indeed not only march on roads in knee deep mud but also on its stomach and there were still another 300 miles to Moscow – but as we know hope was on the way in the form of the column of supply and soldiers being brought by General Lewenhaupt.

“So once the Swedes had secured the area around Mogilev they stopped to wait for Lewenhaupt and his vital supplies to arrive. … Meanwhile the Russian army had also halted and encamped, as the next obvious destination of the Swedes was the city of Smolensk, the Russians occupied a strong position on the road from Mogilev to this city.  The camp was at Horka, sometime called Gorki, a short distance east along the road to Smolensk. … The Swedes considered attacking the position but in the end did not. Had they done so it seem likely that the Russians would have stood and fought.”

from The Dawn of the Tsarist Empire, by Nick Dorrell

We know the King would have liked to get on with it.

“Charles XII wanted to march on and put further pressure on the Russians after their disappointing defeat at Holowczyn – the sooner the better – before they had a chance to recover.”

Translated from Katastrofen vid Poltava (The Catastrophe at Poltava) by Peter From

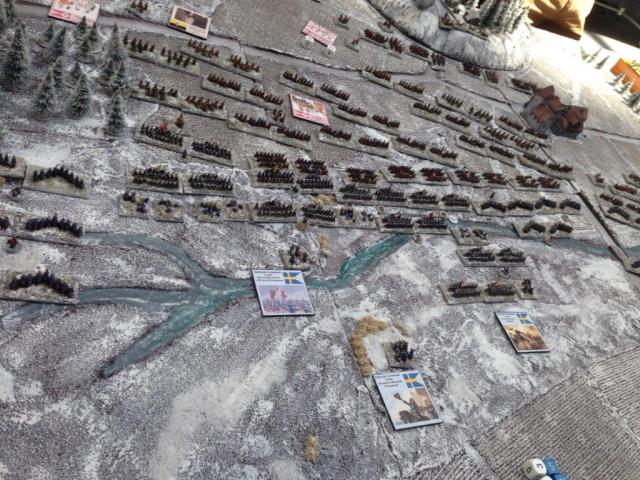
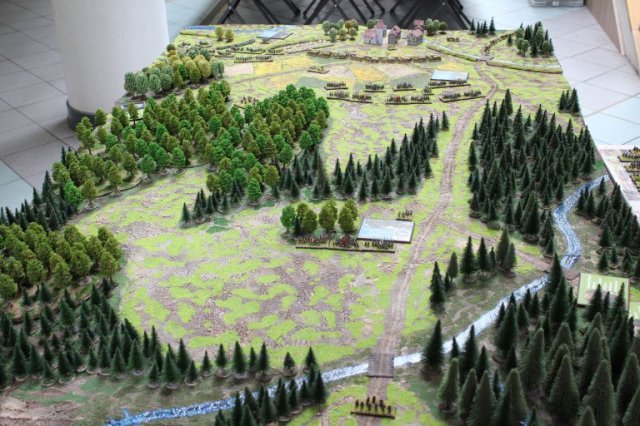
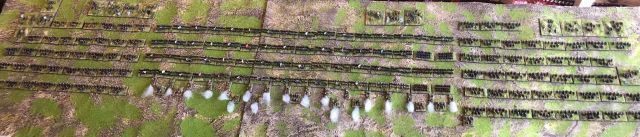
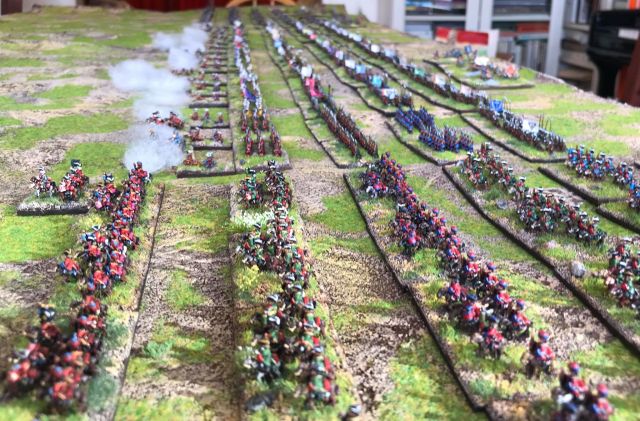
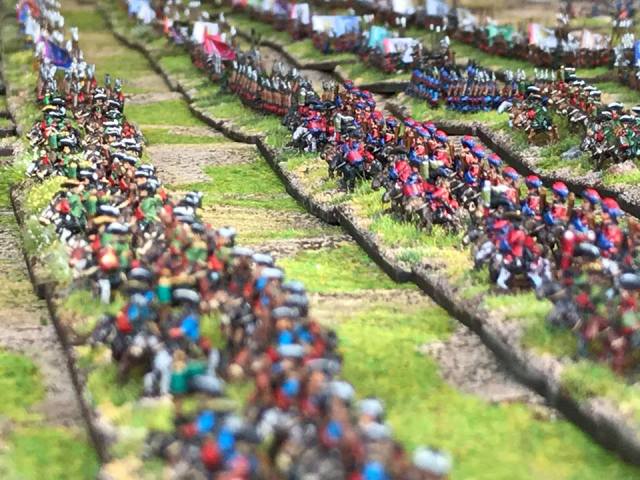
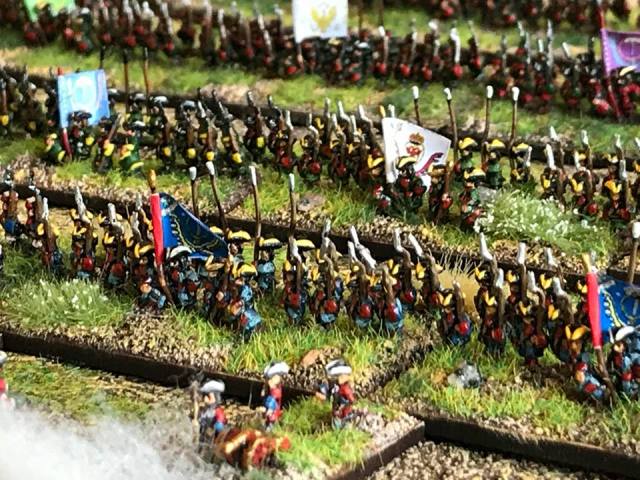
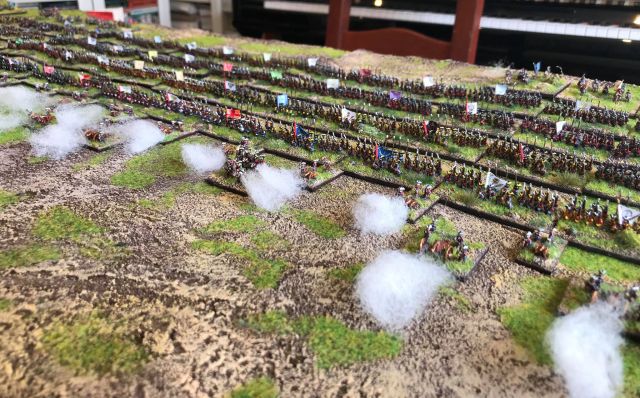
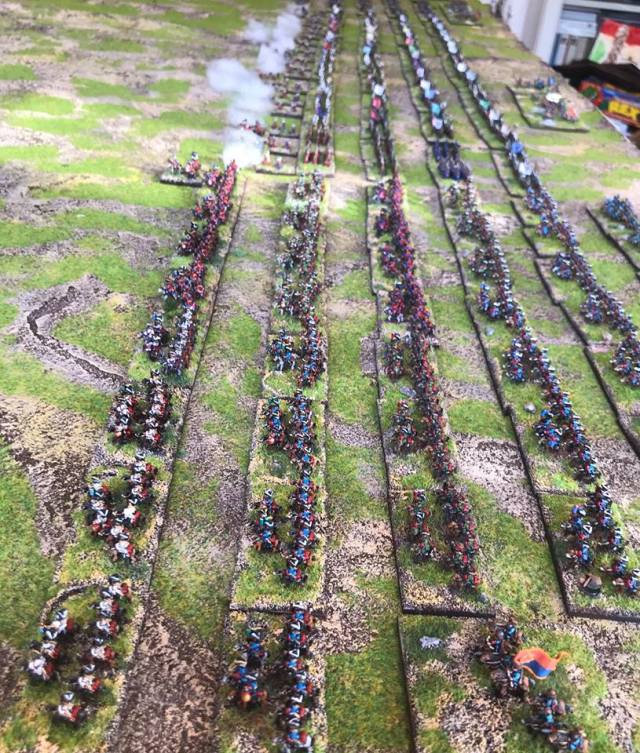
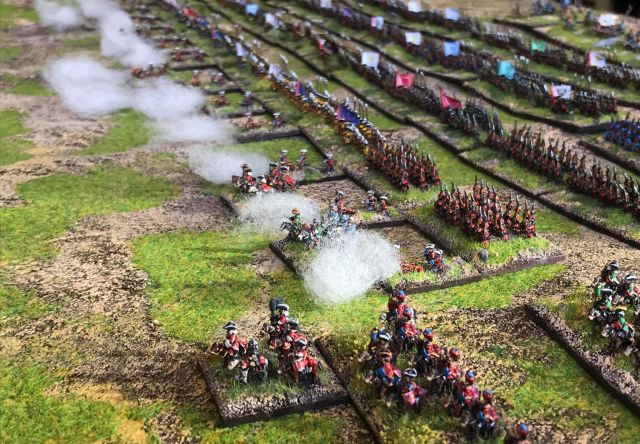
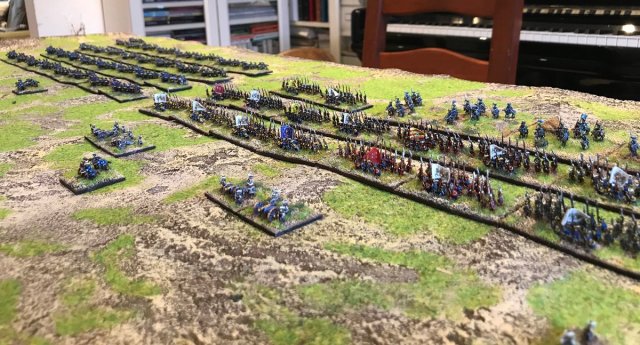
So in our scenario the King gave the order to break up the camp and “Gå-På” towards the Russian position at Horka and the Russians did not slip away.  It is large battle for the period and roughly represent a force of 32,000 Swedes vs. 55,000 Russians.

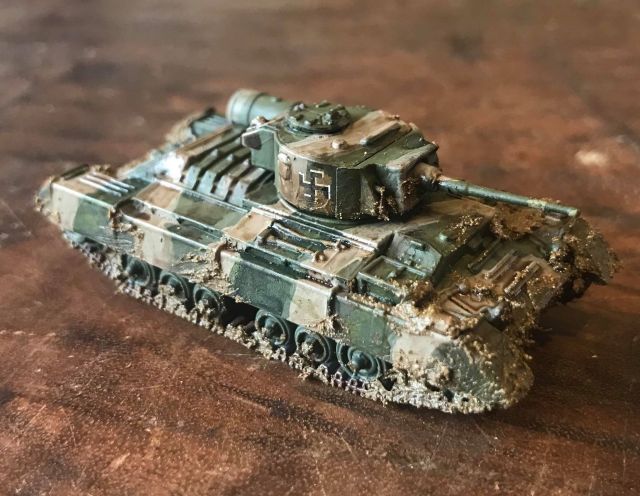
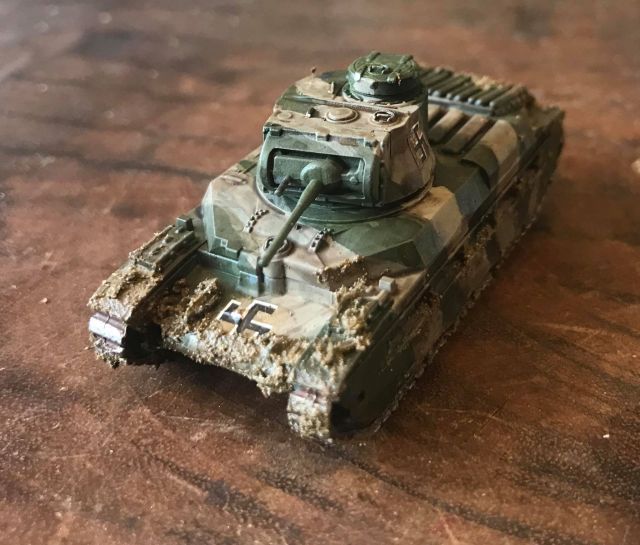
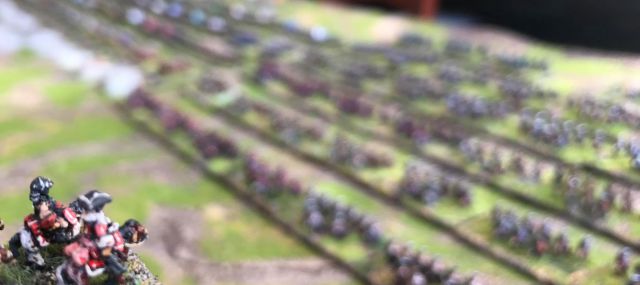
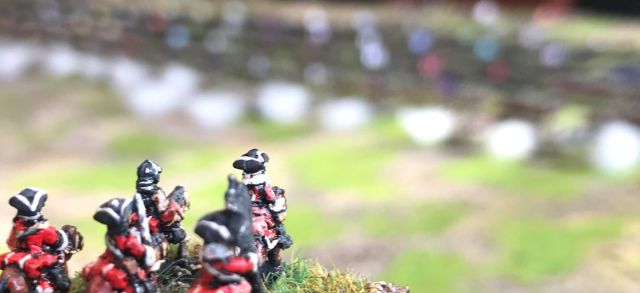
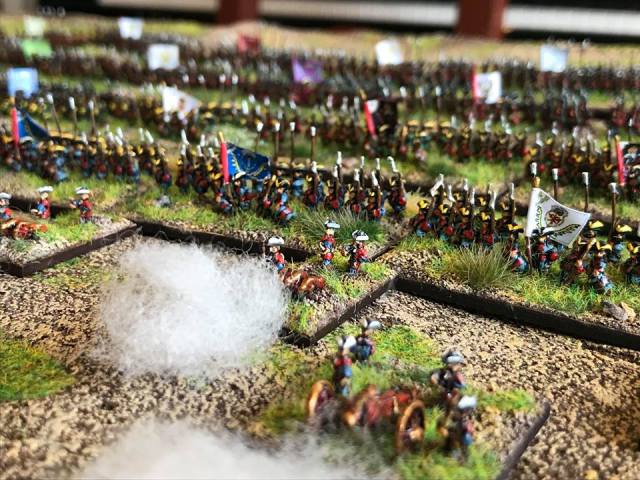
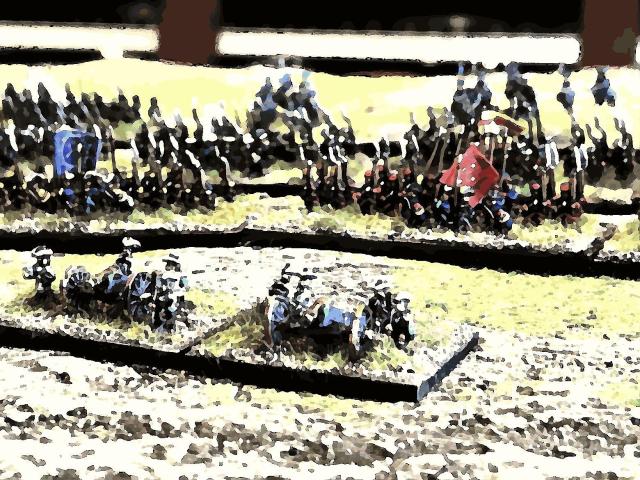
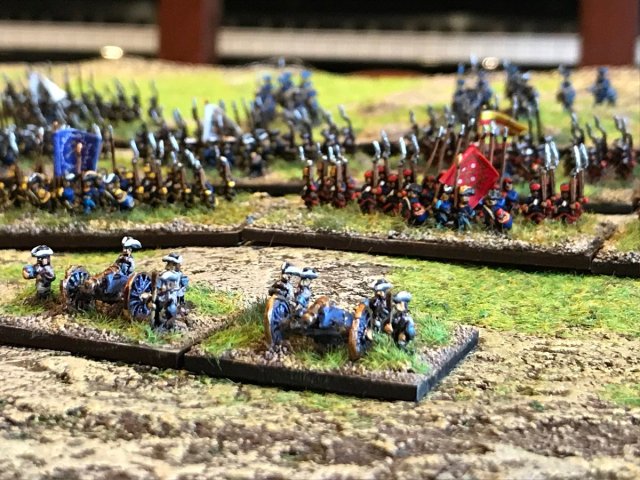
The battle is fought on a 12′ by 5′ table using Baccus Miniatures from the Great Northern War and the Spanish Succession Range.

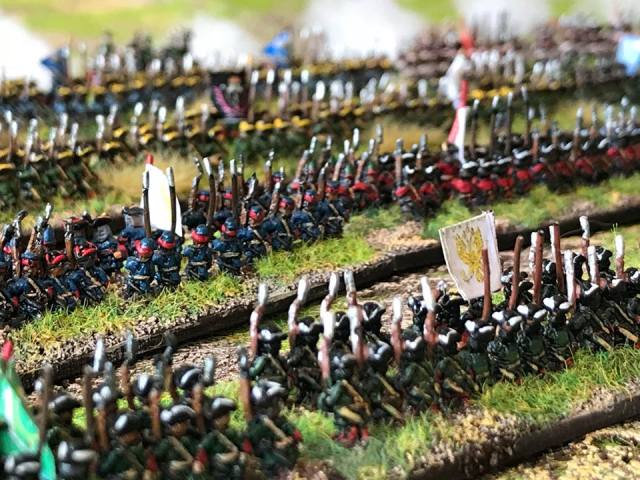
The Russian Army consist of 787 cavalry miniatures and 1536 No. infantry figures (excluding artillery and command bases) on 155 bases.

The Swedish Army is about two thirds of the size of the Russian Army and consist of 636 cavalry and 672 infantry.

Typically a base on infantry represent a battalion of about 400 to 600 men armed with musket and pike, typically represented by 24 miniatures.  They are grouped in either normal units of 2 bases or large units of 3 bases.  A base of cavalry represents two or three squadrons of about 200 to 300 men, as for the cavalry they can be organised as normal or large units.  There are normally between 7 and 9 cavalry models on each base with.

We are using the Twilight of the Sun King Rules to run the game, The rules are, to quote the Design Philosophy notes, “…radical, some would say reductionist, in their conception. It is based on the premise that during this time period, morale rather than numbers of casualties was the key to deciding combat and even the outcome of battles. Many wargames rules pay lip-service to this; however, these rules take the radical step of collapsing shooting and close combat into morale. This dramatically simplifies game play but does so, in the designers’ opinion, without significant loss of historical accuracy.”

We are the Wyre Foresters and the Game is Umpired by Nick Dorrell who has edited the latest version of the Twilight of the Sun King Rules and Per Brodén who has painted the miniatures and made the terrain.

IF YOU HAVE ANY QUESTIONS AND/OR WANT TO ROLL SOME DICE PLEASE APPROACH US – THAT IS WHY WE ARE HERE AT THE SHOW.

We will be back next year putting on the Battle of Poltava 1709.

For further information:

Wyre Forest Wargames club: wfgamers.org.uk

Per Brodén’s Wargaming blog: Rollaone.com or twitter @roll_a_one

Twilight of the Sun King rules: http://www.wfgamers.org.uk/resources/C18/Twilight/ToSK.htm


Engagement at Wargames Shows and a final call for Joy of Six 2018

jos11

Following on from some discussions I have followed on twitter recently (@Roll_a_One) I wanted to write a short note about two things about wargame shows that triggered a little bit of deeper thought than I normally allow myself. Also helped by the fact that I have spent more time than I ever wanted on delayed trains this week and have had no chance to do anything practical hobby wise, here we go.

1. The Show walkthrough
2. Demo vs. Participation Games

The Show Walkthrough

I had the following amusing situation (well at least in my view) at Salute a few years back (it was when Nick Dorrell and I demonstrated the Fraustadt 1706 game):

“Do you mind if I take a picture of the table?”, a middle-aged man with a beard that would be called trendy nowadays with a smart looking camera asks politely.

“Not at all!, are you familiar with the Battle of Fraustadt or the Great Northern War?”, me leaning in and hoping for some kind of interaction.

“Not at all!”, the man says taking a few shots form above and then moving away from me trying to zoom in on one of the Saxon infantry bases and his camera takes some time to autofocus (the lighting being unforgivable in the Salute hall).

“The models are from Baccus and they are mostly from their Great Northern War range, they are 6mm. Those Saxons are from their War of Spanish Succession range as the Saxons wore similar uniforms to the Western Europeans”, me moving closer and leaning even deeper.

P1020011

“Couldn’t paint anything so small”, moving onto the Swedish side and taking another quick succession of shots and then a close-up of some of the cavalry bases, with the same issues with the autofocus.

“This is the decisive Battle of the Saxon campaign of the Great Northern War and as a direct consequence Charles XII managed to obtain a peace treaty with Augustus II the Strong of the Albertine line of the House of Wettin was Elector of Saxony, Imperial Vicar and elected King of Poland and Grand Duke of Lithuania. after 6 years of war”, me getting very excited and with sweeping arm movements I am set up to transfer this essential knowledge of history to the man with the camera.

“Sorry not really interested, I am just taking pictures for my blog. Do you mind moving a little bit so I can take a picture showing the name of the Battle”, he interrupted me, I moved surprising swiftly out of his firing arc, he took his snap and then proceeded to the next table repeating the procedure.

IMG_2641

I put my waving hands behind my back and carried on! I reflected on the fact that he would never know that the marshland on the Saxon/Russian left flank was moss from my garden baked in the oven then soaked with pva glue, that the hedges around the field were made from green scourers, that the reason the line was not straight were due to a miscalculation on the available space between the two villages by the Saxon Commander, that the Saxons/Russian had been standing in their position for ages and were freezing their balls off, that the reason I painted the Russians in Red Coats was that they had turned their coats inside out to look like Saxons, etc.

I was interrupted in my thoughts as another a middle-aged man with a beard that would be called trendy nowadays with a smart looking camera came towards the table. I got my lean-in position ready.

The incident above made me laugh and I reflected on these unsung heroes rushing around taking pictures of stuff not for themselves but to share with other people who may be interested but not able to attend themselves – it s a great service and sacrifice! So to the Man with the Camera – thanks for doing this and sorry for retelling the story in what may be confused with irony or some kind of bitterness.

I find myself invariably drawn into a wargames table (yes we are drifting back towards that kind of thing again) and I am keen to understand what is going on and very often how things have been done and how it works – I am kind of into this hobby you see. It is not always obvious and I like it when a table either gives a nice history/story lesson and/or gives a great game – I love it when it does both. I also like nice terrain and clever solutions mainly with regards to decluttering the table of makers and instead using inventive markers that blend in with the table – it helps the immersion.

It is a lot of hard work and research behind most of the games that are presented at shows and my best advice when going to a show is to stop and talk to people and learn more. If you are shy just stand next to someone who seems to be part of the group until they are free and I bet someone will start talking to you. Grab a handout and ask, they did not just come to show of their game as a flashy post card in an album of many – let them give you its soul and perhaps you will fall in love with it too. Perhaps you could share this experience to the world with a little write-up and maybe a picture or two trying to convey what you felt about the game as a whole – not just what it looked like. I think we need a few more Walkthrough Reflectionists too – the slow walkthrough. Beauty, it is said, is only a paint layer deep!.

Are Demonstration Games the Opposite to Participation Games?

Some groups putting on games seem to treat shows as an outing and any passers-by as a distraction. They face inwards and normally seem to have entrenched themselves with everything they need for the day within reach – they are there to play their game with themselves. Luckily, I think these ones are in decline.

When Nick (Dorrell) and I do our Great Northern War battle we do them as demonstration games, but you can participate for as long as you like. Perhaps to try out some of the mechanisms of the game, we never expect to play the game to its conclusion – although, as a notable exception, we managed to finish Klissow 1702 a few years back at Joy of Six. The game is there as a discussion point in our case about the Battle itself, the rules we are using, the origins of miniatures and terrain, how we painted it and built it, etc. We have roles – I talk about the terrain and the miniatures (having painted and built it), Nick does the rules questions (having developed the latest set of the Twilight of the Sun King rules), we both talk about the Great Northern War (both being passionate about it). Anyone else helping gets a role depending on what they know, normally they will keep the game going.

cover

Some time ago I heard, or perhaps read, Richard Clarke (one of the Too Fat Lardies) saying that he does not run dumbed down versions of the rules at shows to make it easy – he runs his rules as they come. I think it is important to reflect on this in how you want to present your game. I have had a lot of fun playing some game specific rules in 30 minutes at many shows, but we cannot run the Battle of Fraustadt in 30 minutes with the rules we are using – Sorry! Therefore we need to engage in a different way.

They key with a show game, in my opinion, is that it is should be there to engage with others should they want to. Have handouts to give out or to refer to, bring some books about the period (it always looks impressive) or props. We want people to get a feel for whether this kind of game, period, miniatures used, etc is something for them. Scaring people away will not showcase your particular niche of the hobby and to be honest it is at your own detriment.

Demonstration games should not be the opposite to participation games – you actually have to work as hard, or perhaps harder, interacting with the visitors. What the hell are you demonstrating? It is your flippin’ job on the show mate!, you may not get paid but you are taking up space.

Let me know what you think!

By the way, you have a chance to see whether this engagement talk is just bullshit at Joy of Six next week as Nick and I are putting on a table. You are free to ignore us, come by and take a photo and just go, or to stay around and ask a few questions if there is something of interest, or even stay and roll some dice for a while. We are happy to engage with you at any level you want.

We will be putting on a 4 by 12 table with 250 bases of the finest Russia and Sweden had to offer in 1708! – Horka 1708.

Check it up here. And here some background on the table we are putting on, but there are 22 other games ranging from ancients to sci-fi and pretty much anything in-between.

All the best,

/ Have a good day!

(TMT) Horka 1708 – Making the Mat – Part 2 and ready and steady for Joy of Six 2018

It has been some busy weeks since the last update on this mat business.  Had time to go to a 50th birthday party, visit the Tower with the kids, Father’s day celebration, some relaxation by the river and starting a new Job.  However I have done some progress on the 12 by 5 feet battlement, or the hairshirt as I call it,  that I will march my soldiers on at the Joy of Six on the 15th July.

I managed to do the dry brushing for most of the mat, I use the normal three colours on top of the chocolate brown I have used for the last 10 years or so.  It may not be the best combination but serves to tone down the cholate brown and the final light yellow is very effective.  All my stuff, terrain, model bases, etc. fits together, it is done with the same colour and even the static grass (I use the two tones of green that Kalistra sells).

colours
Colour I use to drybrush with and the order they are applied.

Here is my best advice for doing the dry brushing of the mat, use a small brush (not a paint brush) and take your time, change direction, small brush strokes.  Dry brush to scale!


I prefer a little bit of patchy application of the grass areas as I want parts of the base mat to be seen, you may like it differently.  This is a messy process as it is difficult to turn around the mat to shake the excess of with this big mat without causing major mayhem – with static fibres flying everywhere.  When I did my 2 by 2 boards I used to shake them in a large plastic bag.  Now I use a bagless vacuum cleaner (make sure it is empty before you start) but it is not a perfect process.  I also detailed up the river and used some high gloss varnish on top.  This is how it ended up (note the darker grass areas are to be filled with trees on the day) and I am very happy – apart from the real estate, bridges and trees it is all in the mat.

jos3


mat8
The Original Concept Sketch


So apart from making some bridges (5 No.) I think we are ready to go and I can fit the roll in the car….

jos

the trees are ready….

trees.jpg

and so are the men…

jos11

Joy of Six 2018 we are ready for you,  I hope to see you there (link here).

jos10

Traders

  • Baccus
  • Wargames Emporium
  • Commission Models
  • Brigade Models
  • Leven
  • GM Boardgames
  • Heroics and Ros
  • Rapier
  • Christopher Morris (Books)
  • GS Miniature Workshop

And as for the games…

  • GM Boardgames
Battle of Seven Pines
  • Wakefield and District Wargamers
Ultra fast Sci-Fi
  • SAD Wargames
Operation Excess
  • Cold War Commanders
  • COGS
DBA
  • COGS
To the Strongest
  • Gripping Beast
Swordpoint 6mm
  • Naval Wargames Society
Zeebrugge Raid 1918
  • Per Broden and Wyre Foresters
Horka 1708
  • Commission Figures
Napoleonic
  • Mailed Fist
Normandy 44
  • Yorkshire Renegades
Megara
  • Ian and Mark Henderson
Hastings
  • MAD gamers
Future War Commander
  • Baccus 6
Manchester 1642
  • Milton Keynes
DBMM Ancients
  • Harry Ryder
Battle of Issus
  • Grantham Strategy and Gaming club
Battle of Britain
  • Ian Willey and Lee Sharpe
Magnesia
  • Robert Dunlop
Matz 1918
  • Sheffield Wargames Soc & WD
Cliches of the Great Patriotic War
  • James Mitchell
ECW – Halfway Down


Also some seminar and Dr. Mike’s painting clinic, more stuff here http://www.thejoyof6.co.uk/

/ All the best.


More options for the Finnish Tanker

In a previous blog post I presented a career ladder for a Finnish What a Tanker player for the late continuation war period (see link here) based on known tanks used by the Finns (I also updated this blogpost on the 2 July 2018 with some more pictures of tanks I have made). We are still missing the T-50.  As indicated the Finns did capture a lot of Russian tanks that were pressed into service.  This is an optional list and shows other tanks (and TDs) that were used on the front that theoretically could have ended up being used by the Finns (but were not).

If the Russians had ’em the Finns could nick ’em (all 15mm)

Level 2

Valentine III – Plastic Soldier Company

valentine

Level 3

Matilda II – Zvezda 1/100

Matilda.jpg

M3 Lee – Zvezda 1/100

m3lee.jpg

SU-76 – do not have any yet but are waiting for plastic soldier company to release their set (this is from a press release earlier in the year).  Or perhaps Zvezda who also has a model in the pipeline.su-76


Level 4

KV-2 – Zvezda 1/100

kv2.jpg

Churchill – Plastic Soldier Company

churchill

SU-85 – Battlefront Miniatures

su85.jpg

/ Hope that was of some interest!


Who needs a Tiger when you have Sisu? – Finnish Late Continuation War Career Ladder for What a Tanker

fin16

I should have pressed on with my GNW Horka Project but seem to have drifted off doing Finnish Continuation War tanks – I started doing some of these a very long time ago and base painted six tanks in 2016 but had done nothing since (see this old blog post).  But as always in this hobby we do come around to things one day, one day…

The reason for this sudden diversion is of course the excellent What a Tanker game from Too Fat Lardies (link here) – it is a fun game and plays quickly.  The Little One and I have set of German and a few Russian Tanks to play with and the two small games we had to date were a blast.  However, like with most things I do, a Nordic angle seems to motivate me more.  The Finnish tanker career is a limited one but there are some interesting Vehicles on offer – some are absolutely hopeless and others as good as they get – but tell me who needs a Tiger when you have Sisu?

I have the spent the last few days painting a large number of tanks relatively quickly (about 30 including some Russians).  I do not have the ability or time to do much more but I think overall the impressionistic approach with washes and mud effects gives a reasonable look. All of the models used are 15mm and from Zvezda apart from the T-28, StuGs, BT-42 and the Landsverk that are from Battlefront.  I have a few tanks I need to add to this post at a later date for completeness – the T28s and the T34/85.

fin17.jpg

What follows is a  Finnish Career list for the later part of the Continuation War and covers the major Karelian Offensive in 1944 (from June to September).  The career ladder can be used against a Soviet Opponent using the Soviet 1944 list from the What a Tanker rule book.  Of course there are mistakes in it because nothing is perfect – if you find any I welcome them.  I am an enthusiast with regards to this theatre not an expert.

I may extend this to include a few scenarios based on some of the actual encounters I have come across whilst reading about the offensive. However, this should be a good start,

Finnish Continuation War – A 1944 Finnish Career Ladder for What a Tanker (Karelian Offensive / Vyborg–Petrozavodsk Offensive, link to Wikipedia here)

At the start of the  Soviet offensive in June of 1944 the Finnish Army only had one Armour Division (Panssaridivisioona) that that was mainly equipped with the more or less obsolete T-26 tanks.  The only tanks able to take on the Soviet onslaught were a handful of captured T-34/76 and KV-1s in addition to 30 No. StuGs (StuG 40 G) that had been bought from Germany in 1943.  During the conflict further StuGs were delivered, and some more tanks captured including the T-34/85 and the ISU-152.  In addition, and just before the armistice, some Pz IV J were delivered.  It was a desperate time for the Finns and the young nation’s independence was yet again severely threatened by the eastern bear.

Notes on the list: If I found any mention that at least one tank of a type was used in combat, or ready to be put in service during this period I have made the tank available in the list. Stats for each vehicle can be found in the WaT rulebook apart from the BT-42 and the Landsverk that are provided below.  Most tanks are of Russian origin apart from the ones marked with an asterixis (*) that are German.

The list does not include Armoured Cars or Small tanks like the T-37 and T-38.  Also the Finns did capture both T-60 and T-70 tanks during the 1944 campaign but they were never put into service. If you want to run a more what-if campaign you could just assume any Sovietic tank were successfully captured and used.  Alternatively in a campaign setting you could have any Sovietic tank not destroyed but lost, i.e. where the crew has bailed out, being available as an option for the Finnish player in the next game on a roll of 5 or more (or whatever seem reasonable).  This would to some degree simulate what actually happened during this particular conflict due to the limited armoured resources of the Finns.  Anyway, here we go…

Level 1 – T-26 (any version, declared obsolete in July 1944), BT-42 (separate stats below, only used in the beginning of the offensive and as for the T-26 declared obsolete in July 1944.  It was not a very good piece of kit but the only “Finnish” vehicle of the period), T-28 (either type – go for the best one, also declared obsolete in July 1944), Landsverk L-62 (not really a tank or a assault gun, but perhaps a successful commander could start his career in one after using the AA gun against a tank successfully, or perhaps more adequate to use the word, miraculously. Again, added for Novelty and I did paint one!).

Level 2 – T-28E (see note with regards to obsolescence above)

Level 3 – T-34/76 M41-42, T-50, Pz IV J* (did not arrive until the end of August 1944 so not really in play during the main fighting of the offensive).

Level 4 – KV-1, KV-1a, StuG 40 G*

Level 5 –T34/85 M43 (7 captured vehicles were captured during the offensive and put into service during the offensive)

Level 6 – ISU-152 (only one of two captured vehicles during the offensive were used in combat).

Name / Armour / Strike / Features / From / Points

BT-42 Assault Gun  / 2 / 4 / None / None / 1943 / 6 points

Landsverk L-62 AA Gun / 2 / 3 / None / 1943 / 5 points


Level 1

T-26

fin9

BT-42

fin4

T-28 – Battlefront Miniatures (updated 02/07/18)

t28


Landsverk AA Gun L-62 – Battlefront Miniatures

fin3

Level 2

T-28E Battlefront Miniatures (it is the same tank as the T-28 but with another turret) (updated 02/07/18)

t28e


Level 3

T34 M41-42 Zvezda 1/100

fin10

T-50

There are currently no 15mm models for the T-50 and only one was used by the Finns during the period.

t-50

Pz IV J Zvezda 1/100

fin8.jpg

Level 4

KV-1 Zvezda 1/100

fin5

KV-1a Battlefront Miniatures (updated 02/07/18)

KV1s.jpg

StuG 40 G Battlefront Miniatures (Also called Sturmi)

fin15

Level 5

T34/85 Zvezda 1/100 (updated 02/07/18)

t34


Level 6

ISU-152 Zvezda 1/100

fin11fin12

fin13

/ Hope that was of some interest!


Got myself a Hex Mat

To play Bag the Hun (as well as a number of other air wargames) a hexagon mat is required, I do not have one so I decided to buy one. Yes, I hear you saying “…there are ways around it, and why don’t you make one yourself!”. However occasionally, and contrary to popular belief, I do go with that famous flow and just get something off the shelf. I looked around but could not really find anything suitable. I could not really see the cliffs of Dover representing the Karelian Isthmus, neither would Kentish countryside do nor the desert or anything else that I found for that matter. I suppose that some of the Eastern Front battles would have been fought over some forested areas that could pass for what I needed, but none of these seem to be readily available.

What I really was after was an image showing two things – forested areas and lakes. I went on Google Earth Professional (that you can download for free) and realised, probably as the last person on the (Google) Earth, that you can get rid of all the overlays and plainly look at the picture and capture images at relatively high resolution.

Finnish

Maximum resolution is 4800 by 3288 which proved more than adequate for my purposes.  I found a piece of southern Finland I liked and saved the picture. I then resized it to a 3 by 5 ratio (as I wanted to get a mat I could throw on the dinner table) and sent it to Tiny Wargames (link here) and asked (i) if the image was good enough to print on one of their 3 by 5 mats, (ii) if he could add a 30mm hexagon pattern on top and (iii)how much it would take me back – the answer was (i) no problem, (ii) of course and (iii) £50 (that inclusive of delivery within the UK). Further he said it would take them 4 days to do it.  Incidentally the cost is the same as it would cost to buy a mat with the same dimension of any of their existing mat designs – I suppose if you can provide a picture with sufficient resolution they will print a mat for you.

I also note that they can do more bespoke mats as well, like taking an old air photo from say D-day and make it into a stylised and coloured mat. However I do not know the cost of doing this as I suppose it would take some time to do – but if you are interested drop them a line.

A small note you need to specify how you want your hexagons printed on the mat – I sent a screen shoot from a Bag the Hun scenario map and told him my hexes should be aligned in the same way as those on the map. Very often the hexagon size is about 1½ inch, but since I went with a small mat (3 by 5) I also condense the hex from 38.1mm (1½ inch) to 30mm. The reason for the smaller mat is that I can quickly put the mat on the dining table and fly, with minimal fuss.

This is the map I sent them.

finnish1

And this is what turned up.

FullSizeRender3

Really happy in the way it came out (note the colour difference is due to the lighting when I took the picture of the mat on the table), I ordered it on a Monday afternoon and it arrived safe and sound on the following Monday.  More than pleased and this is how it looks with some Russian and Finnish aircraft flying on it.

FullSizeRenderFullSizeRender2FullSizeRender4

On reflection I should perhaps had taken a lower altitude picture, but I do like it and gives the feel of forests and lakes I was after.

Also in the settings you can include clouds, this could create some interesting pictures as well depending on what you are after.

Note on flight stands

With regards to flight stands the best way to manage it is if you do not attach each plane on a stand permanently but instead magnetise the plane and the base.  There are several reasons for doing this, I think these are the key ones:

  • Base set of stands – you are very unlikely to use all you planes at the same time on the table, so consider what the maximum size your aerial engagements are likely to be. This will determine the number of flight stands you make. For example if you are playing the Check your Six rules more than a handful (that is about five) per player is about right, for Bag the Hun (in my case) where you fly sections a few more would be required – I went for a total of 40 stands (overkill, but what the hell).
  • Changing your mind – If you change the size or type of the base you are using for whatever reason this is easily accommodated as you just need to make some new bases – if you want to revert back you just use the old ones.
  • Storing your flyers – Storing small 1/600 on individual flight stands will take unnecessary space and when my current project is complete I will probably have in excess of 200 aircraft. Without the bases they take hardly any space. If I want to fly some planes for another project, I just use these flight stands again.

I made my flight stands using some transparent acrylic bases (30mm, 2mm thick) that I drilled a hole in and some and acrylic rod (2mm), I also used Neodymium magnets (2mm by 0.5mm).  Remember the polarity when you glue the magnets to allow you to use the same flightstands for all your planes.

Big shoutout and thanks to Tiny Wargames (link here again)

/Hope that was of some interest!

(TMT) Horka 1708 – Making the Battle Mat – Part 1

First a big thank you to all of you who either come by here by chance, occasionally, have registered as followers of the blog, likes the Roll a One page on facebook and/or follow the Per at RollaOne account on twitter (@Roll_a_one).  Please feel free to get in touch here, on Facebook or Twitter if you have any questions or comments on this or anything else.  Just doing this for fun, thanks for making it more so. Now without further ado…

It has become a tradition in doing a battle board for Joy of Six as a start of the Summer in our house. For the last few years I have made 8 by 4 feet tables for my GNW stuff, but this year I came to the conclusion that I needed a 12 by 5 feet beast (more on the battlefield and how it was derived can be found in a previous blog post, click here).

mapping-out-2
Some of the stages in deriving the map for Horka 1708

For the first generation of boards (Fraustadt 1706, Klissow 1702, Gadebush1712 and Kalisz 1706) I used 8 No. 2 by 2 feet mdf boards with underfloor heating boards (blue styromfoam) on top that could be shaped to rivers and hills, etc. This created more sturdy individual blocks but it takes a lot of space, especially when you start getting a fair few of them. There is also a question of warping and its impact on the gap between the boards, unless you make very sturdy ones.


In the process of needing to make two smaller tables (4 by 3 feet) for running Saga in 6mm at Joy of Six in 2016 I tried out a method I had seen on the net.  This used a canvas sheet covered in a mix of paint, acrylic sealant and sand (see my notes from then here). This worked really well and creates a mat with some nice texture on top that can be dry brushed and decorated very much in the same way as I would do with the boards (and you can also incorporate roads and rivers directly into the mat).

This is the mat I did last year and apart from the houses, trees, bridges, some small elevation markers and miniatures, all the features are in the 8 by 4 mat and it makes set-up very quick (here are some notes on that process here , here, here and here) – no gaps!

lesnaya1708
The Mat at Joy of Six 2017 – The Battle of Lesnaya 1708.  It is very difficult to roll up the mat with all the trees so I did not glue them in place.  The bridges are also loose, but flat and placed on top of the river crossings.

I decided to have another go with the mat approach this year and got myself some backed dust sheet from Screwfix here in the UK (I did get some before but it was not backed, so I kept this for some other day). The reason I use the backed version is that the backing (a layer of plastic/poly) stops the paste going through the sheet when it is applied and I also think it strengthens the actual mat, compared to using a non-backed dust sheet.

dust
No nonsense sheet, I cut out the desired dimension 12 by 5 feet and will use the other part some other time.

The “innvoation” for this year was that I had some paper backed grass sheets lying around that I cut out some fields from and glued straight onto the mat (I used gripfill for this purpose, still not sure they will stay on!) – the colours are very sharp so far but I think it may work better once the shit (sorry, I meant chocolate brown) colour is dampened by my normal 3 colour dry brushing and the static grass is being added.  Here are a selection of photos from the work so far.

The issues I have found (so far) in making and using this kind of mat are:

  • It is physically harder work to make one than you think – it gives a good workout! My Doctor told me that I need to gain more height so I think this is a good exercise for that purpose – there is a lot of stretching involved!
  • It is very difficult to manage a 12 by 5 sheet when you make it. I do not have a big enough space to put the whole sheet down on a flat surface. So I tend to work on it in sections and then roll it up again, meaning that you have to wait for it to dry which means that works have to be done in short burst and then wait for 12 to 24 hours. If you have a flat surface for the full size of the mat then this is not a problem at all (however if the surface is not totally flat this can effect the shape of the acrylic you apply and also the effect of the dry brushing as any edges will show through very well by the technique – something you may not want. I did mine in the lounge but this is honestly not the ideal place if you are not on your own. It is not just the space you occupy but other impacts to consider.  I try to use low odour stuff but this does not mean no odour so ensure you have your windows open and create a draught. Health and safety for you and yours are more important than a bloody wargames mat – just be sensible.  Luckily, I have a more than understanding family when it comes to these kind of things.   They are more than happy to spend the weekend with breathing apparatus in their own rooms (that was a joke, sorry!).
  • The sheets seem to be 4 feet standard width.  The 12 by 12 sheet I bought from Screwfix was made of 3 no. 12 by 4 feet sheets, it means that there is a border to be dealt with for any greater widths than 4 feet.  I covered it with some gripfill before I got the mix on top. This mediocre mitigation is more than likely going to fail in the future but I am ignoring it for now.  In general it does crack in places but normally looks decent when it lies flat – be prepared to do some repairs the first few times you roll it out.
  • Although I did iron the sheet before I applied the paste (properly I thought, but being mindful not to melt the backing), very often some of the folds seem to reappear and this is less than ideal. I will try to hide this as part of the drybrushing stage by avoiding to make the fold stand out to much by being careful with the brush – you do not want to highlight the fold, it does not look very natural.
  • It does not allow you the same artistic freedom compared to a fixed board. Hedges are more difficult to incorporate into the design and rivers obviously can not be filled with resin (but if you apply some varnish it at least gives some reflection to the surface that fools the eye, at least from a distance.
  • It goes without saying that the mat is not very versatile with the features built-in (rivers, roads, etc.). This is not an issue for me, and it was the same when I did the boards, but worth considering with regards to how much specific stuff like roads and rivers you incorporate into the mat, especially as it is an investment in money and time to make one.
  • Looking back some of the features of those boards some are very difficult to beat using the mat. Maybe some boards next year!?

Obviously none of the points above were showstoppers for me this time, but I hope this discourages you unless you are prepared to get into to something heads on and improvise along the journey.  The rest of the family laugh at my swearing and screaming when I mess things up, so if nothing else it is some cheap entertainment – maybe that is why they tolerate me doing this in the first place?

[To be continued when appropriate level of progress achieved]

conntinue

/ Hope that was of some interest, keep toy soldiering on!

In other news I had the opportunity to see the fabulous Tiger Lillies (the forefathers of Brechtian Punk Cabaret!)  last week and it was absolutely brilliant! More on them here.  I stumbled upon them a few years ago as they had done an album called Mountains of Madness as a homage to H.P. Lovecraft.

tiger lillies
Tiger Lillies


Got myself a Hyding!

A little bonus blog post because I think I am one behind my one a week average, but nonetheless a nice little story.

Some time ago I cleared out some of my books and a amongst the mess I found two old ones about miniatures from the 1970s. I had no idea where they came from but thought that perhaps Henry Hyde would be interested in them.  Maybe he would even give them a place in that famous Hyde book shelf!


MExvHPNR
The Books


One of them had a nice passage saying that…

“Materials for constructing the terrain are very easy to obtain in the model shops. Quite simply it is a matter of plundering the lore of half a century or more of railway modelling.  The cheapest and the best ways of making realistic hills, valleys, roads, bridges, cottages and the like were developed long ago by our fathers and elder brothers.”

Henry said yes and I sent them to him.  They seemed to arrive safe and sound.

The next scene is a flashback to my more younger self and having just bought my first Baccus 6mm GNW models.  I was frantically looking for some guidance on how to paint them.  A friend of mine gave me a some sheets of paper he had ripped out of a Battlegames magazine – the painting guide was of course overkill for the scale but this was my guiding star for those very first 6mm I painted.


5ETysKBq
From the Painting Guide


Anyway and zooming back to more or less the present time and a few days after this a little box arrived from Henry and I could not believe my eyes when two very familiar gentlemen were in it.

4eNH-YEk

They are now on permanent guard duty protecting my Great Northern War books.

A few notes:

The article “A brush with musketeers” can be found in the Battlegames Magazine, issue 7, and was written by Dave Robotham who also painted the miniatures. The miniatures are from the old Musketeer range sculpted by Bill Thornhill (not sure what happened to them?).

Henry Hyde is of course that guy who wrote the Wargames Compendium, edited Battlegames and Miniature Wargames amongst other things, and is now running a Patreon project (is that what you call it?) where you could join in – Battlegames the Spirit of Wargaming! There is a link to it here for you to check out.

DUQKMIXXcAcd7iI

Thanks again Henry!

Other Stuff

In other news I have been doing some flight stands (completed some more planes) and ordered a hex mat for my winter and continuation war project.  Here are some pictures. Links to previous postings on this subject can be found here and here.

brewsterd.xxii-16i-153sb-2

Will write more about this project once the mat arrives.

/Hope that was of some interest


The Russian Army at Horka and some more 1/600 aircraft

swed17.jpg

In the last blogpost the Swedes inspected their forces in preparation of the Horka battle at Joy of Six this year (more here). The Russian spies were in attendance and following their report a few brushstrokes had to be done, but now I dare to say they seem to be ready for inspection and eventually to welcome the attacking Swedes.

swed18.jpg

There is a total of 91 cavalry 60 by 30mm bases of 9 No. riders (apart from the irregular elements on 60 by 60mm bases of 8 riiders) and 64 infantry 60 by 30mm bases of 24 No. infantry in this army as well as Command bases and artillery bases.  Tsar Peter himself has inspected the various infantry detachments – General Golitsyn flying column with the elite regiments who may be ordered to March behind the cavalry and attack the Swedish left flank on they day!.  The three other Generals Sheremetev, Hallart and Repnin are ready as are their men.  A few rounds were fired by the artillery to mark the occasion.  I have included a few of the sketches that the scouts manage to deliver to the Swedish King.


IMG_3474.JPG
7 feet of Russians


swed1swed2swed5swed6swed7swed8swed9swed10swed11swed12swed13swed14swed19

swed3swed4swed21

In other news I progressed my Bag the Finn project (more in the last blog post, link here) adding two more aircraft types:

  • The Fokker D.XXI that was the Finnish primary fighter aircraft during the Winter War (I painted it in the simple paint scheme used during the winter war – the more elaborate camouflage pattern used last time was used during the continuation war).

fin1.jpg

  • The Polikarpov I-16 that was one of the three fighter planes used by the Russians in the Winer war (ther others were I-15bis and I-153).  The I-16 was the most common type and about half of Fighters were of this type at the start of the Winter War.

sov1.jpg

Below are two relevant titles from Osprey and contain a lot of useful information on the fighting during the Winter War era. I really enjoy doing these 1/600 scale planes from Tumbling Dice.

/ Hope that was of some interest.

swed16.jpg


Finnish Aircraft and a Swedish Army

A short one this time but I think there are one or two important points hidden in it all, I let you find them.

brewster5

Bag the Finn

I am currently working on some Tumbling dice 1/600 aircraft models with the intention of doing some games involving the The Lentolaivue 24 or LLv.24 (24 Fighter Squadron) fighting throughout Finland’s three wars during WW2.  I intend to use the Bag the Hun rules by the Too Fat Lardies (link here) and the campaign system Squadron forward.  I got the aircraft a long time ago but it has taken some time to get this started. However Mike Hobbs Malta project inspired me to get this going – thanks Mike.

Postscript:  There is a useful article in the Lardies Summer Special 2009 called Blue Swastika with background and scenarios for the Finnish Winter War for Bag the Hun. This article can also be found in the Scramble supplement (Thanks Jim for reminding me).

I have been buying a fair few books about Finnish and Soviet Airforce of the Period. But my starting point is the suitably titled Lentolaivue 24 from Osprey (link here).  As with any book there are several places where you may get the book cheaper and sometimes the second hand market can be very favourable.

9781841762623_4

As I have mentioned before the family on my mother’s side are Finnish and this is why I have an interest in this particular theatre of the Second World War. 

I have heard many stories from the Finnish war period – some heroic but most of them being about the sad realities of war and the people that had to endure them directly and indirectly.  For example one of my relatives, a pioneering educationalist working in the Finnish border areas, had to take home his two sons in coffins during the war – both of them were volunteers and the youngest was 17. With a Finnish sense of dark humour the story was retold with the afterthought that the only good thing was that he only had to do one trip as they fell at the same time.

My hobby is very much related to war – in doing miniatures, models and gaming various conflicts sometimes in a seemingly light hearted way.  However I think it is important to remember that in reality it is far from a game.  This awareness does not take out the fun of it but adds respect to how I deal with it.

One of the things are symbols used by the various belligerents during the War and as you can see on the picture above the Finnish Aircraft carries a Swastika symbol.  The Swastika had been used on Finnish Aircraft since the early days of the Finnish Air force in 1918, following independence from Russia and therefore its use is different to that used by the Nazi regime. Finland were allied with Germany but through a common enemy in the fight against the Soviet Union – it did not share the overall objectives and world view of the Nazi regime.

I will paint and decorate these aircraft as close as possible to the way in which they looked at the time, not out of disrespect for anyone but out of respect to the historical records  of the period.

This is a slow burning project and I will write a short note on each aircraft type, what paints I used and some pictures as I complete them. Starting with the Finnish ones and the, to me, most Iconic of them all the Brewster Buffalo.  It is a little bit fiddly, but if you can paint a detailed 28mm miniatures then this should not be a problem.

The Flying Beer Bottle (Lentävä kaljapullo)

The Finns bought the Brewster Buffalos (B-239E) from the United States in 1939 and they were first flight tested by the Finnish Air force in early 1940.  A few were combat ready before the end of the Winter War in 1940 but none of them were used in combat.

However during the Continuation War the Brewster became one of the most successful aircraft of the Finnish Air force. The Lentolaivue 24 got them at the end of the Winter War in April 1940 replacing the Fokker D.XXI they used successfully during the Winter War. During the 14 months before the start of the Continuation War the pilot trained hard with their new machines and during the Continuation war they successfully destroyed 459 No. Soviet warplanes by these at a loss of 15 Buffalos (a 26:1 victory ratio) until they were replaced by the Messerschmitt Bf 109G (in May 1944).

finnish brewster.jpg
This is a colorized photo I got from somewhere on the net some time ago. I can not see by whom it is colorized, but it was the inspiration for the paint job.

I used the ISA240 F2a Brewster Buffalo x6 from the Tumbling Dice shop, it can be found in the 1/600 range, link here.  I do not know what the best way is to paint these are and you may want to do some further research, this is how I did mine.

Clean it, magnetise it,

Make sure you clean it up with a scalpel (be careful) or a small file as there is some flash but not excessive.  I then glue a 0.5mm * 2mm magnet under the aircraft.  This is a little bit fiddly and you may have to redo a few but that is all part of the fun! In addition make sure you align the polarities – i.e. glue them in the same direction.  I will take some photos of how I manage this when I do the next set of aircraft.  This allow you to mount them on flight stands that you can magnetise too.  You may end up with a collection of hundreds or aircraft but you may rarely use more than a dozen on each side in a game – therefore you can have a set of flight stands you use for all your aerial dog fights. It also means that you could have different set of stands, perhaps if you have different rules ets, and so on.  But more on this later.

polarity
I know that the Doctor never bothers checking the polarities when he does his flight stands and just reverses them afterwards.  But he uses his sonic screwdriver and do not think even Woodland Scenics have one.

Painting

As I wrote last week I got myself a few pots of the paints from the Finnish Aircraft colour paint set.  In retrospect I probably had all the colours I needed already as part of my base set up, however I put the ones I got to use in this project.

lifecolorfinn

  1. Priming – I used a Vallejo White Polyurethane Primer (mainly because I normally use grey or black for my miniatures, and had it lying around). It has a nice thin consistency that works deceivingly well.  I thought white would work best as I was not going to use the primer as part of the shading.
  2. Let it dry (a few hours should be fine)
  3. Paint undercarriage light grey – I used the Lifecolor Light Grey UA 541.
  4. Paint top green (do not paint the front bit that will be yellow and avoid the yellow part behind the cockpit, not critical but makes it easier to achieve a good yellow later on) – I used the Lifecolor Olive Green UA 540.
  5. Let it dry (if you are doing a large batch like I did there is no reason to wait, just do step 6 for the next).
  6. Paint top with Black camouflage patterns (avoid the parts that will be yellow) and do the front propeller part.  I used Vallejo Model Color Black 950.
  7. Let it dry (see note above on large batch)
  8. Paint the propeller hub/top with a flat brown/light rust colour (I have seen some different colour for this, most of the time it is black but I wanted some contrast so mine have this colour).
  9. Paint the Yellow parts, also under the top of the wings – I used the Lifecolor UA 544.
  10. Let is dry (see note above on large batch)
  11. Paint 80% of the Black camouflage parts in Vallejo Model Color Medium Sea Grey 870. I kind of left a black outline of the pattern.
  12. Paint 80% of the Green with a 50/50 mix of Lifecolor Olive Green UA 540/Vallejo Model Color Yellow Green 78.
  13. Let it dry properly (a few hours should do fine)
  14. Use Windor & Newton Nutbrown ink, be generous and process to 12 immediately before doing the next plane.  This is an old 6mm painter trick Dr. Mike taught me many years ago. You may want to use some other wash/ink type of thing or skip this step if you want a neater look.  I think it adds depth to the colour and make it look better painted than it is.
  15. Dab a piece of toilet paper carefully on the model to take away excess ink, do not rub – this was sourced from Modelling Supreme Industries and is sold by the sheet (Sorry, but at least humour me with a smile!).
  16. Let it dry
  17. Give the yellow parts a little bit of more paint on the top sides (using the same colour as above, looking at the colourized picture above and some others they tended to be relatively dirty quickly so leave some of that ink stain. It does not make the model look prettier but more real).
  18. Paint the glass part of the canopy in blue carefully, let the non-glass part shine through – I used Vallejo sky blue or something similar.

I suppose you could highlight them further and perhaps put a dot of white on each window – however I just did the 18 steps above.

brewster2.jpg
I suppose you could fly them like this

Decals

Next it is time for some decals and this is requires some patience to get right. I got the decals from Dom’s Decals some time ago, link here.  He has a warning of a current backlog on his webpage (April 2018) so I suggest you send him and e-mail and ask him about the current status.  Some of the best of the wargames industry are the small players (mostly one person bands) and I have found most of them more than happy to engage in some conversation upfront as to what the expectations are with regards to getting your orders sent to you.  Dom does a fantastic service to the hobby with his decals – give him and others like him a fair chance to continue doing so.

You need the set 1/600 Finnish Hakaristi Markings (1918-44).

686393773653_ml.png

Basically I cut out every decal neatly and then stick a few of them in a small bowl of water for a while lift them out and wiggle the off on a plastic (sometimes they fall of in the bowl) I use a scalpel (gently) for this .  I used 4 transfers for each plane (I did not do the underwing ones), two on the wings (second smallest ones) and two on the sides (the smallest one).  This is my high-end set-up.

brewster3.jpg
Just be careful when you do this expect to f**k up a few before you get it going – practice does not necessary make perfect but in this case good enough!

This is the result,  I really like they way they turned out and from a distance they look decent enough for my gaming table.

brewster4.jpg
Wingspan of a Penny, comparing with the picture below. Good enough for the table, especially the dirt on the yellow!


finnish-brewster1.jpg

When I have finished (no pun intended) all the aircraft for this project I will do some custom transfers (I bought a sheet for this purpose) to allow some further markings to be done like tail markings etc. This is probably overkill and I do not know if I will be able to do these yet so it is currently just a plan – but if it is possible I will do them like this.  After this I will seal them with a matte varnish.

Swedish Army for Horka 1708

The Swedish King and his Generals mustered the forces for the Horka Battle to be fought 15th July in Sheffield at the Joy of Six show (more here).

joy of six.jpg

The King was seen smiling and the mood amongst the ranks was very good.  They Russian position was strong but so was the Swedish morale.  Here are some colorized sketches from the event. There are a total of 72 cavalry bases and 28 infantry bases as well as a few leader bases and artillery bases. Here we go….

cartoon
Some Swedish Artillery in front of the Infantry Line
cartoon2
General Rehnsköld inspecting

Too blurry?, let us try again.

horkamuster1Horkamuster2Horkamuster3 - CopyHorkamuster4 - CopyHorkamuster5 - Copy

/ Hope that was of some interest