
A short one this time but I think there are one or two important points hidden in it all, I let you find them.

Bag the Finn
I am currently working on some Tumbling dice 1/600 aircraft models with the intention of doing some games involving the The Lentolaivue 24 or LLv.24 (24 Fighter Squadron) fighting throughout Finland’s three wars during WW2. I intend to use the Bag the Hun rules by the Too Fat Lardies (link here) and the campaign system Squadron forward. I got the aircraft a long time ago but it has taken some time to get this started. However Mike Hobbs Malta project inspired me to get this going – thanks Mike.


Postscript: There is a useful article in the Lardies Summer Special 2009 called Blue Swastika with background and scenarios for the Finnish Winter War for Bag the Hun. This article can also be found in the Scramble supplement (Thanks Jim for reminding me).
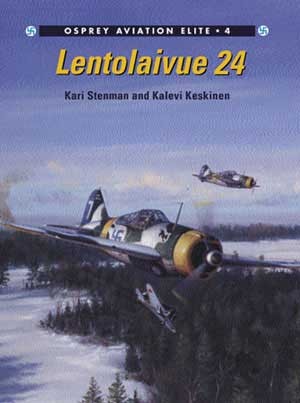
I have been buying a fair few books about Finnish and Soviet Airforce of the Period. But my starting point is the suitably titled Lentolaivue 24 from Osprey (link here). As with any book there are several places where you may get the book cheaper and sometimes the second hand market can be very favourable.
As I have mentioned before the family on my mother’s side are Finnish and this is why I have an interest in this particular theatre of the Second World War.
I have heard many stories from the Finnish war period – some heroic but most of them being about the sad realities of war and the people that had to endure them directly and indirectly. For example one of my relatives, a pioneering educationalist working in the Finnish border areas, had to take home his two sons in coffins during the war – both of them were volunteers and the youngest was 17. With a Finnish sense of dark humour the story was retold with the afterthought that the only good thing was that he only had to do one trip as they fell at the same time.
My hobby is very much related to war – in doing miniatures, models and gaming various conflicts sometimes in a seemingly light hearted way. However I think it is important to remember that in reality it is far from a game. This awareness does not take out the fun of it but adds respect to how I deal with it.
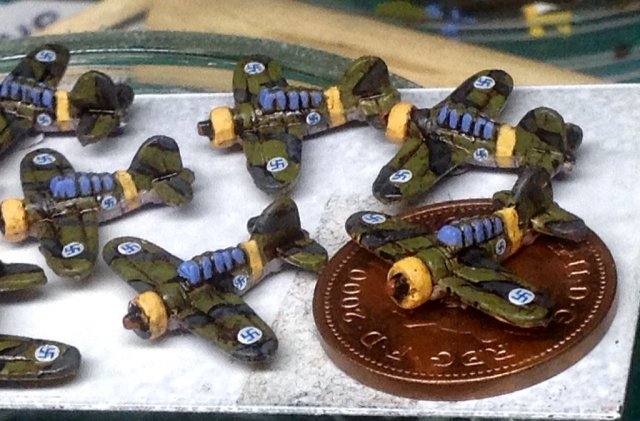
One of the things are symbols used by the various belligerents during the War and as you can see on the picture above the Finnish Aircraft carries a Swastika symbol. The Swastika had been used on Finnish Aircraft since the early days of the Finnish Air force in 1918, following independence from Russia and therefore its use is different to that used by the Nazi regime. Finland were allied with Germany but through a common enemy in the fight against the Soviet Union – it did not share the overall objectives and world view of the Nazi regime.
I will paint and decorate these aircraft as close as possible to the way in which they looked at the time, not out of disrespect for anyone but out of respect to the historical records of the period.
This is a slow burning project and I will write a short note on each aircraft type, what paints I used and some pictures as I complete them. Starting with the Finnish ones and the, to me, most Iconic of them all the Brewster Buffalo. It is a little bit fiddly, but if you can paint a detailed 28mm miniatures then this should not be a problem.
The Flying Beer Bottle (Lentävä kaljapullo)
The Finns bought the Brewster Buffalos (B-239E) from the United States in 1939 and they were first flight tested by the Finnish Air force in early 1940. A few were combat ready before the end of the Winter War in 1940 but none of them were used in combat.
However during the Continuation War the Brewster became one of the most successful aircraft of the Finnish Air force. The Lentolaivue 24 got them at the end of the Winter War in April 1940 replacing the Fokker D.XXI they used successfully during the Winter War. During the 14 months before the start of the Continuation War the pilot trained hard with their new machines and during the Continuation war they successfully destroyed 459 No. Soviet warplanes by these at a loss of 15 Buffalos (a 26:1 victory ratio) until they were replaced by the Messerschmitt Bf 109G (in May 1944).

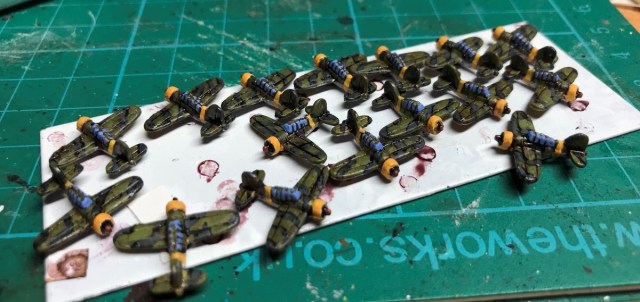
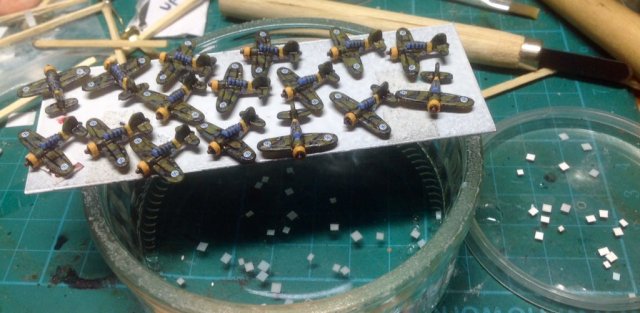
I used the ISA240 F2a Brewster Buffalo x6 from the Tumbling Dice shop, it can be found in the 1/600 range, link here. I do not know what the best way is to paint these are and you may want to do some further research, this is how I did mine.
Clean it, magnetise it,
Make sure you clean it up with a scalpel (be careful) or a small file as there is some flash but not excessive. I then glue a 0.5mm * 2mm magnet under the aircraft. This is a little bit fiddly and you may have to redo a few but that is all part of the fun! In addition make sure you align the polarities – i.e. glue them in the same direction. I will take some photos of how I manage this when I do the next set of aircraft. This allow you to mount them on flight stands that you can magnetise too. You may end up with a collection of hundreds or aircraft but you may rarely use more than a dozen on each side in a game – therefore you can have a set of flight stands you use for all your aerial dog fights. It also means that you could have different set of stands, perhaps if you have different rules ets, and so on. But more on this later.

Painting
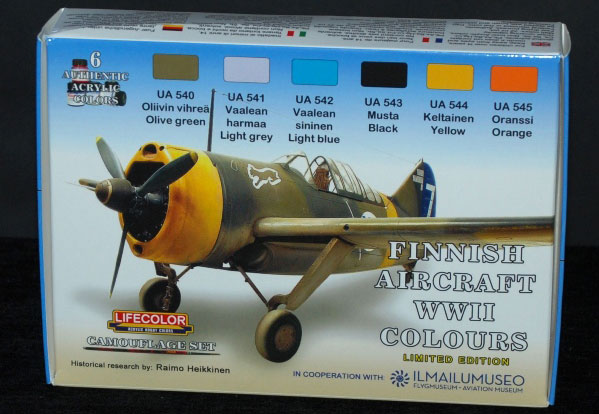
As I wrote last week I got myself a few pots of the paints from the Finnish Aircraft colour paint set. In retrospect I probably had all the colours I needed already as part of my base set up, however I put the ones I got to use in this project.
- Priming – I used a Vallejo White Polyurethane Primer (mainly because I normally use grey or black for my miniatures, and had it lying around). It has a nice thin consistency that works deceivingly well. I thought white would work best as I was not going to use the primer as part of the shading.
- Let it dry (a few hours should be fine)
- Paint undercarriage light grey – I used the Lifecolor Light Grey UA 541.
- Paint top green (do not paint the front bit that will be yellow and avoid the yellow part behind the cockpit, not critical but makes it easier to achieve a good yellow later on) – I used the Lifecolor Olive Green UA 540.
- Let it dry (if you are doing a large batch like I did there is no reason to wait, just do step 6 for the next).
- Paint top with Black camouflage patterns (avoid the parts that will be yellow) and do the front propeller part. I used Vallejo Model Color Black 950.
- Let it dry (see note above on large batch)
- Paint the propeller hub/top with a flat brown/light rust colour (I have seen some different colour for this, most of the time it is black but I wanted some contrast so mine have this colour).
- Paint the Yellow parts, also under the top of the wings – I used the Lifecolor UA 544.
- Let is dry (see note above on large batch)
- Paint 80% of the Black camouflage parts in Vallejo Model Color Medium Sea Grey 870. I kind of left a black outline of the pattern.
- Paint 80% of the Green with a 50/50 mix of Lifecolor Olive Green UA 540/Vallejo Model Color Yellow Green 78.
- Let it dry properly (a few hours should do fine)
- Use Windor & Newton Nutbrown ink, be generous and process to 12 immediately before doing the next plane. This is an old 6mm painter trick Dr. Mike taught me many years ago. You may want to use some other wash/ink type of thing or skip this step if you want a neater look. I think it adds depth to the colour and make it look better painted than it is.
- Dab a piece of toilet paper carefully on the model to take away excess ink, do not rub – this was sourced from Modelling Supreme Industries and is sold by the sheet (Sorry, but at least humour me with a smile!).
- Let it dry
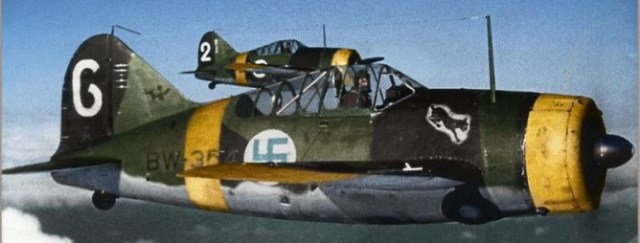
- Give the yellow parts a little bit of more paint on the top sides (using the same colour as above, looking at the colourized picture above and some others they tended to be relatively dirty quickly so leave some of that ink stain. It does not make the model look prettier but more real).
- Paint the glass part of the canopy in blue carefully, let the non-glass part shine through – I used Vallejo sky blue or something similar.
I suppose you could highlight them further and perhaps put a dot of white on each window – however I just did the 18 steps above.
Decals
Next it is time for some decals and this is requires some patience to get right. I got the decals from Dom’s Decals some time ago, link here. He has a warning of a current backlog on his webpage (April 2018) so I suggest you send him and e-mail and ask him about the current status. Some of the best of the wargames industry are the small players (mostly one person bands) and I have found most of them more than happy to engage in some conversation upfront as to what the expectations are with regards to getting your orders sent to you. Dom does a fantastic service to the hobby with his decals – give him and others like him a fair chance to continue doing so.
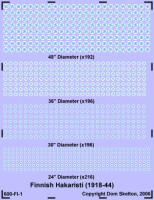
You need the set 1/600 Finnish Hakaristi Markings (1918-44).
Basically I cut out every decal neatly and then stick a few of them in a small bowl of water for a while lift them out and wiggle the off on a plastic (sometimes they fall of in the bowl) I use a scalpel (gently) for this . I used 4 transfers for each plane (I did not do the underwing ones), two on the wings (second smallest ones) and two on the sides (the smallest one). This is my high-end set-up.
This is the result, I really like they way they turned out and from a distance they look decent enough for my gaming table.
When I have finished (no pun intended) all the aircraft for this project I will do some custom transfers (I bought a sheet for this purpose) to allow some further markings to be done like tail markings etc. This is probably overkill and I do not know if I will be able to do these yet so it is currently just a plan – but if it is possible I will do them like this. After this I will seal them with a matte varnish.
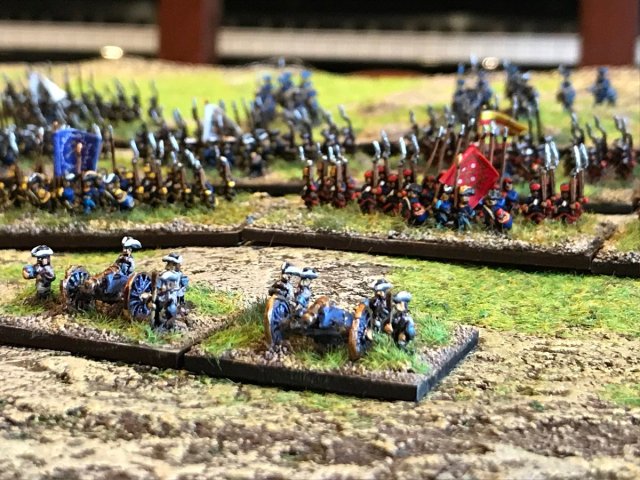
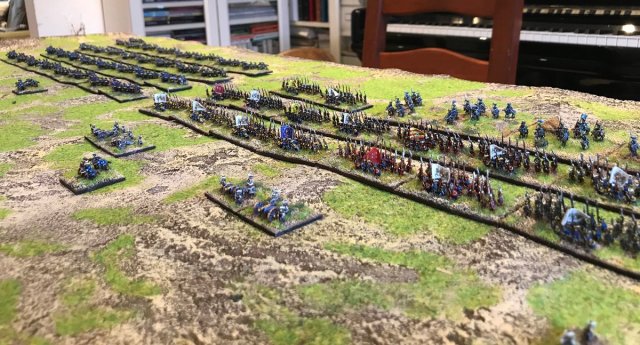
Swedish Army for Horka 1708
The Swedish King and his Generals mustered the forces for the Horka Battle to be fought 15th July in Sheffield at the Joy of Six show (more here).

The King was seen smiling and the mood amongst the ranks was very good. They Russian position was strong but so was the Swedish morale. Here are some colorized sketches from the event. There are a total of 72 cavalry bases and 28 infantry bases as well as a few leader bases and artillery bases. Here we go….
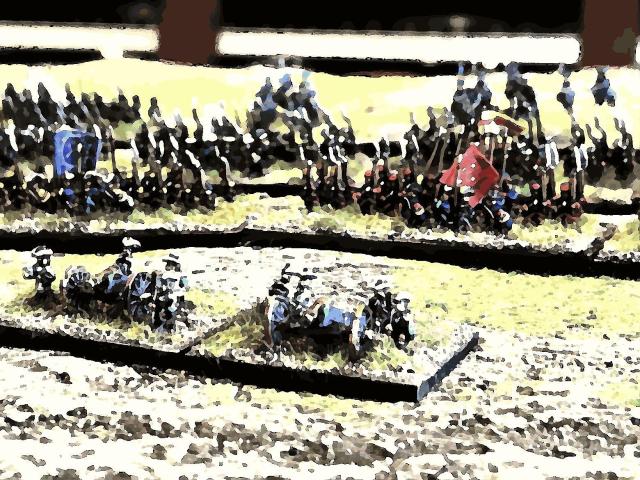
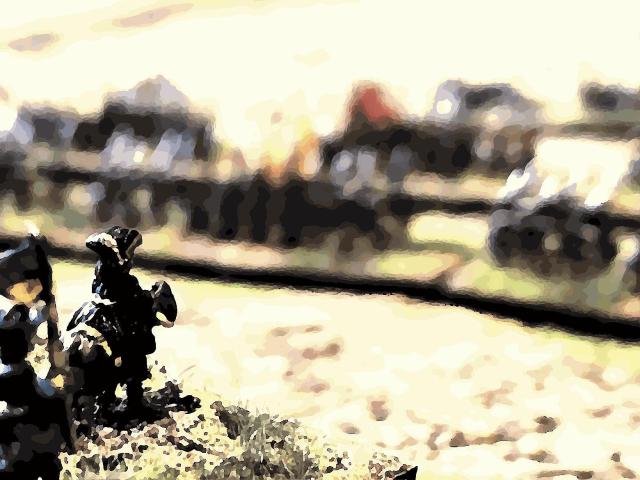
Too blurry?, let us try again.


/ Hope that was of some interest

Pingback: The Russian Army at Horka and some more 1/600 aircraft – Roll a One
Pingback: Got myself a Hyding! – Roll a One