With two more weekends before the Joy of Six show, I felt under positive pressure this week to get the final bits completed, the key item being the mat.
The idea this year was not to use terrain boards, as I have done previously, but instead try to do a terrain mat that contains most of the terrain features (see some background here and here). I had this rolled up piece of plastic backed drop-sheet with the acrylic paste on top – all dry but a very heavy 8′ by 4′ mat. Having been rolled up for about 2 week I did notice some cracking and a few strange folds, but nothing scary. It was time to decorate.
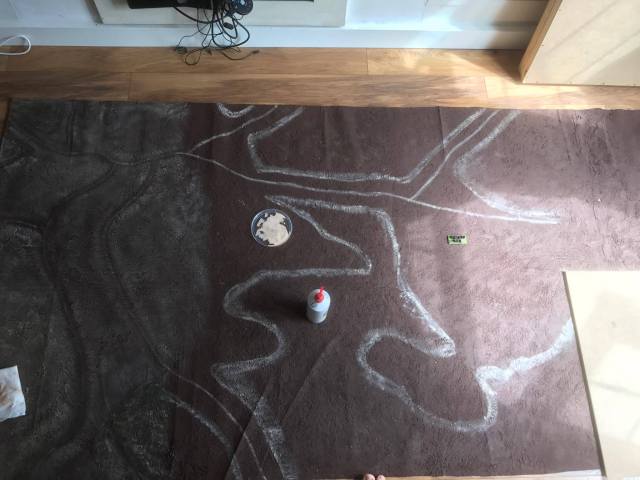
Remember the objective (upside down compared to the previous postings).
Marking it all out and getting stuck in there.
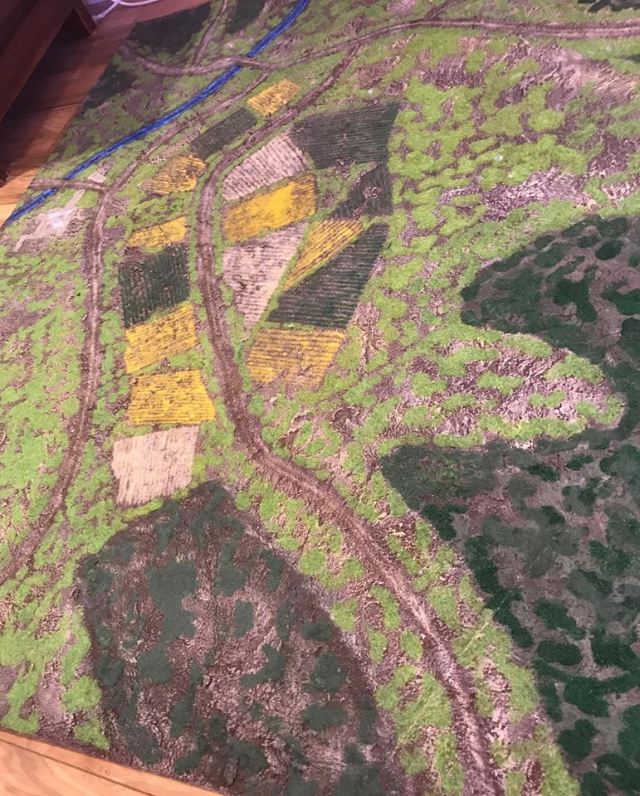
Drybrushed and ready for some static grass and flock!
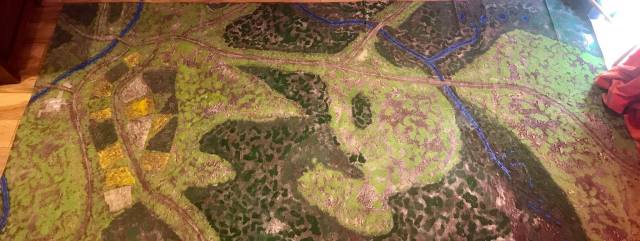
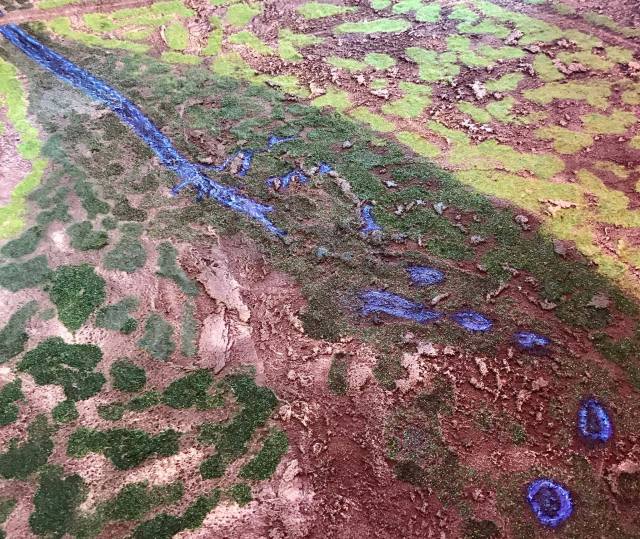
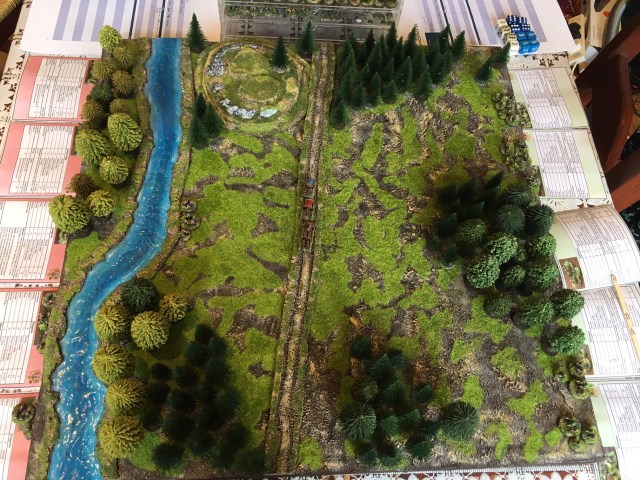
After static grass, flock and river detailing (and a good vacuum clean!) – I am actually very pleased. Dark green areas will be covered with trees and I will make some small bridges to put over the river crossings, and some buildings for Lesnaya and finally some features to show the elevation on the left.
Some details (note road space exaggerated – to allow a basewidth through!)
I think it will be good enough for the day! It took some time but I think it was worth it. It took two relatively long sessions to get it done.
Plan B
As you are aware we have two tables at Joy of Six this year (16th July in Sheffield, see more details here) – the Lesnaya Battle as show above but we were also going to do some French-Indian War using the Sharp Practice 2 (SP2) rules with the help of Neil Shuck, of Meeples and Miniatures (see, or actually listen, here!) fame; “Hello Neil!”. Neil and I ran the Saga games last year and we had a blast. However Neil is not able to make it this year so I decided to change the plans slightly and run something with the Little One. We have too little time to get up to speed with SP2, to give it a fair go, so we decided to go with plan B. As you are well aware we have grown very fond of the Dan Mersey rules and as there are no other fantasy games on offer at Joy of Six this year – we went and figured.
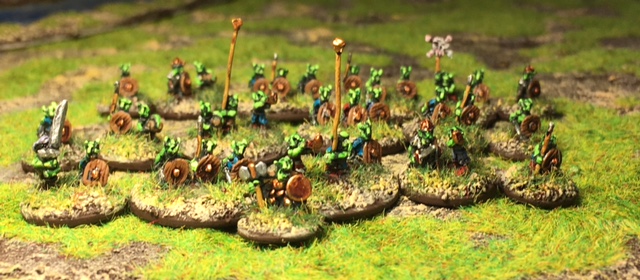
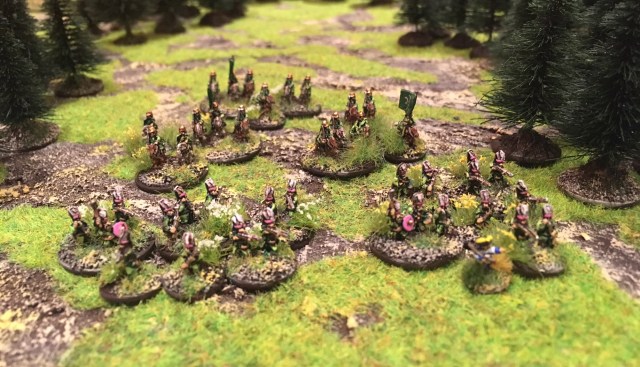
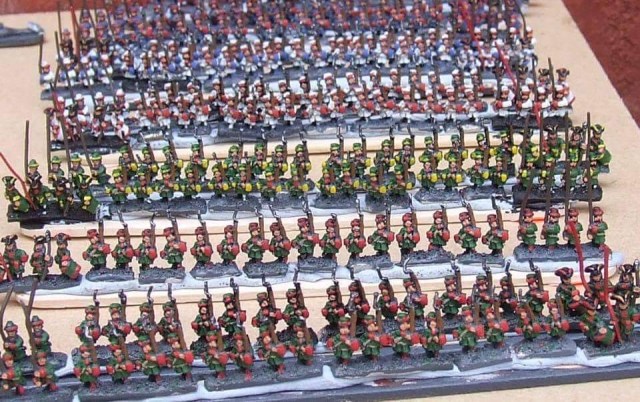
I will do a little presentation of that game next week but you can see some background in previous posts (here). In addition I decided to do a few more units and here are some work in progress shots (Ogres and Treemen from Irregular Miniatures, Elves from Baccus and Centaurs from Rapier Miniatures).
/ Take care and hope to see you at the Joy of Six(tenth July)
I have been working away on a few fantasy forces in the background of doing my Joy of Six preparations. This week I mainly did trees and some other terrain preparations and did not really take any pictures – next week more on Lesnaya (the mat I did last week is working really well). I also got drawn into the Glastonbury catch-up on BBC iplayer and some wonderful performances by Foo Fighters and Jamie Cullum – great stuff!
Back to the fantasy. I plan to do the following forces (this is certainly a Joy of Six as I have found what I wanted from various 6mm producers):
Goblins based on miniatures from Baccus (see here) and Microworld Miniatures (see here). I have completed the initial miniatures for this warband (they are presented below), but plan to add some Trolls from Perfect Six as well.
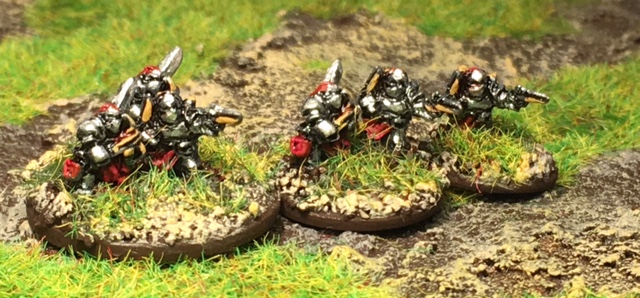
Knigthly Order – I have done some knights using the Order of the Dragon miniatures from Perfect Six. These are heavily armoured knights and give a “space marine feeling” with the nice and bulky armour and the inclusion of pistoliers and crossbow men is really nice. Mine have shining armour with some red detailing. Check out the growing fantasy range (and other useful stuff) at Perfect Six here. I have completed enough to field a small but very strong warband of these (see below) – the idea being that the are all elite units so only a few would be needed to match a the Goblins above.
Future Warbands
Scorpion Men – I have ordered some of these from Rapier Miniatures, see here , they are part of their new Glorantha range – the fantasy world created by Greg Stafford (see here) and made famous by the fantasy roleplaying game Runequest. As an old Runequester I could not resist. I know Rapier are working away on a new 6mm Mongol range but later in the year we may see Bison riders and Broos (those are a given for me, so perhaps some more factions). They do some great ancient ranges too.
Elves and Centaurs – I already have some Elves from Microworld Games (see above) and the Centaurs are on their way from Rapier Miniatures (see here) from their Greek Myth Range. I plan to get some elven archers from Baccus.
Adventurers and Hirelings – Remember the hirelings from Dungeons and Dragons (D&D) that could be hired by the adventuring group with a few hit points each? This homage to D&D warband will be using the adventurers from Perfect six supported with warriors, pack mules, horses (for strength marking purposes). Each adventurer will be a unit with an adventurer supported by hirelings, pack mules and other items used as strength markers, as the unit takes damage the hirelings are removed until only the adventurer remains. The look of a real power gaming set-up!
I want to use the Dragon Rampant rules (same family of rules as Pikeman’s Lament and The Men Who Would be Kings that I have tried out successfully in the past, see here or here for some examples of these games being played) as this have the right level of complexity and playability for the Little One and I.
The format of the warbands and the 1-2-3 basing works really well and it only takes a few evenings to prepare, paint and base each faction.
Progress so far
Goblins
Baccus Goblin Chariot and Microworld Wolfriders (15mm, 20mm and 25mm bases)
Baccus Wolfriders
As above, from a different view
Baccus Goblins with a Microworld Orc in lead (12mm, 15mm and 20mm bases)
As above form different angle
Smaller Goblins from Microworld (These are tiny!, so these are 1/2 strength point per miniature!, 12mm, 15mm and 20mm bases)
As above
Microworld Wolfriders
Knightly Order – all from Perfect Six
/ Hope that was of some interest, more on the way!
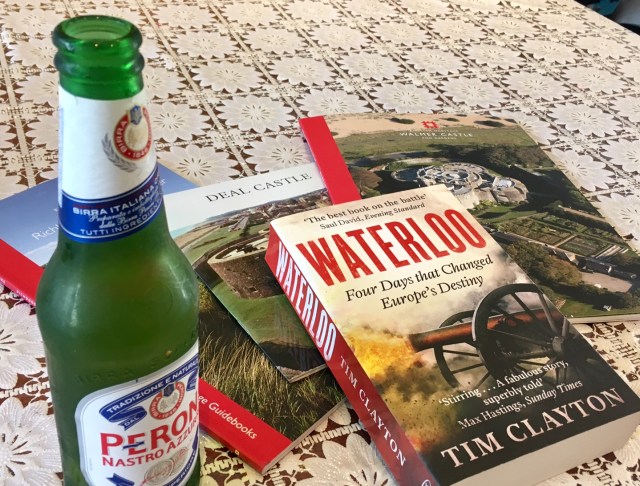
I had a fantastic day on Saturday as the better Ones arranged an early Father’s Day present with a day out that I could not have designed any better myself. I got to see two of the gun forts (Deal and Walmer Castle) that were established following Henry VIII’s break with the Roman Catholic Church and the associated fear of an European invasion. On top of this we went to the old Roman Richborough fort. All of these sites are very close to Dover castle (that is a fantastic place but we did not go there this time) and doing all three sites made an eventful and varied day. All of them are being run by English Heritage (here are links to them should you be interested, Walmer, Deal and Richborough Fort).
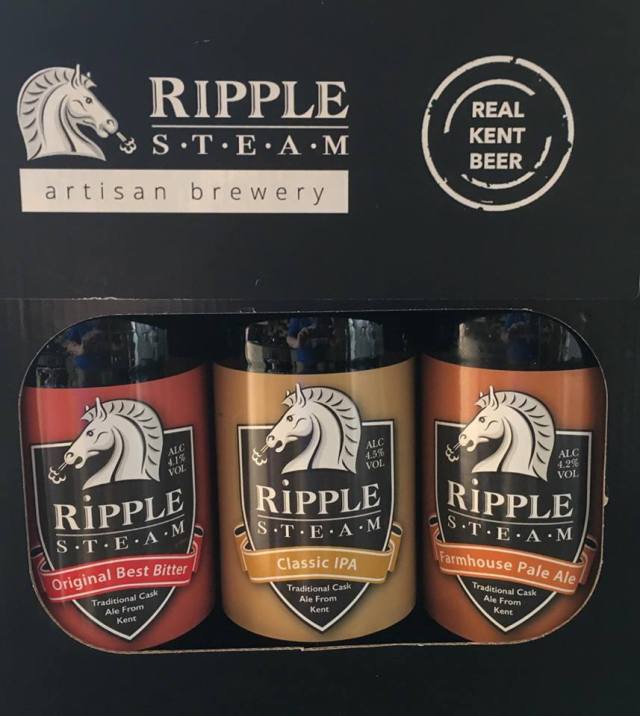
We found a few bottles of fine Kent produce as well.
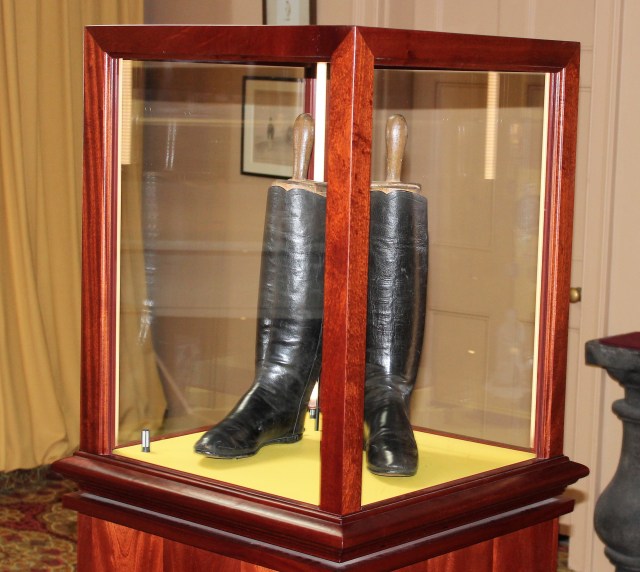
…and we also got to see a pair of Wellington’s own boots. These can be seen at Walmer Castle, where you can also see his field bed that he slept in during this campaigns. This is also the place where the great solider died. Incidentally today is also the anniversary of his most famous battle – Waterloo.
Father’s Day in all glory but the Wargames Show must go on, so on Sunday morning I set out to do the next step of the Lesnaya battlefield – the base mat.
I used the following in doing the mat (base idea from previous posting here, read the external stuff as well as these contains a lot of useful hints and different approach, I am doing the base brown mat first not all of it in one go – for example):
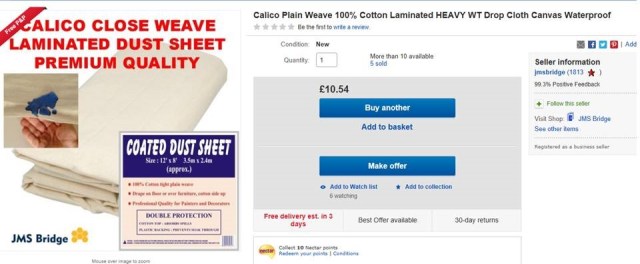
Drop Cloth / Dust Sheet – bought mine from ebay £10.54, it was 12′ by 8′ (I need 4′ by 8′ for my mat, but will do it a little bit wider) – this should be enough to do another larger mat as well. I use the variety that has a weave side and a laminated waterproof side.
Acrylic Sealant / Decorators Caulk (Note: make sure it is acrylic/paintable not silicone that does not take paint very well) – costs from £1 and upwards – I got a good deal on some brown variety (helps out as I want the base colour of the mat to be brownish) for a little bit more. But white should work, you just need enough paint. I used a total of 10 No. 310ml tubes (for use with applicator gun!).
Birdcage Sand – this is fine sand with some crushed Oyster shells that helps the cage birds in their digestion and is a source of calcium. For us the crushed shells helps to create additional structure on the surface of the mat that will look good once dry brushed. I got myself a large bag of sand for a fiver (£5) from the Pet Shop.
Paint– I bought some chocolate brown emulsion paint from a pound shop that I mixed into the overall mix (I used two small pots), this made the Colour less sharp (the basic brown acrylic is not that nice and looks more like something else than a basic ground colour).
Mix it all up and spread it out – let it dry. Not very impressive so far but I now have a 8′ by 4′ structured surface that I can start tailor making for the Lesnaya battle (as presented in the last blog!, see here), with drybrushing, flock and static grasses. I will leave it to dry for the day and then cut it out and roll it up.
But that is for another day, now I am going to go and fully enjoy Father’s Day!
After having banged the 6mm skirmish drum for a while I have no choice but to get on with the big battle of the Year as Joy of Six is getting closer.
In creating a battle board for gaming a known battle there are a number of steps I take to allow me to create a reasonable area that creates the right balance between four elements – historical accuracy, playability, available space and overall visual impact. Remembering important issues such as the difference between the ground scale and the figure scale for large scale battles (and building scale) – this is why you see towns represented by just a few buildings next to rivers that looks like the models could just jump over.
The Lesnaya Battle was not a straightforward “line-them-up-and-attack” battle but happened in stages where the Russians first attacked the Swedish rearguard that was reinforced in stages but the front line of battle constantly moved back towards Lesnaya – it quickly became clear that the battle would be best played length wise on the table.
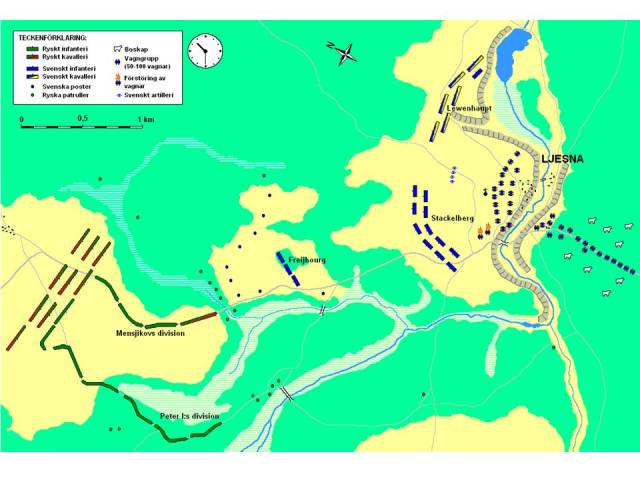
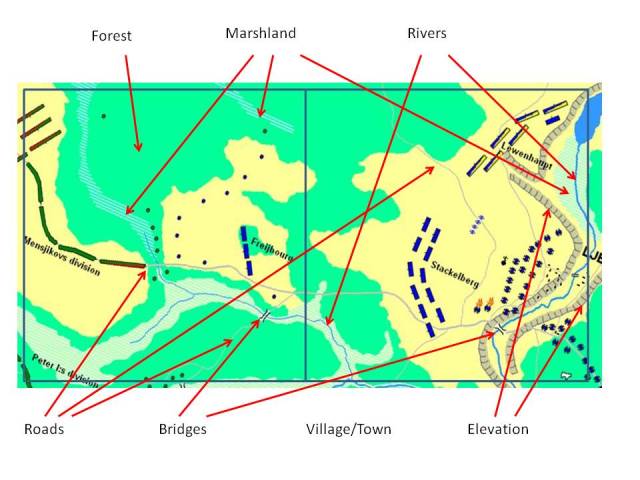
I have used the map below as basis for the battle board and it was produced by Örjan Martinson on his absolutely brilliant Tacitus Webpage that contain a lot of useful information about the Lesnaya as well as other battles of the Great Northern War (link here http://www.tacitus.nu/gnw/battles/Lesnaya/ ). The map show the position of the opposing sides at the start if the battle (Note the name of Lesnaya in the traditional Swedish spelling – Ljesna).
Map from the Tacitus Webpage at the Start of the Battle
The first thing I wanted to do was to overlay my conceptual 4 by 8 feet (120cm by 240cm) battle board space over the map and see what area this would cover – would it be enough to play the battle on? In this case I simply use the Freijbourg Rearguard as the basis for my battle board (marked in the red circle) for my calculations. The Rearguard consisted of 2 No. battalions of De la Gardie’s Regiment and 1 No. battalion of the Närke-Värmland 3-männing Regiment. In the Polemos Rules each battalion is represented by a 60mm frontage base and in the Twilight of the Sun King rules this is (at battalion level) represented by a normal unit (2 No. 60mm frontage bases) and a small unit (1 No. 60mm frontage base). Giving some space between the battalion I used a length of 20cm for the 3 bases.
The Rearguard Battalions
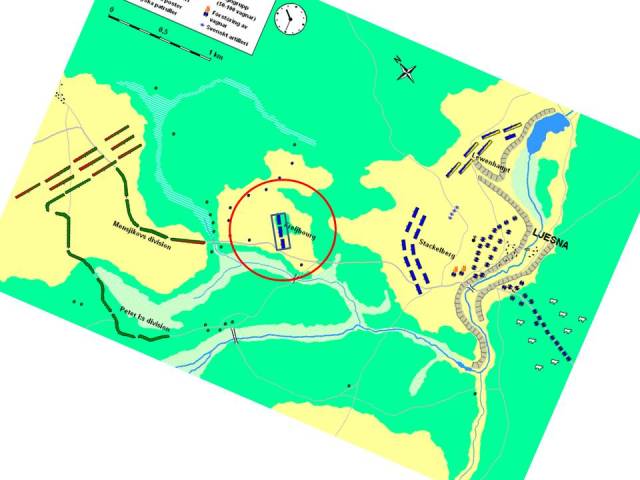
In the PowerPoint files I used to do the exercise the length of the Rearguard Box (in the picture) was 1.4cm and I multiplied this with 6 to get the equivalent of 120cm (or 4 feet) length, this is 8.4cm and I created two squares (with 8.4cm sides) and overlay these on the map to represent the area the board would cover. To my (happy!) surprise the area covered (as shown in the picture below) was spot on for where the fighting actually occurred. Sometimes it does not work and you may not have enough space – you could easily cut this board down to a 6 by 4 table by taking away 2 feet of on the left hand side. The first notable encounter between the opposing armies was at the location of the rearguard. In addition it could be possible to reduce the depth as well but we did not have those problems on this occasion. All the Russian forces will not start on the board!
Following a deeper review of the overall battle from the start to finish with regards to the known locations of fighting, the area covered is sufficient to represent the fighting on the day.
The area captured!
But wait!, you may say… In the In the Twilight of the King Rules a base width (60mm, or 6cm, in our case) is about 150 meters, meaning that the frontage for our 3 bases (18cm) is about 450 meters. As we measured 20cm this equates to about 500 meters width for the set of three bases with some space in-between. We can clearly see that the width of the rectangle is far less than the 0.5km length based on the ruler in the to left corner. So in terms of adherence to real scale it does not work but in terms of ground scale and playability it does – I think that makes sense?
Case Study: Fraustadt 1706
Another example is when I did the wintery Fraustadt 1706 Battle a few years ago where the main feature was the line of Saxons and Russians between the two Villages (Rörsdorf and Geyersdorf). The key design feature of that battle board was to be able to fit all the based miniatures for this line the space available. I physically put all the bases on the table and used this to draw the features on the board, this gave me the “correct” measurements to play the game efficiently. I recall that I took some liberties on the Saxon/ Russian left flank to make the it work, but overall the battle board reflected the terrain features of the battle.
Working on the Fraustadt Board in 2012
Joy of Six 2012 – Battle of Fraustadt 1706. The Saxon-Russian line was not straight as it did not fit the available space. You can find the Ordre de Batallie (OdB) here. It is a map from the excellent book (Fraustadt 1706 – Ett fält färgat rött) on the battle by Oskar Sjöström (only available in Swedish). I used this OdB and the map as a basis for doing the terrain boards. The only change I did was to make move Rörsdorf to make the overall line slightly straighter. All in all the table showed a (1) historically feasible set-up with the key terrain feature present, rivers, roads, pond villages, etc (2) it was playable and the table was based on the frontages used for the battle, (3) it fitted on the table allocated and (4) I think that although the table perhaps leaves you cold (with the pun intended) it is spectacular enough!
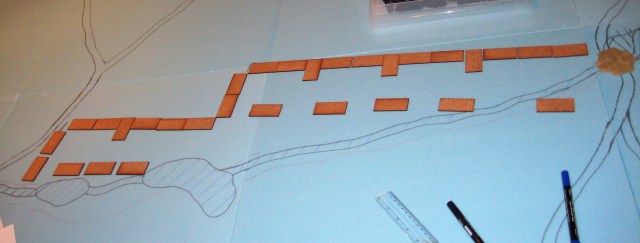
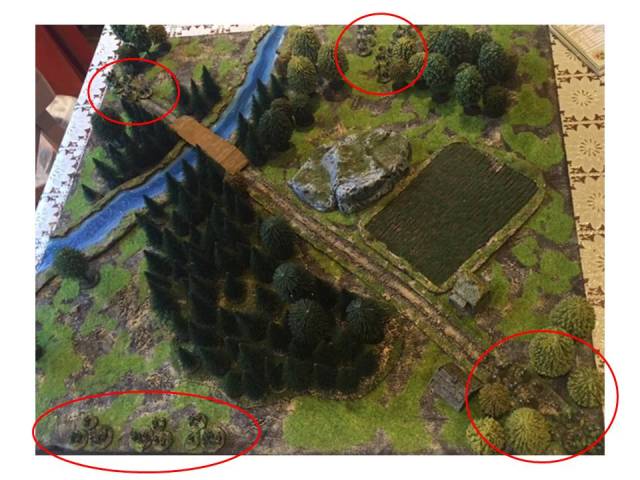
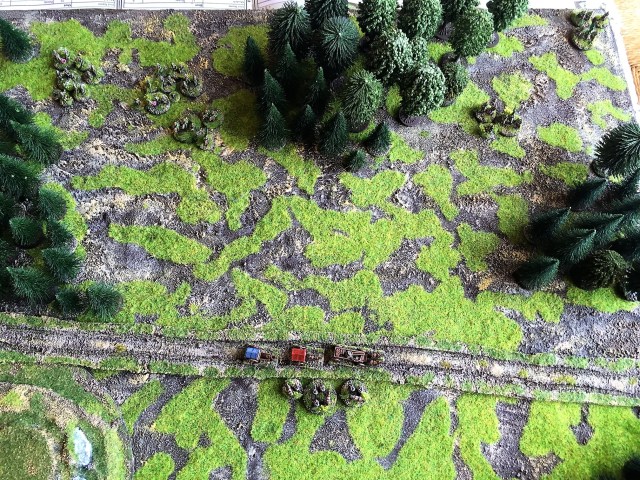
Back to the Lesnaya table and the next step which is to highlight the key features of the battlefield that are needed on the final battle board. The board will contain a lot of forested areas (!), roads (important as they cut through the forests), rivers and bridges and the elevation around Lesnaya and the river.
Key Features
After this I mark out the features (I did not include the bridges or Lesnaya itself at this stage) and we are ready for the tools and the materials.
Sketch for further works
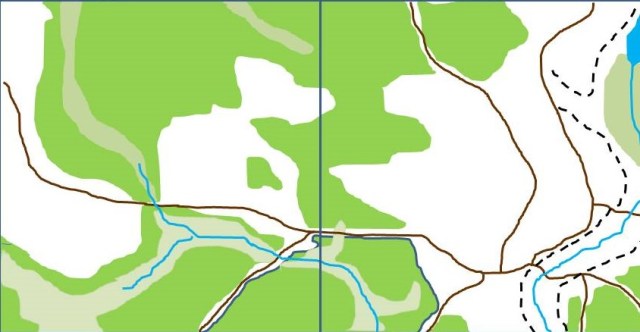
I have previously made the Great Northern War tables as 8 No. 2 by 2 feet boards but decided to do a mat this time in the same way as the Saga mats last year (See link here https://rollaone.com/2016/06/19/saga-in-6mm-part-7/ ).
The mat will incorporate the forest areas and make these darker than the general white areas (these will incorporate a few fields) the marshland will be a in yet a different colour and I will create separate river tiles to put on top of the mats (with bridges), including the elevations around Lesnaya.
I have not yet started the mat, instead focused the weekend on basing some trees – I will need a fair few.
Hope to show some mat progress soon.
I am working on some 6mm fantasy stuff in the background, here are a few pictures of work in progress (I will do a write-up later).
I was going to progress on the main project this Sunday doing some bespoke terrain mats for Lesnaya (well at least starting them), but felt a little bit tired after spending the evening watching the news about yet another horrendous terror attack this time in London. I work a stone throw from London Bridge and have spent a fair few evenings in Borough Market. I decided to listen to the latest (two!!) Meeples and Miniatures podcasts (link here and here) and to do some gardening to clear my mind as I did not find myself even close to a creative mood. My thoughts are with those affected directly and indirectly in the recent terror attacks in Manchester, Kabul and London. Mats will have to be done later.
A little bit of effort this week
I have wanted to try out the IABSM (I ain’t been Shot Mum) rules for some time and decided (a few weeks ago) to make two forces to try these rules out – some British Paratroopers and some German Grenadiers. I have seen some nice games in the past using 6mm miniatures (that is more or less the ground scale of the rules) – So I got myself a fair few packs of Brits and Germans from Baccus (here is a link to their WW2 section).
I was initially considering doing some Winter War themed 6mm stuff but had a change of mind as I already have a lot of Winter War stuff in 15mm (see more here showing the nice winter war stuff from Herois and Ros in 6mm) – but perhaps in the future. Heroics have a nice range of Winter geared soldiers and since the Germans and the Finns had the same type of helmet it is easy to make a Finnish force.
Having been encouraged by the recent 6mm skirmish stuff (see more in the individual links: (i) Sharp Practice, (ii) Men who Would be Kings, and the recent (iii) Pikeman’s Lament) I thought I would do the companies for each force in a way that I could play Chain of Command as well using one of the platoons. I have platoons for the Winter War in 15mm and Germans and British for 1940 Europe, but not for Normandy. One of my very good friends live in Normandy and it would make it easy to take the stuff with me on my next trip.
Incidentally, there is a scenario in one of the Lardies Special about the fighting around the Pegasus bridge (it is the Summer Special 2006 – What’s for Afters?, link here). I also have a 6mm Pegasus bridge that I spent far too much monies on, so I better get some use out of it. The Paratrooper company could be scaled down to represent a glider company.
Testing with the 8th Army
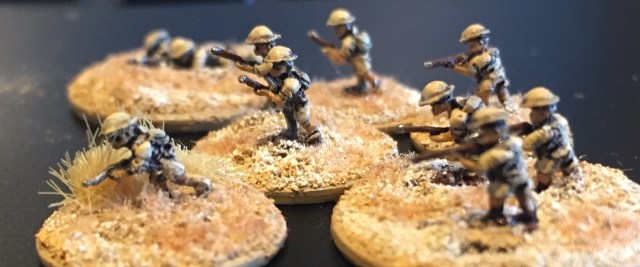
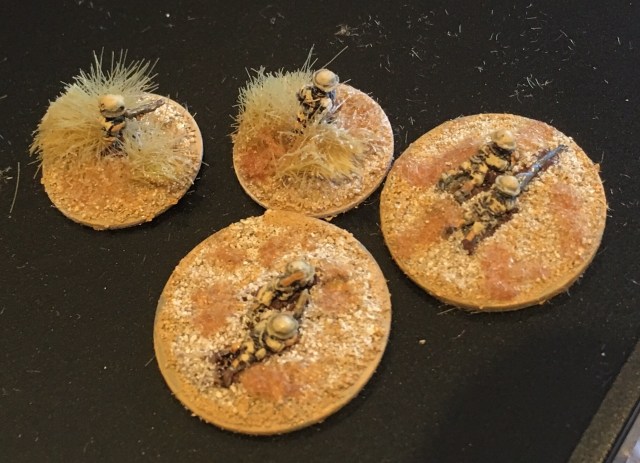
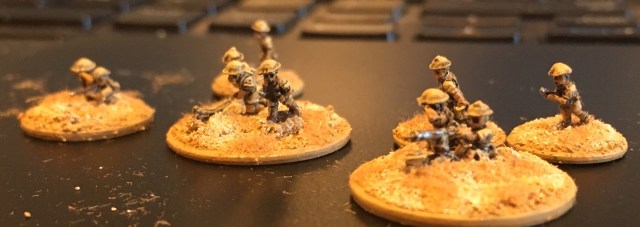
I quickly painted a platoon of early war 8th Army guys this week (they are 6mm Adler figures that I bought some years back, here is a link to the range) as I found them on the lead mountain. I based them so I could use them in a chain of command scenario and also to get a feel on how it looked. I have to admit that I am really please with the results and I really like the way the basing turned out.
The bases are 12mm to 20mm washers (see here for how I tend to get them). There is a Lieutenant (Pistol, 15mm), Platoon Sergeant (SMG, 15mm), 2″ mortar team (20mm), Boyes AT rifle team (20mm), 3 Junior Leaders (SMG, 15mm) for each section and 3 sections of two teams; Bren team (3 miniatures, two on a 20mm base and one on 12mm base) and rifle team (6 miniatures, 3 on a 20mm base, 2 on a 15mm base and one on a 12mm base). Note that I have stopped using the 9mm base – as I feel it is too small.
In summary, three sections like this (from left to right), Junior Leader with SMG (one tuft to indicate his leadership ability), 3 man Bren team and 6 man rifle team.
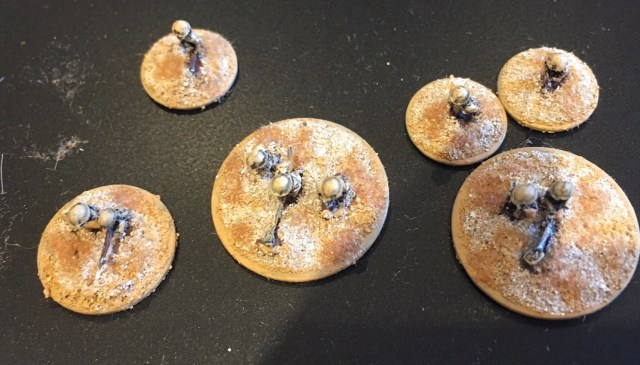
Senior Commander (Platoon Sgt with SMG), Senior Commander (Lt with Pistol) – both with two tufts to indicate their status. In addition a Boyes team and a 2 inch mortar team.
Supports – 2 man sniper team, Medical orderly, 3 man engineering team and 5 man (forgot one in the picture) HMG team.
I think I need to get some Afrikakorps as well, this test got a little bit too inspirational. I have heard that the GHQ vehicles works very well with Adler.
Anyway I have spray-painted the necessary stuff for the Normandy Stuff and will complete them at some point this Summer.
Dragon’s Rampant in 6mm
I also dug up some 6mm fantasy stuff I have (some bought recently and some a little bit older) as I ordered a copy of Dragon’s Rampant last week – it is the same “engine” as Pikeman’s Lament and the Men who would be Kings. The Little One has enjoyed these games and asked me for some fantasy – so why not. I am planning on doing Goblins (with miniatures from Baccus, link here, and Microworld Games, link here) and some high powered knights (based on the Dragon order from Perfect six, see link here).
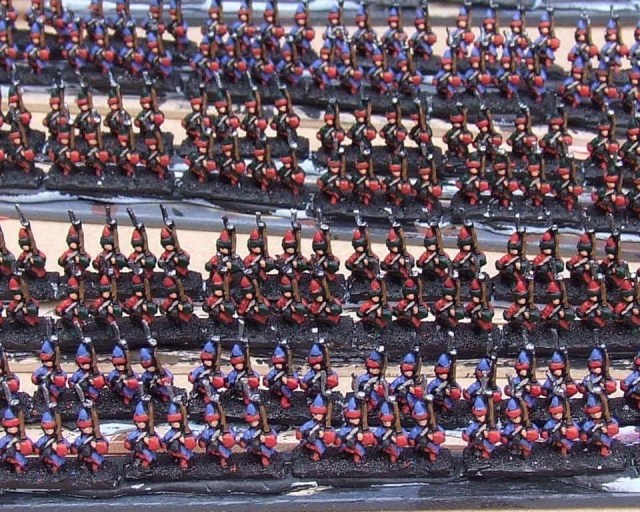
Here are a few picture of the basecoated (grey basecoat with black ink) stuff.
/ That is all for this week, take care of yourself.
Part of a Sipahi cavalry unit contemplating their next move
We could not help ourselves and really ought to be cracking on with the main project (whatever that was) but enjoyed the game of Pikeman’s Lament last week (see here) so we thought we give it another try. As usual a lot of pictures, hope you like it… but first a few other things.
Loose ends from Last Week
I got some questions about some of the stuff I used for last weeks battle, especially about the battle board. I will do a similar one for the Joy of Six Sharp Practice game in a few weeks time so I will do a tutorial and post it here, as this will be done in a similar way.
Also I made simple cards for each unit and laminated these – simple but effectual. I did them in Excel and pasted them into PowerPoint and added a picture of each unit, with a national emblem and a background. No more information than on the normal company roster, just one of those things we feel enhances the gaming experience overall.
Some Swedes
I have plenty of Swedish lead hanging around so I thought I do a few of these as well for our trials of the PL rules.
As per the plan a few blogs ago.
Swedish
No
Pts/ unit
Total Pts
Unit Size
Total Models
Baccus Pack
Shot
5
4
20
12
60
GNS01
Pike
2
4
8
12
24
GNS03
Aggressive Elite Gallopers
3
6
18
6
18
GNS05
Total
9
–
46
–
102
–
5 units of Shot
2 units if Pike
3 units of Gallopers
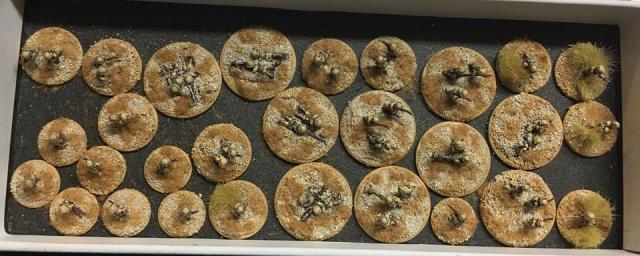
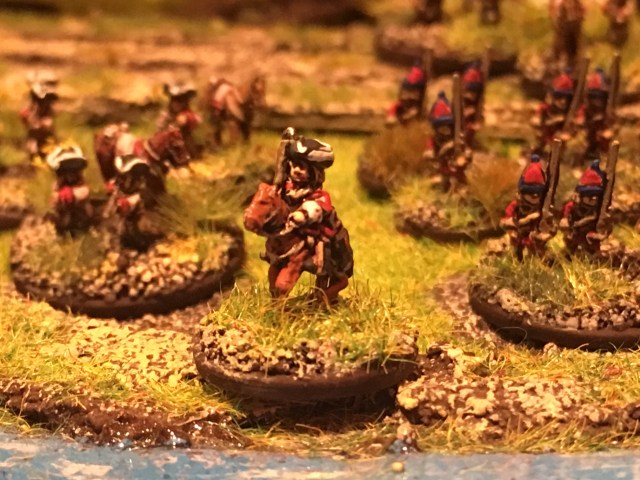
Rebasing the French Indian War Stuff
Whilst I was at it I have also rebased the French Indian War stuff I did for Sharp Practice using the “1-2-3 method” I have discussed before, as it is makes it easier to play especially for smaller skirmish. Here are some pictures of the bases with the “old” shock markers next to them. We will have to get things ready for this one as well pretty soon, as they are showing up at Joy of Six! Note the French Commander from our game last and this week (Lt. Dupont – the younger I suppose?). For the original posting and the previous basing, see here. Note that some of the units are based in a 1-2-2-3 for the 8 model units (line) and 1-2-2-2-3 for the 10 model units (militia).
A What-if Battle to test the Pikeman’s Lament rules again
Forces
We thought we should take the Swedes for a spin against the same Ottoman side as last week (see here).
We had a friend of the family visiting so we invited him to be the Swedes and the Little One got the Ottomans again. Unlikely pairing but we wanted to try the Swedes out and the Little One wanted to field the Ottomans again (and hoping to gain some more Honour to his Lt. Dupont). We agreed on doing it but keeping the historical blasphemy quiet.
I actually painted the Swedish infantry above as being part of the Dalregementet in uniforms they had around the time of the Poltava Battle in 1709 were they surrendered. The regiment was then reformed in 1710 and stayed in Sweden until they fought bravely at Gadebusch in 1712 . So they were certainly not around in Pruth.
The regiment was disbanded in 2000 and was the pride of the Dalarna region and fought in many famous Swedish battles throughout history, including Breitenfeld (1631), Lützen (1632), Lund (1676), Narva (1700), Kliszow (1702), Holovczyn (1708), Malatitze (1708), and as mentioned above at Poltava (1709) and Gadebusch (1712).
Their marsch was the famous Stenbocken Marsch to honour Fieldmarshal Magnus Stenbock who was Colonel for the Regiment at the Battle of Narva and later the commander of the Great Victories at Halmstad (1710) and Gadesbusch (1712). The lyrics in Swedish here. The first part of it translated to English (rather hastily) by yours truly below (the rest is as “poetic”, note that I have translate the Gå-På as Go Unto – this was the name of the offensive Swedish tactics used since Gustavus Adolphus days).
March, Soldiers! Go unto in the name of the Lord,
Cock the hammer merrily back, then eagerly present,
Give fire, musket down, take the sword in your hand.
Go unto, fear neither death nor fire
Go unto, for our native land!
To dare your life for king and family,
Is covered both in heaven and on earth,
Therefore we will plucky,
In our blue uniform,
Go unto, stand, thrust and slash,
Yes, beat them all, so
that they lay dead like cut straw
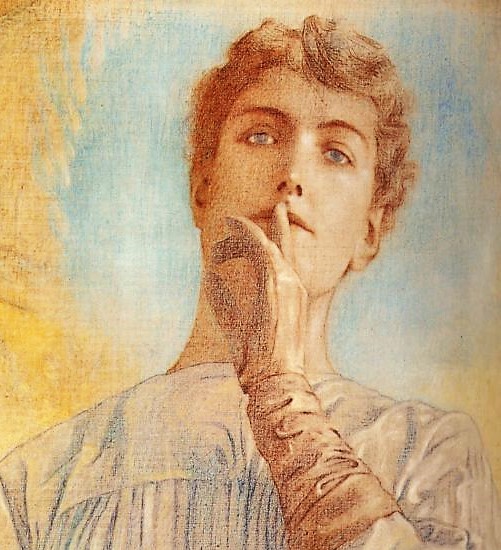
We promised not to tell anyone. Detail from the Painting Silence, by Fernand Khnopff (1858-1921), painted 1890
As for the Galloping cavalry I had a few left overs from the ones I did a few weeks back as I only needed one base of the Adelsfanan i Livland och på Ösel but had a fair few of grey coated cavalry I no longer needed. This is the Cavalry Corps of the Nobility in Livonia and Ösel. They were part of the march to Ukraine with Lewenhaupt and also surrendered at Poltava (1709) and a smaller part of the unit that had remained in Riga surrendered in 1710.
In fact, and based on reading the draft of Nick Dorrell’s upcoming book (discussed here), there were a small number of Swedish soldiers with the Crimean Khanate as part of the Ottoman allies most likely cavalry unit and some officers as advisors. I will repent and make another more likely force containing mostly of gallopers from the elite Drabanterna unit and some riders from the Södra Skånska Kavalleriregementet. These would most likely fight side by side with some light cavalry units.
But I digress and back to the what-if battle….
For the Swedes we chose (a 24 point force):
2 units of Shot @ 4 points each
1 unit of Pike @ 4 points
2 Aggressive elite Gallopers @ 6 points each
The Scenario and Set-up
With regards to the battlefield (yet again a 2 by 2 board) we had a little section of river with a bridge, a road, a field, a rocky hill, some houses and a lot of trees.
The starting positions for the Ottoman units were: (1) the Siaphi 3 cavalry units at the south end of the table behind the forest, and (2) the 2 Janissary shoot units in the southeast corner on the road next to the two houses.
The Swedes, of course, came from the North with the (1) two Adelsfanan cavalry units from the Northeast on the road and (2) the three foot units from the North.
Here some close-ups of those starting positions.
This was a straightforward battle to the end scenario.
The Battle
The Swedish battle plan was to get up on the hill in the middle with one of the shot units (to which the officer was attached) and move the pike units towards the road. The second shot unit would move around the North West forest and move forward from there. The two cavalry units would advance to the other side of the bridge and wait for the foot units to get into position.
The Little One wanted to get his cavalry through the forest and start harassing the enemy as soon as possible but at the same time advance his shot to the middle of the road. He regarded the Elite Gallopers as the biggest threat with their stamina of 4. On me telling him not to underestimate the Swedish infantry he asked me if I had read about Poltava and told me that they would probably get lost in the forest! Fair enough point taken.
Below are the pictures I took during the battle. In short the Ottomans had some problems getting their shot getting to move on the road (perhaps the orders in French by Lt. Dupont were not clear enough). However the Ottoman Cavalry did managed to move through the forest and although it did manage to cause some damage to the Swedish cavalry who had advanced to the other side of the bridge it was not enough and instead the Swedish cavalry (being elite and with Stamina at 4) got the upper hand of that exchange but at very high cost.
The Swedish shot unit (as planned) got up on the top of the hill and from a relatively safe position managed to take out most of the Ottoman cavalry threat and also kill Ottoman shot unit with Lt. Dupont attached to it that had been successfully reduced in power by the pike unit. However it (the shot unit) became a target for the Ottoman Crack shots (the second shot unit) that successfully manage to remove almost half its units in one shot (having previously done the same with the unit coming down on the east flank), killing the commander and making the unit rout (miserable morale roll). But before then a reinforcement unit of Swedish shot had appeared.
The Little One waited for the right moment and managed to clinch victory by routing the newly arrived reinforcement and then manage to get reinforcements in the eleventh hour – but by this time the battle was over. The Little One had rolled brilliantly and turned the tides, yet again! It feels a little bit better not standing there as a looser for a change!
In short we had yet another great time and the reflections this time are:
The terrain modifiers with regards to movement and combat are simple but yet feel realistic.
The elite gallopers are a very potent force!
The pike ability of close order is very good and captures the role of pike in a simple straightforward way. It worsens the ability to attack but makes it better to defend and cause damage to the attacker much better. The Pikes stamina score of 3 is also useful and makes them very strong against attacking- (as opposed to shot) biased units – like gallopers.
The Little One learned that it is not over until the last dice are rolled although his cavalry was decimated he still had two strong (elite) shot units that made the day.
The rule of something good happening if you roll a double 6 on activation (and bad on a double 1) created some interesting events during the battle with the Swedish reinforcement about midway through the battle and the Ottoman reinforcement at the end of the battle. Again this adds to the Narrative and fog of war.
The Little Ones commander Lt. Dupont survived and was saved by the soldiers and he got another 5 honour so he is now “officially” a Lieutenant (at 24 points total) and he got the new trait of Fencing Master (giving him benefits if he challenges another Commander).
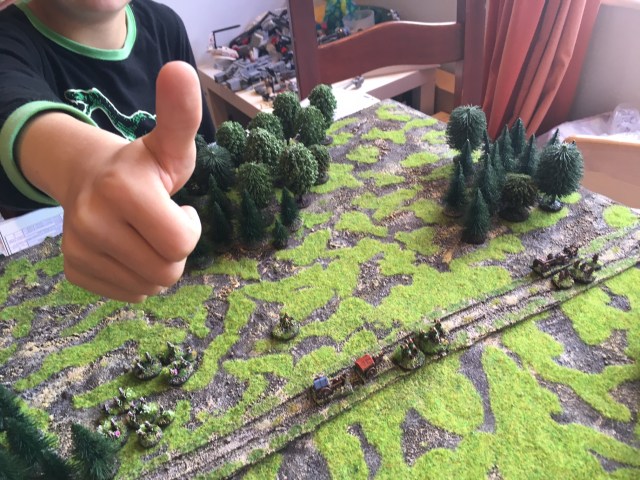
But, as you know by now, it is not over until the thumbs are up or down.
So all in all another successful game.
/ I hope that was of some interest, have a good week
The Little One and I were eager to have a go and test the Pikeman’s Lament (PL) rules, here is a write-up of it. For some background on this diversion see here (initial thoughts and overview) and here (painting up the units). 6mm miniatures played on a brand new 2 by 2 feet board (that we made the day before) played using centimeters instead of inches so in relative terms it would have been as playing with on 5 by 5 feet board using 28mm and inches. It is not a roll-for-roll account but a summary how it all played out.
Forces
We selected 24 points for each side resulting in the following two forces:
Ottomans
2 units of Veteran Shot @ 6 points each (Janissaries; may form Close Order)
3 Gallopers @ 4 points each (Sipahis cavalry, I changed my mind of these from being Trotters)
For the Ottoman officer we rolled Mercenary Officer, representing a foreigner with some renown but not fully trusted bythe men (offering no morale bonus for units within 12”) We decided that he was a French officer and we used the French officer from our Sharp Practice French Marine unit to mark his unit – one of the Janissary units. We named him Lieutenant Dupont, a young commander disgraced in his home country turned mercenary and eager to get promoted through the ranks by impressing the Pasha.
Russians
3 Dragoons @ 4 points each
2 Forlorn Hope @ 6 points each (Grenadiers)
For Officer background trait we rolled the result Hothead indicating an officer with difficulties with his superiors but, leading from the front, with the full trust of his men. This gives him the ability of Strong – a re-roll for an attack/defence die during every attack. We decided that he was Podporuchik Alekseyev (Podporuchik was a rank introduced by Peter the Great in 1703, equivalent to a second Lieutenant). We used one of the other Dragoons as a marker for this leader in the battle (not counting him as a figure).
The Scenario and Set-up
We opted for the scenario C: King’s War Chest. The Russian’s are defending and at the Start of the Scenario have one of the Dragoon units taking a bath in the river with 3 No. war chest wagons on the road. The rest of the force are off-board but can enter (if successful at activating in Turn 2) The Ottoman strike force is aware of the important cargo and are coming from the South (right in the picture below) – this would be a good way for the young Lieutenant DuPont to get some recognition from the Pasha. The Russia commander has just been made aware of the approaching danger and need to reinforce the Dragoon unit (that has just finished its bath and geared up) and get the wagons out of danger, either to the east or west. The French Ottoman Lieutenant will seek to take the wagons down the way he came (South).
Overview at the start of the battle – left near the river the refreshed dragoon unit and in the South the Ottomans are getting ready to attack. Two units of Shot and a Galloper in the upper corner and two units of Gallopers in the lower corner.
We now rolled for who is playing what and the Little One rolled highest on both dice and chose to attack and to be the Ottomans. I hoped that was the last of his high rolls today!
The Battle
The Little One set out the onslaught by successfully managing to activate most of his units and my Dragoons got their act together and rode towards the Wagons.
The Ottoman pressed forward further and the Dragoons failed to activate a shoot action to reduce some of the oncoming impact. But, by a miracle, I decided to get all the Russians on the table – the Dragoons on one flank and the Forlorn Hope on the other.
One of the Gallopers did the first attack of the day and with the follow-up attack managed to disable the Dragoons in one round. Lucky, but what a nice way to start the battle. He then spent the following round routing them off the table.
After this the Little One got one of his other Gallopers to get onto attacking the Forlorn hope units – I could see him being “Charged up!”.
However they opened fire and knocked out two of the six models making the unit wavering (we used ammo box markers for this!).
Meanwhile on my Left flank the Dragoons had advanced and used the skirmish feature attacking the Shot unit with the commander and managed to get it wavering too. It looked like a had regained some control.
However two rounds later the Gallopers who routed the first Dragoon unit had forced the Dragoon unit with the Russian Commander to evade straight into the jaws of the enemy.
Shorty afterwards the Officers Dragoon unit was destroyed and the other Dragoon unit having sustained heavy fire from the Shot units withdrew toward the river. Meanwhile one of the Forlorn Hope units had snatched one of the wagons and I hoped to do the same with the other unit.
However the second Forlorn Hope was decimated by the remaining Ottomans and I had no longer a feasible chance of doing anything more than drag some of the total war chest out of the Enemy’s hand.
The result
With only a Forlorn Hope unit left but with control of one of the War Chest wagons we agreed a 4 -2 victory to the Little One. Fair enough.
That means that Lieutenant Dupont could add 4 Honour to his roster, whilst the Russian got 2. We also rolled on the table to see the impact of his health being a casualty in this battle – we found (following a low roll – of course) that he had manage to escape the battle field and hidden (in some honour unfriendly manner) and got captured loosing 5 points of honour.
So the honour tally of our Protagonists’ are 19 to the Ottoman and 7 to the Russian.
Afterthoughts
These were our observations:
Managing the Resource of Luck
The tests for actions (move, attacks, etc.) are good as it creates a fog of war situation, it is also interesting that a failed test for one unit stops the overall activation phase for the player. It is irritating when it happens but not a bad rule feature – like being scared whilst watching a horror movie (I do not like it, but I like horror movies!). The activation values for the units we used were in ranges between 5+ and 7+ (i.e. success on a role of the value or higher) or 4+ to 7+ if considering that an officer within 12″ (or cm in our case, give a -1 to the roll), the probabilities for success of doing the action, and doing anything else that round, are:
4+ – 92%, 5+ 83%, 6+ 72% and 7+ 58%.
So it gives a nice balance between trying to optimize the order in which you activate. If there are no other considerations they you should do them in the lowest activation roll order. However this indirectly decreases the chance of being able to activate a unit that may be critical for that particular round. Luck is a finite resource and it is important to manage that resource well!
Cool Units
We found the Gallopers being very powerful and the follow-on attack was devastating – it would have helped to have some Pike available. The Dragoon ability to evade was interesting and worked really well in the game (but I did fail to activate it a few times, and the Little One outsmarted me in using it). We also like the Shot First Salvo rule as it makes the Shot very potent (especially the Veterans we used).
Officers
As for the Men Who Would be King rules (see more here) there are the officer traits (although there is an overall officer as opposed to unit commanders) that we found interesting – that the Little One talked with a French Accent whilst commanding his Ottomans made the game more enjoyable.
Next time we will try the special orders (i.e. sub-mission to give more glory – or to loose some) and see how it goes.
Simple but not simplistic
As for the other rules in the Series the rules are relatively simple but there is more to it and with the special abilities, activation considerations it has sufficient depth to make it interesting and very playable.
But as we say in Sweden “till syvende och sist” (at the end of the day) it is not over until the Little One’s thumb has had its say. We both had a good time this afternoon and are looking forward to the next session.
Very well, it seems like we have another game we can play together.
I do apologise if you are a follower of this blog and got sent an update earlier this week. I did a draft based on what I intended to do this week and instead of saving it to add some more text and pictures to over the weekend (when I actually had something to show) I pressed publish. Anyway here is the real update, hope it is of some interest.
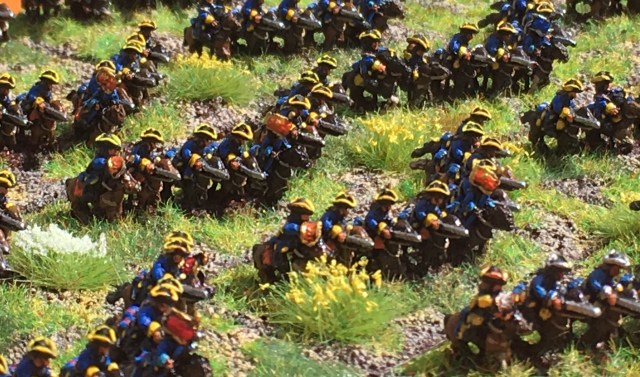
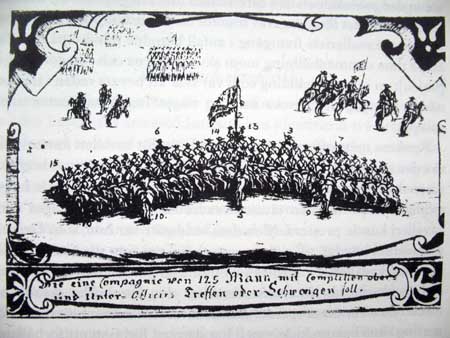
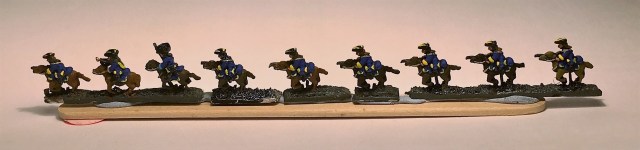
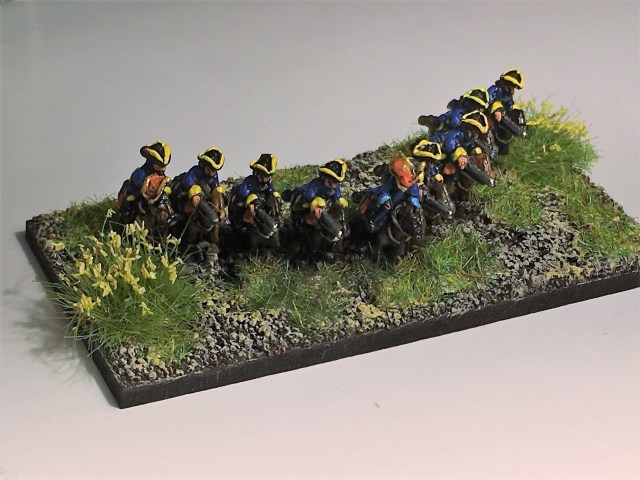
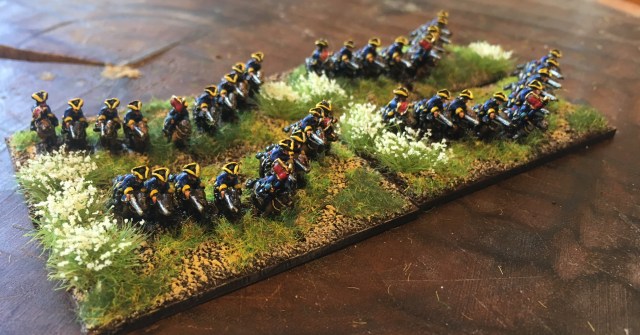
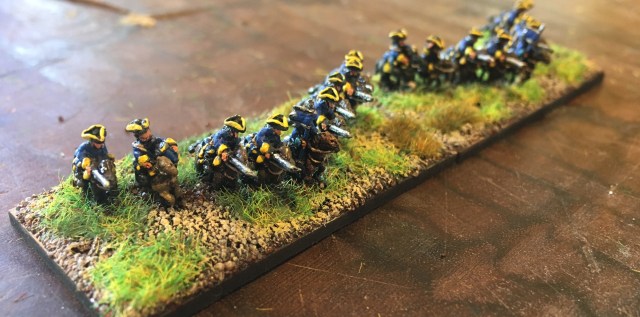
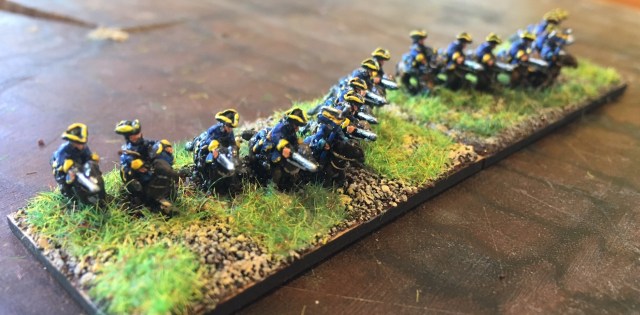
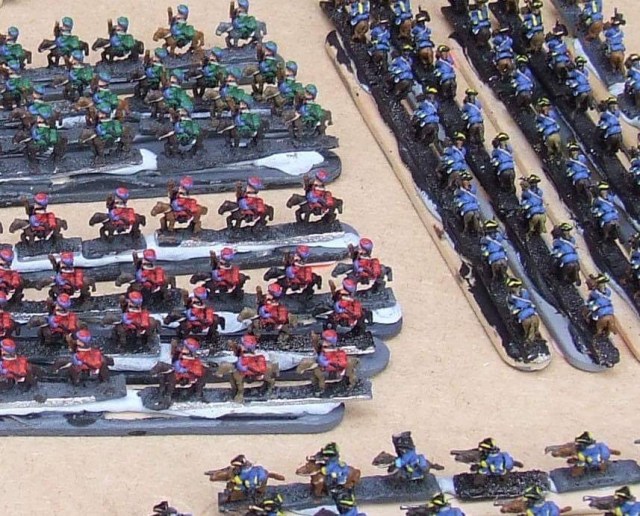
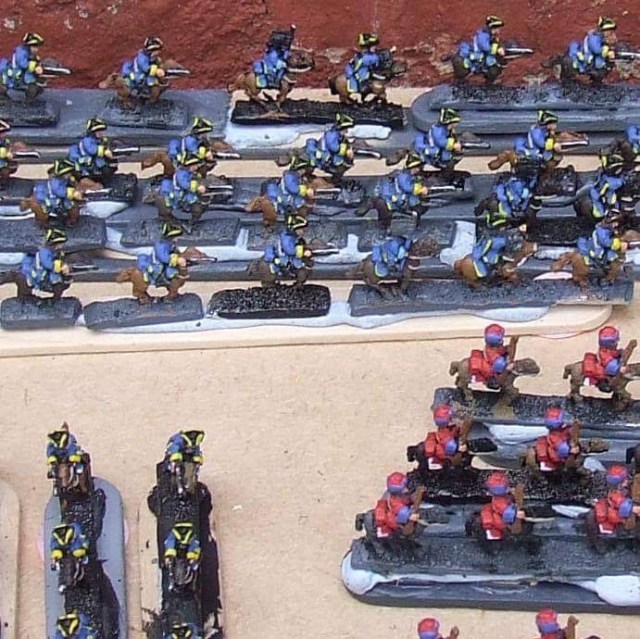
Back to basics again and a update on the progress with the Lesnaya battle, this time the hard-hitting Swedish Cavalry. All based in a wedge formation. This formation represents the way in which the cavalry (and dragoon units) attacked (knee-behind-knee) as part of the overall Gå–På–method focused on aggression and shock.
Picture by Krigsarkivet (Swedish War Archives) from 1707, Public Domain (link here)
All these miniatures were part of a commission I received from Chris at Marching Colour (link here), this is the third batch he has done for me and I have nothing but praise. I know I said it before, but it has given me time to explore some alternative stuff I normally have no time to do.
My remit to Chris was “Block painted neatly not with layers, hightlight, varnish or basing”. I also asked for the flags/standards to be left blank.
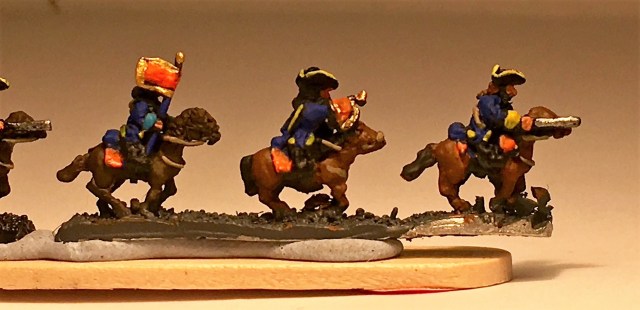
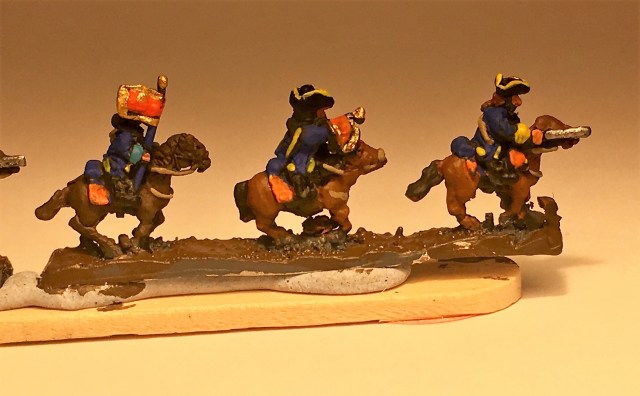
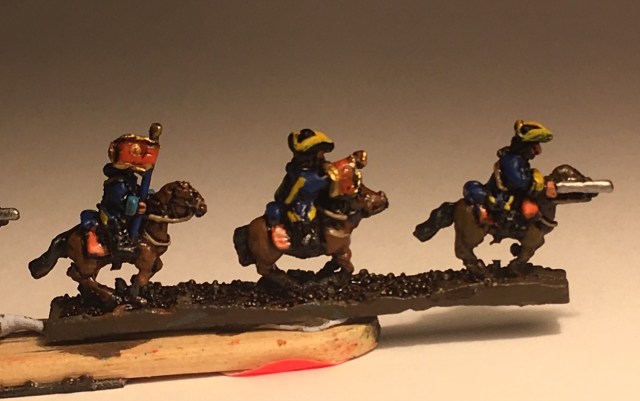
My job is the pleasurable task of doing some final touches (including flags), ink them, some highlight and base them up. Before I show the individual overall units, I will go through these steps. The models from Chris are more or less ready to be based without doing these additional steps – but to me it makes a difference and adds some satisfaction in having provided some kind of input into the overall production process, whether you can actually see it on the table when you stand up and look down at them. A kind of flat pack approach to miniature painting, but hopefully more enjoyable than those Billy Bookcases from IKEA. I am using the brave riders of the Åbo och Björneborgs Kavalleriregemente as an example. With regards to painting guide there are some reasonable information but a lot of gaps (see the discussion here, on the Tacitus webpage that also shows a reasonable interpretation of the material available for this and many other battles). I am also lucky enough to have copies of the eminent Acedia Press books The Great Northern War 1700-1721 : colours and uniforms Part 1 and Part 2 that contains a lot of further information. The books are long since out-of-print.
Step 0 – Done by Chris – block paint miniatures neatly (the longest step)
Step 1 – do the flags and any repainting (e.g on some occasions I have changed the colour of a horse etc)
Flags (a orangy standard for these guys)
Trumpeter (or drummer) details
Light Silver on the swords (adds to the overall effect)
Highlight the hat lace (in this case yellow)
Horsetails in dark grey (german grey)
I changed the schabraque and pistol covers to Orange although I had told Chris something different (no information and perhaps unlikely but Orange it will be).
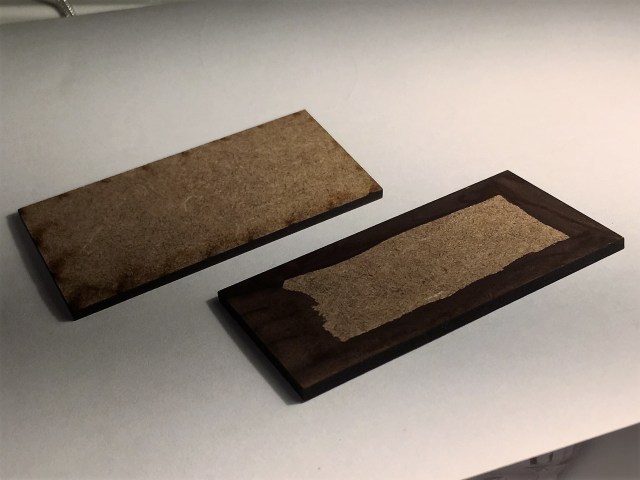
Step 2 – Paint the bases of the miniatures brown (I use a burnt umber or chocolate brown for this – same as for my base terrain colour)
Step 3 – Apply Nutbrown Ink – let it dry. Apply generously, avoid the metal parts (no soldier would keep his, mostly men in this case. sword rusty). I sometime add some highlights if the ink makes it to dark or messes something up.
Step 5 – Prepare base. I paint the edges brown as it saves time later. I use 2mm laser cut 60 by 30mm bases.
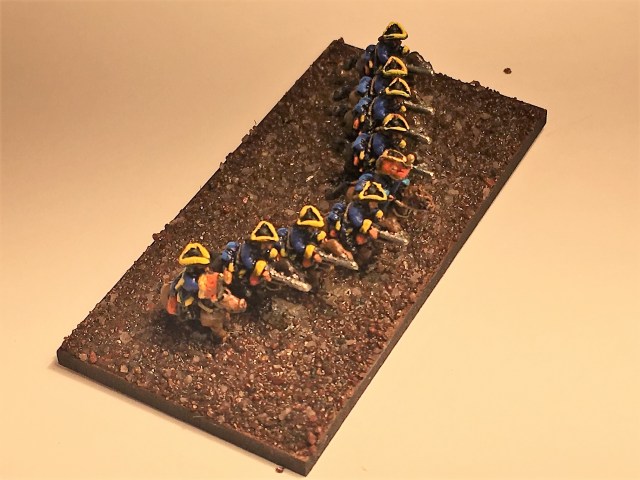
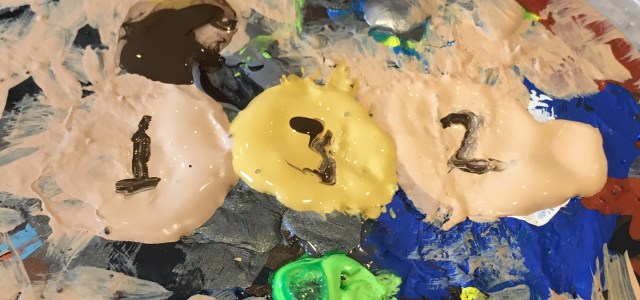
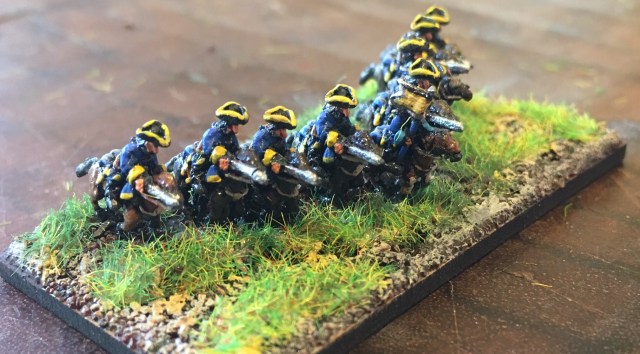
Step 6 – glue to base. Well first you have to cut the strips into the individual riders, make sure each of them can stand on a flat surface so they do not fall in the glue later. Apply glue all over the base when you are ready to put them on the base. Note: The miniatures forms a shallow wedge shape (in line with the picture above) with the trumpeter on the right and the Kornett in the middle and furthest ahead holding the standard. The Kornett, or Cornet in English, was the lowest commissioned officer rank equivalent to a Second Lieutenant (or Fänrik in Sweden) . The rank was also used in the British army up to the late 19th century. It has nothing do with the family of wind instruments with the same name.
Step 7 – Apply sand as soon as possible. Carefully flip it slightly so that excess sand falls off. If any bare metal still shines through or the bases are too obvious apply a little bit more of glue in these places and apply some more sand, “flip away” the excess carefully and then let dry.
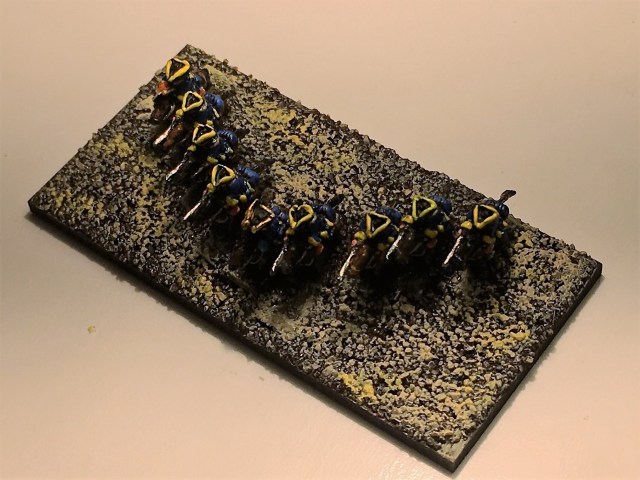
Step 8 – Paint the sand brown (I do not as I have some chocolate coloured sand)
Step 9 – dry brush Colour 1 to 3 (decide on a set and stick to it, all your stuff will look the same whether you do them today or several years ago. The picture does not really come out well. The colours are a very pale brown, a little more yellowish brown and fnally a light yellow. But try out your own combo.
Here are the colours I use.
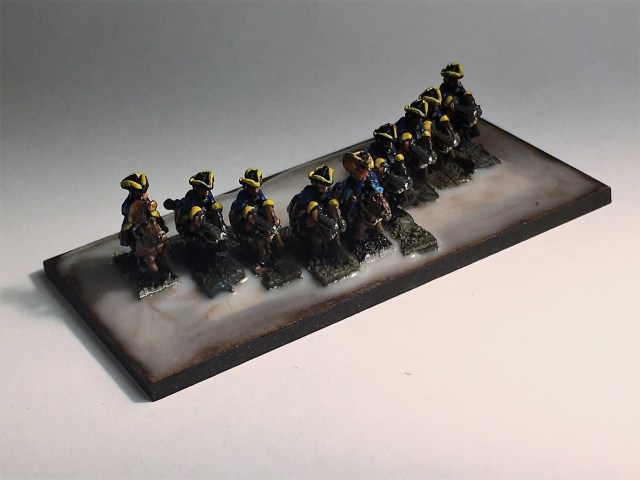
Step 10 – add PVA glue where you want the static grass. Apply Static grass and shake off excess (same here get a lot of a brand and stick to it, I use Busch light and dark grass. Mostly the light) I then stick on some flowery tufts when I feel for it (they are a little bit overwhelming scalewise, but I like it!).
Step 12 – Add base to your collection (here with the other three bases of the regiment).
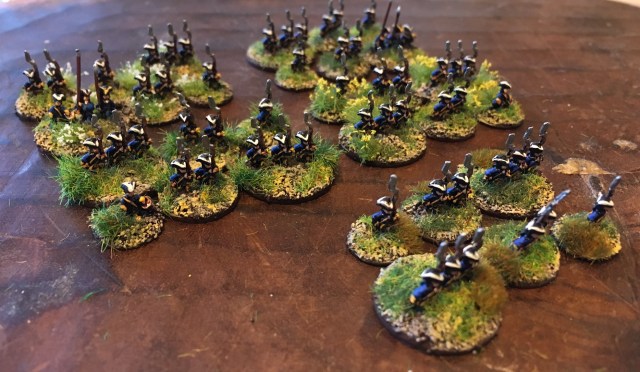
Anyway here are the other ones I have done this week in no particular order,
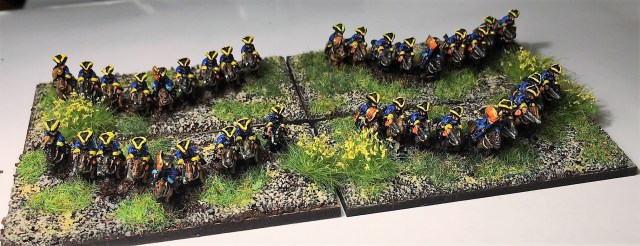
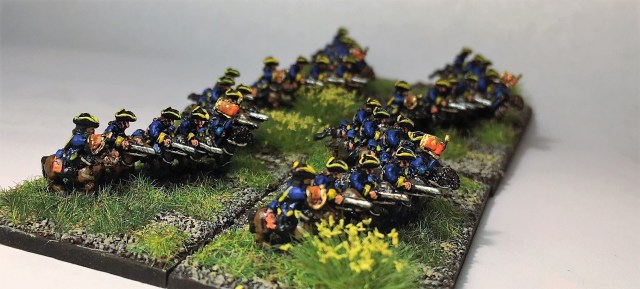
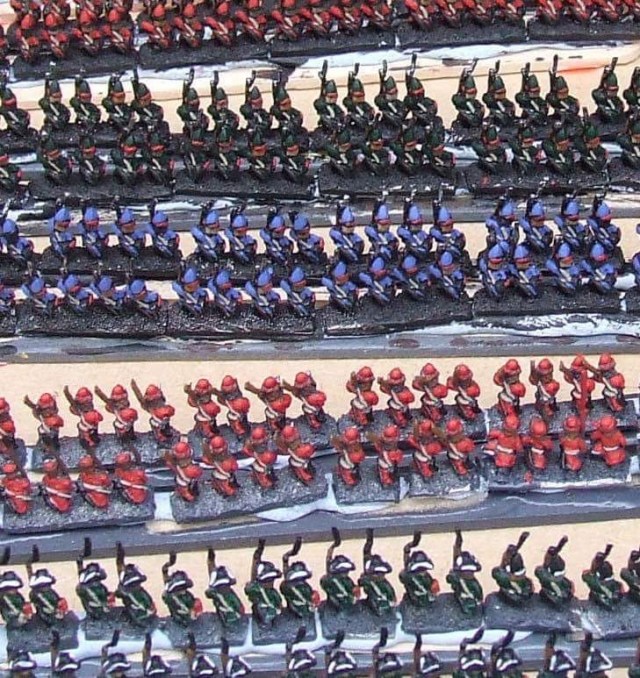
Cavalry Regiments
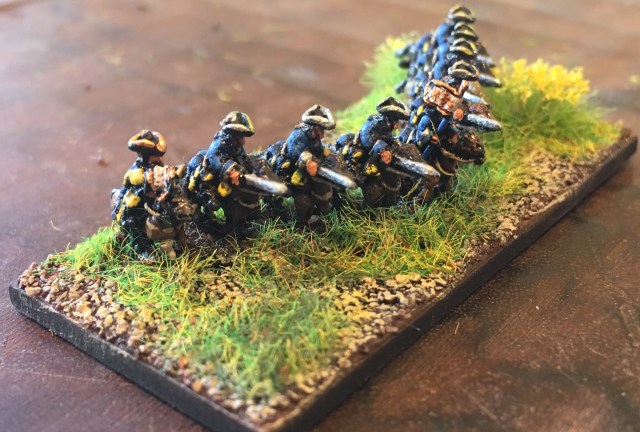
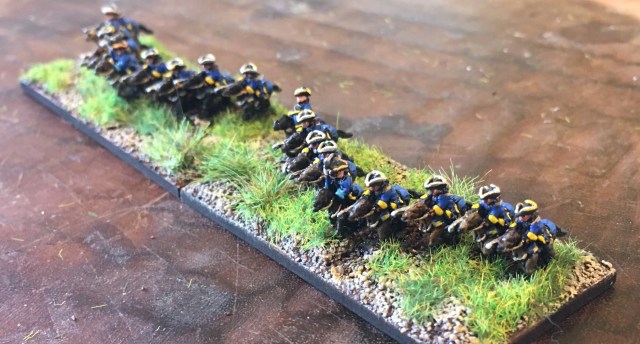
Karelska Kavalleriregementet (4 bases)
Adelsfanan i Sverige och Finland (1 base) – a company was part of Lewenhaupts army. So a base may be excessive. But why not.
Adelsfanan i Livland och på Ösel (1 base), this is the Cavalry Corps of the Nobility in Livonia and Ösel. Strictly speaking Adelsfanan means the Nobel Banner.
Dragoon Regiment / Squadrons
Skogh’s Dragon Skvadron (1 base)
Karelska Land Dragon Skvadron (1 base)
Damn, forgot to this one. Well…..
Schreitterfeldts Dragonregemente (2 bases)
Schlippenbachs Dragonregemente (2 bases)
Upplands Ståndsdragoner (2 bases)
Öselska Land Dragon Skvadron (1 base)
Light Horse Regiment
Vallack / Vollosh Regementet (2 bases) – light cavalry unit formed from Polish and Lithuanian Free Companies. I have plenty of these from the past already so I will be using a few of those on the day.
I did the Swedish infantry before (see here). So all that remains for the Swedes are some commanders and that dragoon base I forgot!
In the previous blog entry (see here) I set out the forces and the miniatures I intended to use for this project. I have just completed these units this week and hope to get a game with the Little One in the near future. Same approach as always in trying to achieve reasonable results not individual master pieces. The units I planned to do were as follows, based on some possible small encounters during the Pruth Campaign 1711.
Ottomans
No
Pts/ unit
Total Pts
Unit Size
Total Models
Baccus Pack
Veteran Shot
5
6
30
12
60
OTT02
Trotters
4
4
16
6
24
GNP05
Total
9
–
46
–
84
–
Russians
No
Pts/ unit
Total Pts
Unit Size
Total Models
Baccus Pack
Dragoons
4
4
16
6
24
WSS12
Forlorn Hope
3
6
18
6
18
WSS03
Raw Trotters
4
3
12
6
24
WSS08
Total
11
–
46
–
66
–
I am very happy with the result and I am tempted to make a small Swedish “force” from the same era (with some pikes).
Perhaps something like this.
Swedish
No
Pts/ unit
Total Pts
Unit Size
Total Models
Baccus Pack
Shot
5
4
20
12
60
GNS01 (Tricorne) or GNS02 (Karpus)
Pike
2
4
8
12
24
GNS03 (Tricorne) or GNS04 (Karpus)
Aggressive Elite Gallopers
3
6
18
6
18
GNS05 or GNS06
Total
9
–
46
–
102
–
Sorry trying to avoid drifting, back to the Pruth stuff.
Russians
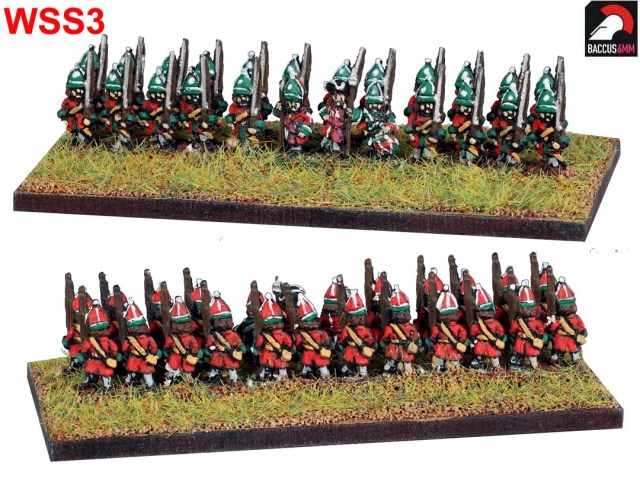
For the Russians I decided to go for units with red as a common denominator and painted them as based on units that took part in the campaign (based on a list from the draft of Nick Dorrell’s upcoming book – discussed in the previous blog, here). All these are from the “new” Baccus WSS range – I had not yet painted these but I must say that they are a joy to paint. I have so far used the old WSS range for my GNW stuff as I have a fair few of the ones lying around from previous purchases with hybric flavours.
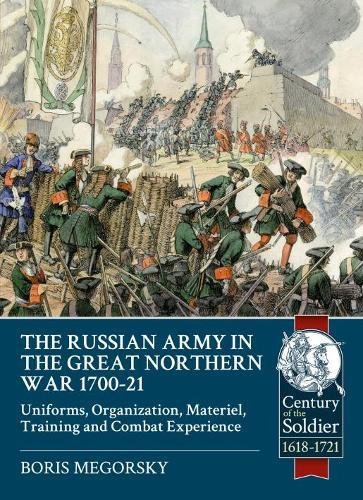
On the subject of the Russians of this era I did notice a book currently on pre-order due out in November this year. The book is titled The Russian Army in the Great Northern War 1700-21 with the subtitle Uniforms, Organization, Materiel, Training and Combat Experience. I hope this will have some more information on uniform colours than what is currently available. Although I have to admit that I pre-ordered it based on the title, what is really interesting is the background of the author. I let you read it yourself.
Boris Megorsky was born in Leningrad, USSR in 1978. He lives in St Petersburg, Russia with his beloved wife Olga and three-year-old son Vadim. He did his PhD in Political Science and works in Human Resources, but his true passion has always been military history. As a scholar, he specializes in the everyday life of the Russian Army, its uniforms and siege warfare of the Great Northern War period; he has written dozens of articles and theses on these subjects. His book about the siege of Narva in 1704 was published in Russia in 2016 and, as a re-enactor, he is a member and sergeant of the Preobrazhensky Life Guard Regiment, 1709 ( Russia’s leading re-enactment society of the early 1700s). His passion for miniatures makes him pay great attention to details both in research and in reconstructions, be it re-enactors’ kit or graphical illustration consultations. He has consulted on a number of films, museum and publishing projects, and has worked with miniature manufacturers and artists. – From the Amazon Webpage
Here is a link to it at Amazon (but there are probably other places where you can buy it too, like the book depository). Worth having on your radar, but a long way from being out. Would of course be useful for the Pruth campaign too. Back to the key thread again.
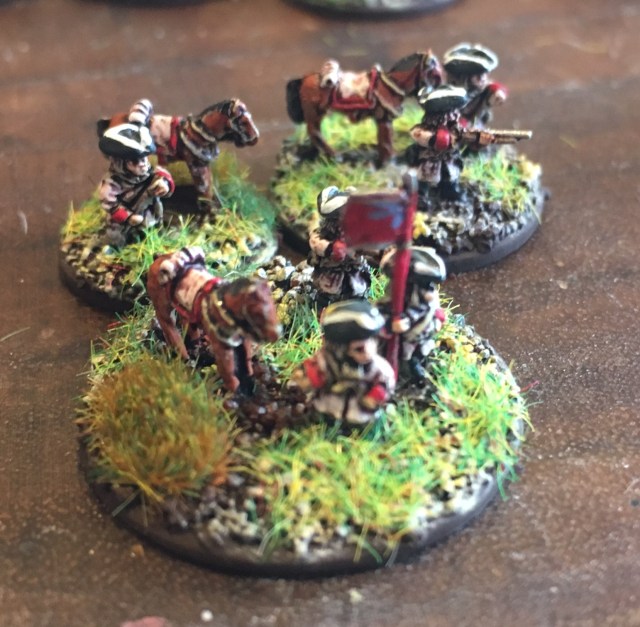
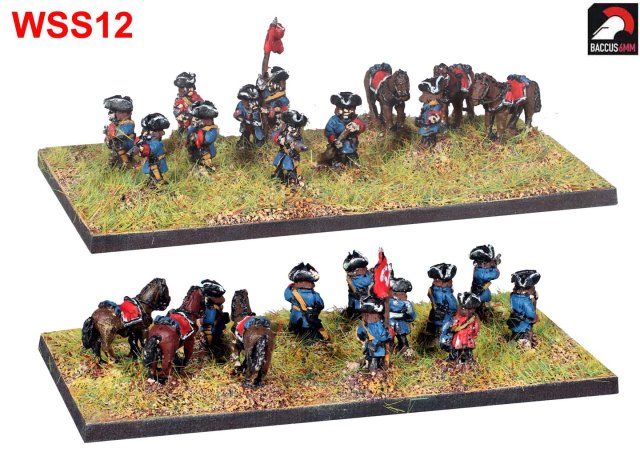
Permski Dragoon Regiment (Dragoons)
The Permski dragoon regiment were present in the 1711 campaign so I decided to make my dragoon units represent a detachment from this regiment. They had white coats with red cuffs. I have already painted some of these for the Lesnaya Battle but they are based on 60 by 30mm bases. As these represents the Dragoon in the traditional role of being more mounted infantry than cavalry they have been based with unmounted figures but with a horse present on each base. I have used the 1-2-3 system (shown in the Pikeman’s Lament rulebook), modified to fit the 6mm scale, and as discussed in this blog entry if you do not have the book at hand.
4 units of 6 dragoons, based with the 1-2-3 method (15mm, 20mm and 25mm bases)
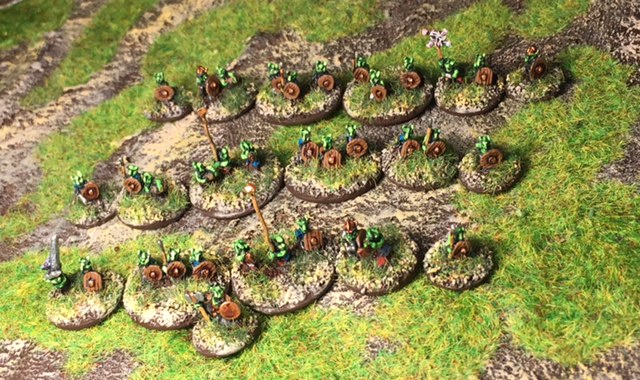
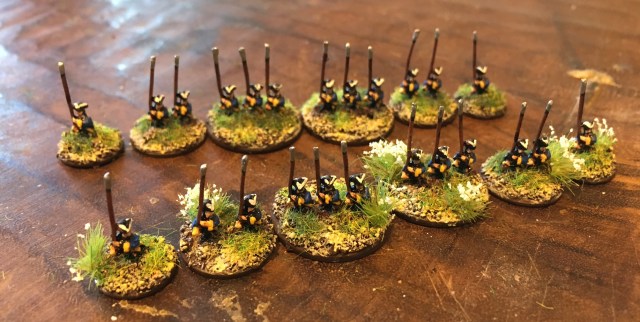
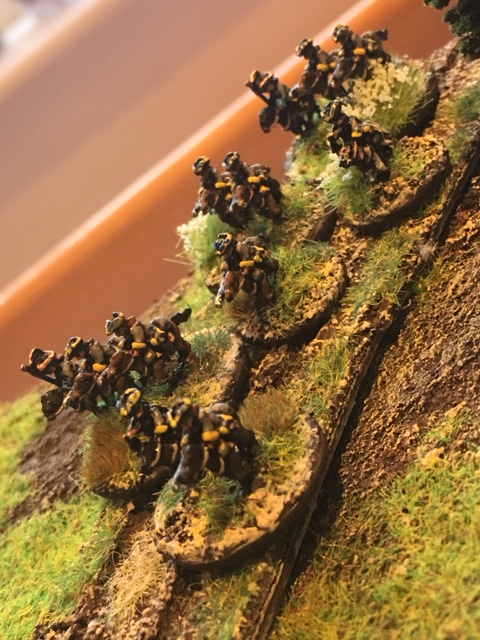
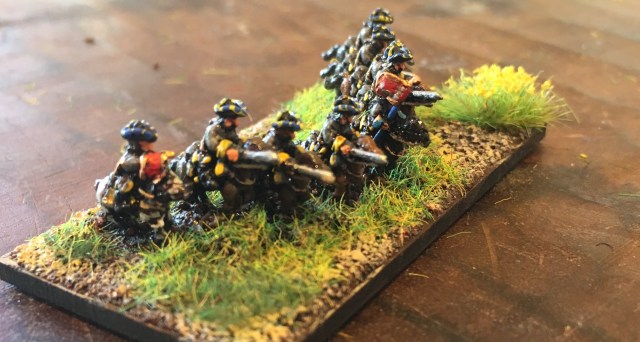
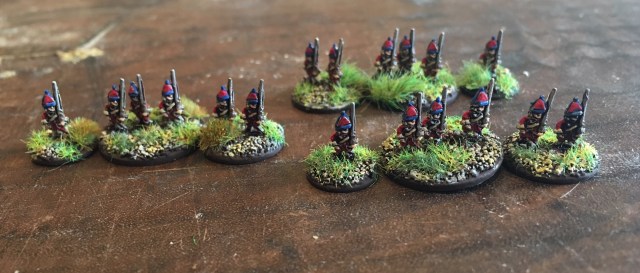
Repnin’s Grenadiers (Forlorn Hope)
I painted these to represent Repnin’s Grenadiers that had red coats with (speculative?) blue cuffs. Named after the Russian General, and eventually Field Marshal, Prince Anikita Ivanovich Repnin who commanded one of the Russian centre commands at Poltava in 1709 (you can read more about him here). These were also based with the 1-2-3 system.
3 units of 6 Forlorn Hope, based with the 1-2-3 method (12mm, 15mm and 20mm bases).
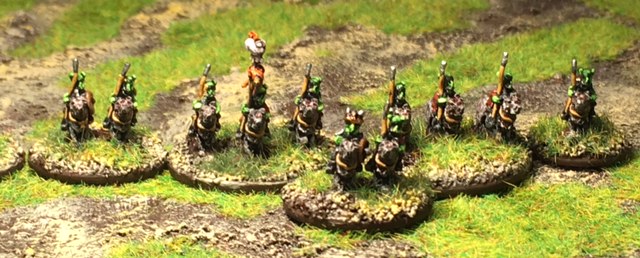
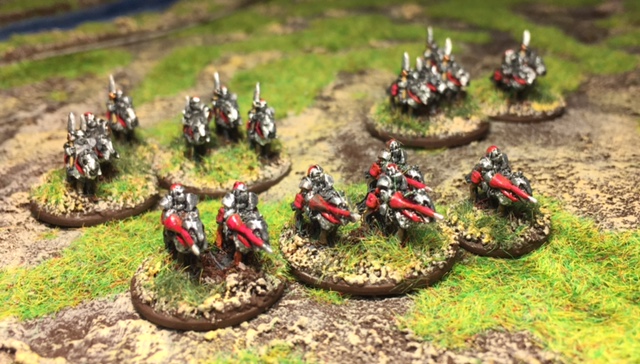
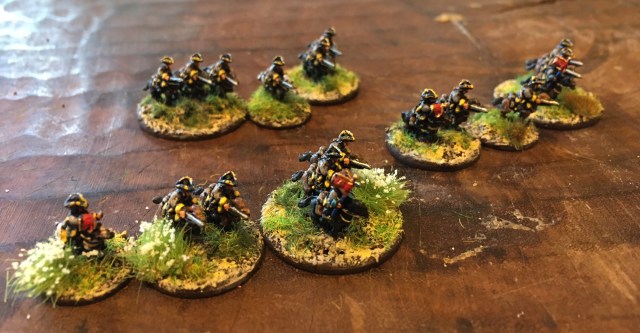
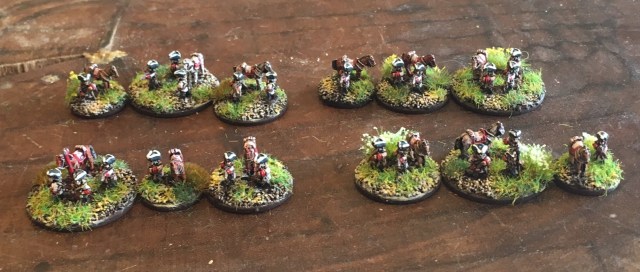
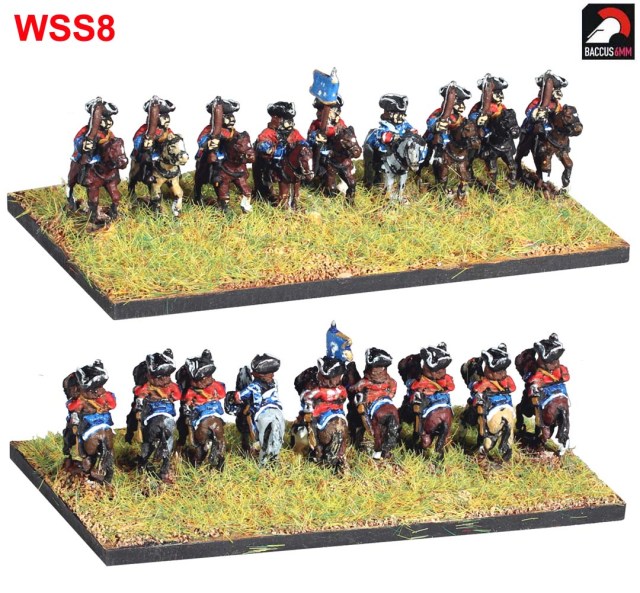
General Sheremetev’s Dragoon Squadron (Raw Trotters)
For these I wanted them to represent General Sheremetev’s Squadron, I painted them with red coats and white cuffs. Potentially these could be classified as non-raw (or even Veteran) assuming that the General’s squadron may be more potent than the standard dragoon unit. Boris Sheremetev commanded the overall centre at Poltava in 1709 and led the main army in the Pruth Campaign (more about him here).
4 units of 6 trotters, based with the 1-2-3 method (15mm, 20mm and 25mm bases).
The Ottomans
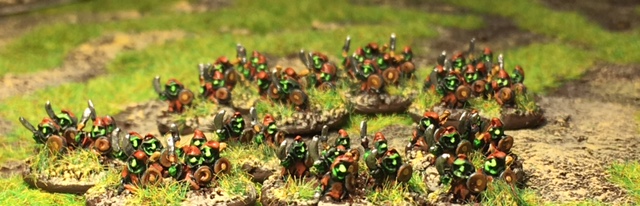
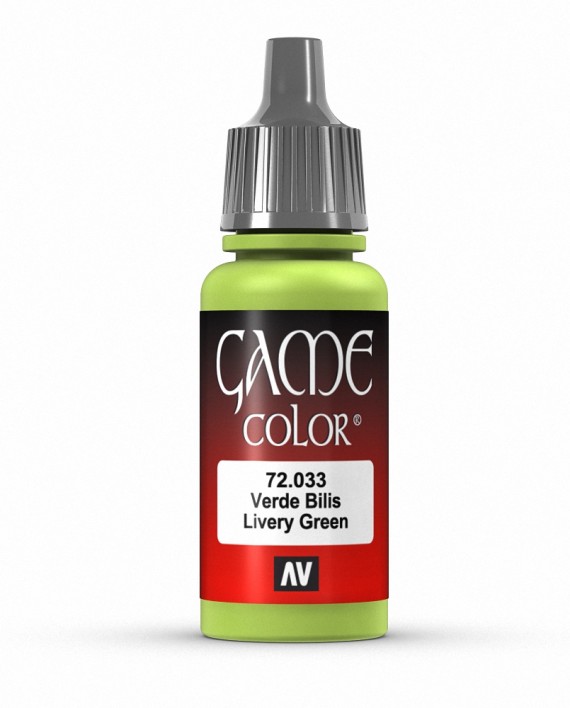
I do not have a lot of information of who wore what for these units – so I did a quick decision to paint them based on a basic livery green (green ink on the clothing and then picking out some detail with Livery Green). Finally got to use this fine Colour!
I would be very keen to get some comprehensive information on detailed organization and uniform guides from this conflict – but until then artistic freedom will do. I you have any views or suggestions please do let me know through the contact option on the blog of find us on facebook and ask away.
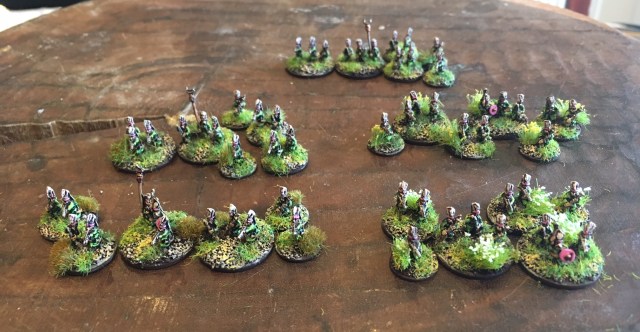
Janissaries (Veteran Shot)
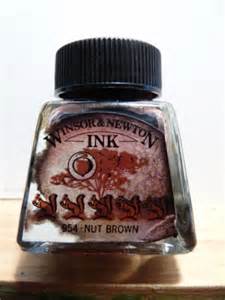
I painted these in a green coat with the traditional white headgear with some simple pink detail/ There is a little story about how models were developed by Master 6mm painter Dr. Mike also known as Cranium (here). He is the man who runs the SMS (Small Model Soldier) painting clinics at various shows, teaching people how to paint “something so small”. I developed most of the techniques I am using in painting 6mm from reading his entries on the old Baccus forum (I do not find these anymore) – my favourite is the use of Windsor & Newton Ink (Nut Brown) after the painting is done – the army painter quick shade equivalent for smaller scales (kind of!) . It really makes the models “look better than they are”, in my opinion. Try it for yourself – go nuts!
5 units of 12 Veteran Shot, based with the 1-2-3 method (12mm, 15mm and 20mm bases).
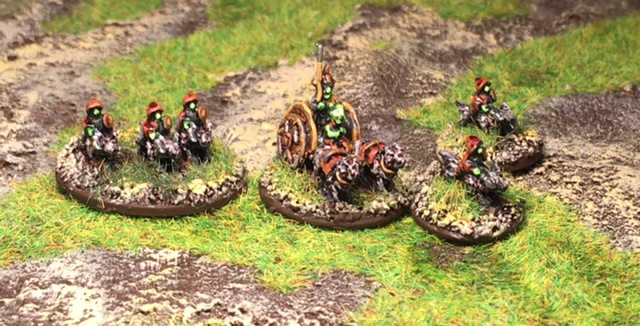
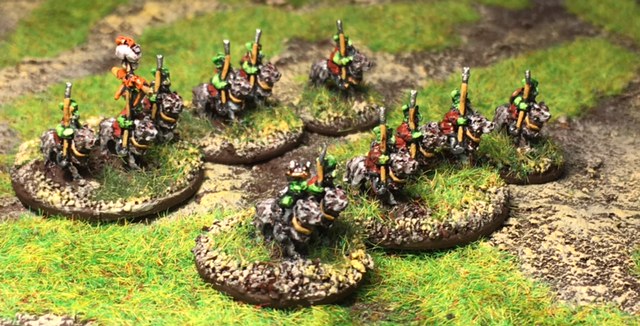
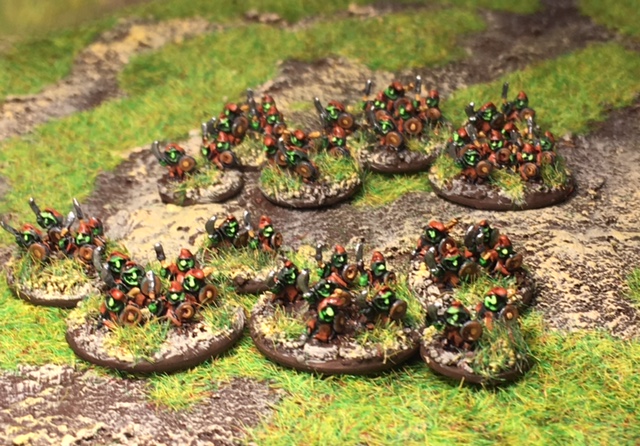
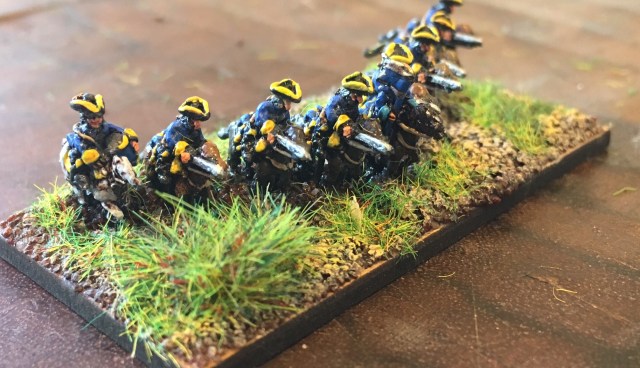
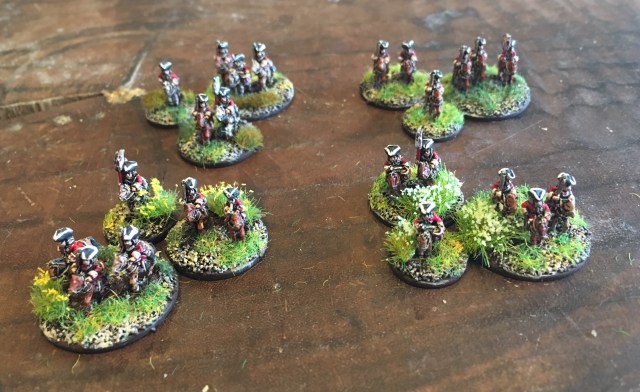
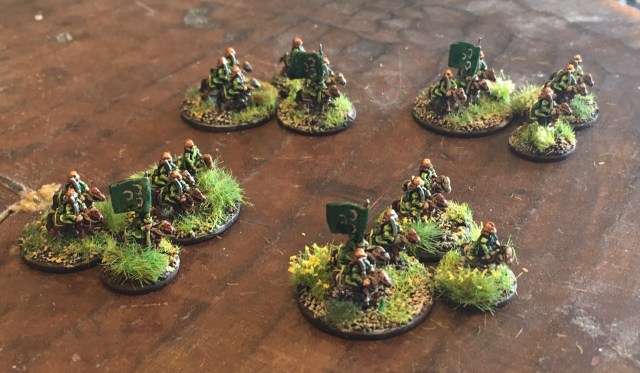
Sipahi (Trotters)
Again a green colour scheme with bronzed helmet. I painted the flags green with three crescents as I had seen this for an Ottoman unit many years ago at a wargames show and liked it. Having done some research I am not 100% sure it is a valid flag for the Ottomans – but I like it so it stays until I have better alternative. The bronze helmets also looks good and, like the pink and white on the Janissaries, show that these uniforms where not designed to blend into the countryside but to look stunning!
4 units of 6 trotters, based with the 1-2-3 method (15mm, 20mm and 25mm bases)
Hope that was of some interest, another read of the rules and we have to hit the table with these. Not the same splendor as individual 28mm bases for skirmish, but it works for me. The fact that I have produced two opposing forces of almost twice the recommended starting size in a week of hobby-time is perhaps the biggest advantage.
I did a similar project for the Men Who Would be Kings rules that you can find information about (here, here and here).
Next week I will be showing some progress on the main project (a proper large battle). As the package with models came through from Marching in Colour last week (see here) and I have started slowly getting my act together again this week (afterthought – as if it ever was there!).
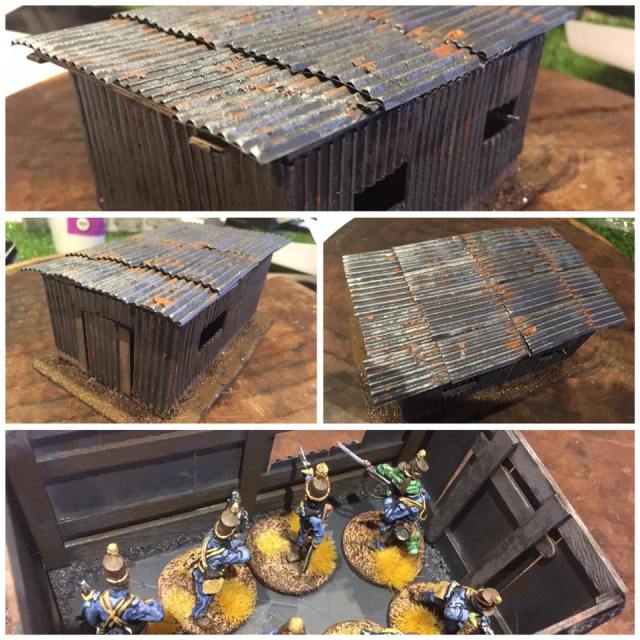
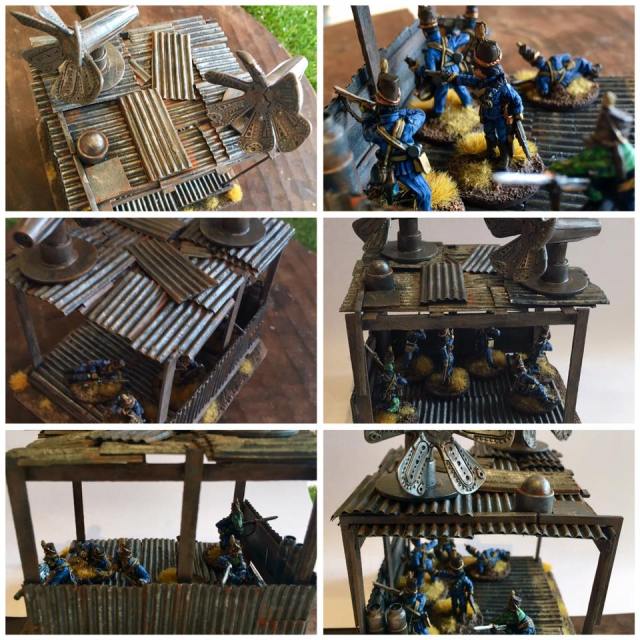
I have decided to give the Mutant 1984 project a break over the Summer – I did paint the two little structures/buildings I did a few weeks back (here) and showed them on the Facebook page. For completeness I include them here as well. I think we are getting closer to having the terrain we need for a proper game with these rules. I am excited to start a campaign with some Pyri Commonwealth Soldiers – The recollections of rifleman Crocodylus. However there is something rather therapeutic in doing some terrain so perhaps there will be some pieces done in the background of everything else.
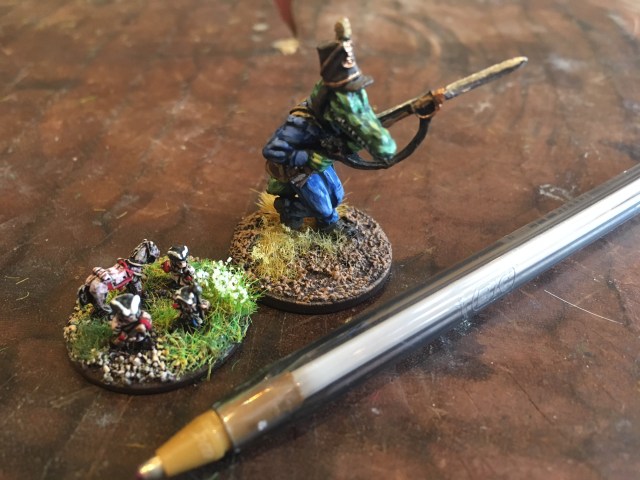
The picture below shows the good Rifleman Crocodylus himself next to to one of the 6mm Dragoon bases above and a BIC pen for size comparison, as I occasionally get questions about this through the site. The Rifleman is a converted Warlord 95th rifle model (28mm scale) with a head from a crooked dice model.
Pikeman’s Lament in 6mm – Planning and Buying Stage
Another batch for the Towards Moscow Project from Marching in Colour
Mutant 1984 for Scrappers, some more “terrainish” stuff – a Citroën, oil tanks and some old Trucks
Pikeman’s Lament in 6mm
I bought a copy of The Pikeman’s Lament by Daniel Mersey and Michael Leck a few months ago. It is, as the title hints, a Pike and Shot period skirmish level game and in the sample companies provided it covers the Thirty Years War (TYW), English Civil War (ECW), the Deluge (Northern War 1655-60), Scanian Wars, King Williams War (the First French Indian War) and the Great Northern War (GNW). Being a Osprey book it has the typical style and layout of their other wargames books.
The rules are derived from the very popular Lion Rampant rules created by Daniel Mersey (who also wrote the Dux Bellorum and Men Who Would be Kings that the Little One and I really enjoy playing having had a few goes, see here for our first game) and on a quick read these rules caught my interest sufficiently to get me thinking about trying them out.
Michael Leck is, perhaps, more famous for the fantastic stuff he presents on his Dalauppror blog (here) and his articles in the Wargames, Soldier and Strategy magazine where he has presented snippets from the rich Swedish military history and how to adapt some popular rule set to play in these, more than often, unknown theatres. You may recall that I put up a picture of his fantastic, and award winning, game at Salute in the last blog update (here).Michael, and I, used to roll dice and use our imagination in the same role-playing club many moons ago.
There is a comprehensive review of the rules on the “I live with Cats blog”, that I found useful (link here). I wanted to give them a try doing two small starting forces in line with the Men Who Would be King stuff I did before. I just needed to find a period – a pleasant problem looking for a solution.
Last week Nick Dorrell, and I, were talking about some (far) future projects and we discussed the Russian Pruth Campaign. This was whilst we were running our Salute Game (more here). Nick has a book soon to come out called Peter the Great Humbled: The Russo-Ottoman War of 1711.Nick’s book tells the story about this campaign that led to the surrender of the Russian forces near the Pruth river. It also presents the forces involved in the conflict, their size, actual composition, and tactics used. It is not a very well known conflict but due to the natural link to the Great Northern War I find it very interesting and I am looking forward to read the final book (I pre-ordered my copy of Nicks book from here).
Although the engagmement were mainly attacks on fortifications some “what ifs” or special scenarios could be played – but then I thought why not do a few units from this period and try out the Pikeman’s Lament Rules. Following on from this I went ahead and actually bought a few miniatures from Baccus at Salute that will be perfect for a very small diversion to try out the Pikeman’s Lament rules. Arguably more shot than pike as the Russian left their pikes at home for this campaign (if my sources are correct), but why not?
Miniatures
I got the following packs from Baccus (pictures taken from their Webpage, as I have not yet even opened the packs):
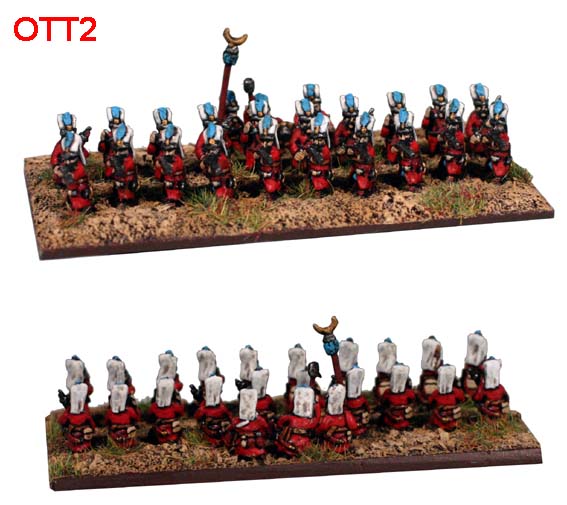
Ottomans
OTT02 – Janissaries, musket – firing and loading
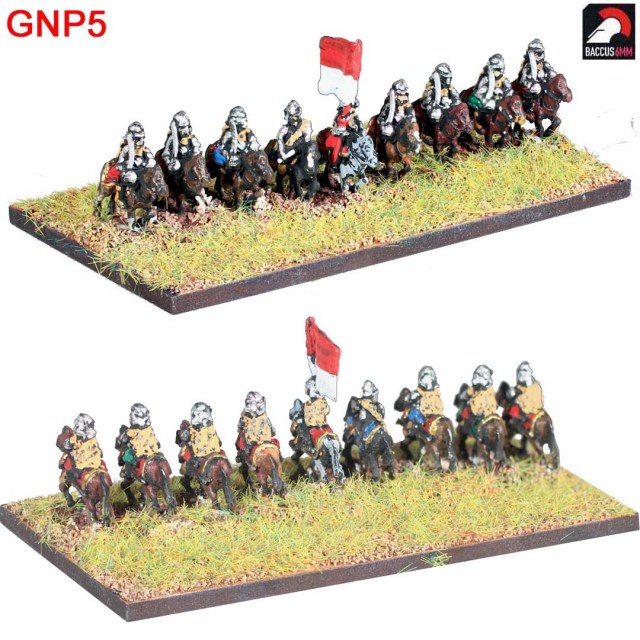
GNP05 – Hussars – to represent Ottoman Sipahi cavalry
From this I will do:
5 Veteran Shot @ 6 points each (Janissaries; may form Close Order)
4 Trotters @ 4 points each (Sipahis cavalry, the Polish Hussars without wings being used as a reasonable proxy)
Russians
WSS03- Grenadier (Tall Mitre)
WSS08 – Dragoons
WSS12 – Dismounted Dragoons
Forces
From this I will do (note the models are from the WSS range not the GNW Russian Range, as these works perfectly well for Russians of this period. I also wanted to get a chance at seeing these):
4 Dragoons @ 4 points each (these are Dragoons in a traditional dismount to fire role as per the rules)
3 Forlorn Hope @ 6 points each (Grenadiers)
4 Raw Trotters @ 3 points each (In reality also Russian Dragoons but to simulate a more active cavalry role classified as Trotters. The Russian Dragoons did practice some all out cavalry attacks and by this time it seems reasonable but still classified as raw).
This gives me 46 points for each side (starting size is 24 points so should be more than plenty to give me some variety in size). There is also enough to do another few Shot units and Trotters for the Ottomans and some more Trotters and Forlorn Hope units for the Russians.
In summary:
Ottomans
No
Pts/ unit
Total Pts
Unit Size
Total Models
Baccus Pack
Veteran Shot
5
6
30
12
60
OTT02
Trotters
4
4
16
6
24
GNP05
Total
9
–
46
–
84
–
Russians
No
Pts/ unit
Total Pts
Unit Size
Total Models
Baccus Pack
Dragoons
4
4
16
6
24
WSS12
Forlorn Hope
3
6
18
6
18
WSS03
Raw Trotters
4
3
12
6
24
WSS08
Total
11
–
46
–
66
–
Basing and Notes
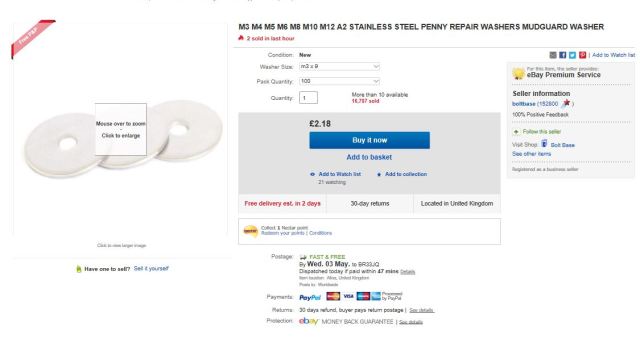
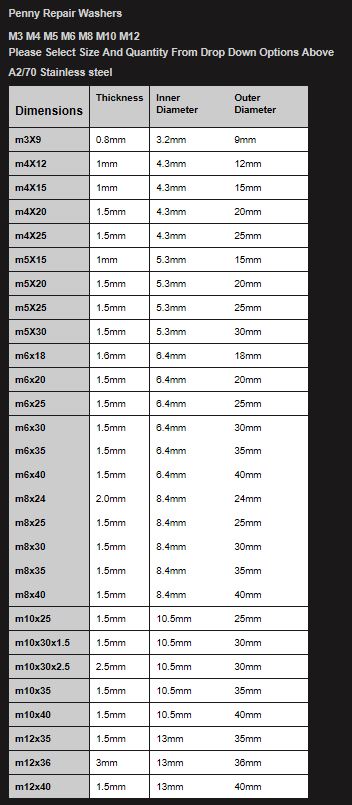
These will based as I did my Zulu war stuff based on the 1-2-3 method discussed in a previous posting (see here). I have had a few questions about where I get bases of small size like 9mm etc. Basically I order Penny Washers from ebay, here is an example (I have no association with this seller) but I have successfully bought stuff from them.
In the detail provided the following list is given, we can see the diameter we may need (outer diameter). Just pick the one you want.
With regards to the little hole in the middle I put a magnet inside and cover it with a sticker on both sides (see here to get the idea, Step 6 in the “Shock Marker” tutorial). I think the washers are also sometimes referred to as fender washers.
Another batch from Marching in Colour
As discussed in previous blog posting I have decided to use Marching in Colour painting service (link to the background to this decision here and to the Marching in Colour Website here) to help me with the Towards Moscow Project and Chris sent me through the pictures from the latest batch the other day. I have to admit that my experience in using this service have been second to none. I am looking forward in getting these and complete the miniatures needed for this and next years Joy of Six. I will get to this in the next few weeks (as I have to!) and will post updates as I progress and also discuss the next stages of production to final based units. Here are the pictures (Russians and Swedish), I let them speak for themselves. Although it is a little bit of a luxury this is the best decision for some time I have done with regards to my hobby time (and budget!). Thanks for your help Chris!
More about the Towards Moscow Trilogy (TMT) Great Northern War project can be found here.
Mutant 1984 for Scrappers
I did a few more pieces for the Mutant 1984 project inspired by three recent purchases (see more about this project here).
Muddy Car
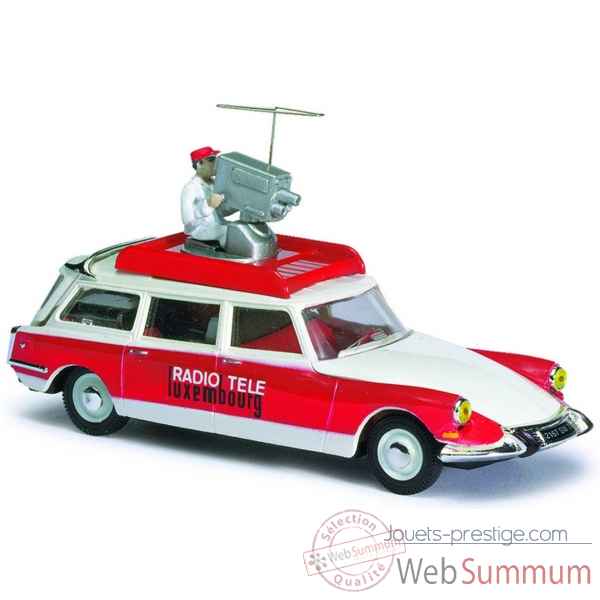
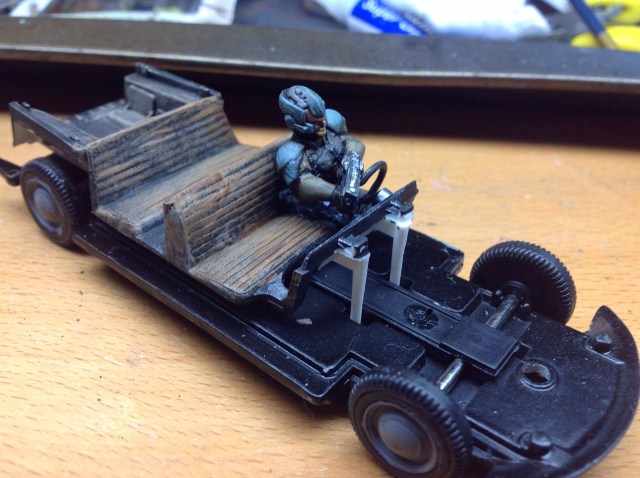
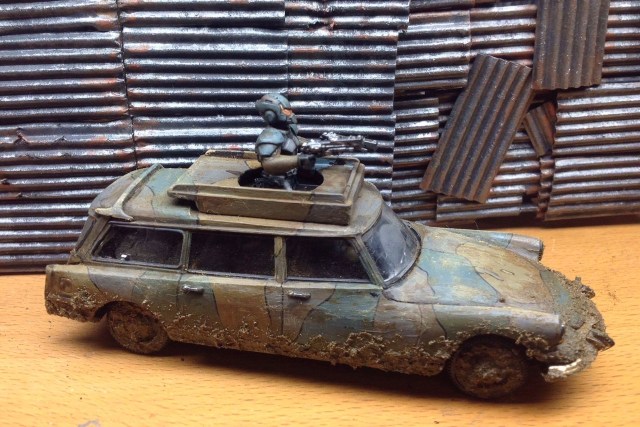
When I went to South of France a few weeks backs I went to a French Market and found one of these for a few Euros. It is a Citroën ID19 and is in 1/43 scale. I love the look of these cars.
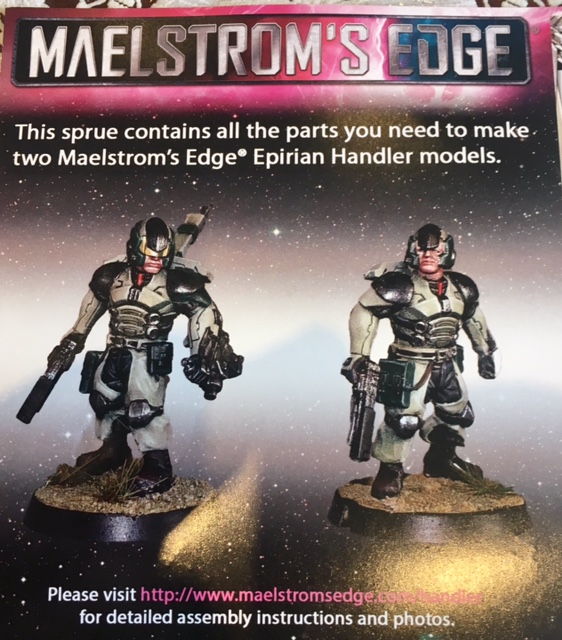
I thought it would be weird to make it into a military vehicle and found this little pack with two plastic (28mm) miniatures given out for free at some show a few years back.
I carefully opened up the car and added one of them as a driver and the second one standing on the top. Then I painted it in three colours and gave it a Sepia Wash.
Then I put the two pieces together and applied some mud. Job done and weird enough.
Oil Tanks
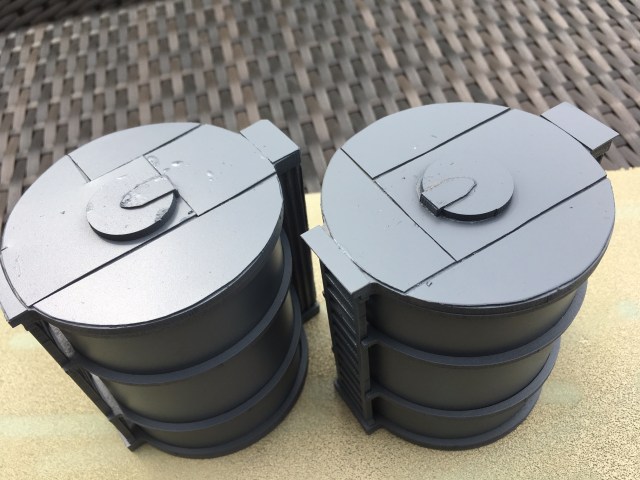
Our Salute table was next to a demo table showing some oil tanks from Bandua wargames. I convinced myself that I needed some of these. You can buy them from Wayland Games (here).
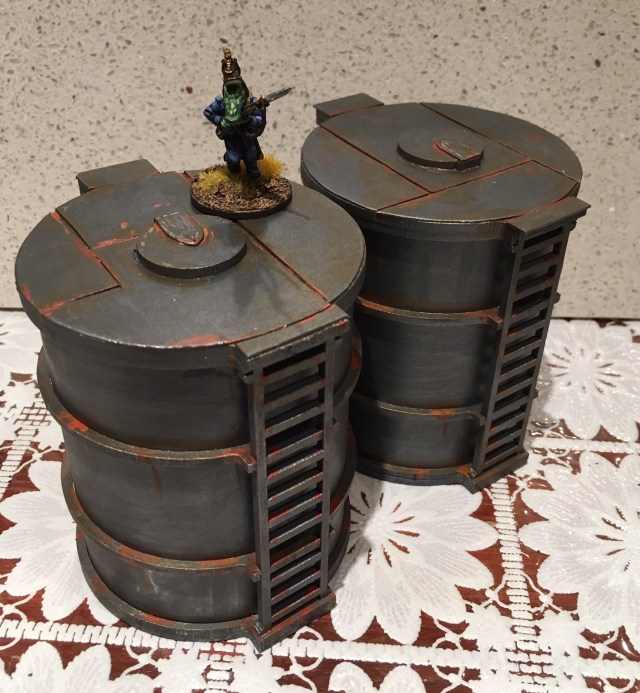
These are ready painted and the looked great with the other ready painted terrain on the table. When I had assembled them I got some second thoughts and decided to modify them slightly. I cut out some plastic (from a DVD box) and added this on top and then did some detailing on the hatch (a little piece of plastic). This created a little more detail to the piece and took 5 minutes.
Then I dry brushed it with Gunmetal and added some dots of rust (light rust from the Vallejo range) and then applied a light wash with Vallejo rust effect.
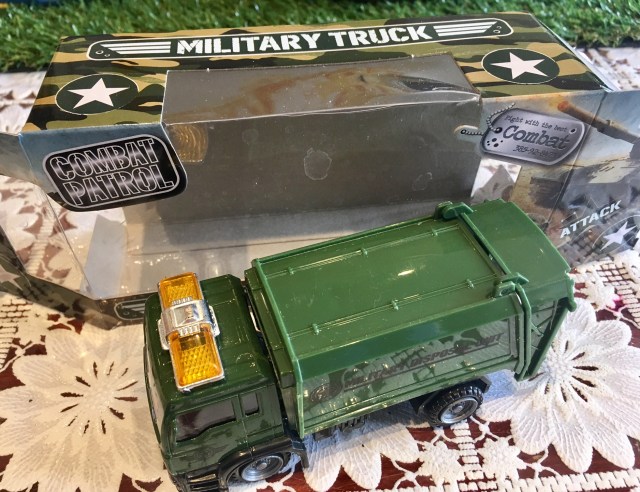
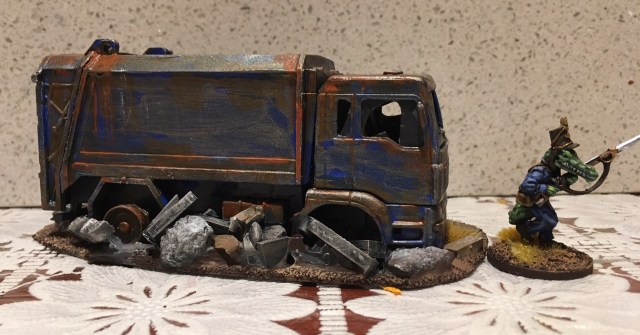
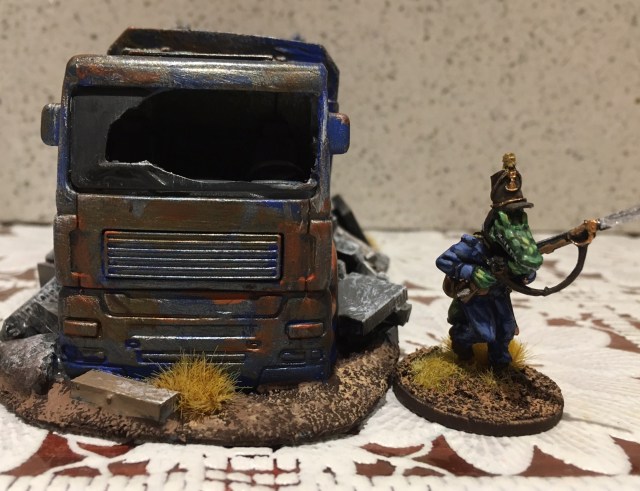
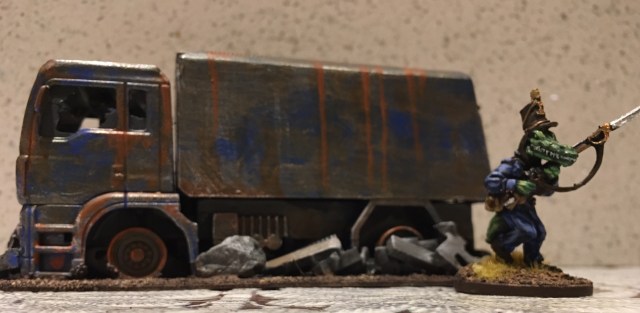
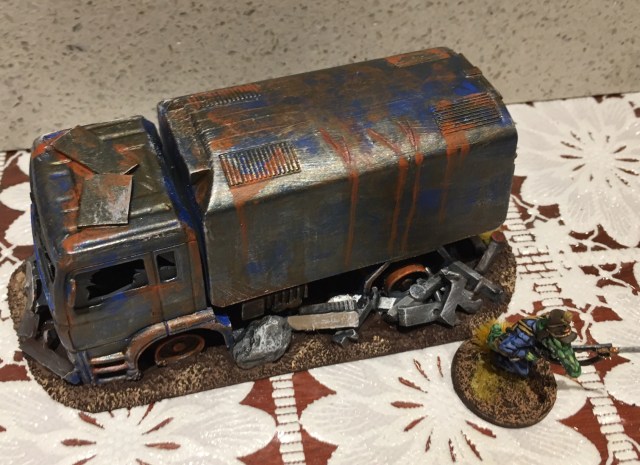
Poundland Trucks
We (I and the little One) bought some grey spray paints from Poundland here in the UK. We noticed some trucks and thought we could do something with them – we splashed out and bought two of them.
And turned them into two terrain items (good value indeed).