Salute 2019 by the Little One

[The Little One has written the blog today… I will write a little bit more next week from my perspective, but enough of me…]

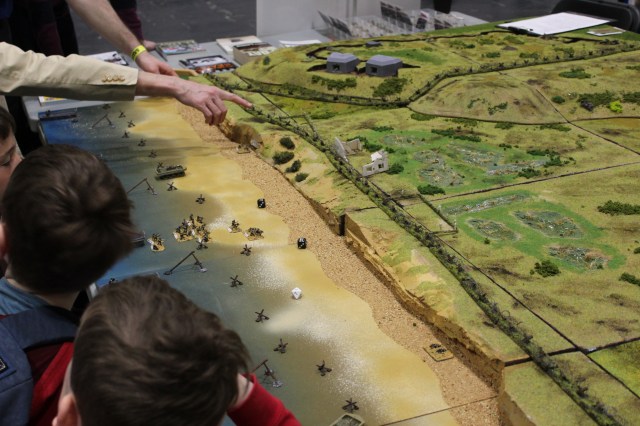
I asked my Papa (that is what I call my Dad) if I could write the blog post today as we both went to the Show. I played two games at Salute. I could have played more but some were demonstration games whilst other were crowded when we went there and Papa tended to stop and talk to all kind of people that he knows. We did not maximise the playing time very well – but we both did have a good time and I know he likes to talk. I wanted to play the Omaha Beach game but it was full every time we went there – it looked really good [ed: this was the Omaha Beach game put on by  Peterborough Wargames Club]. I will write about the two games I did play in more detail below, but first a few general things.

IMG_7543.JPG
Omaha Beach by the Peterborough Wargames Club – it looked really nice.

I did like

  • I really enjoyed the show, there is a lot to do and buy;
  • I got myself 3 Tiger tanks in 15mm from Peter Pig and they gave me a bonus miniature (thanks!) and I also got the Osprey Book about the Tiger I. We also bought a target lock laser line each – this will help us when we determine whether something is in an arc of fire or not. It avoids arguments, I tend to be more rules strict than my opposition (like Papa). I always see Peter Pig at shows and Papa has a lot of their WW2 stuff – I think he has the world record.  I also got some dice, but they were not very exciting.
  • Everyone was friendly to me and answered all my questions really well;
  • There is a lot of different games at this show, I really like historical games but you could also play fantasy and science fiction (I was looking for someone playing Star Wars Legion but I could not find any, we play it at home so I was not too sad about it).  Some games are more like street fights but there are a lot of very big battles as well;
  • We went to the venue using the Cable Car – it is very exciting, and
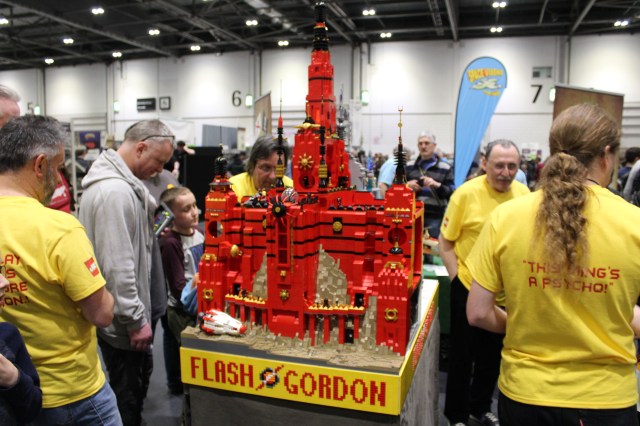
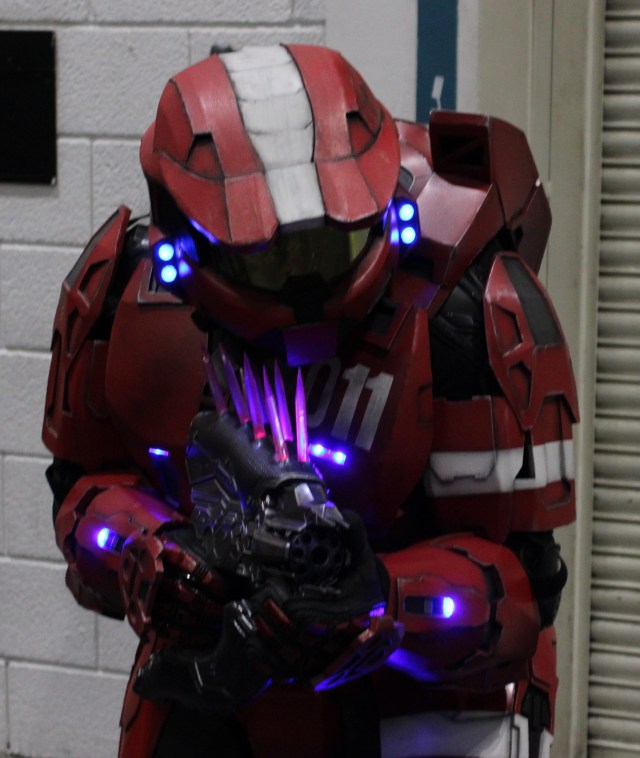
  • They always have some cool people with costumes at the show, like Star Wars and 40k. This year they had a Spartan from the HALO universe too.
IMG_7512
I took this picture from the Cable Car, you can see the big Excel centre in the background just behind the big boat, that is where Salute takes place every year.
IMG_7570.JPG
Peter Pig doing a Pirate Game, it looked really funny!
IMG_7604.JPG
There was even a game using Lego models, that is really cool.
IMG_7578.JPG
Romans fighting Celts – very exciting. I am currently reading a lot of books about the Roman army, you should too it is really interesting.
IMG_7548.JPG
Spartan Soldier

I did not like

  • I was looking for some of the latest Star Wars Legion releases but the traders were only selling older stuff from the range – things I already have.
  • I am not used to walking around that much and should have taken better shoes.


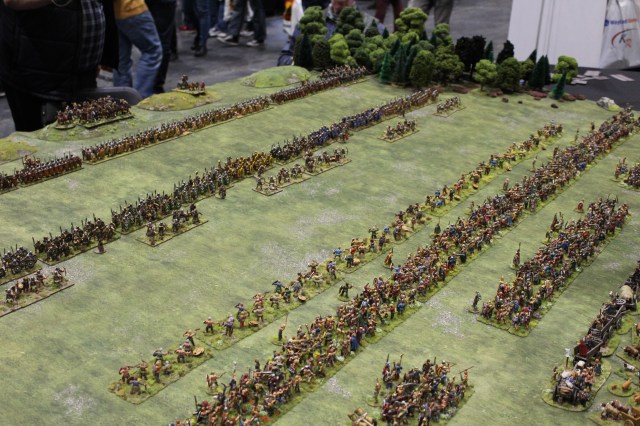
The Battle of The Little Big Horn 1876 – The Wargamer Collection Calculator

little

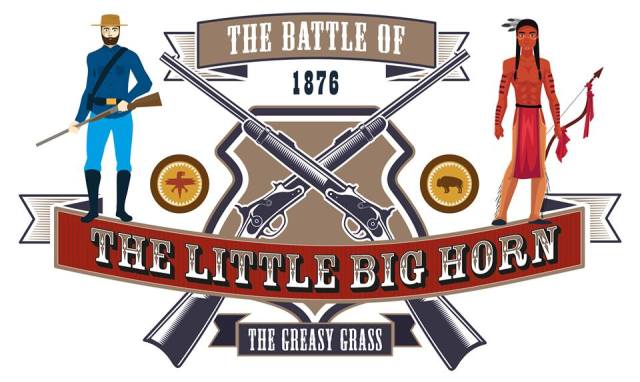
The first game I played was the Battle of Little Big Horn, it was fought in 1876. It was a battle between 650 soldiers of the US 7th Cavalry regiment under the command of Lt Colonel Custer against Allied Native American tribes led by Sitting Bull. It was fought over land that had been given to the Native Americans but the Government wanted to take it back because they found gold in the region.

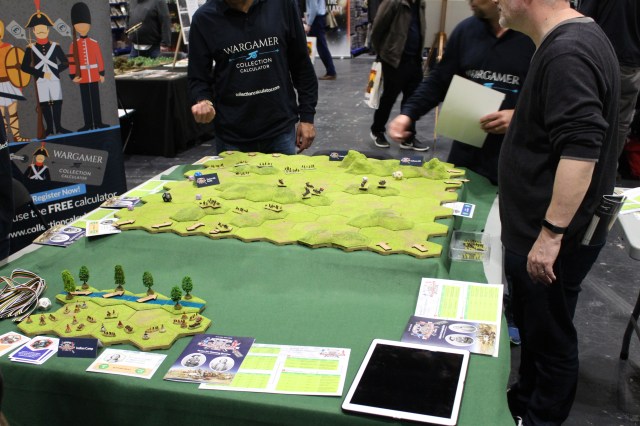
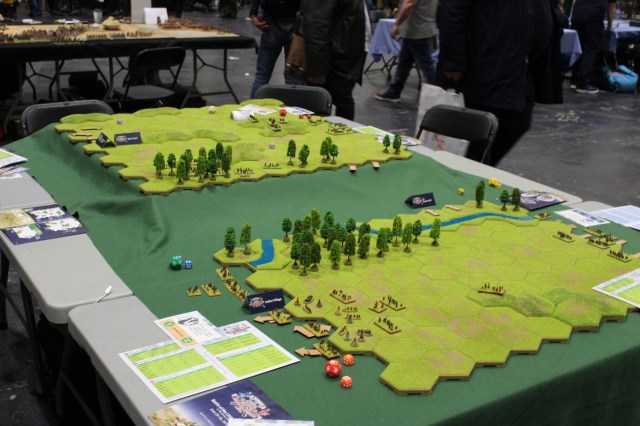
The game was cleverly designed and was played on four different boards, each linking to the other boards and events were interconnected. First I played as the Indians but later I took the role of Custer himself, and my strategy was to get into the Indian village and take the women, elders and children hostage. However I found this challenging, first I attacked when I thought the Warriors had gone off hunting but they were still around, second I had left my Gatling guns behind.  During the game, I found myself facing three different enemy leaders (one being commanded by my Dad) but managed to fight bravely and get into the actual village, but unfortunately I had lost my bonus (as my leader – Custer had taken injuries) and had nothing to counter the Native Americans – ensuring my defeat.  I did put up a brave fight and when I talked to Peter who was one of the organisers at the end he said that I was the closest to Victory on that day. I do not like losing and felt annoyed at first, but I realised that as a consequence the children and the women would be safe – so that is a good thing.

It was a really good game, and I really recommend it if you see it on another show.  It is being run by the Wargamer Collection Calculator – you can find a link to them here.  I heard that they won best Participation Game on the day – I think they deserved it.  I hope I can play it again at Joy of Six in July as I will be going there this year [ed: as if you had any choice mate!].  I am getting the book about the Battle by Philbrick.

IMG_7597
Here is the first of the four areas that was part of the game, the small board is the Native American Village and the big board is where Custer fought. In reality he died on top of the Hill in the Middle. The wooded arrows show how the board links with the other boards.
IMG_7598
Here are the other two boards that form part of the overall Battle.

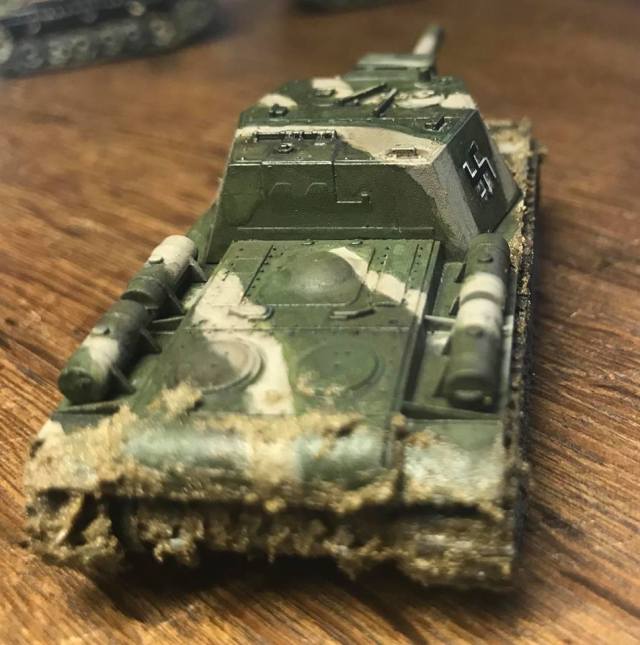
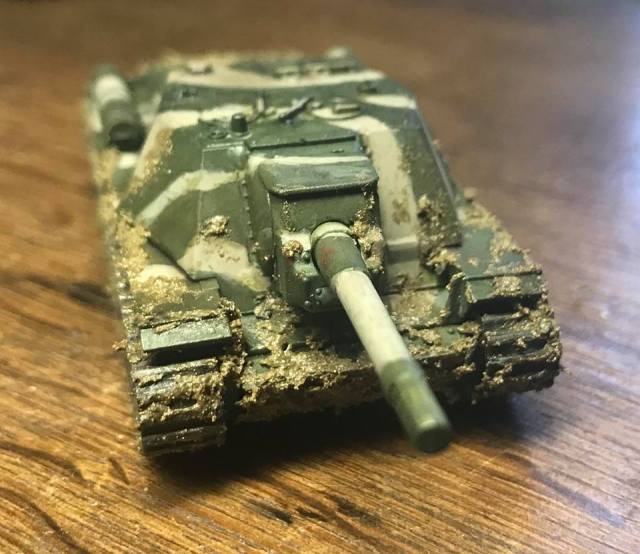
Space Vixens from Mars – “Meine Ehre heiβt Treue”, The Road to Castle Itter May 1945

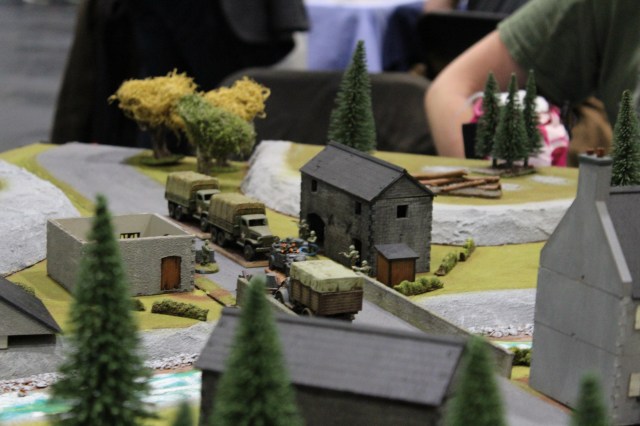
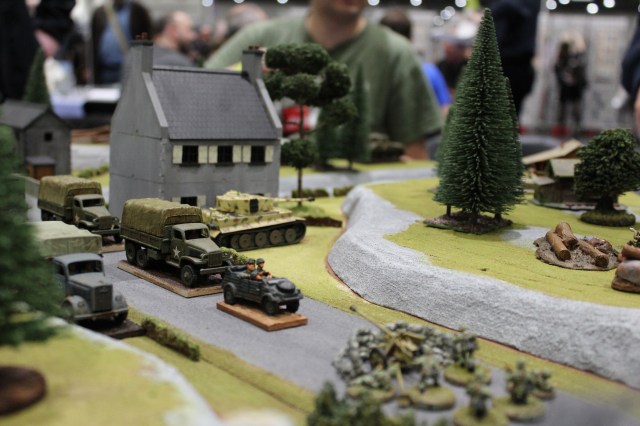
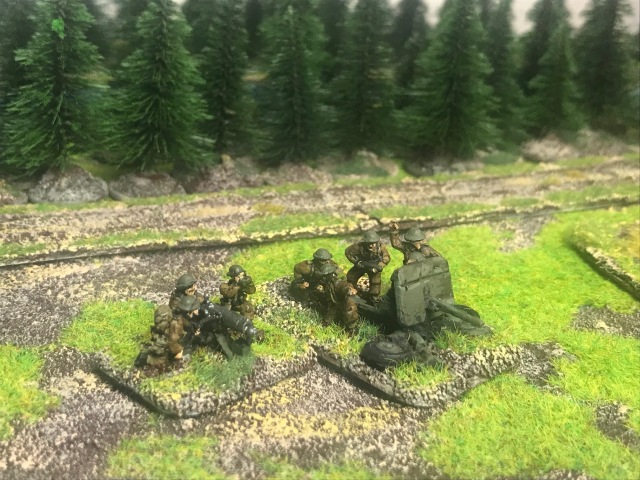
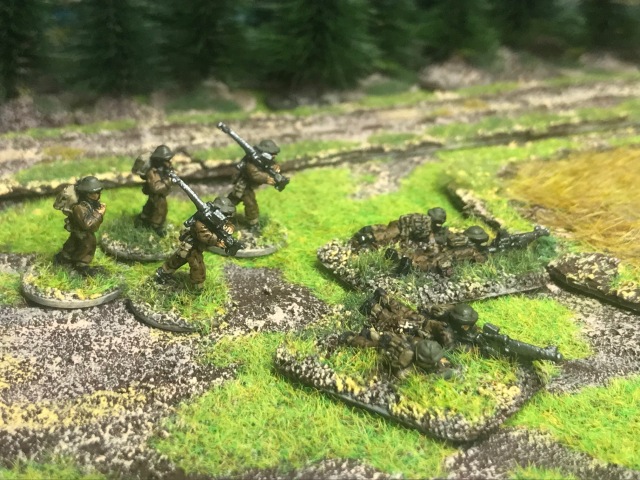
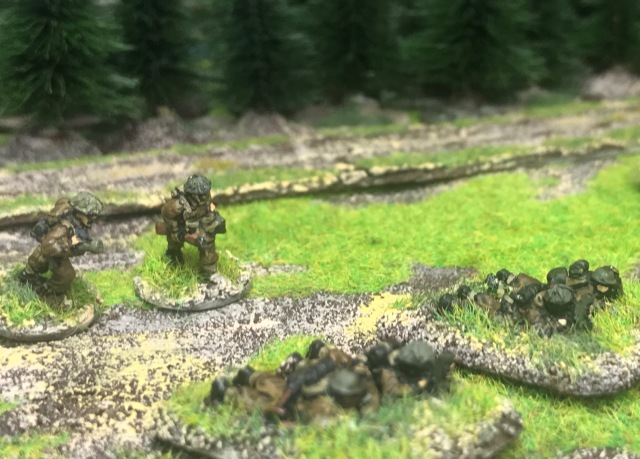
The second game was interesting too and was about a situation at the end of WW2 where a German Army Major and an American Lieutenant joined forces to save French prisoners in the Austrian Alps. These prisoners were being guarded by loyal SS Soldiers at Castle Itter, determined to ensure that the prisoners are terminated.

harding
The Book that inspired the game – The Last Battle with Stephen Harding. I ordered it today as I found it really interesting.

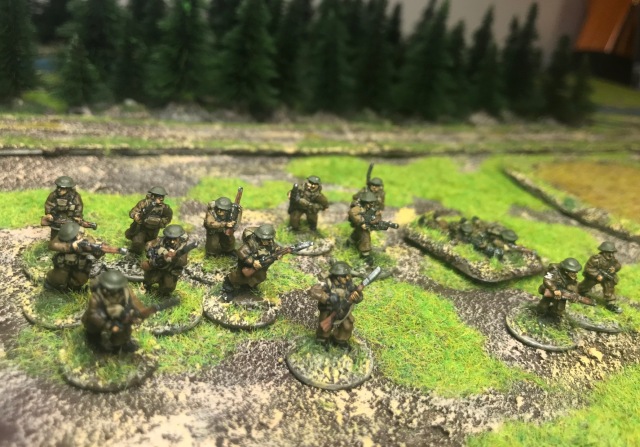
In the game I played the German major and his two squads of the finest German Army Soldiers.  We had to convince the SS checkpoints at two stages to successfully enable us to get behind the PAK 40 AT Gun and the Tiger Tank the SS soldiers were equipped with. This would allow me to conduct a surprise attack whilst the American approached the SS position with his Sherman tanks.  Once the Shermans were spotted, they concentrated their fire on the Tiger and managed to disable it. I overwhelmed the gun crew and put some of my men to operate it and managed to use it to destroy some enemy positions.  The American commander did his job well and finished off the remaining opposition.  As a results we managed to free the prisoners.  All-in-all another great game indeed.  They were using the SFD rules. Really nice people (Phil, Gary and Steve) and they have a webpage too (link here) [Ed: and thanks to Josh Shuck who played the American Commander].

IMG_7662.JPG
The Germans approaching the SS position – the Major in his Kubelwagen and his men in the American lorries behind. This requires nerves of Steel.
IMG_7666.JPG
The German Major is bluffing his way through as the Sherman Tank sneaks closer at the far end of the table, getting ready for the knock-out shot on the Tiger. Then all went according to plan.

/ Hope that was of some interest, Great Show and Great day. Thanks to the organisers and all the people who put on nice games and shared the hobby with me!


Some Platoons for France 1940 and a kind of a review by the Little One of Airfix Battles

I have finally finished my France 1940 15mm Platoons I have been working on.  I intend to use these with the excellent Too Fat Lardies France 1940 supplement I bought some time ago (link here).  I have talked about the book before and it is a fantastic resource for any Platoon based WW2 Gaming.  Here they are, I used Skytrex (link here) and Peter Pig (link here) miniatures.

I bought the Little One a copy of the Airfix Battle game for us to try out over Christmas and we took it with us to the holidays in Sweden. He rather likes it and I thought why not ask him to write a short review/reflection of the game I have added it at the end of this blog post.

British 1940 Regulation Platoon (Skytrex and Peter Pig)

img_9882
Platoon Structure with support (note that I made prone Bren Gunner Teams as well as walking, with the same for Boyes Anti-tank team and the 2″ inch mortar team).
img_9883
I think these relatively old Skytrex Models are just fine.
img_9894
I did base them eventually – part of Machine Gun Team and a 2pdr AT Gun (these are Peter Pig)
img_9895
Peter Pig Anti-Tank Rifle Teams
img_9897
2″ mortar teams
img_9898
A British Squad (All Skytrex apart from the Bren Gunner from Peter Pig) on the left and the Platoon Sgt and the Lt on the right (both from Peter Pig)

German First Wave Platoon (Peter Pig)

img_9886
Some regulars and a Sniper
img_9887
Infantry Gun
img_9885
Platoon Structure with Supports
img_9900
Based up Squad on the Left and Platoon HQ on the left

img_9901-2.jpg

img_9903
Mortar and Anti-tank Rifle Teams
img_9904
Nice weekend of basing


Airfix Battles – A review by the Little One

I find Airfix Battles a good game because everything you need sits in a small box – flat miniature soldiers, tanks and guns. The rules are simple to understand for a 10-year old wargamer. However I have played a lot of games before so maybe they are a little bit more difficult for you.  There a paper sheets that are used to play on and some terrain features you place on the mat. These are ruins, hedges and difficult ground.  It takes on some things that I like with WW2, such as Tigers, Bazookas and Pak-40 guns.  However, it is a little bit unrealistic as you can shoot in a curved trajectory (kind of) and mortars and artillery do not seem very powerful – I read in a book that artillery was the biggest cause of death in WW2. Also the ranges are a little bit strange, the MG-34, Browning and Sniper Rifle has the same range.  My Papa, that is what I call my dad, tells me there should be figures with the game, but we have plenty at home and the flats works well for travel.  It also shows how dangerous war is – so you have to manage your units carefully and protect your commanders as they are important to allow you do things like getting cards and playing orders.  You can also use the set to play other games on while you travel, we played What a Tanker using the Panzers vs the Shermans – that was fun!

img_9556
The Game comes with two thin sheets of paper you can use instead of a battle mat, they look ok.
img_9558
Here are some of the unit cards, showing a lot of useful information like the number of stars (this is how much the unit is worth), how may are in the unit, what the units skill is (the dice), how much it moves, what weapons it carries (with range and damage) and any special abilities.
img_9561
I like this game.  Our games have taken between 20 minutes to 2 hours.
img_9629
I think the rough terrain markers are funny – maybe they could have used something less boring like some stony ground of something.  My Papa hates markers like this – I am less bothered and just get on with things.  That is clearly one of his rolls by the way.

The other day we used miniatures to play the game, it made my Papa a little bit happier and we had a very good time.  He does not like this game as much as I do.  I really like it.  There is also a way you can play against yourself in Solo mode – I like it and it is harder than playing against Papa because I roll very well for both sides.

I really like games and I think I have learned a few things from this one that I will try to use in my own rule set I have been working on.

As Papa would have said, I hope that was of some interest.

– The Little One (you can read more about the game here)

Below are some more of the pictures we have taken of our games.

.

Swedish Rifle Platoon in WW2 for Chain of Command – Part 2 fleshing it out

His shoes are too big and his hat is too small,
His trousers are tight and his coat is too long,
But it does not matter, because he is my soldier,
Somewhere in Sweden!
– Translated from the 1940 Swedish Song “Min Soldat” (My Soldier), performed by Ulla Billquist and written by Nils Perne.

8f149e07a918afe3b91b895023d4d377-290x400

Here is the link to the Original Song.

IMG_8595.jpg
Some of the Swedish Troopers and a slightly Converted 38(t) from Plastic Soldier Company

A few weeks back I presented an initial stab at a Swedish Platoon Organisation for the WW2 era (here is a link to the earlier posting) for Chain of Command.  Since then I have been working on some miniatures for the platoon and some of the support options – I will present the work to date in this blog update.  I will leave out the work I have been doing on vehicles (armoured cars and tanks, I think that will be a good one on its own) as I have not yet finished the tank markings/decals – but I am working on it with some help from some friends.

I want to state how grateful I am to the community when doing something like this, the support from all kind of places with encouragement, the research and offers of help.  I even got a fair few of 3D printed models for a Swedish Tank type sent to me by a friend on Twitter.  Good stuff!

Later blog updates will also show/discuss jump-off markers and some terrain features to make the battle field having a touch of Scandinavia – making it look as Scandinavian as a wargames table with Snake rail fencing looks American!

Gardsgard-Vilhelmina.jpg
Here is a clue!

I would like to do an what-if Scenario based on the operational plan developed by the commander of the 25th Panzer Division (link to Wikipedia here), Adolf von Schell, to attack Sweden with a handful of divisions from Norway.  This is described at high level in the book “Andra Världskriget och Sverige (2002)” (that translates to: The Second World War and Sweden) by Jan Linder, and contains the following picture.

img_8631.jpg
The side note states “Map showing the German Operative study against Sweden the Summer 1943”. Sketch from Ny Militar Tidskrift 1961.  The Heading of the Map states “Study of a Operation against Sweden in 1943”.  The Map show airborne attacks and the movements of divisions, the two top arrows for the “Operation II” goes through the County were the Roller of Ones was born – therefore I find this potential scenario interesting.

I have not been able to find any more information on this operation and if you are reading this and know more – please let me know.  It would be fun to do a linked campaign of fighting in some of the areas I know very well from my childhood.

It is interesting to note that the 25th Division was issued with outdated French Tanks and according to the Wikipedia entry above the following was the combat strength in 1943:

..21,000 men and fielded 14 Panzer II tanks, 62 Panzer III, 26 Panzer IV, 40 Hotchkiss H39, 15 Somua S35, and 15 Self-propelled assault guns, such as the StuG III.

It would give a nice opportunity to get some French tanks and do them in German “livery”.  However that is for the future and I have yet some research to do…

The Swedish Platoon Organisation and Models Used

In reading the old manuals there are a few changes required to the original list that are summarised below.  I will update the Platoon document at a later date.

IMG_8610
1940 Platoon – More pictures below

Part2_1

(i) Due to allocation of runners, I have reduced the number of Riflemen in each section with one.  I need to verify this so I did 4 extra models just in case!

(ii) The first Section/Grupp had an SMG armed rifleman in the Rifle Team/Gomgången.  However, due to shortages this was not always possible, especially early in the period.

(iii) The manuals indicate the presence of two Teams/Omggångar and that there are situations when they fight as two elements – one K (Kulspruta / Light Machine Gun) and one G (Gevär / Rifle). Therefore I have re-organised the Platoon organisation in the picture to reflect these changes.

This is still work in progress and may change as I read more stuff. For the 1943 to 1945 Platoon I have made the same changes to the organisation.  Again, this is an aspirational platoon, and as you can see it offers a significant increase of fire Power with 2 SMGs per section and the M/42 Semi-Automatic Rifle, and in addition the Platoon 47mm mortar and the Anti-tank rifle.

IMG_8618
1943 Platoon – More Pictures Below

Part2_2
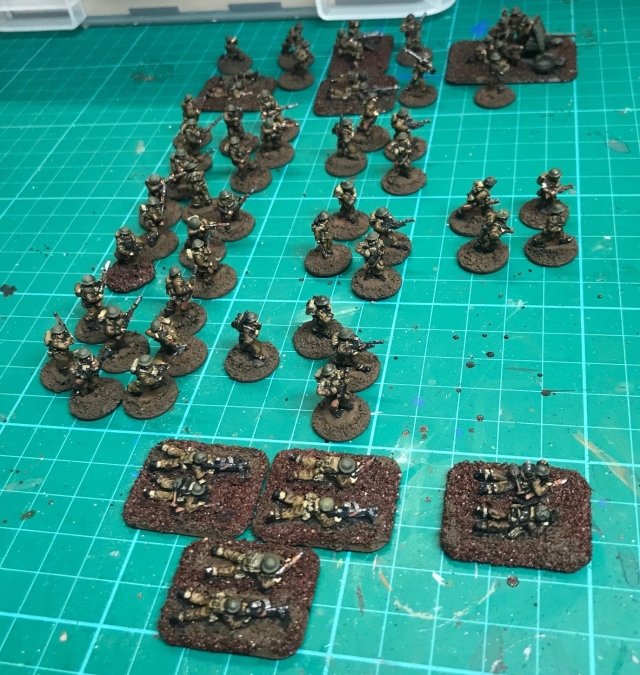
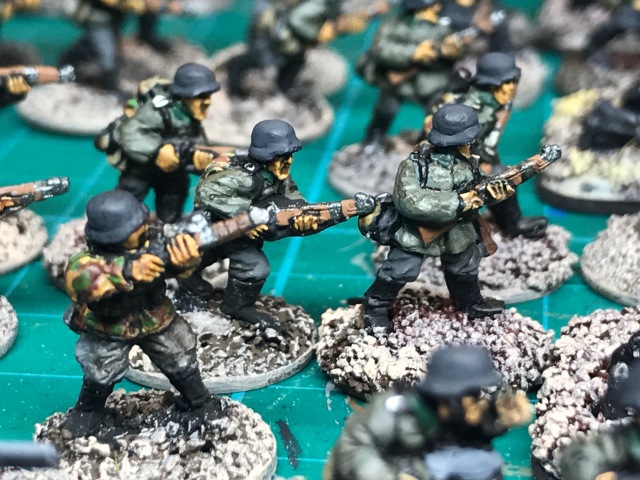
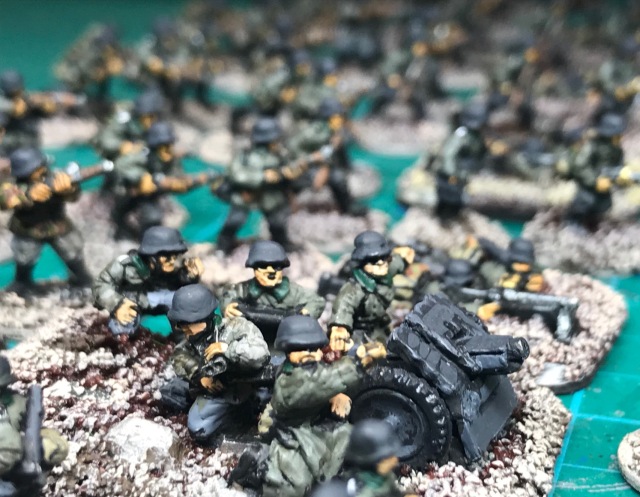
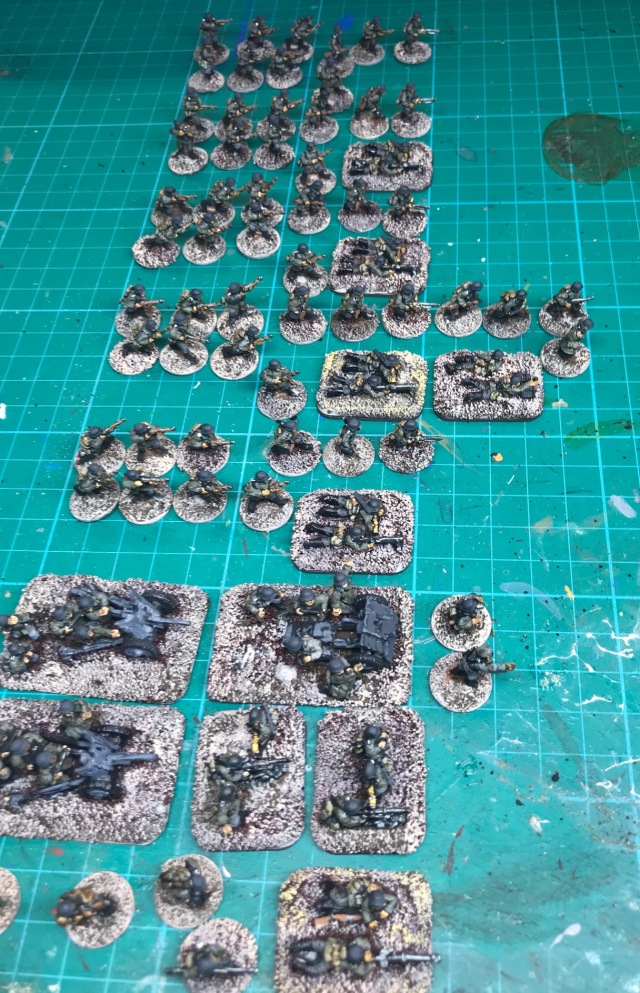
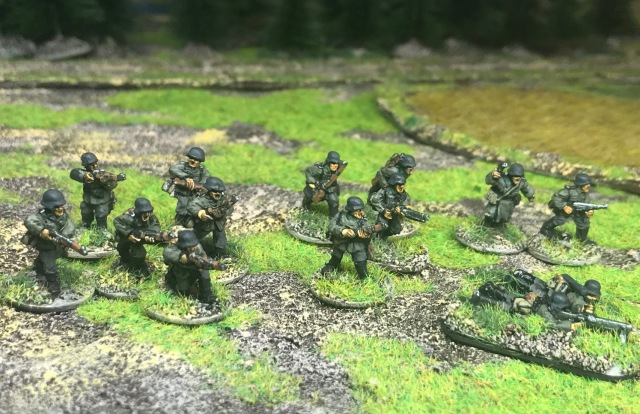
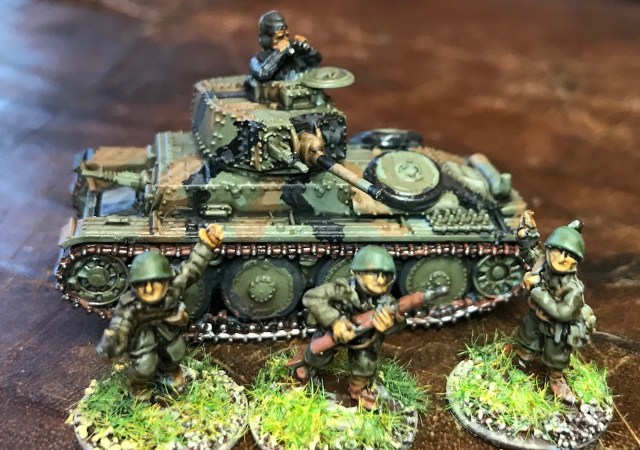
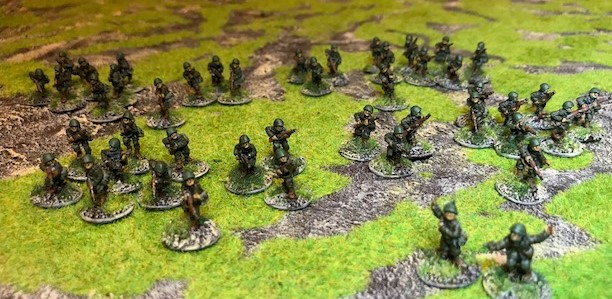
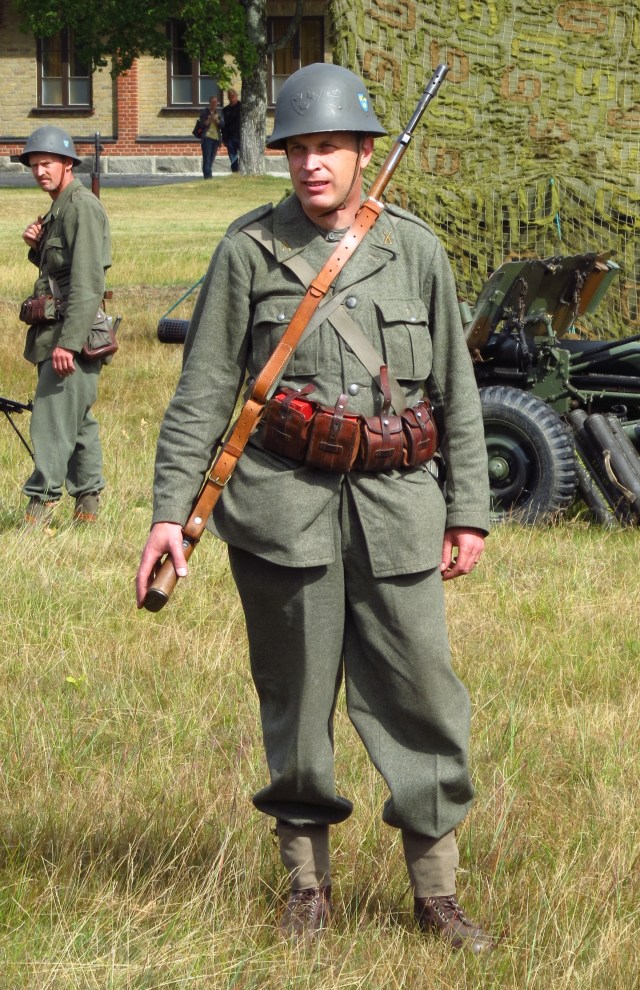
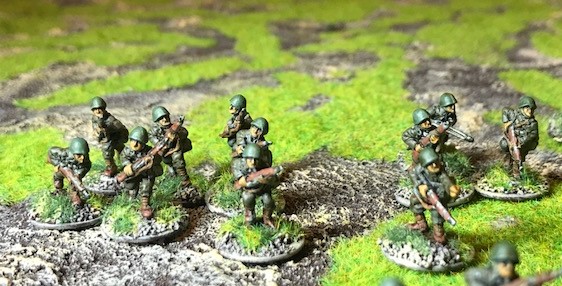
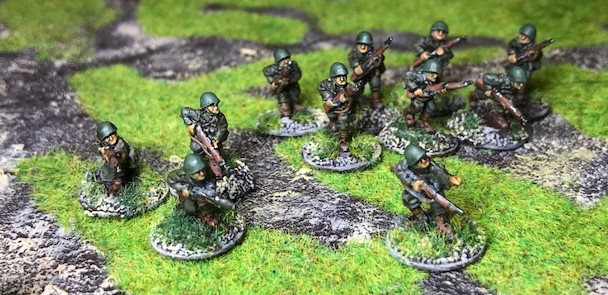
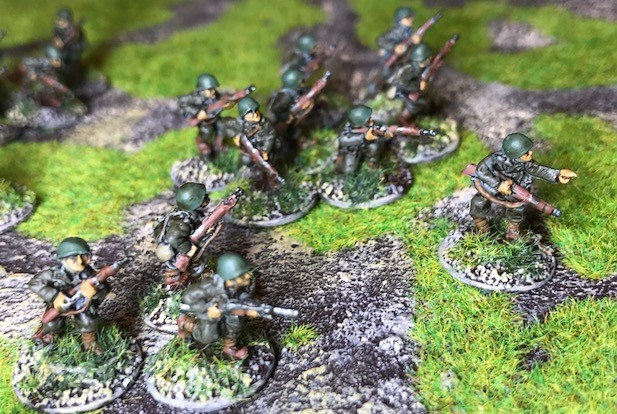
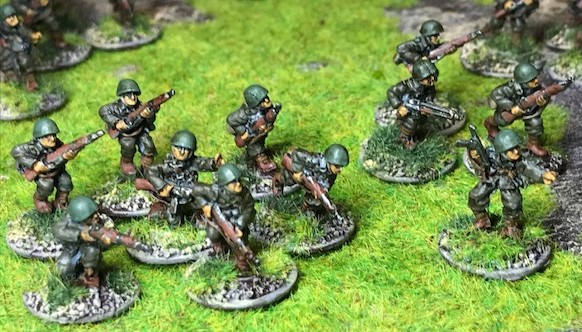
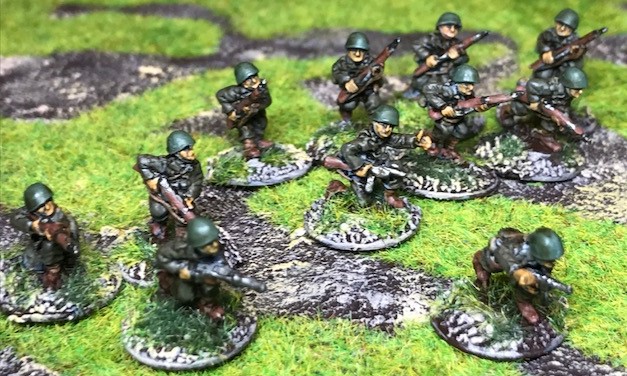
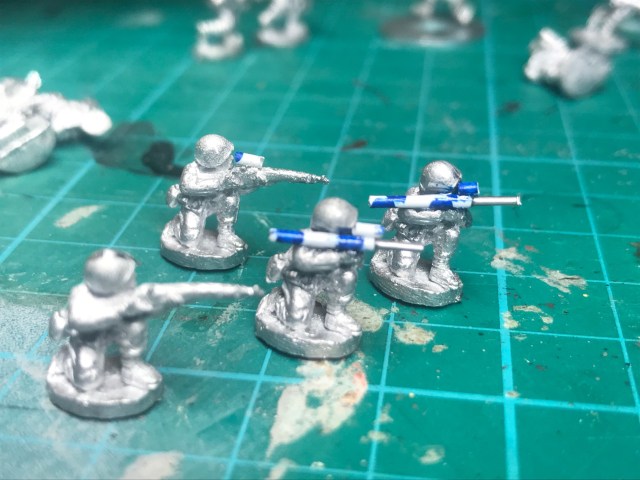
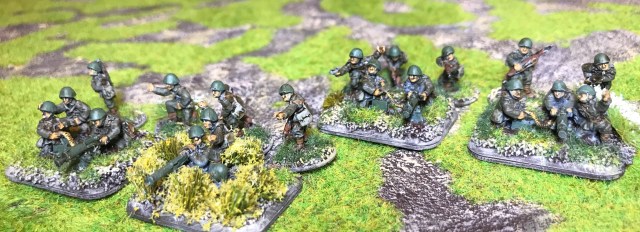
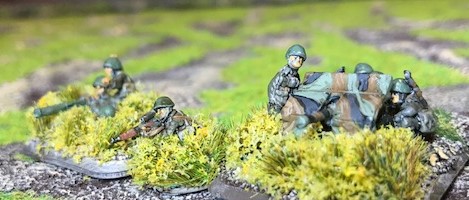
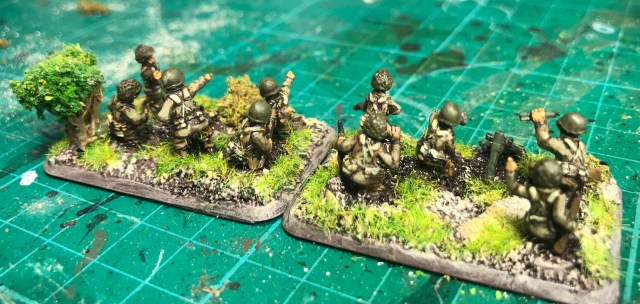
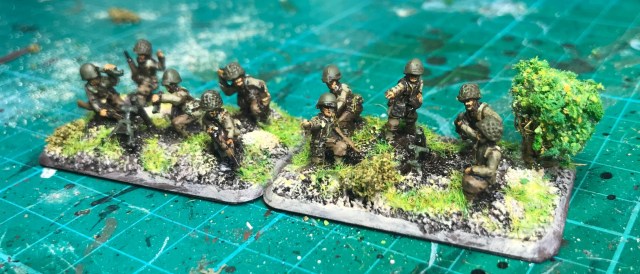
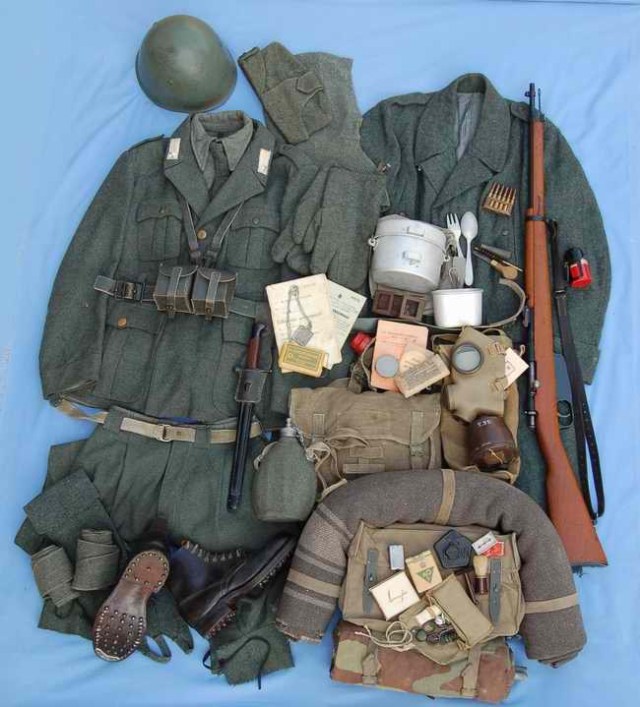
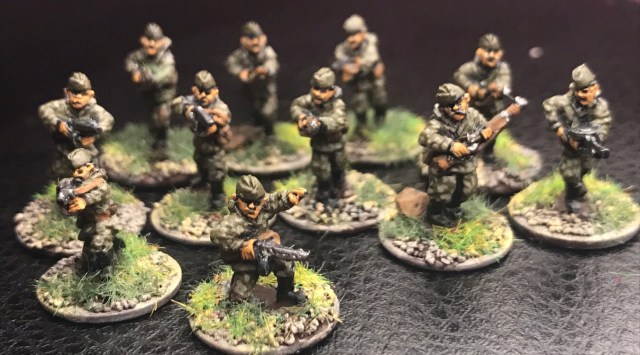
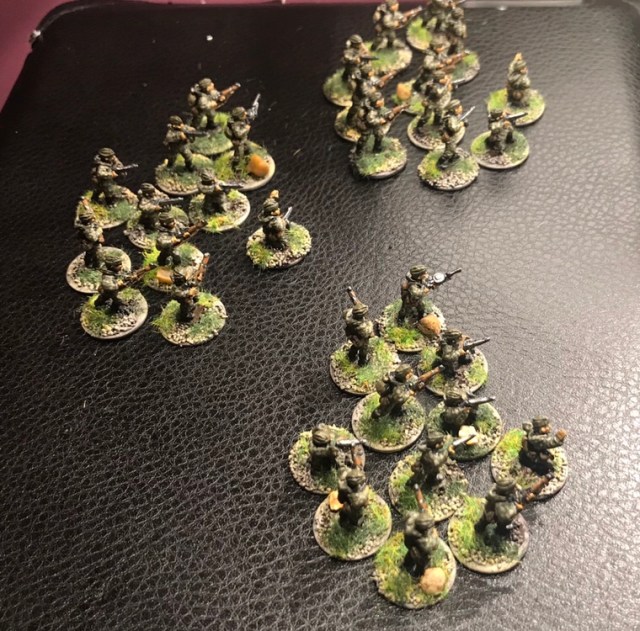
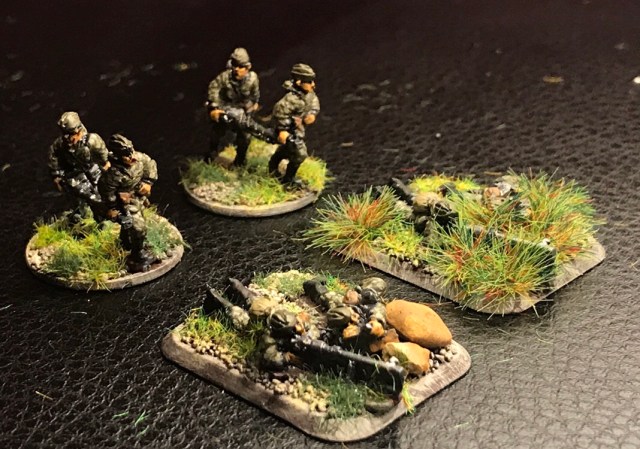
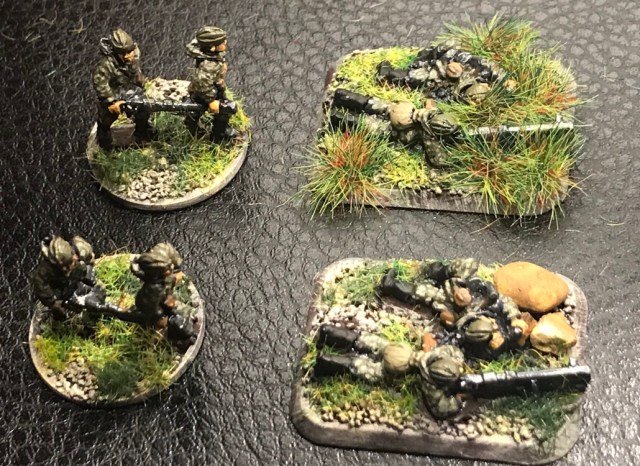
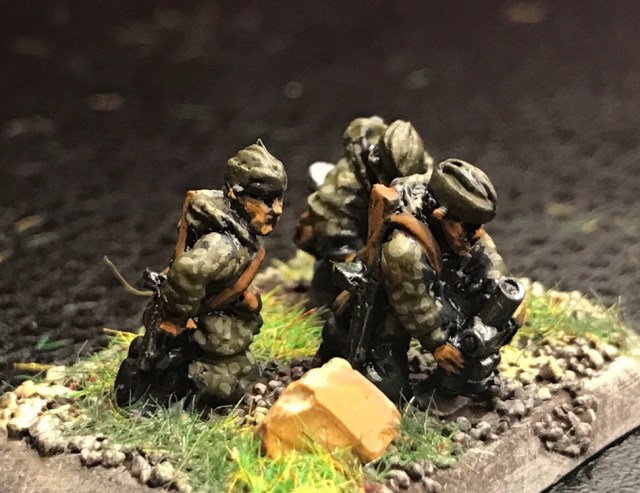
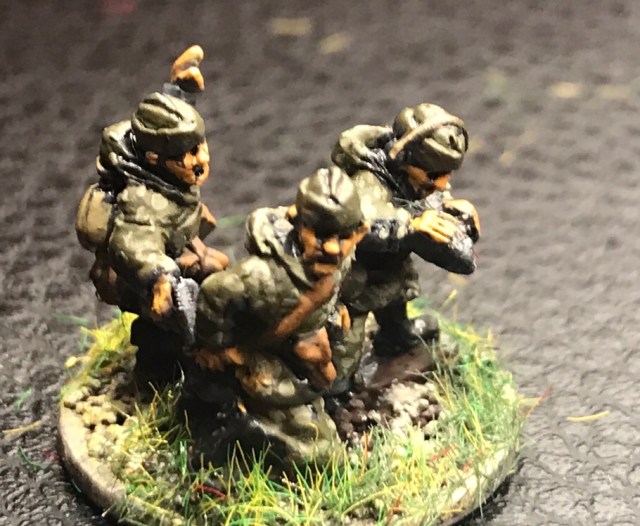
I decided to make enough miniatures so that I could field a platoon at any stage of the WW2 period.  Following some discussions on twitter and a few other similar projects the 15mm Italians from Flames of War seemed to be a good match for the m/39 uniform.

This assumes the M/37 helmet and the M/39 uniform, at the time the latest equipment available.  Some units would be equipped  older uniforms and helmets, like the earlier helmet M/26 and older uniforms.

If you are doing this project in 28mm you could use the fantastic Ådalen Range that depicts interwar Swedes, these are just troops that have not had new kit – the range covers all that you need for the early war (limited poses, and there are no SMGs and the Machine Gun is perhaps a bit dated, but I think it would work and if you even use some of the earlier uniforms in the mix you may get a motley crew of ill-prepared 1940 soldiers), more information here (I have not ordered any, but they do look good.  I suggest you contact them first before you make your order – I always do).  

Anyway back to my 15mm project.

I bought the following from Battlefront

  • 1 pack of ISO101 Italian Artillery Group – gives you crew for your guns as well as some SMG armed gentlemen.
  • 2 packs of IT702 Fucilieri Platoon – your bulk infantry
  • 3 packs of ISO131 Italian Fucilieri (Late) – again gives some SMG armed soldiers and some more LMG (for simple conversion)
  • 2 pack of GSO517 7.5cm GebK15 howitzer – for the infantry gun option (more below)
  • 1 No. PL510 37mm wz.36 gun – this is the famous 37mm Bofors Anti-tank gun, used by the Poles, Finns and the Swedens (and others).

I also had some Polish Machine Guns from Batttlefront and bought the WW1 Austrian Machine Gun from Peter Pig.

Uniform_m1939_Revinge_2012-1.jpg
This is a picture of an enactor I found on the net, with an older helmet than the M/37.

I used the following paints for these:

  • Jacket and Trousers – Vallejo German Field Grey 70830
  • Helmet – Vallejo 70895 Gunship Green
  • Bread bag – Vallejo 70886 Green Grey
  • Leather / Belt – Vallejo 70875 Beige Brown
  • Water Bottle / Gaiters – Vallejo 70988 Khaki

I tend to use Field Drab, then Medium flesh tone for skin, saddle brown for the rifle buts.

I put a wash of army paint quick shade on top – soft tone.

The Swedish 1940 – 1943 Platoon

IMG_8610
The full platoon with the Platoon HQ and the 4 Sections
IMG_8605
Platoon HQ
IMG_8606
1st Section (with the SMG, he is the kneeling Soldier in the middle of the left team, from the Artillery Group Pack)


IMG_8607
2nd Section


IMG_8608
3rd Section


IMG_8609
4th Section

The Swedish 1943 to 1945 Platoon

This is the same models as above but with some swaps and the Mortar Section.

IMG_8618
The Platoon with the HQ, Mortar Section and 4 Rifle Sections
IMG_8611
Platoon HQ – note the Platoon Sergeant now has a Submachinegun.
IMG_8612
1st Section – As before but now Sergeant also has a Submachinegun. Note that two of the Rifel


IMG_8613
2nd Section – as the 1st Section


IMG_8614
3rd Section – as the 1st Section


IMG_8615
4th Section – as the 1st Section


IMG_8616
Mortar Section – built from a casualty Polish miniature and 2 Polish anti-tank crew from the 37mm AT Pack.


IMG_8617
The 47mm Mortar again!
IMG_8345.jpg
Before paining – mortar built using a paper clip and a thin spaghetti!

In addition there is an anti-tank Rifle for the Platoon, I made two of these conversions.

IMG_8621

The are based on a kneeling rifleman and I did the simplified rifle from some plastic coated paper clips, it shows better in the picture below.

IMG_8319
It also shows the simple Snipe Conversion.

Some support options

IMG_8620
A Sniper
IMG_8622
Three blokes on a base, the Engineering Team for now. Will do some conversions at some point from Peter Pig Engineers.
IMG_8625
Bofors 37mm Anti- Tank Guns, mix of the Italian and Polish Crew to create these dynamic bases! Perhaps they were not Camouflage painted, but his is a little bit of a what-if so I may perhaps be forgiven.
IMG_8626
Same as above
IMG_8627
Same as above

The next one was a little bit trickier, but once I found a reasonable proxy the conversion was simple, using some very thin cocktail straws I bought may years ago. I wanted to mode the Bofors 75 mm Model 1934 Mountain Gun.

It looks like this,

IMG_7644

Battlefront makes the GSO517 7.5cm GebK15 howitzer, it looks like this.

IMG_7645

I hope this sequence is self explanatory

IMG_8630
Again, using the models from the Artillery Group Pack!

And finally some Machine Guns, one using an old Polish MMG set and the other head swapped Austrian WW1 MMGs from Peter Pig.

IMG_8322.jpg

img_8624.jpg

I am really enjoying this project, it is not a Labour of Love, just Love
IMG_8628

/ Hope it was of some interest!

29 Let’s Go Pint Sized Campaign for CoC – Houses and Battlefield Clutter in 15mm

IMG_7244

In the post last week I discussed the Project the Little One and I are doing to play the 29 Let’s Go Pint sized campaign from Too Fat Lardies (link here if you are interested). The German platoon and supports have not yet been delivered as an item is on back-order, so we have pressed on with other stuff.  One of the most pleasing aspects of a WW2 Skirmish is a nice looking table that sets the scenes alive. If you look at any of the Too Fat Lardies games there is plenty of character in the table itself – nice buildings, trees, hedges but also those additional things that makes it look real, like Green houses, planters, sheds, benches, telegraphs poles, pissoirs, statutes, monuments, civilian cars, old advertisement on buildings,  etc.

Warbases have a nice range suitably called Chain of Command that has some very nice item including two garden sets (link here), they have been developed with Too Fat Lardies. The only problem for our project is that they are all in 28mm – if I did this in 28mm I would definitely get these.

I contacted Warbases and said something in the line of “Hey Lets Go 15mm?”.  They told me they do not do them in 15mm, but that perhaps the stuff that Scenic Route Models could fit my needs (link here).  Now these model are in OO scale that technically is 1/76 whilst 15mm is about 1/100 (most of the time) – in reality I feel that most of the Battlefront miniatures are bigger than 15mm.  However, I thought to myself, I could throw a few pounds in their direction in the interest of research. So I ordered the following sets this Tuesday and they were delivered this Saturday.

And of course their Green House (well I got two).

4631763544.jpg

I got them and as I suspected felt that there were a little bit on the large side (as they are design for another scale), this is the Greenhouse door vs the doors on the houses I am using (more about those below).

IMG_7237

However I got out my good old razor saw and cut of a few layers on the bottom on all the pieces before assembling (you could use a knife and cut carefully as well) – A relatively easy modification.

IMG_7238

And, I did similar modifications to the other stuff – always modifying the height.  The only further modifications I did to the buildings where adding roof ridges (cocktail sticks), and gluing on 80 grade sandpaper on the shed roofs, and adding some glass to the plant boxes and green houses – this was from some sheets from some thin plastic from packaging for strawberries (I ate them and cleaned it up first).  After I painted them I added some flower tufts to the planters and green houses. And, I almost forgot, I also added some detail to make the opening to the Green house look more like a door.

I am very happy with the results (the 15mm Americans from last week making another appearance).

IMG_7242IMG_7243IMG_7244IMG_7245IMG_7246IMG_7247IMG_7249IMG_7250

I have made a second order for some more stuff (mainly repeats, but trying out one or more other things) and also ordered some other things from some other suppliers I hope will work as well – but will write about those in future updates here on the blog.

I also stumbled upon the following during an eBay search for something completely different.  I thought it looked like some kind of stone pattern.

IMG_7168

So, I got myself a piece of it to try out – it is called Faux Leather Python Pattern Upholstery Fabric and is sold in 1 meter lengths (1.4m wide) for £12. I got it and did a quick dry-brush and detail and this is how it turned out – not 100% satisfied but it does work.


DnsfI0yX0AYv759

Finally I bought a whole bunch of 15mm Normandy houses/structures (16 No. in total) from Empires at War – they are pre-painted stuff and are very good (link here).  We only built a few and will only need about 5 No. for the 29 Lets Go campaign and only applied a little bit of additional paint mainly to hide the brown laser cut mdf sides – if you look at the pictures you can see the before and after look – they do work well without any modifications as well.

IMG_7215IMG_7216

I will show more of the houses when I finished them.

/ All the best


29 Let’s Go Pint Sized Campaign for CoC – the American Platoon

IMG_7029
Holy Shit!

I have bought all of the Too Fat Lardies Pint sized campaigns for Chain of Command to date, but I have to admit of not yet played any of them.  I have used Chain of Command for some very fun Games in a Finno-Russian Winter war setting and for the Continuation war period.  I am currently struggling with time to do any bigger gaming ventures apart from some gaming with the Little One as I spend more time than I would like away from home due to work.  He had up to recently not been to interested in Chain of Command but now, out of the famous  blue, he would like to do some Normandy actions, so I thought the first campaign Richard Clarke did could work well (and I have to admit I fancied painting some Americans and Germans).

Capture

I really enjoy the format of the “Pint Sized” campaign books and you can find this one and others on the Too Fat Lardies webpage (link here), you would need the Chain of Command Rules as well as At the Sharp End campaign supplement for the full experience – but I dare say you could use this with any WW2 plutoon based rules and have fun they are great products. The campaign covers the advance of the US 175th Infantry Regiment and their struggles in linking the Omaha and Utah beaches.

To play the scenarios you basically need a platoon or US Infantry and a Platoon of Germans, with some support options.

I am also using this project as an opportunity to get the Little One a little bit more involved in the terrain making aspect of the hobby, this time we did some roads and telegraph poles – which was great fun and with immediate gratification (at least for us) in the pictures below.

IMG_7021
The Little one dry brushing a road with great care and precision, I wish I had that dedication but I do not have the time. Joke aside he was a great help and it is nice to have some company doing this kind of stuff.

We also did some Telegraph poles that we bought from e-bay, they are laser cut MDF but I think they work very well and saved us some building time and 24 for a fiver (£5) is much cheaper than some alternatives – that perhaps look better, but for us this was perfectly adequate.

telegraph
The one we bought, but I battlefront, Galeforce 9 and I believe Peter Pig does versions too.

We did not use the base it came with instead installed them on top of thin washers with superglue (some of them on bases) and made a few damaged ones.

We also have a set to winterize for some other theatres, but that is for another colder day.

American Rifle Platoon

The American Rifle Platoon and the support options is more or less completed – there are a few I have not done yet and I will pick these up from Peter Pig at SELWG.  The basic Platoon is based on the Battlefront US Rifle Company pack – this is not the plastic one they are currently selling but the old metal version, it gives you everything you need for the campaign except for some Shermans, Flamethrower, 50 cal. HMG and some Engineers (the new plastic box should do the same too).

Here are the models…

IMG_7023
One of the three Rifle Sections, those Shermans will also come handy for the Scenarios.
IMG_7025
An extra Bazooka Team taking a careful aim


IMG_7029
Some 30 cal. MMG teams in a little bit of an awkward position.
IMG_7030
A Sniper Team – taking out a Tank Commander
IMG_7031
Three Sniper teams


IMG_7035
Some extra BARs
IMG_7037
The Whole Platoon with the Options

And then two mortar teams finished today (apart from gun metal colours – I realize now),

IMG_7105IMG_7106

That is all we need for the American side, next the Germans….

/ Hope that was of some interest, take care

More Platoons (Soviet and Italian) for Chain of Command and Lights

Three things this week:

  • Soviet Platoon/Company for Chain of Command (Finnish Continuation War)
  • Bersaglieri Platoon for Chain of Command (Greek 1940-41)
  • My lighting solution(s) for my travel rig

Soviet Platoon for Chain of Command (Finnish Continuation War) with Support

Had some marathon sessions last week to paint up a company box of plastic Russians/Soviets from Battlefront (Product code SBX33 Strelkovy Company in Plastic, at £28, but I got mine cheaper on ebay), with some additional miniatures from Skytrex (LMG second men, AT Rifles), Mortars from Peter Pig and further SMG men from Battlefront. I did the photos after having based them so there is still some static grass on the figures in some places – sorry!

These guys will fight the Finnish Platoon I made earlier (link here).

IMG_4706
This is an overview of some of the Poses (go back to my earlier posting here as there is a link to a review of these miniatures there from another blog highlighting some issues – I agree with this review). Great models to paint.
FOW Soviet paint set
I used this as a guide for the painting for the helmets, the two uniform colours (drybrush it first then highlight with the same colour) and the boots. However for the bedrolls I used German Camouflage Beige (821 Vallejo) and the for the bread bags (Plague Skin from Warpainter).  I gave them a light wash of brown at the end.

Using the list from the Chain of Command book we find the following information for a Russian Rifle Platoon.

Capture
Screen capture from the Chain of Command Rulebook

So let us start with that Leytenant

IMG_4701
A Leytenant
IMG_4702
A Serzhant
IMG_4708
A 2-man LMG team (the ammunition carrier is an old Skytrex miniature I had lying around – they are cleary from different districts of the Great Motherland – but it works. Try it by standing up and carefully taking 5 steps back and have a look)
IMG_4710
The rest of the Squad, the Seven Riflemen

Add two more squads and we have our Rifle Platoon (I did 4 or these Platoons)

IMG_4704

Some of the support options I made this week (in addition I have plenty of tanks from my What a Tanker stuff I made earlier this year, just need to add some Infantry Gun and Anti-tank Guns:

IMG_4705
A Commissar team
IMG_4703
Some extra Sub-Machine Gunners (these were from a separate Battlefront Pack)
IMG_4707
An anti-tank rifle from Skytrex
IMG_4711
Heavy Machine Gun from Skytrex
IMG_4695
Medium Machine Gunners (from the Plastic Company Box)
IMG_4696
Mortar teams (Peter Pig and Skytrex)
IMG_4697
Flamethrower team (Peter Pig and the pointer from the Platoon Box)
IMG_4698
Anohter Anti-tank rifle from Skytrex with the pointer from Battlefront (I had lying around)
IMG_4700.JPG
Forward Observer

Having placed all that on the table I still had this left.

IMG_4709

So there is enough for more Platoons for a large game of Chain of Command, or even a IABSG.

Bersaglieri Platoon for Greece 1940-41 with some Supports

image045

Whilst I was on holiday in Rhodes, Greece, I painted a Greek Platoon that I had lying around on the lead mountain (here is a link to that one).  Below some picture of this platoon.


I got really inspired and decided to paint up a platoon of Italian Bersaglieri – Italian light elite infantry with those cool black feathers (actually capercaille feathers). To fight these brave Greeks. By the way Bersaglieri means marksman.

I love the intensity in this video showing them in action in the beginning – it is a propaganda video and I have no idea what they are saying and I especially like the part where they are pulling the AT Gun up the slope about 30 seconds in – quality.

I have seen these previously on the wargames table in the North African Theatre with the tropical helmets and light coloured uniforms and later in the war during the Italian campaign with a light khaki top and brown trousers.  However for the Greek campaign the sources I found suggest a much darker uniform at this point and I have gone for this in doing these. I guess this uniform would work for the attack of Southern France in 1940 as well as for Barbarossa.

IMG_4681
I had this picture on my laptop but not sure where I got it.  It is the colour I was after but I made the shoes in a lighter brown.  For the uniform I dry brushed heavily the uniform with Vallejo German Camouflage Dark Green (879) and then highlighted with the same colour mix with Stone Grey (884) at a ratio of 2 to 1 (2 parts 879 and 1 part 884). I painted the helmet in German Field Grey (830).  The bread bag was painted in Khaki (988).  This is similar to what is advised by Battlefront.

I got the models from Battlefront and I used the following packs (unless stated otherwise stated in the text) to make the platoon and the supports (prices in british pounds from Battlefronts webpage, I got mine about 10% cheaper from ebay).  I really like the models but there is some flash especially on the two firing rifle poses and some of the rifles are a little bit weak so be careful.

  • [IT762] Weapons Platoon (Bersaglieri), 23 Figures [Products] – £8
  • [IT763] Rifle Platoon (Bersaglieri), 22 Figures [Products] – £8
  • [IT765] Assault Engineer Platoon, 27 Figures  – £11.50

I need to get some more infantry Guns and perhaps a small tank, anyway this is the platoon and the support option at this point in time.

IMG_4688
Overview Picture

As a basis for the platoon I used the list from the Too Fat Lardies webpage (link here), however this is a list for a Fucilieri platoon in Africa so may not be correct (if yoy know it is not and are reading this could you please let me know through the contact or comment on this blog).  Anyway it is an assumption for now.

Capture2

By the way Too Fat Lardies are soon to issue a new supplement for Chain of Command that maybe will contain further information on the Bersaglieri at this point in time.  I am very excited about this as I have painted platoons for Germans, French and BEF (and a few on the lead mountain).  In addition they will include rules that will be useful for my Continuation War scenarios as there will be rules for bikes (remember Lt. Eero Perkolas platoon in the movie Ambush [ Rukajärven tie] ) and boat assaults (see this link, if you do not understand why I am excited about this).

DlT6MwVWsAA4CI0.png

So really looking forward to this one, for many reasons.

finals5

peter-franz-n-and-pekka-huotari-in-rukaj-rven-tie-1999

…back to the Italians.

IMG_4686
The Tenente and one of the Sergente.
IMG_4684
Two Light Machine Gun teams
IMG_4689
A Caporale with his Rifle Group
IMG_4683
The Platoon with the two Squads (sorry for the half second squad and the missing Sergente.
IMG_4685
Anti-Tank Rifle,  I made by cuting the head of the normal Italian AT Gun from Peter Pig and replace with one of the head from the battlefront models, and added a Battlefront as a number two.
IMG_4691
Some SMG armed gents – for later war?
IMG_4692
Medium Machine Gun team (not very good picture)
IMG_4690
Flamethrower team
IMG_4693
Mortar
IMG_4694
Another Anti-tank rifle
IMG_4687.JPG
Sniper team (kind of)
IMG_4682
An AT-Gun made from a Peter Pig AT-gun and then some left over figures from the packs. Not very happy with this one, but good for now.


Let there be light!

Earlier (link here) I wrote about my current work situation requiring me to stay away form home in hotels a few evenings every week and about taking back the hobby time in bringing a “painting and basing rig” with me.

rig2
From the earlier blog

However there was an issue and I made a promise.

Light is a problem in hotel rooms and I have invested in a travel led lamp that will be a very welcome addition to the “rig!” but it is waiting for me in the house at the moment. I will get back to you with my verdict.  

I find it difficult to focus if I paint in a poor light environment and I quickly get tired – affecting both quality (can’t see properly) and output (can’t do it for long).  So something needed to be done.

I actually “splashed” out and bought two slightly different lamps and what follow is a little bit of a discussion or a review if you wish.  I did not do any research prior to buying these so there may be better and more cost effective ones – this is just my view on the two I did buy.  I have no technical knowledge of light and it is just based on my opinion and what seems to work for me – have I caveated myself sufficiently?

First out is Ideaworks super bright portable LED lamp, I call this one Gimli.

gimli

Gimli – £9.27 from Amazon UK

This one folds into a little compact box (13 X 7 X 4.5cm) and is powered by 4 No. AA batteries or by USB cable. I have only used this one using the USB cable so I do not know how long the batteries will lasts. There are also three levels of light that can be used 30%, 50% and 100%.

Second is the taller but with more sleek design, MoKo Portable LED Desk Lamp, I call this one Galadriel.

Capture

Galadriel – £22.99 from Amazon UK

This taller but slimmer lamp (23 x 5 x 2.5cm)has an internal rechargeable battery and can also be powered via USB cable. The battery can also be used as charger for your other gadgets (2800 mAh, this in theory is more than sufficient to charge an iPhone from 0 to 100% once) – so a handy additional feature.  Further the battery lasts for about 7-8 hours according to the product blur (but there is a deterioration of strength during use).

Compacted versions
Side by Side – brutal vs elegant (however Galadriel may be a little bit unstable on uneven surfaces).
This picture sums it up – Galadriel is the brightest and the most pleasant light – the key criteria for me.

So overall I am most happy with Galadriel as the light is better, but in addition she takes less space (they both weight about the same, when Gimli has the 4 AA batteries added) and further she has the added feature as a back-up power bank. I recall one of  my University Lecturers saying that price is an information carrier and in this instance it is correct.  I used it whilst on holiday and I am more than happy with the product.

However, as I now have them both I think I will use them together as this gives the even a better light experience. They are my two Towers.

Two Towers in action – great stuff.

“Dark is the water of Kheled-zâram, and cold are the springs of Kibil-nâla, and fair were the many-pillared halls of Khazad-Dûm in Elder Days before the fall of the mighty kings beneath the stone. She looked upon Gimli, who sat glowering and sad, and she smiled. And the Dwarf, hearing the names given in his own ancient tongue, looked up and met her eyes; and it seemed to him that he looked suddenly into the heart of an enemy and saw there love and understanding. Wonder came into his face, and then he smiled in answer.

He rose clumsily and bowed in dwarf-fashion, saying: „Yet more fair is the living land of Lórien, and the Lady Galadriel is above all the jewels that lie in the earth!

from the Two Towers by Tolkien

The point is whether you are painting at home or roaming the land, make sure that you have good light as it make the experience easier, more enjoyable and less tiring.

/ Hope that was of some interest, time to put on a few colours and then switch off the light. By the way here is a picture from the movie I referred to earlier Ambush/Rukajärven tie showing the Finnish soldiers with their bikes.

You can follow this blog on this page by signing up for an email, or on facebook (https://www.facebook.com/rollaonepage/) or follow it on twitter @Roll_a_one .

peter-franz-n-and-pekka-huotari-in-rukaj-rven-tie-1999


Russian Scout Platoon for CoC, Painting Rig and Strelkovy


This week, actually the last few days, I have been working on a 15mm Scout/Recon Platoon for Chain of Command to fight the Finnish platoon I did last week (see here).  The organisation of the platoon is based on the list found in the Too Fat Lardies Christmas Special 2016 (link here).  They are all from the Peter Pig (link here) range and are in 15mm scale.  I really enjoyed painting them and I think they are really nice models. If you are not familiar with Peter Pig, go and have a look at what they do – they have a very comprehensive WW2 range and a lot of specials like different type of Uniforms, Sniper, engineers, etc.

In addition Peter Pig has a lot of ranges covering War of the Roses, Samurai, English Civil War, Pirates (and even small 1/450th pirate ships), American War of Independence, American Civil War (and again some naval ships in smaller scale), Vikings & foes, colonial, wild west, great war, Spanish civil war, Vietnam and Modern Africa.  Further they sell Scenery and some fantastic rule sets (http://www.peterpig.co.uk/).

I could have painted the Scouts in a one colour  uniform but were keen to have some kind of camouflage to make them look  a little bit cooler. Artizan design have some very useful Painting Guides produced by Mick Farnworth on their webpage (link here), I found one showing Russian Leaf Patterns that I liked (link here) with only two nice contrasting colours. I then found two good colour matches (Vallejo 886 Green Grey and 887 Brown Violet – it may be called US Olive Drab nowadays).

Stuff1
It is great to have these kind of guides. I just place paints until I find matches.

Then I painted the Uniform in the 887 and made small random dots with 886 on top and I think it looks good from the distance they will be looked at.

Stuff2
Very happy with the test model. It certainly looks like he has some kind of camouflage on him and it looks good enough from here (yes I have since sorted the moustache from that skin tone).  Black boots, some gun metal, light brown on dark brown for leather details and the rifle.  US field drab on skin, highlighted with Medium Skin tone.  Relatively quick to do but be careful with the dots – I used a fine detailed brush for this.

Anyway, here are the completed miniatures.

Platoon Headquarters

Leytenant, Senior Leader, with Pistol

Serzhant, Junior Leader, with SMG

3 Squads each consisting of;

Serzhant, Junior Leader, with SMG

Light Machine Gun (LMG) with 2 crew

4 No. Submachine Gunners

4 No. Semi-Automatic Rifle Men (SVT40, not sure the models are, but hey!)

Support Options

Anti-tank rifle teams

50mm Mortar teams

Generic Engineering team (more a marker)

Commissar, to give the troops a kick in the arse (sorry, I meant to increase their morale)

img_6254

Mid-week Paining Solution – Getting my Hobby time back

Due to work I currently spend about 2 nights every week in hotels – it is a little bit of a change but I thought I make the best of it.  I am already getting tired of hotel bars.  I have decided to do some painting on these evenings, if I can, and have set up a little “paint-rig!”. Not very high tech and based on three old VHS boxes, and the system is modular as you can add more boxes ;).

rig1
The three VHS Boxes
rig2.jpg
The set-up! – (1) basing box on the left. The dark brown base, the three tone for dry brushing on top of the base layer, pva/water mix for static grass, superglue for tufts, tufts and 2 colours of static grass in bags under the paints! (2) Colours needed for current paint project in the middle box (10 Vallejo bottles can easily be fitted) and (3) the brushes and miniatures (magnetic sheet in the bottom, magnetised washers for bases, primed grey and black washed, ready for painting).  Piece of plastic for the paint, a little bowl of water and some paper, and your favourite podcast or audiobook on the iPad.

Light is a problem in hotel rooms and I have invested in a travel led lamp that will be a very welcome addition to the “rig!” but it is waiting for me in the house at the moment. I will get back to you with my verdict.

Capture

With regards to Podcast there is a new one out from the Wargames Soldiers and Strategy team that I enjoyed whilst painting yesterday, it is about participation games (link here). I wrote a blog a few weeks back that relates to this about engagement at wargames shows (link here).  Give it a go.

wss

Future Plans

I also plan to do 4 No. platoons of normal Strelkovy/Russian Infantry and I won a new box of Battlefront plastic 15mm Russians for £18 including postage from Ebay (they retail at about £26).  I checked them out and I like them and think they will paint up nicely. I also looked at Plastic Soldiers company pack but decided to start with the Battlefront ones – perhaps I get a PSC box in the future.  Since then I found out that the Battlefront ones are bulkier than the PSC ones and may not work together that well (thanks Ignacy Kurowski).

plastsoviet

plastsoviet2

To do 4 No. Platoons I will need:

  • 4 No. Senior Leaders with Pistol (there are 6 No. in the pack)
  • 12 No. Junior Leaders with SMG (there are 12 No. in the pack).
  • 12. No. LMG with 2 crew (there are 12 LMG soldiers in the pack but I would need 12 more Russian riflemen. I have some lying around I think).
  • 84 Riflemen (there are 84 No. in the pack)

In addition it comes with 6 No. MMG. These should keep me busy for a while!, but I will not start it until my Greeks are done (another story) and I have enjoyed a few weeks of leave.

/ Hope that was of some interest!, back in a bit.

img_6250

More options for the Finnish Tanker

In a previous blog post I presented a career ladder for a Finnish What a Tanker player for the late continuation war period (see link here) based on known tanks used by the Finns (I also updated this blogpost on the 2 July 2018 with some more pictures of tanks I have made). We are still missing the T-50.  As indicated the Finns did capture a lot of Russian tanks that were pressed into service.  This is an optional list and shows other tanks (and TDs) that were used on the front that theoretically could have ended up being used by the Finns (but were not).

If the Russians had ’em the Finns could nick ’em (all 15mm)

Level 2

Valentine III – Plastic Soldier Company

valentine

Level 3

Matilda II – Zvezda 1/100

Matilda.jpg

M3 Lee – Zvezda 1/100

m3lee.jpg

SU-76 – do not have any yet but are waiting for plastic soldier company to release their set (this is from a press release earlier in the year).  Or perhaps Zvezda who also has a model in the pipeline.su-76


Level 4

KV-2 – Zvezda 1/100

kv2.jpg

Churchill – Plastic Soldier Company

churchill

SU-85 – Battlefront Miniatures

su85.jpg

/ Hope that was of some interest!


Who needs a Tiger when you have Sisu? – Finnish Late Continuation War Career Ladder for What a Tanker

fin16

I should have pressed on with my GNW Horka Project but seem to have drifted off doing Finnish Continuation War tanks – I started doing some of these a very long time ago and base painted six tanks in 2016 but had done nothing since (see this old blog post).  But as always in this hobby we do come around to things one day, one day…

The reason for this sudden diversion is of course the excellent What a Tanker game from Too Fat Lardies (link here) – it is a fun game and plays quickly.  The Little One and I have set of German and a few Russian Tanks to play with and the two small games we had to date were a blast.  However, like with most things I do, a Nordic angle seems to motivate me more.  The Finnish tanker career is a limited one but there are some interesting Vehicles on offer – some are absolutely hopeless and others as good as they get – but tell me who needs a Tiger when you have Sisu?

I have the spent the last few days painting a large number of tanks relatively quickly (about 30 including some Russians).  I do not have the ability or time to do much more but I think overall the impressionistic approach with washes and mud effects gives a reasonable look. All of the models used are 15mm and from Zvezda apart from the T-28, StuGs, BT-42 and the Landsverk that are from Battlefront.  I have a few tanks I need to add to this post at a later date for completeness – the T28s and the T34/85.

fin17.jpg

What follows is a  Finnish Career list for the later part of the Continuation War and covers the major Karelian Offensive in 1944 (from June to September).  The career ladder can be used against a Soviet Opponent using the Soviet 1944 list from the What a Tanker rule book.  Of course there are mistakes in it because nothing is perfect – if you find any I welcome them.  I am an enthusiast with regards to this theatre not an expert.

I may extend this to include a few scenarios based on some of the actual encounters I have come across whilst reading about the offensive. However, this should be a good start,

Finnish Continuation War – A 1944 Finnish Career Ladder for What a Tanker (Karelian Offensive / Vyborg–Petrozavodsk Offensive, link to Wikipedia here)

At the start of the  Soviet offensive in June of 1944 the Finnish Army only had one Armour Division (Panssaridivisioona) that that was mainly equipped with the more or less obsolete T-26 tanks.  The only tanks able to take on the Soviet onslaught were a handful of captured T-34/76 and KV-1s in addition to 30 No. StuGs (StuG 40 G) that had been bought from Germany in 1943.  During the conflict further StuGs were delivered, and some more tanks captured including the T-34/85 and the ISU-152.  In addition, and just before the armistice, some Pz IV J were delivered.  It was a desperate time for the Finns and the young nation’s independence was yet again severely threatened by the eastern bear.

Notes on the list: If I found any mention that at least one tank of a type was used in combat, or ready to be put in service during this period I have made the tank available in the list. Stats for each vehicle can be found in the WaT rulebook apart from the BT-42 and the Landsverk that are provided below.  Most tanks are of Russian origin apart from the ones marked with an asterixis (*) that are German.

The list does not include Armoured Cars or Small tanks like the T-37 and T-38.  Also the Finns did capture both T-60 and T-70 tanks during the 1944 campaign but they were never put into service. If you want to run a more what-if campaign you could just assume any Sovietic tank were successfully captured and used.  Alternatively in a campaign setting you could have any Sovietic tank not destroyed but lost, i.e. where the crew has bailed out, being available as an option for the Finnish player in the next game on a roll of 5 or more (or whatever seem reasonable).  This would to some degree simulate what actually happened during this particular conflict due to the limited armoured resources of the Finns.  Anyway, here we go…

Level 1 – T-26 (any version, declared obsolete in July 1944), BT-42 (separate stats below, only used in the beginning of the offensive and as for the T-26 declared obsolete in July 1944.  It was not a very good piece of kit but the only “Finnish” vehicle of the period), T-28 (either type – go for the best one, also declared obsolete in July 1944), Landsverk L-62 (not really a tank or a assault gun, but perhaps a successful commander could start his career in one after using the AA gun against a tank successfully, or perhaps more adequate to use the word, miraculously. Again, added for Novelty and I did paint one!).

Level 2 – T-28E (see note with regards to obsolescence above)

Level 3 – T-34/76 M41-42, T-50, Pz IV J* (did not arrive until the end of August 1944 so not really in play during the main fighting of the offensive).

Level 4 – KV-1, KV-1a, StuG 40 G*

Level 5 –T34/85 M43 (7 captured vehicles were captured during the offensive and put into service during the offensive)

Level 6 – ISU-152 (only one of two captured vehicles during the offensive were used in combat).

Name / Armour / Strike / Features / From / Points

BT-42 Assault Gun  / 2 / 4 / None / None / 1943 / 6 points

Landsverk L-62 AA Gun / 2 / 3 / None / 1943 / 5 points


Level 1

T-26

fin9

BT-42

fin4

T-28 – Battlefront Miniatures (updated 02/07/18)

t28


Landsverk AA Gun L-62 – Battlefront Miniatures

fin3

Level 2

T-28E Battlefront Miniatures (it is the same tank as the T-28 but with another turret) (updated 02/07/18)

t28e


Level 3

T34 M41-42 Zvezda 1/100

fin10

T-50

There are currently no 15mm models for the T-50 and only one was used by the Finns during the period.

t-50

Pz IV J Zvezda 1/100

fin8.jpg

Level 4

KV-1 Zvezda 1/100

fin5

KV-1a Battlefront Miniatures (updated 02/07/18)

KV1s.jpg

StuG 40 G Battlefront Miniatures (Also called Sturmi)

fin15

Level 5

T34/85 Zvezda 1/100 (updated 02/07/18)

t34


Level 6

ISU-152 Zvezda 1/100

fin11fin12

fin13

/ Hope that was of some interest!


Got myself a Hex Mat

To play Bag the Hun (as well as a number of other air wargames) a hexagon mat is required, I do not have one so I decided to buy one. Yes, I hear you saying “…there are ways around it, and why don’t you make one yourself!”. However occasionally, and contrary to popular belief, I do go with that famous flow and just get something off the shelf. I looked around but could not really find anything suitable. I could not really see the cliffs of Dover representing the Karelian Isthmus, neither would Kentish countryside do nor the desert or anything else that I found for that matter. I suppose that some of the Eastern Front battles would have been fought over some forested areas that could pass for what I needed, but none of these seem to be readily available.

What I really was after was an image showing two things – forested areas and lakes. I went on Google Earth Professional (that you can download for free) and realised, probably as the last person on the (Google) Earth, that you can get rid of all the overlays and plainly look at the picture and capture images at relatively high resolution.

Finnish

Maximum resolution is 4800 by 3288 which proved more than adequate for my purposes.  I found a piece of southern Finland I liked and saved the picture. I then resized it to a 3 by 5 ratio (as I wanted to get a mat I could throw on the dinner table) and sent it to Tiny Wargames (link here) and asked (i) if the image was good enough to print on one of their 3 by 5 mats, (ii) if he could add a 30mm hexagon pattern on top and (iii)how much it would take me back – the answer was (i) no problem, (ii) of course and (iii) £50 (that inclusive of delivery within the UK). Further he said it would take them 4 days to do it.  Incidentally the cost is the same as it would cost to buy a mat with the same dimension of any of their existing mat designs – I suppose if you can provide a picture with sufficient resolution they will print a mat for you.

I also note that they can do more bespoke mats as well, like taking an old air photo from say D-day and make it into a stylised and coloured mat. However I do not know the cost of doing this as I suppose it would take some time to do – but if you are interested drop them a line.

A small note you need to specify how you want your hexagons printed on the mat – I sent a screen shoot from a Bag the Hun scenario map and told him my hexes should be aligned in the same way as those on the map. Very often the hexagon size is about 1½ inch, but since I went with a small mat (3 by 5) I also condense the hex from 38.1mm (1½ inch) to 30mm. The reason for the smaller mat is that I can quickly put the mat on the dining table and fly, with minimal fuss.

This is the map I sent them.

finnish1

And this is what turned up.

FullSizeRender3

Really happy in the way it came out (note the colour difference is due to the lighting when I took the picture of the mat on the table), I ordered it on a Monday afternoon and it arrived safe and sound on the following Monday.  More than pleased and this is how it looks with some Russian and Finnish aircraft flying on it.

FullSizeRenderFullSizeRender2FullSizeRender4

On reflection I should perhaps had taken a lower altitude picture, but I do like it and gives the feel of forests and lakes I was after.

Also in the settings you can include clouds, this could create some interesting pictures as well depending on what you are after.

Note on flight stands

With regards to flight stands the best way to manage it is if you do not attach each plane on a stand permanently but instead magnetise the plane and the base.  There are several reasons for doing this, I think these are the key ones:

  • Base set of stands – you are very unlikely to use all you planes at the same time on the table, so consider what the maximum size your aerial engagements are likely to be. This will determine the number of flight stands you make. For example if you are playing the Check your Six rules more than a handful (that is about five) per player is about right, for Bag the Hun (in my case) where you fly sections a few more would be required – I went for a total of 40 stands (overkill, but what the hell).
  • Changing your mind – If you change the size or type of the base you are using for whatever reason this is easily accommodated as you just need to make some new bases – if you want to revert back you just use the old ones.
  • Storing your flyers – Storing small 1/600 on individual flight stands will take unnecessary space and when my current project is complete I will probably have in excess of 200 aircraft. Without the bases they take hardly any space. If I want to fly some planes for another project, I just use these flight stands again.

I made my flight stands using some transparent acrylic bases (30mm, 2mm thick) that I drilled a hole in and some and acrylic rod (2mm), I also used Neodymium magnets (2mm by 0.5mm).  Remember the polarity when you glue the magnets to allow you to use the same flightstands for all your planes.

Big shoutout and thanks to Tiny Wargames (link here again)

/Hope that was of some interest!