Reflections – Lesnaya Part 2

I always use the Summer to take some reflective thoughts on what to do next and as discussed in the last post I did have a fair go at some GNW (Great Northern War) miniatures for yet another legendary battle – although it seems more like a prologue to that devastating battle in Ukraine a year later.  So far I, Nick Dorrell and his chums from the Wyre Forest Wargames club, have put on the following Great Northern War Battles at the Joy of Six (from 2012 to 2015):

  • Fraustadt 1706 (2012)
  • Klissow 1702 (2013)
  • Kalisz 1706 (2014)
  • Gadebusch 1712 (2015)

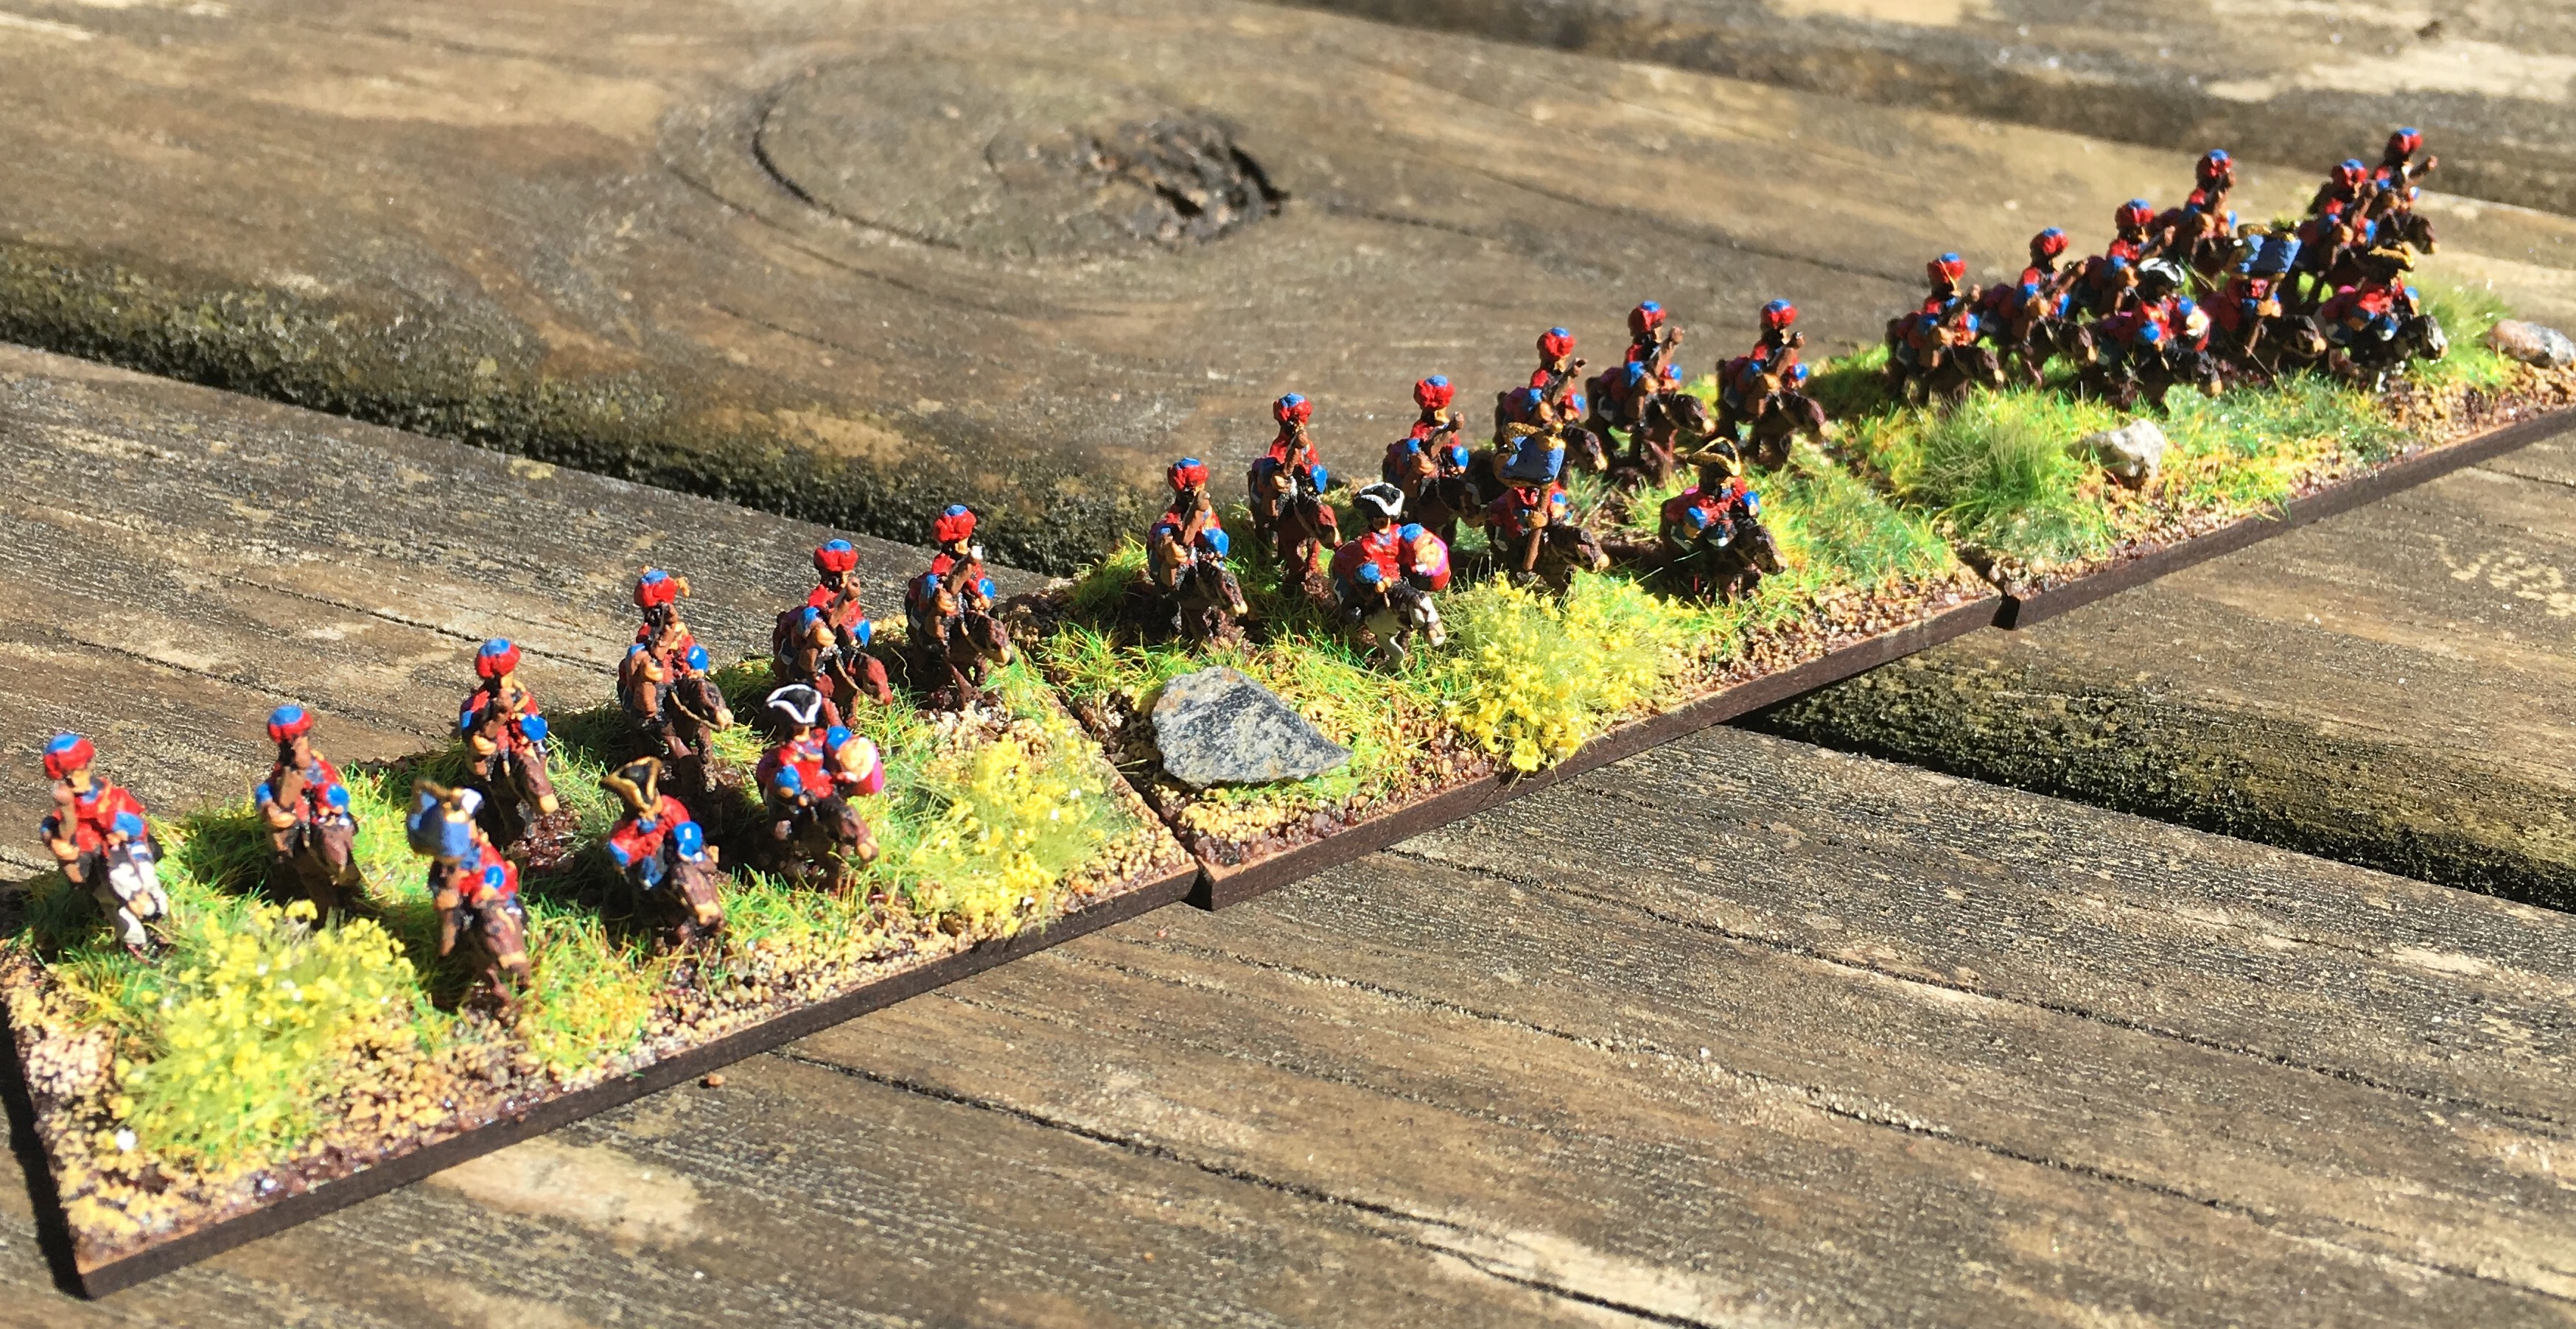
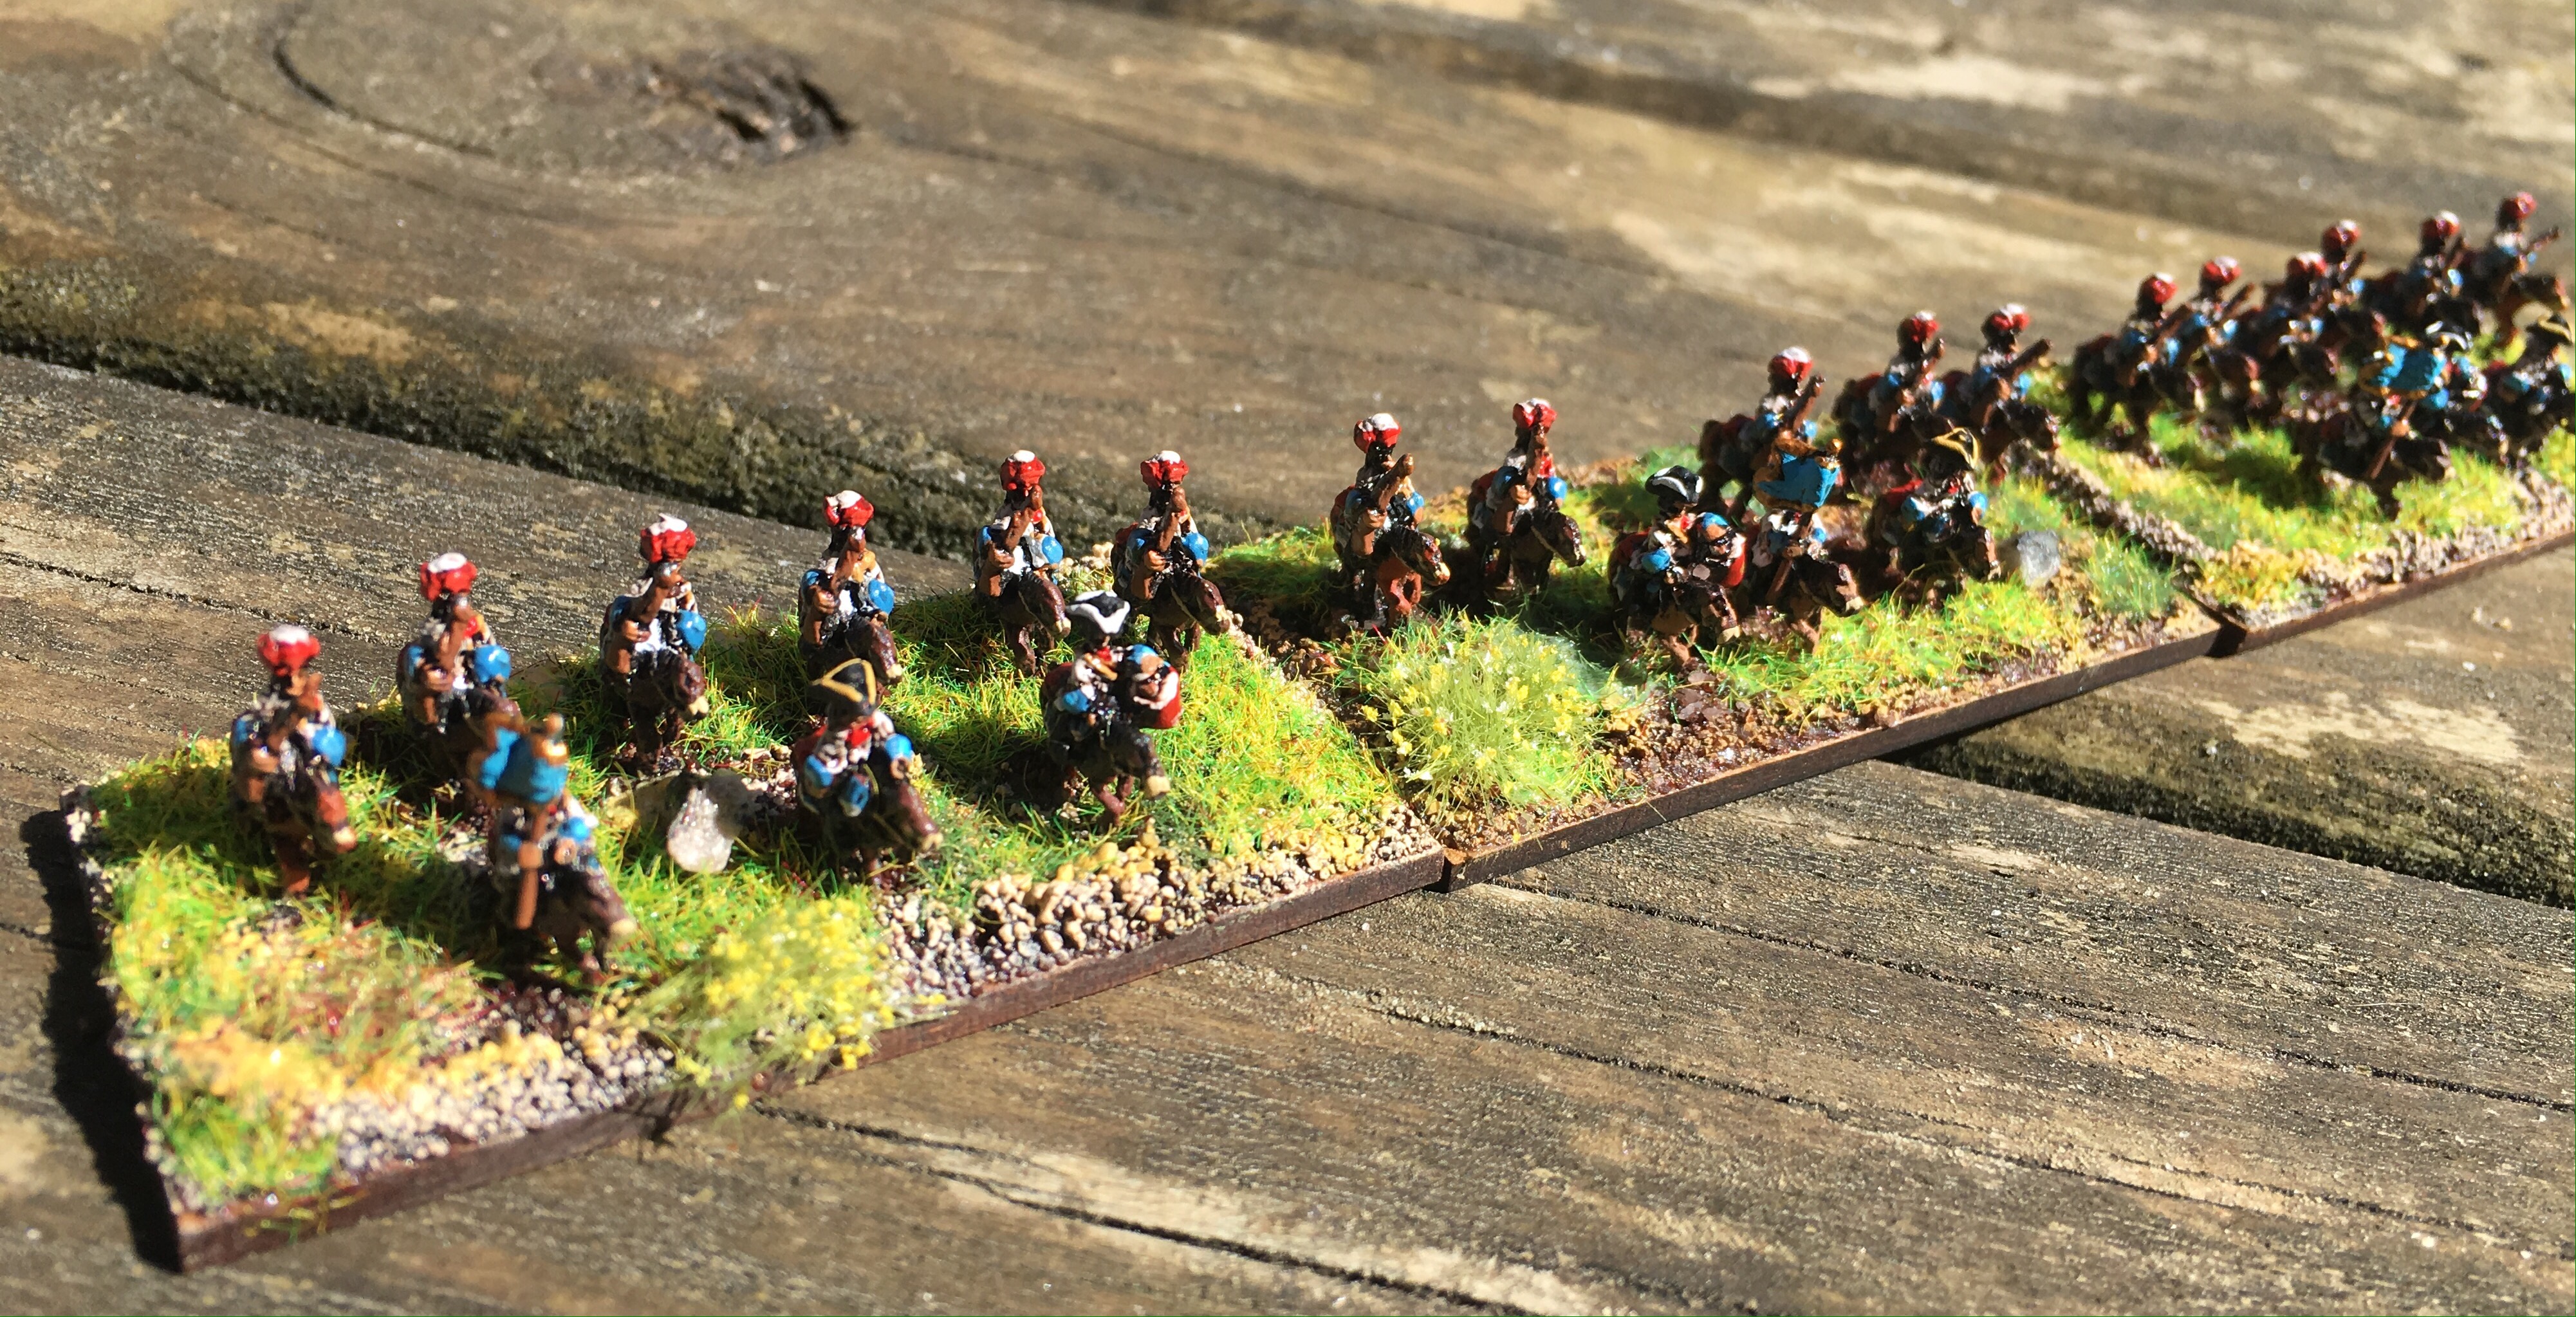
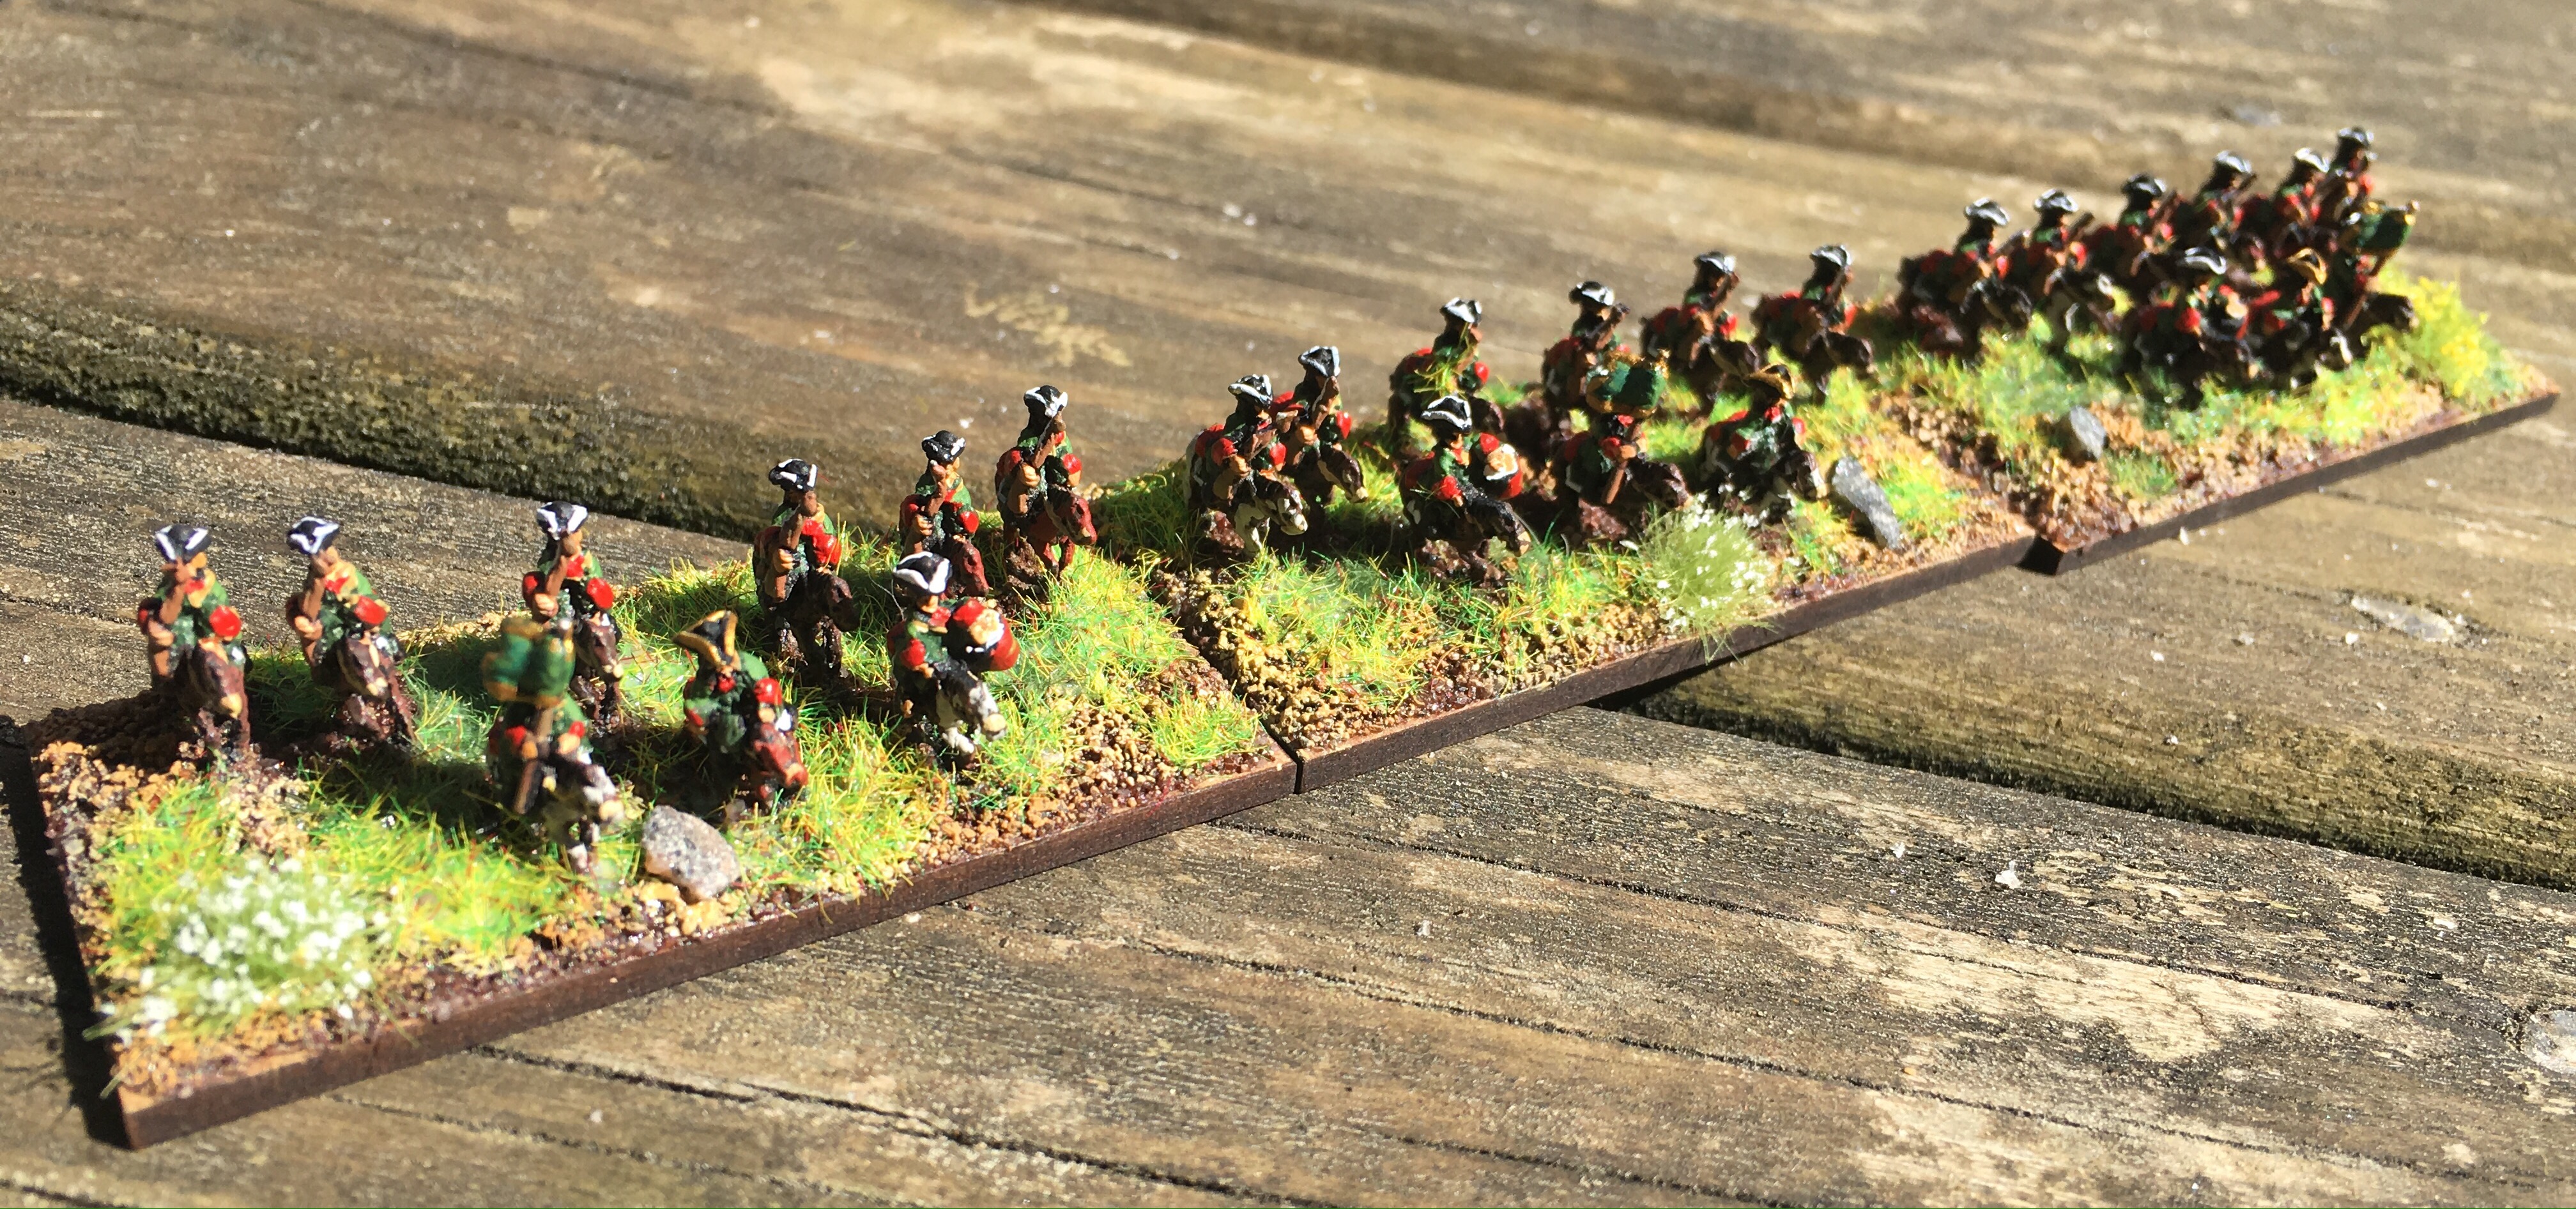
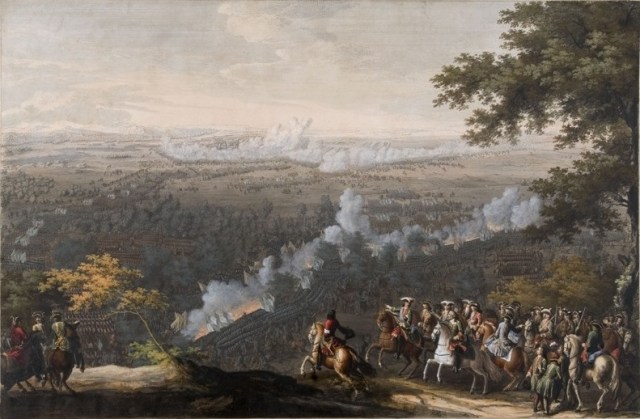
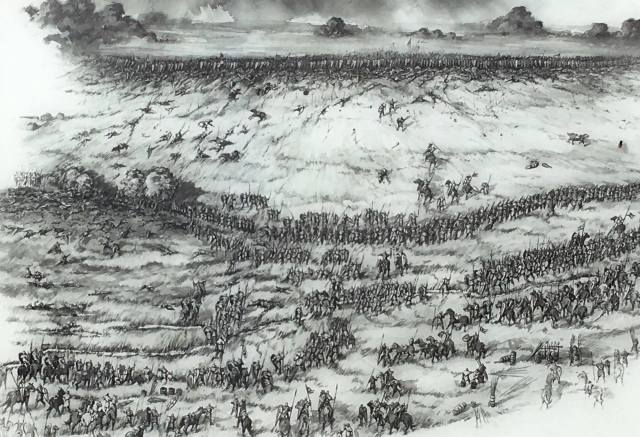
Following this years sabbatical I have decided on doing the “Towards Moscow Trilogy” and do the three key battles for future Joy of Six shows, namely:

  • Lesnaya 1708 (2017)
  • Holowczyn 1708 (2018)
  • Poltava 1709 (2019)

Perfectly doable projects and some reusability of miniatures from battle to battle with a natural build-up (..to disaster, at least if you are Swedish).  Apart from the finale it should be possible to fit these on 4 by 8 tables.  They are all very different types of battles so this offers some variety.  Now I just have to convince Nick Dorrell et al that this is a jolly good idea.  If I still have the will to live after this I think Narva 1700 and the two key battles of the Finnish Campaign 1713-14 would be fun to do too. But that is rushing ahead a little bit too much.

Overall I am working on a few different strands at the moment:

  • Towards Moscow Trilogy (TMT) (as discussed above) with the next target being Lesnaya 1708 for the Joy of Six (2017)
  • Halo Ground Battles – I and the little one are waiting for the box to arrive. We pre-ordered at Salute in April earlier this year and the little one took part of the first demo game of the day. He really enjoyed it. This is my dad and lad project. We are painting some Halo fleet battles in the interim.
  • French Indian War Skirmish in 6mm – I have some fond memories from this period and my dad read me the Last of the Mohicans about 3 times when I was little and when I was older we watched the movie with Daniel Day-Lewis together on more than one occasion.  Dad left us far too early – this project is for him.  I have ordered a fair few SYW/AWI from Baccus, including the new Compagnies France de la Marine and Canadian Militia.  I also ordered highlanders, Indians, jaegers, continental light infantry, queens ranges and british line. This should be plenty to build a decent French and British force. I intend to use these with the Musket and Tomahawk, Sharp Practice and Songs of Drums and Tomahawk rules sets.
  • Finnish Winter, Continuation and Lapland Wars 1939 to 1945 – I have started a project doing the Winter War in 15mm using the Chain of Command rules.  I am using miniatures from Battlefront, Resistant Rooster and Peter Pig with the idea of being able to field, for both sides, a platoon for the Winter War (1939-40) as well as the later stage of the continuation war (1941-44) that allows (with limitation) an interesting range of supports to the finns including the Landsverk L-62, F-42, Vickers 6 tonne, SU-152, T-26, T-28, BT-5 & 7, KV-1, Panzer IV Ausf J and Stug III. Some more likely than others to appear on the Battlefield. Later in the war they also get Panzerfaust and Panzerschrecks too.  This again is a historical period that is personal to myself as my mother was born in Finland.  Finland basically fought for its existence during the those cold Winter months of the Winter War against the Russians and the sacrifices on both sides deserves our respect and remembrance.
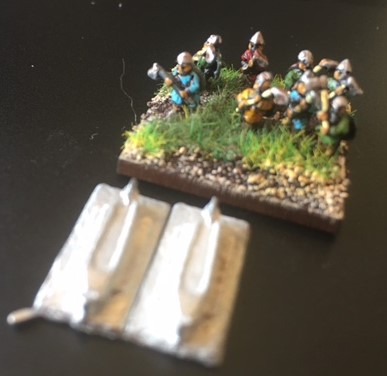
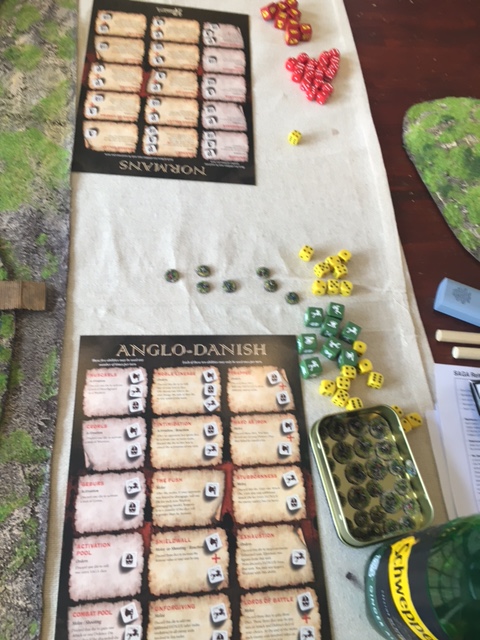
  • Other Stuff – I will do some more Saga factions as some point and also do something with the 1/3600 galleys I bought for Poseidon’s Warriors (however it currently feels like they will take a back-seat for a while). I also have 1940s Germans, French and British Chain of Command Forces I am slowly working on.  I also have some kickstarters that are screaming for some paint including Zombiecide:Black Plauge, Bloodrage and soon, I hope, the stuff from the Conan Boardgame. There are probably more things on the (slow) go.

I will try to provide some variety in updates based on these projects but as they move in very different speeds it would be pointless to do have a rolling schedule.  Things will be updated as and when they are done.

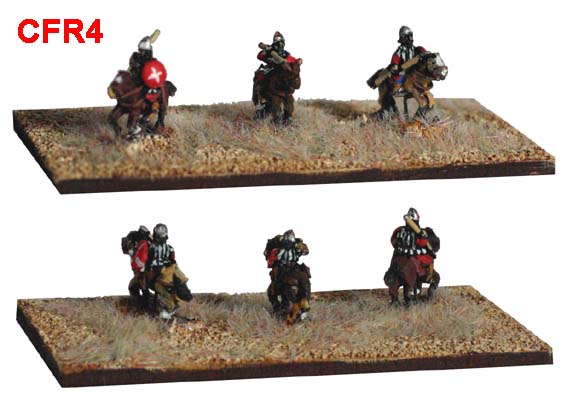
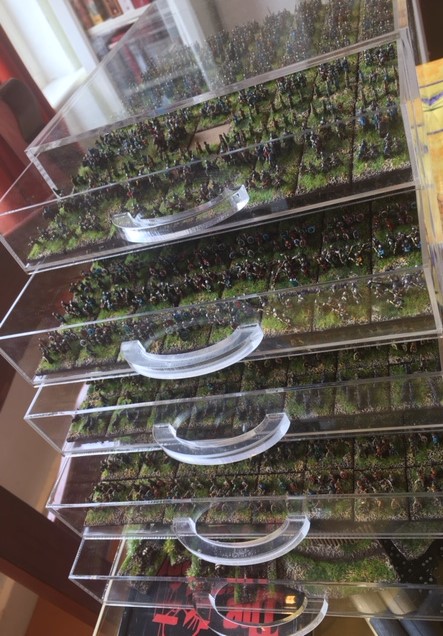
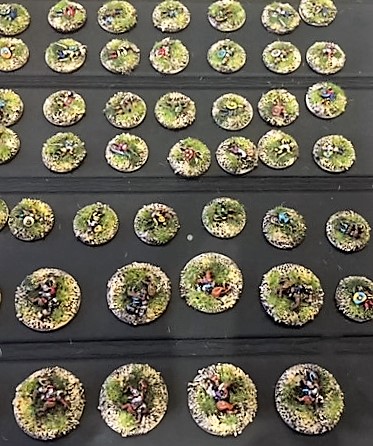
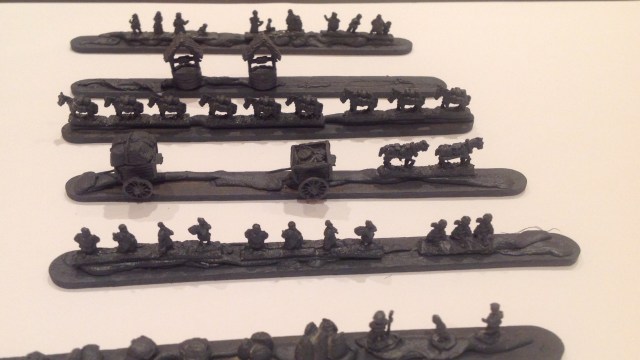
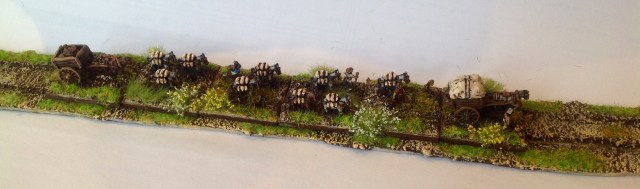
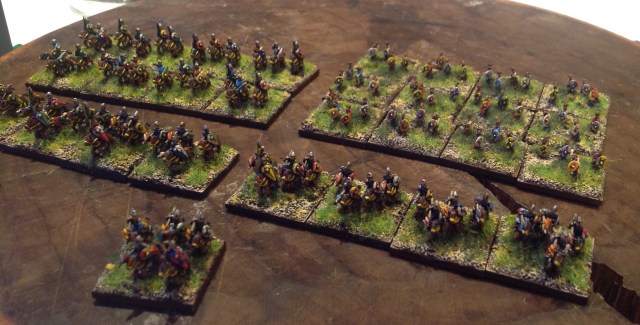
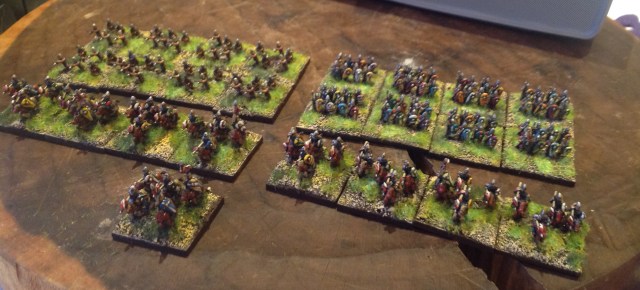
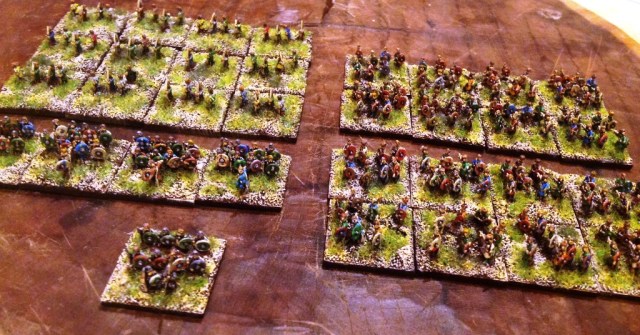
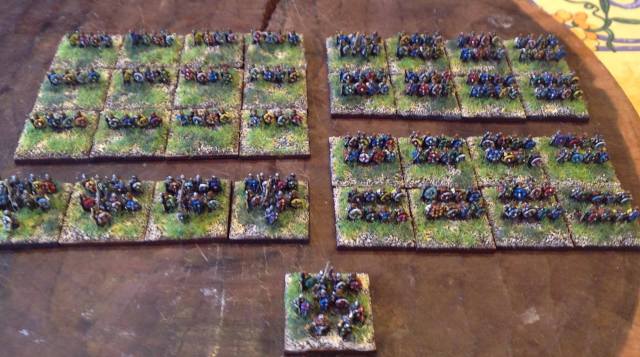
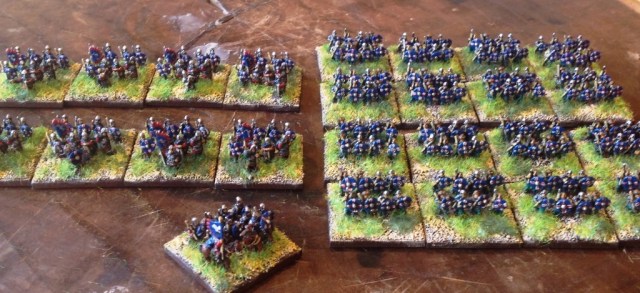
Nevermind, some further Lesnaya progress. Three dragoon regiments. / Take care.

Tverski Dragoon regiment
Smolenski Dragoon regiment
Troitski Dragoon regiment

Saga in 6mm – Part 12 – Faction Ideas

I wanted to do a short note on some of the additional Saga factions I intend to do next. I have been diverted doing some other stuff and the good weather has been non-inspiring with regards to painting.

IMG_2131
Senator shuttle, debris fields, satellites for X-wing from Combatzone Scenery and some laser turrets I bought off ebay ages ago.  Immersion and diversion level increasing.

The following are my notes on the three factions in the SAGA supplement called Varjazi & Basileus (all reference are to Baccus figure codes):

Pagan Rus

Starting army: Warlord (EMV01 -Armoured Spearmen), 2 No. Hearthguard (EMV01 -Armoured Spearmen), Warrior (EMV01 – Armoured Spearmen) and Levy with Javelins (ALR04 – Lanciarii)

For these I would just use the Baccus Viking codes (Spearmen) for hearthguard and some later roman lanciarii for Levy Javelins (although by now I have painted more of the buggers than I would have liked to).

Byzantium

Starting Army: Mounted Warlord (CIS01 – Seljuq Turk Heavy Cavalry), Mounted Hearthguard (CIS01 – Seljuq Turk Heavy Cavalry), Mounted Hearthguard with Bow (ASS02- Armoured Horse Archers), Warriors (EMV01 – Armoured Spearmen), Warriors with Bow (ALR05 – Archer).

seljuk turks
Seljuq Turk Cavalry from Baccus Crusade Range


This gets slightly more interesting and I thing the codes above gives a nice mixture of different troop types.

Princes Era Rus

Starting Army: Mounted Warlord (CFR04 – Turcopoles), 2 No. Mounted Hearthguard (CFR04 – Turcopoles), Warrior (EMV02 – Unarmoured Spearmen) and Warrior with Bow (ALR05 – Archer).

1560-cfr4
Turcopoles from Baccus Crusader Range

/ All the best


Saga in 6mm – Part 11 – The Joy of 6 2016

I have had a few busy days since returning from the Joy of 6 show and I suppose I need to write a summary of what happened on the day. In short it was an excellent day.  We actually arrived the evening before and had the pleasure of doing the traditional stop in Broom Hill for an ale at the York and then a Curry at the Balti King with Peter Berry et al. It is a nice little preamble to the show and this year the discussions ranged from milk protein paint (looks interesting indeed) to kickstarters we had backed (seems like I am not the only one who has some big boxes of stuff at home).

The Sunday weather on offer was magnificent and I do not miss the old venue as it tended to get very hot inside. The new venue is superb and it is nice to see how the show grows every year and the selection of periods, game systems and style of presentation is very varied and makes the event well worth going to.  It is also nice to meet up with some old friends, although the time for a chat is limited when you are running a participation game.  Here are a few links showing off some of the stuff presented on the day (one, two, three, four).

IMG_2089
Our two tables on the day.  Note the Lewis chess set Queen overseeing the proceedings on the table. According to the British museum they are from the period 1150-1200 which is a little bit later than the 10th to 11th century of the Saga game – no one seemed to mind though.


I and Neil Shuck arrived at about 9am with the doors opening at 10am. Usually I have hundreds of Great Northern War units to put up which invariably I mess up giving me an headache in setting up – does the Kalmar regiment stand on the left or right flank?, is the Dorrellian Dragoons dismounted or on their horses? Instead I just rolled out the mats and placed the terrain and we were good to go.  Neil umpired the Kings table where we had Normans vs. Strathclyde Welsh and I umpired the Queens table where we had Vikings vs. Anglo-Danes. You can read about Neil’s day on his blog here.

IMG_2074
One of the first battles involved a lot of maneuvering in the forest areas.  Note the canopies having been taken off leaving the darker tiles to represent the forest area. In later games I took away some of the forest areas to allow a more full on clash.


Neil, not just a smooth voice on the radio but a pro umpire, just got straight into it and had a father and son playing within minutes so I just had to get going. We ran 7 or 8 games over the day and we did not dramatically change (at least knowingly) any of the original rules – they (the rules) works very well as a 6mm game. And it gives a different feel to the warband than in 28mm of being bigger – but not big enough to be an army.  The Saga rule set allow the person with the most impressive facial hair to go first in case of a tie in rolling for initiative – and on more than one occasion it was hard to tell the best beard of the day!  What is great with Saga is that it takes a while to master each faction and I learn something new every time I play (or in this case watch others playing it).

IMG_2099
Less forest and a more straightforward battle!


I think everyone who tried out the game enjoyed it and although I do hope it promoted the Saga rulesets per se I am more keen that it provoked some thought about using alternative scales for other games.  This is not universal but applies to a lot of games –  Mike Whittaker has posted some interesting things about ground scale and other considerations you may need to take (see his blog.). I have seen Flames of war in 6mm and it looks beautiful especially when there are many tanks on the table compared to 15mm, Chain of Command is based on a 15mm ground scale but perfectly playable in 6mm using centimeters instead of inches (but some consideration should be given to the basing of team instead of individuals).

Thanks to everyone who came by and asked about the terrain and how I had done this and that – it really makes my day! In addition a very big thank you to my daughter who helped out on the day and of course to Peter Berry and Wargames Emporium for putting on another fantastic show.  I am also more than grateful for the support I have had from the Meeples and Miniatures crew in getting this done (Dave I hope your foot gets better soon and Mike we need to have a beer at some point) – so thank you Neil.

IMG_2093
Neil’s first skirmish of the day


I am not 100% sure what to do for next year but I have some thoughts….

Battle_of_Lesnaya_1708_by_Larmessin
Maybe a proper GNW action like the Battle of Lesnaya 1708?


IMG_2067
…or a Pegasus Bridge Chain of Command Scenario in 6mm?


I will discuss a few more Saga issues in the next posts, including some thoughts on other factions and what Baccus models to use.  Then we may move on to something completely different – but more about that later.

All the very best


Saga in 6mm – Part 10 – Pre-Show

Work commitments has led to limited time to spend on anything remotely funny recently.  I see that Neil and Dave have been busy doing Saga  games on the Meeples and Miniature site so I suppose they are more prepared than I.  It looks as the game works in 28mm scale as well – who would have thought! 😉  Having checked out some of the other games being presented at the Joy of Six I think it will be a good day out and it seems like 6mm sceptics can get in for free – my favourite so far is Dan Hogdsons Star Wars Games. I first saw Dan’s 6mm Sudan stuff at the first Joy of Six a few years back and was blown away.  His work actually  inspired me to put on my first big 6mm table – the battle of Fraustadt 1706 (that is the date of the battle by the way, I am not that old yet!). Do spend some time on the Baccus site because the other games seem equally good.  If you are coming to the Show please come by and say hello and perhaps join in on a game.

IMG_0995.JPG
The Battle of Fraustadt 1706 – my first outing at Joy of Six. It is the first of four Great Northern War (GNW) games I have put on at JOS. I will do a write up at some future point. Missing Nick D and Wyre forest gang but hopefully we will return in splendor at some other show with some 6mm GNW stuff.

I spent today checking that I have everything I need before the journey to Sheffield next week. Both mats are packed, the terrain sorted, all miniatures sorted out, Saga dice counted, measuring sticks made, etc.

IMG_2030
All the miniatures being stored in a transparent acrylic display case and ready to rumble. It was sold as a make up display case but works for 6mm dark ages stuff as well.

It is all looking good. Let us hope we have fair wind on our journey to the north! Some photos from the show coming up next week or shortly after and then I have to think about what is next! I was planning on spending the Summer on catching up on some of my half finished projects of old until I had a Shuck moment – yes one of those.  Neil discussed a new naval ruleset he is reviewing and I read the article in the morning, ordered the rule set from Amazon and got it delivered at home the same evening.  I then recalled that Outpost Wargames Services had a 1/3600 naval range so I decided to order a few of them and got them yesterday – they are small! –  My summer is “saved”. I am already thinking about doing a mat similar to that I used for the Saga mats, using a thin layer of acrylic sealant mixed with green blueish colour and some fine sand – fix it up with some sponging (more about that some other time) and then let it dry and finally spread a layer of transparent acrylic sealant on top to create some depth – it has to be done!


IMG_2033
Some Quinquiremes in 1/3600 scale without sails next to some Axe wielding 6mm Norse Gaels. Thanks Neil!


/ Take Care

Saga in 6mm – Part 9 – Some action shots

Lazy update this time, a few actions shots from games I played with the little One (2 slide shows below). I hope they speak a little bit for themselves.

IMG_1938

Today the mighty Icelandic Vikings were beaten by the mighty Franks. As expected I suppose, but the Welsh are still in it after their phenomenal Saga dice rolls the other night!  Well deserved…

wales_647_061315044830

We played two games recently with the little one:

The first one was between Normans and Anglo-Danish. I managed to win this one.

This slideshow requires JavaScript.

The second one was between the Welsh and Vikings. I did not managed to use their abilities very well – so I lost.

This slideshow requires JavaScript.

Not sure if you noted the fatigue markers. here they are.

IMG_1892
Fatigue Markers from Baccus


All the very best

Saga in 6mm – Part 8 – Real Estate

There are a fair number of companies selling 6mm buildings and terrain out there. Previously I have used buildings from Baccus, Total Battle, Irregular Miniatures, Magister Militium and Timecast for my 18th century GNW stuff.  For this project (with the exception of the palisade walls of the second village that are from Irregular miniatures) I used the excellent buildings from Leven Miniatures. Leven has a very extensive range of buildings and fortifications in 6mm for all kind of periods.  They will also attend Joy of Six in July together with Baccus, Total Battle and Timecast.

Big Village/Settlement

IMG_1885
Some Anglo-Saxon manning the walls of the Settlement.

For the first village/settlement I wanted to create the feeling of a slightly larger settlement continuing off-board. I did a base to place the buildings on top to allow the ability to make it look more like paths between the buildings instead of putting them directly on the bare mat (with the perusual cocktail of some brown sand, chocolate brown paint, acrylic sealant topped up, when dry, with some dry brushing).  The buildings are from Leven and are the Saxon great hall, round houses and cottages. The walls and the gatehouse is from the upcoming Palisade Fortifications set (accidentally it works very well to place my 25mm bases on top of the walls). I could have built the walls myself but really liked the Leven model and could not resist it for very long.   Note the well that is from Perfect Six  (you may recall from a previous posting that I got the Irish war dogs from there too).  The same type of well was used in the second village (as they come in a pack of two).

IMG_1927
The Leven Saxon collection
gggg
The full Palisade set from Leven.

Small Village/Settlement

IMG_2872
The small village/settlement with the Viking houses.

For the second village I used buildings from Leven’s Viking settlement range with the palisade being formed by a combination of the walls and gates from a wild west fort from Irregular Miniatures but with the corners replaced by 3 no. Leven Viking watch towers and one of their fantasy watchtowers. Again on top of a base dry brushed and with grass to make the buildings blend in.

villb9
Village base with no palisade.

Longboats

cc
The Vikings have arrived!

I got the longboats from Heroics and Ros. They come with the option of having the shields hanging on the outside and there are rowers and crew as well. However, I wanted to show them as being left whilst the warband is rolling Saga dice on land. They look a little bit plain, but I am not sure what the final configuration will be  – so I will leave them like this for the moment and probably for the show too.

IMG_2772
The plain boats!

Next time I will show some “in-action” pictures from some of the games we have played.  Looks like Neil and Dave are getting ready for the event as well, over at the Meeples and Miniatures “island“!

/ Take Care

Saga in 6mm – Part 7 -Terrain

Terrain Modelling – approach

As discussed in the last entry I use a base colour (chocolate brown) and dry brush 3 colours on top and then apply two different types of grass for my miniature bases. I use exactly the same approach on my terrain pieces (more or less).   For me the aesthetic side is important as it helps the immersion in the game.  I do not mind playing with pieces of felt but it is relatively easy and cheap to achieve something slightly more pleasing to the eye and where the pieces interplay to create a (in my opinion) more pleasant experience.  For me the game itself includes the terrain and the miniatures – but I know that is not an universal opinion.  [I will not drift away talking about preferring to sit in my comfortable sofa, as opposed to a camping chair, whilst watching a good movie.] By using a consistent approach you can use the terrain pieces you make for most of your game and scales. This is not a step-by-step guide but more a high level discussion/presentation with some links to sources.  If you have any questions just ask here or come to Joy of Six on the 17th July 2016.

In action 2
Our first test games of Saga in 6mm were held in Normandy, France.  My Vikings were beaten twice by my Norman opponent. I am sure that his French version battle board had some in-built favouritism (C’est une blague). An improvised table with whatever we had available on top of an old but still serviceable mat from Terrain Mat including some Memoir ’44 river and forest tiles! – the game was brilliant but I felt that the terrain needed to take a step up!
1st table
One of the two set-ups to be used at Joy of 6! A step in the right direction….

Battle Mat(s)

As we will use two tables for the Saga demonstration game at Joy of 6 I needed two 3 by 4 playing surfaces. I normally use terrain boards but wanted to allow more flexibility in setting up and the mats (as opposed to boards) are taking less space.  I got inspired by this posting on the Meeples and Miniatures blog on making your own wargames mat using acrylic sealant and canvas. I followed the approach as described but (i) applied the static grass after it was all dry (this allowed me to drybrush the mat before grass was put on top – using my three colours) and (ii) made the acrylic mix dark (chocolate brown) using Brown acrylic sealant and dark chocolate brown emulsion, (iii) used plastic backed drop sheets instead of canvas, and (iv) spread the mix with an old plastic VHS tape cover.  I am happy with the results.  It is easier than it looks and make sure to secure the sheet when you do it with clamps as it does shrink a little.

IMG_1907
One of the two battlemats, rolls out perfectly after having been rolled up for 3 weeks (on a 10cm diameter roll) after production.

Note: Buy the acrylic sealant (sometimes called adhesive) from places like Screwfix at about £2 or less per 310ml to use in an applicator gun (silicone based sealants do not take paint well so avoid these). Use cheap paint. Allow a weekend for this project, do not apply to thick and make sure there is sufficient amount of sand to create some graininess without making it to dry when you mix it. Also vacuum clean the mat when dry to get rid of excess static grass. 

Roads, Rivers, Marshland and Shoreline

To create roads, rivers, marshland and shoreline I use “Nylon Adhesive tile planks”. They are normally 3′ (90 cm) long and allows you to create continuous looking pieces for terrain. I bought mine from Wickes. I use acrylic sealant mixed with brown paint and sand that I spread all over the road (and then use a plastic fork to create a wagon trail), create banks for the river and to do the land for the shoreline piece (work on the sticky side).

I paint the edges of the road in the normal three dry brush way, as well as the banks and the shoreline land. I painted the river and the ocean in shades of blue with some white detailing and applied Gloss Mod Podge carefully on top to create some structure as well as a gloss shine to the water.  I applied the same process for the marshland, but use a darker green-blue shade for the water.

Note: Be careful with these long pieces as they snap easily if you bend them too much. If you have no space to store them make smaller lengths instead.

Hills

I use Styrofoam that I cut out and shape to taste, brown acrylic mixed with sand on top and then the normal procedure. There must be thousands of tutorials on making hills out there – pick your favourite.

Forest Sections

Mailed Fists wargames group put on a great looking participation game at JOS 2015 called “The Hungry Legions” that had some nice forest tiles that allowed the creation of pieces of forests as opposed to trees (the bases could “hide” under the trees). After some searching on the net I found something very similar here.  As always I did make some changes:

(I) Instead of the Woodland scenic foliage I decide to do my own as I recalled a youtube video on making your own foam foliage that you can find here.   Great stuff and cheap. I bought a budget range mixer for £10 and got a £5 bag worth of upholstery off cuts, some cheap green emulsion and mixed with some brown colour to create different colours for each little batch I made. Most blenders are designed to run for about 2 minutes continuously – any longer and they may overheat and possible stop working. Be careful and take small breaks. It needs to dry for some time so this is a slow project is terms of waiting time. It will take days for it to dry so plan for it accordingly.

(ii) I opted for removable tree trunks instead of building them into the base or the canopy.  This makes it less bulky to store as well as the ability to make stumps for different scales. I did mine 30mm that will work even with the mounted based for this project. If I would use these for another scale I just need to check my tallest model that will be used and adjust the tree trunks accordingly. The tree trunks are twigs mounted on 20mm penny washers using putty pellets from poundland – I made 39 treestumps with a pack!.  I also made the forest tile slightly darker than the the mat itself – i.e. more dark static grass.


Bridge(s)

I wanted bridges that could allow the 25mm square bases to sit comfortably on the top and to work with my river tiles.  I could not find anything so I made some from a lolly pop stick, matches and spaghetti – “Cheap as spaghetti as they may say in Italy!”.  They look alright and make a great story. The final result can be see in the picture of the river above.

Fields

I have some rectangular fields that I bought a few years back that are ok but put together on a table they look too similar and unnatural for my taste.  I wanted to create some funkier looking fields and did some odd shaped nylon tiles with fields all over the place. To avoid the problem of floating bases on top of high coir mat sections (that can look a little bit overwhelming in 6mm scale) or needing to remove sections I just used different colours of short static grass. I applied a layer of browned acrylic sealant and shaped ploughed fields with a plastic fork, then let it dry and put some pva on top of the furrows (leaving a few gaps here and there) and use a different colour every day for a few days (to allow the pva glue to dry between grass applications) and you end up with some funky looking field tiles (me thinks!). Then I add some borders (brown acrylic) and brushed them up with the three colours and decorated with some static grass and tufts. Does it for me.

aaaa

None of these projects are difficult if you plan carefully and take your time.  Next time I will discuss the “terrain items” I did not do from scratch and where I got them from – the villages and viking ships.  Bye.

Saga in 6mm – Part 6 – Painting

Painting 6mm overview

I have been painting 6mm miniatures for some time and I have to admit I found it difficult at first due to (i) not having painted any miniatures for a long time and (ii) I wanted to paint more detail than I needed.   I stumbled across 6mm miniatures searching for a book on the Great Northern War that Peter Berry, of Baccus, was selling at the time.  I ended up buying a lot of GNW miniatures and my first attempts at painting them were dreadful.  I still have one of those bases somewhere.  With some experimentation (and a lot of inspiration from Dr Mike and his 6mm painting clinics and postings on the old Baccus forum) I did not give up as I felt that the scale is second to none for large mass battles and this is what I wanted to do for the GNW era.

Generally my objective is to do a big battle or a project every year and normally need to produce a large amount of miniatures to achieve this.  I have been able to achieve this for the last five years due to signing up to the JOS event – it puts the right level of pressure and my half-finished projects of old justifies this approach. Here is my step-by-step approach to painting them:

Preparing to Paint

After having painted almost 2000 shields for my current Saga project I have to admit that there are days when the destination does not seem to outweigh the journey.  On these days I find that listening to music and perhaps even better a podcast helps me along.  I have especially enjoyed the following relevant podcasts in no particular order – Meeples and Miniatures (and View from the Veranda), Dan Carlin’s Hardcore History, Ancient Warfare Magazine, Nova Squadron Radio and In the Garage.   But there is so much more good stuff out there.

  1. Check if the miniatures are ok. Normally I paint Baccus figures that does not require any further work (i.e. filing) apart from perhaps a little bit filing on some of the older casts under the base to ensure the model stands straight when you base it later. I then mount them on ice lolly sticks with Blu Tack. I do not glue as I can reuse the Blu Tack and this gives me the ability to do stage 2 immediately. I should say something about soapy water. I tend not to wash my 6mm miniatures and do minimal prep of them – I do not feel the need. But other people say you need to – so perhaps you should listen to them.
  2. Spray your miniatures with a grey base coat – I buy grey spray cans (Primer) from poundland (for this purpose they are brilliant!). Let it dry, ideally for 24 hours.  Do it outside! You could do white or black. I used to do black but prefer grey with black ink to better see details and with my sloppy approach white does not work.
  3. Apply a black wash (diluted ink – enough to highlight the details in the figure). This helps with the painting as it allows the detail to be seen more easily.  It also creates a shading in the deeper areas. Let it dry, again ideally for 24 hours. I use a mixture of equal parts of water and pledge multisurface wax (with klear) that I drip some black artist ink into, but you may opt for a dark pre-mix wash from one of the paint producers.
grey
Primed miniatures for the weekend Sir! – Some farmers from Baccus and Perfect Six, mules and carts from Baccus and wells and bags from Perfect Six.

Note:  When doing a project try to get this done for as many miniatures as possible as you need to wait for (literary) paint to dry. Make sure you are always a few painting sessions ahead with the prep.

Painting and Shading

  1. Block paint the miniature with a decent brush – I used to buy good quality brushes but messed up a few too many so now I buy some detailed nylon brushes from the Works – I get 24 brushes for £10 and occasionally they have even better deals.  They are not brilliant and wear out, but I can paint a fair few miniatures before they give up. If you can manage your brushes better than me then go for quality. I use acrylic Vallejo paints as I like them – you will not use a lot of paint in a session. Keep the lid tight and shake them well before use – I have some that are over 10 years old!. Try to get the paint to hit the right parts of the miniature.  Do not over apply the paint – less is more. Let some of the grey and black show, but not too much. I do not have time to spend much quality time with each figure so that is it. Sometimes I do some more elaborate painting on some key units.  However the next stage will do the trick.

Note: I tend to paint large batches at the same time. For the Saga Project I have painted one full faction at the same time. I very often started with the shields did a few in a colour then another and so on, next ringmail and clothes, then face etc. Construction line approach!

  1. Make sure the miniatures are dry and then go for Nutbrown ink! (can be bought from almost any art shop, Winsor & Newton drawing ink) dip in your brush and let it flow…. This is magic! Be generous. Move your brush over some tissue paper and dip it at areas where too much of the ink have stayed, e.g. around the shield boss. Try it out on a few miniatures first and learn how to get it to work for you. Let it dry.
  2. Paint the bottom of the strip in chocolate brown. . Do not use Vallejo paint for this as it far too expensive and unnecessary for this purpose – buy a cheap acrylic hobby paint or even a tester paint pot. Let it dry.
mules
Step-wise process with some pack mules – was Mad Jack’s mule not called No. 7 in that Grizzly Adams show from the seventies?


Basing your miniatures

  1. Cut the strip of miniatures if required, normally cavalry and skirmishers.
  2. Put a mixture of 25% paint (same brown as before), 25% water and 50% PVA glue (bought in bulk from Screwfix or cheap from Poundland) on the base.
  3. Put the miniatures on the base
  4. Sprinkle sand on top – I use chocolate brown sand that used to be available from hobbycraft – not any more. And let them dry safely. Be careful when you handle the base so the minatures do not fall of.
  5. Paint the sand chocolate brown watered down a bit so it flows nicely (unless you used coloured sand). At this stage I also apply more glue and sand if I can see the base of the miniature too clearly. I hate seeing the small squarish bases through the sand.
  6. Drybrush the ground – I use three colours – first one goes on the whole base the second and third goes on “randomly” on the base – covering less and drybrushing lighter.  I have used this combo for the last few years on all my (non-winter) bases.  I also use the same scheme for my terrain. Make sure it is dry before next step.
  7. Apply random dots of watered down pva glue (50/50) and apply static grass Grass (I use Busch Spring Meadow and Marsh Green, with an emphasis of Spring Meadow with a little bit of Marsh Green). Shake off.
  8. When it is all dry I use the vaccum cleaner whilst holding each model firmly to get rid of any excess grass and glue a strip of adhesive magnetic tape on the bottom. Again I get this from poundland. Job done.

Note: Develop and approach and stick to it with regards to basing. Next week I will discuss terrain and it is nice when the base on a miniature blends into your table – it helps with the immersion aspect – that for a moment or two it looks like an army marching or attacking on your table.

By the way I did use those farmers, carts and mules for something as I needed a few bases for the Saga Escort! scenario! I hope you like them.

escort
Some bases for the Saga Escort! Scenario


Saga in 6mm – Part 5

Note 1: It probably makes more sense if you read Saga in 6mm – Part 1 before your read this.

Note 2: All miniatures are from Baccus miniatures, unless indicated otherwise, and the codes relates to their catalogue.

Breton, Norse-Gael and Franks

I spent last week enjoying some relaxed time with friends and family and forgot to update the blog yesterday (Sorry!). The closest I came to something related with the Saga project was in drinking some Hippocras. We tried “La Licorne (the Unicorn)” that is handmade in Normandy and is composed of rare spices and light wine made in medieval tradition from the 13th and 14th century.  The spices works as a conservative so no chemicals are added to the drink.  It is sweet but yet intense and strong in flavours.  The main spices, of the 15 used, are mace (the lacy layer around the nutmeg), cinnamon, galanga root and maniquette seeds. We spent the evening guessing the other 11. Splendid stuff! Now over to the last 3 factions.

13340617_1119449331458481_2056378961_o
La Licorne Hypocras produced by the company Omnis based in Normandy

Bretons

Codes used:

EMN03 – Norman unarmoured cavalry

EMN01 – Norman armoured cavalry, charging

ALR04 – Lanciarii

For the Hearthguard and Warlord I used EMN01, however in doing it again I would have used the EMN03 code for all mounted units – to represent the more Javelin oriented Breton cavalry.  I did however use the EMN03 code for the mounted warrior unit.  For the levies I (again) used the late roman lanciariis.  Try out the Breton metal band Herzel and their “Nominoë” for some inspiration (Check out the link below).

Bretons
Breton 4pt Warband

Norse-Gael

Codes used:

EMV03 – Armoured Axemen

EMV01 – Armoured Spearmen

EMV02 – Unarmoured Spearmen

ALR04 – Lanciarii

EMV05 – Viking Luminaries and Loonies

EMN06 – Norman Leaders

For these domesticated Vikings I used armoured Viking spearmen (EMV01) for one of the hearthguard units as well as the warlord unit (fronted with miniatures from the Viking and Norman leader packs – leftovers).  For the second hearthguard unit I used the Viking axemen (EMV03), this code was also used for one of the warrior units but I did not paint them with armour.  The final warrior unit used the unarmoured Viking spearmen (EMV01) fronted by the good old lanciarii (ALR04) as these are Javelin armoured warriors. Did I mention Amon Amarth before? Try their “Death in Fire” for inspiration.

Norse-Gaels
Norse-Gael 4pt Warband


Franks (Capetian)

Codes Used:

EMN04 – Norman armoured infantry

EMN01 – Norman Armoured Cavalry, charging

EMN07 – Norman Crossbowmen

I have chosen to depict the Capetian Franks that more or less looks like a Norman  warband.  For the Warlord and the hearthguards I used the Norman charging cavalry (EMN01).  As one warrior unit can be armed with Crossbow I did those with the Norman Crossbowmen (EMN07) and the other warrior unit using the Norman armoured infantry (EMN01). Listen to the multi-talented Christopher Lee’s Charlmagne album as inspiration (his last metal album).

Capetian Franks
Franks (Capetian) 4pt Warband


Unit Faction Pts Type Miniatures per Base
Warlord (Mounted) Breton 0 Warlord 5
4 Mounted Machiterns Breton 1 Hearthguard 4
8 Mounted Soldiers (Warriors) Breton 1 Warrior 3
Skirmishers (Javelins) Breton 1 Levy 4
 Warlord Norse Gael 0 Warlord 10
4 Hearthguards with Dane Axes Norse Gael 1 Hearthguard 9
4 Hearthguards Norse Gael 1 Hearthguard 9
8 Warriors with Dane Axes Norse Gael 1 Warrior 8
8 Warriors. Norse Gael 1 Warrior 8
Warlord (Mounted) Franks 0 Warlord 5
Mounted Hearthguard Franks 1 Hearthguard 4
Warriors (Spear) Franks 1 Warrior 8
Warriors (Crossbow) Franks 1 Warrior 6


Related Links

Baccus

Herzel “Nominoë”

Amon Amarth “Death in Fire”

Christopher Lee Charlemagne Omens of Death Album


Saga in 6mm – Part 4

Note 1: It probably makes more sense if you read Saga in 6mm – Part 1 before you read this.

Note 2: All miniatures are from Baccus miniatures, unless indicated otherwise, and the codes relates to their catalogue.

Welsh, Anglo-Saxons and Jomsvikings

We decided to take some advantage of the weather and the English Heritage membership so ventured to Pevensey Castle and then later to the Abbey at Battle. The old Abbey is overseeing what is probably one of the most famous battle fields in history – the Battle of  Hastings 1066. I recommend visiting both these sites if you have a general interest in history and it is great for the children too.  Here are a few pictures from the day that may interest you.

pev_1
Pevensey Castle –  this is the Anglo-Saxon shore fort that was overlooking the bay where the Normans landed in 1066 (today suitably called Norman Bay).
batt3
Detail from one of the information posters around the battlefield showing the Anglo-Saxons on top of the slope with the Normans below.
batt2
The Battlefield 950 years later with the Abbey on top of the slope. The Abbey was ordered to be built by the Pope in 1170 as penance.
batt1
Today There are only a few sheep grazing away. I suppose later in the year the field will be full of reenactors and visitors. It will probably be a memorable event – it is 950 years ago after all!
elky
The Little One taking advantage of a lessons in early Medieval Swordsmanship.

Now over to the main event, starting with the Welsh…

Welsh

Codes used:
ALR04 – Lanciarii
EMV02 – Unarmoured Spearmen
EMN05 – Norman Archers
For the Hearthguard and Warlord I used the unarmoured spearmen (EMV02 – from the Viking code) fronted by an individual model from the Late Roman lanciarii code (ALR04) to mark the units as being armed with Javelin – the Warlord unit was fronted by 2 spearmen figures For the bonnedig (levy) I used Norman Archers (EMN05) – as I thought I had enough Javelins already.  Painting inspiration perhaps by listening to those mighty Manic Street Preachers and perhaps “There by the grace of God”.
Welsh
Welsh 4pt Warband

Anglo- Saxons

Codes used:
EMA01 – Huscarls with Spear
EMA03 – Fyrd Spearmen
EMA05 – Saxon Leaders and command
For the warriors and the shield and spear levy I used the Fyrd Spearmen (EMA03).  The thin line for the levy unit works well to represent these weak but potentially useful peasant soldiers.  For the hearthguard and the warlord unit I used the Huscarls with Spear (EMA01) fronted by the miniatures from the Saxon Leaders pack. I suppose these are late Anglo-Saxons less tarnished by the Danes than the Anglo-Danes (!).  As for painting songs listen to anything with Saxon – one of Yorkshire’s finest bands and still going strong – “Crusader” is a good choice.
Anglo-Saxon
Anglo-Saxon 4pt Warband

Jomsvikings

The semi-legendary unit of mercenary Norse Warriors selling their spears (swords, axes and shields too) to the highest bidder.  I opted for a shield with the same design as the Icelandic flag – I wanted to give them a coherent look.  I used these codes:
EMV01 – Armoured Spearmen
EMV02 – Unarmoured Spearmen
EMV05 – Viking Luminaries and Loonies
For the hearthguard and warlord units I used the Armoured Spearmen (EMV01) fronted by characters from (EMV05) and for the Warrriors the unarmoured spear (EMV02). Amon Amarth’s “Way of Viking” is very appropriate for these tough guys (from their recent Jomsviking album).
Faster!
Stronger!
Fight until your dying breath!
Fiercer!
Harder!
This is a matter of life and death!
“Way of Viking” by Amon Amarth
Jomsviking
Jomsviking 4pt Warband

Next time the last three factions. If you want to follow the blog enter your details on the left or like us on facebook.  All the best / The One.


Unit Faction Pts Type Miniatures per Base
Warlord Welsh 0 Warlord 1
4 Teulu with Javelin (Hearthguard) Welsh 1 Hearthguard 9
8 Priodaur with Javelins (Warriors) Welsh 1 Warrior 8
8 Priodaur with Javelin (Warriors) Welsh 1 Warrior 8
Bonnedig (Levy) with Bow Welsh 1 Levy 4
Warlord Anglo-Saxon 0 Warlord 10
4 Thegns (Hearthguard) Anglo-Saxon 1 Hearthguard 9
8 Ceorls (Warriors) Anglo-Saxon 1 Warrior 8
Geburs with Spears & Shields (Levy.) Anglo-Saxon 1 Levy 4
Warlord Jomsvikings 0 Warlord 10
4 Jomsvikings (Hearthguard) Jomsvikings 1 Hearthguard 9
8 Dreng (Warriors) Jomsvikings 1 Warrior 8

Related Links:

Baccus

Pevensey Castle

Battle of Hastings, Abbey and Battlefield

Manic Street Preachers “There by the Grace of God”

Saxon “Crusader”

Amon Amarth “Way of Viking”