
Painting 6mm overview
I have been painting 6mm miniatures for some time and I have to admit I found it difficult at first due to (i) not having painted any miniatures for a long time and (ii) I wanted to paint more detail than I needed. I stumbled across 6mm miniatures searching for a book on the Great Northern War that Peter Berry, of Baccus, was selling at the time. I ended up buying a lot of GNW miniatures and my first attempts at painting them were dreadful. I still have one of those bases somewhere. With some experimentation (and a lot of inspiration from Dr Mike and his 6mm painting clinics and postings on the old Baccus forum) I did not give up as I felt that the scale is second to none for large mass battles and this is what I wanted to do for the GNW era.
Generally my objective is to do a big battle or a project every year and normally need to produce a large amount of miniatures to achieve this. I have been able to achieve this for the last five years due to signing up to the JOS event – it puts the right level of pressure and my half-finished projects of old justifies this approach. Here is my step-by-step approach to painting them:
Preparing to Paint
After having painted almost 2000 shields for my current Saga project I have to admit that there are days when the destination does not seem to outweigh the journey. On these days I find that listening to music and perhaps even better a podcast helps me along. I have especially enjoyed the following relevant podcasts in no particular order – Meeples and Miniatures (and View from the Veranda), Dan Carlin’s Hardcore History, Ancient Warfare Magazine, Nova Squadron Radio and In the Garage. But there is so much more good stuff out there.
- Check if the miniatures are ok. Normally I paint Baccus figures that does not require any further work (i.e. filing) apart from perhaps a little bit filing on some of the older casts under the base to ensure the model stands straight when you base it later. I then mount them on ice lolly sticks with Blu Tack. I do not glue as I can reuse the Blu Tack and this gives me the ability to do stage 2 immediately. I should say something about soapy water. I tend not to wash my 6mm miniatures and do minimal prep of them – I do not feel the need. But other people say you need to – so perhaps you should listen to them.
- Spray your miniatures with a grey base coat – I buy grey spray cans (Primer) from poundland (for this purpose they are brilliant!). Let it dry, ideally for 24 hours. Do it outside! You could do white or black. I used to do black but prefer grey with black ink to better see details and with my sloppy approach white does not work.
- Apply a black wash (diluted ink – enough to highlight the details in the figure). This helps with the painting as it allows the detail to be seen more easily. It also creates a shading in the deeper areas. Let it dry, again ideally for 24 hours. I use a mixture of equal parts of water and pledge multisurface wax (with klear) that I drip some black artist ink into, but you may opt for a dark pre-mix wash from one of the paint producers.
Note: When doing a project try to get this done for as many miniatures as possible as you need to wait for (literary) paint to dry. Make sure you are always a few painting sessions ahead with the prep.
Painting and Shading
- Block paint the miniature with a decent brush – I used to buy good quality brushes but messed up a few too many so now I buy some detailed nylon brushes from the Works – I get 24 brushes for £10 and occasionally they have even better deals. They are not brilliant and wear out, but I can paint a fair few miniatures before they give up. If you can manage your brushes better than me then go for quality. I use acrylic Vallejo paints as I like them – you will not use a lot of paint in a session. Keep the lid tight and shake them well before use – I have some that are over 10 years old!. Try to get the paint to hit the right parts of the miniature. Do not over apply the paint – less is more. Let some of the grey and black show, but not too much. I do not have time to spend much quality time with each figure so that is it. Sometimes I do some more elaborate painting on some key units. However the next stage will do the trick.
Note: I tend to paint large batches at the same time. For the Saga Project I have painted one full faction at the same time. I very often started with the shields did a few in a colour then another and so on, next ringmail and clothes, then face etc. Construction line approach!
- Make sure the miniatures are dry and then go for Nutbrown ink! (can be bought from almost any art shop, Winsor & Newton drawing ink) dip in your brush and let it flow…. This is magic! Be generous. Move your brush over some tissue paper and dip it at areas where too much of the ink have stayed, e.g. around the shield boss. Try it out on a few miniatures first and learn how to get it to work for you. Let it dry.
- Paint the bottom of the strip in chocolate brown. . Do not use Vallejo paint for this as it far too expensive and unnecessary for this purpose – buy a cheap acrylic hobby paint or even a tester paint pot. Let it dry.

Basing your miniatures
- Cut the strip of miniatures if required, normally cavalry and skirmishers.
- Put a mixture of 25% paint (same brown as before), 25% water and 50% PVA glue (bought in bulk from Screwfix or cheap from Poundland) on the base.
- Put the miniatures on the base
- Sprinkle sand on top – I use chocolate brown sand that used to be available from hobbycraft – not any more. And let them dry safely. Be careful when you handle the base so the minatures do not fall of.
- Paint the sand chocolate brown watered down a bit so it flows nicely (unless you used coloured sand). At this stage I also apply more glue and sand if I can see the base of the miniature too clearly. I hate seeing the small squarish bases through the sand.
- Drybrush the ground – I use three colours – first one goes on the whole base the second and third goes on “randomly” on the base – covering less and drybrushing lighter. I have used this combo for the last few years on all my (non-winter) bases. I also use the same scheme for my terrain. Make sure it is dry before next step.
- Apply random dots of watered down pva glue (50/50) and apply static grass Grass (I use Busch Spring Meadow and Marsh Green, with an emphasis of Spring Meadow with a little bit of Marsh Green). Shake off.
- When it is all dry I use the vaccum cleaner whilst holding each model firmly to get rid of any excess grass and glue a strip of adhesive magnetic tape on the bottom. Again I get this from poundland. Job done.
Note: Develop and approach and stick to it with regards to basing. Next week I will discuss terrain and it is nice when the base on a miniature blends into your table – it helps with the immersion aspect – that for a moment or two it looks like an army marching or attacking on your table.
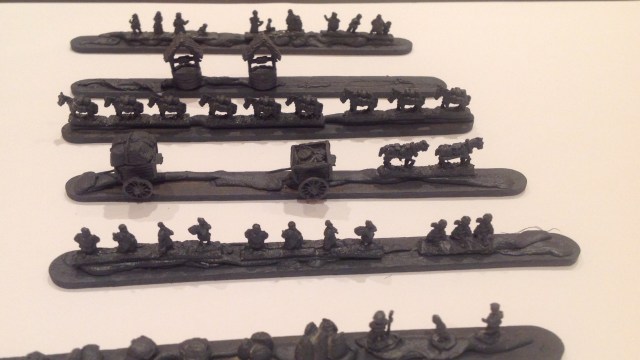
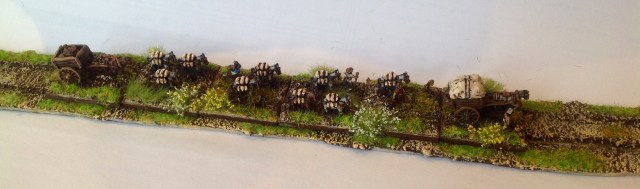
By the way I did use those farmers, carts and mules for something as I needed a few bases for the Saga Escort! scenario! I hope you like them.

Pingback: Saga in 6mm @ The Joy of Six – Meeples & Miniatures
Pingback: Saga in 6mm – Part 1 – Roll a One