This Part 14 of a series of a fair few posts, Part 1 (link here) gives an overview and the philosophy applied to the series – cheap, simple and fun.
Mum used to make these big washings and hang them to dry, I used to pretend I was a musketeer fighting between the white bed linen, like in the 1974 version of the Three Musketeers – the one with York, Reed, Chamberlain and Finlay (not to forget Lee, Welch, Dunaway and Heston). Here is the fantastic clip.
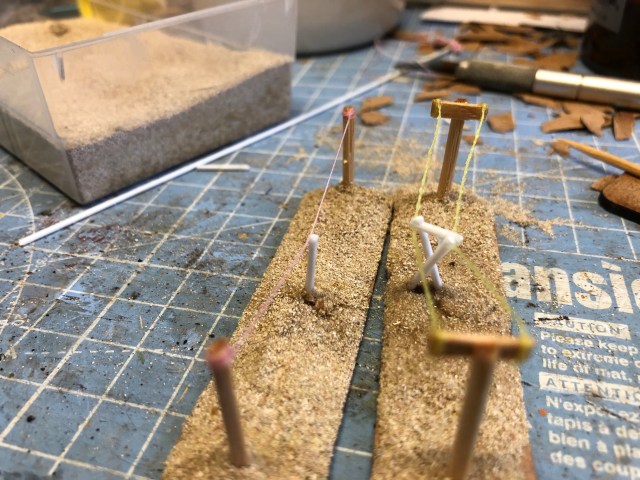
Today we are going to do a washing line with some washing drying, here a brief description.
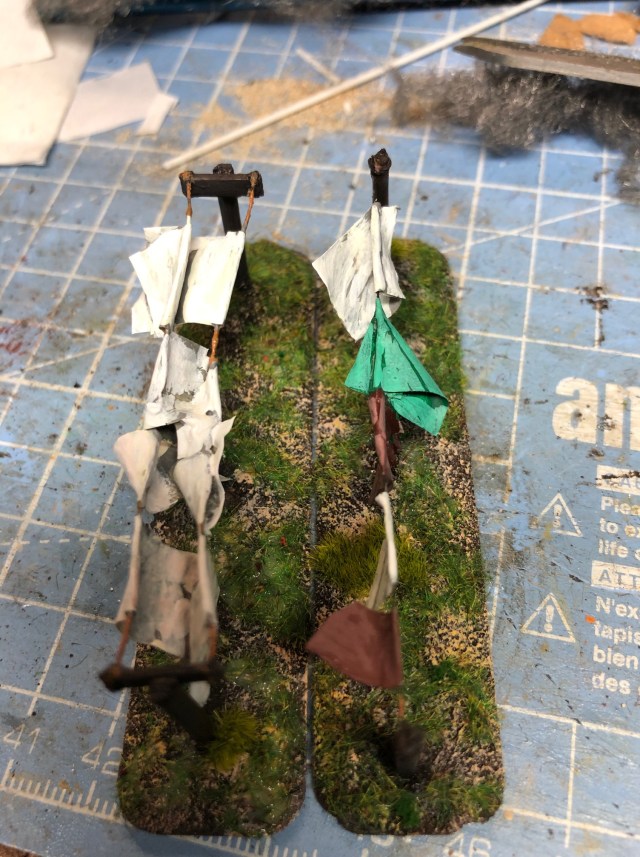
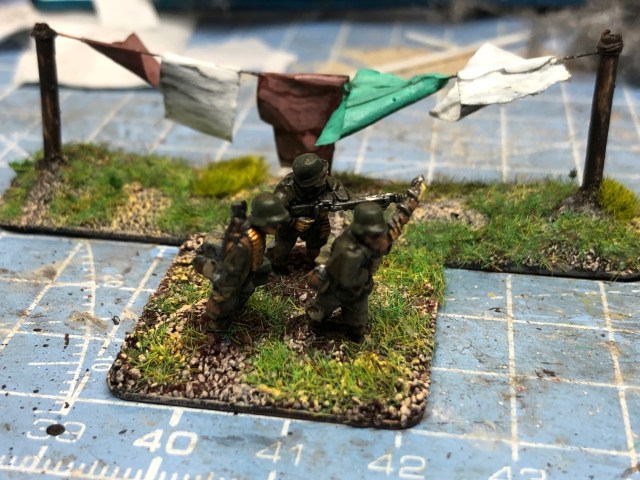
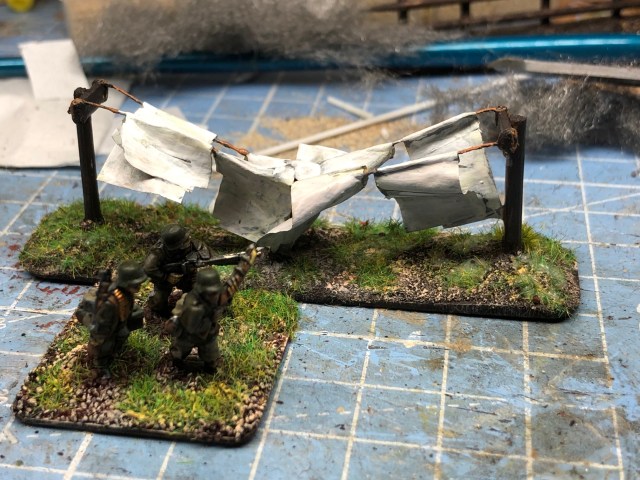
I did not takes picture until halfway through, basially this is using a single line between two kebab sticks and one with a coffee stirrer plank allowing a double line. I end add a small structure to glue onto to allow the sewing thread to be saggy like on clothes line (attached with superglue in stages).For the sheets I use rice paper, this is really easy to work with feels like something you could roll cigarette with if you are so inclined or have some lying around. I guess normal paper or even some cloth may work too. Paint the base set-up. Then brush glue on both sides and try to create something resembling items flying in the wind – also cover the “Structure”.Let it dryThe paint it up, I am more happy with the single line, it looks less messy but hey ho.That is spot on – me thinksMaybe too much going on? Anyway you get the idea. Simple but adding some drama.
And that budget, well we are still at £17.93 we are almost half way through, will we be able to contain this within the £30 limit (yes we will but I might add some items to spice it up a little bit)
Tomorrow we are doing some boxes (back to the 2 minute clutter approach), sleep tight.
This Part 13 of a series of a fair few posts, Part 1 (link here) gives an overview and the philosophy applied to the series – cheap, simple and fun.
When I was a boy we used to go to the Folkpark (People’s park) in the Village of Sågmyra where I was brought up until the Factory sacked everyone and we moved in the “big” town with 50,000 people. There was not much more organised activities in the Village, with perhaps and market once or twice a year. Here I went to my first live gig, my uncle’s band with him on Guitar and song (RIP Lasse) and my Dads cousin on drums (keep on rockin’Blämmen!), here playing one of their many songs – Klockorna Ringer (The Bells are Chiming). It was my first live gig and I thought it was magic – I still do.
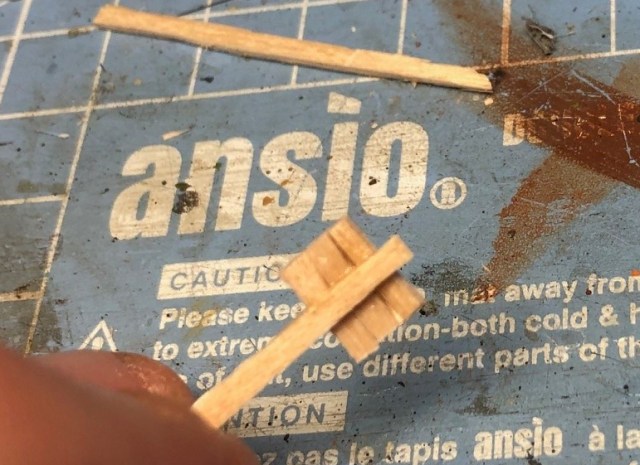
We only need our coffee stirrers for this project (again), the idea here is the sign, It gives a sense of place with a sign saying Rue de Quoique, we might think France, well you get the idea. So more heart than content this time…
Coffee stir away
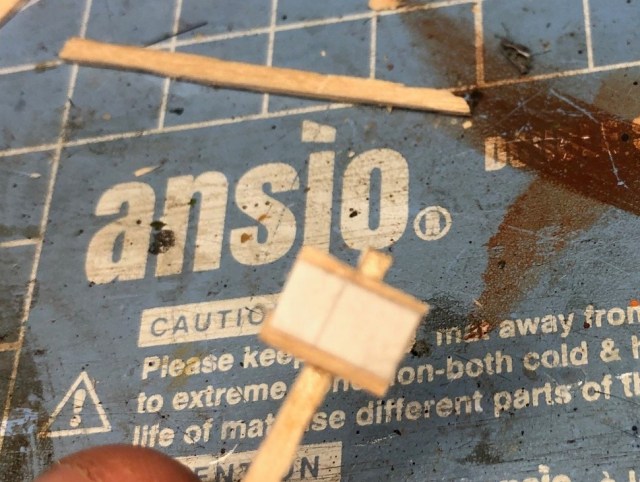
I put a little piece of paper on the front
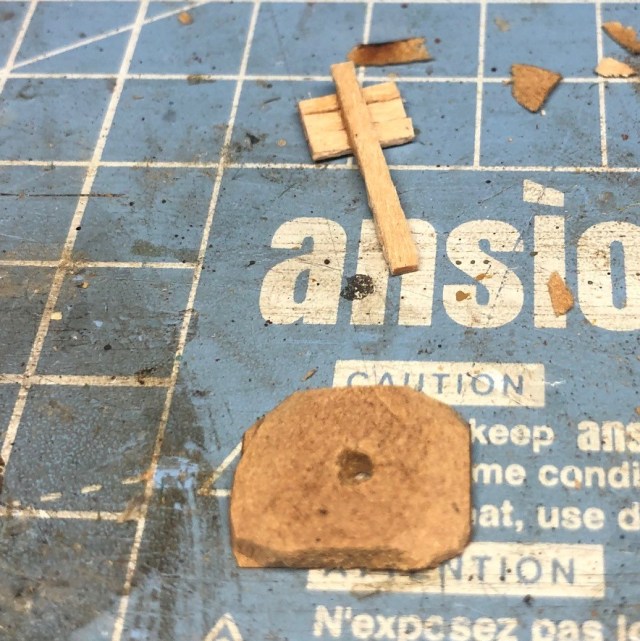
Base it up
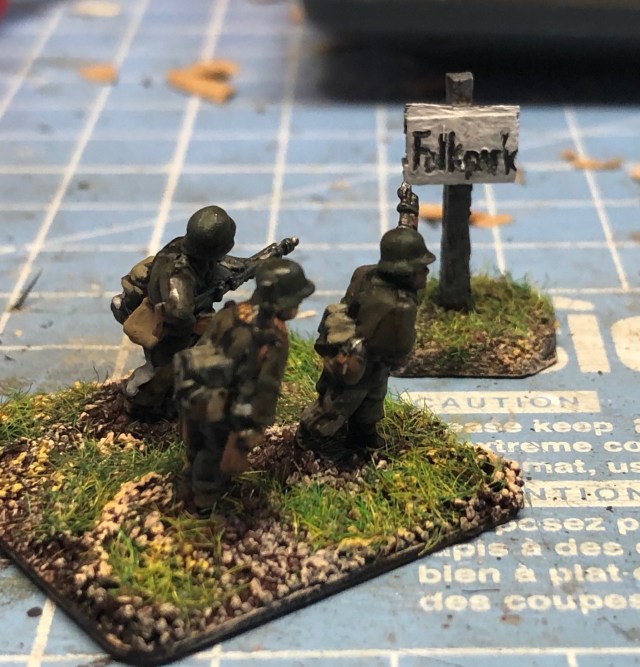
Then write something on it! That is suppose to say Folkpark. Well you get the idea. Perhaps the Germans invading Dalarna in 1943 would like to listen to Fader Andersson too?
And that budget, well we are still at £17.93 as these were all free issue material, I think I might spend a buck or two at some point.
Tomorrow we are doing some washing, I heard the wind will be strong.
This Part 12 of a series of a fair few posts, Part 1 (link here) gives an overview and the philosophy applied to the series – cheap, simple and fun.
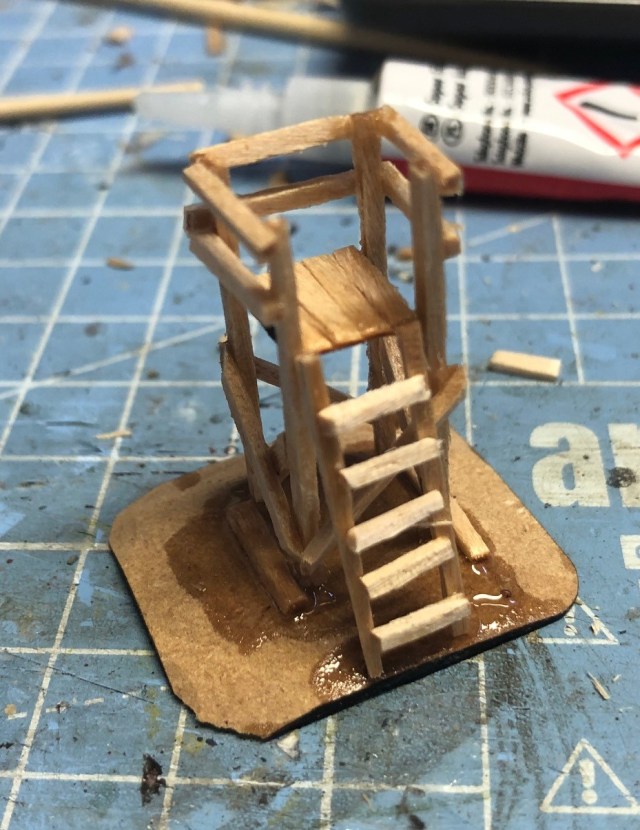
A Moose Hunting Tower (Jaktpass in Swedish)
Today we are doing a common item in a Swedish forest, not sure how many they had in the 1940s but at least they had one on my table. The towers are used by hunting teams for setting up positions during the hunt. It would be a fun clutter to put in to break up some forest area.
Sweden has the most dense population of moose in the world and annual almost 100,000 moose are being shot to control the population. The Moose was almost extinct at the beginning of the 19th century but due to modern thinking from hunting organisations the Moose slowly came back.
The hunting tower is a welcome sight when you are hiking in the forest or looking for berries, mushroom and fungi (not the ones from Yoggoth), it is a place to stop for a moment hang up your backpack and perhaps have a break and eat your picnic. Dad and I used to go to the same spot every year for a weekend and pick lingon berries, blue berries and if we were lucky some wild raspberry (we used to be able to forage enough in weekend to last to the next year and it was a damn good time. There was an old hunting tower in the area, it was our point of reference and we used to have this as a base for our operations and I wish I had picture of us being there, but we never brought a camera so I guess the only picture I have is up there is my head.
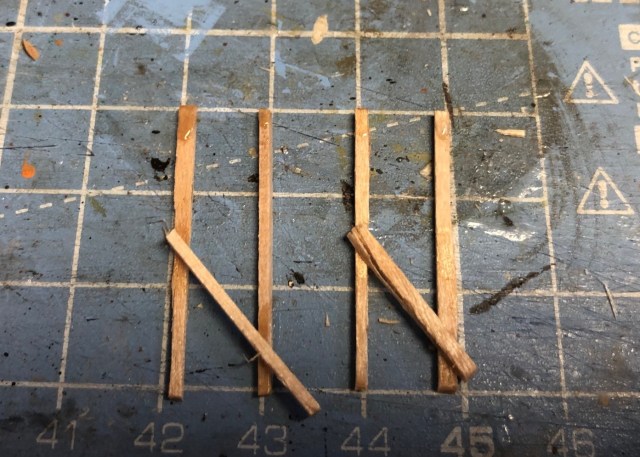
We only need our coffee stirrers for this project.
First I cut a few coffee stirrers lengthwise and then cut them in 30mm lengths (15mm scale) and then made a platform about 10mm square (as always this is glue on top of a piece of cardboard or plastic).
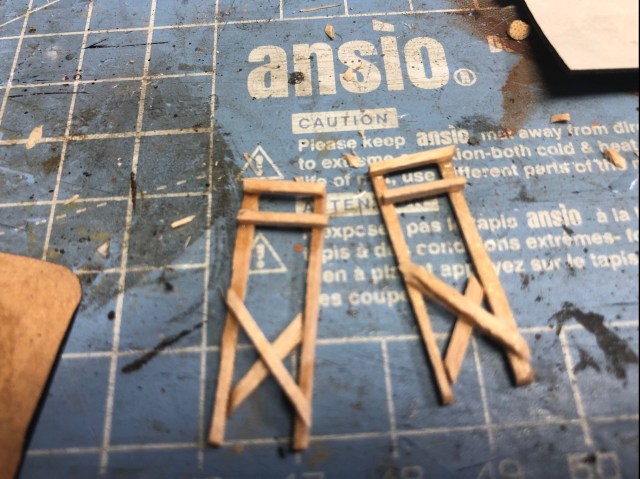
Then start building up the sides, roughly 10mm wide, you can cut them when the glue has dried.
Slowly build up something like that
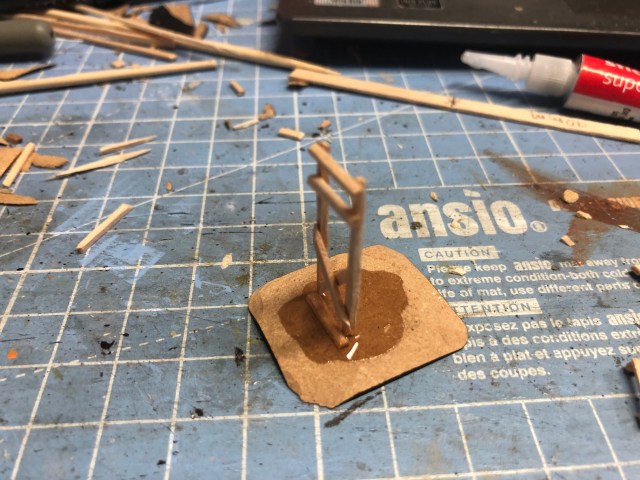
Superglue it
Just build up the structure leave one side open to create the ladder
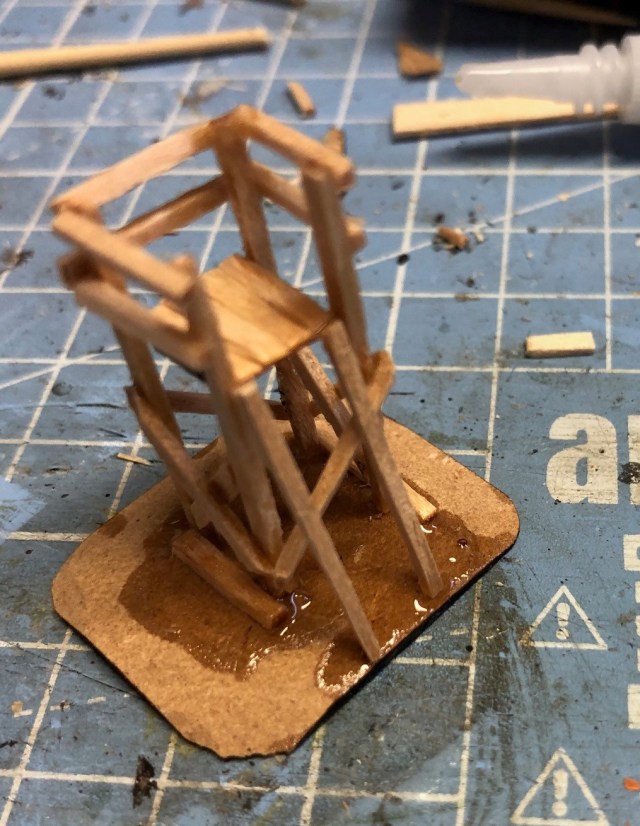
Then add some steps – Job done
Little bit late but check your work against your models, remember in 1/100 10mm is a meter in real life.
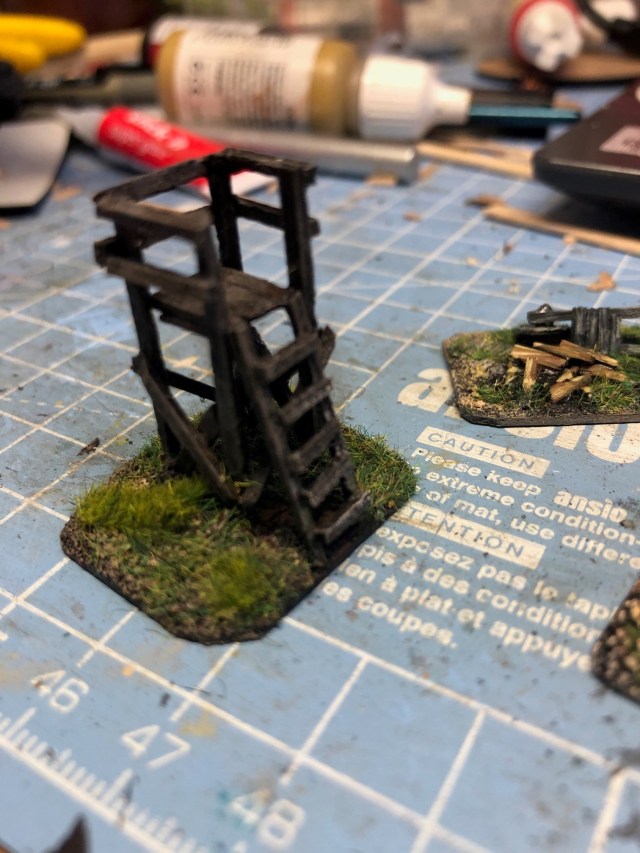
Painted and ready to go, just like the tower Dad and I used to go to.
And that budget, well we are still at £17.93 as these were all free issue material, so we seem to be able to keep this under control
Tomorrow we are making signs, well actually only one sign as it is a lazy Wednesday project.
This Part 11 of a series of a fair few posts, Part 1 (link here) gives an overview and the philosophy applied to the series – cheap, simple and fun.
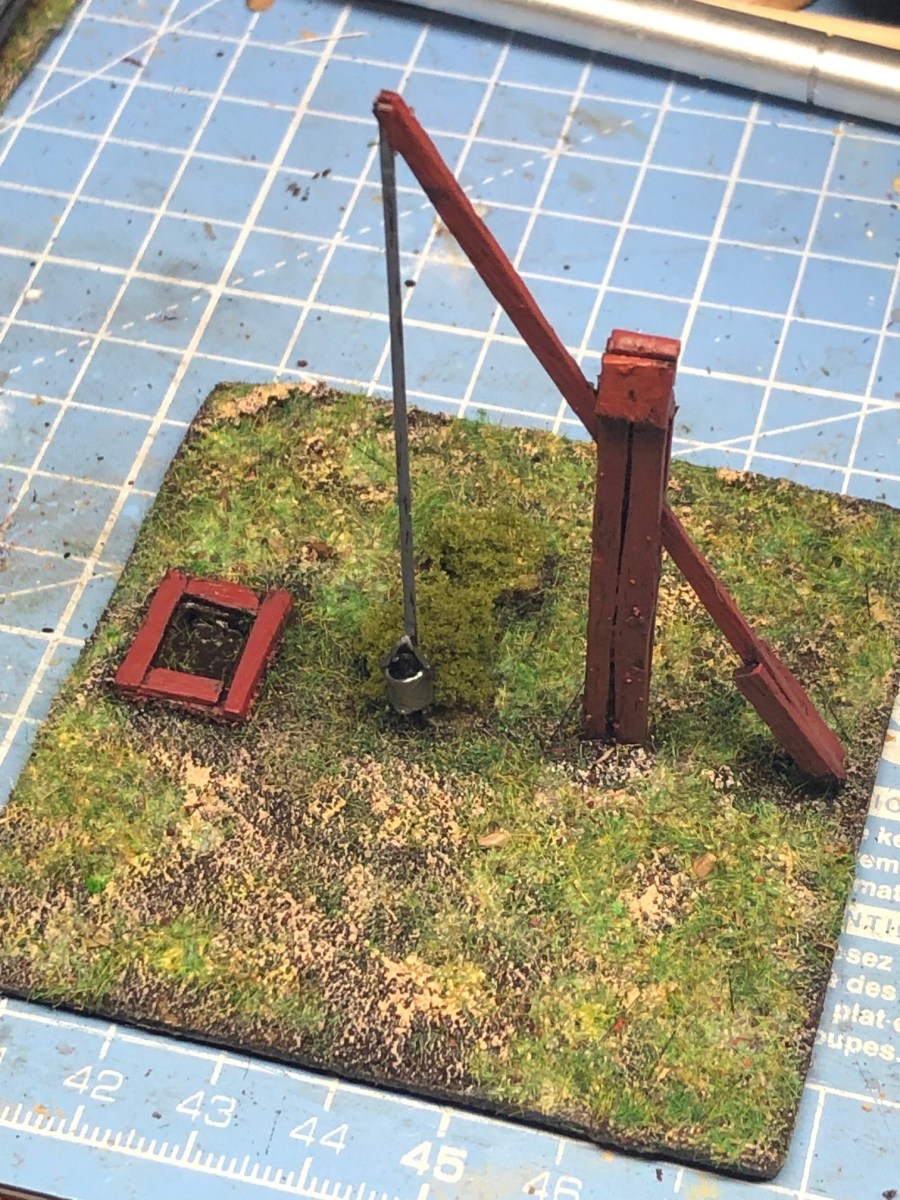
A Well
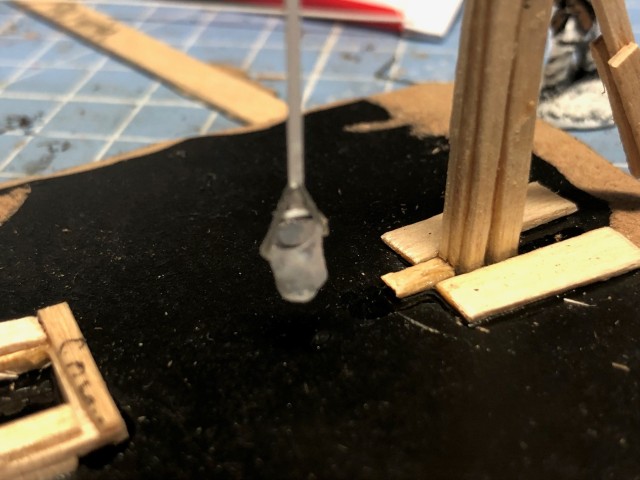
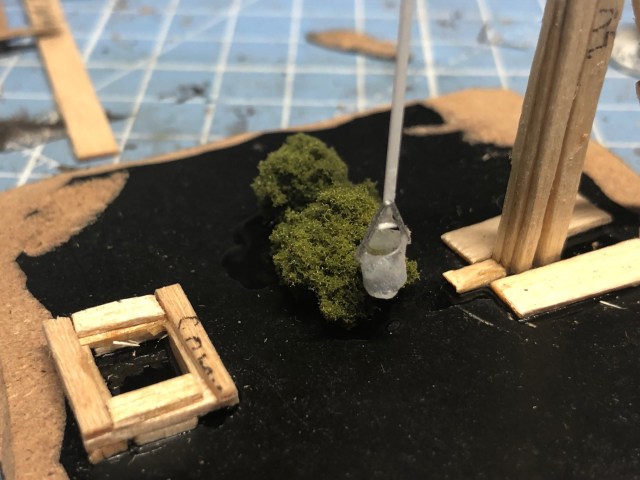
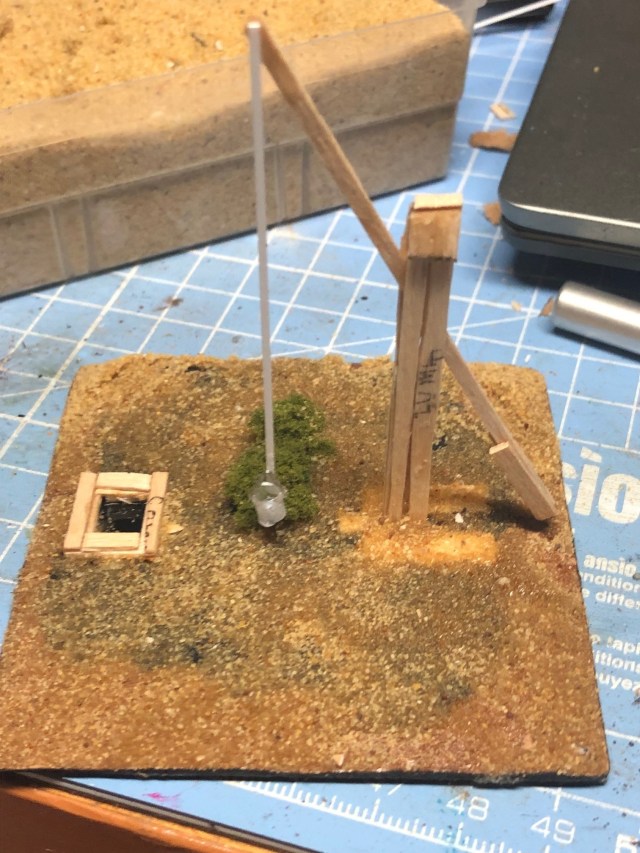
Todays little project is to build a well, with a lever like the one seen in the picture.
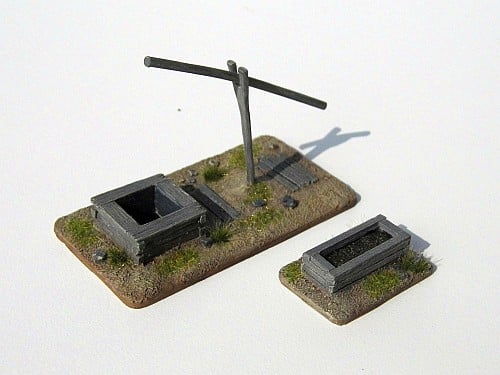
You can buy a perfectly adequate one from iron clad miniatures (also check out their terrain in many scales – I have a lot of their buildings and trench systems in 15mm and some of their nice 28mm miniatures too) – more here.
Comes with a trough too from Iron Clad at £3.50. You could use this one for a basis and add the rope and the bucket to it.
However, we have a pile of coffee stirrers that needs to be used, so we will build one from scratch. Here is a rough outline how it was done (this for a well fitting 15mm miniatures).
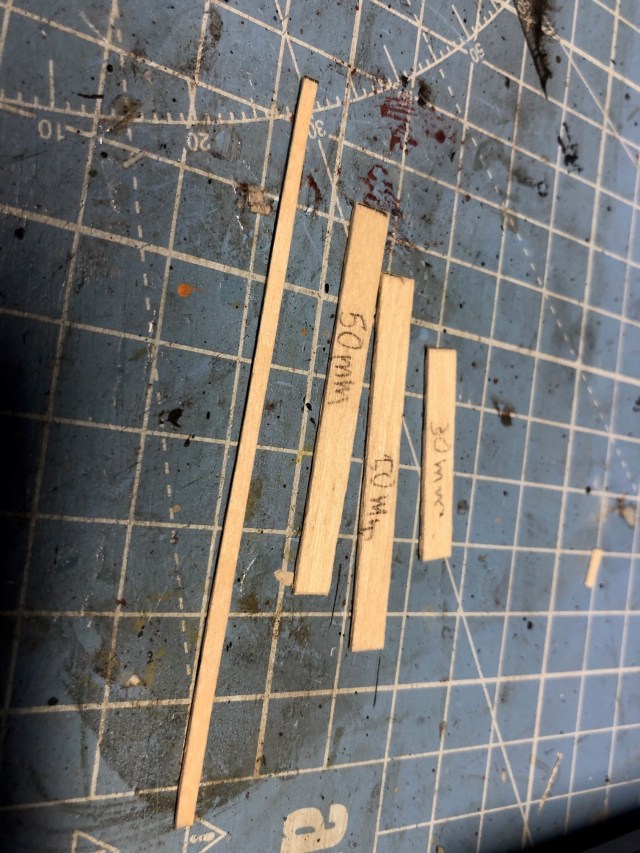
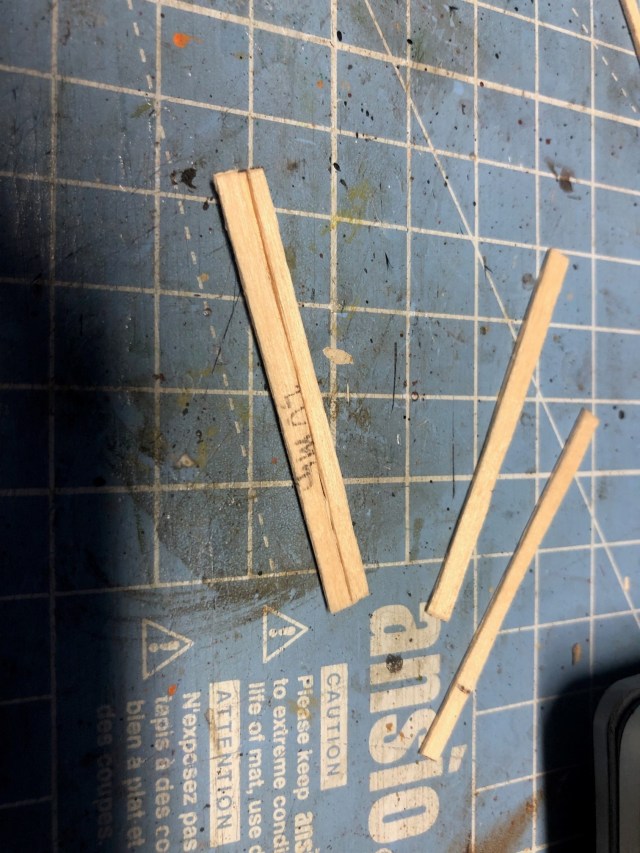
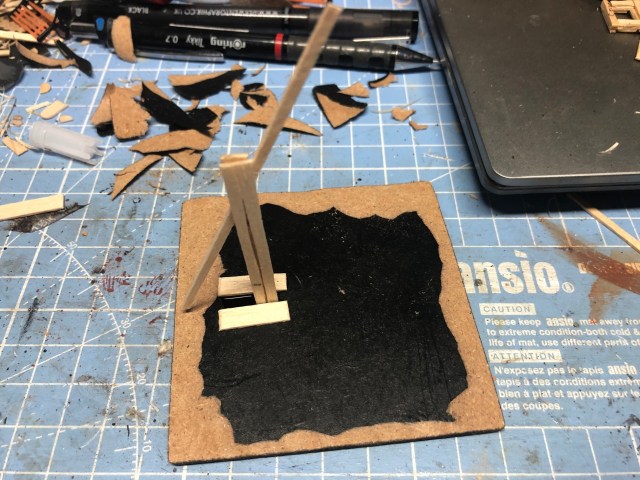
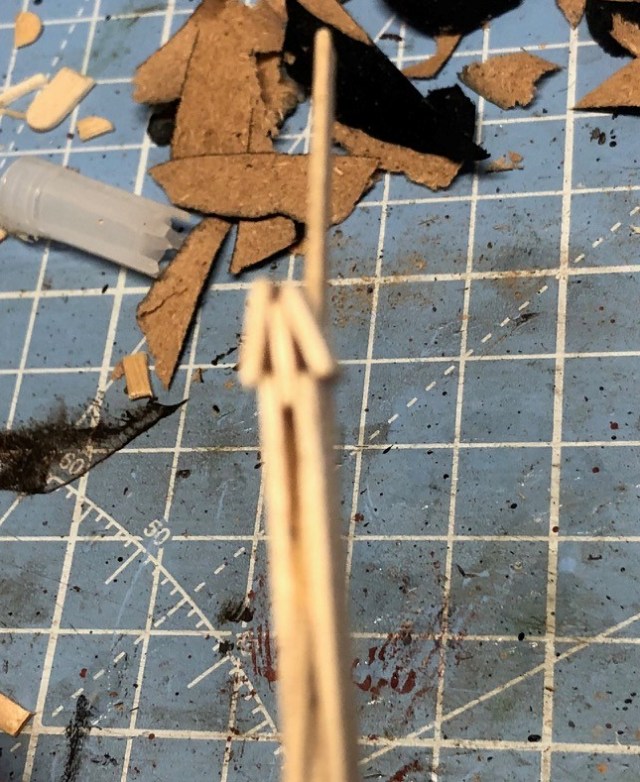
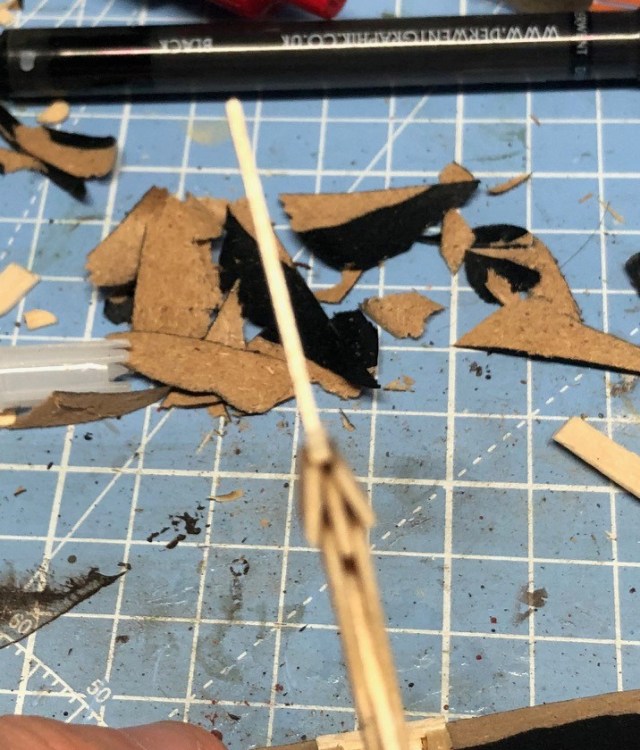
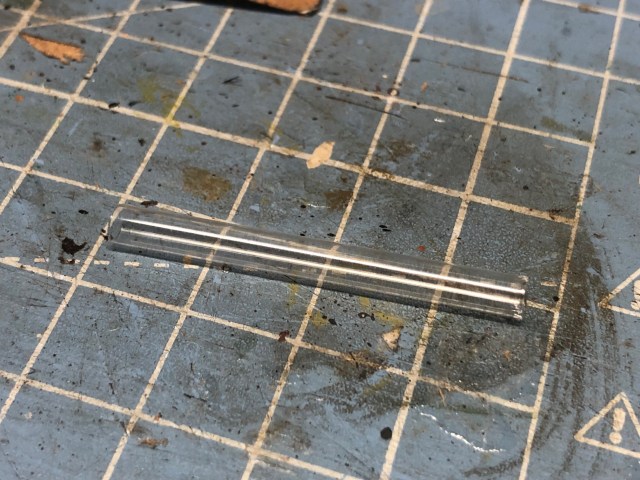
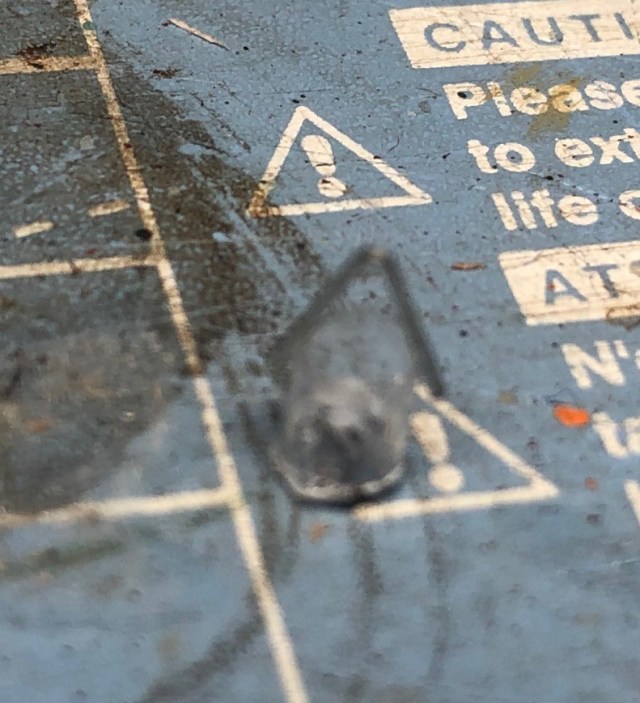
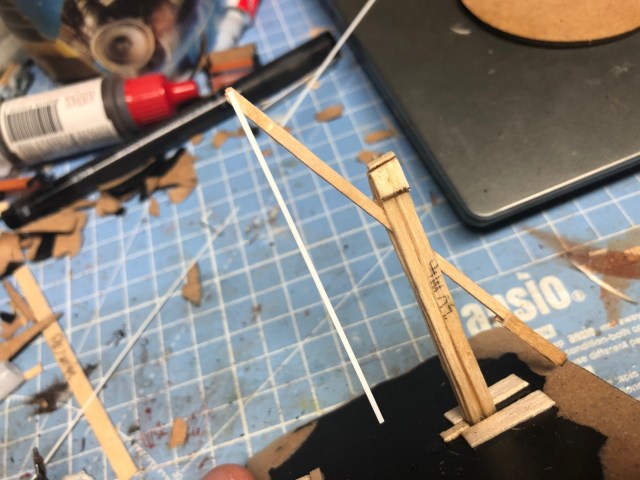
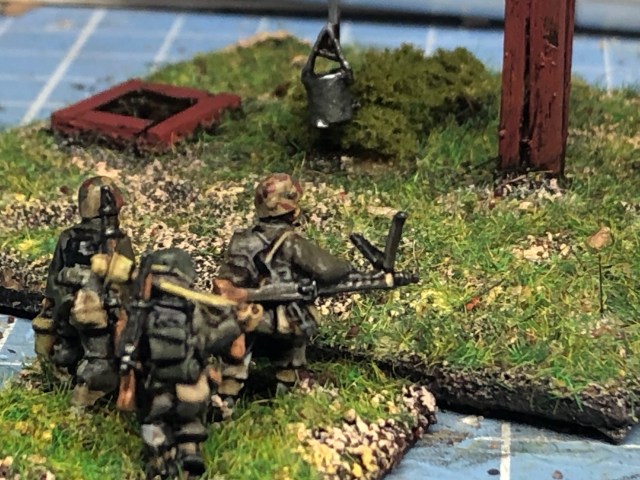
Cut coffee stirrer lenghtwise (two parts) and then cut it in a 90mm lenght, then cut uncut coffee stirrer in a 30mm and two 50mm lengths.Cut all the pieces lengthwiseStart assembling the parts with glue, look at the next picture too and you should be able to figure it out.The idea is a structure like this.Glue on the struture on a base (this one about 75mm square), note I used some coffee stirrers to enhance the strength.I then decided to add a piece between the planks a build a little roof (again using some coffee stirrer material)Then a little piece of topNext we need a bucket and for this I used one of the tube that had come with a brush (to protect it).I also needed a handle for the bucket, so why not some of those staples?So I cut out a piece of the tube and a small part of the staple and glued them together, I also put some blue tac at the bottom of the bucket.For the Rope (or sometimes a pole, but I am assuming the rope if grabbed and brought to the well and then “pulled down”, at least this is how this one is designed) I used a thin plastic piece I had, this is some kind of plastruct material but I guess you could cut any thin plastic to this effect, or use some string/thread.The add your bucket, also note that I have use some lengthwise cut coffee stirrers to create a frame for the well hole (you could also make a cover if you want).The problem with the construction was that the bucket is swingoing around as you hold it and to avoid some issues associated with this, so to mitigate this I simply put a piece of green foam next to the bucket and superglued them together – no longer a swing.Add some sand and all ready for painting – by hey please note the additional weight added to the lower end of the lever to give a counterweight to make sure the bucket goes up when the user lets go of the rope.Really happy with his and again will add character to your tableFighting makes you thirsty!
And that budget, well we are still at £17.93 as these were all free issue material, so we seem to be able to keep this under control.
Tomorrow we are making something like this, see you then.
This Part 10 of a series of a fair few posts, Part 1 (link here) gives an overview and the philosophy applied to the series – cheap, simple and fun.
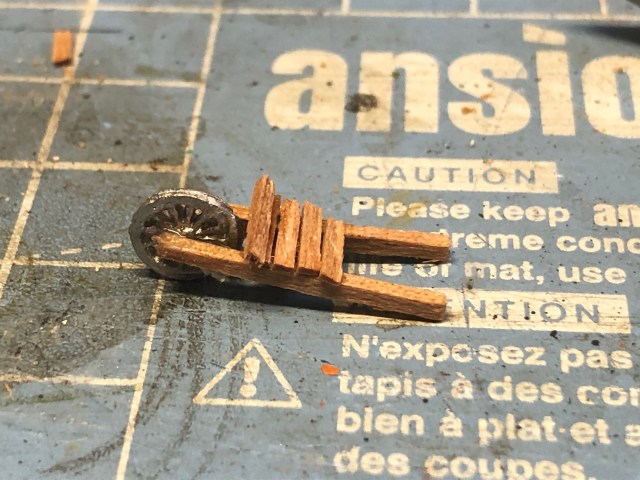
A Wheel barrow
Again we are using coffee stirrers
Cut a few coffee stirrers lenghtwise and cut smaller pieces to build something resembling a wheelbarrow, I use a wheel for a 6mm scale wagon that worked well. Alternative find another type or cut one out from a piece of plastic.
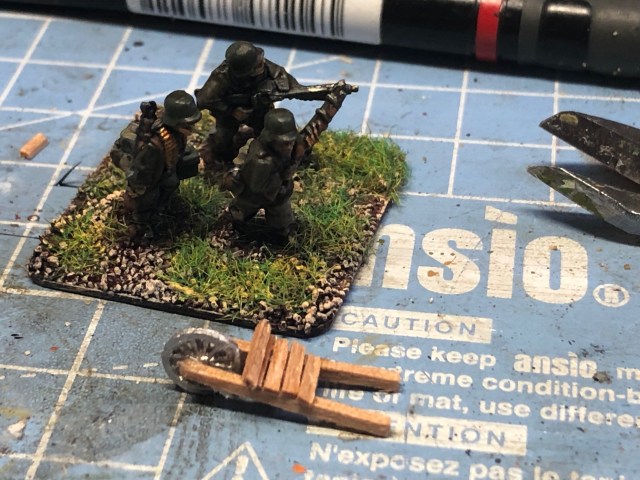
Make sure it works with the scale you are using, this is 15mm.
I wanted to create a little bit a drama so put it on a base on the side with some cutouts of wood to show perhaps someone just dropping it as the fighting came closer.
Quick Paintjob and we are all done
And that budget, well we are still at £17.93 as these were all free issue material, but as I tend to say we have a long way to go.
Tomorrow we are making something like this, see you then.
This Part 9 of a series of a fair few posts, Part 1 (link here) gives an overview and the philosophy applied to the series – cheap, simple and fun.
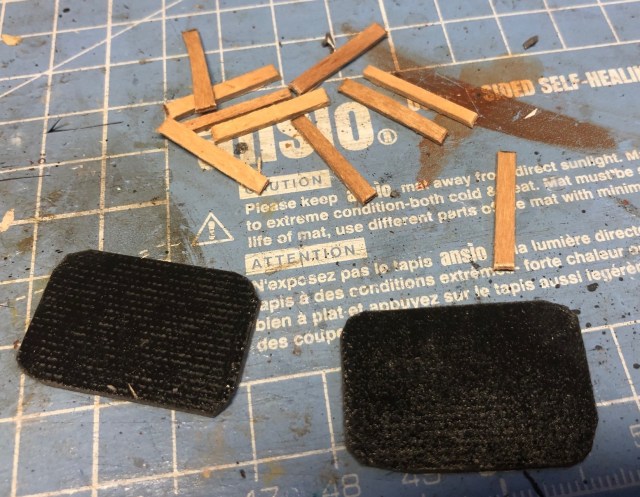
A Planter
Well something you could make of all those Tufts you have lying around for your basing.
Here we go
Ok we need a base and some coffee stirrers cut lenghtwise and then in small lenghts, I made my planter 10 by 20mm, you need 4 pieces of each length per planter
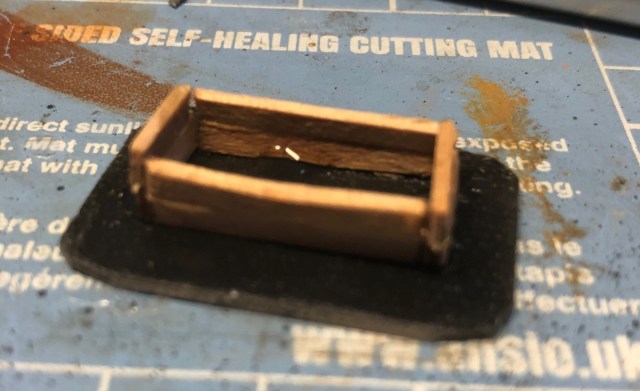
Glue them together like a little box
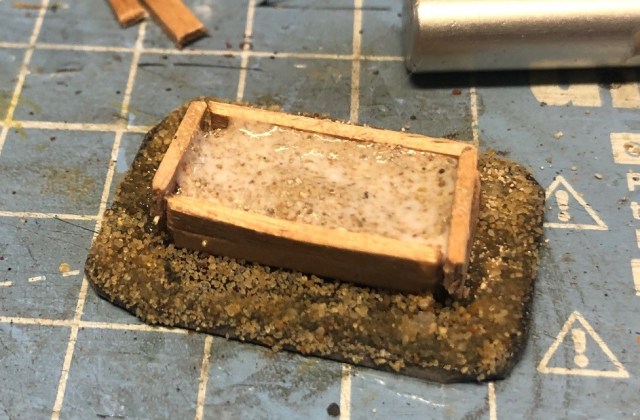
Fill up the box with your basing sand and glue.
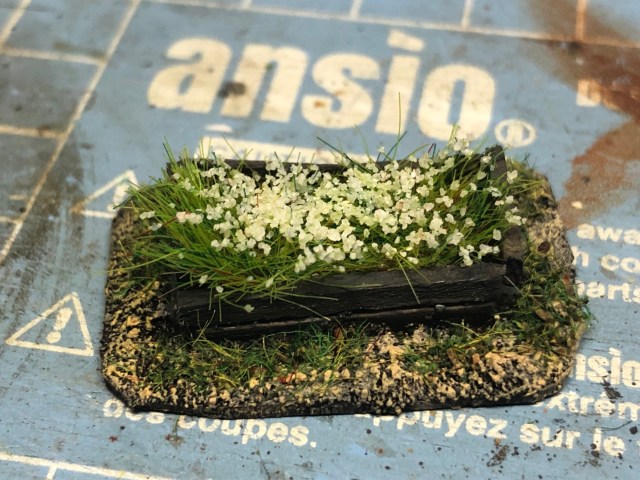
Paint up the box and base it and add some tufts on top, job done…
And that budget, well we are still at £17.93 as these were all free issue material, but we have a long way to go.
Tomorrow we are making a small wheel barrow, see you then.
This Part 8 of a series of a fair few posts, Part 1 (link here) gives an overview and the philosophy applied to the series – cheap, simple and fun.
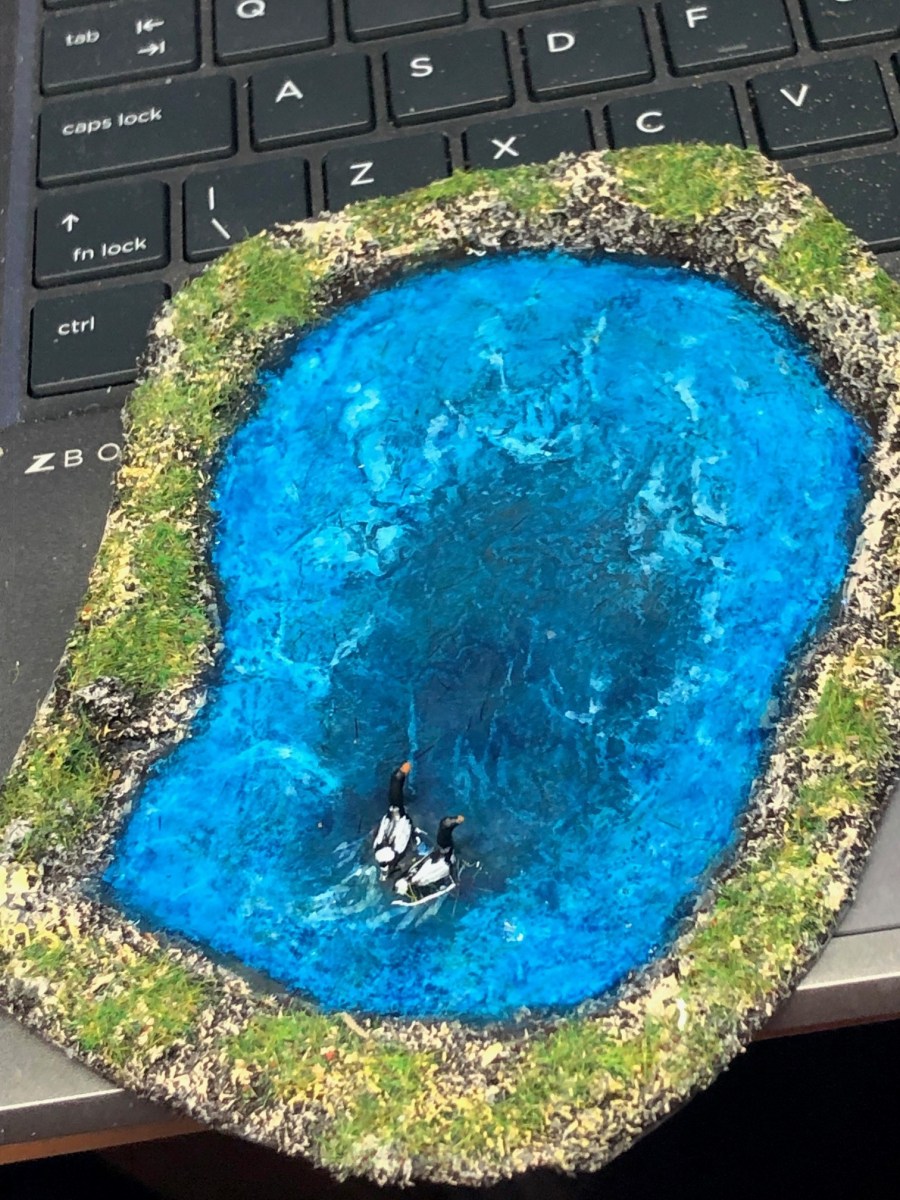
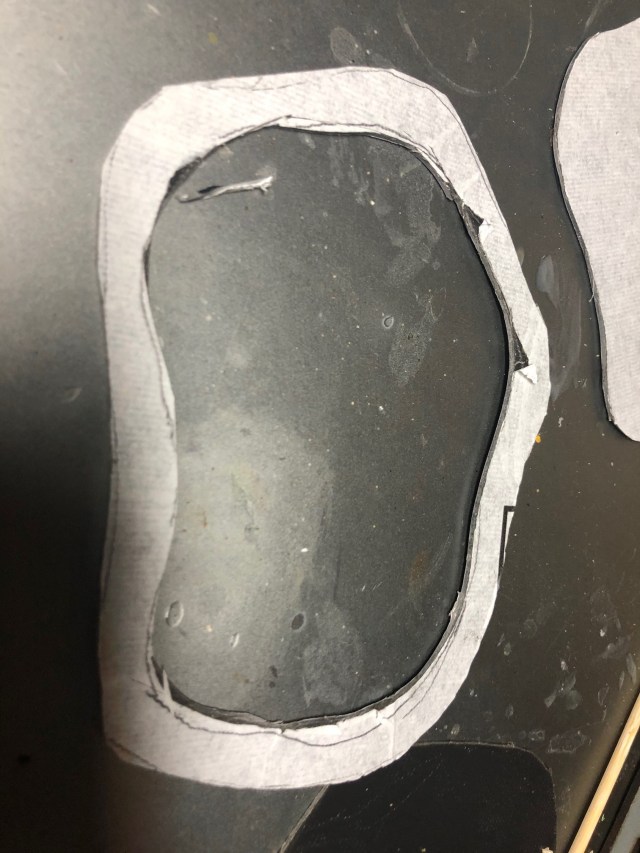
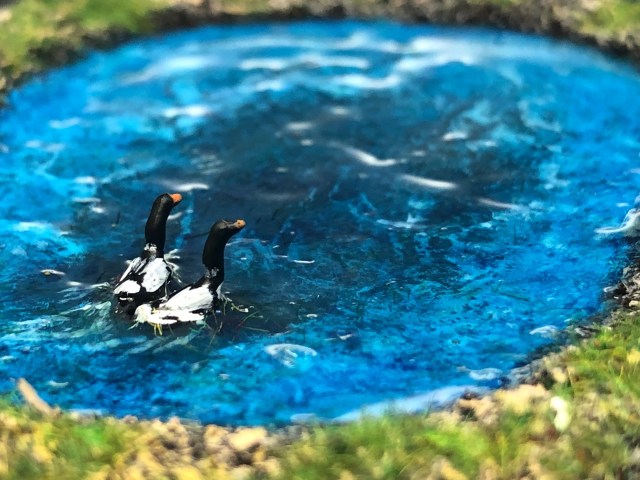
A Small Pond
Today we are doing a little bit of a different type of tile, a more natural feature, a little pond. Do not really have any good reflection from a pond from my youth, so let us get straight into it.
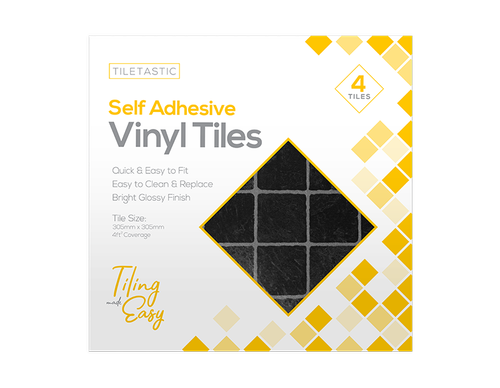
A lot of the terrain manufacturers produces templates for making your own lakes or ponds. It is really easy to make one yourself using adhesive tiles (that was part of the initial investment for the project). These are sold both as tiles and planks (they can be picked up from pound shops or from eBay for about £5 for 4 No. 1X1 feet tiles). It is nice material to work with an has some flex and can be bent into shape if needed. I really like this as a medium for doing a lot of things, basing your terrain, making roads, making rivers etc.
These are the type
Here we go
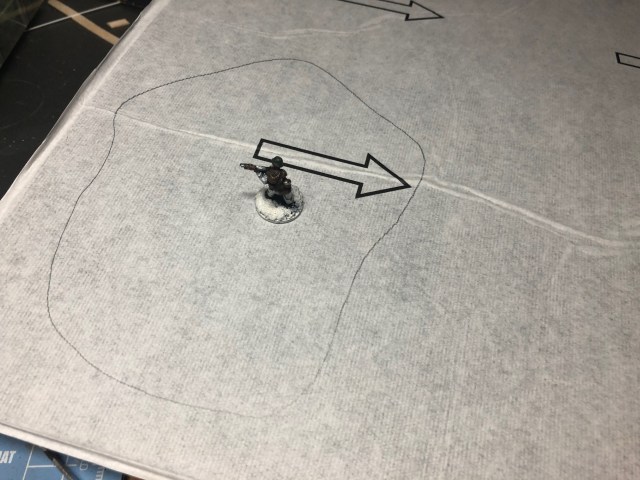
Plan your pond, how big you want it. I went for a smalling one.
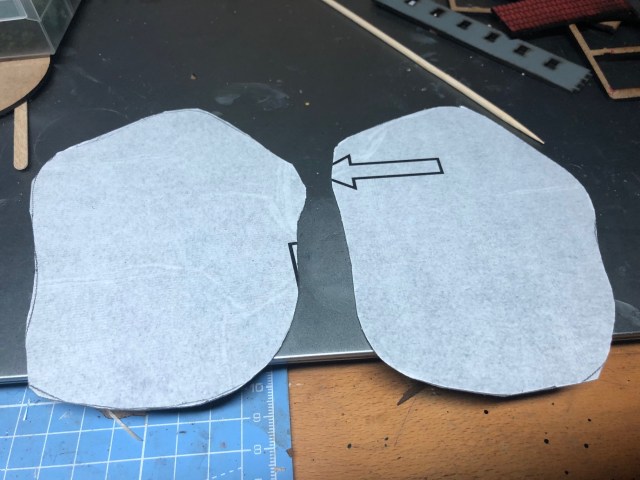
Cut our two identical pieces
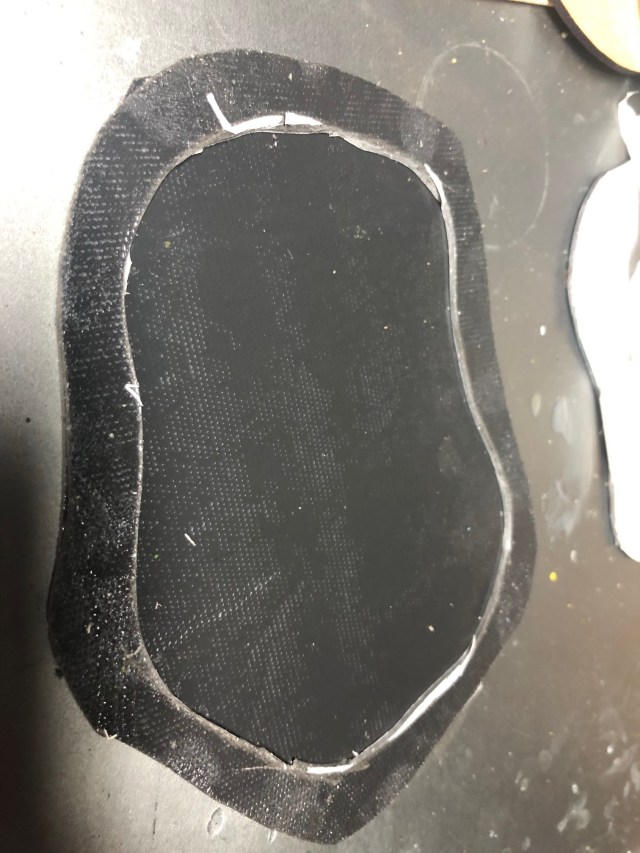
Cut out out the inner part of one of the pieces, this will form the border of the pond
Take away the paper and put the full piece with the top down and then stick other part on the top, both side should have sticky surface up.
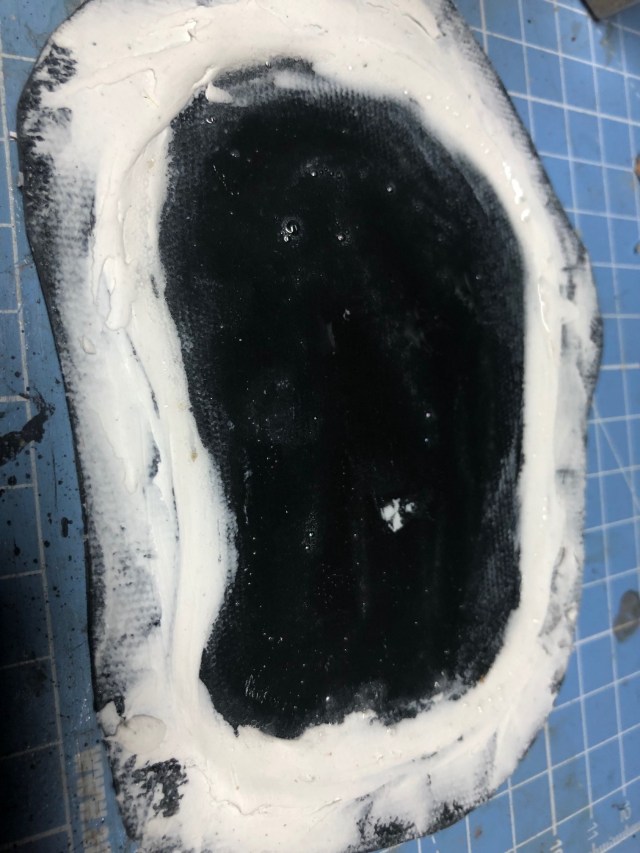
Use some filler to make a little less edgy transitions, also add some gloss varnish to the bottom of the pond to flatten the surface and avoid this to be seen once you paint the water.
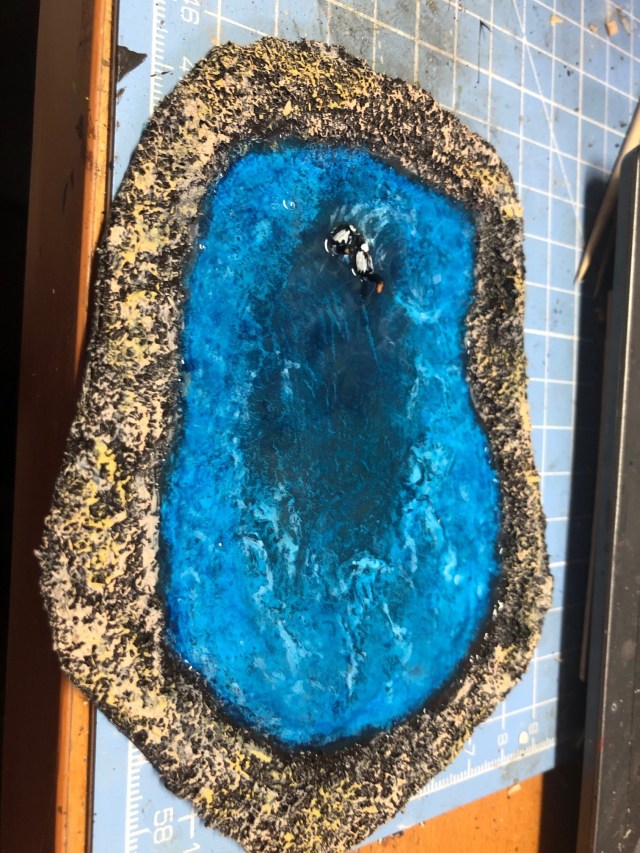
After it has dried, add some sand to the borders, paint shitbrown then drydrush some earth colours and work on the water. Mine became rally dramatic and I added some wildlife I had in one of my boxes.
Then add some grass around it and you are done, when fully dried vacuum clean the pool and go with a fair few layers of gloss varnish with drying in-between.
Simple and fun
And that budget, well we are still at £17.93 as these were all free issue material (well bought for the monies we already spent), but we have a long way to go, I had the birds in my tool box so I will cheat with those.
Tomorrow we are making a small planter, see you then.
This Part 7 of a series of a fair few posts, Part 1 (link here) gives an overview and the philosophy applied to the series – cheap, simple and fun.
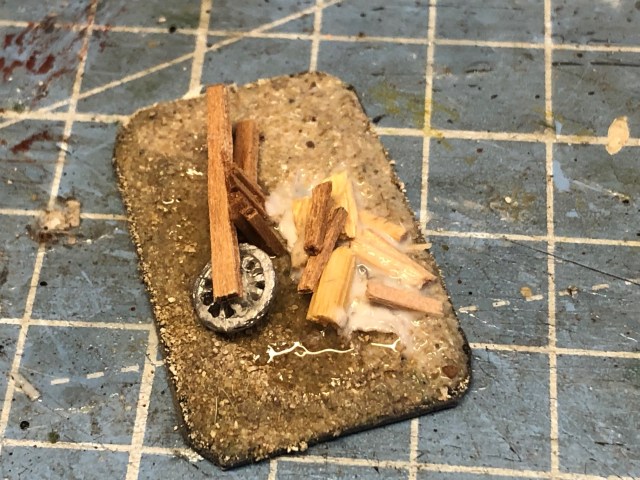
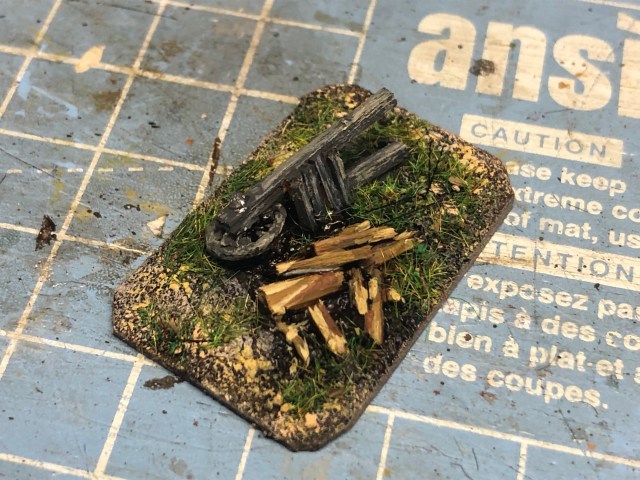
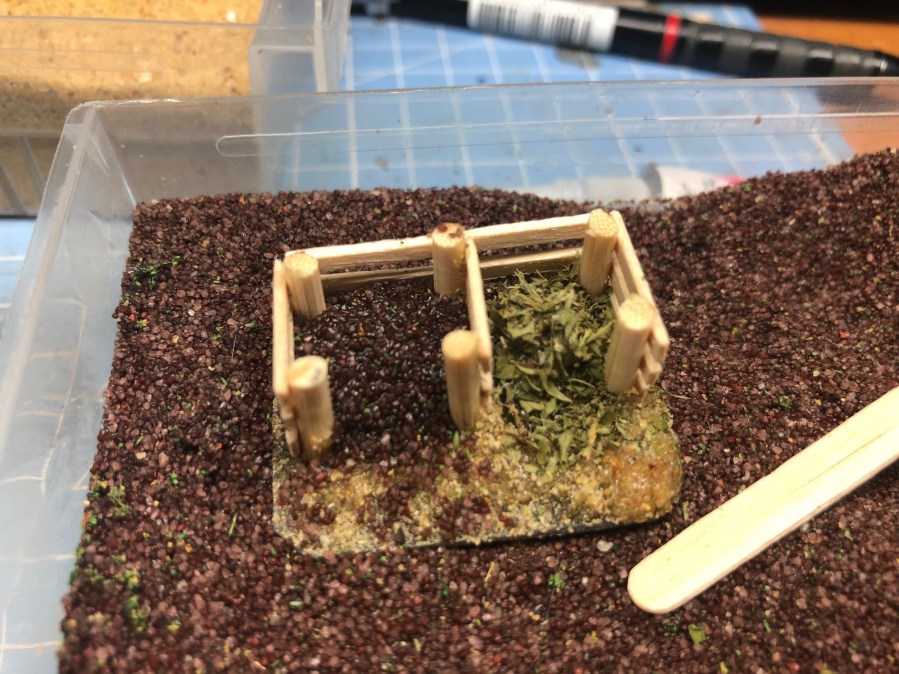
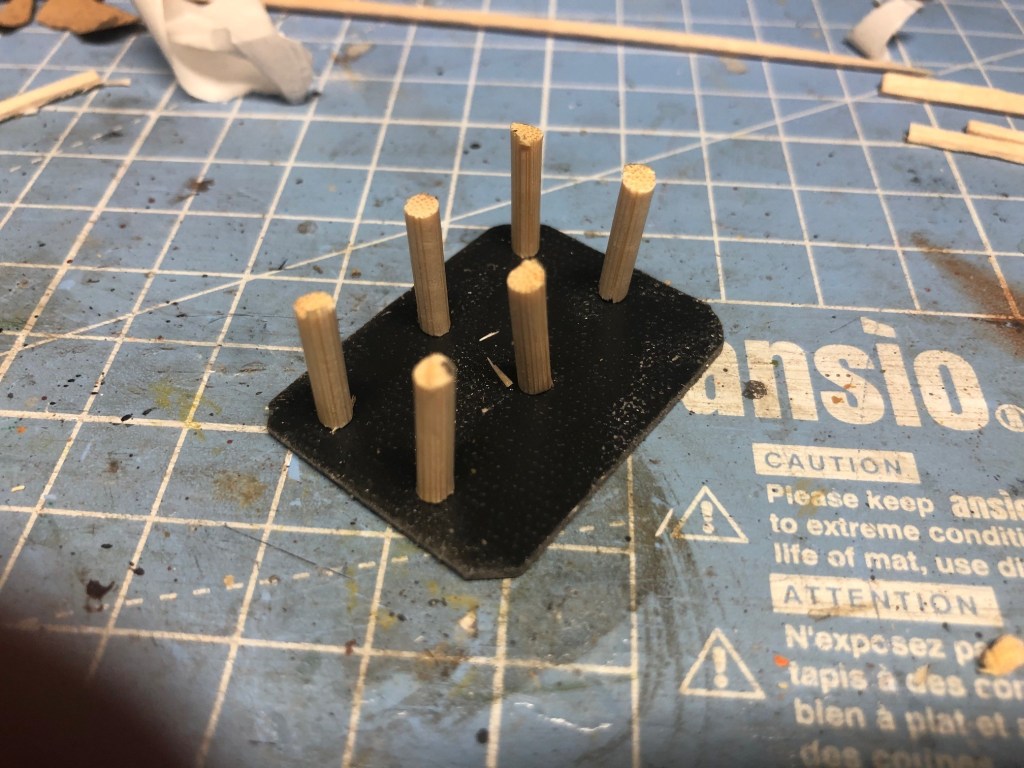
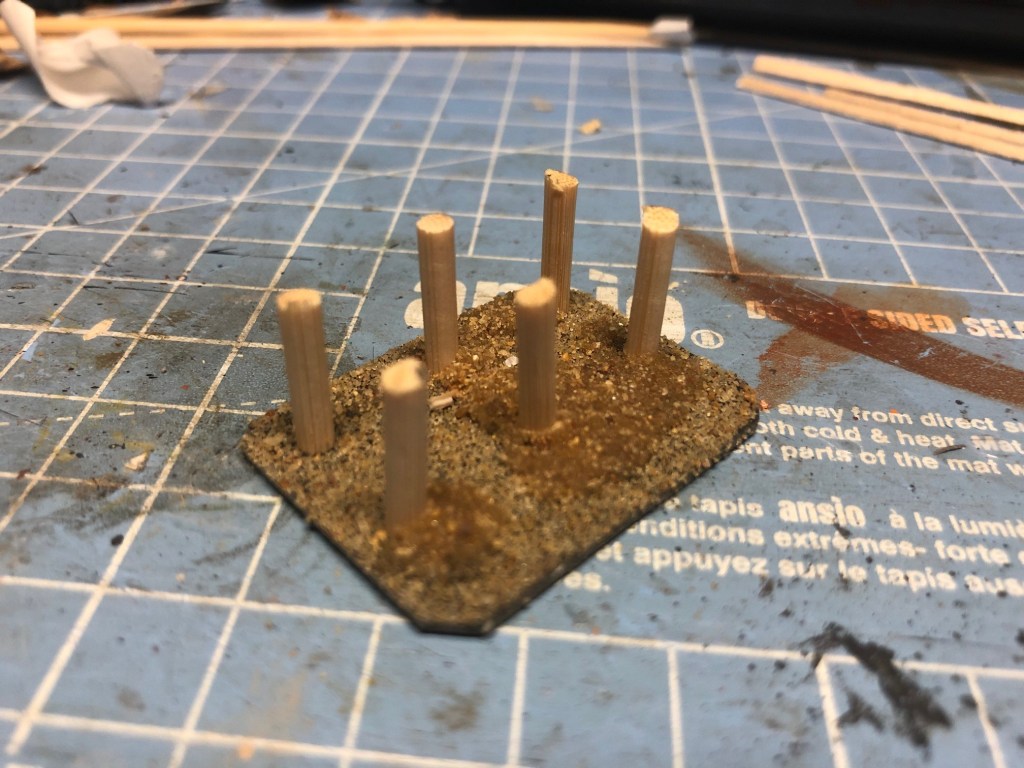
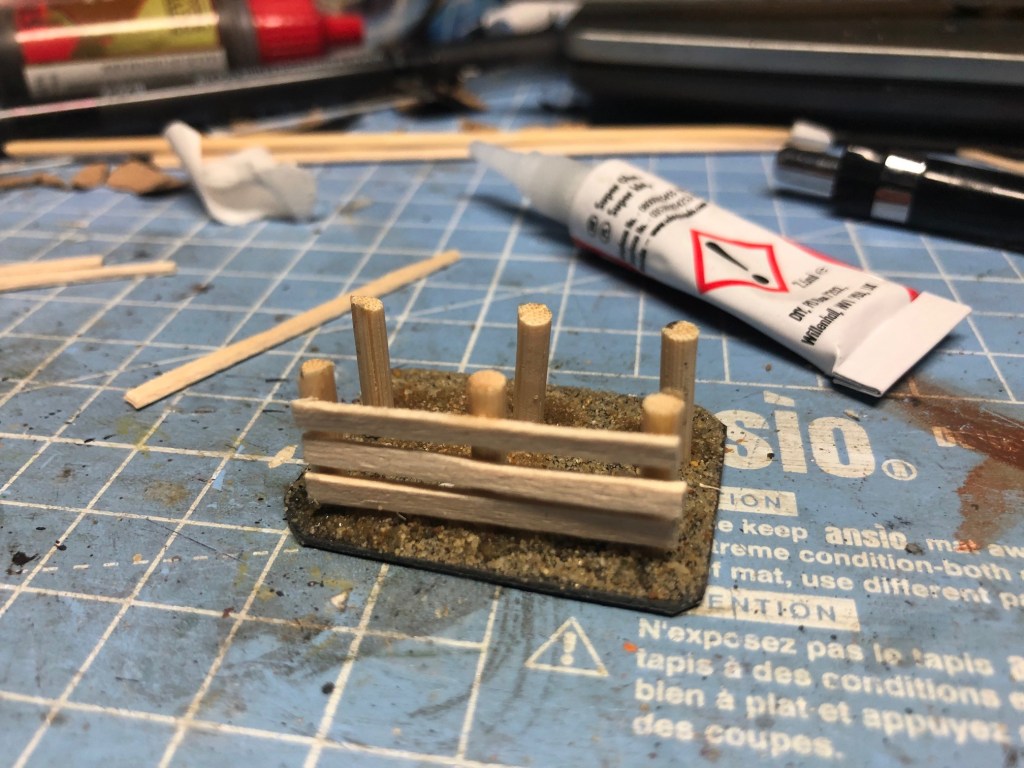
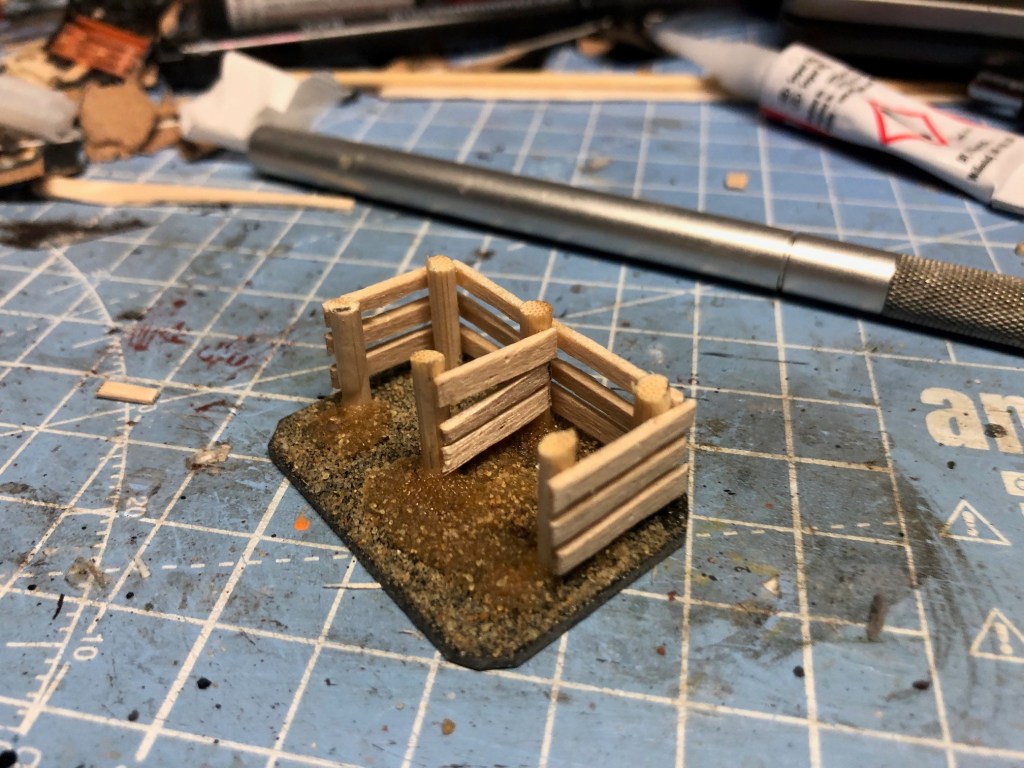
A Composter
Well a environmental friendly way of dealing with kitchen and garden waste is to use a composter that also produces an excellent soil improver. Of course we had a little composter when I grew up, where else would we get the worms from when we went fishing? I remember getting the little container and a small spade and digging for worms,
Anyway for our rural composter I am looking at something like this.
Not to tough project today then, let us get on with it.
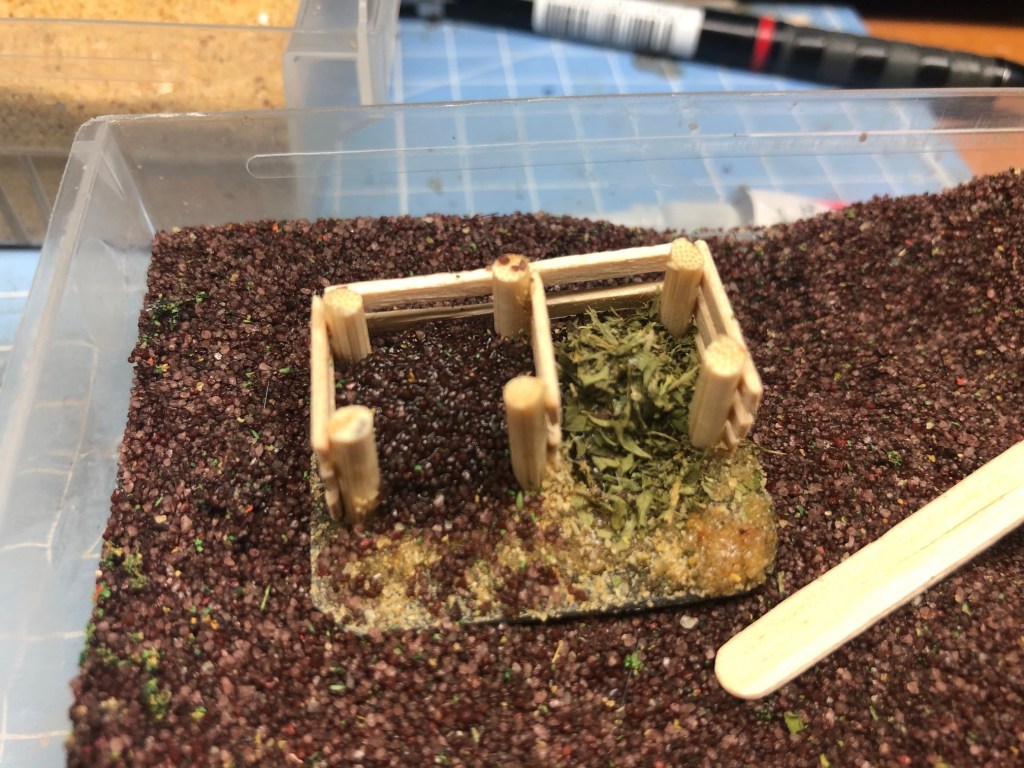
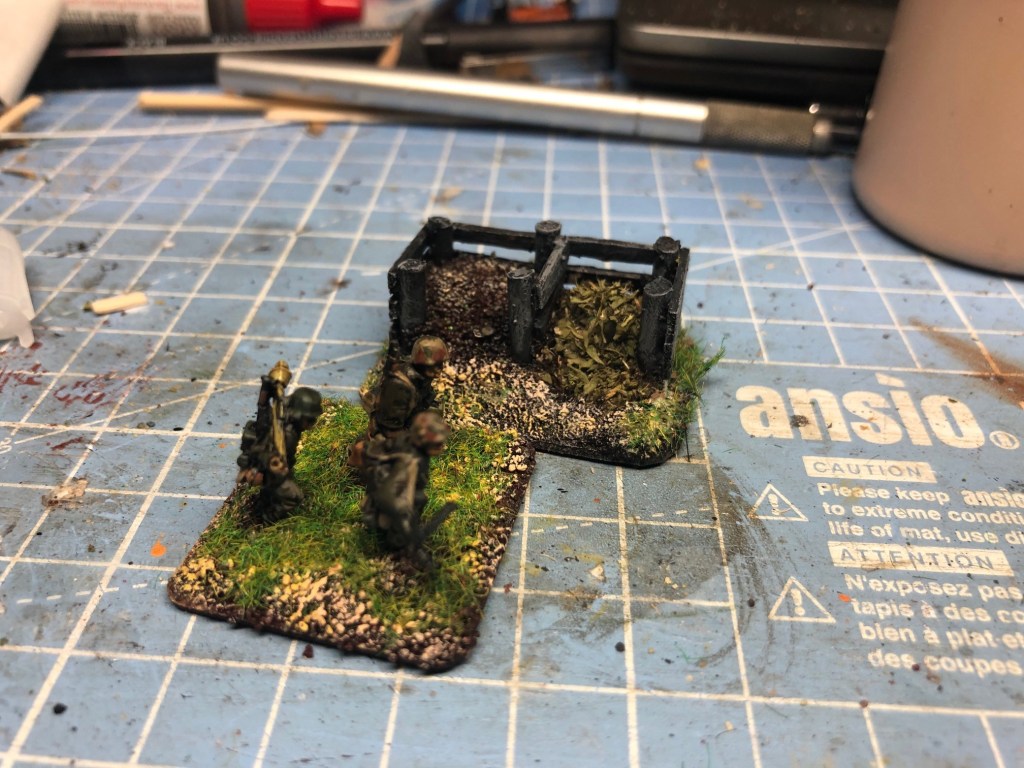
Cut some 15mm long sticks from a kebab stick/skewer add glued them on a base.I Added some sand, it can help with the strength of the adhesion and works for this buildBuild up the walls (leave some space)DoneI addd sand in one put some on and then add some runny super glue then add more until you are happy, the other side I filled with oregano herbs, this is the fresher side.Then just paint the wood, it is a little bit lighter than it looks.
And that budget, well we are still at £17.93 as these were all free issue material (well bought for the monies we already spent), but we have a long way to go, will the stirrers last?
Tomorrow we are making a small pond, see you then.
This Part 6 of a series of a fair few posts, Part 1 (link here) gives an overview and the philosophy applied to the series – cheap, simple and fun.
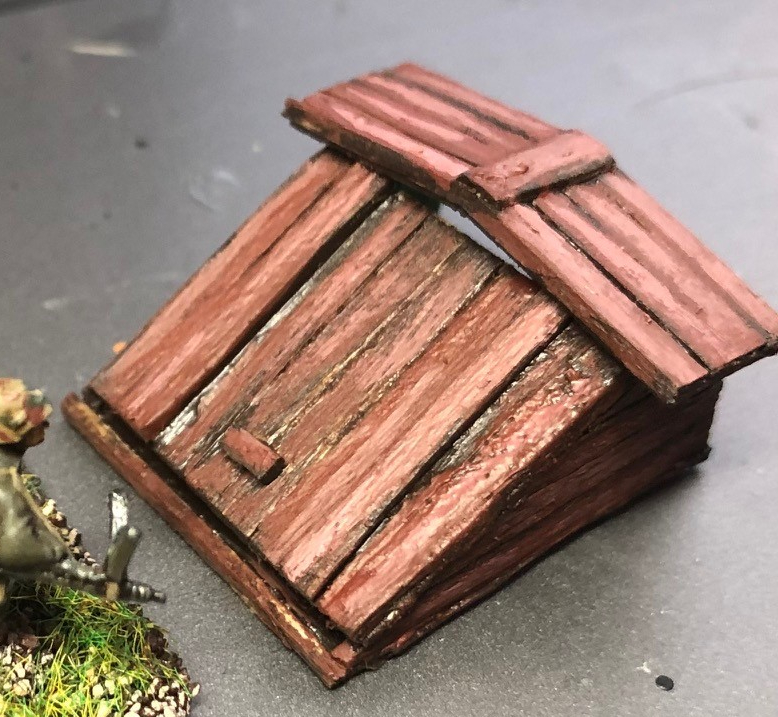
A Cellar Entrance
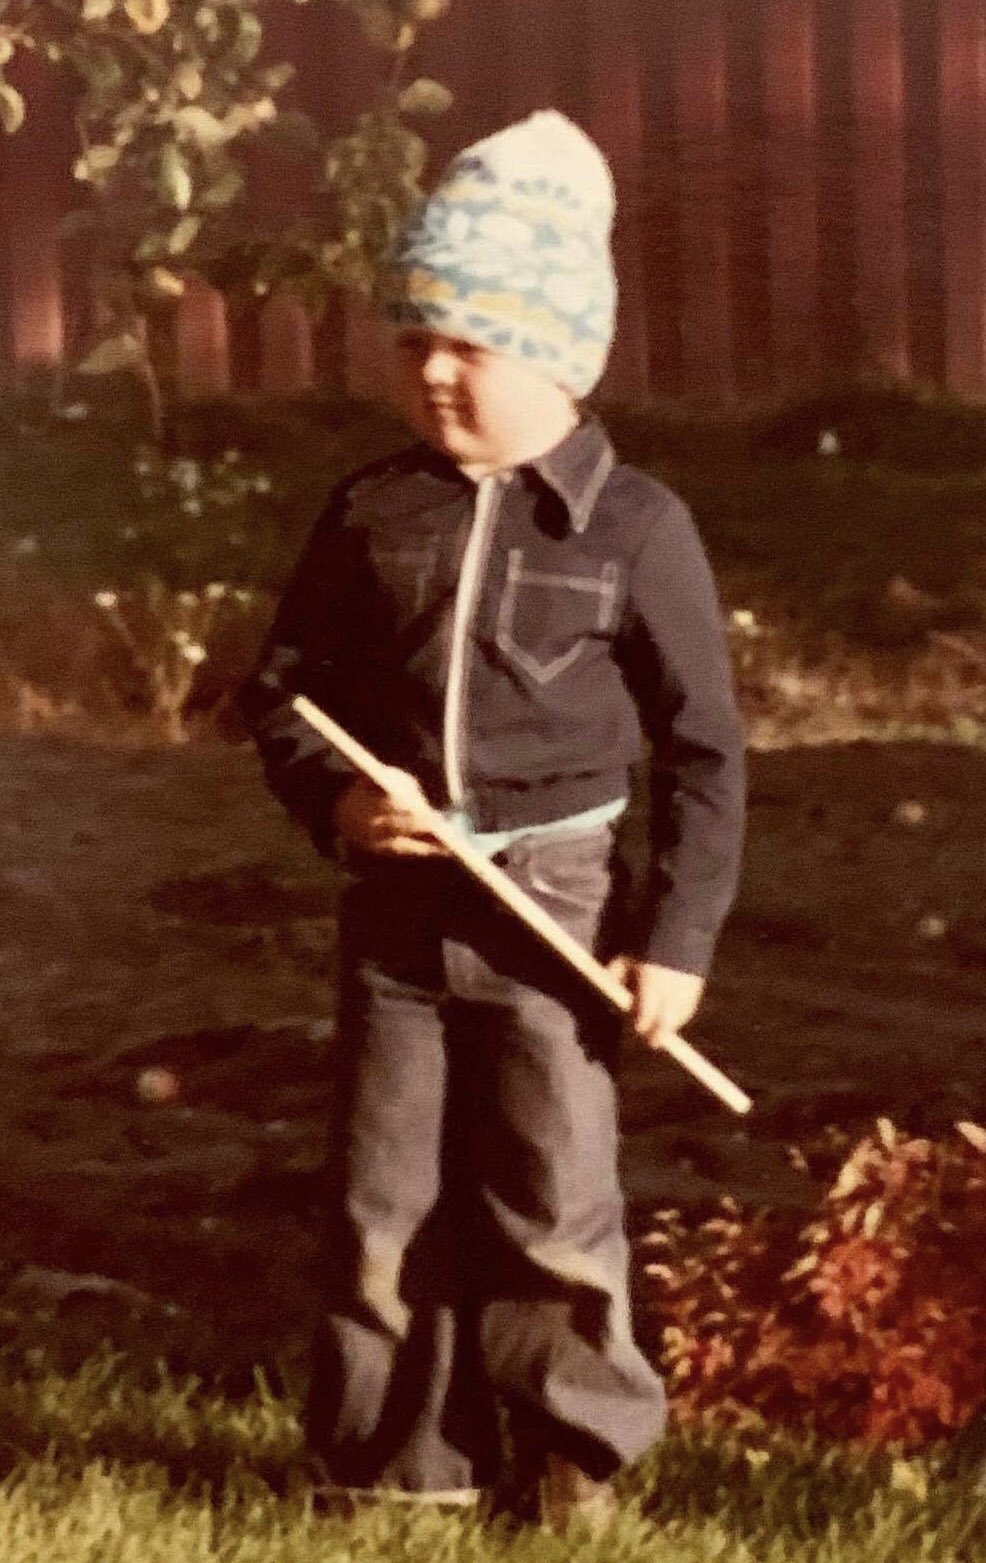
The old house I grew up in had a large and dark cellar. Sometimes Mum would send me down to get some potatoes or jam. I always used to talk loud with her as I moved slowly down the stairs, never telling her I was really scared of it all, you see there was an alternative entrance and although it was always locked I always feared someone having broken in and was waiting there to scare the shit out of me. But I was too tough to tell Mum. I used to arm myself with my favourite stick, it could pretty much be anything from a lightsaber to a full fledged Mauser Rifle – they do not do sticks like that anymore.
Well I guess any intruder would have been quickly scared off at the sight of this tough Norse warrior.
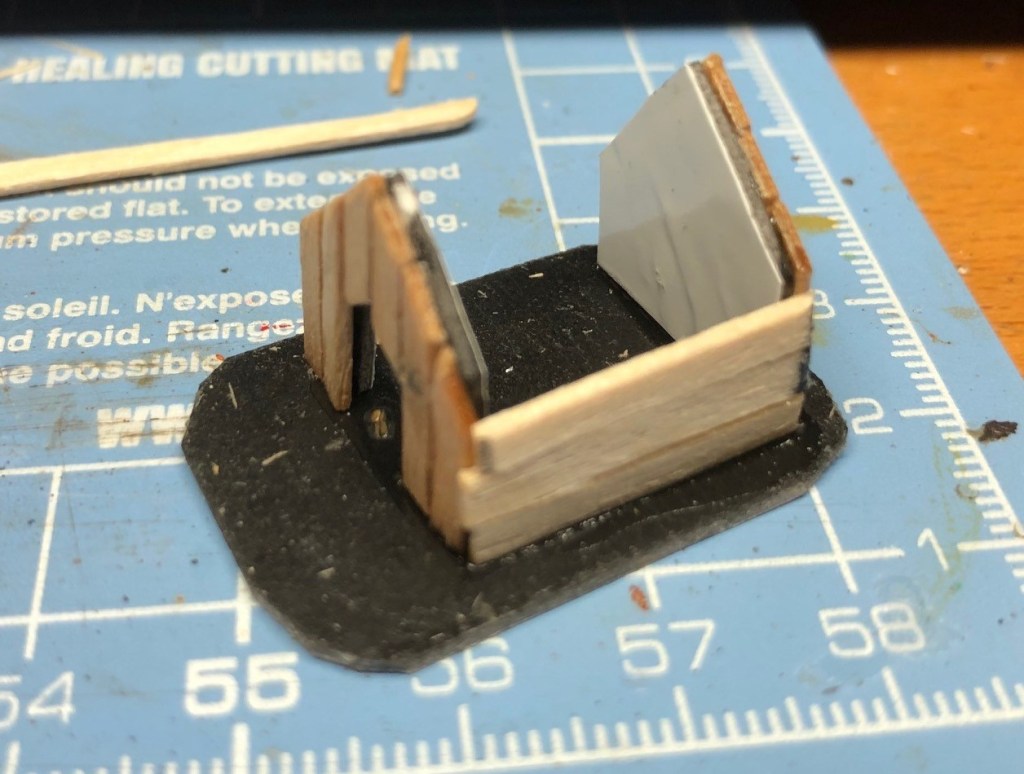
Today we are are doing a piece of clutter to allow the creation of added interest to a house by doing an external cellar entrance. Something like the pictures below.
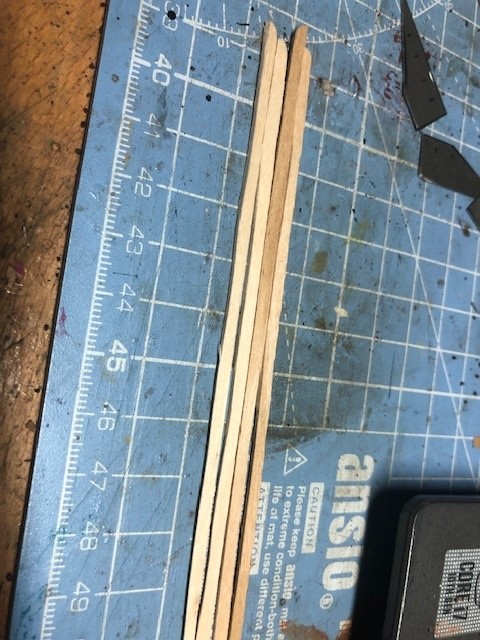
First I cut out (15mm scale) some pieces on cardboard to do the planking on. I did them about 40mm long with a slope up to to 10mm tall as seen in the picture with a roof.
Basically the walls and the roof ready for planking
Cut your coffee stirrers lengthwise to get some planks
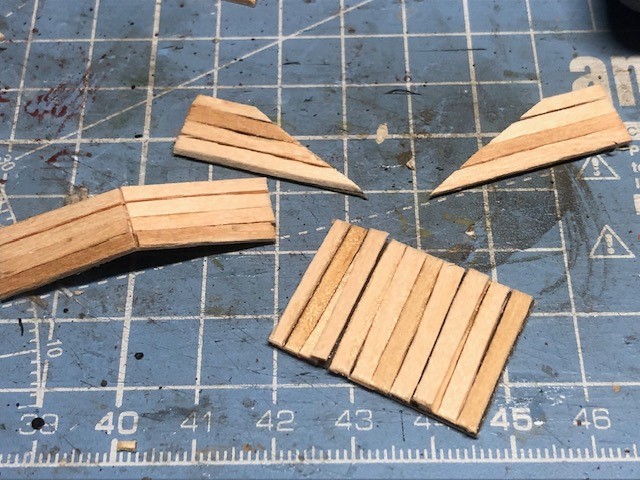
Glue on the carboard pieces (not I messed up one of the sides and glued it the wrong way around, I did fix it later though)
Then do the same with the front part
You will end up with the following parts. Note the front part has two added planks to define the door.
Glue them together and cut out a base
Add a handle and some detail on the roof, done
Paint it to fit your real estate, just put it next to your building and you have an instant cellar.
And that budget, well we were at £17.93 yesterday and this project did not add any additional costs, so we are still within the overall budget!
Tomorrow we are making a compost unit, see you then.
This Part 5 of a series of a fair few posts, Part 1 (link here) gives an overview and the philosophy applied to the series – cheap, simple and fun.
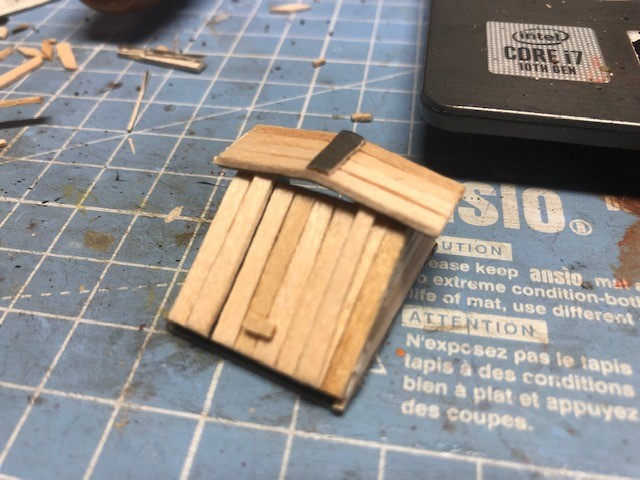
Dog Kennel
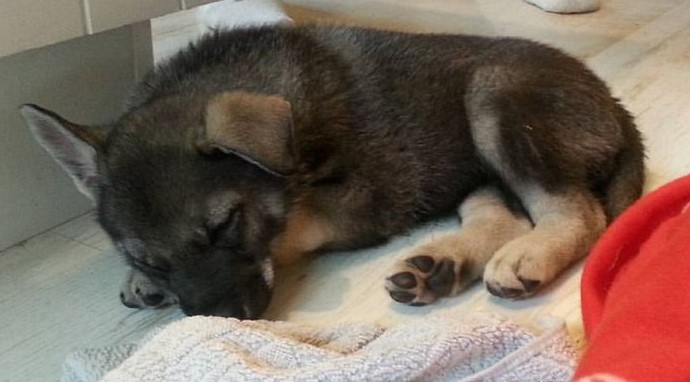
Ares might might be the name of the Greek god of courage and war, one of the Olympians and son of Zeus and Hera. But it is also my sisters dog and loves his main job which is to assist in the hunting of moose.
Now a big and eager dog but I still prefer this picture from his youth, nice and peaceful on the kitchen floor – wonder what thoughts might go through his head.
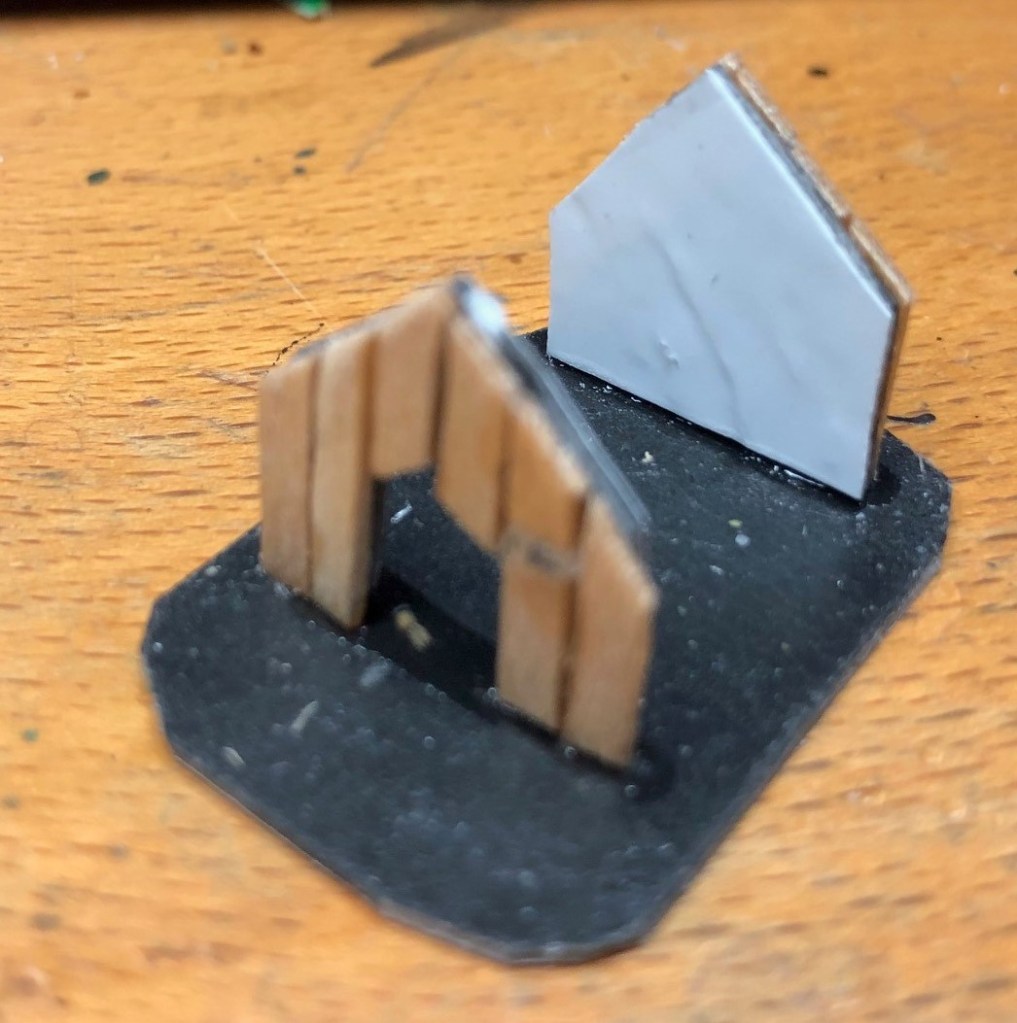
Anyway let us step up the game slightly from a few pieces of wood piled on top of each other that we had yesterday and the day before, to actually building a structure albeit small. Today we are doing a dog Kennel.
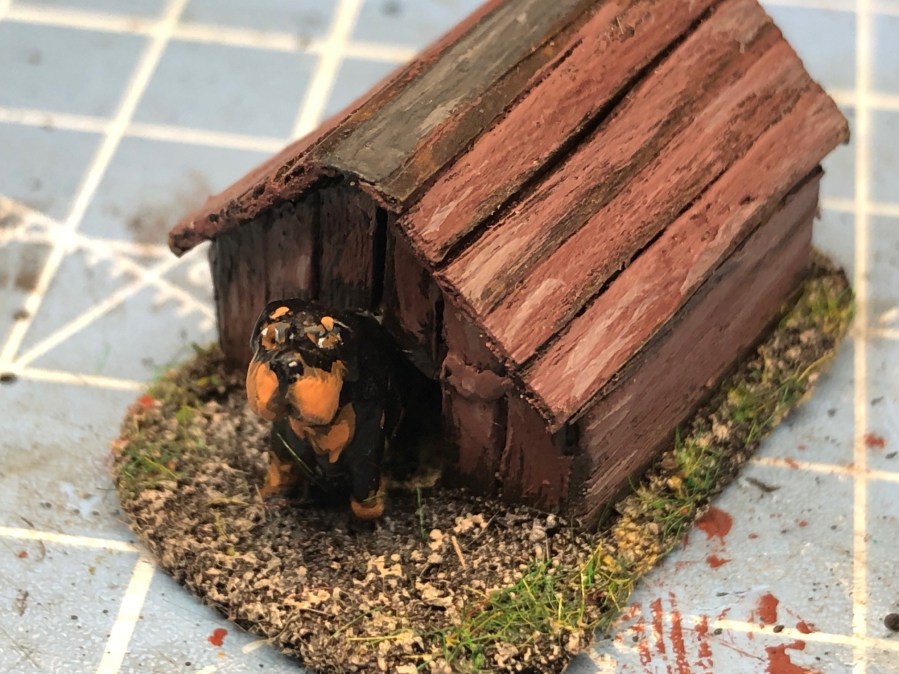
Just like in Part 1 I cut out piece of cardboard that I glue coffee stirrers on (these were cut lengthwise in half) and then glue on the cardboard, then trimmed with side cutters. Then superglue them on the base.Add some “planks” for side walls.Then add a roof, just put planks on and trim once dry and put the dog halfway out, and base the whole thing with sand.As for the paiting I went for a red Kennel as this fits with he Sweden 1943 theme I am working towards, and the dog, well not sure what kind it ended up being but I think it worked out.Maybe I try to do something to represent a bowl or something and perhaps a bone (but that will do for now). You could also take some sandpaper and add to the roof, it really looks good painted black (not the coarse one but the fine one).
And that budget, well we were at £14.93 yesterday and we added the Dog, this was from a packet of 15mm dogs from Museum miniatures and set us back £3, so we have now spent £17.93 (But a good investment and some dogs in our back pocket for another project).
Tomorrow we are making an instant cellar, see you then.