

Some time ago I fancied doing some Swedish WW2 era soldiers for fun, originally thinking I would do some kind of border skirmish scenario or something similar. It grew in scope somewhat, I have recorded the progress so far in a number of blog posts (here, here and here).
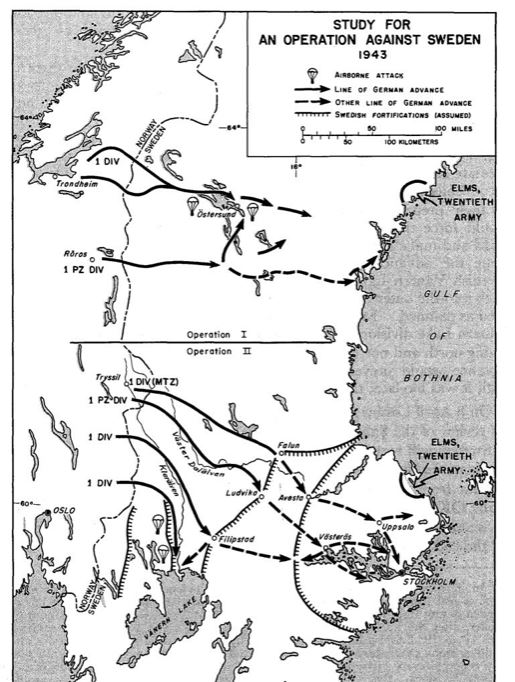
Current I am planning a few Scenarios based on the 1943 Swedish invasion plan made by Adolf Schell. Part of this plan had some of the lines of advance going through Dalarna (the county where I was born) in Sweden and it would be interesting to place some of the action here. So having some units for the Swedish side I really needed some suitable Germans and decided to start by doing some tanks representing the 25th Panzer Division as it was in the Summer 1943 when it was stationed in Norway.
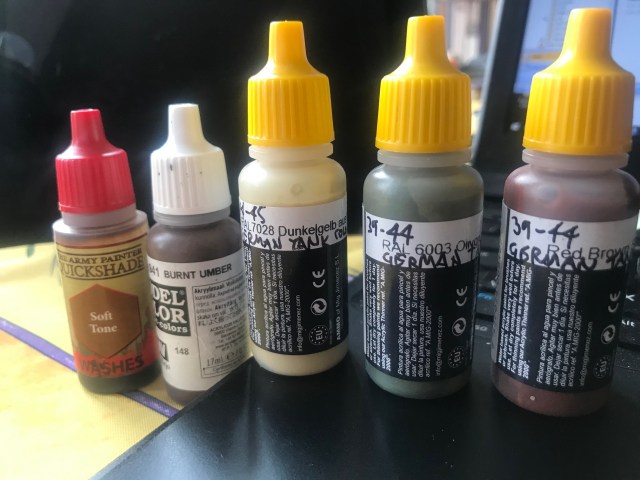
So from this we know that the division had the following tanks:
- PzKpfw II
- PzKpfw III
- PzKpfw IV
- Hotchkiss H39 (captured French tank)
- Suoma S35 (captured French tank)
- Self-Propelled assault Guns
As the Swedes on the other side did not have a very strong tank force and anti-tank capability at the time, this list is still challenging but not as devastating as a list with Tigers and Panthers for example.
In addition the division would have a number of other supporting units like Panzer grenadiers, scouts/recon, artillery etc. I will get to these later, however as this is a Chain of Command project, I am not interested in some of the heavier stuff and/or supporting companies, but it would be fun to include some scout types as I read somewhere that they were mainly on Motorcycles and did not have armoured cars, etc.
However back to the focus of today – the tanks.
First I had to decide on how to paint them, my initial idea was to just make them Panzer Grey but since the directive was to paint them in dunkelgelb was issued earlier in the year, I asked people on twitter for some advice and got may helpful hints, like this one from Petri Niemenien (thank you):
To be specific, Feb 1943: Dunkelgelb RAL 7028 base coat + Rotbraun RAL 8017 and Olivgrün RAL 6003 stripes 😉
So, and I noted this down mainly for myself, this is the process I used (it creates some reasonable and quick results, it works for my table):
- I used Plastic Soldiers Tank Spray Dunkelgelb (link here) cans – awesome product to be honest, saved me a lot of time. But you could of course use a brush.
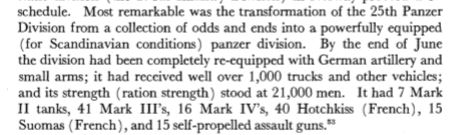
- Then I dabbed/stipple (use a thin wasted brush) on the Olive Green mixed with the Dunkelgelb paint (4:1 mix to tone it down) forming some 2-3mm stripes – I used the paints in the picture below, but anyone will do. The MIG paints are a little bit runny and work great for this, if you use other paints water them down somewhat, I want to have some of the primer shining through.
- The same with the Rotbraun (reddish brown).
- Then I highlighted the green stripes with the Oliver Green unmixed, tried to do a line in the middle kind of – do not paint stipple it on.
- For the Rotbrown stripes, use the colour again but mix in some dark brown (I used burnt umber). Again highlight the middle.
- Let it dry
- Wash the tank with a light brownish wash – I used Army Painter Quickshade – Soft Tone.
- Let it dry
- Drybrush with the Dunkelgelb
- Do the details as appropriate.
- Put on Decals (I used Plastic Soldier Company Decals for mine).
I will do some further weathering but will perhaps add some division insignia decals (I will do these myself later) and decide what time of the year the actual invasion “happens” so will wait with that and do it when all is completed.

I really fancied the idea of including some of the French captured tanks – as they are rarely seen on a wargames table unless it is depicting France in 1940. I went to the Tank Museum in Saumur in 2016 and really enjoyed the French tanks in the collection.

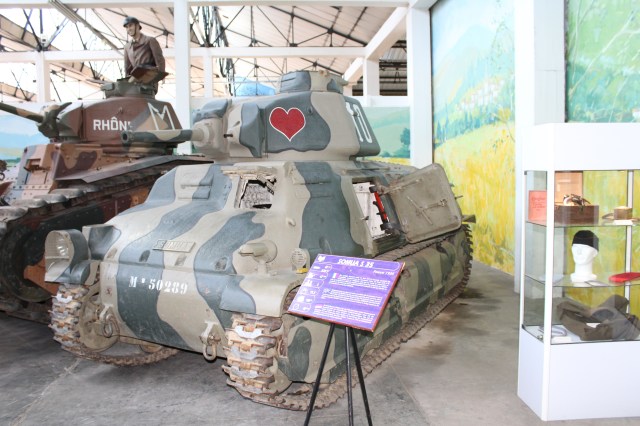
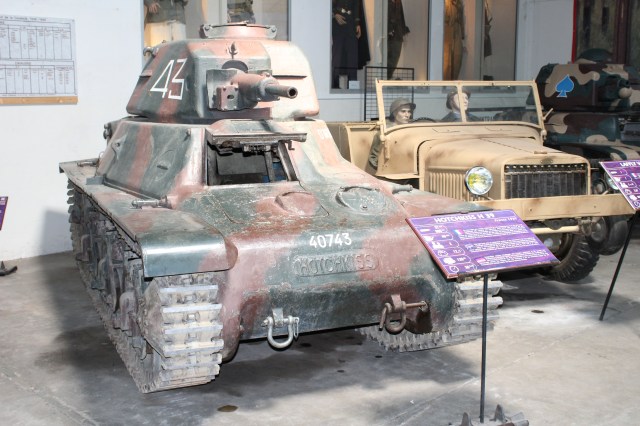
I bought three each of these French tanks from Peter Pig (link here) and they are brilliant metal models with limited parts, just ensure you use either 2 part epoxy glue or some milliput or equivalent when you assemble them to ensure strength and durability.
The French tank had cupolas instead of hatches on top and in many cases the Germans added hatches on top. I did not modify the H39s but on the S35 a used a modelling knife and did a cut in the middle of the cupola to represent a hatch on two of them and a tank commander with some improvised hatches (I cut some plastic Sherman hatches roughly from a Plastic Soldier Company sprue the Little One had not used).
Here are the H39s (Peter Pig)

..and the S35s (Peter Pig)

Then the standard German tanks, first out PzKpfw II.
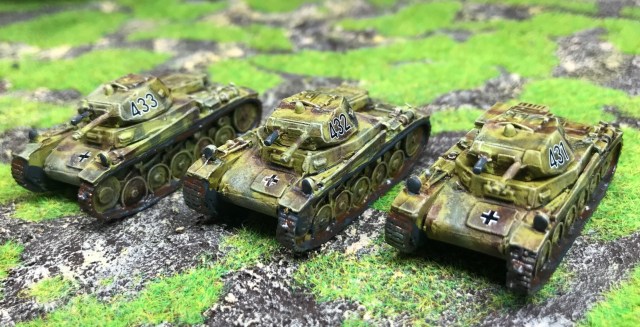
Then the PzKpfw III.
So now we have some options, and good progress overall on the tank front.
- PzKpfw II (done)
- PzKpfw III (done)
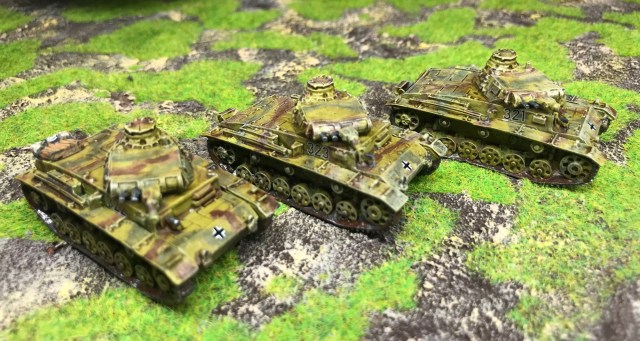
- PzKpfw IV
- Hotchkiss H39 (done)
- Suoma S35 (done)
- Self-Propelled assault Guns
I guess next I will do some PzKpfw IVs and StuGs but fancy including some early other Self Propelled Guns as well – but that will be the next binge batch some other time.
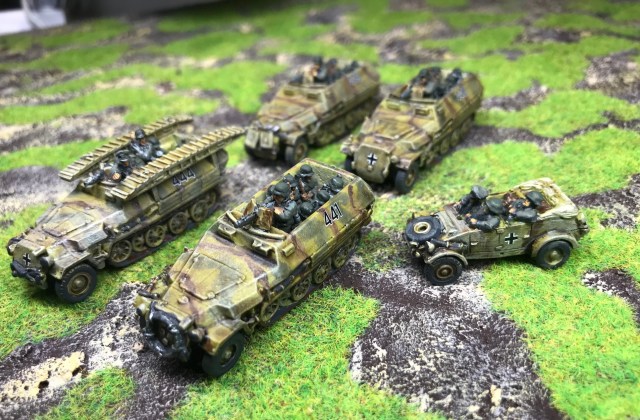
By the way I also did some Hanomags and command vehicles… (all from Peter Pig, except the Befehlswagen that is from Skytrex, this is the last vehicle in the second Picture)
If you have any information about the 25th Panzer Division that could be relevant up to them leaving Norway in 1943 I would be more than interested. Also any books that may include some coverage of the Division or the individual regiments/battalions that formed it, etc.
- Panzer Regiment 9
- Panzer Grenadier Regiment 146
- Panzer Grenadier Regiment 147
- Panzer Artillery Regiment 91(undersized)
- Panzer Reconnaissance Battalion 25
- Motorcycle Battalion 8
- Panzerjäger Battalion 87(Tank Destroyer Battalion)
- Panzer Engineer Battalion 87
- Panzer Signal Battalion 87
- Panzer Pioneer Battalion 87
- Feldersatz Battalion (Field Replacement Battalion)
/ Hope that was of some interest

Lovely work. Nice to see some of the older designs in a camo paint job.
Cheers,
Pete.
LikeLiked by 2 people
Most of them from the Lead mountain.
LikeLiked by 2 people
I’ve been following this with interest. Really good.
LikeLiked by 2 people
I am enjoying it too. Hope you are well!
LikeLiked by 1 person
Very interesting project on a potential invasion I knew nothing about. Looking forward to seeing some AAR’s on the games.
LikeLiked by 2 people
It will take some time before they will see any action working on a big show game for July, so it will be at some time in the Autumn. Thank for checking it out Steve!
LikeLiked by 1 person
Great work again Per. That’s a lot of armour for Chain of Command though, isn’t it?
LikeLiked by 2 people
Indeed, may have a few more ideas 😉
LikeLiked by 1 person
Per, great job, especially on the camo on the captured French tanks. Had not thought of Peter Pig as a tank source before, so thanks for sharing that. These would be also great for a What a Tanker game with your Swedish armor. Love the tutorial too as I was debating which Army Painter tone to use with my Panzers in progress, and the soft tone did well.
LikeLiked by 1 person
Thanks Mark, I am pleasantly surprised how they turned out too!
LikeLiked by 1 person
Per,
Interesting post – a bit of history that I didn’t know – well done for sharing.
Do you have any details of the Swedish Divisional organisation(s)?
LikeLiked by 1 person
Thanks Bill, I do have some information, will do a summary on the blog in a few weeks time!
LikeLike
Nice work!
I wonder if the half tracks wouldn’t be captured French as well? As for the 21st in Normandy. And if the SPGs wouldn’t all be of the older / captured types, rather than StuGs? Gives some options to field interesting stuff 😉
Following this with interest, one day Thomas and I will succumb to the temptation, for sure…
LikeLiked by 1 person
Thanks Koen! Will look into this.
LikeLike
Pingback: GNW, Little One, Sweden 1943, Mutant 1984 and Podcasts – a review of 2019 – Roll a One
Pingback: Latest Swedish Infantry Platoon Lists 1940-45 for Chain of Command – Roll a One