This Part 24 of a series of a fair few posts, Part 1 (link here) gives an overview and the philosophy applied to the series – cheap, simple and fun.
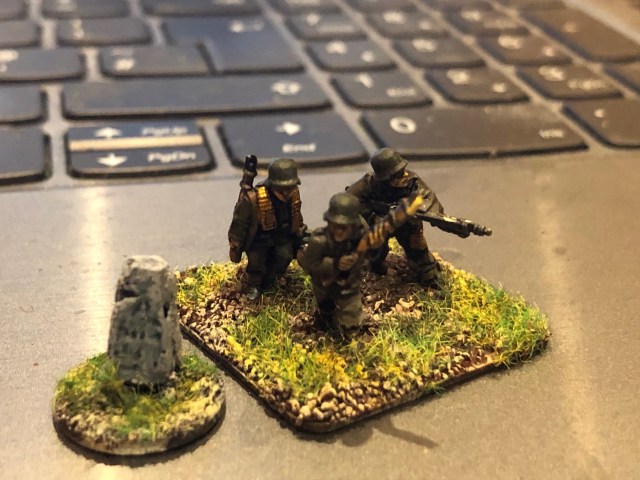
MIlestones have been used throughout history and initially, at least in Sweden for the 17th century, were used to enable the administration to pay its staff for various cost relating to travel. Many materials were used including wood, stone and from the 19th century in iron. The milestones were phased out in the 1890ies but remain in many places today.
So possibly the easiest piece so far, I just took a piece of blue foam, cut a shape and glued it (do not use superglue) on a small base and there you go,
This Part 23 of a series of a fair few posts, Part 1 (link here) gives an overview and the philosophy applied to the series – cheap, simple and fun.
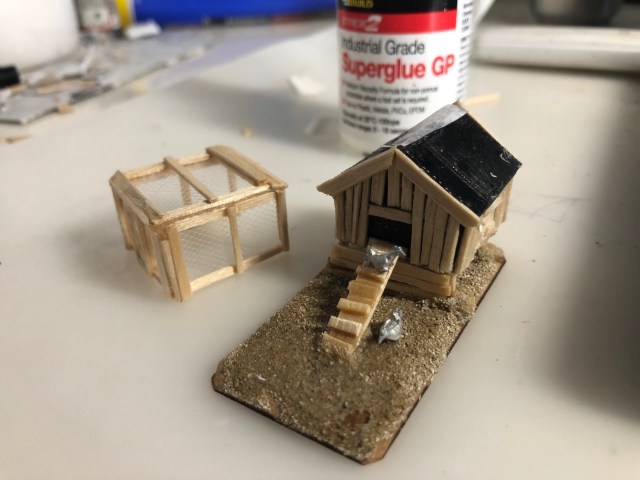
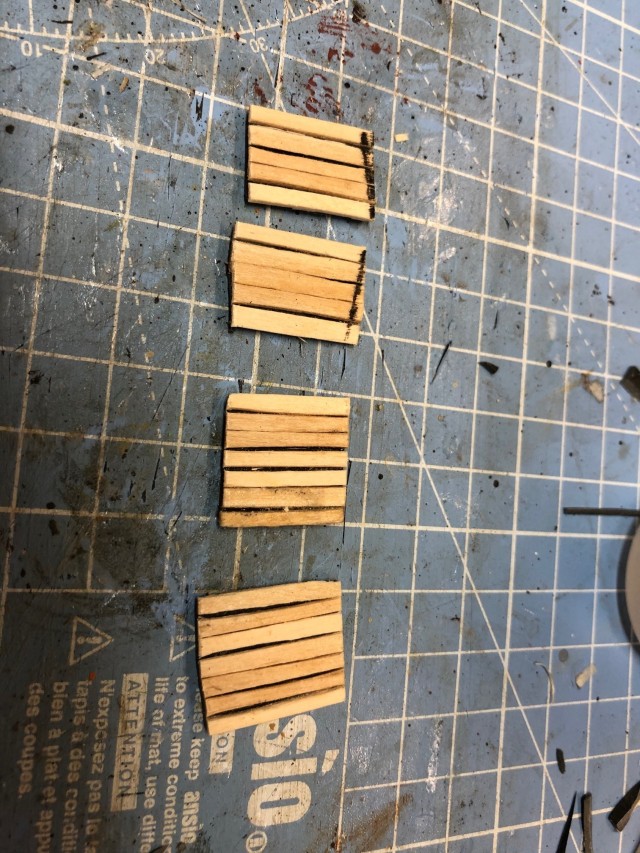
Today I have been running around like a headless, chicken so let us get straight into it, you will mainly need coffee stirrers cut lengthwise separating each in three lengths.
Create three walls and roof I make mine about 15mm high and 30mm wide.
Attached some neeting with superglue, but what is it (see below)
The material is referred to as Tulle Fabric (I had some at home)
Glue the pieces and add some detail (supporting beams, you can glue these carefully to create strength), also some detail for a door. Now put it on the side.
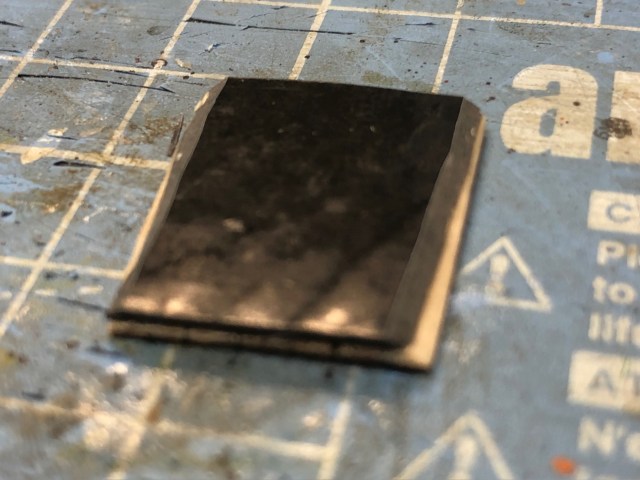
Cut out some pieces of nylon tiling like this, about 30 by 30 mm, with walls being about 15mm tall or something like that,
Glue them together to form this shape
Clad the whole piece with the coffee stirrers and put it on some short stilts (some planks to stop exit/entry) and a ladder
I added a few pieces to symbolise where the eggs would be collected.
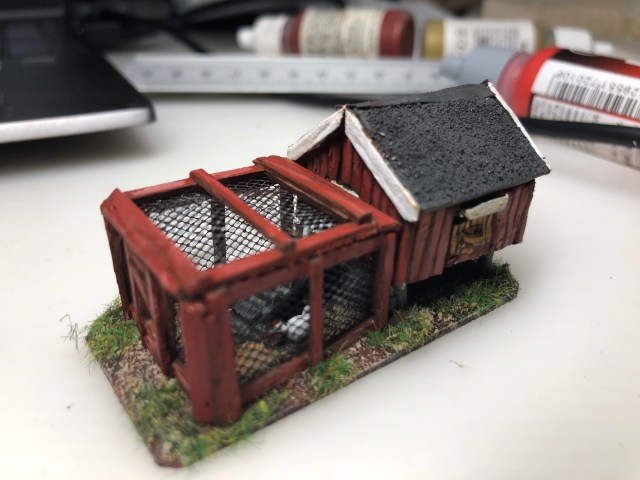
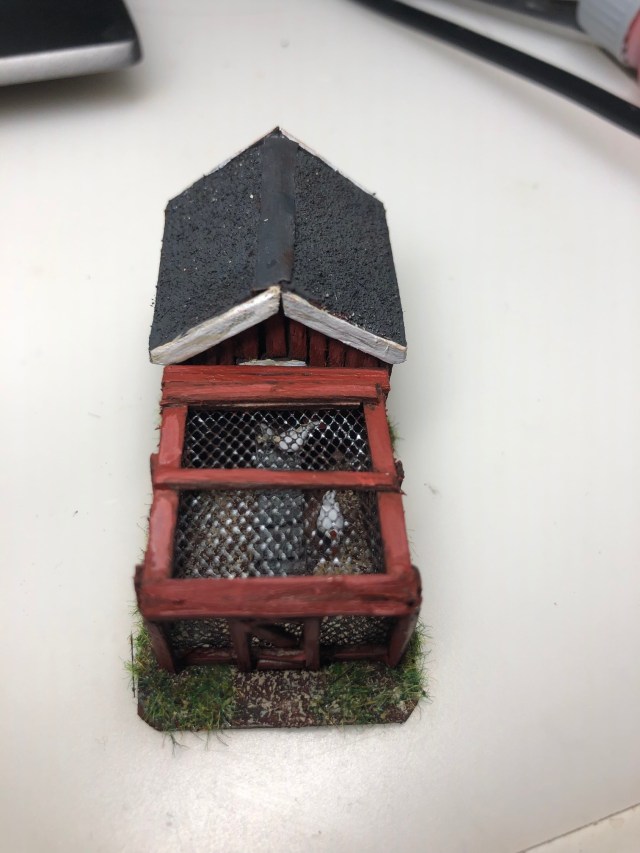
Detailing on the front and roof (nylon tiles) and some chickens from the lead mountain (not required(
Detailing on the back (also I add some fine sand on top of the roof to create a roof felt structure.
I painted all before I glued on the cage. Alternatively if you do not have the fabric to make the cage, you can make yours like this.
Really cool seeing the Hens in there.
Have to say that this one and one in Part 21 (Charcoal Burner) are my favourites.
Spend is still £24.42 in total as we just used coffee stirrers. Ok, the chicken and the fabric would have cost some cash if I did not have it at home so it is debatable and in that case the budget is blown, however I am leeting myself off the hook this this time.
This Part 22 of a series of a fair few posts, Part 1 (link here) gives an overview and the philosophy applied to the series – cheap, simple and fun.
This is a quick one, so lets get on with it.
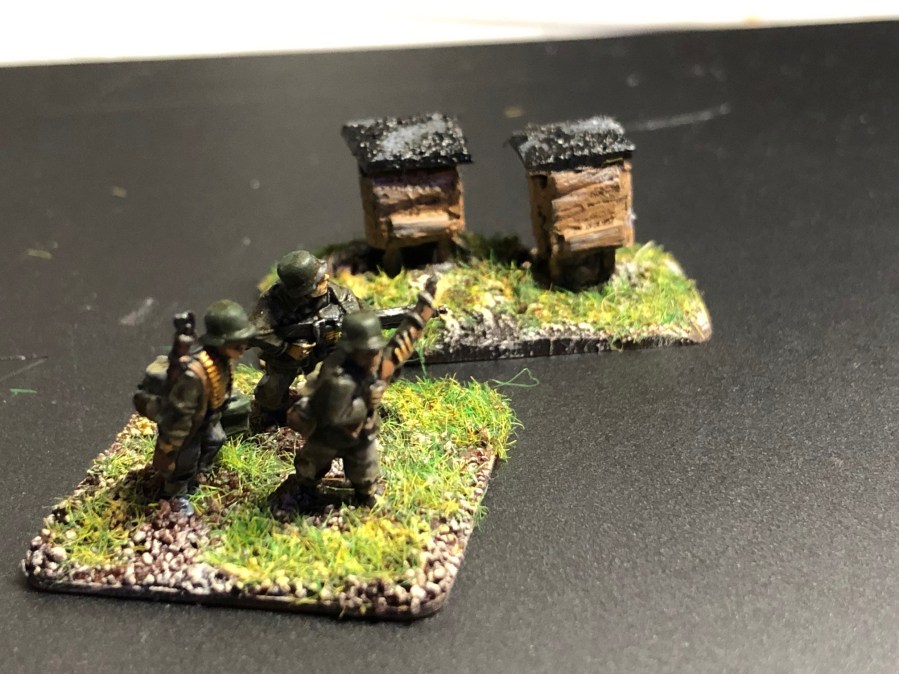
Cut coffestirrers lenghtwise in three pieces, then cut small pieces as shown glue them on top of a coffeestirer
Like thatCut off in small lengths, trim and put on top of some spagetthi/plastic rod/toothpics as shown.Ass some pieces of cardboard on top and add some fine sand (or make a tiled or plank roof)Add a small piece on front to the the part where the bees flies in and outPaint them up, not 100% happy with these but the show must go on. I will probably make some new ones, but you get the idea.
If you these yourself, measure and be neater than I have been. This was very rushed. Spend is still £24.42 in total as we just used coffee stirrers.
This Part 21 of a series of a fair few posts, Part 1 (link here) gives an overview and the philosophy applied to the series – cheap, simple and fun.
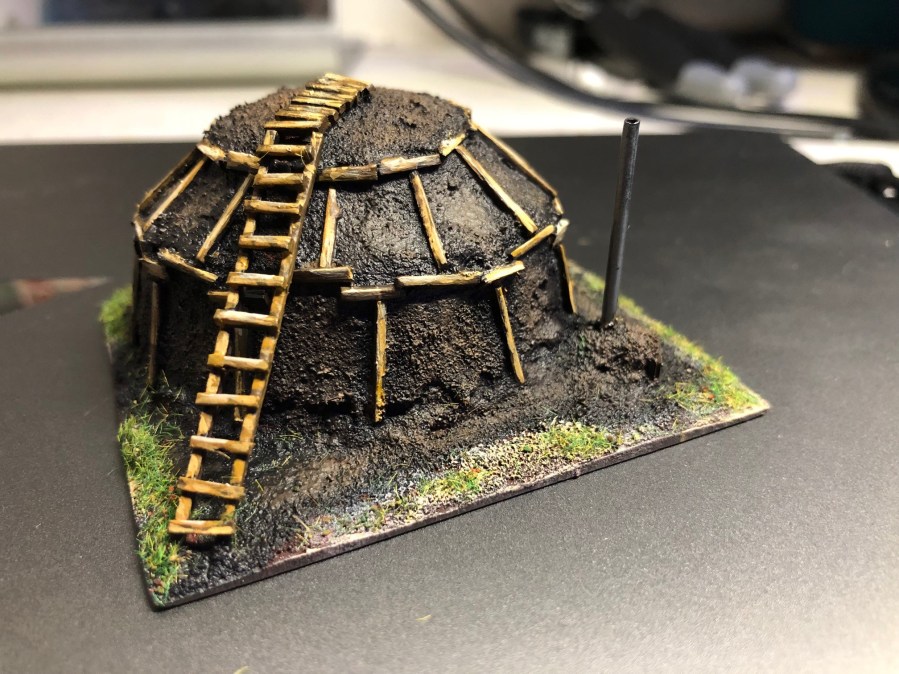
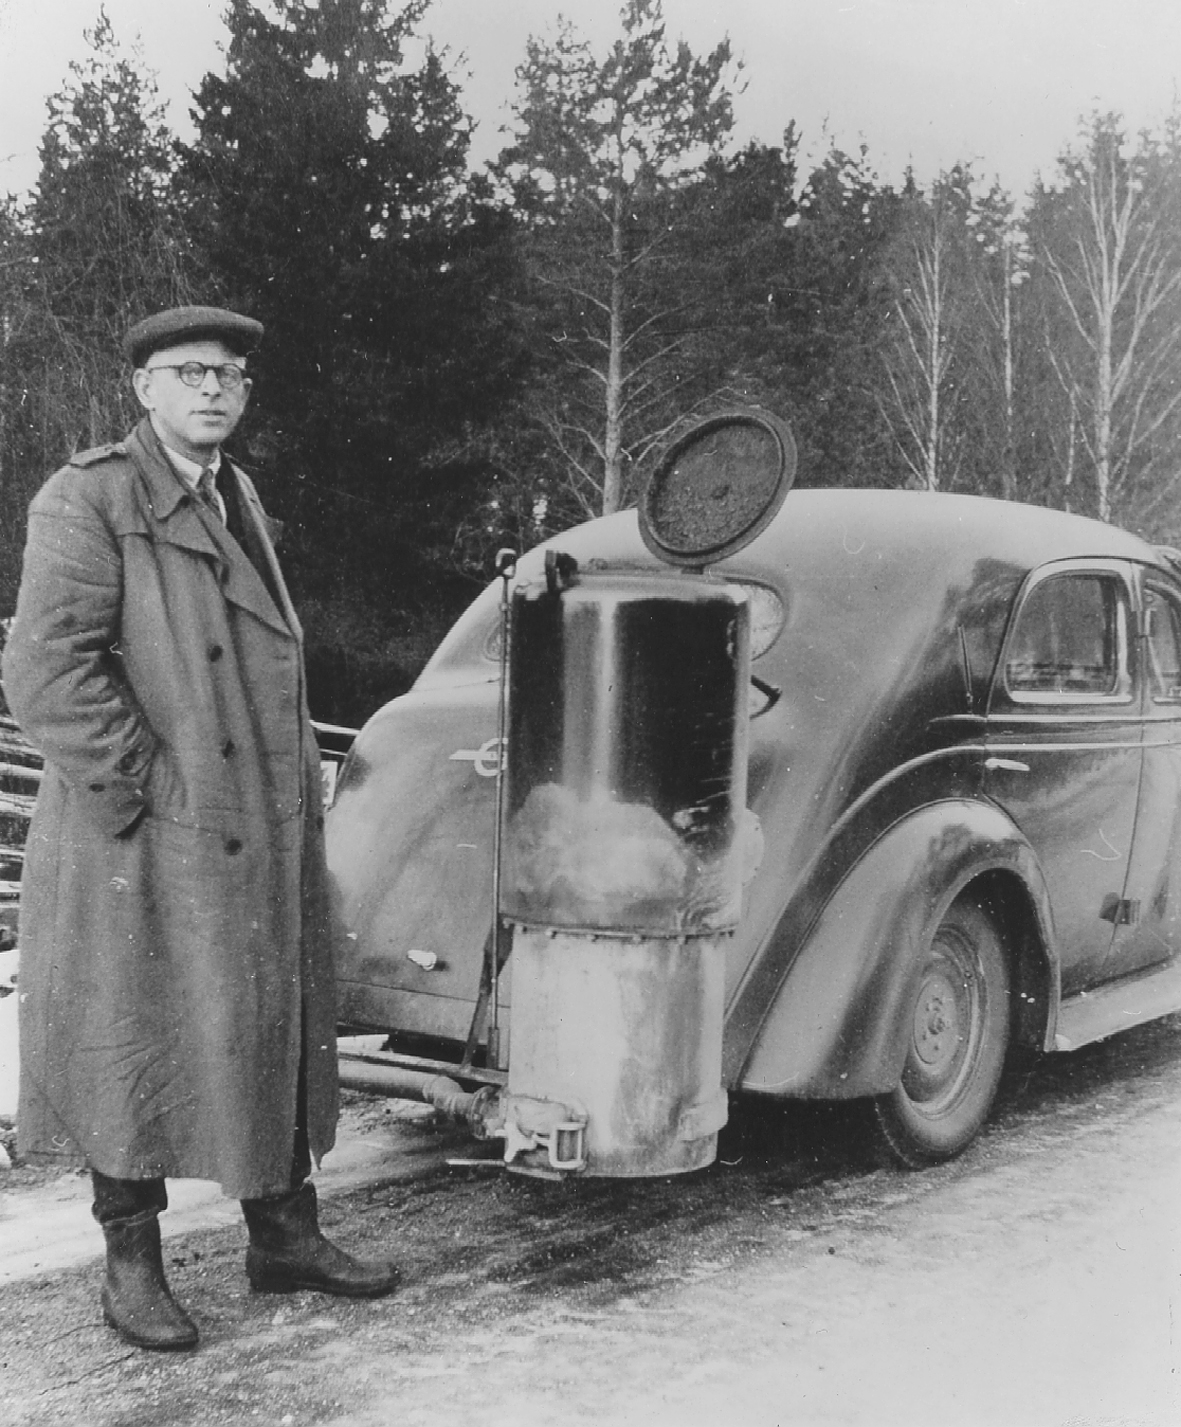
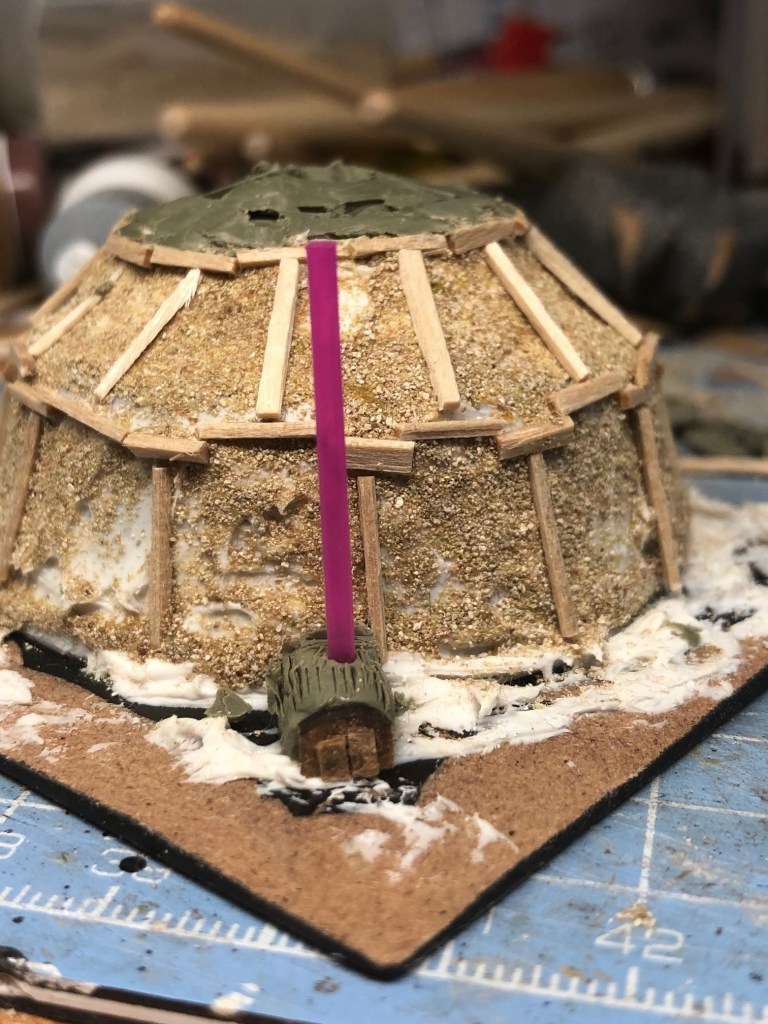
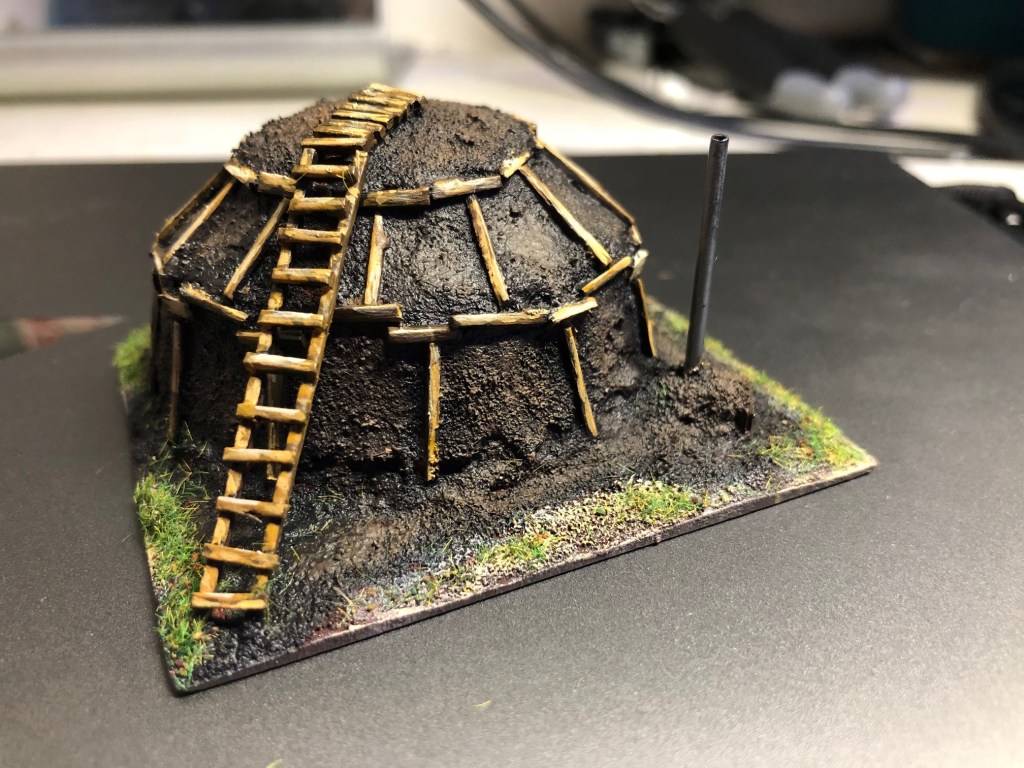
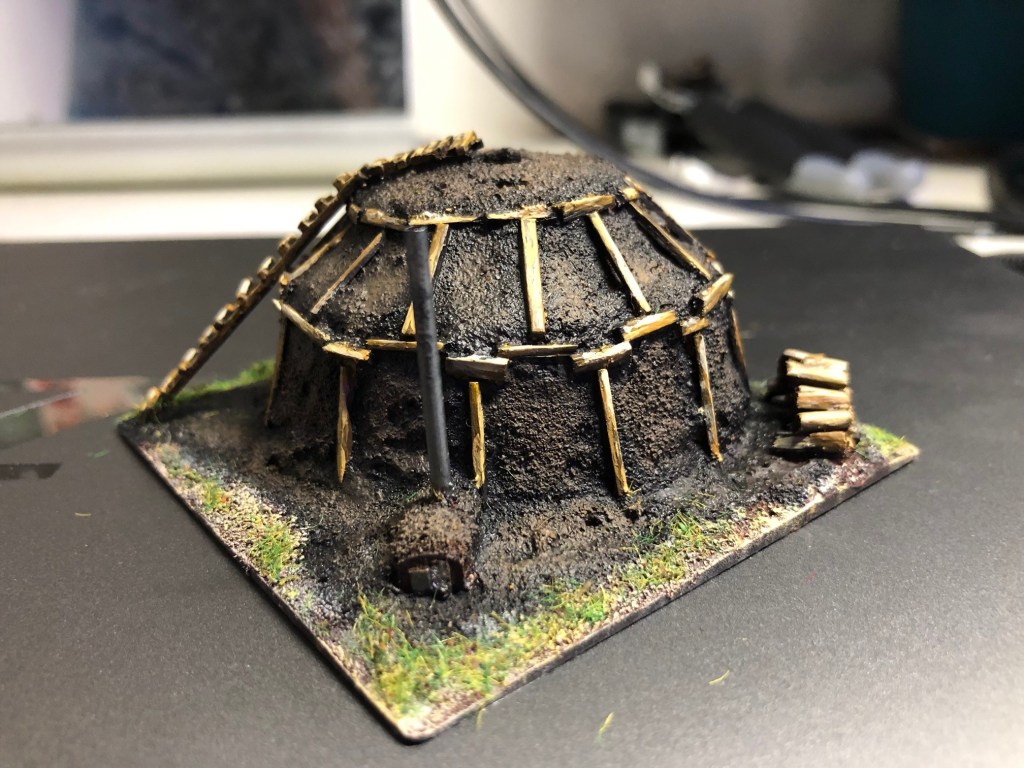
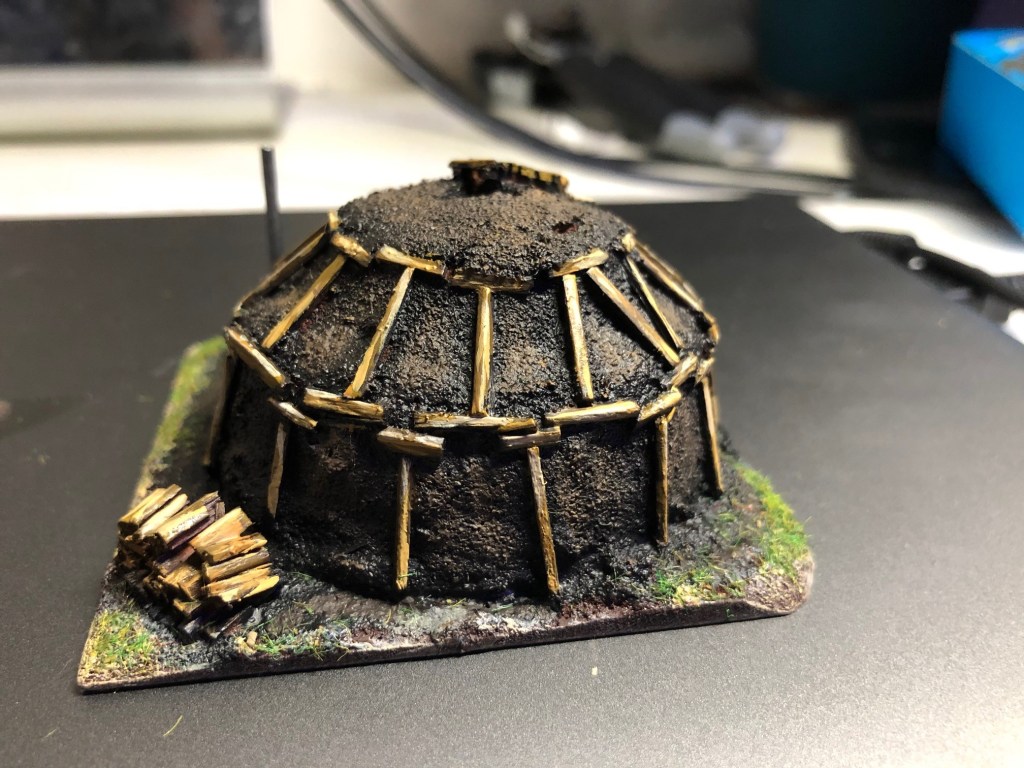
Today my favourite so far the Charcoal Burner, a very common feature up to the second part of the 20th century, it is used to produce charcoal. In Sweden as in many countries charcoal was important during the war years due to fuel rationing and the of coal to produce wood gas to use for vehicle fuel.
A Charcoal burner is basically a packed pile of wood covered and being burnt to produce charcoal, here is a video (in Swedish, showing an overview, if you are interested).
Anyway this is how I made one (note my support arrangements have been simplifed)
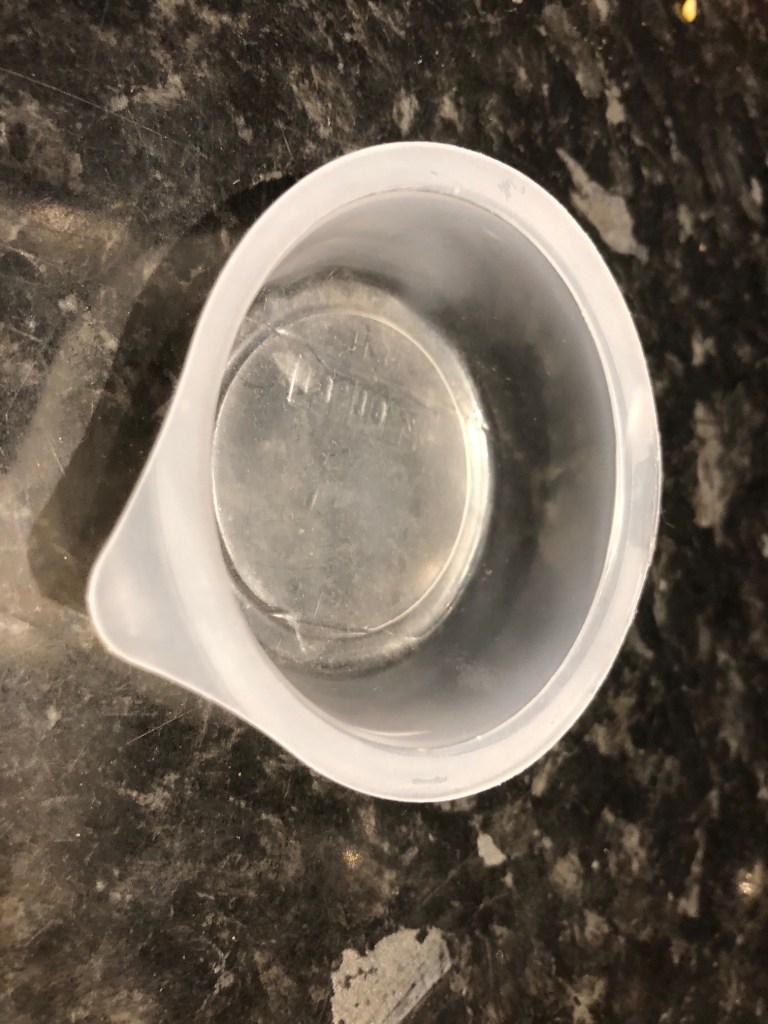
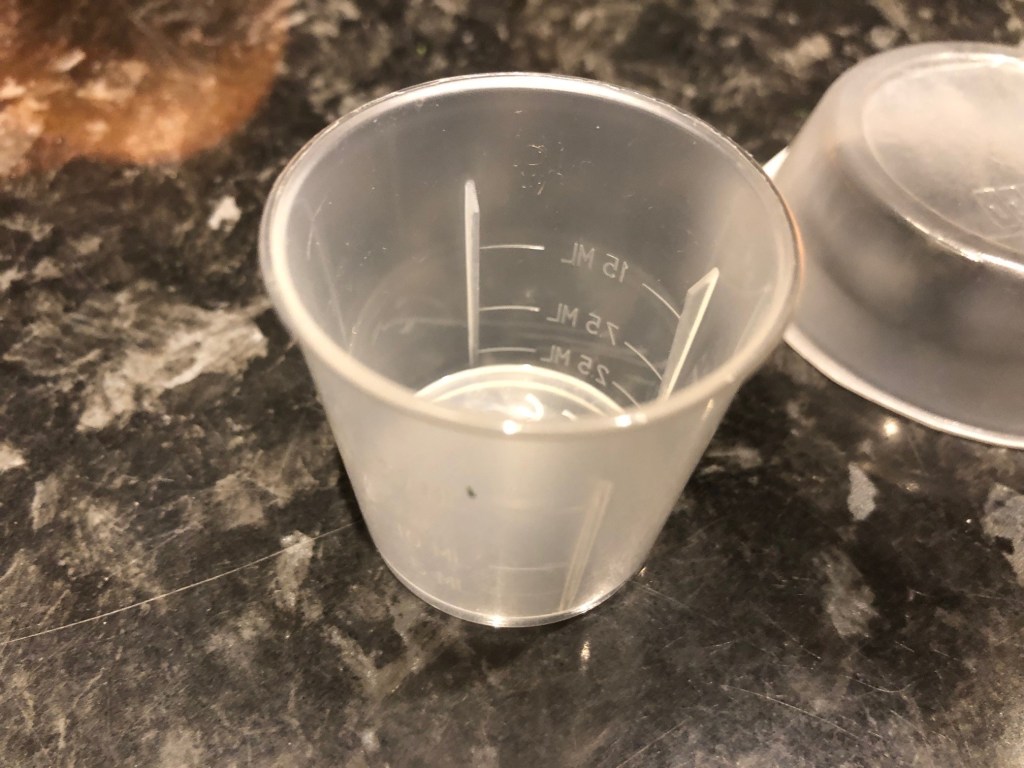
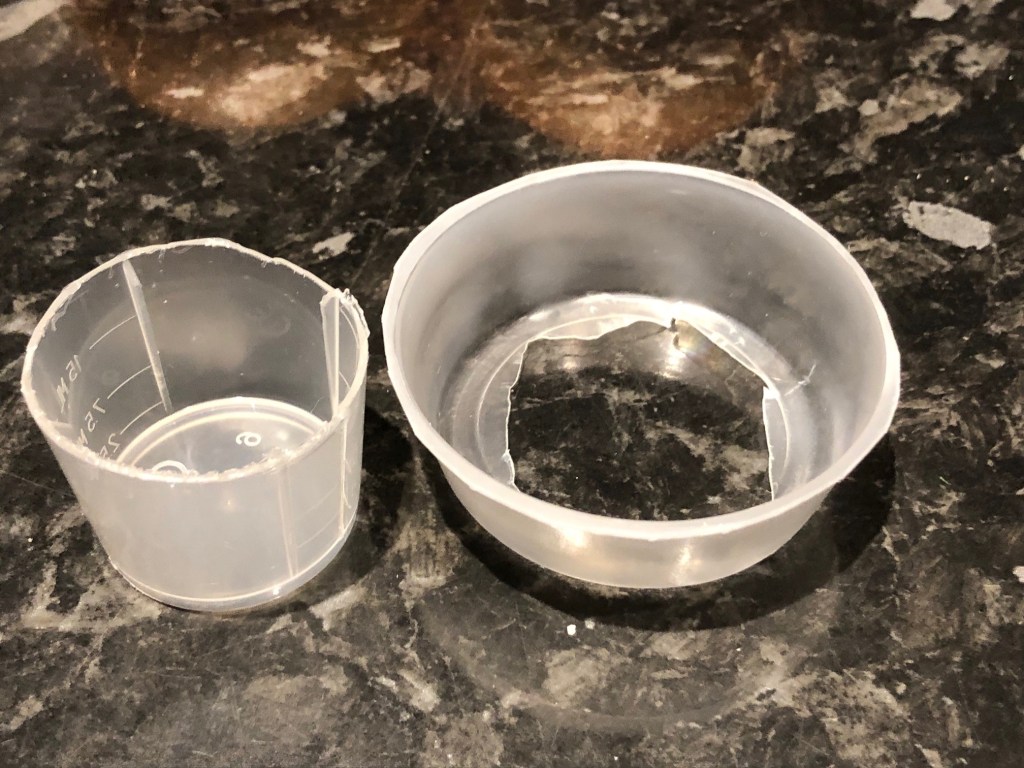
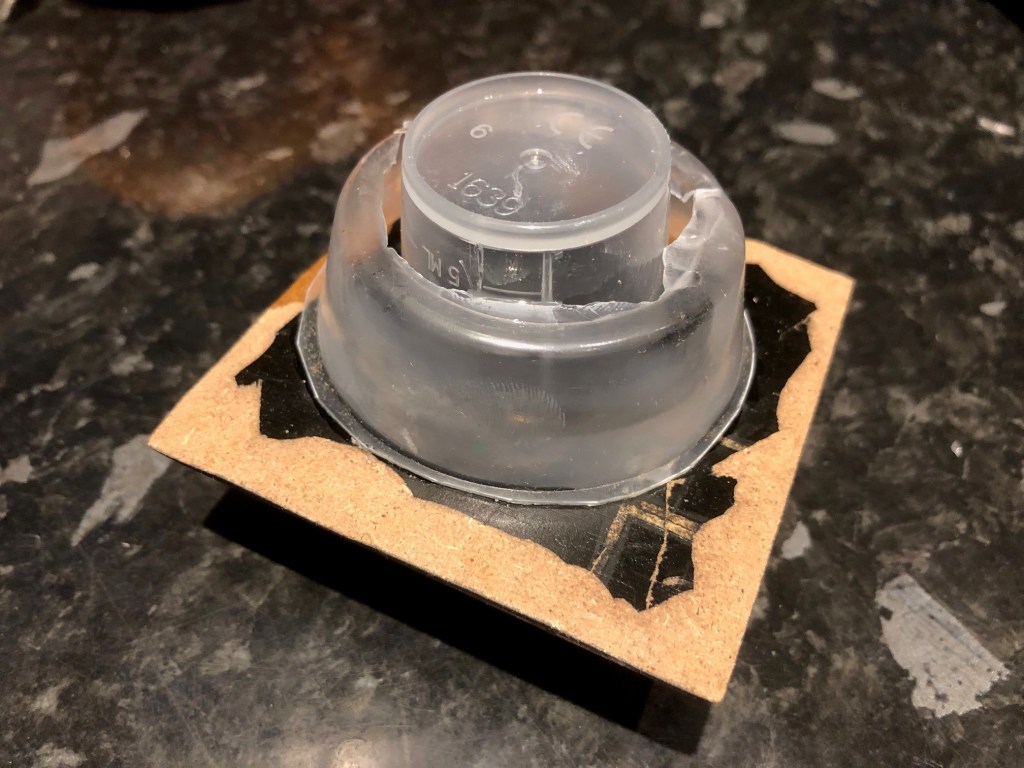
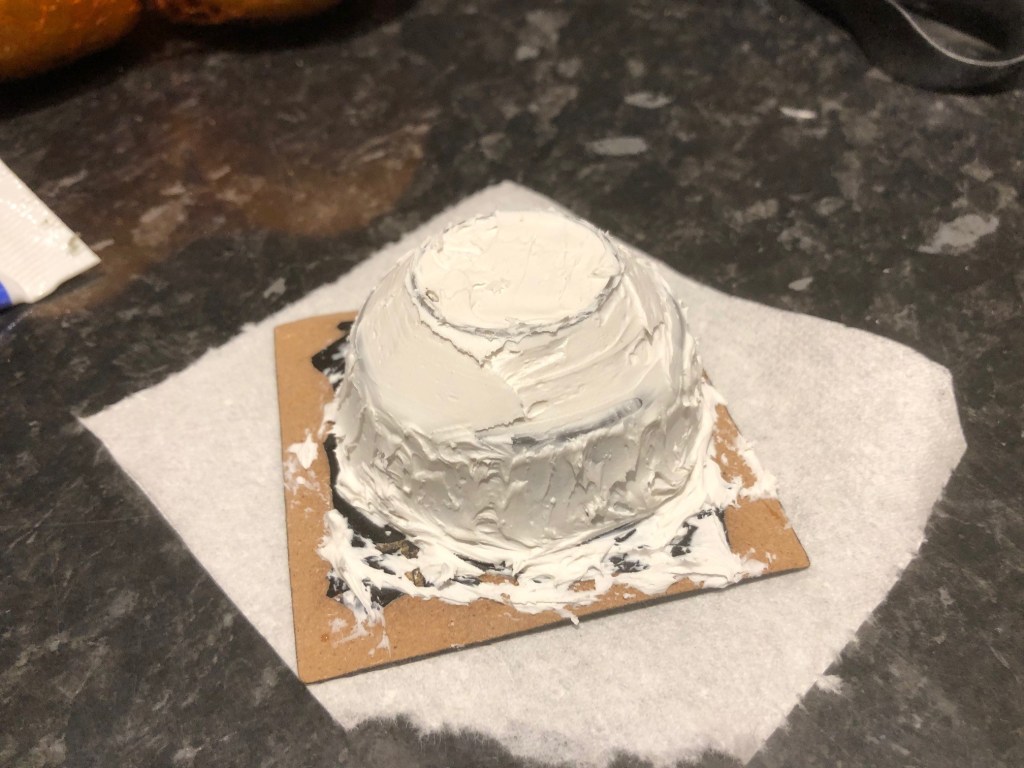
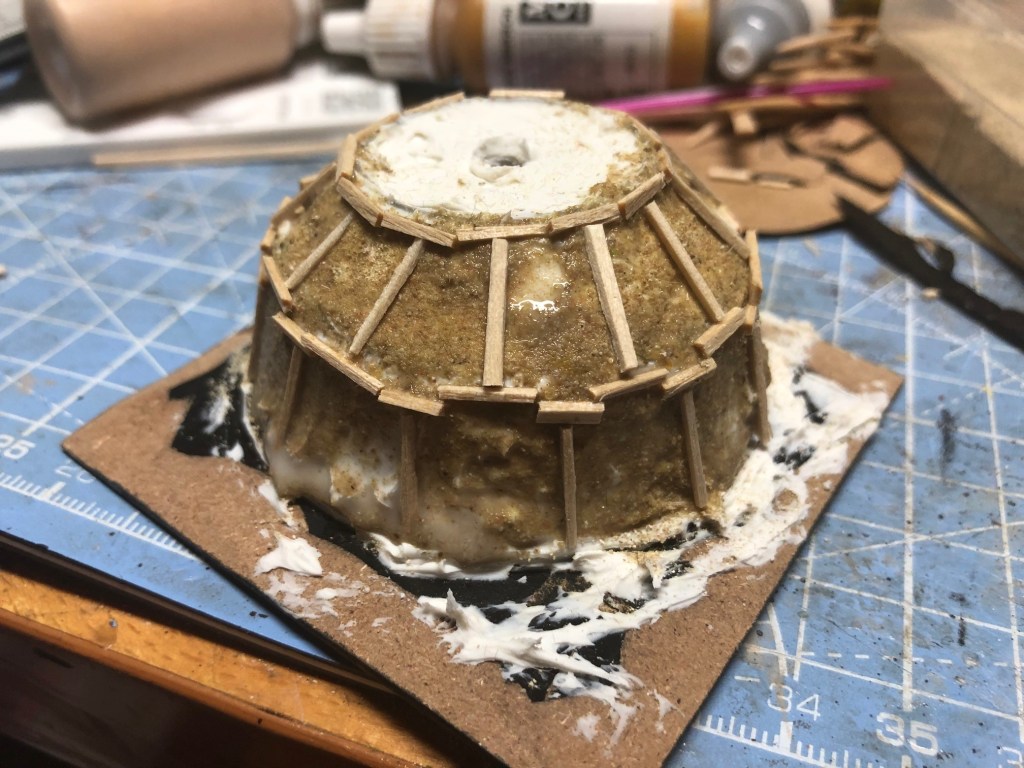
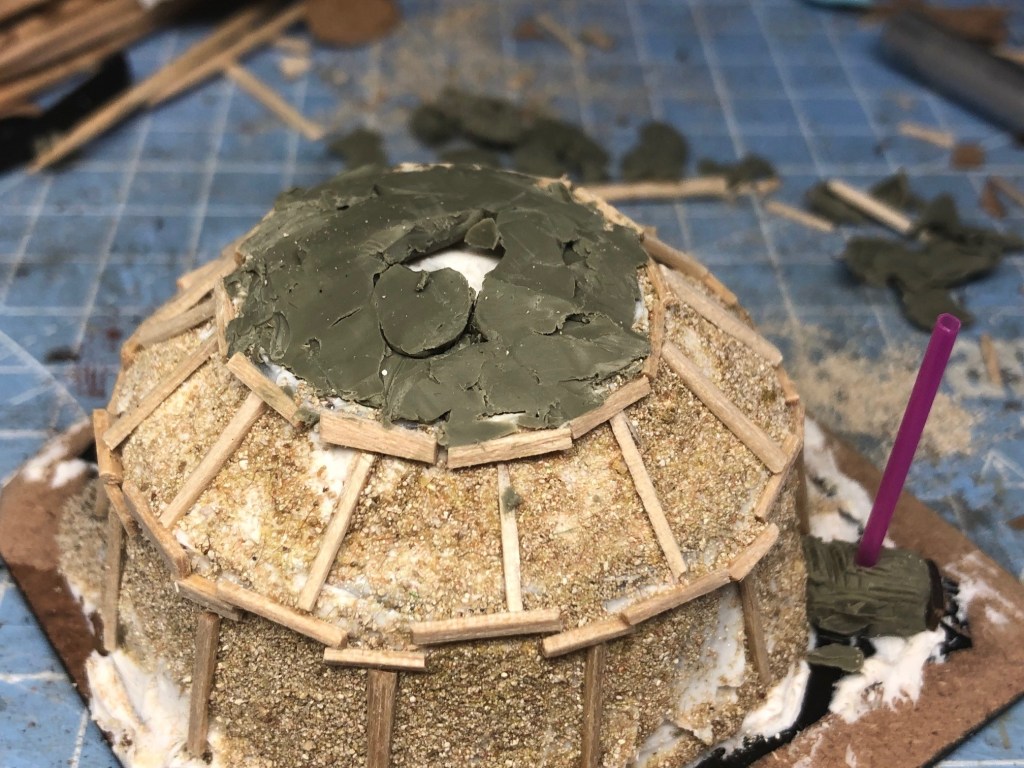
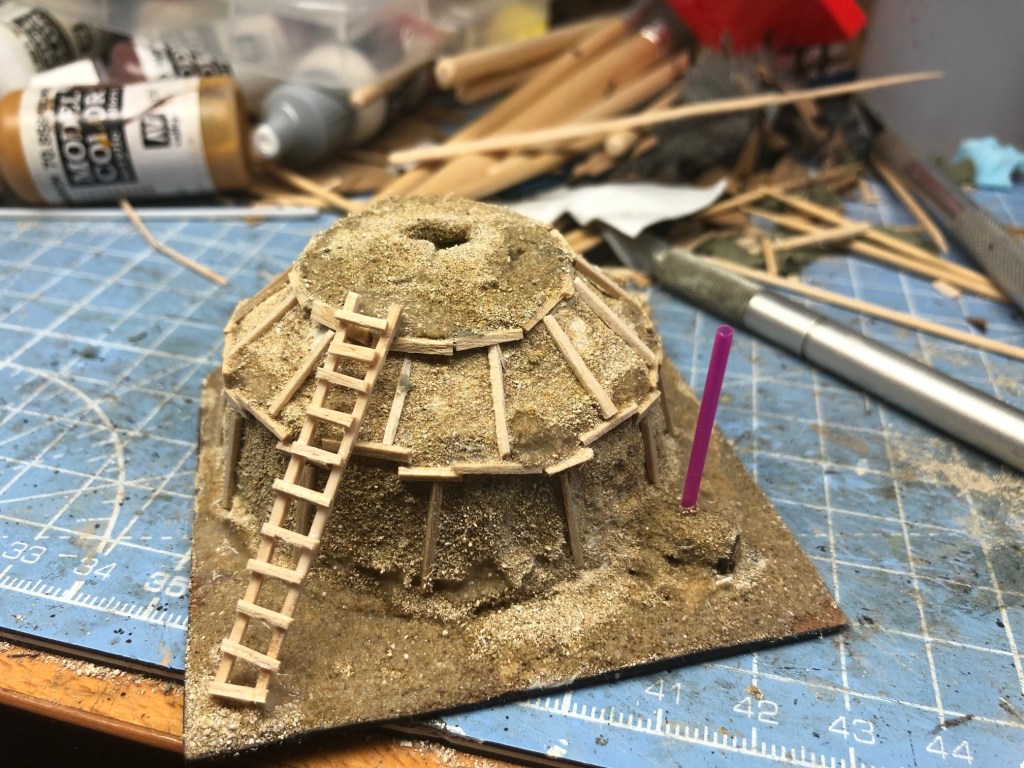
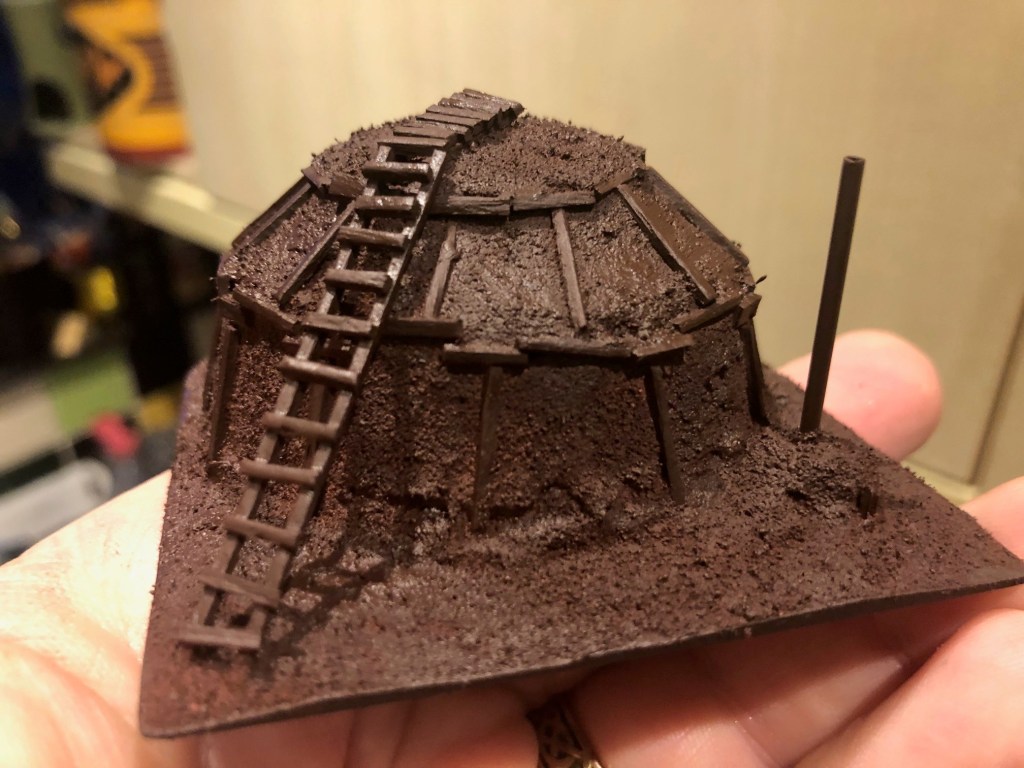
I found this in the rubbish probably with some sauce or something from a takeawayAnd a measuring cup for medicineI cut a hole in the big piece and cut away a part of the small mugGlue it downCover with filler, acryulic adhesive, no more nails or something like thatI then started building up the supports (thinly cut coffee stirrers) and then added some glue and sandI used some clay to do the little exhaust, added some wood for some door, a straw for the extraction pipe and then also to add some shape to the top.Keep an hole on the top before you add glue and sand to it all.Then I added a ladder (and also a platform as seen later).Sprayed it brown before painting (the I washed it with black ink to get that forestry dark earth colour like seen in the video)
Really happy with that, I will do a Charcoal Burners hut later as part of this project and some more piles of earth to put around the burner. Spend is still £24.42 in total as we just used coffee stirrers and some junk.
This Part 20 of a series of a fair few posts, Part 1 (link here) gives an overview and the philosophy applied to the series – cheap, simple and fun.
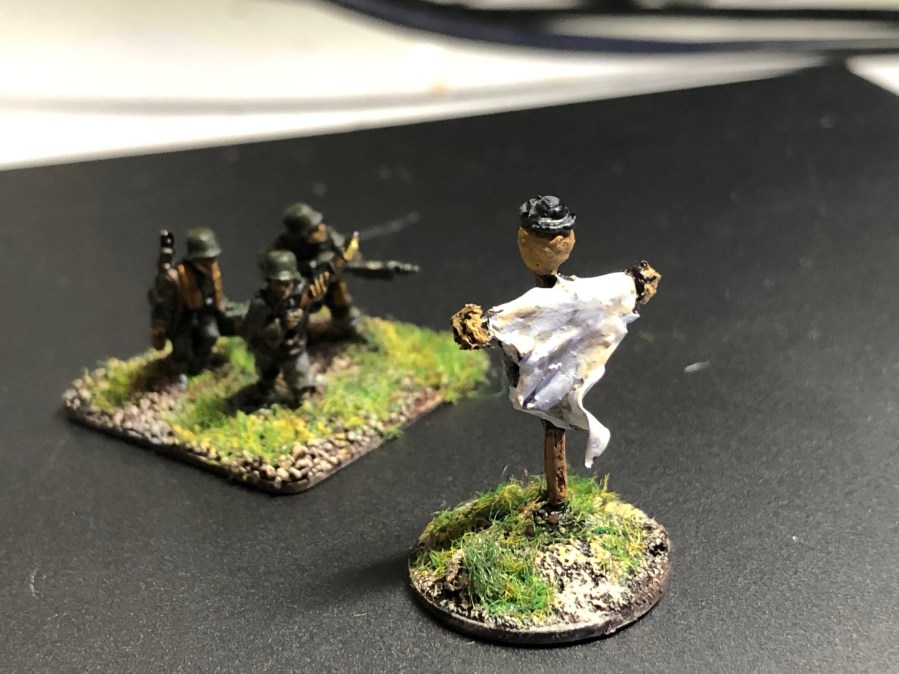
Today we are making a really simple piece of clutter, a scare crow that you can place on or next to one of your fields.
Use some coffee stirrers lengthwise and do the following structure and add some clay, bluetac or green stuff on the top.
I added a hat from a 15mm miniature, then made toga from rice paper (or just normal printing paper) soaked it in glue and then put some strings around the arms, make it look like there is some wind
Spend is still £24.42 in total as we just used coffee stirrers .
This Part 19 of a series of a fair few posts, Part 1 (link here) gives an overview and the philosophy applied to the series – cheap, simple and fun.
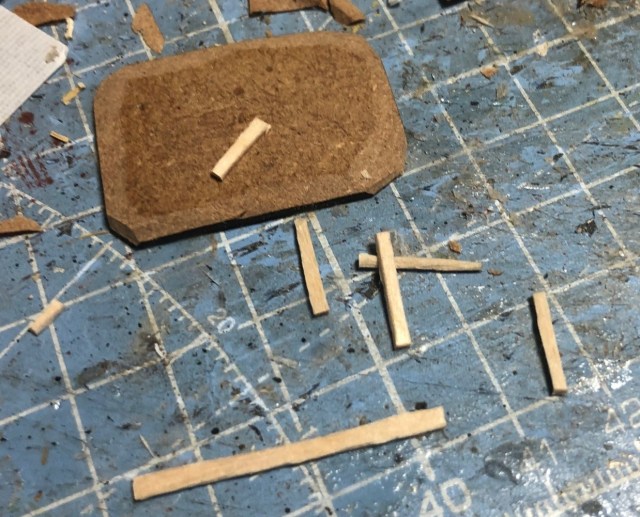
Today we are making some more clutter, a see-saw and a play house.
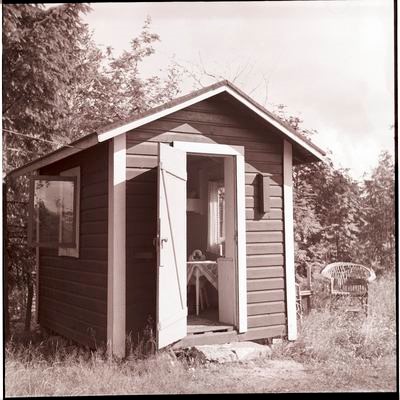
A simple playhouse
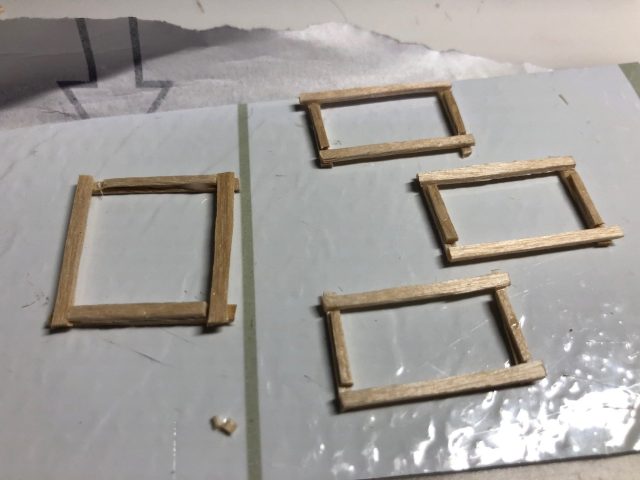
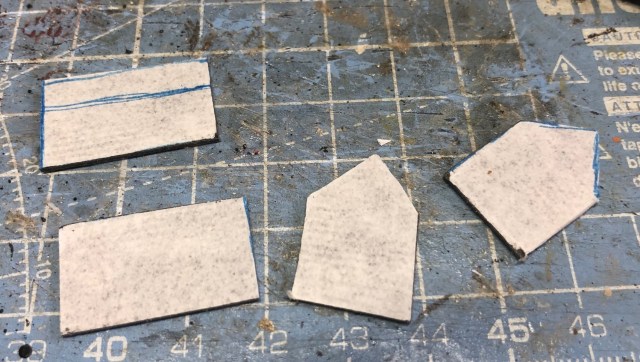
First cut out the walls you need (I used some of the adhesive floor tiles, I bought for the project, you could use thick card)
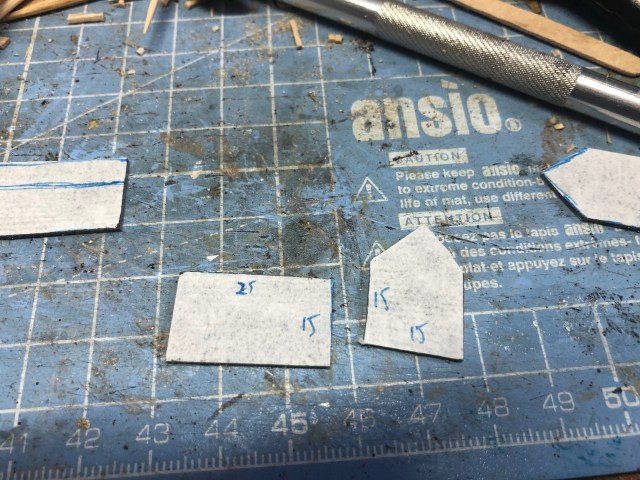
These where the measurments I used (remember it is a playhouse
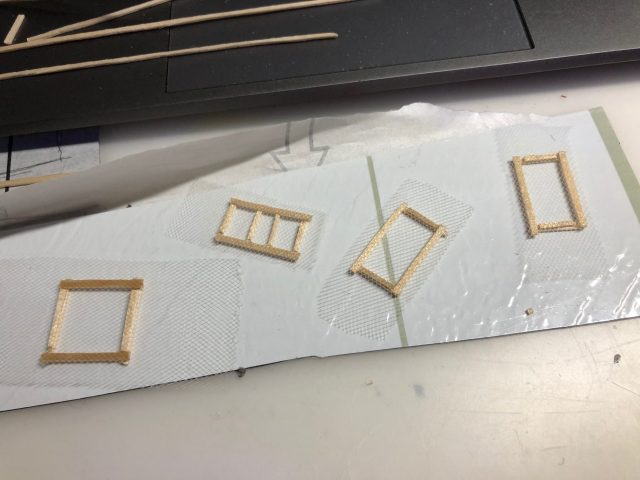
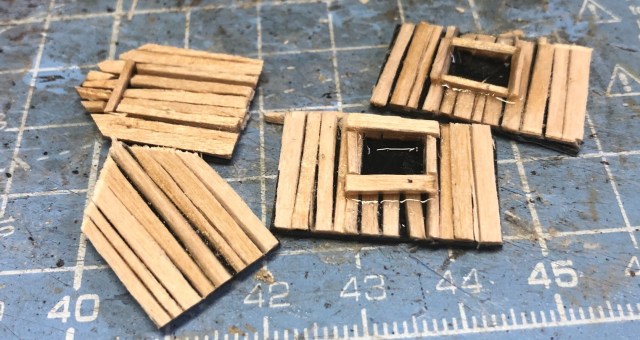
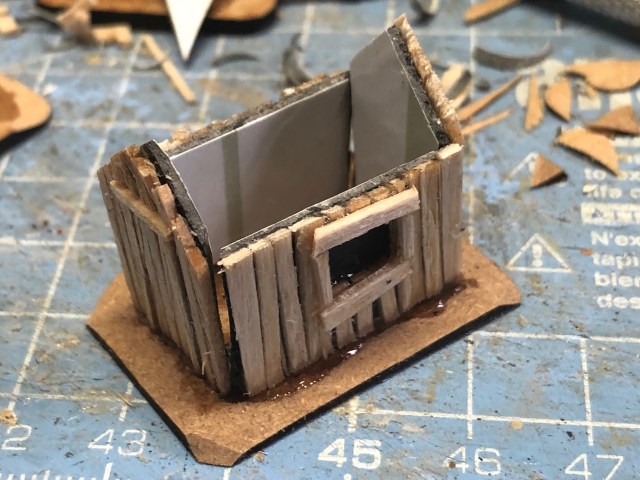
Cut coffee stirrers lengthwise (I did a mixture of halves and thirds) and then clan the walls, I did two windows and of course a door, just an outline doorframe really, Glue it onto the vinyl tiles.
Cut an angle on the backing so it is easier to fit
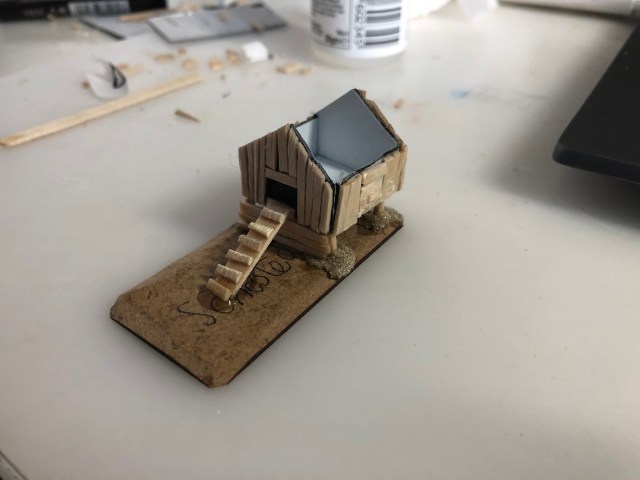
Put them on a base and glue them together (fill the gaps if there are any with a thin piece of coffeestirrer)
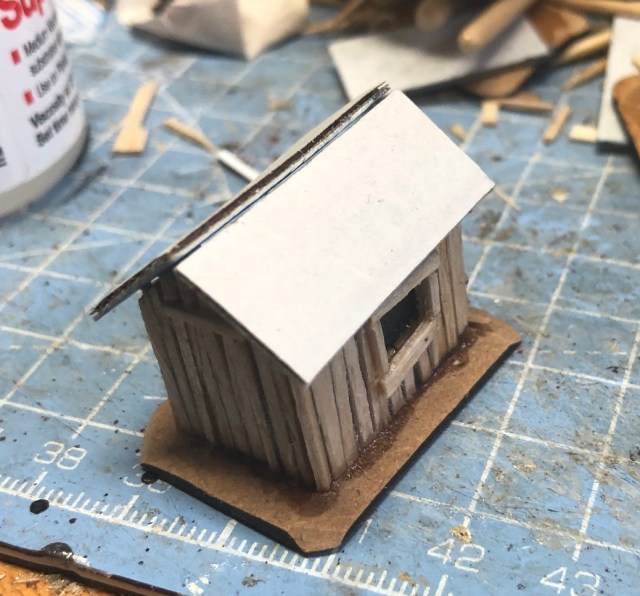
I then added some thick card as roof (note the fixing of the gap)
Glue on some detailing
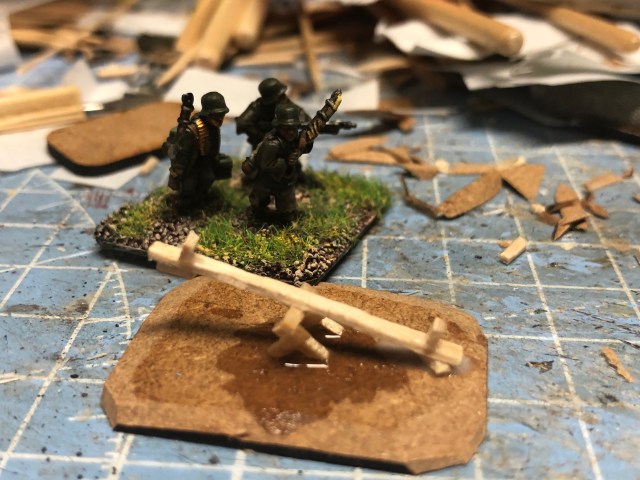
For the See-saw, you again need some thin coffeestirrers
Cobble something together like that
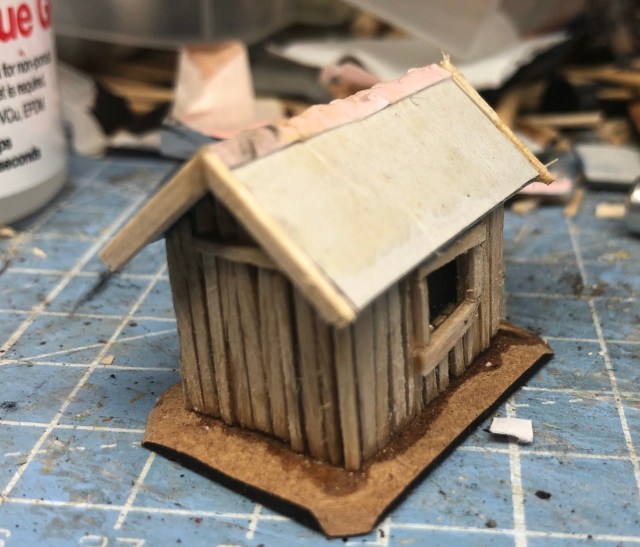
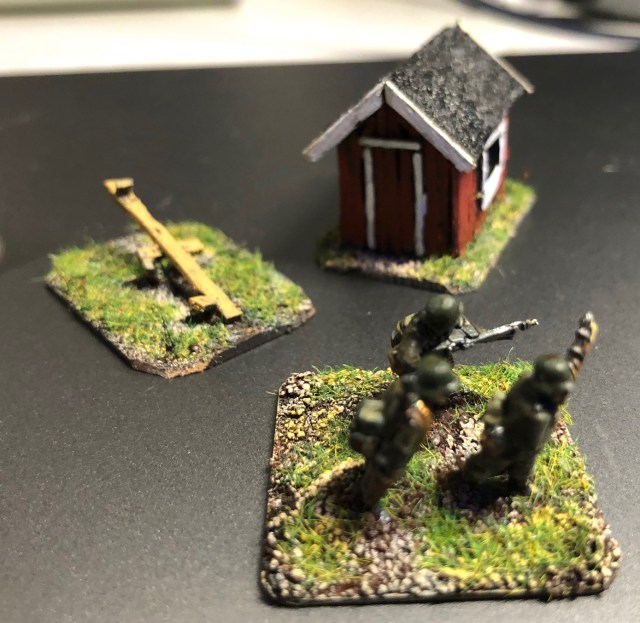
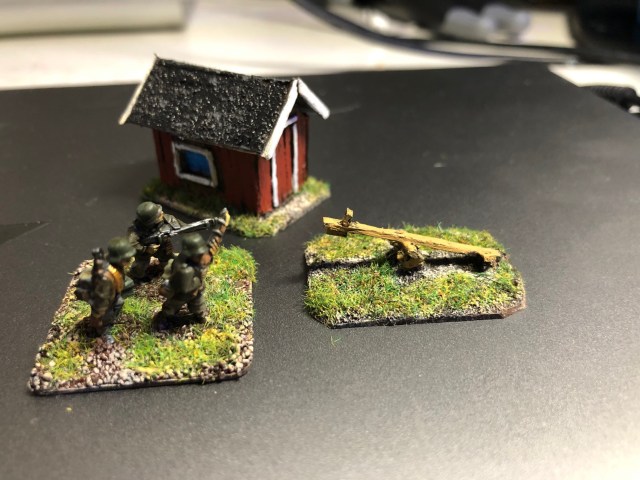
Paint it up (note I addes some fine sand on top of the roof to give a faux roof felt feel)
Spend is still £24.42 in total as we just used coffee stirrers and some of vinyl tiles for the project.
This Part 18 of a series of a fair few posts, Part 1 (link here) gives an overview and the philosophy applied to the series – cheap, simple and fun.
Today we are doing some lazy clutter to represent the fact that sometimes you can just take whatever and glue it on a base and use it as a clutter, in this case a hay wagon doing nothing special on my lead mountain.
This is a hay wagon
A deserted WagonAgain perfect in a rural enviroment, providing that nice break in your line of site and some immersion too.
And that budget, well the hay wagon is currenty priced at £4.50, giving us £24.42 in total. A painful hit on the budget and giving us a mere £5.58 left to go.
This Part 17 of a series of a fair few posts, Part 1 (link here) gives an overview and the philosophy applied to the series – cheap, simple and fun.
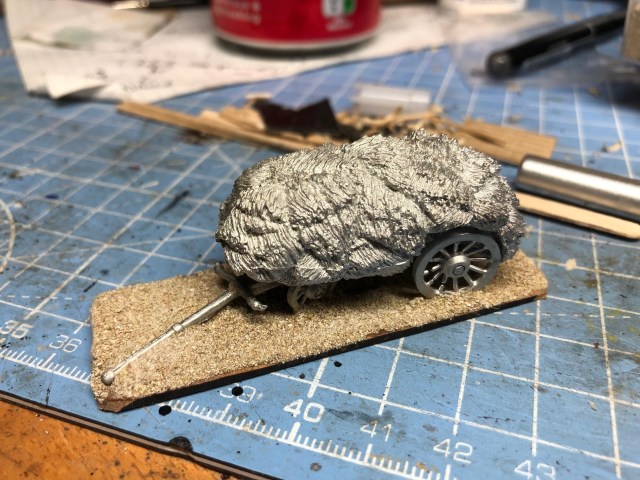
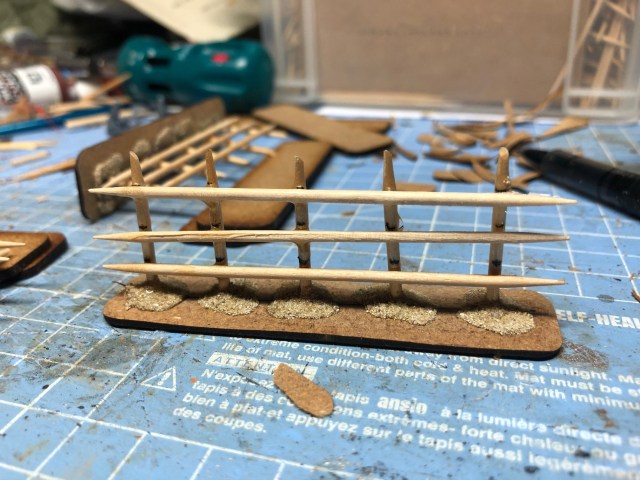
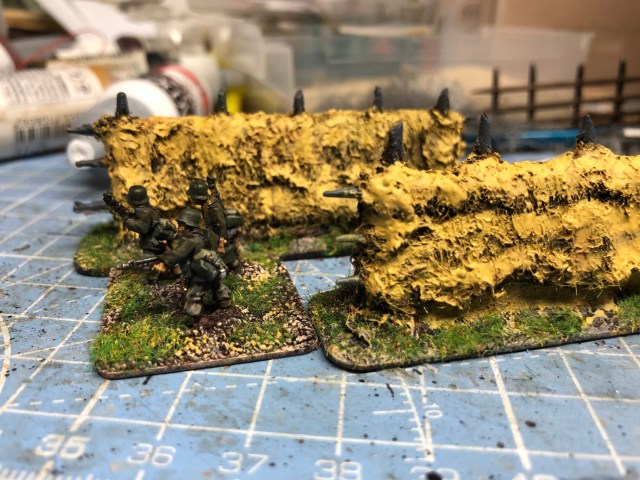
Today we are doing a Swedish Hayrack (hässja), the key here isn’t the type of hayrack but the material we use which works perfect for the 15mm scale.
Anyway here is a nice slow video now how they are made for real.
We will try to do something representing this on the table.
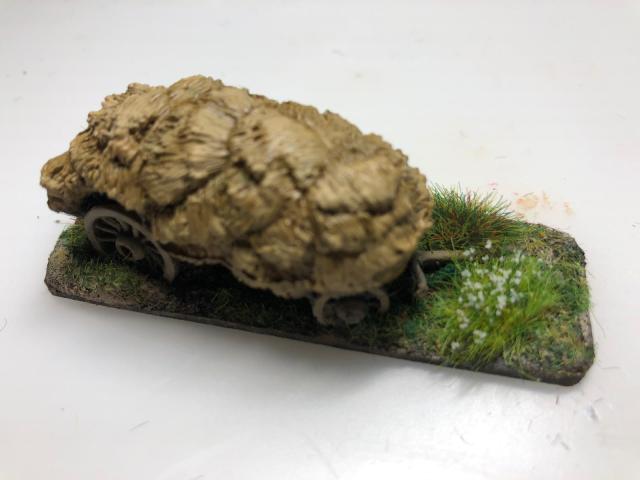
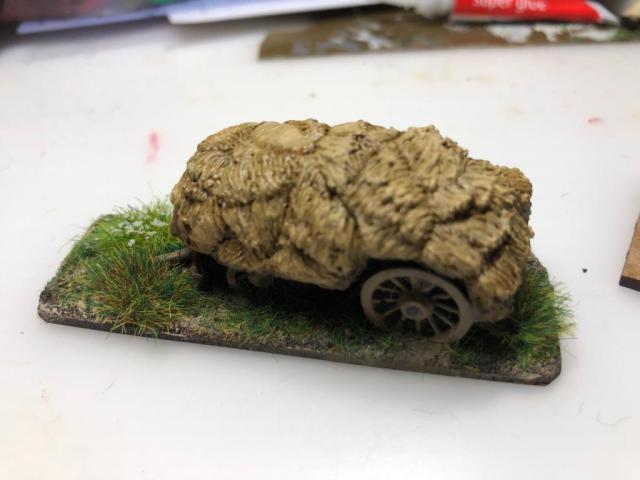
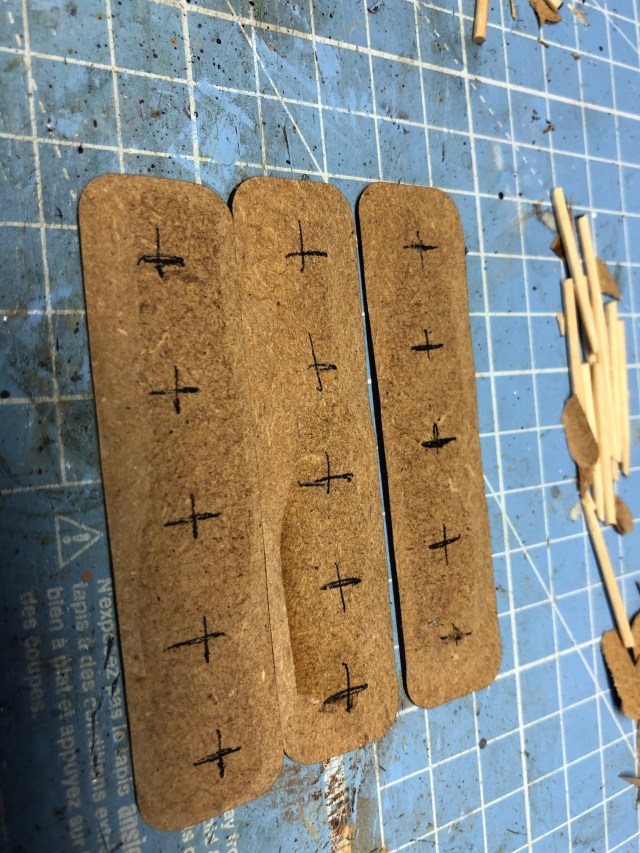
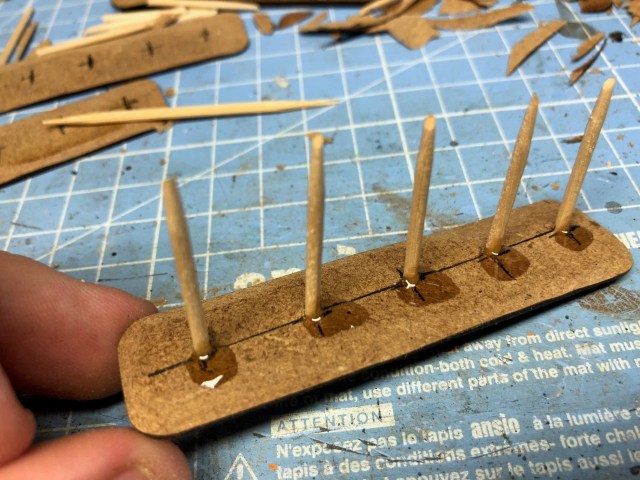
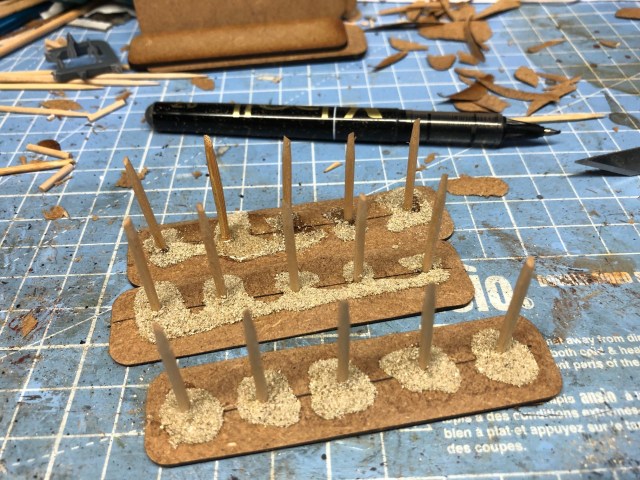
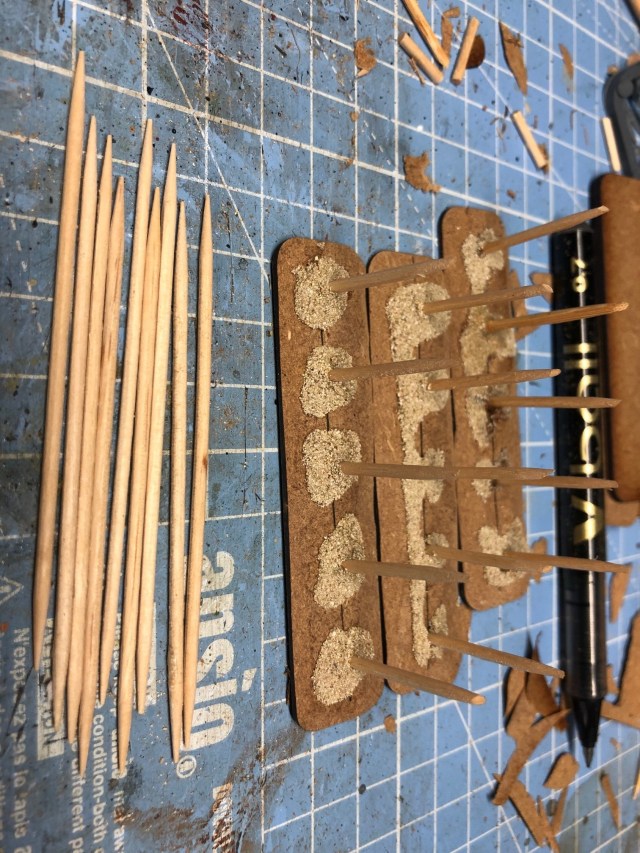
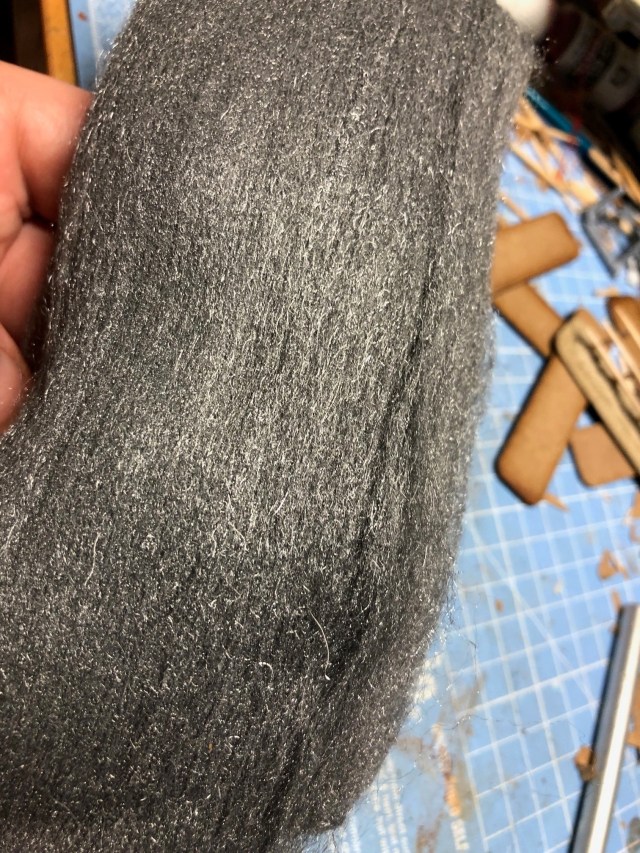
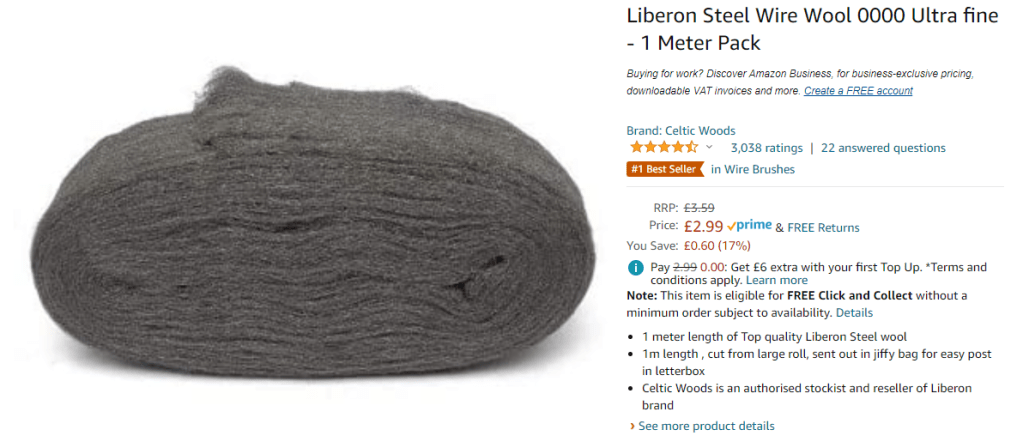
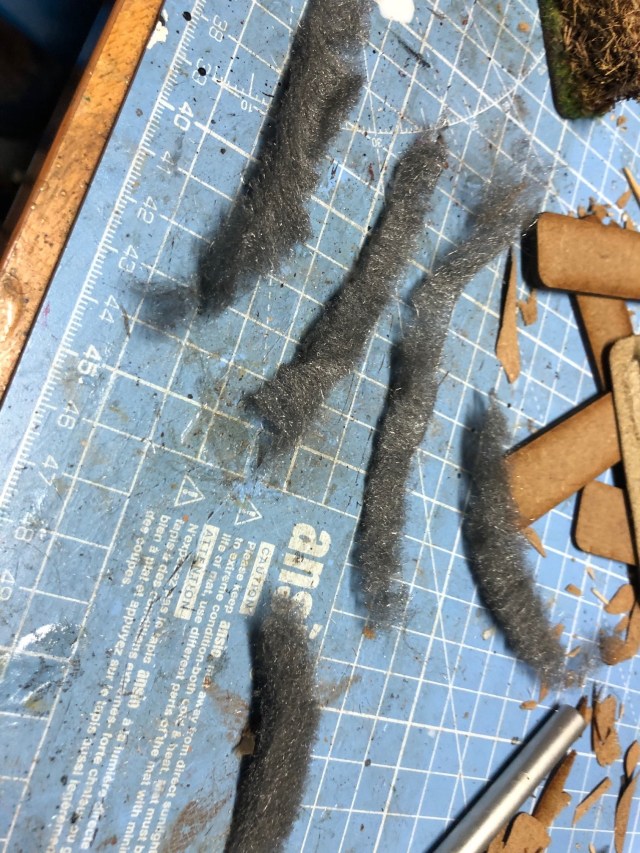
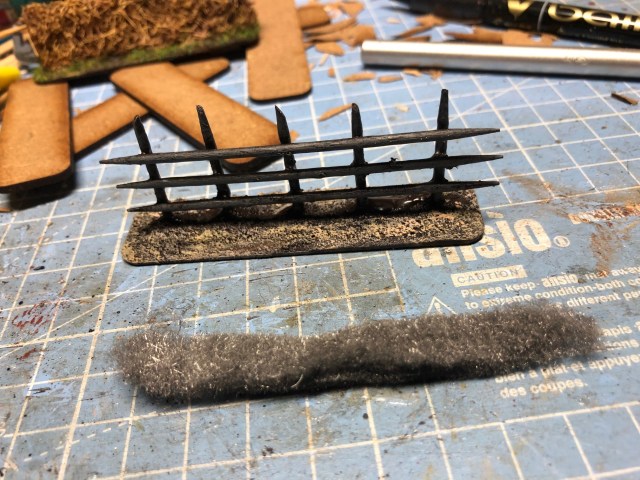
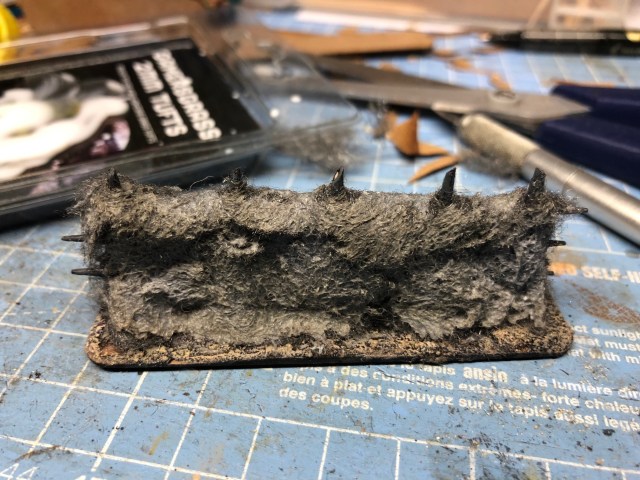
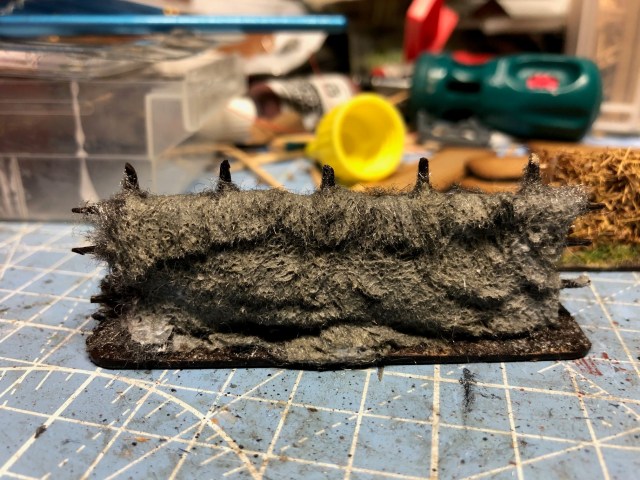
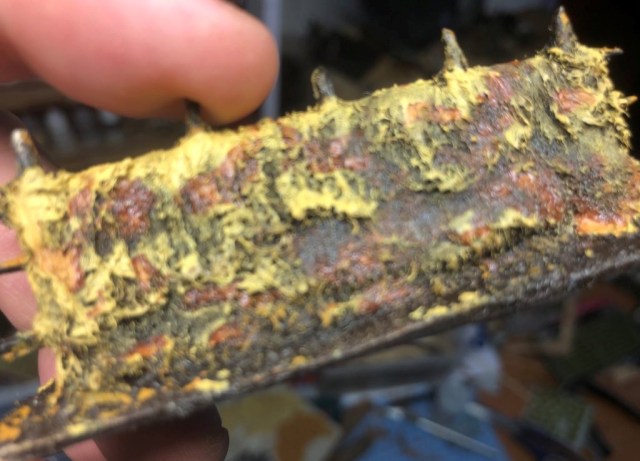
Mark up some bases (I used 80mm bases, working at a 15mm scale here) I drilled some holesThen I added some 30mm long cocktail sticks (I cut off the tops a little bit)GlueSecureThen use some cocktail sticks (mine fitted perfectly, but you could cut them if they do not fit, most of it will be covered anyway)Glue on threeI bought some steel wool from AmazonCut out some thin slices (about 1 cm)Paint up the base with the sticksThe add the pieces in layers, I put superglue on the stick structureI added three strips on each side, then a small layer on top. But did not take a picture, when dry I used PVA glue and a brush to shape the structure make sure the PVA totally soaks the material, down strokes is the key movement here.Then paint it – however, you need to wait until the PVA is fully dry as steel wool rust within minutes with any exposure to humidity. You might have to repaint a few times as paint might provoke some further rust, but the PVA should create a little bit of a protection.
SO PATIENCE IS THE KEY HERE.
It kind of works, might try to use some spray matt varnish next time perhaps.
And that budget, well had to buy that steel wool so we are now at £20.92 in total.
This Part 16 of a series of a fair few posts, Part 1 (link here) gives an overview and the philosophy applied to the series – cheap, simple and fun.
When I was young boy we went to see some relatives in Finland in their country house. The little house did not have a “normal” toilet but instead they had an outhouse for the job. I was so scared of going in there that I almost shat myself outside – a little bit of a paradox. Anyway I went in to do the deed, when I sat there in my solitude I saw a bucket with some white powder and a big ladle. I found it strange to have a bucket of flour on the loo and ask my Mum why. She explain is was to keep the flies away from the “shit”. Well in reality the “flour” was lime powder and it kills the bacteria (minimising the smell) at the cost of the speed of the decomposing process.
Another thing was the bloody flies in the area and I was not used to this and there were a lot of normal flies and horseflies. One day as I came back from the toilet visit my Mum looked chocked and said “What have you done, you are white all over your body and hair”. I smiled, and according to mum, looked very prooud of myself, “Mum, I had enough of these flies, so I poured the bucket of lime over me.”.
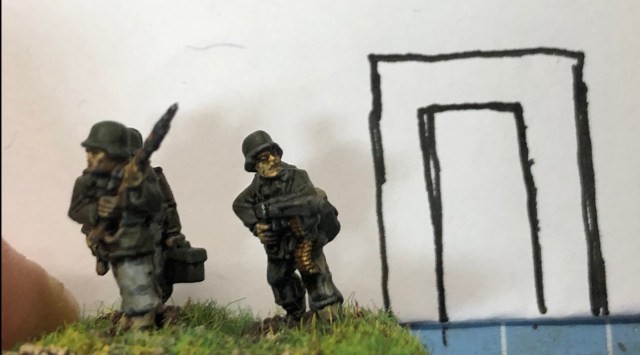
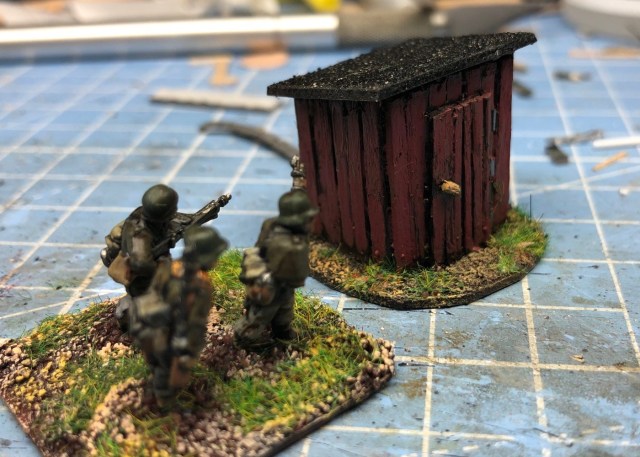
Today we are making an outhouse (you buy a nice one from Peter Pig, I have a few already). Anyway let us get going.
Measure up the front of the outhouse based on the models you have, this is in 15mmThen make four sides using coffee stirrer cut lengthwise, mine will be a little bit wider than deep, I basically cut out four shapes from vinyl floor tiles (or thick cardboard) then clad the pieces. This design is based on a taller front than base with a backwards sloping roof.Then I cut the sides in an angle so it is easier to fit the pieces together. Glue the pieces together on a base
Add some planks to simulate a door
Add a roof, I used some vinyl tiles. Then added some thin sand to represent roof felt (using PVA).A door handleAnd some hinges, you could use some thin plastic tubes or perhaps spaghetti?Then Paint it, notice the structure on top of the roof.
And that budget, well we are still at £17.93 we are now beyond half-way on this project and will we make it under £30.
This Part 15 of a series of a fair few posts, Part 1 (link here) gives an overview and the philosophy applied to the series – cheap, simple and fun.
It has been documented before but a box that changed my life when I was a boy was this one, the Mutant RPG, the 1984 version. I have been raving about that many times before so I will spare you from that now (but more here in case you missed it).
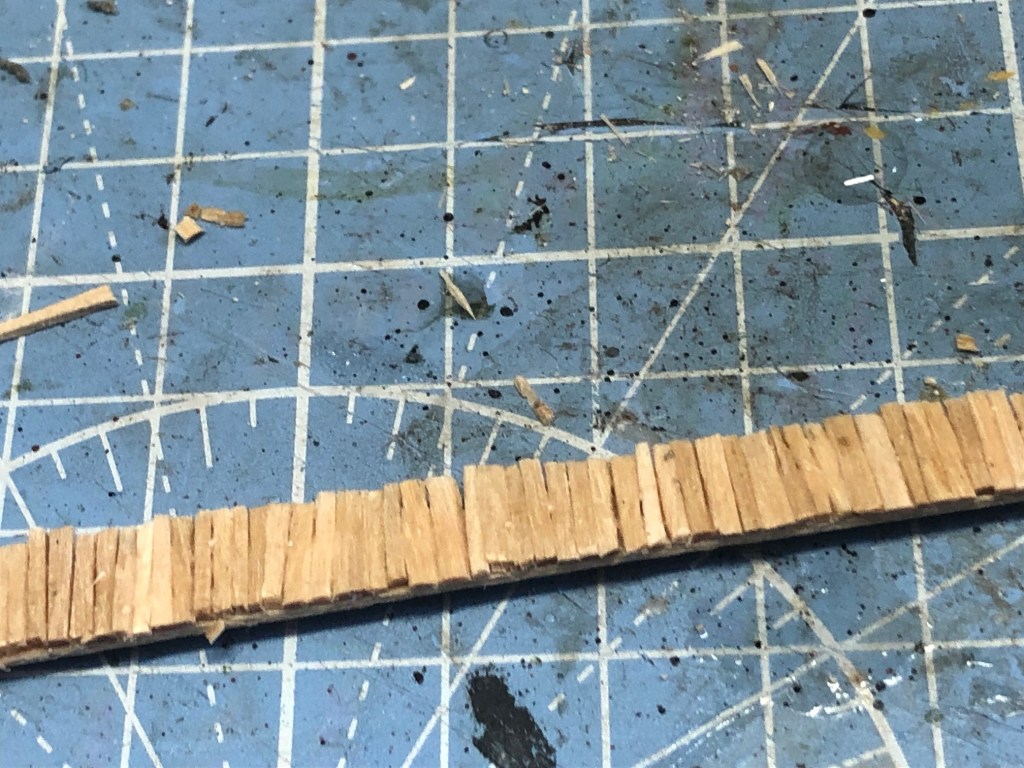
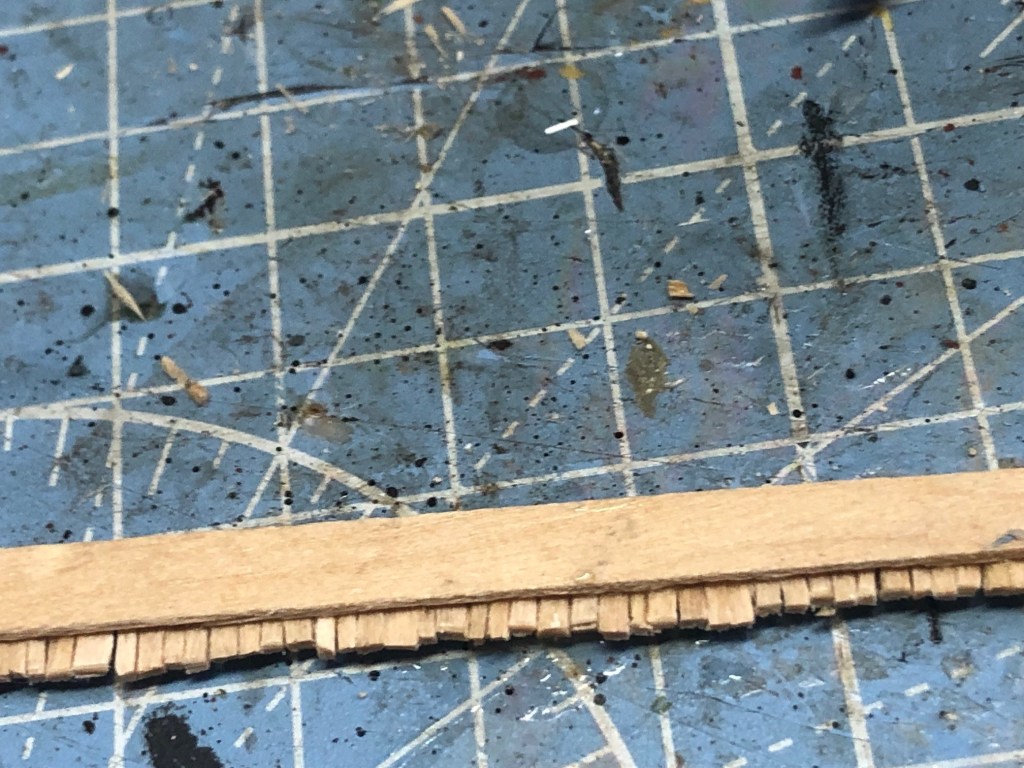
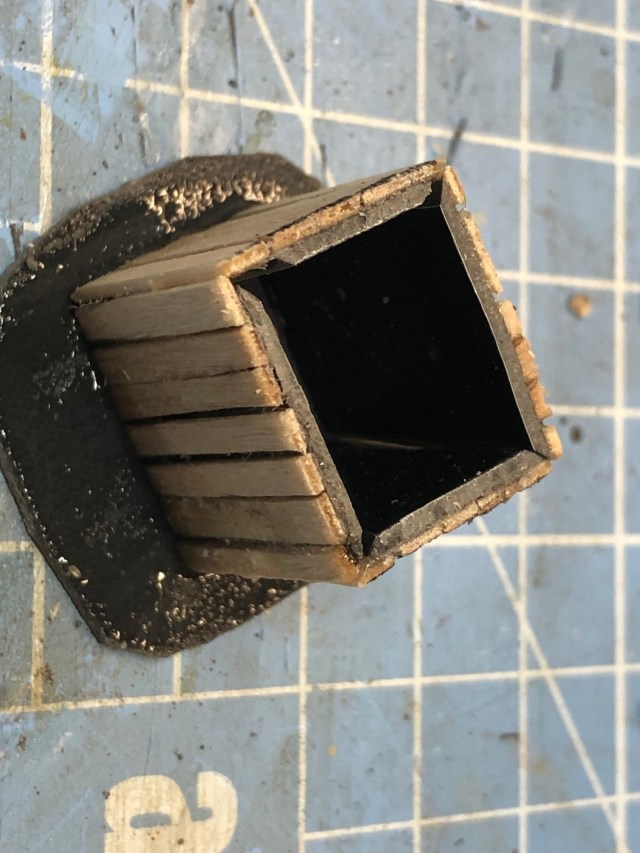
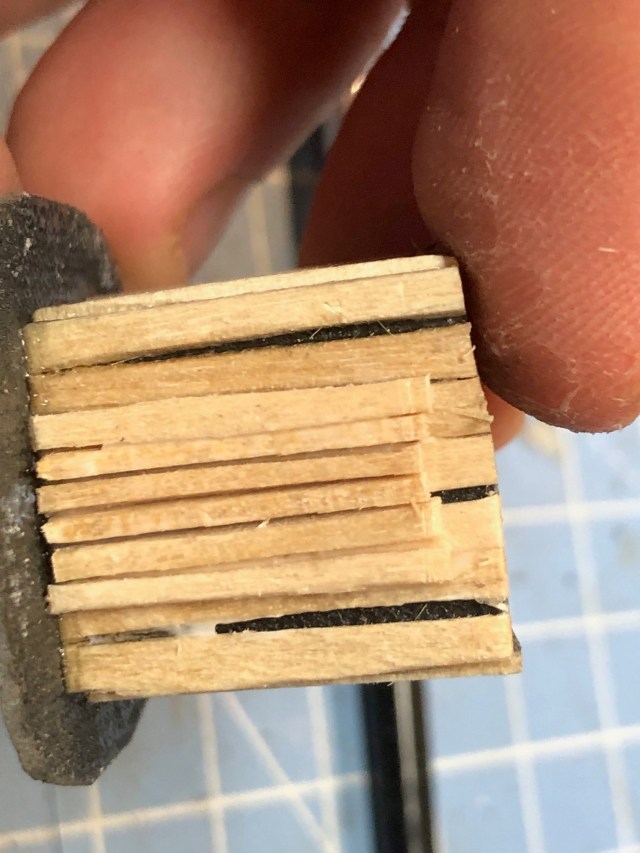
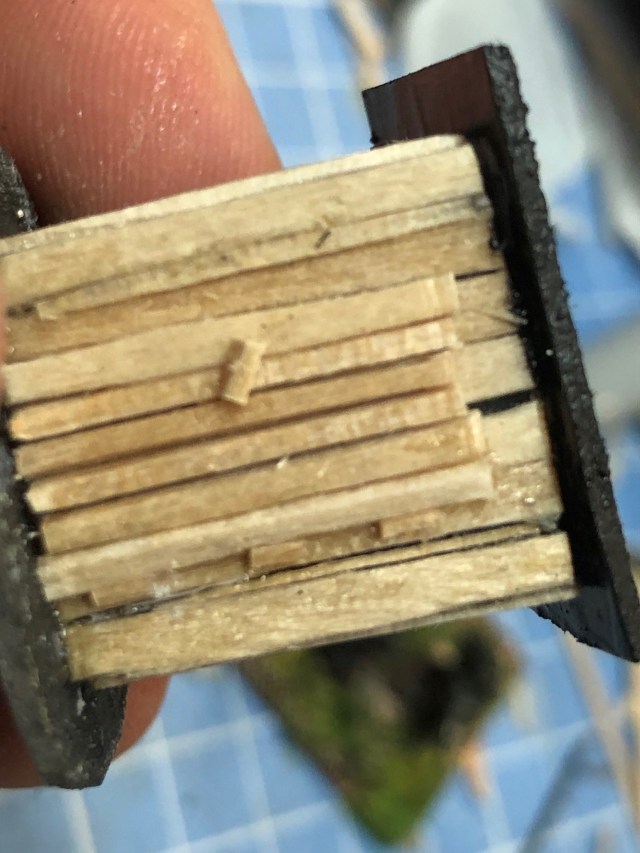
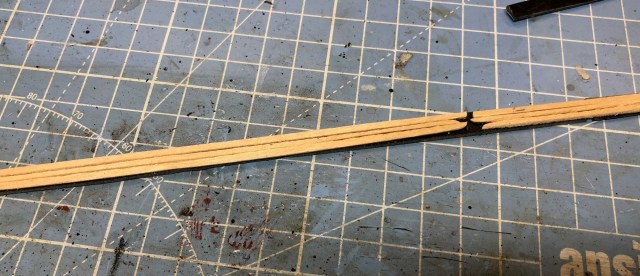
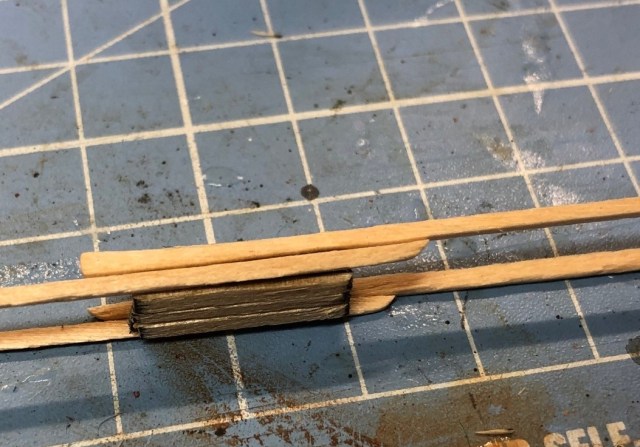
However today we are doing slightly different boxes, again we are going to get out our coffee stirrers…
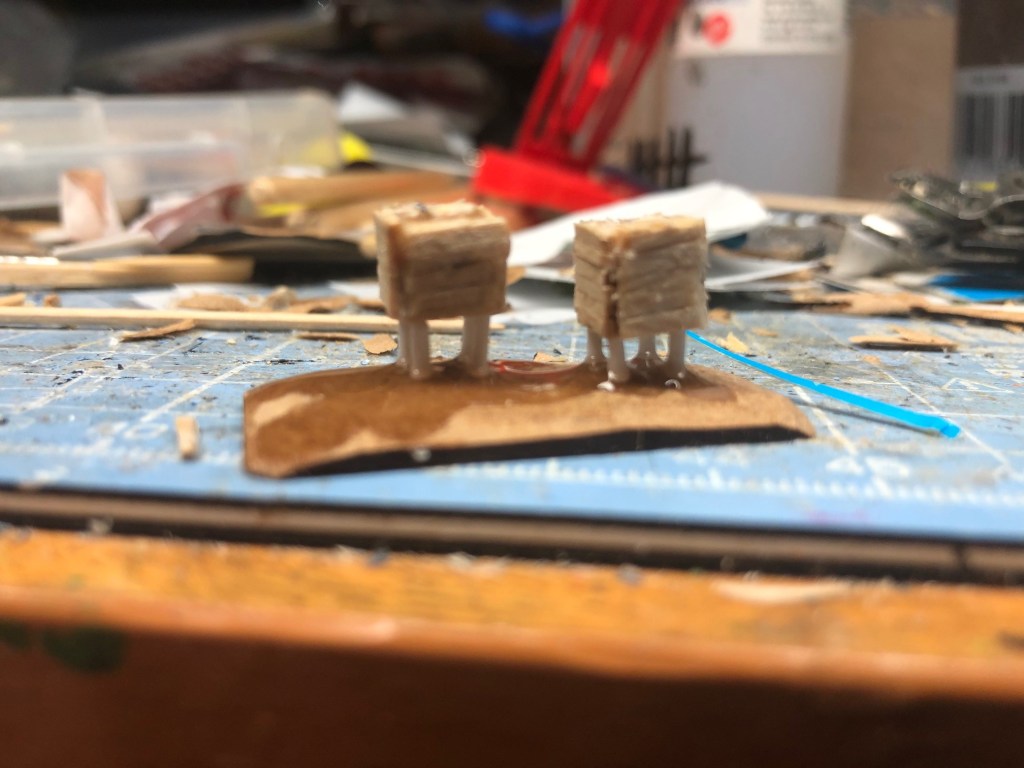
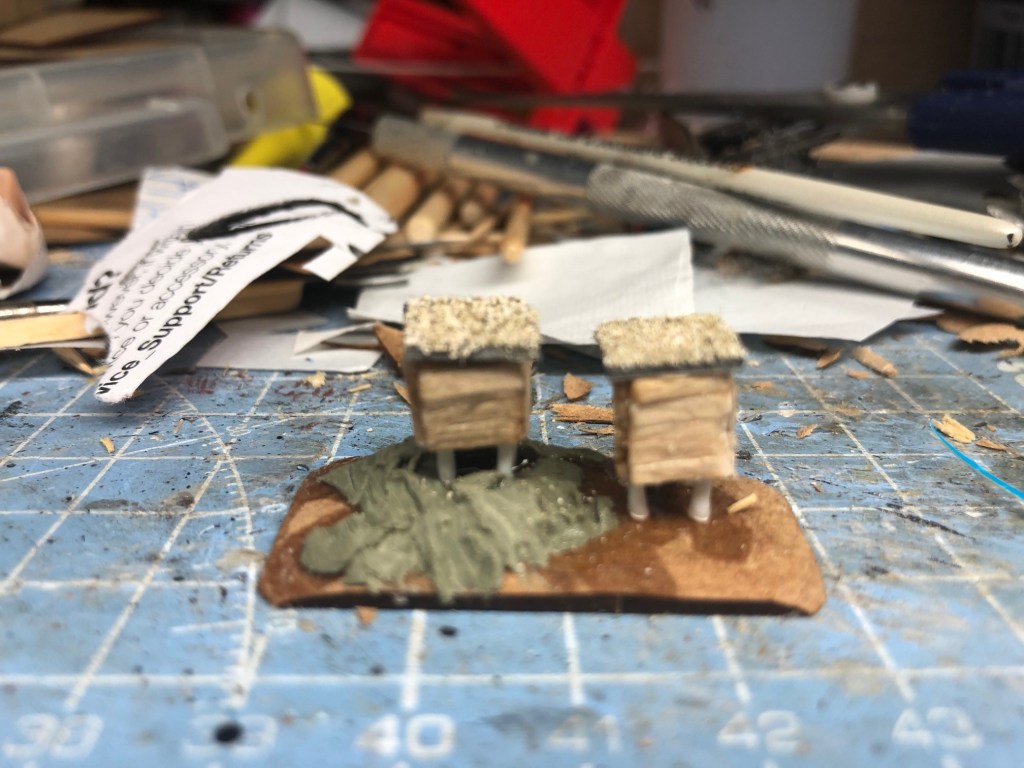
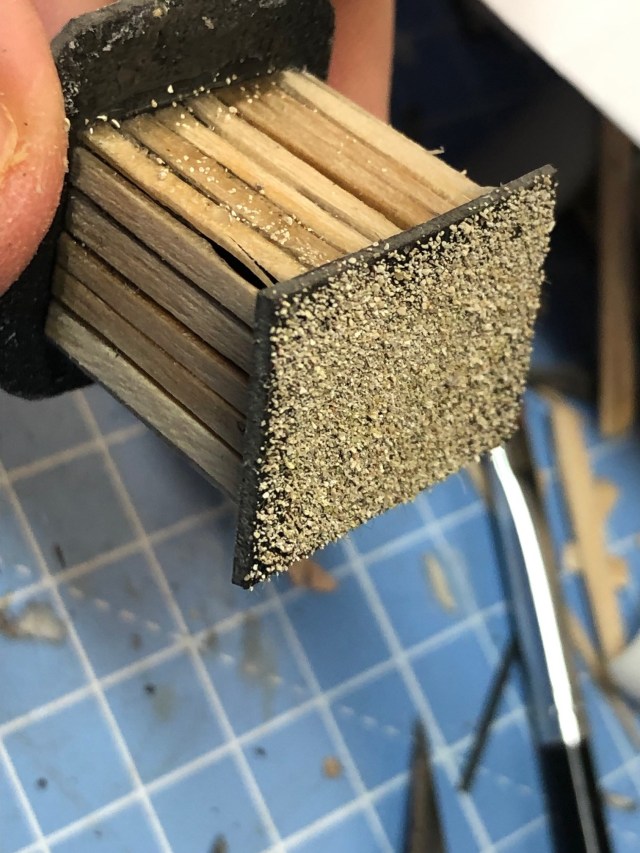
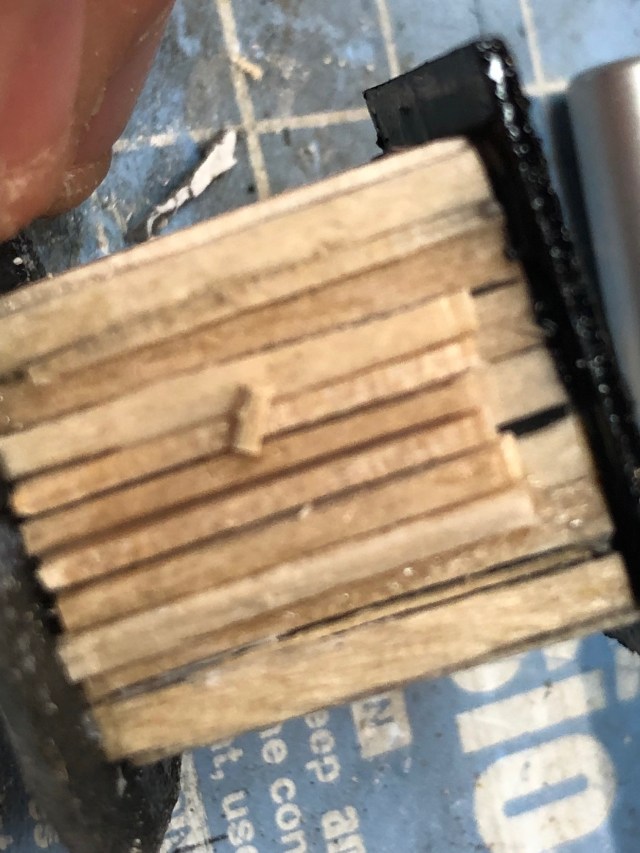
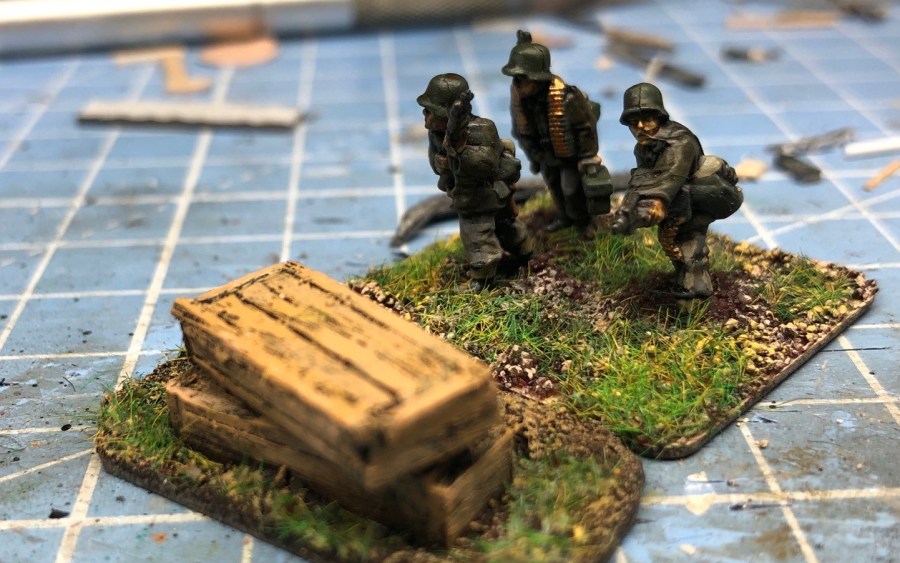
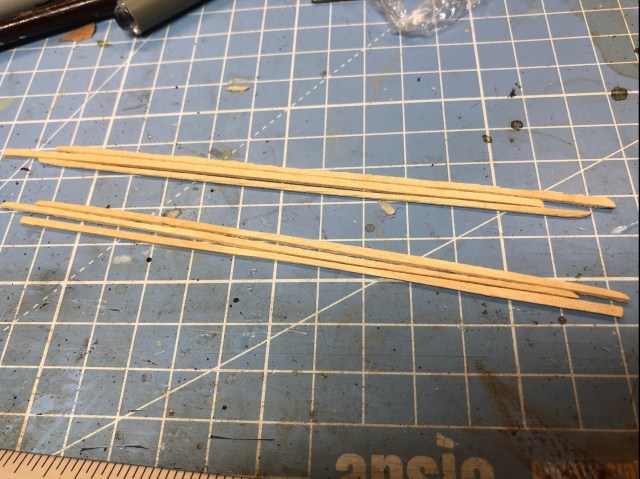
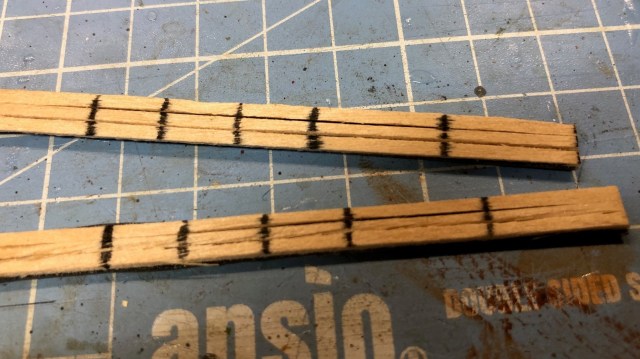
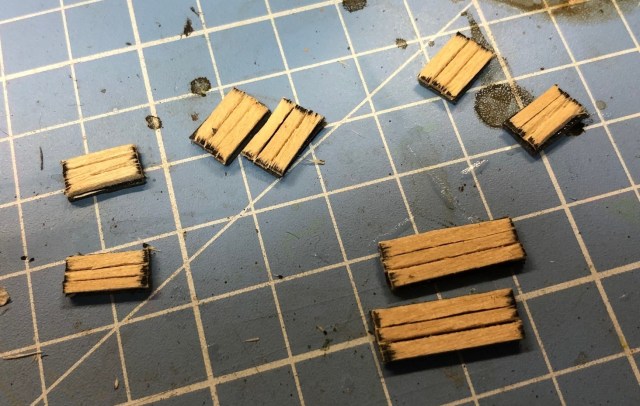
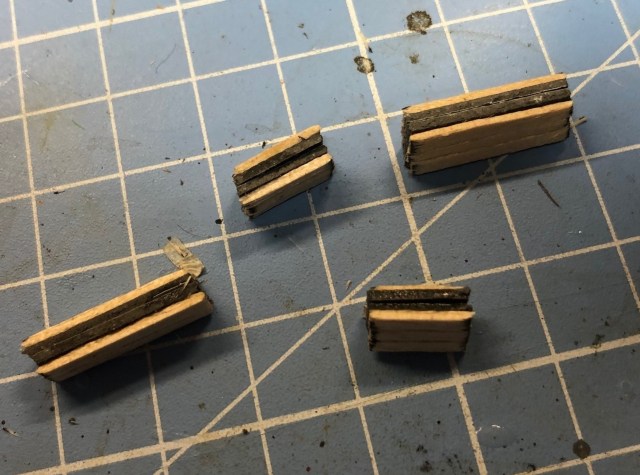
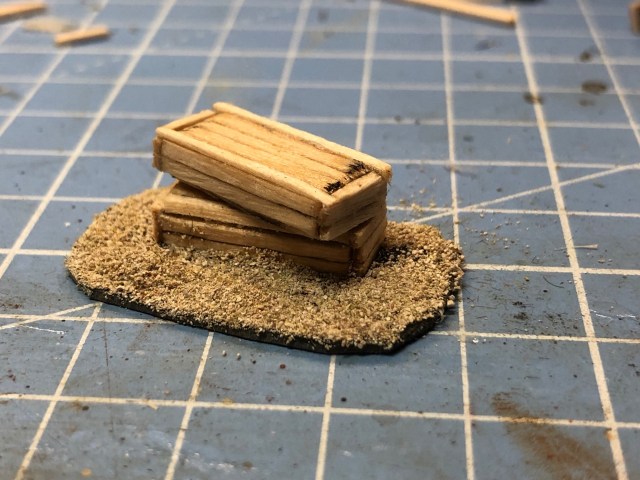
By know you should be a master at cutting them lengthwise at least in half – this time we try to cut in the three pieces to get some finer planks for our boxes. Careful and it does not need to be perfect.Then just glue them on top or cardboard (thick please), or as I have done here on some vinyl tiles.I am making some boxes in different sizesThen cut them outglue them togetherAdd some planks on the sides – just superglue them on and cut and smooth later.When you clad everything use the knife and cut it nice all around, put them on a base we are ready for painting.In total about 5 minutes of work
And that budget, well we are still at £17.93 we are almost half way through, will we be able to contain this within the £30 limit (yes we will but I might add some items to spice it up a little bit)